Peppermint Macarons
Hello friends! Today I bring some Christmas Macarons for you! These amazing and festive Peppermint Macarons!
This is the season for baking these Peppermint Macarons! Christmas is everywhere, and it definitely has reached my kitchen!
This post may contain affiliate links. I earn a commission from qualified purchases. Please read our Privacy policy here.
You can find my many Christmas Macarons in the following posts: Christmas Cookie Box, Holiday Macaron Box, Christmas Macaron Box.
Every year I make a Christmas Cookie Box. I am still working on this year’s (2021) box. I remade these Peppermint Macarons (which were initially included in my Christmas Macaron Box) and they will be included also in this year’s box.
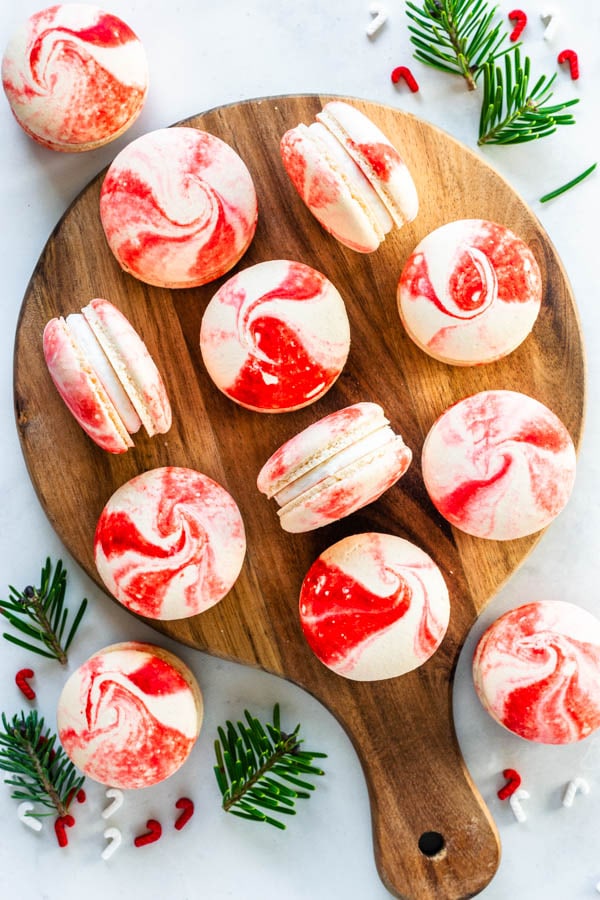
To fill these Peppermint Macarons, I made a simple Peppermint Buttercream filling, with peppermint extract, plus some crushed candy canes around the buttercream filling.
You can find crushed candy cane pretty much anywhere.
Peppermint candy is fun to use in baking, you can add it to brownies, cookies, and pretty much anything. It’s perfect for Christmas baking, it adds a fun and crunchy touch to your baked goods.
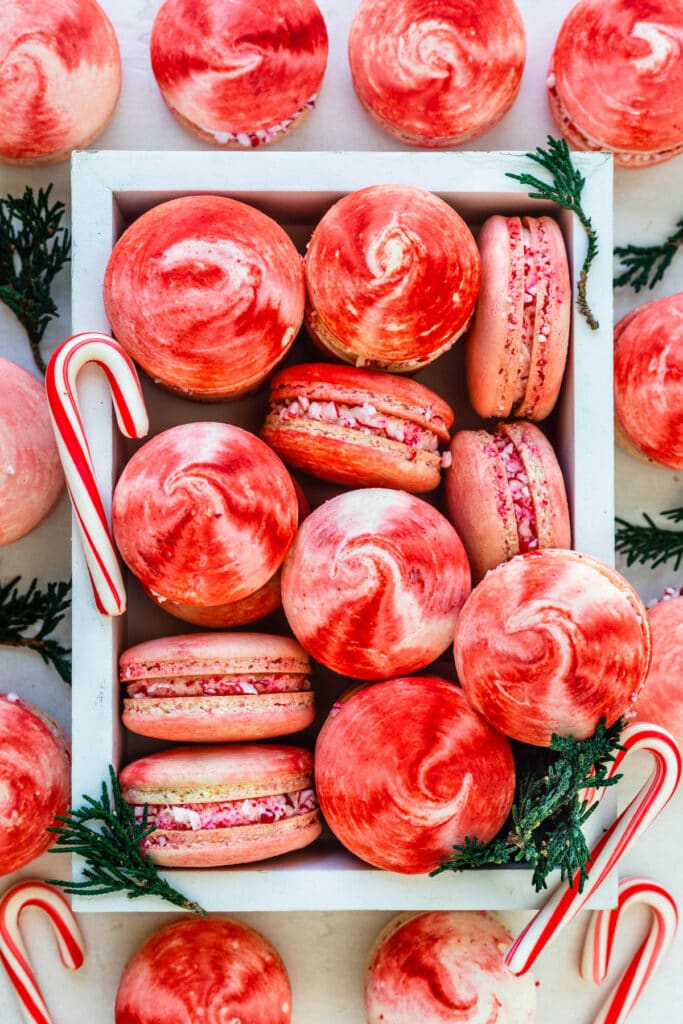
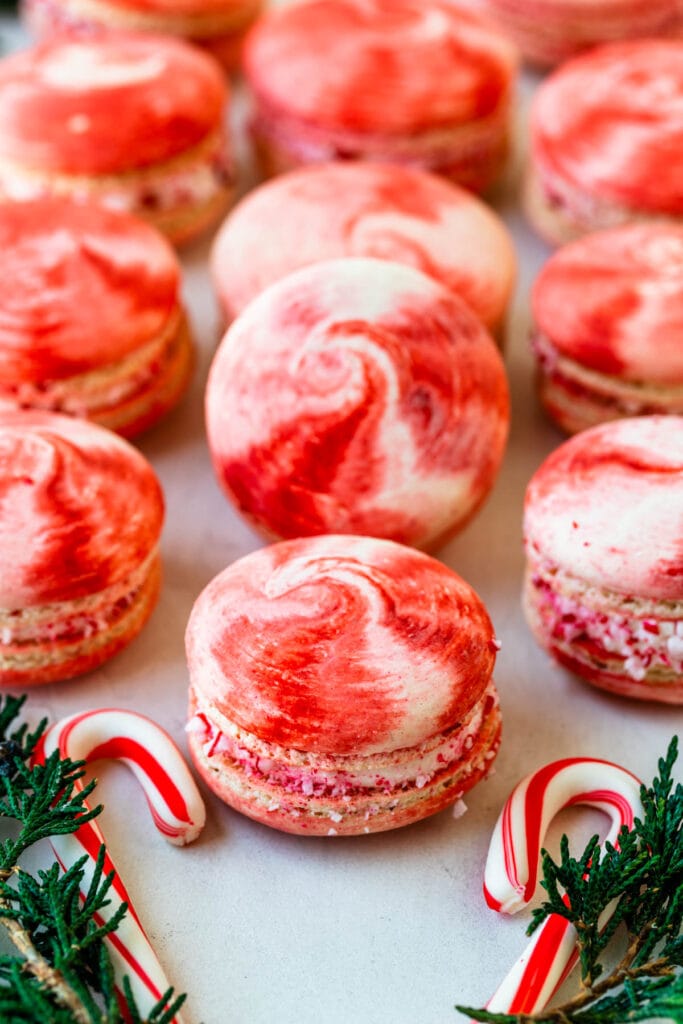
I rolled the sides of the filled macarons in crushed peppermint candy, which added a delightful crunch to the macarons.
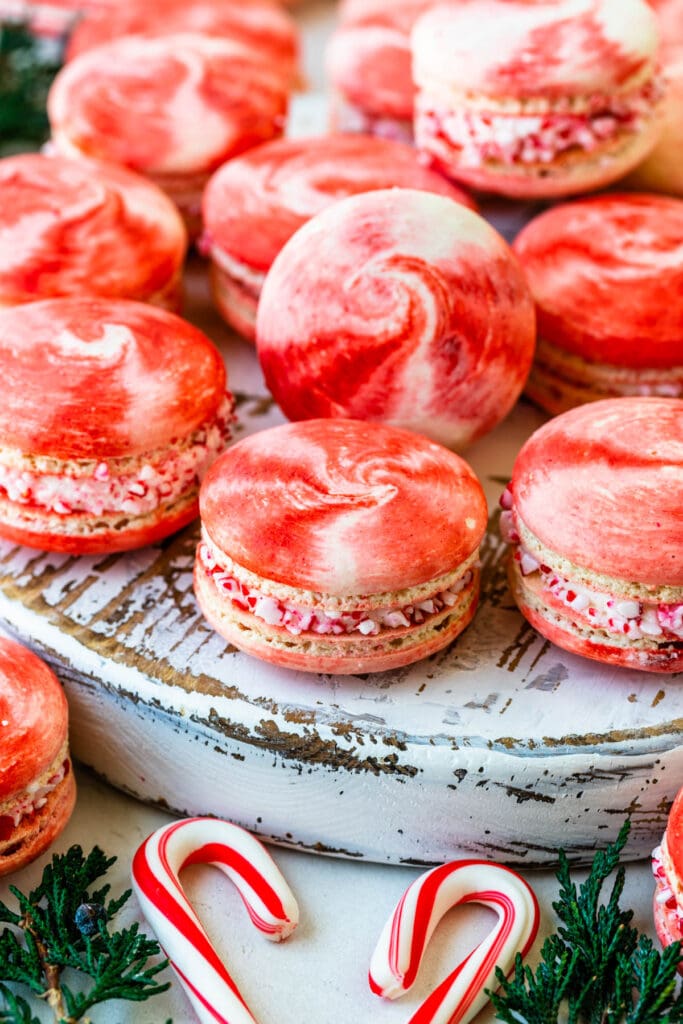
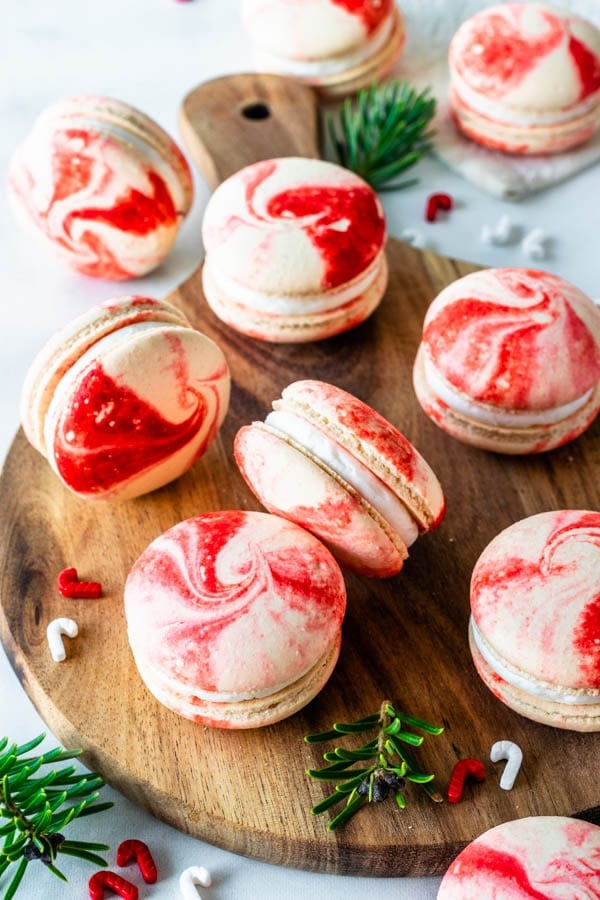
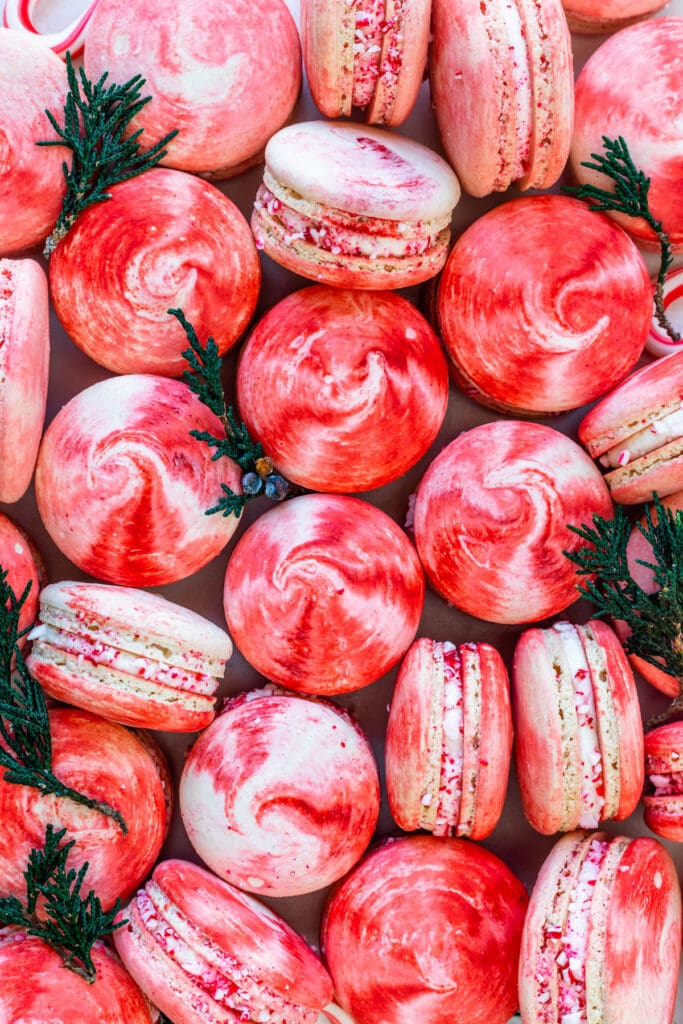
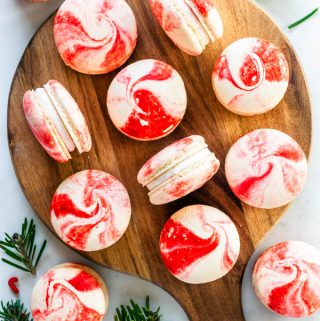
And about the red marbled shells, it’s very simple to obtain that effect.
I was going to take some pictures, however, I made these at night, so I couldn’t take any.
But hear me out, it’s pretty easy. I will give out instructions below, but you should also check out the video on YouTube or on this page, which shows much better how the process works and how easy it is.
Grab the piping bag and put it inside of a cup, wrapping the outside of the bag around the top of the cup, so the bag is held open.
Then, dip a small brush in some red food coloring. Don’t add too much, just a very little dab of food coloring.
Brush 4 vertical lines from the bottom of the bag, where the round piping tip is, all the way to the top. Make sure the lines are spaced out evenly, at 12 o’clock, 3 o’clock, 6 o’clock, and 9 o’clock.
Also, it may seem like the brush strokes are faded dotted lines, but trust me, once those little drops of food coloring get in contact with the macaron batter, the color will become very vibrant.
Make sure you don’t add a lot of food coloring, or it will mix in with the white batter making the shells red, or it will make the shells crack because it will make them too wet.
After brushing the lines on the bag, pour the macaron batter in. Then pipe the macarons on the baking sheets.
Here are some more Macaron ideas for your Christmas baking:
- Cranberry Macarons
- Apple Macarons
- Pear Macarons
- German Chocolate Macarons
- Salted Caramel Macarons
- Caramel Popcorn Macarons
- Toffee Macarons
- Penguin Macarons
I hope you loved these Peppermint Macarons, and I hope you are loving making all the Christmas Macarons as much as I am! Have a beautiful day!
Peppermint Macarons
Ingredients
Macaron Shells
- 100 grams granulated sugar
- 4 grams egg white powder optional, read notes below
- 100 grams egg whites
- 105 grams almond flour
- 105 grams powdered sugar
- Food coloring I used a bit of red
Peppermint Buttercream
- 1 1/3 cups confectioners’ sugar sifted
- 4 tbsp unsalted butter softened
- 1 tsp peppermint extract or a bit more, to taste
- 1/2 -1 tbsp milk, or water if necessary
Instructions
Macaron Shells
- Before you start, get all of the ingredients ready. Prepare a large piping bag, fitted with a large round tip, I use a 1/4” diameter tip, or a Wilton 12. Set aside. Line two baking sheets with parchment paper or silicone mat.I use a baking mat with the macaron template already in it.
- Line two baking sheets with parchment paper or silicone mat. I use a baking mat with the macaron template already in it.
- Wipe the tools such as bowls, spatulas, and silicone mats with vinegar if desired, this helps getting rid of any grease particles that might be in the tools.
- Start pre-heating the oven. I pre-heat my large oven to 310ºF for 60 to 90 minutes, this helps with temperature fluctuations. I pre-heat the countertop oven for 30 to 45 minutes.
- Measure out all of the ingredients.
- Sift the powdered sugar and almond flour together. Set it aside.
- Place a bowl over a pan with barely simmering water. Add the sugar and egg white powder to the bowl if using. If you’re not using egg white powder simply skip it, nothing needs to be changed in the recipe.
- Whisk the sugar and egg white powder so it doesn’t clump up.
- Add the egg whites to the bowl and whisk until the sugar is completely melted. It will take a couple of minutes. You can test by touching the mixture between your fingers, and if you feel any sugar granules just keep whisking the mixture over the water bath.
- Make sure the bottom of the bowl isn’t touching the simmering water because you don’t want the whites to cook.
- Also, don’t overheat the sugar syrup, you are just looking to melt the sugar, no need to bring it to a certain temperature.Transfer the syrup to the bowl of a stand mixer. Before transferring the syrup, you might consider whipping the bottom of the bowl with a towel so the water doesn’t fall into the mixer bowl.
- With the whisk attachment, start whisking mixture on low (speed 2 of the KitchenAid) for about 30 seconds, then gradually start increasing speed to medium. Whisk on medium (speed 4) for one to two minutes, until the mixture is white and starting to become fluffy. Raise the speed to medium or medium-high and whip for a few minutes until stiff peaks are formed. I like to finish whipping the meringue on speed 6 of the KitchenAid.
- It takes me about 13 to 15 minutes to whip the meringue, but you shouldn’t go by time, go by what the meringue is supposed to look like because a lot of things can affect whipping time, such as the quality of the eggs, the weather, how powerful your mixer is, and more.
- Once the meringue gets glossy and you start seeing streaks formed by the whisk, and the meringue raising in the center of the whisk, it might be time to stop.
- You don’t want to over whip the meringue at this point because that can cause several issues, mainly hollow macarons.
- Whisk until stiff peaks have formed. When you pull the whip up, the peak should be stiff and shooting straight up, with possibly a slight bend at the top, but not bending to the side.
- Also when you swirl the whisk around in the bowl to collect the meringue, you should feel some resistance from the meringue. And when you look on the bottom of the whisk the meringue collected should be forming soft but defined waves.
- Pour the sifted powdered sugar and almond flour into the stiff meringue.
- Add the food coloring at this point, if using. If you were using powder food coloring, you could add it during the final stages of whipping the meringue. I haven't added any but you could have added some white powder food coloring, or white gel food coloring.
- Start folding gently forming a letter J with a spatula.
- Once the dry ingredients have incorporated with the meringue, you can start squeezing the air out of the batter by pressing it down along the sides of the bowl as you fold.
- How to know when to stop folding the batter: It’s time to stop folding when the batter is glossy and has a thick and flowing consistency. There are several ways to test this.
- First, pick up some batter with the spatula and try to draw a figure 8 with the batter that is dripping off the spatula. If you can form several 8 figures without the batter breaking up, that’s one indication that it might be ready.
- The batter that’s falling back into the bowl should take 10 to 15 seconds to incorporate with the batter that’s already in the bowl.
- There’s another test you can do. I call it the Teaspoon test. Grab a teaspoon of batter and spoon onto the parchment paper or silicon mat. Wait a minute to see how it behaves.
- If the batter stays stiff, forming a point and doesn’t spread out, fold a little bit more, about 3 folds. Test again.
- Once the batter spreads out a bit and starts to look glossy and smooth on top, on the parchment paper or silicone mat, it’s ready.
- You don’t want your batter to be too runny either. So be careful not to over mix. It’s always best to under mix and test several times until the proper consistency has been achieved.
- When you hold the spatula with batter on top of the bowl and the batter falls off the spatula slowly but effortlessly the batter is ready. The batter will keep flowing off the spatula non-stop, but not too quickly.
- Before transferring the batter to a piping bag fitted with a round tip, I put the piping bag in a cup, wrapping the top of the bag around the edges of the cup, in a way that the bag stayed open and the sides wouldn't touch each other. Then grab a small brush and lightly dip in the red food coloring. Brush 4 vertical lines from the bottom of the bag, where the round piping tip is, all the way to the top. Make sure the lines are spaced out evenly, at 12 o'clock, 3 o'clock, 6 o'clock, and 9 o'clock. Then pour the batter in the bag immediately. Don't use too much food coloring or it will add too much moisture to the shells.
- I also like to seal the top with a bag tie, so the batter doesn’t dry out and it gives you more control while piping because there’s no risk of the batter escaping through the top of the piping bag.
- Place the piping bag directly 90 degrees over the center of each macaron template. Apply gentle pressure and carefully pipe for about 3 to 5 seconds, and then quickly pull the bag up twisting slightly at the top.
- The first few macarons you pipe might not have the swirl, because it can take a bit for the batter to blend with the food coloring.
- Once you’ve piped as many circles as you could, bang the trays against the counter or against the palm of your hand a few times each.
- Use a toothpick to pop any air bubbles in the surface of the shells.
- Let your trays sit for a while so the shells will dry. I usually leave about 20-40 minutes, depending on how humid the day is. You’ll know they’re ready when you gently touch the surface of a macaron and it seems dry. It's important to let these macarons dry and not use the no-rest method with them because chances are if you don't rest them, the shells will crack due to the food coloring.
- Bake one tray at a time in the pre-heated oven.
- Bake for 5 minutes, rotate the tray. This step is not necessary, I don’t rotate the trays on the small oven, but I have to do so on my large oven, otherwise the macarons will be lopsided. Not all bakers have to rotate the tray.
- I bake each tray for about 15 to 20 minutes.
- When baked, the macarons will have a deeper color and formed feet. If you try to move a macaron, it shouldn’t feel jiggly. If the macaron is still jiggly, keep baking. Also try to touch the top of a macaron and it shouldn’t feel soft, if it’s still soft, keep baking.
- Remove from the oven and bake the other tray.
- Let the macarons cool down before proceeding with the filling.
Peppermint Buttercream
- Beat the butter at medium speed in the bowl of an electric mixer for about 1 minute. With the mixer off, add all of the powdered sugar in.
- On low speed, mix the sugar and butter together. Once they are incorporated, turn speed to medium and beat for 1-2 minutes until very fluffy.
- Add peppermint extract.
- If the buttercream seems dry and stiff, add the milk or water. Mix for another 30-45 seconds. If the buttercream seems too runny, add more sifted powdered sugar until you obtain a firm, but smooth and creamy consistency.
To assemble
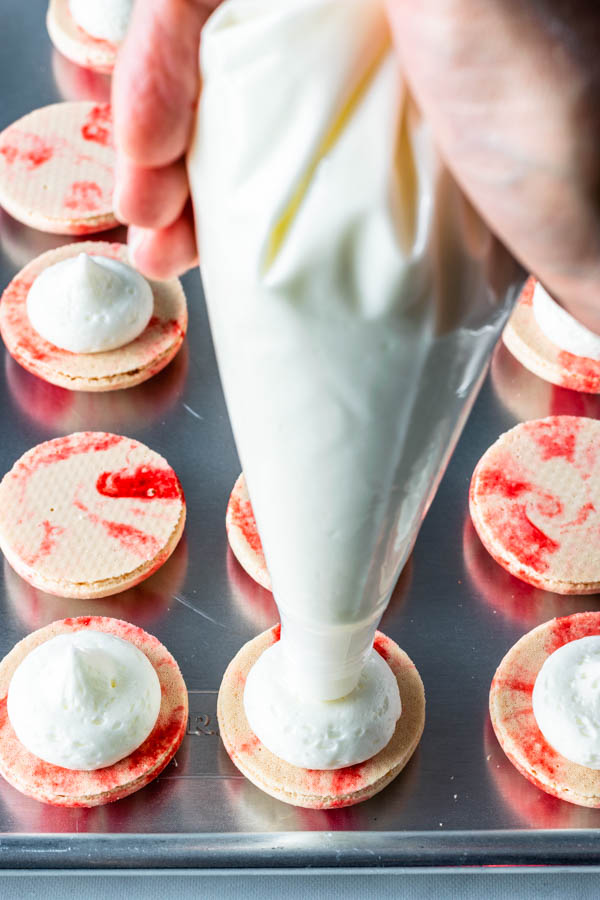
- Place Peppermint Buttercream in a piping bag, and then pipe some buttercream on half of the shells, then top with another shell.
- Roll the sides of the macarons in crushed peppermint candy, and then place the macarons in the fridge, let them mature for 24 hours before serving.
Storage
- These Macarons will freeze well for up to 2 months in an air-tight container, or up to 1 week in the fridge.
is there anything that can be used to replace almond flour due to nut allergies?
sunflower seeds can be replaced: https://www.piesandtacos.com/macaron-recipe-without-almond-flour-sunflower-seed/
This recipe was easy yet at the same time challenging to make I love how they tasted this was my first time making macaroons and it turned out great!!
Thanks!
Thank you sooooo much for this post! I followed your recipe with only slight flavoring changes, and they turned out perfectly. The swirls, the feet, the crunch, the chew! Delicious! Your instructions were very detailed and easy to follow.
I used peppermint oil instead of extract. I added less than 1/8 tsp peppermint oil to to the shell batter, and I also used 1/4 teaspoon peppermint oil and 1/2 teaspoon clear vanilla extract to the buttercream.
These will certainly impress as holiday gifts. I can’t thank you enough!
I tried the technique for getting the swirls with not super great results, with only a few light pink swirls. I tried again switching to Americolor and was a bit more liberal painting the stripes in the bag, with slightly better results but nothing close to what you have here. It also stained my silicone bag, so I’m wondering if maybe a reusable silicone piping bag isn’t the way to go? Did you use a disposable piping bag? Yours look so gorgeous!
I use silicone bag, I actually remade these this week and I am going to post them soon. You probably didnt put enough food coloring, but then again dont put too much or it will stain the whole batter. You want fine lines of a good amount of food coloring in there, nicely spaced out so it doesnt blend.
You said they can be stored in the freezer up to two months is that with or without the filling? If with the filling how do you unfreeze them?
I freeze them with filling. Only sometimes without filling, if i have leftover shells.
Anyway, you can just take them out of the freezer and leave them on top of the counter for 30 min before serving, or just move them to the fridge. To avoid the shells from “sweating” leave the macarons in a closed container for the first 30 minutes as they are coming to room temp.
Hi! Quick question – for the food coloring, are you using the liquid kind that normally comes in the little drop bottle? Or the gel kind that’s a bit thicker/more concentrated?
Nevermind – just read the note about using gel! Excited to try these!
yay! have fun! love these ones!! and yes gel food coloring 🙂
Esse sabor é bem diferente pra macarons!!!!!!
verdade ne bem natalino!