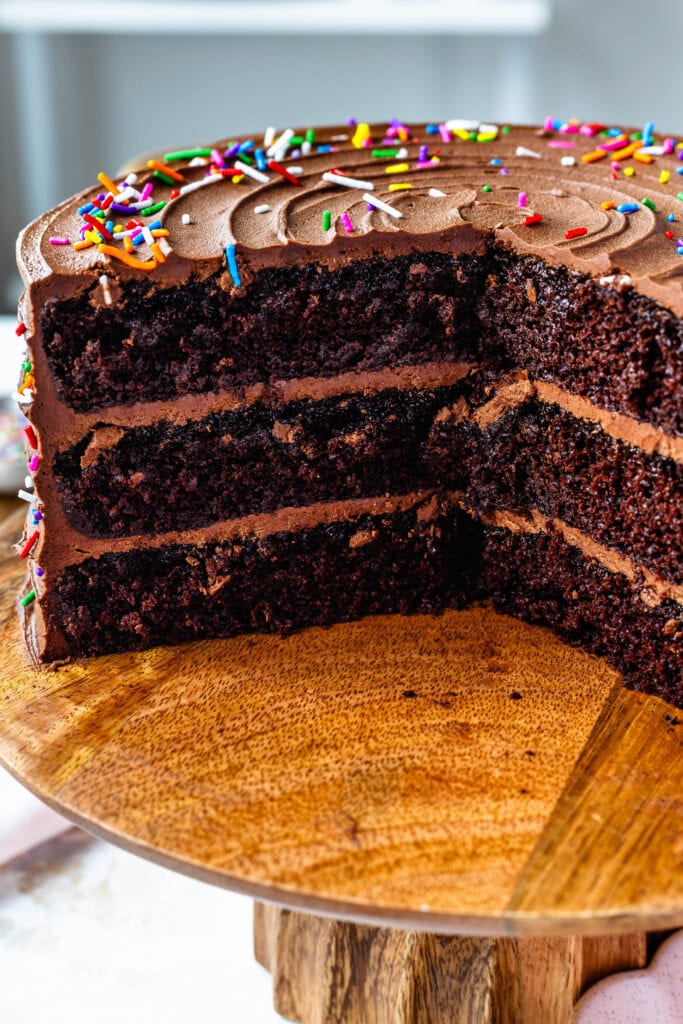
Chocolate Birthday Cake
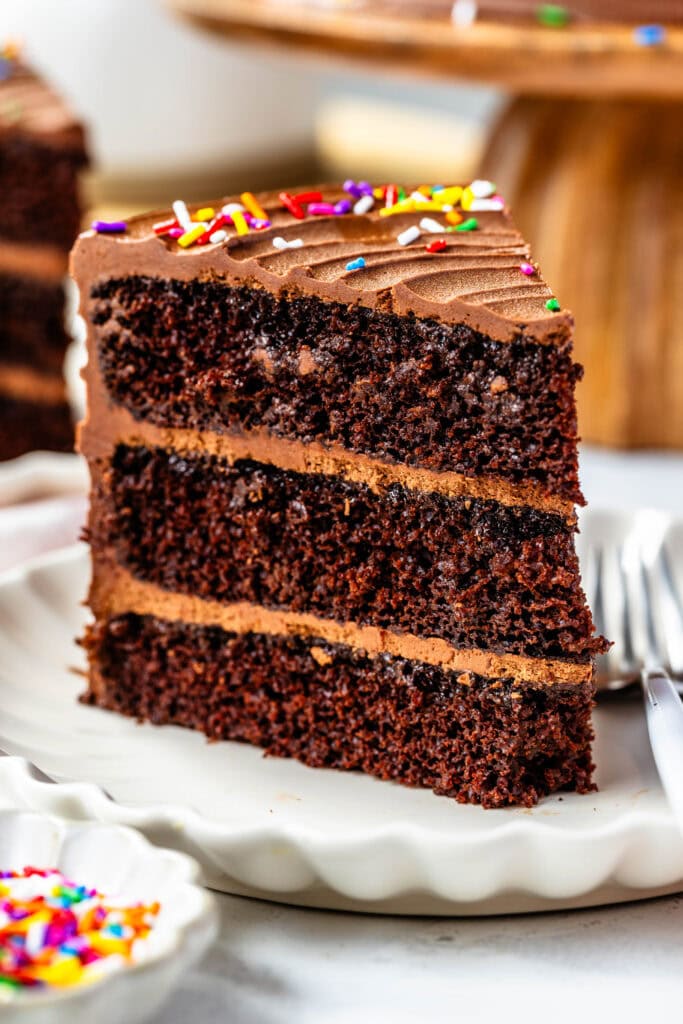
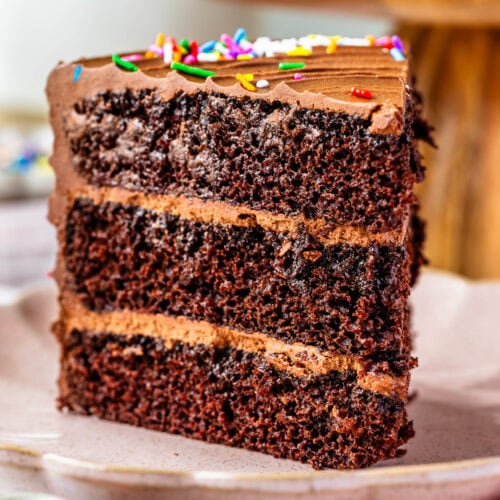
This is such a rich and delicious Chocolate Birthday Cake. Fluffy layers of moist chocolate cake, brushed with Chocolate Syrup for extra chocolate richness, and frosted with a luscious Chocolate Buttercream.
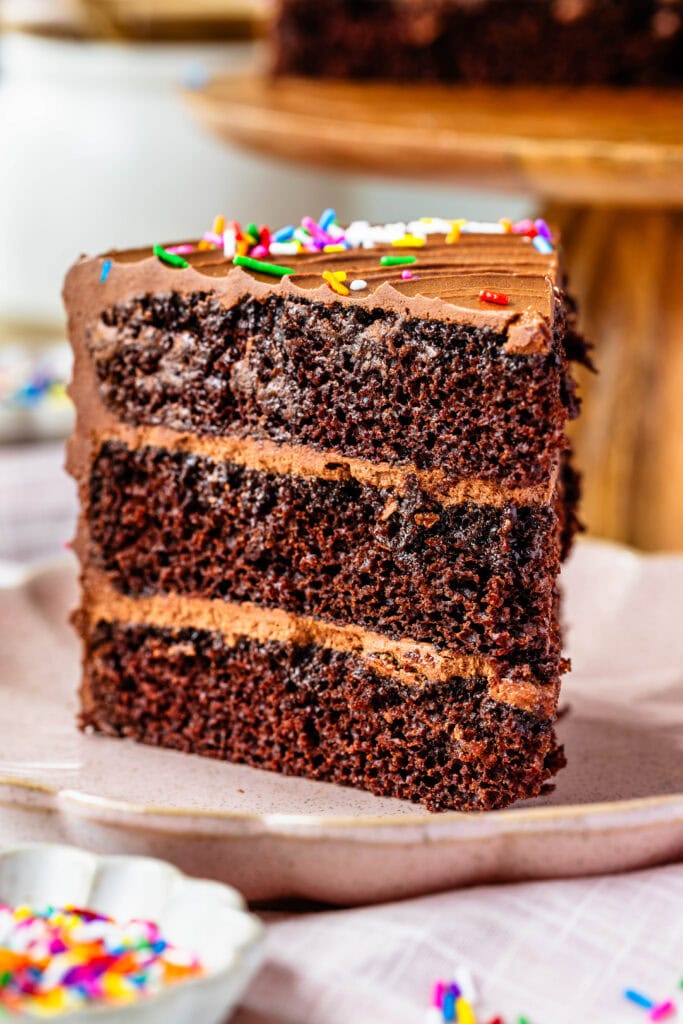
The texture of the cake is moist and tender, because we use sour cream, buttermilk, and oil in our batter. And the chocolate syrup to brush on the cake is totally optional. The cake will be super soft without it too. But the syrup will not only make the cake texture even more moist, it will also enhance the chocolate flavor of the cake, so I recommend it.
The chocolate frosting we use to cover and fill the cake is one of the best chocolate buttercreams I’ve ever made. We make a dark chocolate ganache that gets added to the frosting, making it silky, rich, and helps to offset the sweetness of the powdered sugar.
This post may contain affiliate links. I earn a commission from qualified purchases. Please read our Privacy policy here.
Chocolate Birthday Cake Recipe
This Chocolate Birthday Cake is easy to make, and I will show you step-by-step how to make this recipe.
The ingredients can be found at the bottom of the page, here you will find detailed instructions with pictures that can be helpful when making the recipe.
Let’s start by making the cake layers. They can be made a few days ahead, or even a month or so. I suggest to keep the cake layers in the freezer, wrapped in plastic, if you’re not using them the same day. This is a little trick I learned from a baker friend, who makes wonderful cakes. And ever since I started storing my cake layers in the freezer instead of the refrigerator, I’ve noticed a difference in their texture. The fridge tends to make the cake dry, so the freezer is your best bet for storing the cake layers before assembling the cake.
Best Chocolate Cake Recipe
This is the best chocolate cake recipe you will ever make! It’s soft and moist, super fluffy and rich. And the best part: it’s super easy to make!
In a large mixing bowl, mix together the flour, sugar, cocoa powder, baking powder, baking soda, salt, and espresso powder if using. Whisk until incorporated.
To another bowl, add the eggs, oil, buttermilk, sour cream, and vanilla. Whisk to combine.
Pour the wet ingredients over the dry ingredients, and whisk until incorporated.
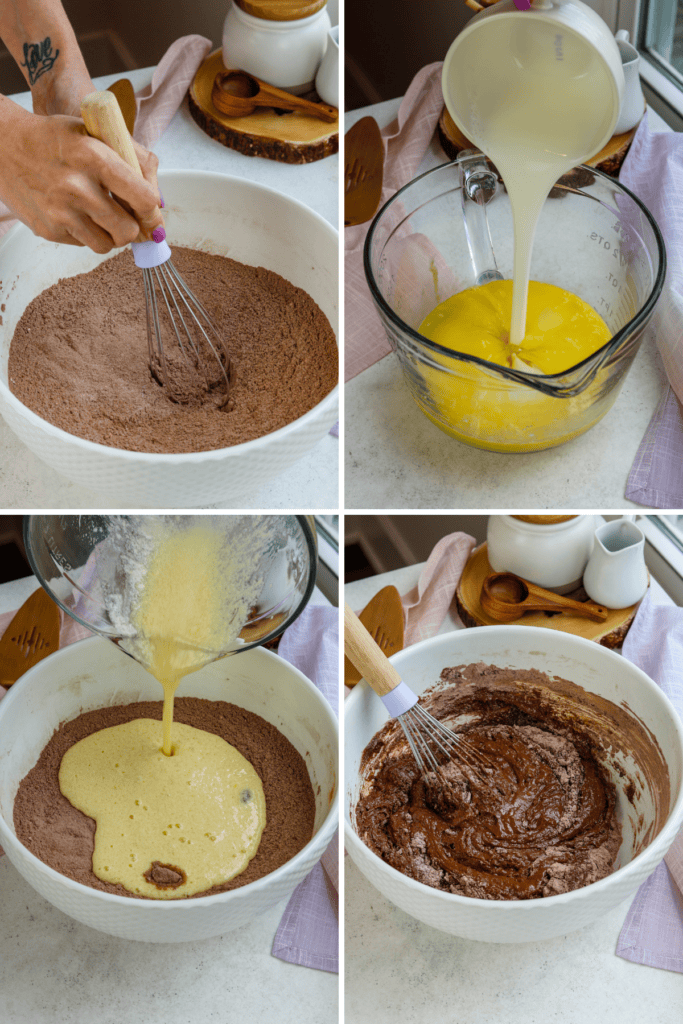
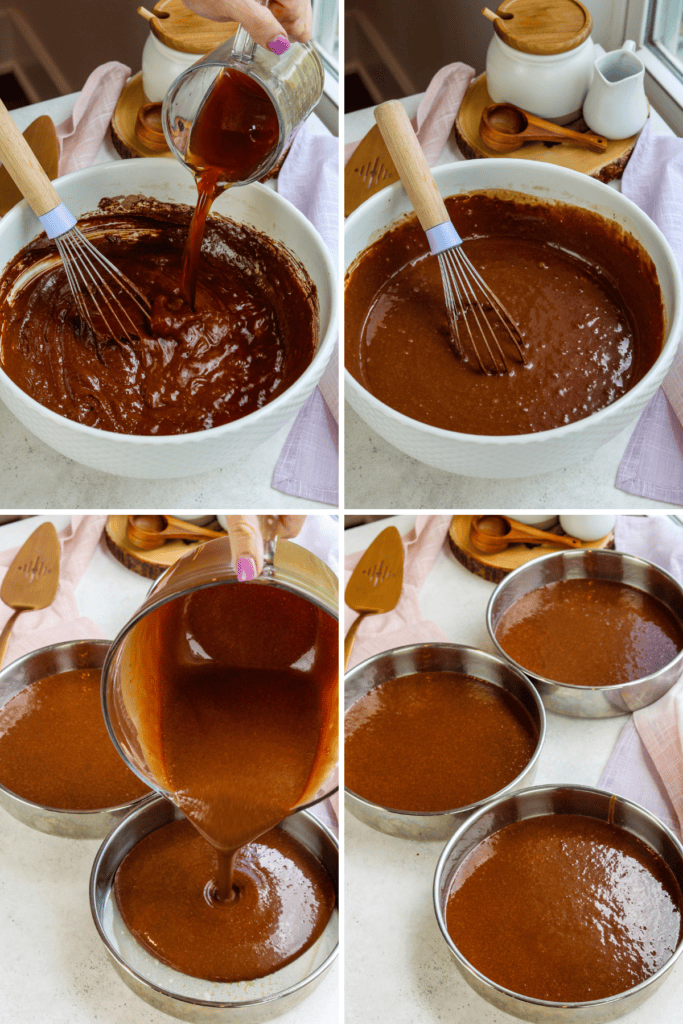
Add the hot coffee to the batter, and stir to combine. If you don’t want to use coffee, you can add hot water instead.
The batter will be very liquidy, which is why I like to transfer it to a spouted cup to divide it between the cake pans.
Divide between the cake pans, I am using three 8-inch round cake pans. You can use 2 9-inch cake pans instead if you prefer.
Bake the cake layers for 30 to 35 minutes, until a toothpick comes out clean when inserted in the cakes.
Let the cake layers cool down for 15 minutes, then flip them over and let the cakes cool down.
Chocolate Syrup
As it’s been mentioned, the syrup is an optional step of the cake. If you prefer your cake not so moist, you can skip the syrup.
The syrup will also enhance the taste of the cake, making it extra chocolatey and rich tasting.
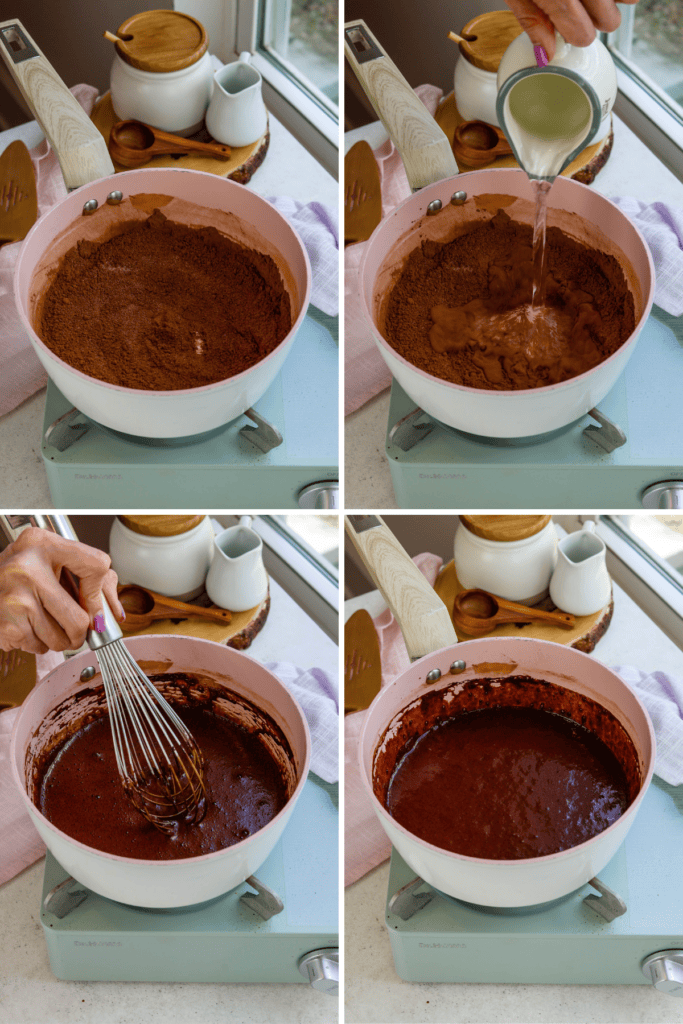
Mix the cocoa powder and sugar in a saucepan, whisk to combine.
Add the water to the pan and whisk to combine. Bring to a boil, and whisk until the cocoa powder and sugar have dissolved with the water and formed a syrup. Let the syrup cool down.
Chocolate Frosting
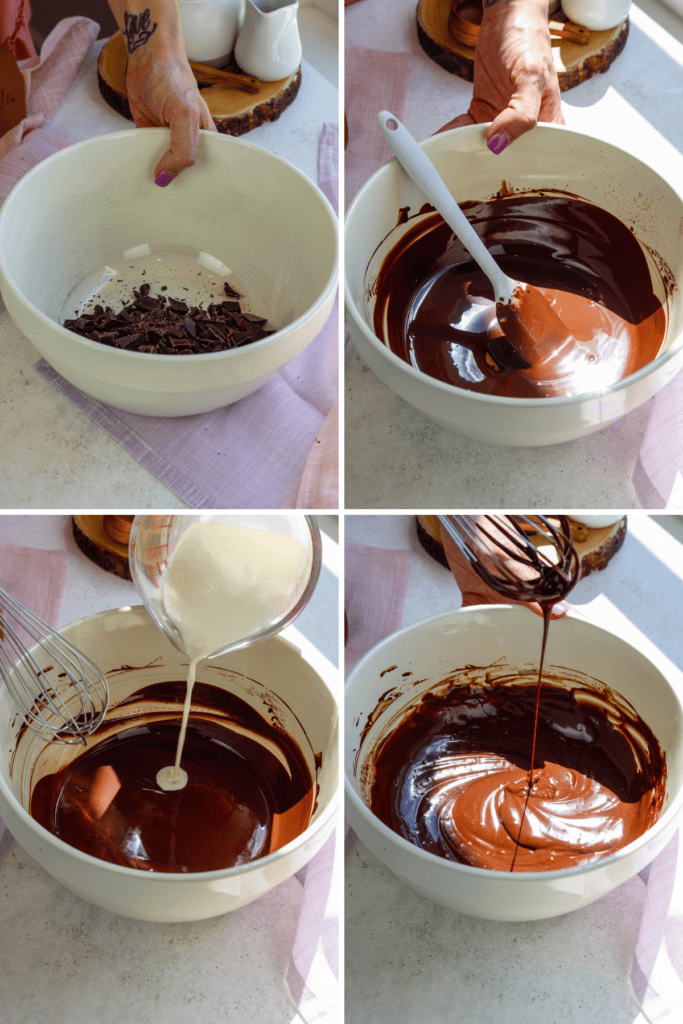
To make the Chocolate Buttercream, start by melting the chocolate with the heavy cream. I used dark chocolate, you can use semi-sweet too.
Let the ganache cool down.
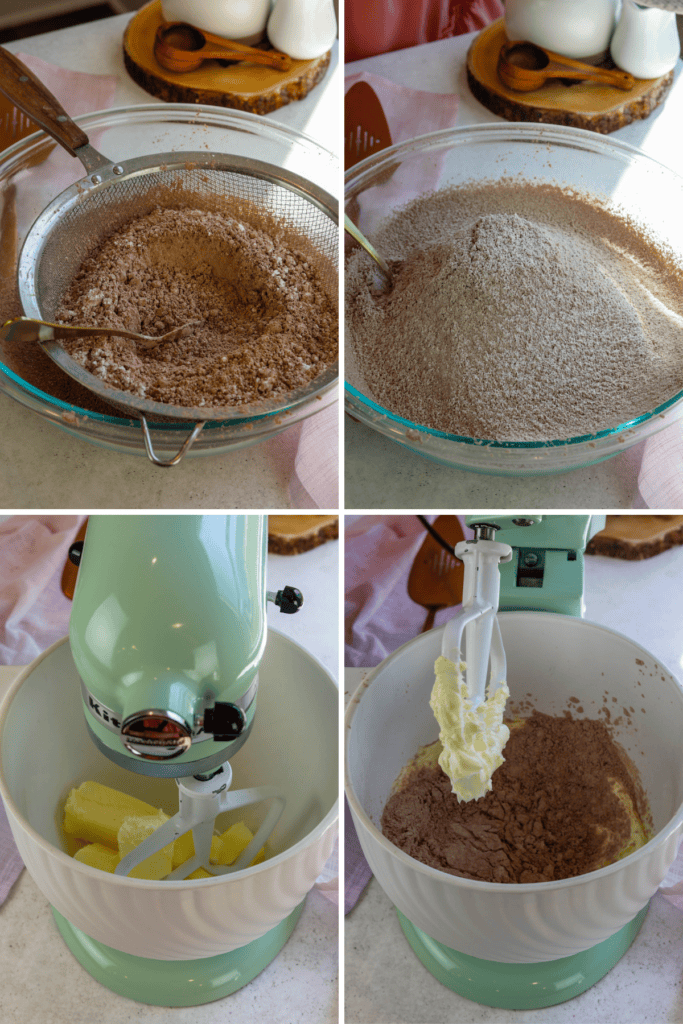
Make sure to sift the powdered sugar with the cocoa powder.
Beat the butter with the mixer. Add the powdered sugar and cocoa powder a bit at a time, until fully incorporated.
Scrape the bowl every now and then to make sure everything is getting nicely incorporated together.
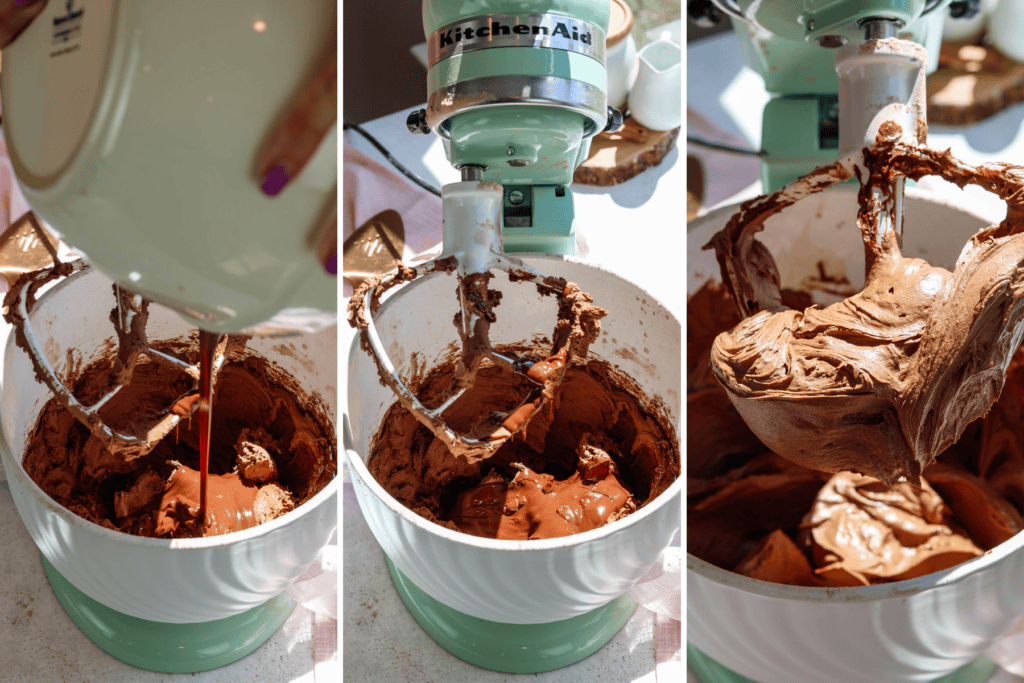
Add the ganache and the vanilla to the bowl. Mix until combined.
The frosting should be silky and smooth.
To assemble the cake
Place a cake layer on a serving plate. Brush with the syrup if using.
Give the syrup a minute or two to be absorbed by the cake.
Cover the first layer with frosting. Use a spatula to smooth it out.
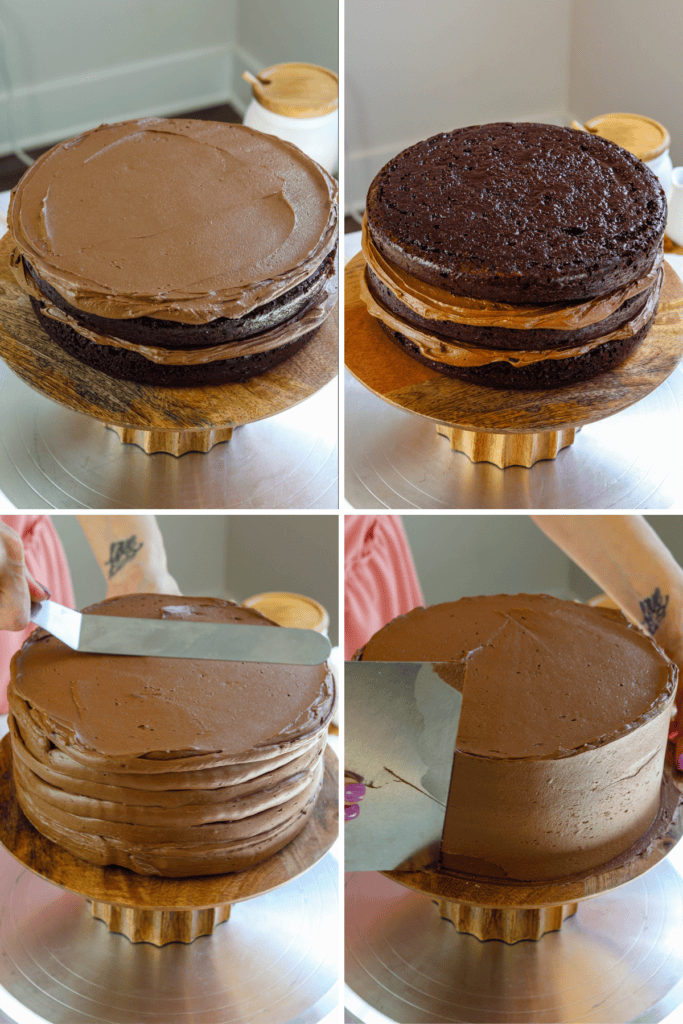
Top with another cake layer.
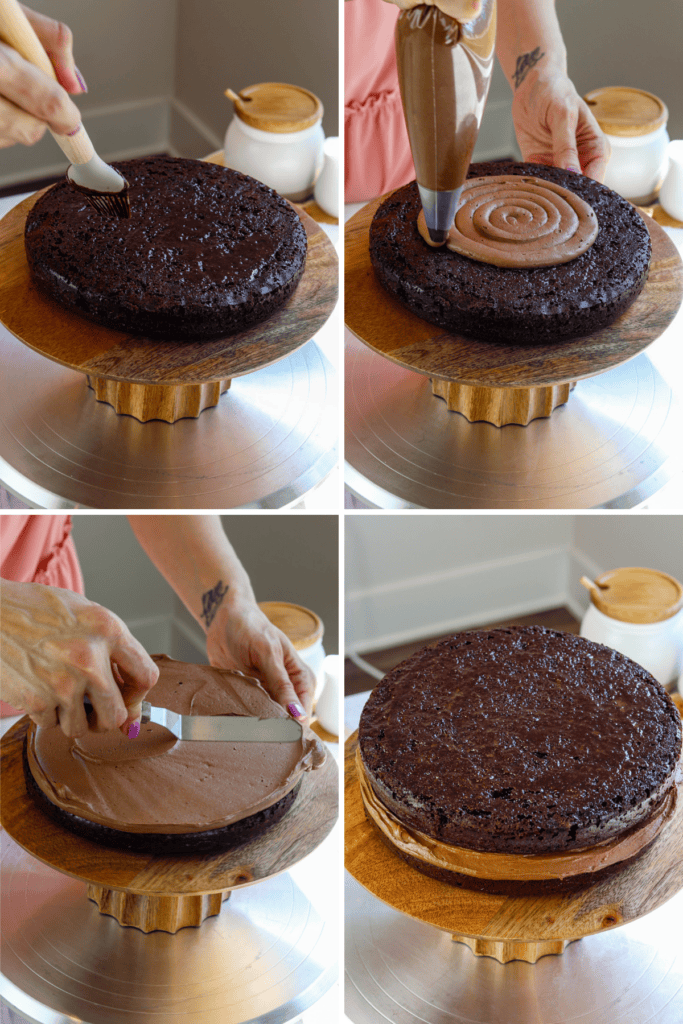
Brush the cake layer with syrup, and top with frosting.
Place the final cake layer on top. Cover the cake with the Chocolate Buttercream. Use an offset spatula to smooth out the top of the cake, and a bench scraper to smooth out the sides of the cake.
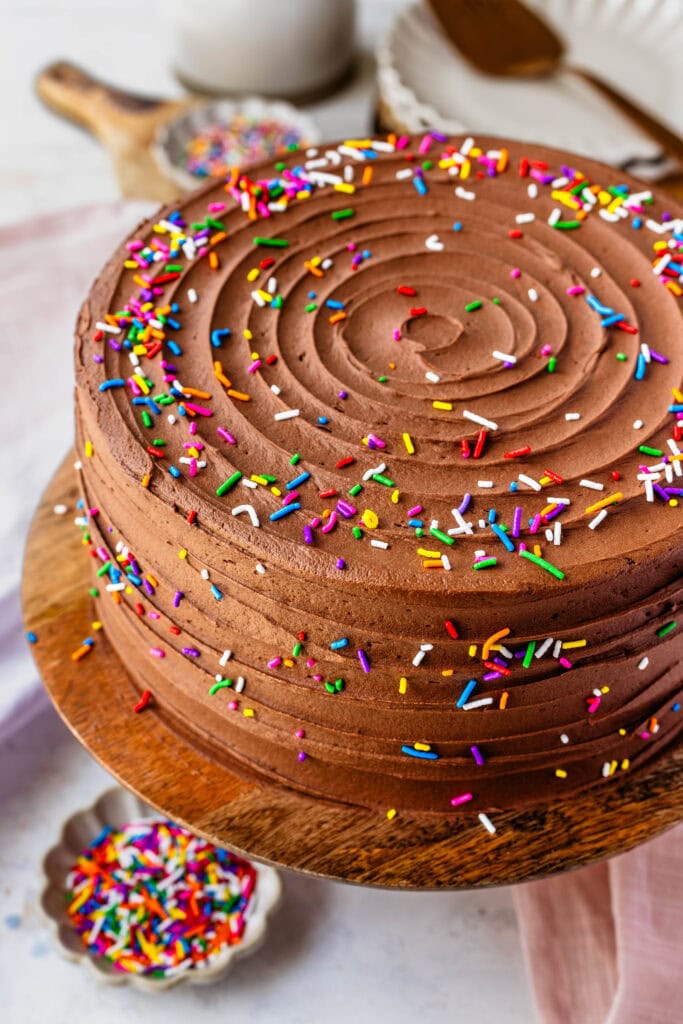
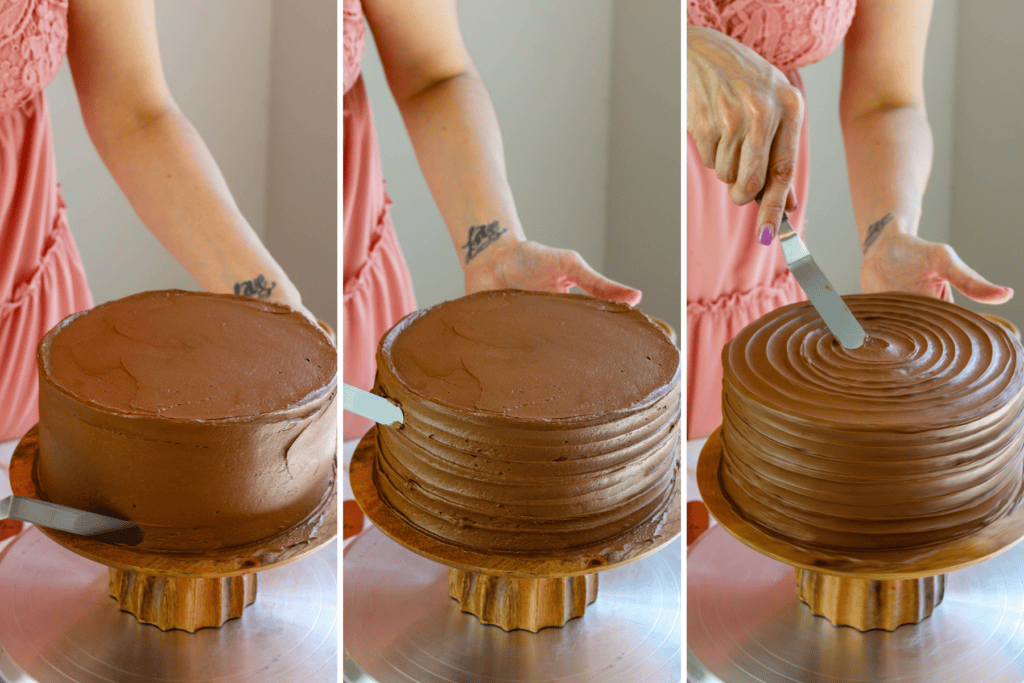
Use a smaller spatula or a butter knife to form the spiral effect on the cake by placing the spatula on the bottom, on the side of the cake, and spin the cake plate as you go up with the spatula, until you reach the top of the cake.
Place the spatula on top of the cake, on the edge, and spin the cake plate around, forming a swirl of frosting, until you reach the center of the cake with the spatula.
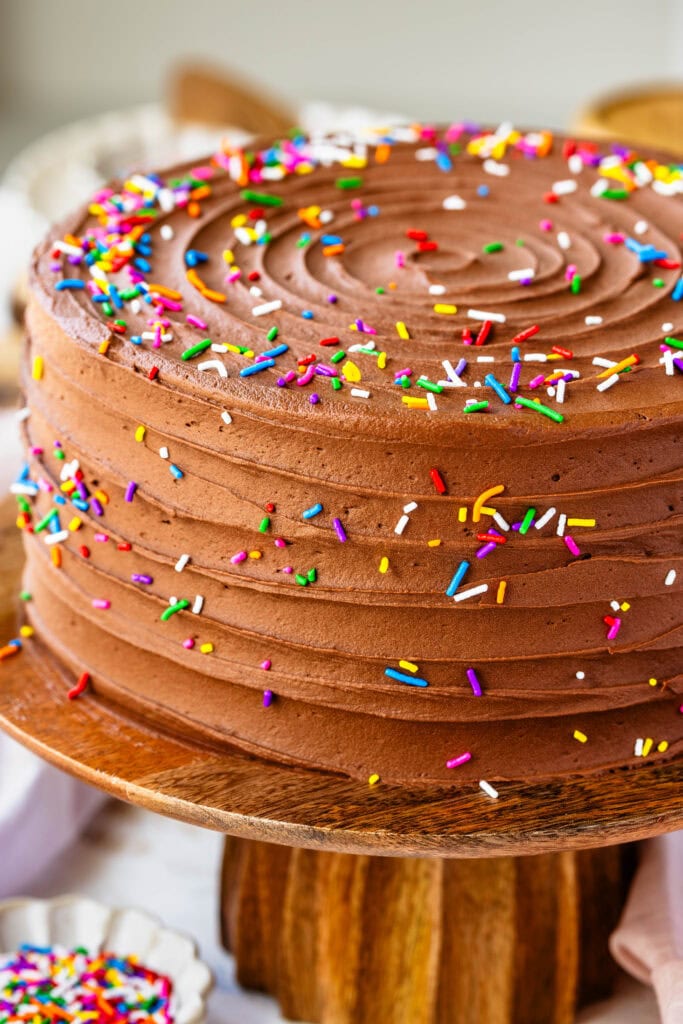
Top the cake with birthday rainbow sprinkles.
To serve and store
This cake is perfect for any birthday celebrations, or for anytime you are craving a chocolatey rich dessert!
This super moist chocolate cake recipe will certainly become your favorite!
Store it in the fridge, in an air tight container for up to 4 days, or freeze the cake for up to 2 months.
To serve the cake, let it sit at room temperature for 10 minutes.
Tips for making this Chocolate Birthday Cake
- Make sure all ingredients such as eggs, butter, sour cream, buttermilk, are at room temperature before starting the recipe. An easy way to bring the eggs to room temperature quickly is to put them in a bowl of warm water for a few minutes. You can also gently microwave the buttermilk, or sour cream, for just a few seconds to take the chill off, in case you forgot to remove them from the fridge a few minutes earlier. And with the butter, I find that usually putting the butter in a warm place such as inside the microwave (without turning it on) for a few minutes, makes it come to room temperature faster.
- Don’t over mix the cake batter, that can lead to a dry cake.
- Scrape the bowl of the cake batter several times while making the cake.
- The same goes for the frosting, scrape the bowl with a spatula while making the frosting, to ensure all ingredients are getting nicely incorporated together.
- Bake the cake just until done, over baking can also cause the cake to be dry.
- If you aren’t frosting the cake on the same day you made it, freeze the cake layers wrapped in plastic. Freezing keeps them from drying out in the refrigerator. No need to thaw the layers before frosting, but you can let them sit at room temperature for 10 to 20 minutes if desired.
More recipes
If you like this recipe, here are some more recipes you might enjoy:
- Cookies and Cream Cake
- Biscoff Cake
- Chocolate Cherry Cake
- Chocolate Coconut Cake
- Dulce de Leche Chocolate Cake
- Walnut Chocolate Cake
- Strawberry Nutella Cake
I hope you enjoyed this recipe! If you make it, leave a comment below, or tag me on instagram, I love to see your creations!
Chocolate Birthday Cake
Ingredients
Chocolate Cake Batter
- 2 cups all-purpose flour 255 grams
- 1 3/4 cup granulated sugar 350 grams
- 1/3 cup cocoa powder 34 grams
- 1 tsp baking powder
- 2 tsp baking soda
- 1/2 tsp salt
- 1/2 tsp espresso powder optional
- 2 large eggs
- 1/2 cup vegetable oil 120 ml
- 2/3 cup buttermilk 158 ml
- 1/3 cup sour cream 75 grams
- 2 tsp vanilla extract
- 1 cup brewed coffee 200 ml
Chocolate Syrup
- 1/2 cup granulated sugar 100 grams
- 1/2 cup water 120 ml
- 1/4 cup cocoa powder 25 grams
Chocolate Buttercream
- 1 cup chocolate chips or chopped chocolate, dark or semi-sweet (170 grams)
- 2/3 cup heavy cream 158 ml
- 4 cups powdered sugar 500 grams
- 1 cup unsweetened cocoa powder 100 grams
- 1 1/4 cup unsalted butter room temperature (282 grams)
- 2 tsp vanilla extract
To decorate
- 1/3 cup rainbow sprinkles
Instructions
Chocolate Cake Batter
- To make the Chocolate Birthday Cake batter start by pre-heating the oven to 350ºF. Grease and line with parchment three 8-inch cake pans. Grease the parchment and the sides of the pan as well.
- Alternatively you can use two 9-inch pans.
- In a large mixing bowl, mix the flour, sugar, cocoa powder, baking powder, baking soda, salt, and espresso powder (if using). Whisk to combine.
- In another bowl, combine the eggs, vegetable oil, buttermilk, sour cream, and the vanilla extract. Whisk until completely incorporated.
- Pour the wet ingredients over the dry ingredients and whisk until combined. When the batter is incorporated, add the hot coffee and mix to combine.
- Whisk until the batter is smooth. The chocolate cake batter will be very thin and liquidy.
- I like to transfer it to a bowl with a spout to help distribute the cake batter between the cake pans, which helps with such a runny batter.
- Divide the batter evenly between the cake pans.
- Tap them gently against the counter to release any bubbles.
- Bake the cakes in the oven for about 30 to 35 minutes, until a toothpick inserted into the cake comes off clean.
- Let the cakes cool down for 15 minutes in the pan.
- Then remove the cakes from the pan. Let them cool down. If you aren’t frosting the cake on the same day, I recommend you wrap each layer individually in plastic wrap and then freeze until you are ready to use the cake layers. When you are ready to frost the cake, you can simply use the frozen cake layers, or let them sit on the counter for 20 minutes before frosting the cake.
Chocolate Syrup
- The syrup is optional, but really helps take the cake to an extra level of rich chocolate taste.
- To make the syrup, add the sugar and cocoa powder to a saucepan and whisk to combine. Add the water and whisk again. Over medium heat, whisk the mixture until it comes to a boil and the cocoa powder has dissolved with the sugar and water.
- Let the syrup cool down, then cover until you are ready to use. You may have to whisk the syrup again before using it to brush on the cake layers.
Chocolate Buttercream
- Place the chocolate chips or chopped chocolate in a bowl. Place in the microwave for 15 to 30 second intervals, stirring until melted.
- Heat up the heavy cream gently, until just hot, and pour over the melted chocolate chips.
- Let the mixture cool down for about 15 minutes.
- Sift the powdered sugar and cocoa powder together.
- In a large bowl, or the bowl of a stand mixer, beat the butter for 1 minute using the paddle attachment, until creamy.
- Add the sifted powdered sugar and cocoa powder slowly, while beating the butter on low, scraping the bowl every so often to ensure everything is getting nicely incorporated together.
- Add the cooled ganache (the melted chocolate and heavy cream) along with the vanilla to the bowl, and beat on low until combined.
- Add the vanilla extract and mix.
To assemble the cake
- To assemble the cake, start by placing one cake layer on a cake plate.
- Brush the cake layer with the syrup, if using. Allow a couple of minutes for the cake to soak up the syrup.
- Spread the Chocolate Buttercream Frosting on the cake layer. Use an offset spatula to smooth out the frosting.
- Place another cake layer on top. Brush syrup on the cake layer.
- Spread more Chocolate Buttercream on the cake layer, and smooth it out with an offset spatula.
- Top it with the final cake layer, and also brush it with syrup.
- Spread the frosting on top of the cake and all over the sides of the cake.
- Use an offset spatula to smooth out the top of the cake.
- And use a bench scraper to smooth out the sides of the cake.
- To do the spiral look, grab a smaller offset spatula or a kitchen knife and place it on the side of the cake. Just the tip of the spatula is touching the cake. Spin the cake plate around as you move the spatula up the side of the cake, until you reach the top. Do the same for the top of the cake, place the tip of the spatula on the top edge of the cake and spin the cake plate around as you move the spatula to the center of the cake.
- Top the cake with the sprinkles, you can also throw some sprinkles against the sides of the cake so they will stick to the sides while the frosting is still not dry.
Storage and serving
- Store the cake in the fridge for up to 4 days, in an air tight container. You can also wrap the cake in plastic and freeze it, for up to 2 months.
Hi
Can you make and freeze the buttercream ahead of time.
Thanks
Yes, definitely! Keep it in an airtight container or a freezer ziplock back for up to 2 months.
Hi!
Can I store the cake it in the fridge after frosting? Before first serving.
Since I won’t have time to frost it before we celebrate (it is in the morning).
yes you can!
The cocoa powder comment should have been up top! I didn’t realize the chemistry of “dutch-process” vs natural cocoa powder… I’m afraid my cake is going to taste like baking soda as it’s in the freezer now… other than that, thanks 🙂
I agree! I have made this cake at least four times and JUST caught the word “not” wrt the dutch process cocoa powder!
Recipe looks amazing! Would this recipe work for 2 x 10 inch cake tins instead? Thanks 😊
The cakes might be slightly thin but you could
If I’m not assembling the cake for a day or two and I freeze them, do I brush the syrup on the cake before freezing or after freezing?
brush the syrup as you are assembling the cake. freeze without the syrup.
Que maravilha! Amei a receita! 😍👏🏻👏🏻👏🏻👏🏻
Can I make this with sour cream as optional I have no sour cream
yes you can use yogurt instead