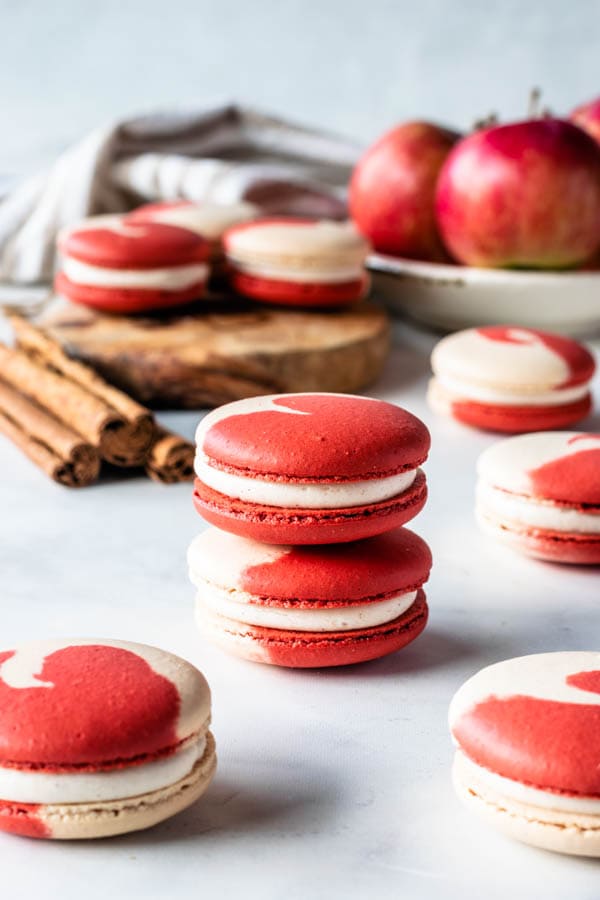
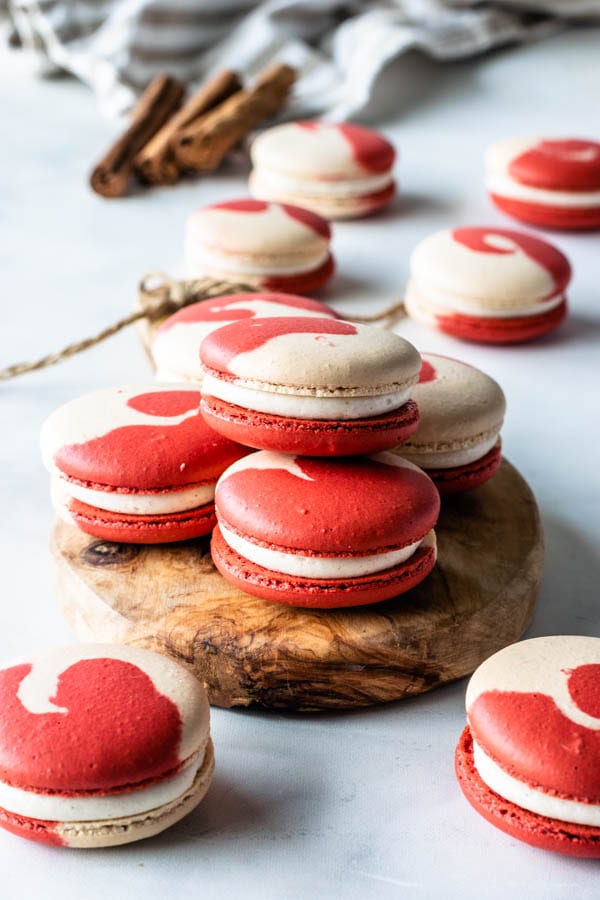
Apple Macarons (plus video)
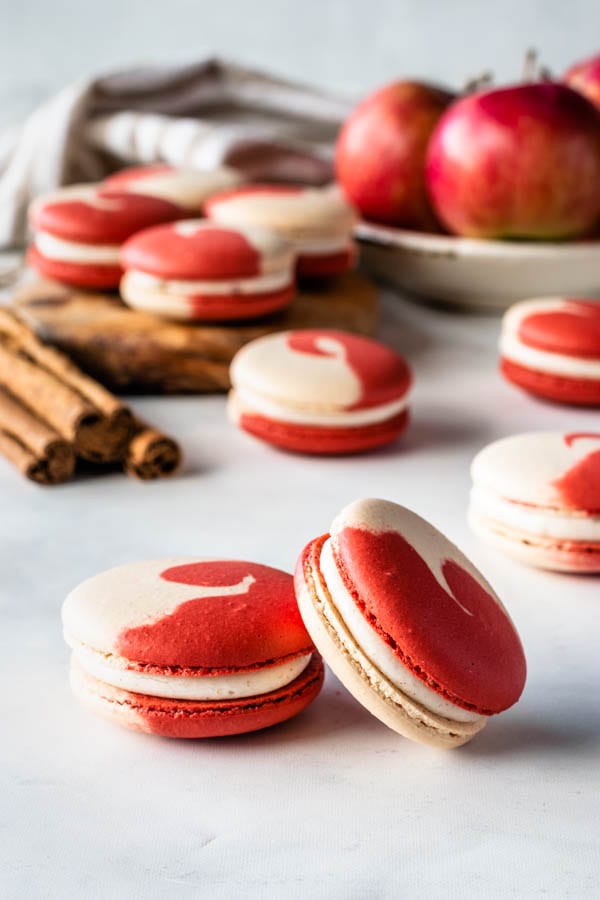
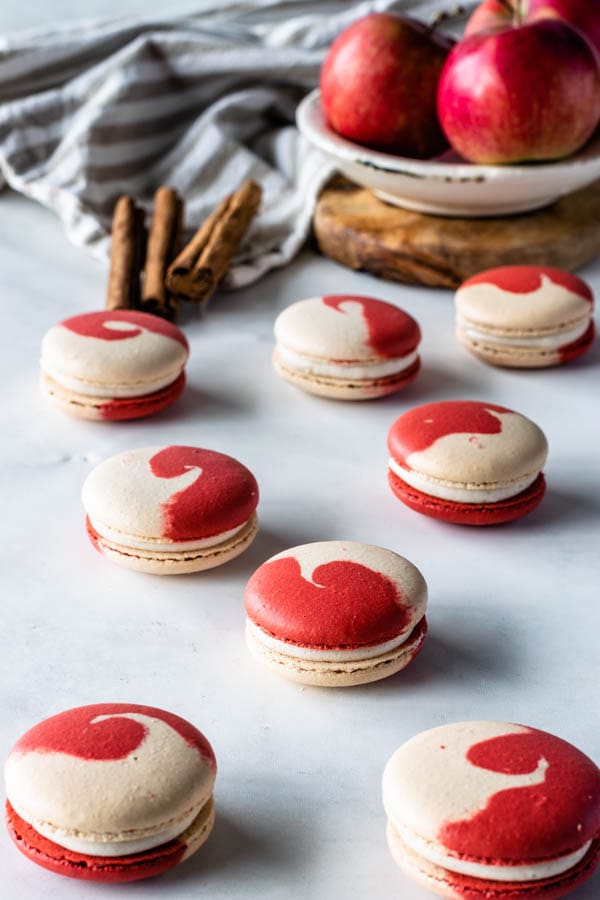
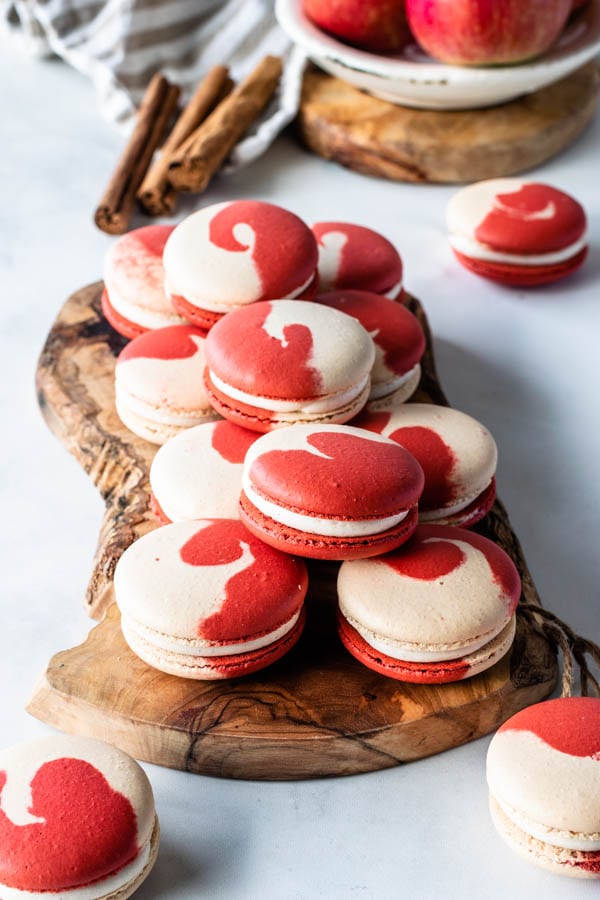
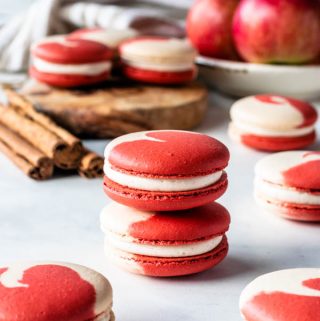
Hello friends! Welcome to my blog Pies and Tacos! Today we are making Apple Macarons, filled with Cinnamon Cream Cheese Frosting, and Apple Filling! Make sure to watch the video included here in this post with the detailed instructions on how to make these Apple Macarons.
I’m going to start out by saying that these macarons were highly complimented by anyone who’s tried them!
The Cinnamon Cream Cheese Frosting used to fill these macarons is one of my most popular posts! I even made an exclusive video for it too, which can be found on the blog post, or on my Youtube Channel (and you can also see how to make the Cinnamon Cream Cheese Frosting with the amounts required for this Apple Macarons recipe on the video posted on this page).
This post may contain affiliate links. I earn a commission from qualified purchases. Please read our Privacy policy here.
This Cinnamon Cream Cheese Frosting has also been used in a couple of my other recipes, for being so delicious and requested!
Here are the recipes where I use the Cinnamon Cream Cheese Frosting:
- Apple Crisp Cupcakes (which are pretty much siblings of these Apple Macarons, since they are filled with a similar Apple filling, and also topped with the delicious Cinnamon Cream Cheese Frosting, and a bonus crumble topping!😮)
- Cinnamon Roll Cupcakes (one of my most popular recipes, topped with a glazed cinnamon roll on top!)
And besides the delicious Cinnamon Cream Cheese Frosting, let’s not forget about the incredible Apple Filling used in these Apple Macarons. It is like an apple pie filling, but better because it’s inside of a macaron!
Plus, it’s really not hard to make. Just 10 minutes in and you can have this delicious Apple filling! You can use this filling for many other things, like pies, cakes, cupcakes (like I did with my Apple Crisp Cupcakes), ice cream, and the list goes on.
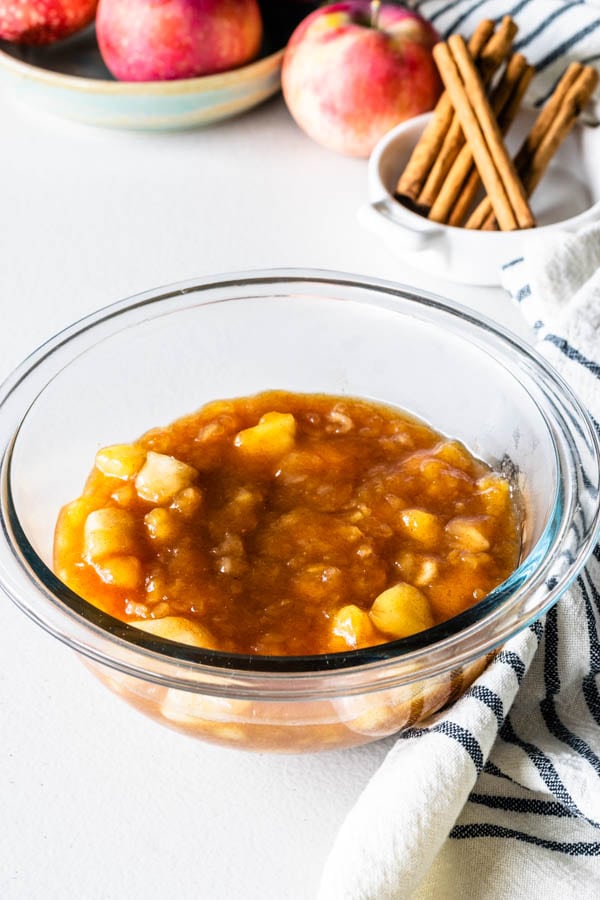
You might want to double or triple the recipe if you are using for anything else though, because this recipe makes enough to fill the macarons, which isn’t much, since each macaron takes about 1/2 teaspoon of filling inside.
What are your favorite fall desserts? Here are some Fall macaron ideas for you!
- Pumpkin Cheesecake Macarons (which also includes a video)
- Pecan Macarons
- Pumpkin Macarons
- Tiramisu Macarons
- Salted Caramel Macarons

During this blog post I won’t go over too much on how to make these Apple Macarons, the recipe below is very detailed, and the video included here goes into a lot of details and visuals that will definitely help you learn how to make macarons. So I really encourage you to watch the video, and read the recipe thoroughly.
If you are new to macarons, just know that I have a LOT of resources on my page, so many recipes, tips, videos. Making macarons is about practice and research, and about finding out what works best for you through getting your hands (and spatulas) dirty.
Visit my Macaron recipes section for more macaron ideas, tips, videos, and resources to help you on your macaron baking journey.
And I always try to answer to questions that you have if you dm me on instagram @piesandtacos as well.
It’s always best if you also have a picture to send me, if the case is troubleshooting. Because it really helps to be able to get a visual, so I can tell you where I think the mistake could be, and how to best fix it.
Also, if you make any of my recipes, don’t forget to tag me on instagram also, I love love love seeing them, and I have SO much appreciation for each one of you that is here, and is a part of this awesome community of warm and incredible bakers! You all ROCK!
Have a beautiful day!
These are the containers I use to store my macarons. They are specially great to freeze them.
These piping bags are also awesome! Very thick and sturdy!
And, of course, my favorite food coloring. Wilton, gel based! Always make sure to use gel based food coloring, not water based ones!
Apple Macarons
Ingredients
Macaron Shells
- 100 grams egg whites 3.5 oz
- 100 grams white granulated sugar 3.5 oz
- 96 grams almond flour 3.4 oz
- 90 grams powdered sugar 3.17 oz
- Food coloring I used red and a touch of pink
Apple Filling
- 1 cup apples chopped small, from about 2 small apples
- 1 tablespoon lemon juice
- 1/2-1 tablespoon water
- 1/4 cup brown sugar
- 1/2 teaspoon cinnamon powder
- 1/4 teaspoon freshly grated nutmeg
- 1/2 teaspoon cornstarch
- 2 teaspoons water
Cinnamon Cream Cheese Frosting
- 85 grams cream cheese softened (3 oz, 6 tablespoons)
- 42.5 grams unsalted butter softened (1.5 oz, 3 tablespoons)
- 113 grams powdered sugar about 1 cup, 4 oz
- 1 teaspoon cinnamon powder or more to taste
- 1/4 teaspoon vanilla extract
Instructions
Macaron Shells
- Before you start, get all of your ingredients ready. Prepare a large piping bag, fitted with a large round tip. Set aside.
- Also set aside as many piping bags as the number of colors you’d like to color your shells. I used 2 different colors: white and red.
- Line two baking sheets with parchment paper or silicon mat.
- I use a baking mat with the macaron template already in it. You can make your own or print it from the internet, and just place it under silicon mat, or parchment paper. I recommend using a silicon mat
- Measure out all of your ingredients.
- Sift powdered sugar and almond flour together. Set aside.
- Place egg whites and granulated sugar in a heat proof bowl or in a double boiler. Over a pan of simmering water, whisk the whites and sugar until frothy and sugar completely melted. It will take a couple minutes. You can test by touching the mixture between your fingers, and if you feel any sugar granules just keep whisking mixture over the water bath.
- Make sure the bottom of the bowl isn’t touching the simmering water.
- Transfer mixture to the bowl of a stand mixer.
- With the whisk attachment, start whisking mixture on low for about 30 seconds, then gradually start increasing speed to medium. Whisk on medium for one to two minutes, until mixture is white and starting to become fluffy. Raise speed to high for a few minutes until stiff peaks are formed. Best way to check this is to keep your eye on the whites. Once they get glossy and you start seeing streaks formed by the whisk, it might be time to stop.
- Whisk until stiff peaks have formed. When you pull your whip up, the peak should form a bird’s beak shape, but shouldn’t be falling to the side, the peak should be stiff, forming a slightly curved shape at the top.
- Pour powdered sugar and almond flour into stiff whites.
- Start folding gently forming a letter J with a spatula.
- Fold just until you don’t see any streaks of dry ingredients any longer. Once that happens, you can split the batter between the number of bowls correspondent to the colors you want to use in your batter.
- I split my batter into 2 different bowls.
- Work quickly, with each color, one at a time, folding the batter until ready, then transferring it to a piping bag. Move on to the next color and do this until the entire batter is ready.
- It’s time to stop folding when the batter is glossy and has a thick and flowing consistency. There are several ways to test this.
- First, I pick up some batter with my spatula and try to draw a figure 8 with the batter that is dripping off the spatula. If you can form several 8 figures without the batter breaking up, that’s one indication that it might be ready.
- There’s another test you can do. I call it the Teaspoon test.
- Grab a teaspoon of batter and spoon onto the parchment paper or silicon mat. Wait a minute to see how it behaves.
- If the batter stays stiff, forming a point and doesn’t spread out a bit, I start folding a little bit more, about 3 folds.
- Test again.
- Once the batter spreads out a bit and starts to look glossy and smooth on top, on the parchment paper, I transfer my mixture to the piping bag.
- You don’t want your batter to be too runny either. So be careful not to overmix. It’s always best to undermix and test several times until the proper consistency has been achieved.
- Transfer each color to one piping bag. Then cut the tip of each piping bag. And place them inside of a large piping bag fitted with a round tip.
- Applying equal pressure around the whole piping bag, start piping the macarons onto the baking sheet.
- Once you’ve piped as many circles as you could, bang the trays against the counter a few times each.
- Let your trays sit for a while so the shells will dry out a little bit. I usually leave about 20-40 minutes, depending on how humid the day is. You’ll know they’re ready when you gently touch the surface of a macaron and it seems dry.
- Pre-heat the oven to 300°F.
- Bake one tray at a time.
- Bake for 5 minutes, rotate tray.
- I bake each tray for a total of 18-20 minutes.
- When baked, the macarons will have a deeper color and formed feet. And they will be coming off the mat easily, and with a completely formed bottom.
- Remove from the oven and bake the other tray.
- Let the macarons cool down before proceeding with the filling.
Apple Filling
- Place apples, lemon juice and 1/2 tablespoon of water in a small saucepan.
- Cook apples over medium heat until softened.
- Depending on what kind of apple you are using, it might take less or more time to cook them. Softer apples will cook faster.
- Add more water if the apples are too dry.
- Add brown sugar, nutmeg, cinnamon powder.
- Cook for a minute to dissolve the brown sugar.
- Mix 1/2 teaspoon of cornstarch with 2 teaspoons of water. Mix to combine.
- Add this mixture to the pan.
- Cook for 1-2 minutes until the apple filling becomes thick.
- Remove to a bowl. Let it cool down in the fridge all the way before using.
Cinnamon Cream Cheese Frosting
- Start by sifting the powdered sugar with the cinnamon. Set it aside.
- Now, cream the softened cream cheese and butter together in the bowl of an electric mixer, for about 2 minutes, until light and fluffy.
- Add vanilla extract. Mix to combine.
- With the mixer off, add powdered sugar/cinnamon mixture to the bowl.
- Turn mixer on low to incorporate the powdered sugar with the cream cheese and butter.
- Once you see no streaks of dry powdered sugar, cream mixture on medium high for one minute.
- This frosting will store well in the fridge for up to 5 days, covered.
- Make sure to always leave your frosting covered. Cover the bowl with a lid or plastic wrap, because otherwise, the surface will dry out and get hard.
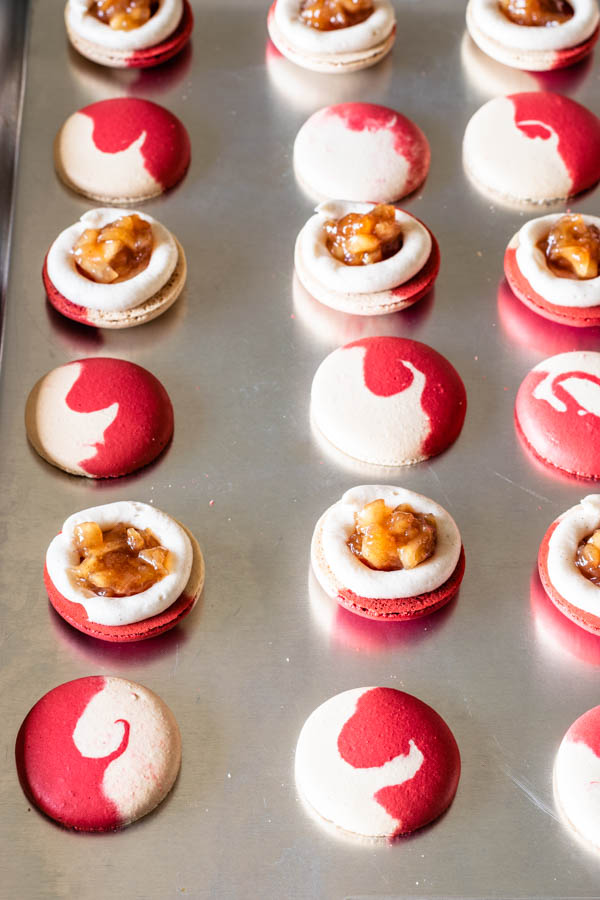
To assemble
- Pipe a ring of Cinnamon Cream Cheese Frosting around the edges of the bottom shells.
- Spoon some Apple Filling in the middle.
- Top with another shell.
Storage
- Store macarons in the fridge for up to 5 days.
- To freeze: freeze them in an air tight container for 1-2 months.
So we just made these and they out GREAT! But here’s the thing once you make them let them sit for 24 hours. My other half and I were making Macarons for the first time and he said Macarons should sit for 24hrs or so because they develop in flavor. I instantly didn’t believe him. So I said what ever we can do a test and have one know and freeze the rest. The first one was awesome. The next day I took one to work with my lunch, it gace it time to thaw. Let me tell you when I ate that macaron I almost lost my mind. The flavor was crazy good! I will be making these absolutely again!
Made these for a bake sale fundraiser. AMAZING! Ran out of red gel coloring and they turned out pink and white but no one complained. I need to practice the dual piping bag piping. The apple filling was so good that I used the leftovers for a topping on my overnight oats. Great compliments from all.
Thank you so much for sharing! I’m so glad they were a hit at the bake sale! 🌟 Pink and white sounds beautiful, sometimes those little surprises turn out just as lovely, if not more! And using the apple filling on overnight oats? Genius! It’s wonderful to hear they received such great compliments, and with a bit more practice, your dual piping skills will be perfect in no time. Thank you again for making these and spreading the joy!
How do you prevent the fruit filling from making the macarons soggy? I haven’t had luck with fridge storage (even for a day or two) for “wet” fillings like curd, etc.
do you think your shells could be under baked? if the shells are too soft, or not sturdy enough, they will become soggy very quickly. There is a way around preventing this which is to brush the bottom of the shells with melted chocolate or buttercream, let that dry, and then fill with the wet filling. However, if the macarons are underbaked, they will still become soggy, so I recommend maybe checking if that’s an issue, and in any case, just try brushing the shells with the chocolate or buttercream.
How do you prevent the fruit filling from making the macarons soggy? I haven’t had luck with fridge storage (even for a day or two) for “wet” fillings like curd, etc.
So delicious and so easy to make. My customers love it and it’s all ingredients that are common, nothing complicated. 5 starts definitely.
Camila, thank you for all your recipes and all the detailed explanation. Can we use the French method instead of the Swiss, keeping the quantities the same as mentioned by you? Thanks
I am confused. How is your frosting white? Mine turned brown from the cinnamon.
what brand of cinnamon do you use? is it ceylon or cassia cinnamon? I use ceylon, which is typically lighter in color.
Hi,
Can i freeze the filling?!
yes you can!
Would there be a problem with my macarons if I switched the merengue method???
what do you mean? which method do you want to use?
I want to use the french method instead of the swiss method.
Excelente, gostei muito!!!!!
Camila – you’re definitely the queen of macarons in my book! They always are so creative and look divine! Thanks for another inspiring recipe!