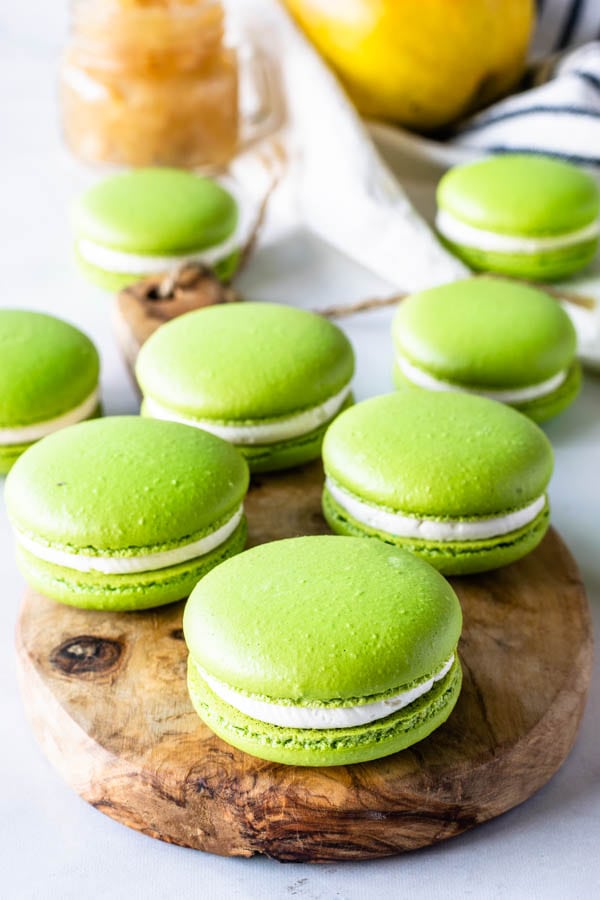
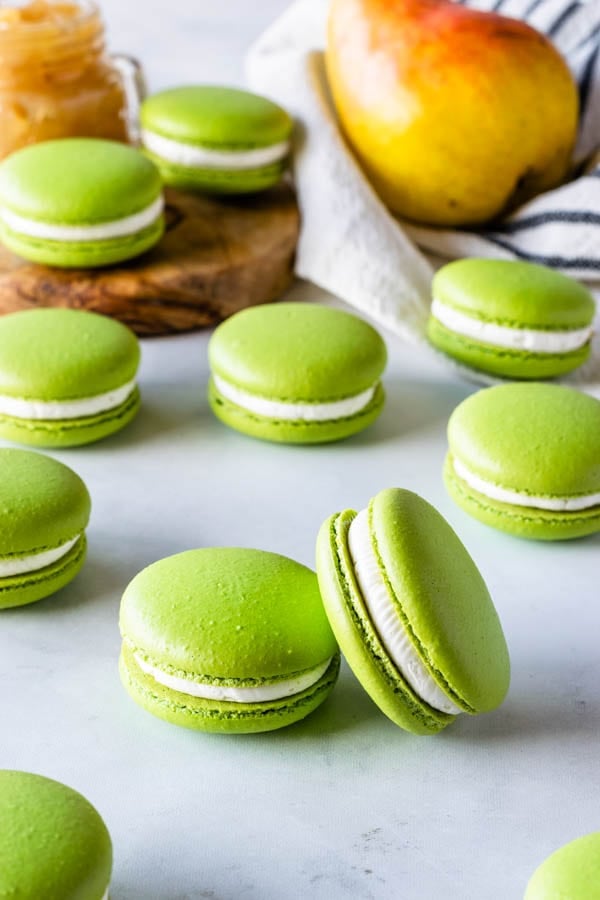
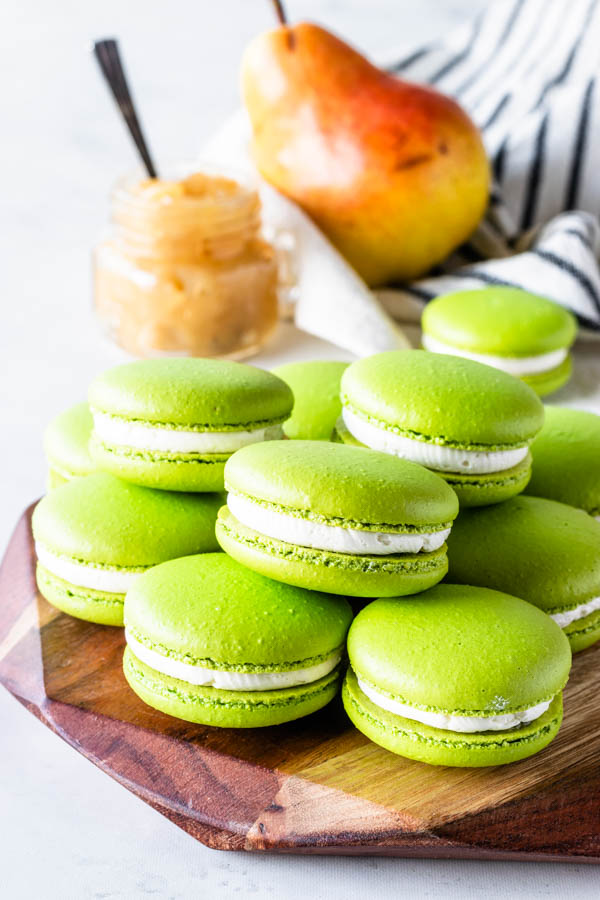
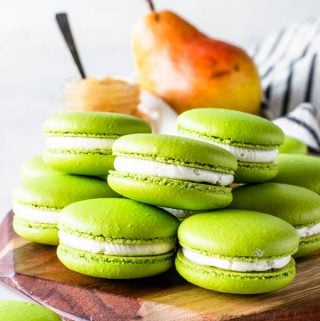
Pear Macarons
Hello my friends! Today let’s make Pear Macarons! One more macaron to add to my list of Macaron recipes!
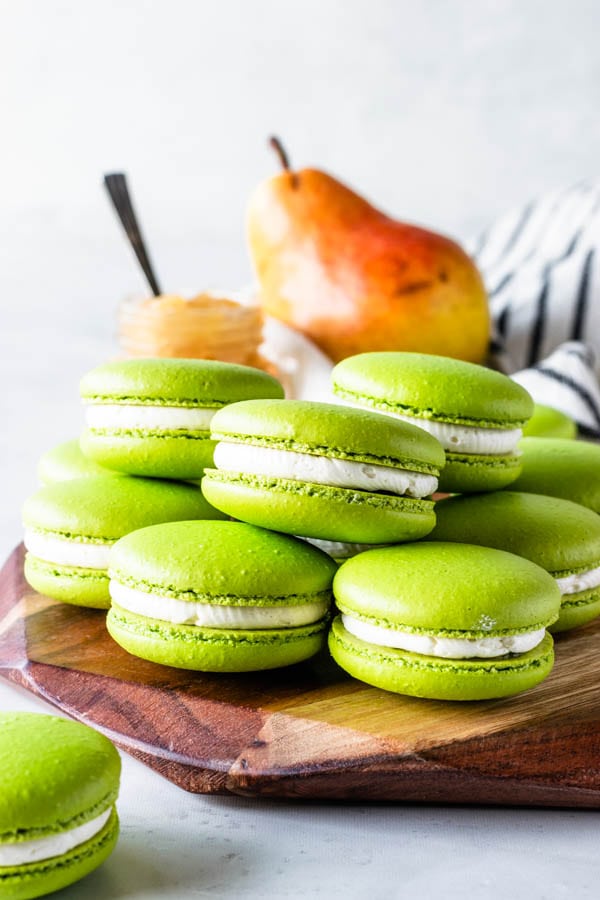
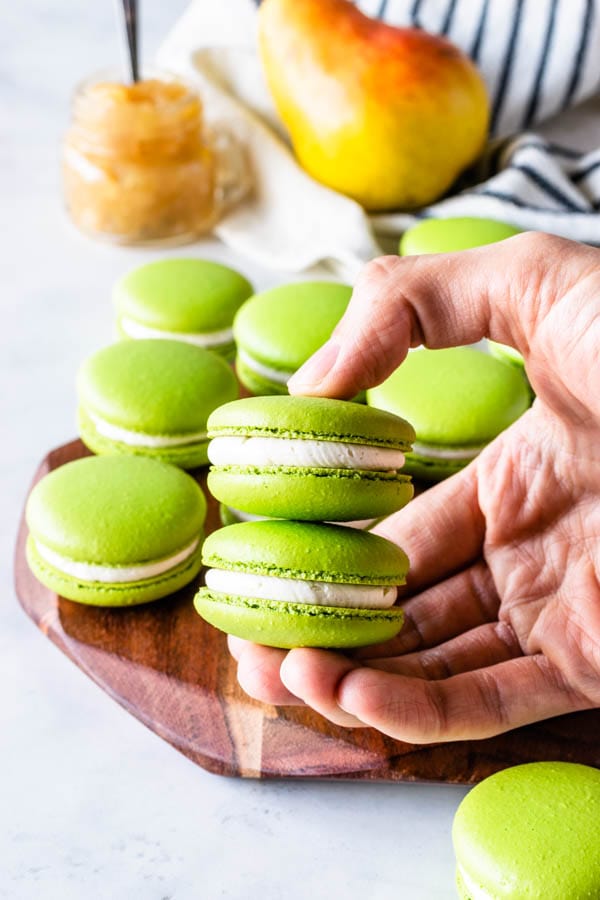
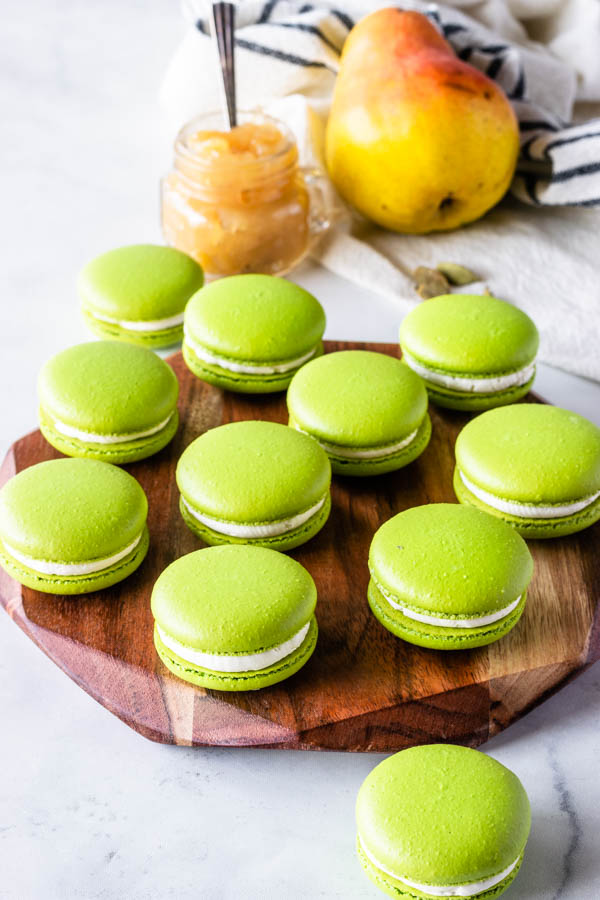
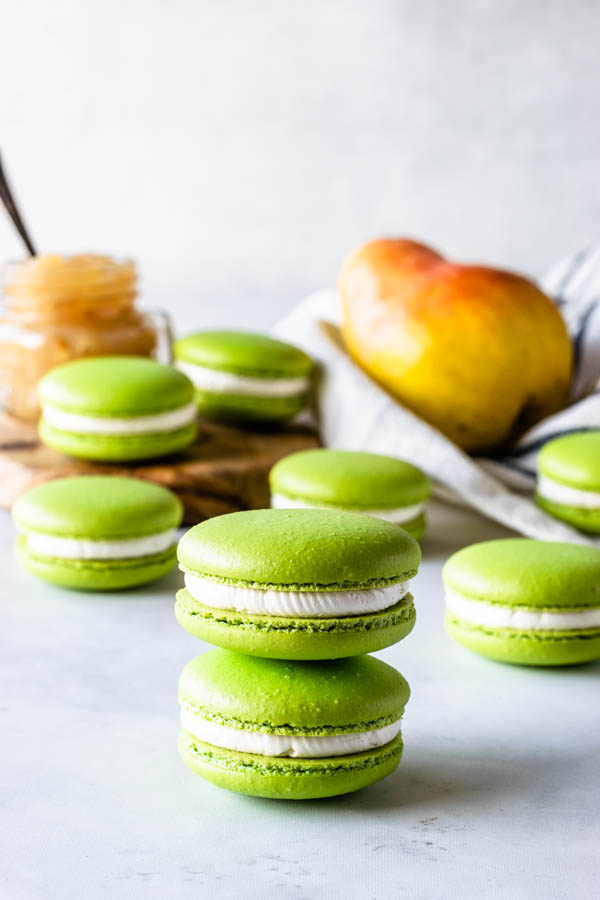
These Pear Macarons are filled with an easy pear jam, and buttercream.
I spiced the Pear Jam filling with cinnamon and cardamom, which made it so delicious!
This post may contain affiliate links. I earn a commission from qualified purchases. Please read our Privacy policy here.
Making the Pear Jam filling is super easy and quick. Simply add some chopped pears, brown sugar, lemon juice, and a cinnamon stick (optional) and cardamom to a small saucepan.
The amount of brown sugar will depend on how sweet the pears are. My pears were very sweet, so I only added 2 tablespoons of brown sugar for 2 cups of chopped pears.
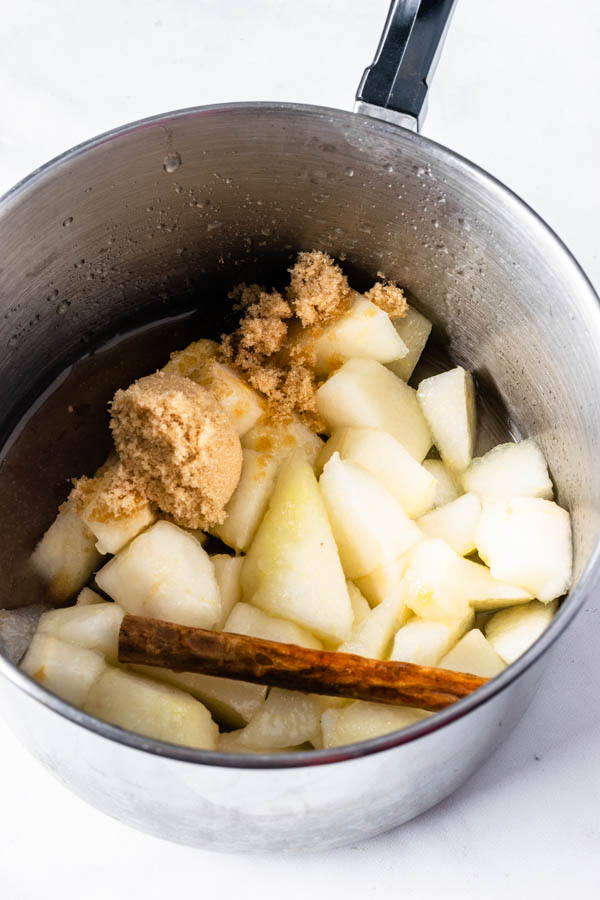
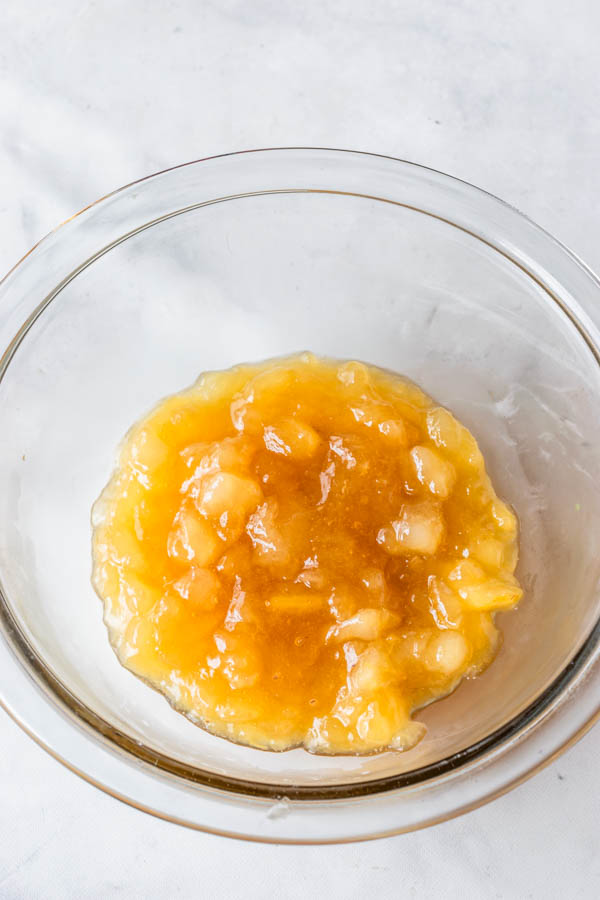
Cook over medium low heat for about 15 minutes, until the pears have softened up. Then add cornstarch and water to the pan to make the filling thick like jam.
Typically, when making pear jam, or pear butter, I would hold off on adding the cornstarch, however, if making it to fill macarons, I add the cornstarch because if the filling of the macaron is too wet, might make the shells soggy. And soggy shells are just sad.
Now, on today’s post, I would like to talk about a very important update I am making to my macaron shells recipe.
I have over 50 macaron recipes on my blog, and I have been making macarons for nearly 5 years. Yet, I am still always improving and learning more about making macarons.
The huge update I am making to my recipe consists in adding more powdered sugar and more almond flour to the shells.
About 15 more grams of powdered sugar, and 10 more of almond flour to be precise.
Why am I making this update to my recipes? Because often times, as you can see on the pear macarons I have here, I would get cracks on my shells between the feet and the top. And since making these Pear Macarons I have made more batches of macarons (more flavors and recipes coming soon!), and I have experimented with adding more dry ingredients, and that did the trick to completely end my cracked feet issues!
On my Pumpkin Cheesecake Macarons post, I am talking about this issue also, and I was thinking it was due to oven temperature. However, after much experimenting, I came to the conclusion that the issue was not the oven temperature, but that adding just a bit more dry ingredients to the shells completely fixed the problem.
This doesn’t mean that my other 52 Macaron recipes here on the blog using the previous measurements won’t work, it simply means I found a way to improve my macarons a little bit. And this might even be different depending on the almond flour brand you are using, the powdered sugar brand, how you measure your ingredients, etc.
Making macarons is a very particular journey, that evolves, changes, and can be very different from person to person based on the smallest details.
So, from now on, I will be posting my macaron recipes with the new measurements (+15 grams of powdered sugar and +10 grams of almond flour), however, I won’t go back and change the previous recipes because they are not wrong, and they have been working for me and for many people for years.
This is simply a tweak in order to keep working towards better results! Always improving, always growing, learning!
Speaking of Macaron recipes, here are some ideas you might like:
- Apple Macarons
- Chocolate Macarons
- Lemon Macarons
- Balsamic Caramel Strawberry Macarons
- German Chocolate Macarons
- Cherry Macarons
- Caramel Popcorn Macarons
- Dulce de Leche Pecan Macarons
- Pomegranate Macarons
- Pistachio Macarons
- Pumpkin Cheesecake Macarons
Thank you so much for reading my blog! I appreciate all the love and support.
If you have any macaron questions, I have a lot of resources for you. Besides my 50+ macaron recipes and posts filled with tips on how to make macarons, I also have videos on my Youtube channel to show exactly how I make macarons.
And, if you want any help troubleshooting, just send me a dm on instagram, it really helps if you have a picture of the macarons you’re trying to troubleshoot as well, so I can help pin point the problem.
I am happy to be able to help!
Here are some products I recommend when making macarons:
This is the air-tight container I use to store my macarons in the fridge and in the freezer. They are really great for freezing macarons.
These are the piping bags I have been using for the past few months. They’re awesome!
Pear Macarons
Ingredients
Macaron Shells
- 100 grams egg whites 3.5 oz
- 100 grams granulated sugar 3.5 oz
- 105 grams almond flour 3.7 oz
- 105 grams powdered sugar 3.7 oz
- Food coloring I used about 30 drops of yellow and 1 drop of blue
Pear Filling
- 2 cups pears chopped small
- 2 tbsp lemon juice
- 2 tbsp brown sugar
- Cinnamon stick optional to infuse flavor
- 1/4 tsp ground cardamom
- 1/2 tsp cornstarch
- 2 tsp cold water
Buttercream
- 1 1/3 cups confectioners' sugar sifted
- 4 tbsp unsalted butter softened
- 1 tsp vanilla extract
- 1/2 -1 tbsp milk as necessary
Instructions
Macaron Shells
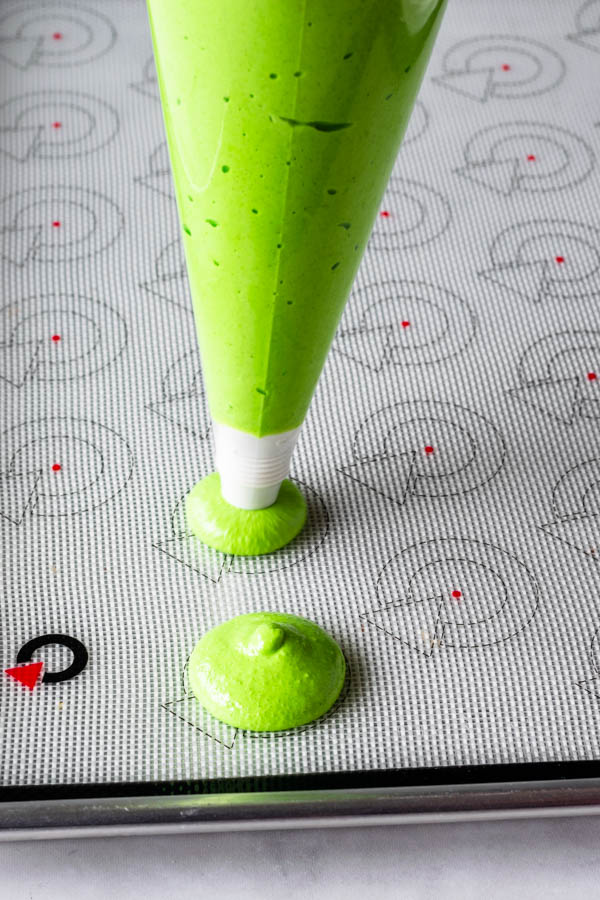
- Before you start, get all of your ingredients ready. Prepare a large piping bag, fitted with a large round tip. Set aside.
- Line two baking sheets with parchment paper or silicon mat.
- I use a baking mat with the macaron template already in it. You can make your own or print it from the internet, and just place it under silicon mat, or parchment paper. I recommend using a silicone mat.
- Measure out all of your ingredients.
- Sift powdered sugar and almond flour together. Set aside.
- Place egg whites and granulated sugar in a heat proof bowl or in a double boiler. Over a pan of simmering water, whisk the whites and sugar until frothy and sugar completely melted. It will take a couple minutes. You can test by touching the mixture between your fingers, and if you feel any sugar granules just keep whisking mixture over the water bath.
- Make sure the bottom of the bowl isn’t touching the simmering water.
- Transfer mixture to the bowl of a stand mixer.
- With the whisk attachment, start whisking mixture on low for about 30 seconds, then gradually start increasing speed to medium. Whisk on medium for one to two minutes, until mixture is white and starting to become fluffy. Raise speed to high for a few minutes until stiff peaks are formed. Best way to check this is to keep your eye on the whites. Once they get glossy and you start seeing streaks formed by the whisk, it might be time to stop.
- Whisk until stiff peaks have formed. When you pull your whip up, the peak should be shooting straight up, it shouldn’t be falling to the side, the peak should be stiff, forming a slightly curved shape at the top.
- Pour powdered sugar and almond flour into stiff whites.
- Start folding gently forming a letter J with a spatula.
- Add the food coloring at this point, if using.
- It’s time to stop folding when the batter is glossy and has a thick and flowing consistency. There are several ways to test this.
- First, I pick up some batter with my spatula and try to draw a figure 8 with the batter that is dripping off the spatula. If you can form several 8 figures without the batter breaking up, that’s one indication that it might be ready.
- There’s another test you can do. I call it the Teaspoon test.
- Grab a teaspoon of batter and spoon onto the parchment paper or silicon mat. Wait a minute to see how it behaves.
- If the batter stays stiff, forming a point and doesn’t spread out a bit, I start folding a little bit more, about 3 folds.
- Test again.
- Once the batter spreads out a bit and starts to look glossy and smooth on top, on the parchment paper, I transfer my mixture to the piping bag.
- You don’t want your batter to be too runny either. So be careful not to overmix. It’s always best to undermix and test several times until the proper consistency has been achieved.
- The best way I can describe this stage being perfect is when you hold the spatula with batter on top of the bowl and the batter falls off the spatula slowly but effortlessly. The batter will keep flowing off the spatula non-stop, but not too quickly.
- Transfer batter to a piping bag fitted with a round tip.
- Place piping bag directly 90 degrees over the center of each macaron template. Apply equal pressure and carefully pipe for about 3 seconds, and then quickly pull the bag up twisting slightly.
- Once you’ve piped as many circles as you could, bang the trays against the counter a few times each.
- Let your trays sit for a while so the shells will dry out a little bit. I usually leave about 20-40 minutes, depending on how humid the day is. You’ll know they’re ready when you gently touch the surface of a macaron and it seems dry.
- Pre-heat the oven to 300°F.
- Bake one tray at a time.
- Bake for 6 minutes, rotate tray if needed.
- I bake each tray for a total of 18-20 minutes.
- When baked, the macarons will have a deeper color and formed feet. And they will be coming off the mat easily, and with a completely formed bottom.
- Remove from the oven and bake the other tray.
- Let the macarons cool down before proceeding with the filling.
Pear Filling
- Add chopped pears, lemon juice, brown sugar, cinnamon stick if using, ground cardamom to a small saucepan.
- Cook over medium low heat for about 15 minutes until pears are falling apart and soft.
- Check the sweetness, my pears were very sweet so I didn’t have to add much sugar.
- Once pears are soft and falling apart, remove the cinnamon stick.
- Mix cornstarch with water.
- Add it to the pan and bring it back to a gentle simmer.
- Cook for 1 or 2 minutes until thickened.
- Remove to a bowl and let it cool down in the fridge.
Buttercream
- Cream butter at medium speed in the bowl of an electric mixer for about 1 minute. With the mixer off, add all of the powdered sugar in.
- On low speed, beat the sugar and butter together. Once they are incorporated, turn speed to medium and cream for 1-2 minutes until very fluffy.
- Add vanilla and milk in, beat for another 30-45 seconds. Only add 1/2 tablespoon of milk if necessary, sometimes you may find that the consistency of the buttercream is already perfect and doesn’t need any more liquid. If the buttercream seems too stiff, add a tiny bit of milk as necessary. If the buttercream seems too runny, add more sifted powdered sugar until you obtain a firm, but smooth and creamy consistency.
- STORAGE: Store buttercream in the fridge for up to 1 week.
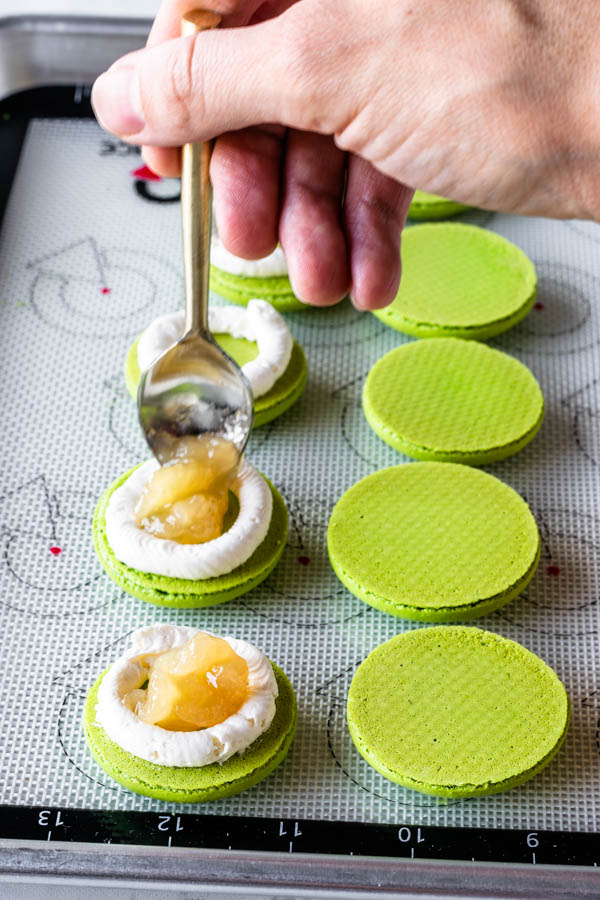
To assemble
- Pipe a ring of Buttercream Frosting around the edges of the bottom shells.
- Spoon some Pear Filling in the middle.
- Top with another shell.
Storage
- Store macarons in the fridge for up to 5 days.
- To freeze: freeze them in an air tight container for 1-2 months.
You mention lemon zest in the instructions, but do not mention it in your ingredients. Confused!
I’m so glad that I saw this about your change in your ratio. I typically use a ratio of 1 EW: 1.25 AF : 1.5 PS : 0.8 S.
I was wondering if you have any advice – I use Hershey cocoa powder for my chocolate macs but they sometimes turn out with wavy tops or speckled……any advice??? I use 300 degrees @ 17-18 minutes.
Also…I”d like to buy some white pearls/sprinkles for my mac tops but I don’t know what size to buy on Amazon…what size of white round sprinkles should I be buying????
Oh….one more thing….you have lovely fabulous pics of your macarons…very often decorated or using dyes to spruce them up…I wish you’d include more specifics about how to exactly copy your decorating or tinting to get the color to match what you’ve done…..food for thought!
Parabéns pelos Macarons Camila, estão com um visual fantástico, gostei muito!!!!