Peppermint Bark Macarons
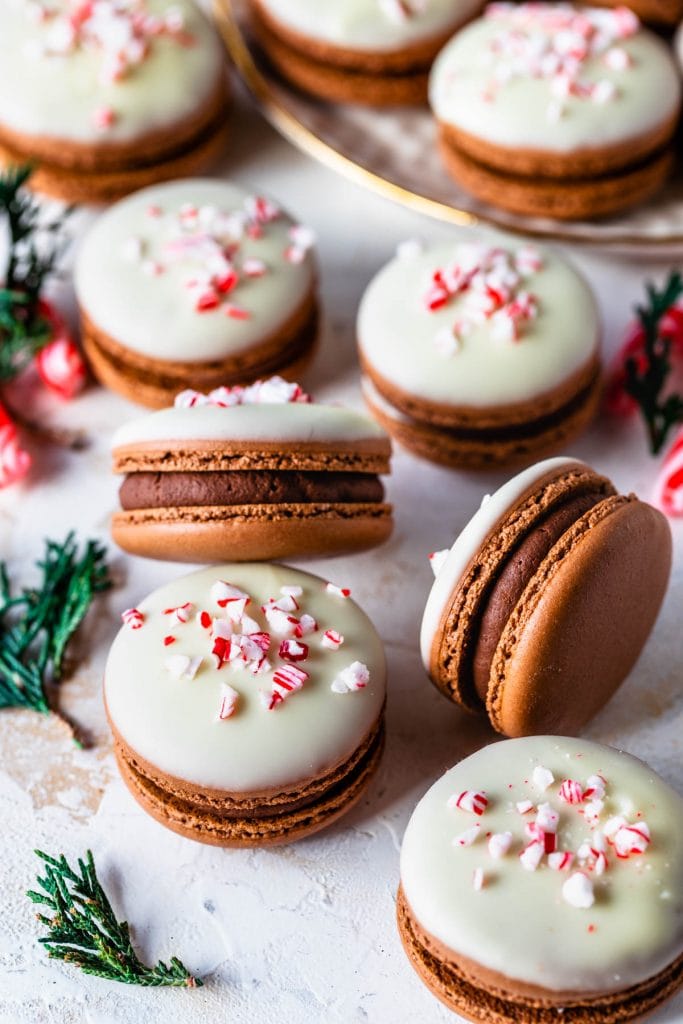
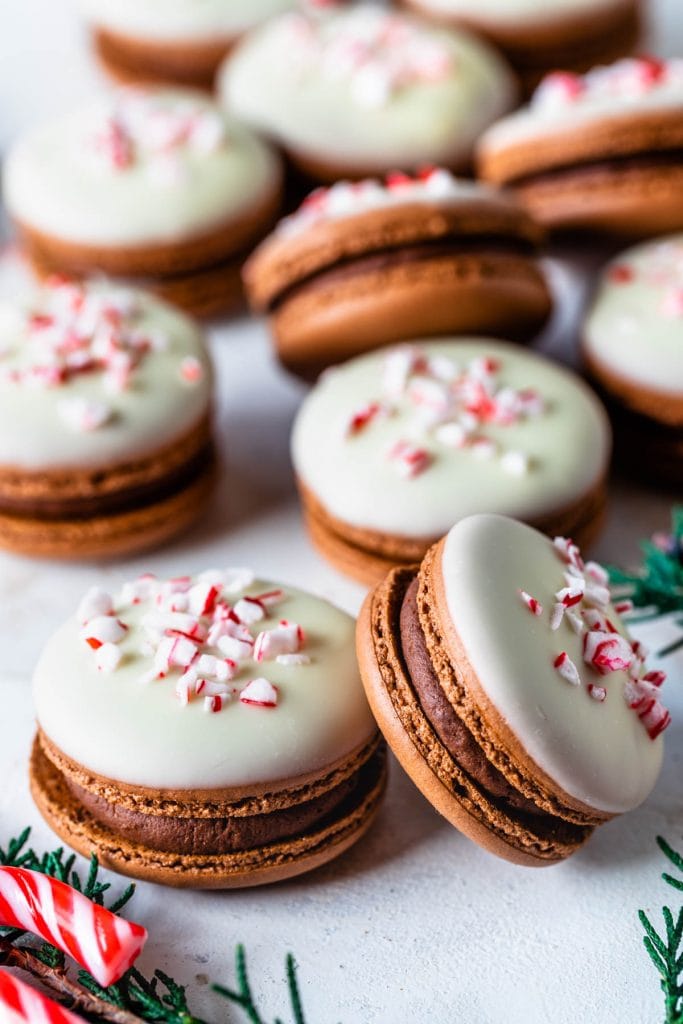
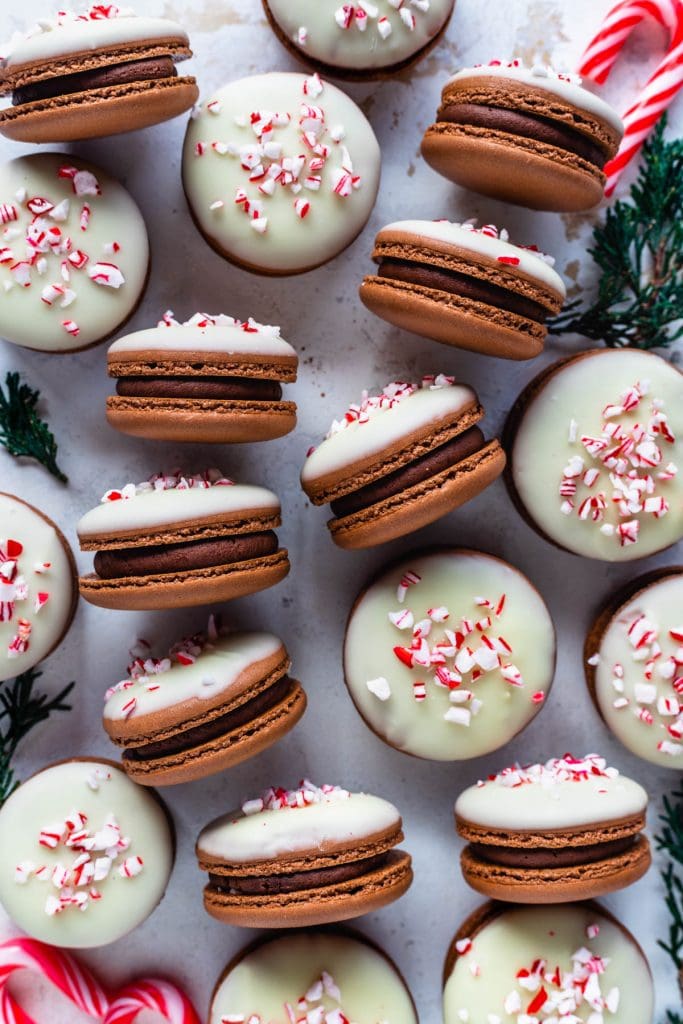
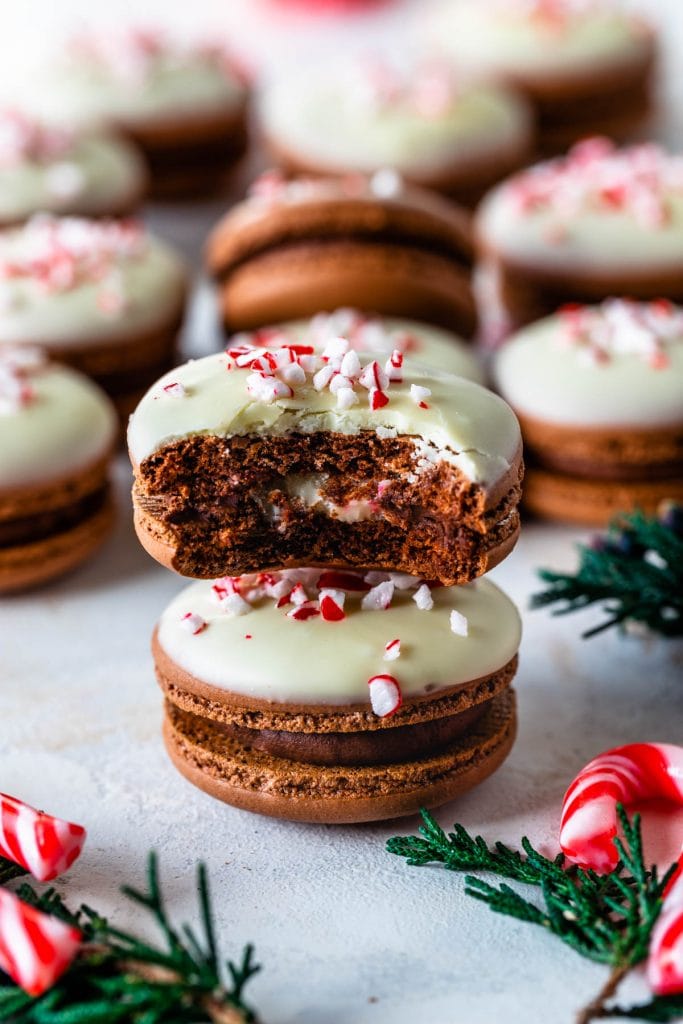
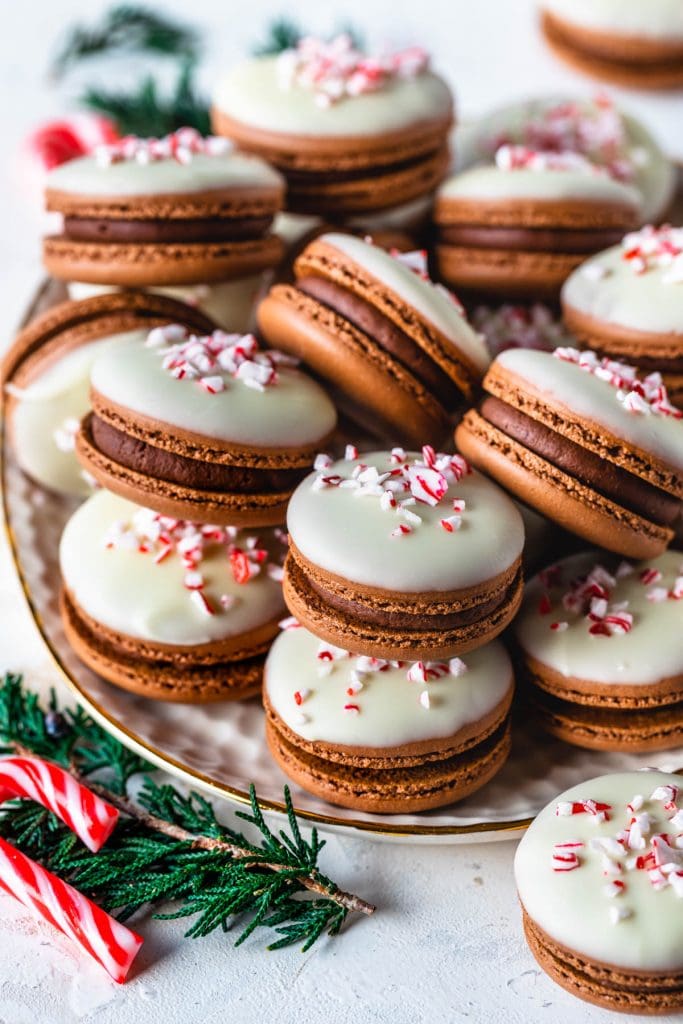
Hello friends! Today we are making another Christmas macaron! These Peppermint Bark Macarons are filled with Peppermint Dark Chocolate Ganache, Peppermint White Chocolate Ganache, and the top shells are dipped in white chocolate and sprinkled with crushed candy canes!
These Peppermint Bark Macarons are super rich and have a refreshing peppermint taste, which provides a beautiful balance to the cookies.
Make sure to check out the video on this page or on my YouTube channel, showing you exactly how to make these peppermint macarons.
This post may contain affiliate links. I earn a commission from qualified purchases. Please read our Privacy policy here.

These Peppermint Bark Macarons are inspired by the delicious treat peppermint bark, which is basically melted dark chocolate, topped with melted white chocolate mixed with peppermint extract and topped with crushed candy canes.
I already have a Peppermint Macaron recipe here on the blog. I made them last year for my Christmas Macaron box.
So this year I figured I’d create a delicious spin on peppermint macarons.
And here it is!
For the filling we have two types of ganache: Peppermint Dark Chocolate and Peppermint White Chocolate. The amount of peppermint extract you add to the ganache is entirely up to you. I added 1/2 tsp to the dark chocolate ganache and 1/4 tsp to the white chocolate ganache. And my macarons had quite a bit of a refreshing taste to them.
If you don’t like such an overwhelming peppermint taste, experiment with adding a bit less.

Tips for making these Peppermint Bark Macarons
- I use Egg White Powder in my shells, but in my chocolate shells I am using a bit less than regular shells. Feel free to leave it out if you can’t find it around. Egg white powder helps strengthen the meringue, resulting in fuller macarons.
- If your shells are getting wrinkled is probably because of the cocoa powder, I use a high ratio of cocoa powder, and it works for me. If your shells do get wrinkled use 7 grams of cocoa powder next time and use 82 grams of powdered sugar instead. Or just switch the brand of cocoa powder. I use Callebaut. For more information on macaron troubleshooting, visit my Macaron Troubleshooting guide here.
- Make sure to use real white chocolate, made with at least 20% cocoa butter. If you are unsure do a quick google search on the brand you are using, however, I will say in advance, most brands of white chocolate chips at the store are not real white chocolate. Use chips from brands like Callebaut or Valhrona. If you can’t find those, use white chocolate baking bars, which are available at every store.
- Let the ganaches cool down to room temperature before using. You can speed up the process by inserting the ganache in the fridge and stirring every 10 minutes, while checking for the consistency. It should be thick but spreadable. If it’s too thick insert it in the microwave for 4 seconds, remove, stir, repeat as necessary.
These Peppermint Bark Macarons are made special for my Christmas Macaron list from this year.
So far I’ve made: Creme Brûlée Macarons, Hazelnut Macarons, Penguin Macarons, Cranberry Macarons and I have more coming soon! So stay tuned!

From last year, my Christmas Macaron flavors were:
- Peppermint Macarons
- Butterbeer Macarons
- Pecan Turtle Macarons
- Vegan Matcha Macarons
- Gingerbread Macarons
- Eggnog Macarons
- Nutella Macarons
- Cranberry Macarons
You can see those flavors on my Christmas Macaron Box, or on my Christmas Cookie Box.
And I have many other suggestions of festive macarons just like these Peppermint Bark ones, that would look great in a Christmas macaron spread:
- German Chocolate Macarons
- Toffee Macarons
- Cactus Christmas Tree Macarons
- Tiramisu Macarons
- White Chocolate Macadamia Macarons
- Cinnamon Roll Macarons
- Fig Macarons
- Red Velvet Macarons
For the complete list of my macaron flavors please click here.
If you make this recipe please tag me on instagram or leave a comment below! I love seeing everything you make!
Also, don’t forget to watch the video on YouTube or on this page to see exactly how to make the Peppermint Bark Macarons.
Thank you so much for reading!

Peppermint Bark Macarons
Ingredients
Chocolate Macaron Shells
- 2 grams egg white powder optional, read notes
- 100 grams egg whites
- 100 grams white sugar
- 96 grams almond flour
- 75 grams powdered sugar
- 14 grams cocoa powder
- Brown food coloring optional to deepen the color
Peppermint White Chocolate Ganache
- 85 grams white chocolate chopped
- 28 grams heavy cream
- 1/4 tsp peppermint extract
- 3 tbsp crushed peppermint candy canes
Peppermint Dark Chocolate Ganache
- 150 grams chopped dark chocolate or chocolate chips
- 100 grams heavy cream
- 1/2 tsp peppermint extract
For the top
- 85 grams white chocolate
- 1/4 cup crushed peppermint candy canes
Instructions
Chocolate Macaron Shells
- Before you start, get all of the ingredients ready. Prepare a large piping bag, fitted with a large round tip, I use a 1/2” diameter tip. Set aside.
- Line two baking sheets with parchment paper or silicone mat.
- Measure out all of the ingredients.
- Sift the powdered sugar, almond flour, and cocoa powder together. Set it aside.
- Whisk the sugar and the egg white powder (if using) in a bowl, and place it over a pan with barely simmering water. Add the egg whites to the sugar and whisk the mixture until frothy and the sugar is completely melted. It will take a couple of minutes. You can test by touching the mixture between your fingers, and if you feel any sugar granules just keep whisking the mixture over the water bath.
- Make sure the bottom of the bowl isn’t touching the simmering water because you don’t want the whites to cook.
- Also, don’t overheat the sugar syrup, this may cause issues down the line, such as wrinkly macarons.
- Transfer the syrup to the bowl of a stand mixer.
- With the whisk attachment, start whisking mixture on low for about 30 seconds, then gradually start increasing speed to medium. Whisk on medium for one to two minutes, until the mixture is white and starting to become fluffy. Raise the speed to high, or medium-high and whisk for a few minutes until stiff peaks are formed. Best way to check this is to keep your eye on the whites. Once they get glossy and you start seeing streaks formed by the whisk, it might be time to stop.
- Whisk until stiff peaks have formed. When you pull your whip up, the peak should be stiff and shooting straight up, with possibly a slight bend at the top, but not bending down to the side.
- Pour the sifted powdered sugar, almond flour, and cocoa powder into the stiff meringue.
- Start folding gently forming a letter J with a spatula.
- Add the food coloring at this point, if using. I have added a bit of brown food coloring to deepen the color.
- How to know when to stop folding the batter: It’s time to stop folding when the batter is glossy and has a thick and flowing consistency. There are several ways to test this.
- First, pick up some batter with the spatula and try to draw a figure 8 with the batter that is dripping off the spatula. If you can form several 8 figures without the batter breaking up, that’s one indication that it might be ready.
- There’s another test you can do. I call it the Teaspoon test.
- Grab a teaspoon of batter and spoon onto the parchment paper or silicon mat. Wait a minute to see how it behaves.
- If the batter stays stiff, forming a point and doesn’t spread out, fold a little bit more, about 3 folds.
- Test again.
- Once the batter spreads out a bit and starts to look glossy and smooth on top, on the parchment paper, it’s ready.
- You don’t want your batter to be too runny either. So be careful not to overmix. It’s always best to undermix and test several times until the proper consistency has been achieved.
- When you hold the spatula with batter on top of the bowl and the batter falls off the spatula slowly but effortlessly the batter is ready. The batter will keep flowing off the spatula non-stop, but not too quickly.
- Transfer the batter to the piping bag.
- Place the piping bag directly 90 degrees over the center of each macaron template. Apply gentle pressure and carefully pipe for about 3 seconds, and then quickly pull the bag up twisting slightly.
- Once you’ve piped as many circles as you could, bang the trays against the counter a few times each.
- Use a toothpick to pop any air bubbles in the surface of the shells.
- Let the trays sit for a while so the shells will dry out a little bit. I usually leave about 20-40 minutes, depending on how humid the day is. You’ll know they’re ready when you gently touch the surface of a macaron and it seems dry.
- Pre-heat the oven to 300ºF.
- Bake one tray at a time.
- Bake for 5 minutes, rotate tray.
- I bake each tray for about 15 to 20 minutes.
- When baked, the macarons will have a deeper color and formed feet. If you try to move a macaron, it shouldn’t feel jiggly. If the macaron is still jiggly, keep baking.
- Remove from the oven and bake the other tray.
- Let the macarons cool down before proceeding with the filling.
Peppermint White Chocolate Ganache
- Chop the white chocolate into very small pieces. Place it in a bowl.
- Heat the cream until it almost comes to a boil.
- Pour over the chopped white chocolate.
- Let it sit for a minute.
- Whisk the mixture together until the chocolate has melted completely.
- If the chocolate is not melting and you still see little chunks of chocolate in the ganache, microwave the bowl for 5 second intervals, whisking in between, until all the chocolate has melted.
- Don’t over heat the chocolate or it will separate and curdle.
- Add the peppermint extract to the mixture and stir to combine.
- Then add the crushed peppermint candy canes.
- Let the ganache cool down to room temperature. Or place it in the fridge for about 10 minutes, stir, and then for another 10 minutes, stir again, and repeat as many times as necessary until the ganache is thick and completely cooled down.
Peppermint Dark Chocolate Ganache
- Chop the chocolate very finely, I used dark chocolate. Place it in a bowl.
- Heat the heavy cream in a small pan over medium heat, or in the microwave. No matter what method you choose, be very careful not to boil the heavy cream.
- Pour the hot cream over chopped chocolate. Let it stand for a minute.
- Start stirring with a spatula until completely melted.
- Add the peppermint extract and stir to combine.
- Let it come to room temperature. If you want to speed things up, refrigerate the ganache for a bit before using, about 10 minutes, then stir it, refrigerate it again, stir, and repeat this process, checking every 10 minutes, until it has piping consistency.
- To achieve the piping consistency, the ganache has to be at the perfect temperature, not too cold and not warm, it has to be at room temperature.
- If it has been in the fridge for a while, and it’s too thick and hard to pipe, insert it in the microwave for a few quick seconds, and stir it again. Test for consistency and keep going until you achieve the desired consistency.
- To be pipeable, the ganache should be thick, but easy to spread.
- If it happens that the ganache is too thin, you might want to put it in the fridge for a few minutes so it will harden up.
To assemble
- Place the Peppermint Dark Chocolate Ganache in a piping bag fitted with a small round tip, I like to use a 10 or 12 for this.
- Pipe a ring of ganache around the edges of a bottom macaron shell.
- Spoon some of the Peppermint White Chocolate Ganache in the center of each macaron.
- Then top with another shell.
Topping
- Melt the white chocolate for the topping in a small bowl by microwaving for 15 second intervals and stirring in between until complete melted.
- Dip the tops of the macarons in the melted white chocolate and place them on a baking sheet. I like to use a toothpick to help the white chocolate spread evenly, to smooth out any bumps or pop any bubbles in the chocolate.
- Then sprinkle the shells with crushed peppermint candy canes.
Storage
- Store these macarons in the fridge for up to 5 days. You can also freeze them for up to 2 months.
Hi! I used this recipe last year and they were a major hit- can’t wait to again this year. I can’t, however, remember if I used 60% dark chocolate chips or 72% dark chocolate. What do you recommend?
Hi! I’m so glad to hear they were such a hit! You can use either one. it really comes down to personal preference. The 60% will make them a bit sweeter and smoother, and the 72% gives a deeper, more intense chocolate flavor, not so sweet. Both work perfectly!
Can these be made with pasteurized egg whites?
Do you mean carton egg whites? they can be very finicky to use to make macarons, but can work if you are willing to experiment for a while until you find a brand that works, the proper consistency for the meringue and batter, etc. in this post there are some tips: https://www.piesandtacos.com/carton-egg-whites-macarons/
Receita perfeita!! Adorei!
As an avid French method fan, I changed it up because of the recipe. I don’t know what it was, the cocoa powder or the double broiler, but I followed the directions and my macarons were more like crinkle cookies 🙁 I honestly hate when this happens so I stick to my own recipe but I wanted to try something different, only to end up wasting my time and ingredients. I’m going to remake them with my own recipe but then stick to this one for the filling. Hopefully it pulls through!!
I had the same issue….twice. Very frustrating. Not sure why I can’t get it to work right.
I made these yesterdays and they were delicious! LIttle hard to put together but still looked pretty good.
Awesome thank you so much!!!
These look amazing!! Love the color and of course the flavor is perfect for this time of year!!
Thank you so much!
OMG! these are amazing! I love opening your emails!!
Merci beaucoup!
thank you so much 🙂
These look so pretty and tasty! I love the treats around the holidays. I’ve always wanted to try my hand at macaroons but they intimidate me hah.
you can totally do it 🙂
Ficaram maravilhosos, seus doces são fantásticos!!!!!!