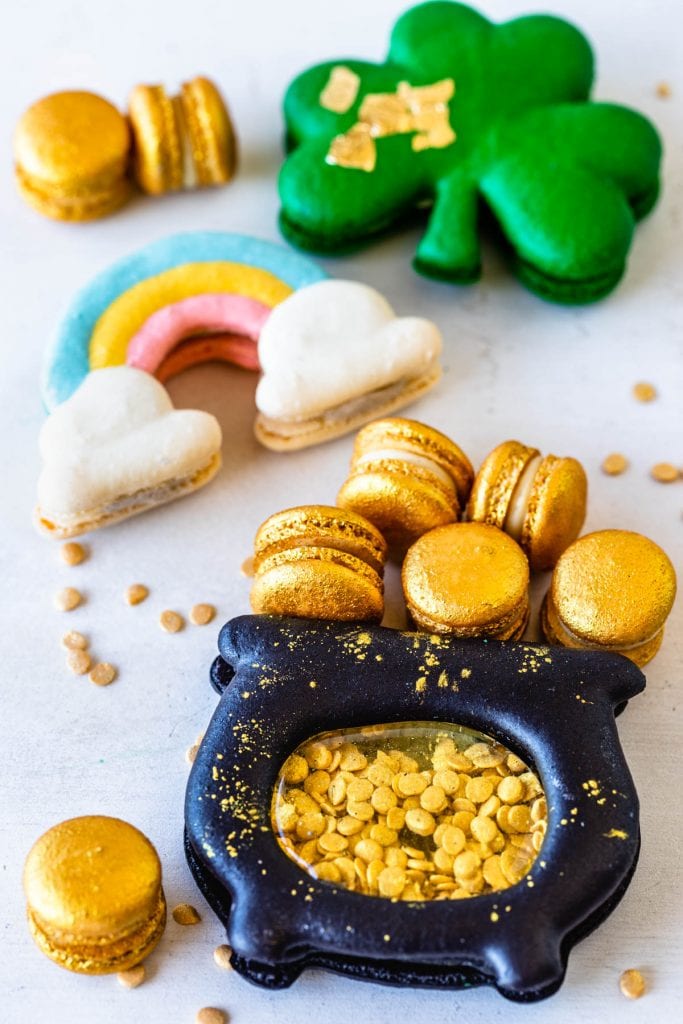
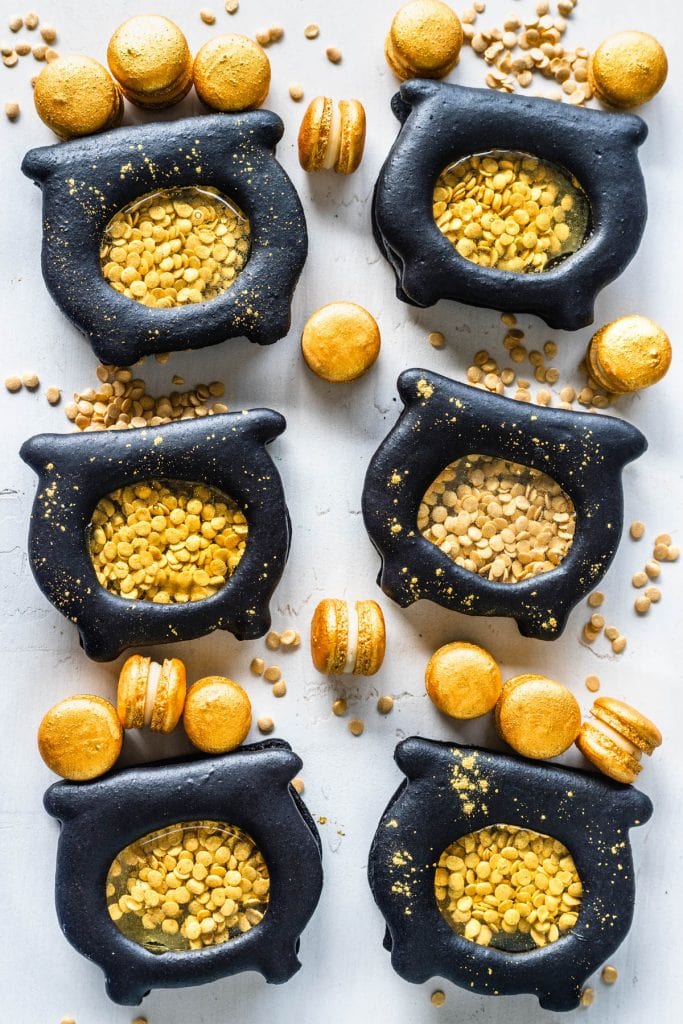
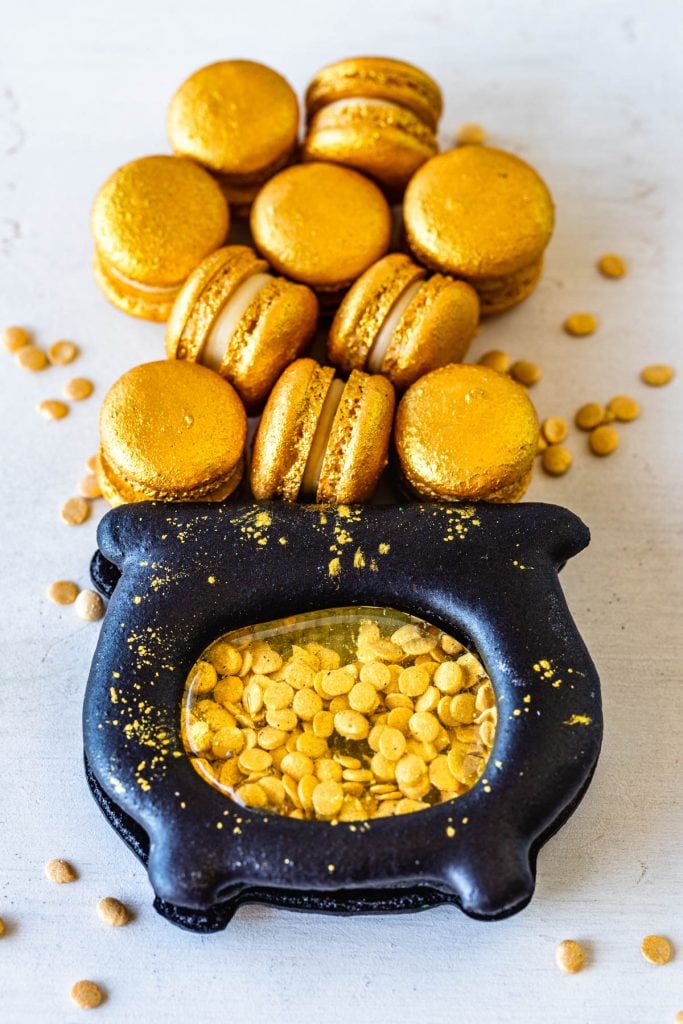
Pot of Gold Macarons
Hello friends! Today I will show you how to make these special Pot of Gold Macarons to celebrate St Patrick’s Day!
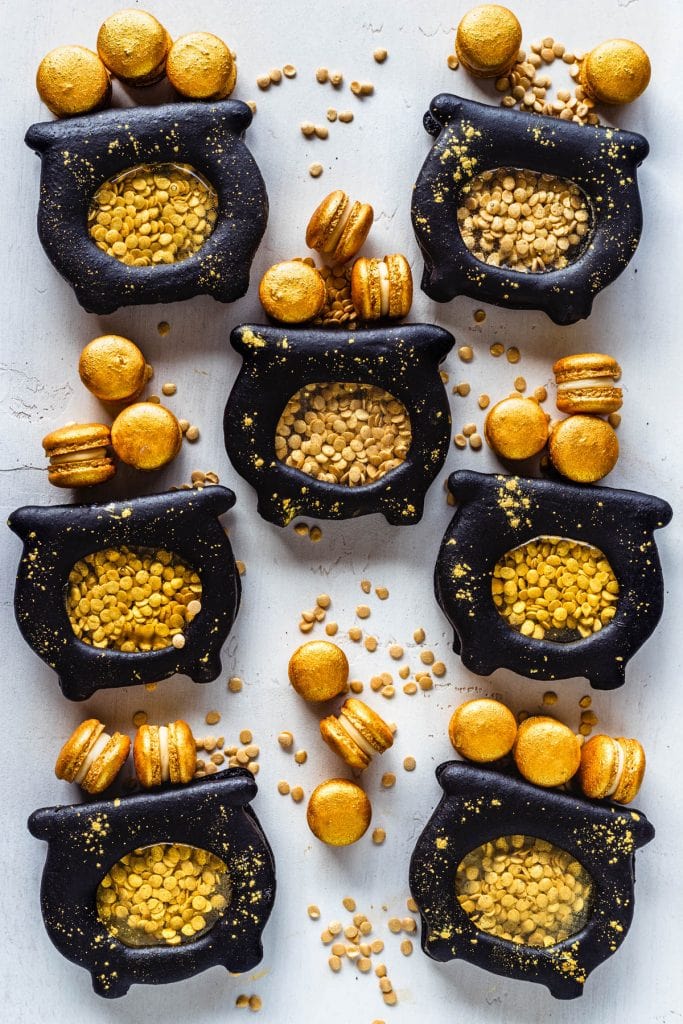
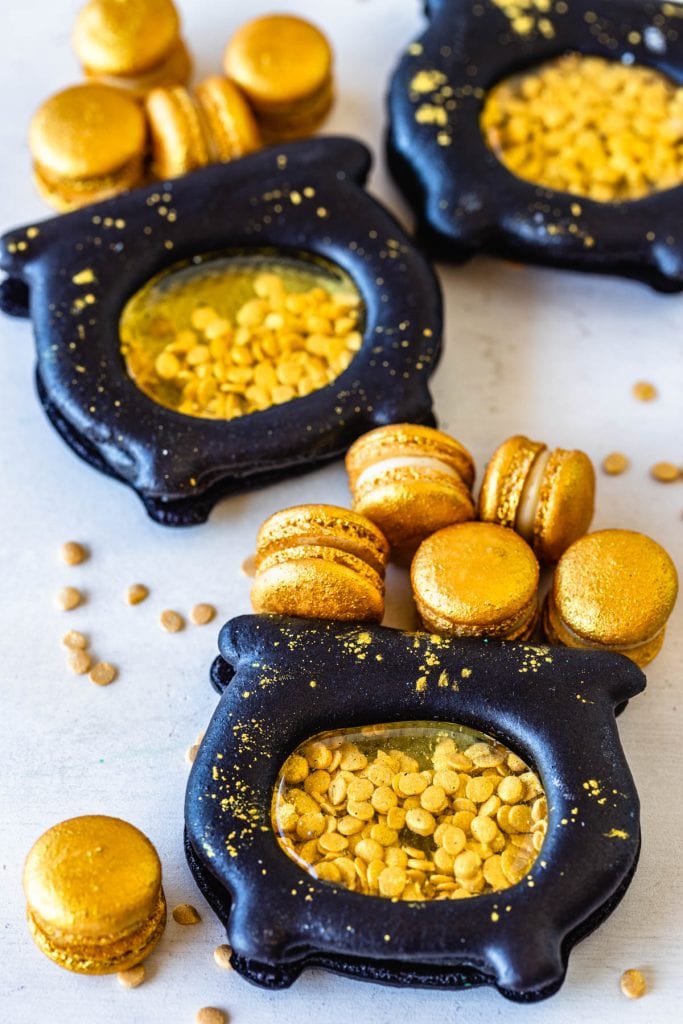
These Pot of Gold Macarons have a hard candy center, and sprinkles inside. I also offer a free template below that you can download and place under your parchment paper or silicone mat to pipe your own pots of gold.
Make sure to watch the video on this page or on YouTube because the videos really do make it way easier to understand how to make the shapes.
This post may contain affiliate links. I earn a commission from qualified purchases. Please read our Privacy policy here.
How to make the hard candy window
I was inspired by my Heart Shaker Macarons to make these Pot of Gold Macarons.
Though this time I decided to use a different technique to make the hard candy window in the middle of the macarons.
Sally from Bewitching Kitchen suggested on the Heart Shaker Macarons post to make a hard candy syrup instead of using Jolly Ranchers.
So I gave the syrup idea a go. The syrup is basically a combination of water, sugar, and corn syrup cooked on the stove top until it reaches 300ºF.
Here are my conclusions concerning both methods:
- The Jolly Rancher technique made the macarons easier to eat, because the candy layer was so thin it basically melted in your mouth.
- The hard candy technique made a harder layer, so you’ll have to make it very thin when spooning the syrup in the middle, or you won’t be able to easily bite into the macaron.
- While the Jolly Rancher technique provided the best texture, the hard candy technique made for prettier, more clear windows. The Jolly Rancher method made a very bubbly window.
- Taste wise I enjoyed both, they both taste like sugar, but the Jolly Rancher’s had pineapple taste because I used pineapple Jolly Ranchers since they are the clear ones.
To make the Jolly Ranchers method, simply find any clear candy you would like to use, like I mentioned, I used pineapple flavored Jolly Ranchers because it’s the only clear one. You should place the unwrapped candy in the center of the macarons after about 6 minutes baking. Continue to bake until the candy melts, and the macarons are fully baked, another 10 minutes or so.
Find more detailed instructions and the video here on the Heart Shaker Macarons post.
And to make the syrup method, you should spoon the syrup in the center of the macarons once they have cooled down after baking.
Pot of Gold Template
Here is the Pot of Gold Macaron template for you to print at home and place under your mat or parchment paper.
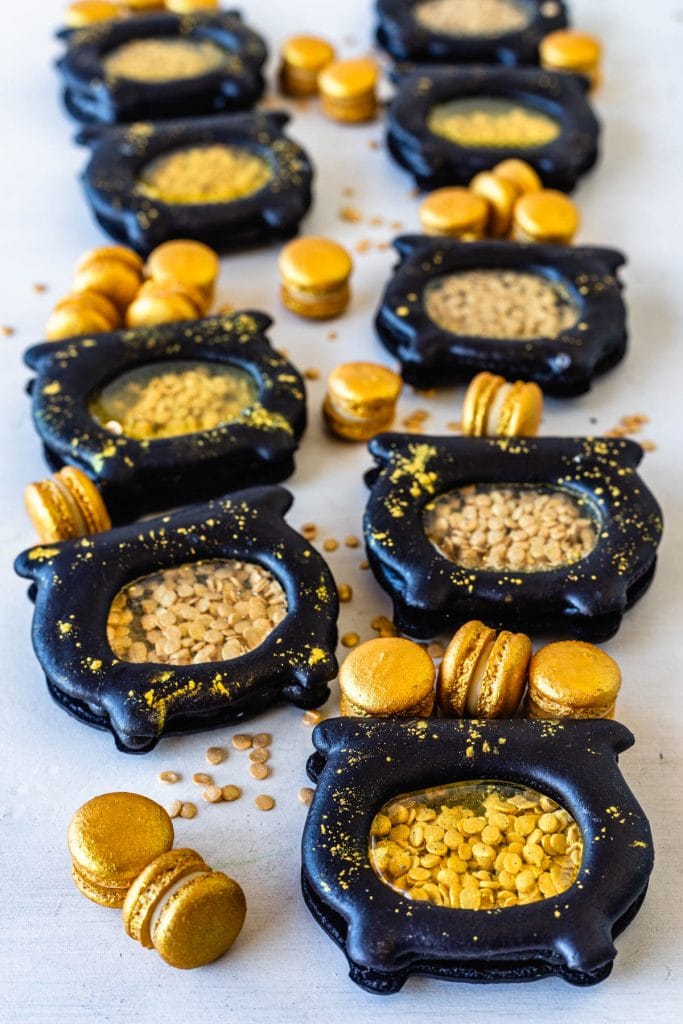
You can pipe the macarons with the window in the middle, or you could pipe the whole thing and fill it all out, to obtain a smooth cauldron without the hole in the middle, in case you don’t want to make shaker macarons.
Tips on how to make the Pot of Gold Macarons
- Make sure the batter isn’t too stiff, or it will be very hard to obtain a smooth shape. Specially when doing the toothpick trick to spread the batter to the outlines, the toothpick will leave streaks in the shell, and the shape won’t be precise.
- If the weather is super dry where you are and you use egg white powder in your macaron batter, consider leaving it out, like I did. Otherwise you will run into the same issues described on the item above.
- Use a very fine almond flour, or sift it a few times before making the macarons. Using a very fine almond flour will also contribute to smooth shells. Specially when making shapes, the texture of the shells will be more evident than on simple round macarons, so using a super fine almond flour will help a lot.
- Lightly tap the tray against the counter or against the palm of your hand several times while piping, this will also help the batter smooth out, and get rid of any air bubbles.
- Once you’ve made the candy syrup, work fast, because the syrup will begin to harden up fast.
- Make a thin layer of candy in the center, or it will be too hard to bite through, or use the Jolly Rancher method that I’ve used here.
- If using a lot of black food coloring like I am here, you may need extra resting time before baking.
Materials used
For the gold coins in the middle I used these beautiful sequin sprinkles from Sugar Deco.
To make the black shell color, I used some powder food coloring by The Sugar Art. But it wasn’t enough, so I ended up adding more gel black food coloring.
My favorite is Super Black by AmeriColor.
And for the golden splatter on top, I used Golden Luster Dust.

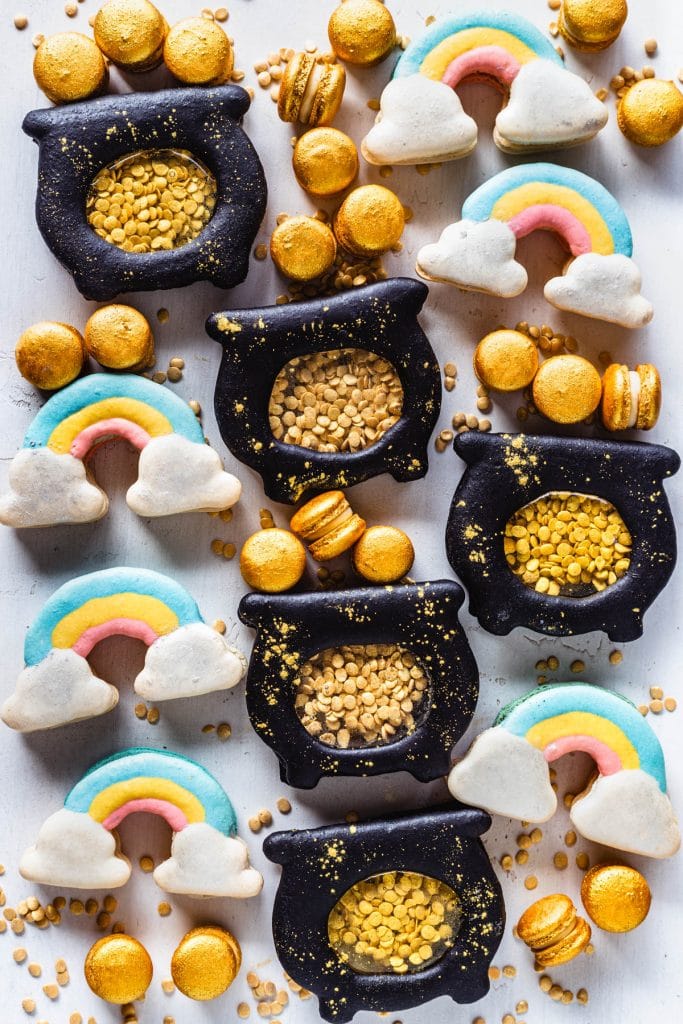
You can find recipes for all my St Patrick’s Macarons here:
The mini macarons you see on the photos are my Gold Macarons made into mini macs.
For my full list of macaron flavors click here.
If you want to learn more about making macarons, visit Macaron School, where I gather lots of articles containing tips, tricks, troubleshooting guides, my favorite tools, the science behind macarons, and much more!
Also make sure to watch my YouTube videos, it is really helpful to get a visual of what each stage is supposed to look like when learning how to make macarons, such as the meringue, the macaronage, the piped shells, etc.
I hope you loved these macarons, tag me on instagram or leave a comment below if you make them, it really makes me so happy to see your creations and hear from you.
Pot of Gold Macarons
Ingredients
Macaron Shells
- 100 grams egg whites
- 100 grams granulated sugar
- 105 grams almond flour
- 105 grams powdered sugar
- Black food coloring gel or powder
Hard Candy Window
- 400 grams sugar 2 cups
- 120 ml water 1/2 cup
- 60 ml light corn syrup 4 tbsp
Black Buttercream
- 85 grams unsalted butter at room temperature (6 tbsp)
- 30 grams black cocoa powder 1/4 cup
- 125 grams powdered sugar 1 cup
- 1 to 2 tbsp milk or heavy cream
- 1 tsp vanilla extract
To assemble
- Gold sprinkles coins
- Golden luster dust
Instructions
Macaron Shells
- Pre-heat the oven to 300ºF (read notes).
- Before you start, get all of the ingredients ready. Prepare one large piping bag, fitted with a round tip, I use a Wilton 7.
- Line two baking sheets with parchment paper or silicone mat. Place the pot of gold template underneath the baking mat.
- Measure out all of the ingredients. Sift the powdered sugar and almond flour. Set it aside.
- Place a bowl over a pan with barely simmering water. Add the egg whites and sugar to the bowl and whisk the mixture until the sugar is completely melted. It will take a couple of minutes. You can test by touching the mixture between your fingers, and if you feel any sugar granules just keep whisking the mixture over the water bath.
- Make sure the bottom of the bowl isn’t touching the simmering water because you don’t want the whites to cook.
- Also, don’t overheat the sugar syrup, this may cause issues down the line, such as wrinkly macarons.
- Transfer the syrup to the bowl of a stand mixer.
- With the whisk attachment, start whisking the syrup on low for about 30 seconds, then gradually start increasing speed to medium or to medium-high and whisk for a few minutes until stiff peaks are formed.
- I added a bit of powder black food coloring to the meringue at the beginning of whipping.
- Best way to check this is to keep your eye on the whites. Once they get glossy and you start seeing streaks formed by the whisk, it might be time to stop.
- Whip until stiff peaks have formed. When you pull your whisk up, the peak should be stiff and shooting straight up, with possibly a slight bend at the top, but not bending down to the side.
- Pour the sifted powdered sugar and almond flour into the stiff meringue.
- Start folding gently forming a letter J with a spatula.
- Add food coloring if using any. I added more black gel food coloring because my meringue didn’t have a deep enough color.
- Fold the batter until the perfect consistency is achieved. The batter should be flowing slowly and effortlessly off the spatula, you should be able to pick up some batter with the spatula and draw several figure 8s with the batter that’s flowing, without having the batter break up. And even after the batter breaks up, it should still continue to flow off the spatula slowly. There’s another test you can do. I call it the Teaspoon test.
- Grab a teaspoon of batter and spoon onto the parchment paper or silicon mat. Wait a minute to see how it behaves.If the batter stays stiff, forming a point and doesn’t spread out, fold a little bit more, about 3 folds.Test again.
- Once the batter spreads out a bit and starts to look glossy and smooth on top, on the parchment paper, it’s ready.
- You don’t want your batter to be too runny either. So be careful not to over-mix. It’s always best to under-mix and test several times until the proper consistency has been achieved.
- When you hold the spatula with batter on top of the bowl and the batter falls off the spatula slowly but effortlessly the batter is ready. The batter will keep flowing off the spatula non-stop, but not too quickly.
- Transfer the batter to a piping bag fitted with the Wilton 7 piping tip.
- Pipe the batter inside the template outlines. On the thicker parts apply a bit more pressure in order to dispense more batter, and on the thinner parts, apply less pressure.
- After piping each macaron, use a toothpick to spread the batter to the outlines, and to pop any air bubbles from the surface of the macarons.
- Tap the tray against the counter or against the palm of your hand to release any air bubbles and help the batter smooth out.
- A few tips: always pipe one pot of gold at a time and use a toothpick immediately after piping. You don’t wanna give the batter a chance to dry, and then when you do try to use a toothpick to drag the batter to the edges, it will be too dry, and form streaks in the shell.
- And also frequently tap the trays against the counter to help release air bubbles and to help the batter smooth out.
- Let the macarons dry for 20 to 40 minutes, when they feel dry to the touch you can bake. These macarons actually took me over an hour to dry, even though the weather was pretty dry. But since I had to use so much food coloring the batter was pretty wet.
- I bake mine at 325 Fahrenheit, baking time and temperature vary depending on your own oven.
- After 6 minutes baking I rotate my tray to help the macarons bake evenly.
- Not everyone has to do that, again it depends on your own oven.
- Bake for another 10 minutes or so for a total of 15 to 20 minutes.
- Remove the tray from the oven and let it cool down.
Options on the candy window
- I’ve made this before by placing transparent hard candy (Jolly Ranchers) in the middle of the macaron halfway through baking. See my Heart Shaker Macarons. The candy will melt in the oven and harden once the macarons cool down.
- You could also use isomalt for the window. And you’d pour it in after the macarons are baked.
- But this time I made a candy syrup, as recommended by Sally, one of my readers.
Hard candy window
- Place the sugar, water and light corn syrup in a small saucepan with a heavy bottom.
- Clip a candy thermometer to the side of the pan.
- Bring the mixture to a boil over medium high heat, once it comes to a boil, reduce the heat to medium. Let the syrup cook until it reaches 290ºF to 300ºF.
- Remove from the heat and immediately begin to spoon some of the candy in the middle of the pots of gold.
- Dont make such a thick layer, or it will be very hard to bite later.
- Let the candy set for about 20 minutes.
Black buttercream
- Beat the butter with a mixer on medium high for about 2 minutes.
- Add the black cocoa and the powdered sugar and mix until incorporated.
- You may need to add one or two tablespoons of milk or heavy cream if the buttercream is too dry.
- Beat the mixture on medium high speed for one minute once it comes together.
- Add the vanilla and mix to combine.
- Place the buttercream in a piping bag fitted with a small round tip.
To assemble
- Pipe the buttercream around the edges of the pot of gold.
- Place some sprinkles in the middle.
- Top with another pot of gold.
- Grab some gold luster dust with a brush and sprinkle it over the macarons.
Storage
- These macarons will last for up to 7 days in the fridge, and 1 month in the freezer.
I would love to make these or the shaker macarons. Could clear Isomalt also be used for the candy window or will they be too hard to chew through with isomalt? Or too bubbly looking like with the jolly ranchers? These are so amazing and beautiful! Thank you!!
I havent tried with isomalt, even tho I have some here, I will try that next, maybe for mothers day themed macarons.
some people arent big fans of the isomalt flavor, but I still want to try.
I LOVED the taste with jolly ranchers, and the texture, it was super easy to eat, because they basically melted in your mouth. But yes the jolly ranchers do have bubbles.
Now the candy made with the sugar syrup was a bit too hard but I made a thick layer, so make sure to make a thin layer, so it isn’t too hard to eat.
Um trabalho de arte Camila! Happy St. Patrick’s Day!
Obrigada Denise!!!! Happy St Patrick’s Day!
Ficaram fantásticos, muito capricho!!!!!!!