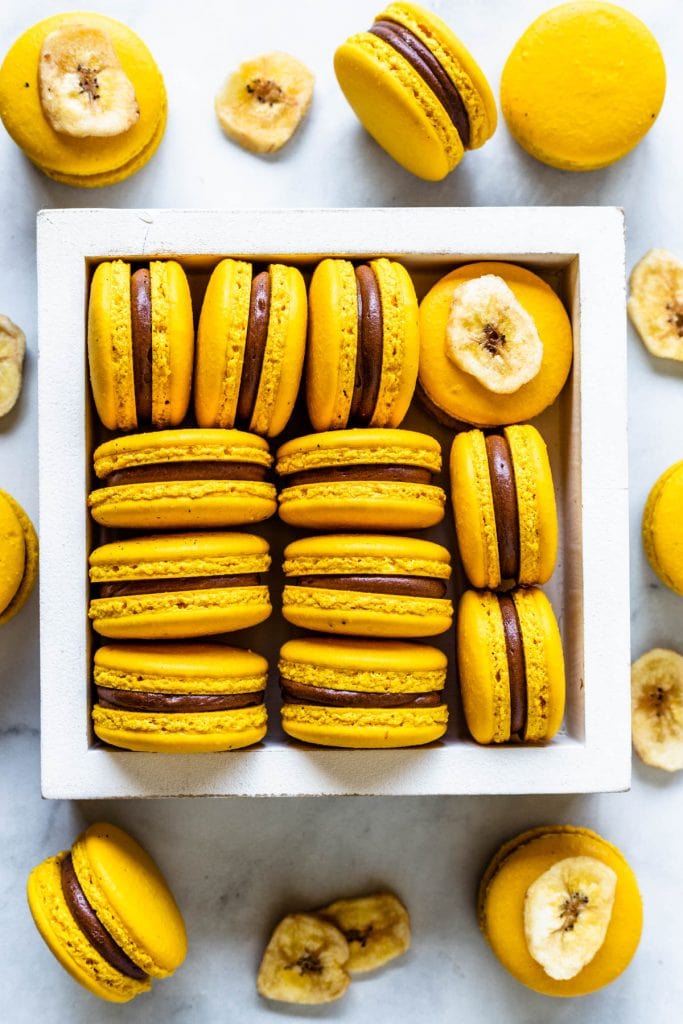
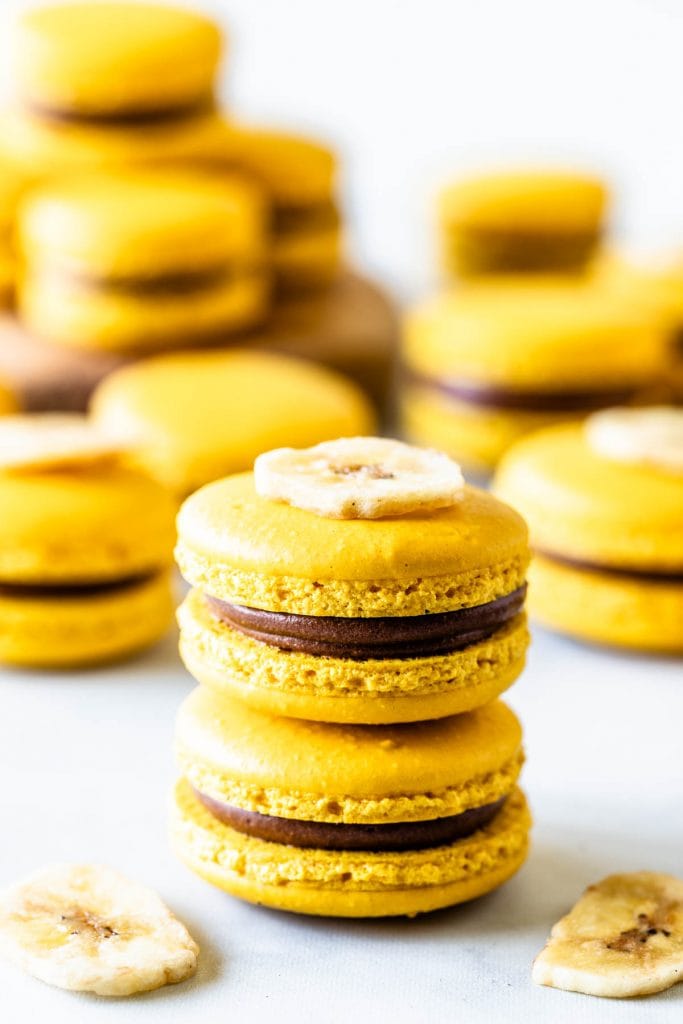
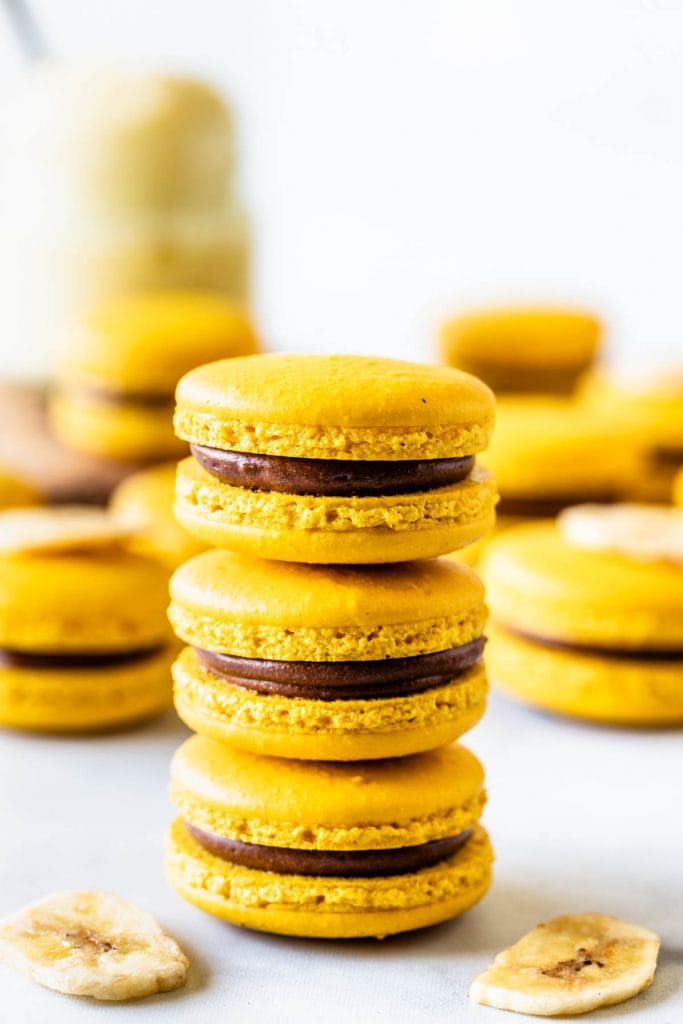
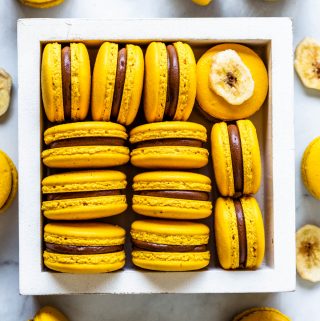
Banana Macarons (plus video)
Hello friends! Today I have a very special recipe. These Banana Macarons are some of the most delicious I’ve ever made! And I have made so many macarons! You can check out my 70+ recipes here on the blog!
For the filling of these macarons, I made a Banana Pudding, and a Whipped Chocolate Ganache.
These Banana Macarons come accompanied by a video, showing you exactly how to make them!
This post may contain affiliate links. I earn a commission from qualified purchases. Please read our Privacy policy here.
Make sure to watch the video here on this page or on my Youtube Channel (click here to go to my Youtube Channel), where I have many macarons videos.
Watching videos is so important when trying to make macarons, because you get to see exactly what the batter is supposed to look like at each stage.
When making macarons, you will often wonder: when do I stop whipping the meringue? or how do I know when the batter is ready to be piped?. As you continue to practice and make mistakes on your own (sorry, you probably will make some), you will find out those answers for yourself, and find out what works best for you.
However, watching videos can help speed this learning process up! So make sure to watch as many videos as you can, read blogs, join macaron Facebook groups. And you will get there! I believe in you!

I have a lot of resources on my blog, and my Youtube Channel, with tips, explanations, detailed information and steps, to help you achieve the perfect macarons!
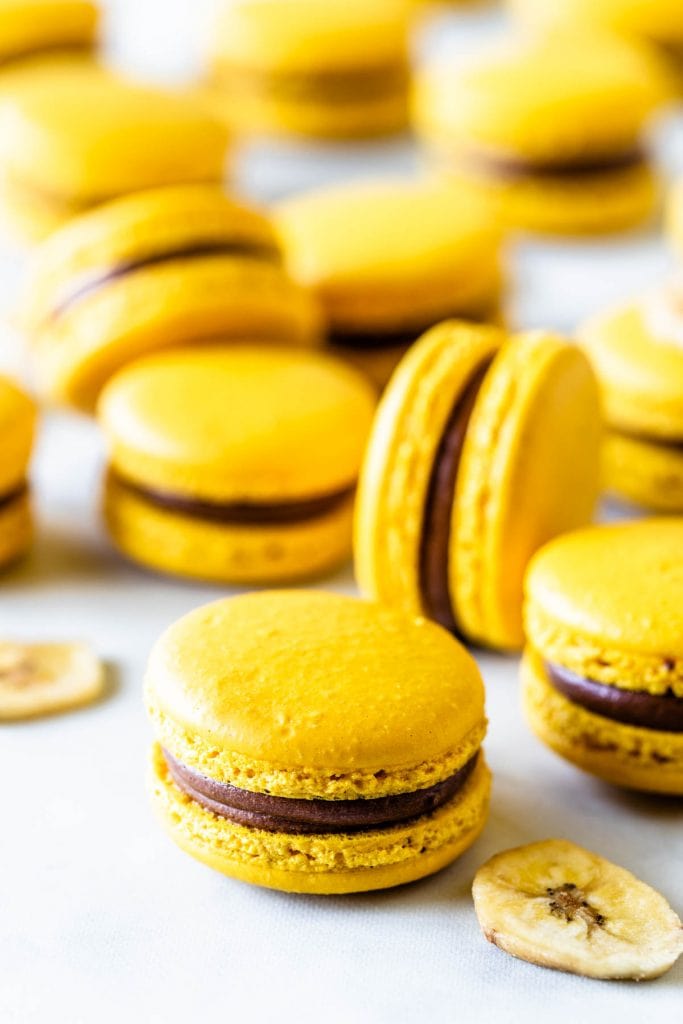
The fillings for these Banana Macarons are Banana Pudding, and Whipped Chocolate Ganache.
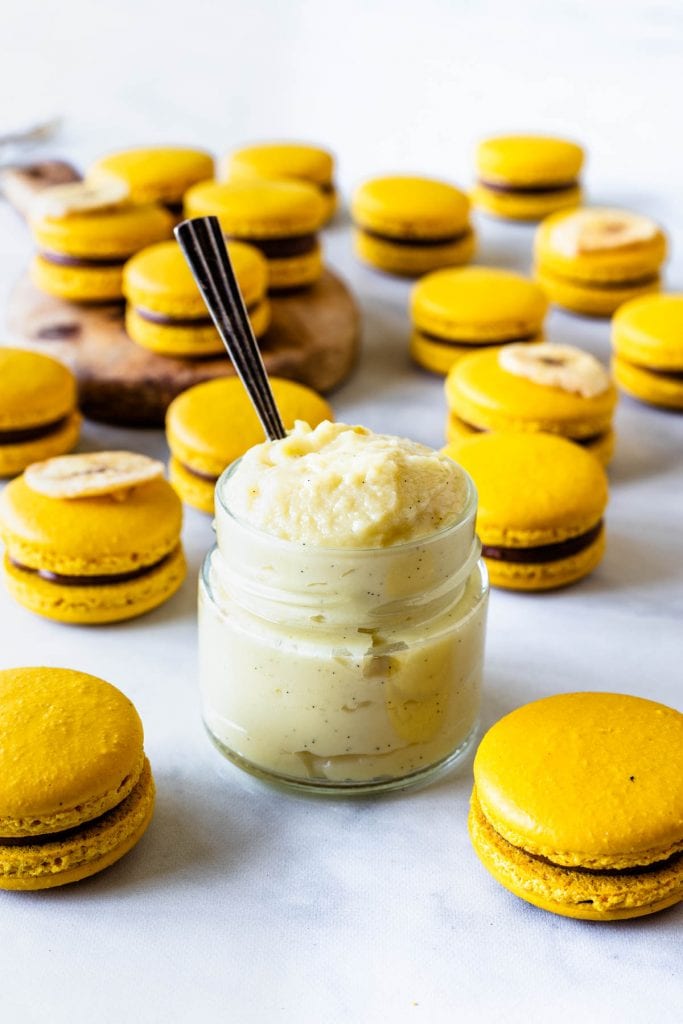
You can use store-bought or instant banana pudding if you want to, but I really encourage you to make this recipe. This banana pudding is the type you will want to eat with a spoon, before even filling the macarons!
And as for the Whipped Chocolate Ganache, you don’t necessarily have to whip it, I like whipping it sometimes to give it a fluffy and delicious consistency. If you want to skip the whipping, just pipe the ganache as it cools down and hardens up.

Here are some other macaron recipes and ideas you might enjoy. Please click on the names of the recipes below to be directed to the blog post:
- Vanilla Bean Macarons
- Orange Macarons
- Coconut Macarons (using the French method)
- Raspberry White Chocolate Macarons
- French Vanilla Macarons
- Strawberry Rhubarb Macarons
- Chai Macarons
- Pear Macarons
- Earl Grey Macarons
- Mango Macarons
- Oreo Macarons
- Balsamic Caramel Strawberry Macarons
And these are only a few of my many macaron recipes. To see the whole list please visit my Macarons category page.

Here are some of the products I use for my macarons. The following images are clickable and will direct you to Amazon page.
Wilton Gel Food Coloring
Nordic Ware Baking Sheets
Piping Bags
Thanks for reading my blog! Have a lovely day! If you make this recipe please tag me on instagram @piesantacos! I love to see your creations, and I am so appreciative!
Banana Macarons (plus video)
Equipment
- Mixer
- Whisk
- Pan
- Baking sheet
- Silicon Mat (or parchment paper)
- Piping bag
- Piping tip (I use a 0.5" diameter tip)
- Spatula
Ingredients
Macaron Shells
- 100 grams egg whites 3.5 oz
- 100 grams granulated sugar 3.5 oz
- 105 grams almond flour 3.7 oz
- 105 grams powdered sugar 3.7 oz
- Food coloring if using I used yellow
Banana Pudding
- 1 cup milk 240 ml
- 3/4 cup chopped bananas 6 oz, 170 grams
- 1/2 vanilla bean split in half*
- 2 large egg yolks
- 1/4 cup granulated sugar 1.76 oz, 50 grams
- 1 1/2 tbsp cornstarch
- 1/8 tsp salt
- 1/2 tsp vanilla extract (or 1 tsp if not using the vanilla bean)
Whipped Chocolate Ganache
- 6 ounces dark chocolate 170 grams, about 1 cup chopped chocolate or chocolate chips
- 1/2 cup heavy cream 120 ml
- 1/4 tsp banana extract optional
Instructions
Macaron Shells
- Before you start, get all of your ingredients ready. Prepare a large piping bag, fitted with a large round tip. Set aside.
- Line two baking sheets with parchment paper or silicone mat.
- I use a baking mat with the macaron template already in it. You can make your own or print it from the internet, and just place it under silicone mat, or parchment paper. I recommend using a silicone mat.
- Measure out all of your ingredients.
- Sift powdered sugar and almond flour together.
- Set it aside.
- Place egg whites and granulated sugar in a heat proof bowl or in a double boiler. Over a pan of simmering water, whisk the whites and sugar until frothy and sugar completely melted. It will take a couple minutes. You can test by touching the mixture between your fingers, and if you feel any sugar granules just keep whisking mixture over the water bath.
- Make sure the bottom of the bowl isn’t touching the simmering water.
- Also, don’t overheat the sugar syrup, this may cause issues down the line, such as wrinkly macarons.
- Transfer mixture to the bowl of a stand mixer.
- With the whisk attachment, start whisking mixture on low for about 30 seconds, then gradually start increasing speed to medium. Whisk on medium for one to two minutes, until mixture is white and starting to become fluffy. Raise speed to high for a few minutes until stiff peaks are formed. Best way to check this is to keep your eye on the whites. Once they get glossy and you start seeing streaks formed by the whisk, it might be time to stop.
- Whisk until stiff peaks have formed. When you pull your whip up, the peak should form a bird’s beak shape, but shouldn’t be falling to the side, the peak should be stiff, forming a slightly curved shape at the top.
- Pour sifted powdered sugar and almond flour into stiff whites.
- Start folding gently forming a letter J with a spatula.
- Add the food coloring at this point, if using.
- How to know when to stop folding the batter: It’s time to stop folding when the batter is glossy and has a thick and flowing consistency. There are several ways to test this.
- First, I pick up some batter with my spatula and try to draw a figure 8 with the batter that is dripping off the spatula. If you can form several 8 figures without the batter breaking up, that’s one indication that it might be ready.
- There’s another test you can do. I call it the Teaspoon test.
- Grab a teaspoon of batter and spoon onto the parchment paper or silicon mat. Wait a minute to see how it behaves.
- If the batter stays stiff, forming a point and doesn’t spread out a bit, I start folding a little bit more, about 3 folds.
- Test again.
- Once the batter spreads out a bit and starts to look glossy and smooth on top, on the parchment paper, transfer it to the piping bag.
- You don’t want your batter to be too runny either. So be careful not to overmix. It’s always best to undermix and test several times until the proper consistency has been achieved.
- The best way I can describe this stage being perfect is when you hold the spatula with batter on top of the bowl and the batter falls off the spatula slowly but effortlessly. The batter will keep flowing off the spatula non-stop, but not too quickly.
- Transfer the batter to the piping bag.
- Place the piping bag containing both batters directly 90 degrees over the center of each macaron template. Apply equal pressure and carefully pipe for about 3 seconds, and then quickly pull the bag up twisting slightly.
- Once you’ve piped as many circles as you could, bang the trays against the counter a few times each. This will release air bubbles that are in the batter and prevent your macaron shells from cracking.
- Use a toothpick to pop any air bubbles in the surface of the shells.
- Let your trays sit for a while so the shells will dry out a little bit. I usually leave about 20-40 minutes, depending on how humid the day is. You’ll know they’re ready when you gently touch the surface of a macaron and it seems dry.
- Pre-heat the oven to 300°F.
- Bake one tray at a time.
- Bake for 5 minutes, rotate tray.
- I bake each tray for about 18 minutes minutes.
- When baked, the macarons will have a deeper color and formed feet. If you try to move a macaron, it shouldn’t feel jiggly. If the macaron is still jiggly, keep baking.
- Remove from the oven and bake the other tray.
- Let the macarons cool down before proceeding with the filling.
Banana Pudding
- Place the milk, the chopped bananas, and the seeds from the vanilla bean in a small saucepan, over medium heat, and bring it to almost a boil. When you see the first few bubbles, remove from the heat. Cover the pan and let the banana and milk infuse for at least 4 hours, or place the pan in the fridge overnight.
- When the milk is done infusing, place the pan back over medium heat and re-heat it until hot.
- While the milk re-heats, whisk the egg yolks with the sugar, the cornstarch, and the salt. Strain the milk, being careful so you don’t let any banana pieces get through the strainer. Gently squeeze the bananas to release as much milk as possible from the solids without letting them through.
- Slowly pour 2 tablespoons of the hot milk over the yolk mixture, while whisking non-stop. This is called tempering the eggs, and it means to slowly add the hot mixture to the yolks so it doesn’t cook them. Keep adding the remaining milk very slowly, while whisking the custard.
- Once all the milk has been added to the yolks, return the whole mixture to the saucepan that you used to heat the milk by pouring through a strainer, to retain any bits of yolk that may have cooked, or banana pieces that may have gone through. Place the pan over medium heat and start cooking, while stirring non-stop.
- Keep heating the mixture and mixing it with a wooden spoon or spatula, making sure to scrape the sides and bottom very well while you cook it. The custard will start to get thick and it will look lumpy for a while, just keep stirring over medium heat. After a minute or so, the mixture should be thick like a cream, and smooth.
- At this point, remove the pan from the heat, and add the vanilla extract to the custard. Pour it in a small bowl, cover it with a plastic wrap, placed right on the surface of the custard, so it doesn’t form a skin as it cools. Place it in the fridge to chill completely.
Whipped Chocolate Ganache
- Chop the chocolate very finely. Place it in a bowl.
- Heat the heavy cream in a small pan over medium heat, or in the microwave. No matter what method you choose, be very careful not to boil the heavy cream.
- Pour the hot cream over the chopped chocolate. Let it stand for a minute.
- Start stirring with a spatula until completely melted. Add banana extract if using.
- Let it come to room temperature and cool down completely. Place the ganache in the fridge for 5-10 minutes until slightly hardened, but not solid.
- Whip with an electric mixer for 2 to 3 minutes.
- If the ganache has been in the fridge for a while before whipping, and it’s too thick and hard to whip, insert it in the microwave for a few quick seconds, and stir it again. Test for consistency and keep going until you achieve the desired consistency.
- To be pipeable, the ganache should be thick, but easy to spread.
- If it happens that the ganache is too thin, you might want to put it in the fridge for a few minutes so it will harden up, and then try whipping it again.
To assemble
- Line a piping bag with a round tip, I used Wilton number 7. Fill it with the Whipped Chocolate Ganache.
- Once the macarons have cooled down, simply pipe a ring of Ganache around the edge of a bottom macaron, fill it up with about 1/4 teaspoon of Banana Pudding, you can place the pudding in a piping bag to help do this. Top with another macaron cookie.
- Macarons are best after they’ve matured in the fridge for a day, or at least a few hours.
Storage
- Since these macarons have a pudding filling, I don’t recommend freezing them.
- I would recommend refrigerating these Banana Macarons for up to 4 days.
I’m going to try these, but tried multiple times to watch your video and it hung up on a AAA ad. I never could watch your video. If there’s a way to not run ads during giving instruction, I would go for it. I hope I don’t miss something important by not getting to watch your instruction.
Hi! I would like to try a banana filling, but I’m also making some macarons with a chocolate ganache already; Is the banana pudding thick enough to use as a filling by itself?
it’s not thick enough for it, sorry! you could use it to make a german buttercream. or perhaps try adding more cornstarch or flour to the pudding.
So, I’m drooling over making these and the only flour I have is banana flour, I plan on using the suggested 3/4 cup of banana flour the package recommends, but I’m wondering if I can roll with that amount of flour or do I need to supplement and add almond flour to make it the total 105g/90g the recipe here calls for to make them fuller? Thanks in advance ~
I have no idea, sorry! I’ve never used banana flour before!!
I do not see the salt for the pudding listed in the ingredients. What is that measurement, please?
1/8 tsp sorry about that Ill fix the recipe. thank you
Made these once and they were soooo yummy!! Have you ever made with almond milk? I’m thinking it needs to be whole milk but curious if you have tried almond.
I have made other types of custard with dairy free milk but I haven’t made this one, I think it will work because the cornstarch thickens it. It should be fine I guess, but it would be an experiment.
I’ll let you know if I do. I kept the dairy milk this time. Thanks!
for the pudding: if I’m not using the vanilla bean, do I still need to let the banana infuse with the milk for at least 4 hours? Do I sub the bean and add 1/2 tsp of extract instead?
yes you still need to infuse it. I made this one time without infusing the banana and the milk and the taste was significantly different. It will be way tastier if you infuse the milk and banana.
and to substitute, just skip the bean, and then at the end, once you are done cooking the pudding, you can add the vanilla and mix
Thank you. Also I didn’t see salt listed, is it just a pinch to add with the cornstarch, sugar and egg yolk?
I made the banana Macarons and they tasted amazing. I tried different Macarons recipes but yours work the best.
thank you so much Christine! That’s fabulous to hear!!!
Esses macarons ficaram fantásticos, que sabor delicioso!!!!!
Obrigada! 🙂
Hi Camila
Please help – every time I use food colour for macaroons, colour fades in baking! For example, I made your lemon and your banana macarons, and I nailed the texture, but I completely lost the colour – they turned cream!
I use Wilton colours too.
How to achieve full bright colours, can you help?
Many thanks and I love your recipes. Some turned out amazingly well!
Millie
Do you use gel colors? You gotta add a lot of food coloring sometimes to achieve the color you want. The color will always become duller as it bakes so go for a shade brighter than what you want the final result to look like. I don’t recommend beginner bakers to add too much food coloring, but it seems like you are nailing the texture and the macarons so I say go for it, add way more food coloring and see how it turns out!
Thank you for responding! Yes, I use gel colours. I’ll try adding more colour next time or see if I can buy bright yellow. Got the ingredients to make coconut macarons tomorrow. You are my macaron guru and thanks to you I learnt different technics for making them. I also made your Lintd cupcakes and they turned out picture perfect.
Hi Camila! I noticed in some of your newer recipes it’s 105 g of almond flour and powdered sugar vs. older ones where it’s 96 g and 90 g – what’s the reasoning behind it? Is the yield the same? All your recipes I’ve had such success with – thank you!
Hello Samantha! I use a higher quantity of the dry ingredients now because I felt like it made my shells fuller, but honestly, I still go back and forth with the measurements and it comes out great regardless of using the 96/90 grams or the 105 grams measurements. I’ve recently done the old way (96/90) and it was great still.