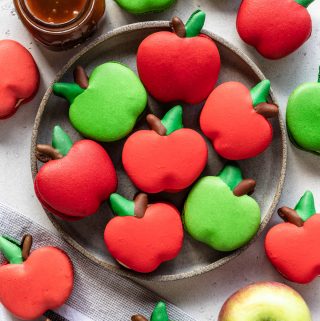
Caramel Apple Macarons
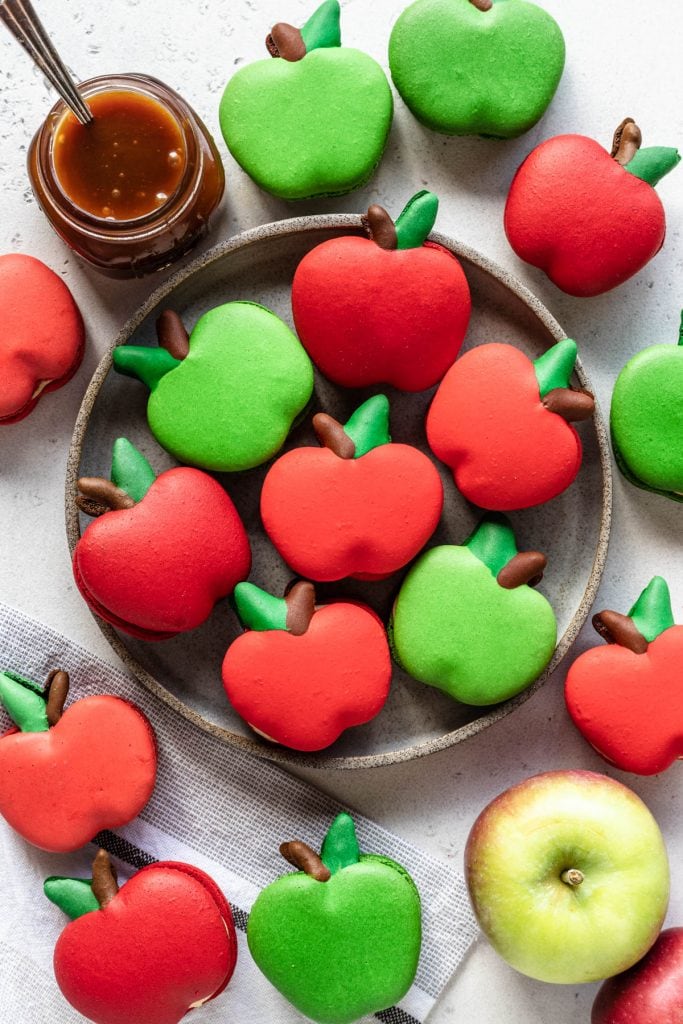
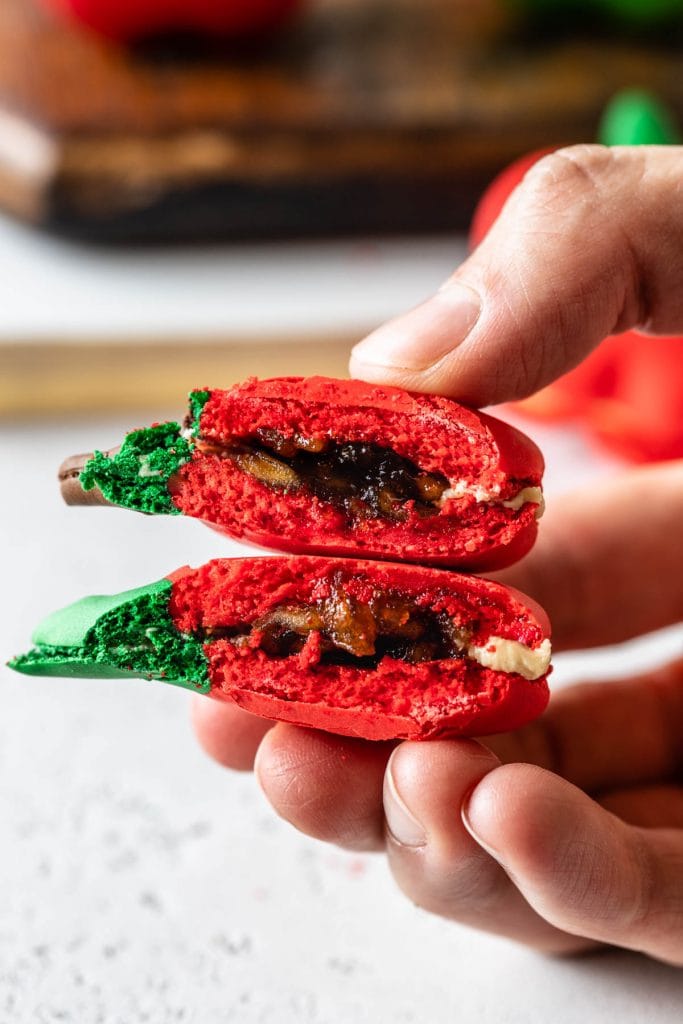
Hello friends! Today we are making Caramel Apple Macarons. These macarons are filled with Salted Caramel Buttercream and Apple Pie Filling!
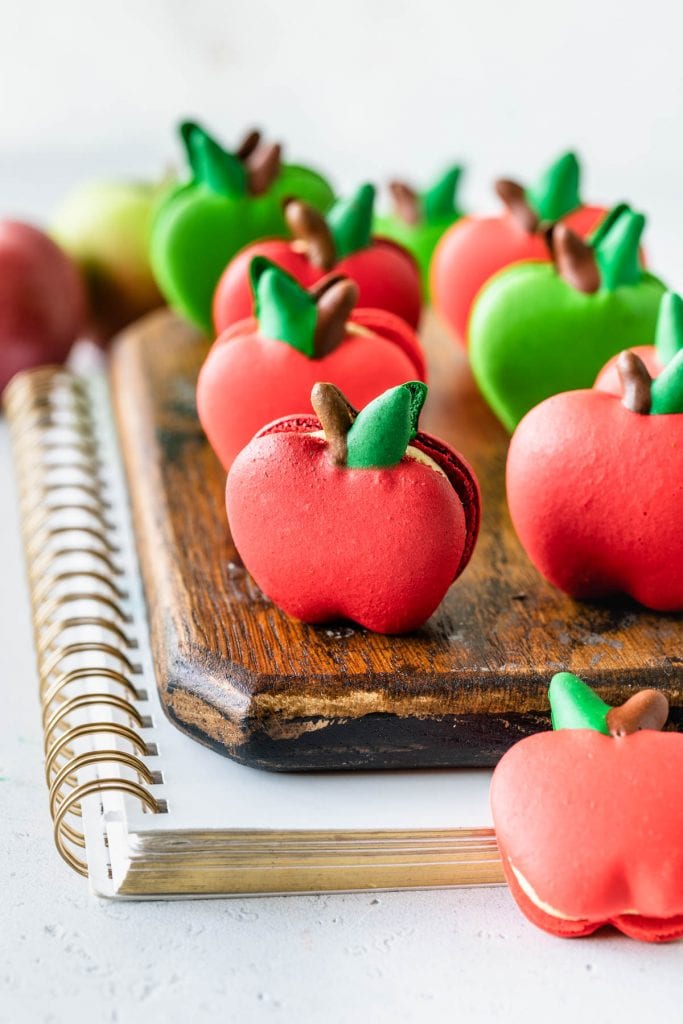
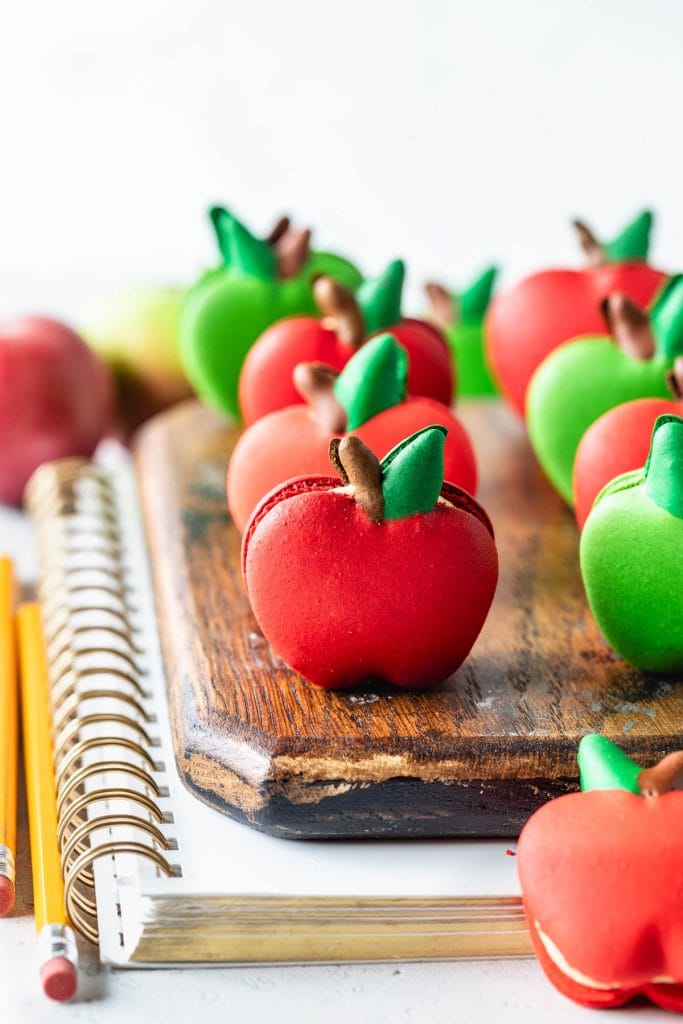
Also these are extra special because they are macarons shaped like apples! What could be more fun than that!
Grab the templates to make your own apple shaped macaron shells at home below, and also make sure to watch the video so you can see exactly how I piped these apples. The video is located on this page, and also on YouTube.
This post may contain affiliate links. I earn a commission from qualified purchases. Please read our Privacy policy here.
So first things first, here are your templates.
Attention! Make sure to print both templates as they are mirrored. If you print just one template, all your leaves will be facing one side, and when you try to form the sandwiches, the direction the leaves are going won’t match. This is VERY important!
I made these Caramel Apple Macarons to celebrate Fall, aka the best season ever, and also for my son to bring to his teachers in school. They make a cute gift for teachers!
Anyway, here are some things I want to say about these Caramel Apple Macarons.
If you are a beginner macaron baker, go easy on the color. To obtain a vibrant red you may need to add a lot of food coloring. However if you are a beginner, that might mess up your shells, because as you add color, you also add a lot of moisture to the shells, which can cause several issues. And also as you continue to add color and stir, in order to obtain the color you desire, you may also end up over mixing.
If you need help with your macarons, check out my Troubleshooting Guide.
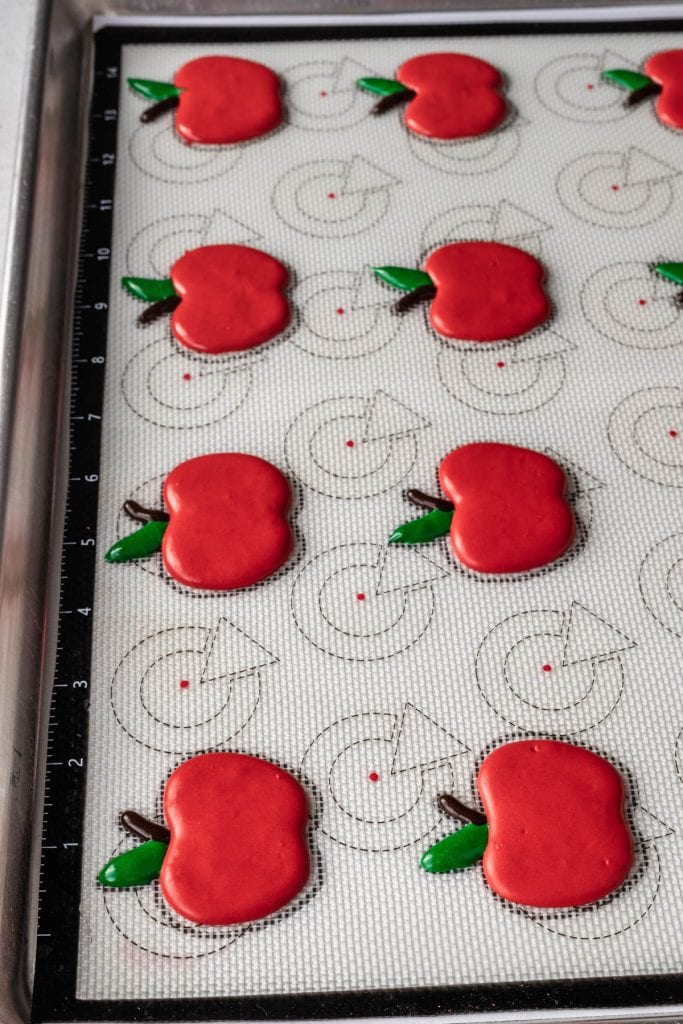
To pipe these apple shaped macarons, there’s a specific way I like to do it. I’ve tried a couple different ones when I was making these Caramel Apple Macarons, and here is the best one that gave me the best shapes:
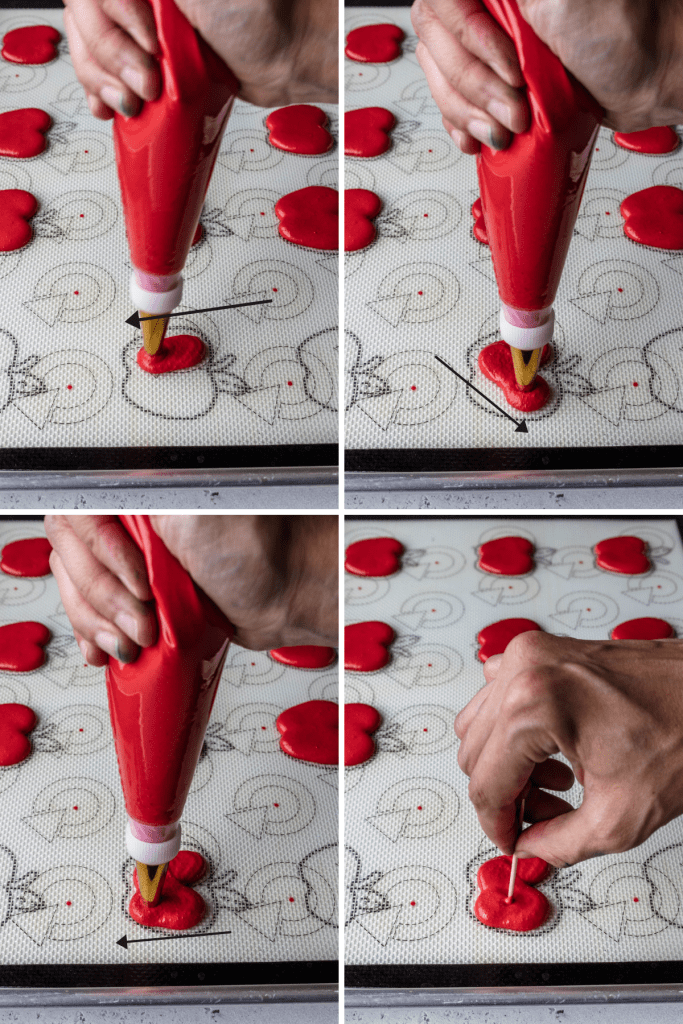
Start at the top left corner of the apple, then move the piping bag down as you release some batter by applying gentle pressure.
Then cross the bag over to the top right corner of the apple, and next bring the piping bag to the bottom right corner of the apple.
And use a toothpick to help spread the batter to the outlines of the template.
Don’t pipe all the way out to the edges of the apples, or they will be misshapen. This way gives you more control to shape the perfect apples.
I am using a #12 Wilton tip to pipe the apples, a #6 to pipe the leaves, and a #3 to pipe the stem.
When making macarons like these Caramel Apple Macarons, you are probably in search of a deep and vibrant shell color. I advice looking for a powdered food coloring, or using gel. And most definitely don’t use liquid food coloring.
If you are a beginner, leave the color out, or go easy, like I’ve explained before.
But this is the food coloring I use.
And recently I ordered some powdered food coloring from Sugar Art. I’ll keep you posted on how that goes.
However, when I was ready to film the video for these Caramel Apple Macarons, I ran out of my food coloring, so I had to get some at the store, and they only had the little container ones where you scoop the food coloring. Those are not my favorite, and they require a lot of it in order to give a nice color to the shells, which may end up messing up with the texture of the batter, and therefore overall results.
Here are a few more tips about this recipe in general:
- Don’t over cook the caramel sauce at any stage, or it will become hard once it cools down. As soon as the sugar melts entirely, add the heavy cream, then the butter, and as soon as the butter melts, remove from the heat. You can also use store-bough caramel sauce.
- Chop the apples for the filling really small so they can fit in the filling of the small macarons, and you’re able to close the sandwich without any issues.
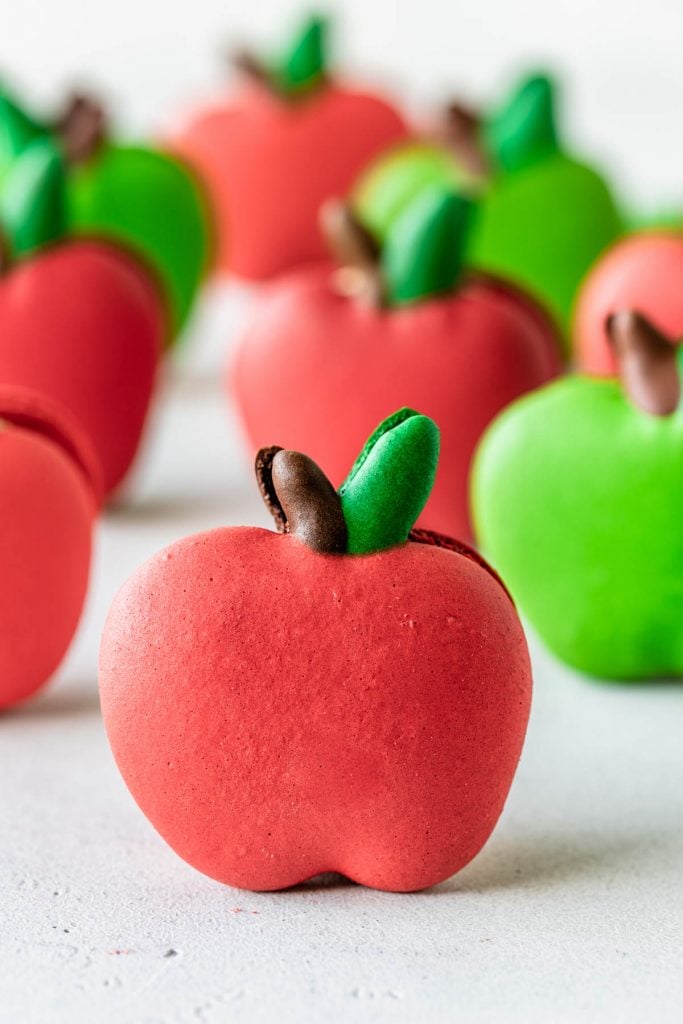
- Make sure to pipe the leaves and stem the same thickness as the apples, or the macarons might even crack at the top.
- To make green apples, split the larger portion of batter between two, and colors one with green food coloring, and the other red.
- Use small tips to pipe the leaves and stem.
- Don’t pipe all the way to the outlines of the template, rather use a toothpick to spread out the batter and have better control of the shape.
- Macarons with a lot of food coloring might take longer to dry, even if the top is already dry to the touch. If your finger sinks in when you touch the surface, might need a bit more resting.
- You can use egg white powder to help the shells dry faster if you have added a lot of food coloring.
And please note that egg white powder is not the same as meringue powder.
If you liked these Caramel Apple Macarons, you may also like the following recipes:
- Pear Macarons
- Apple Macarons
- Salted Caramel Macarons
- Pecan Macarons
- Samoa Macarons
- Pumpkin Cheesecake Macarons
- Dulce de Leche Pecan Macarons
- Balsamic Caramel Strawberry Macarons
- Toffee Macarons
- Chocolate Caramel Macarons
- Caramel Popcorn Macarons
For more macaron knowledge, tips, tricks, troubleshooting, visit Macaron School.
Thank you so much for reading my blog! If you make these Caramel Apple Macarons tag me on Instagram, I love to see your creations! Also leave a comment below! Thanks!
Caramel Apple Macarons
Ingredients
Macaron Shells
- 100 grams egg whites 3.5 oz
- 100 grams granulated sugar 3.5 oz
- 105 grams almond flour 3.7 oz
- 105 grams powdered sugar 3.7 oz
- Food coloring I used red, green, and brown
Apple Pie Filling
- 1 cup apples chopped small from about 2 small apples
- 1 tbsp lemon juice
- 1/4 cup brown sugar
- 1/2 tsp cinnamon powder
- 1/4 tsp freshly grated nutmeg
- 1/2 tsp cornstarch
- 2 tsp water
Salted Caramel Sauce
- 1/4 cup sugar 50 grams, 1.76 oz
- 2 tbsp heavy cream 30 grams
- 1 1/2 tbsp unsalted butter 21.26 grams, 0.75 oz
- 1/4 teaspoon kosher salt or more to taste
Salted Caramel Buttercream
- 6 tbsp unsalted butter room temperature 85 grams, 3 oz
- 1/4 cup salted caramel sauce store bought or homemade included here
- 1 1/2 – 2 cups powdered sugar 187 grams – 250 grams
Instructions
Macaron Shells
- Before you start, get all of the ingredients ready. Prepare 3 piping bags fitted with tips: 12, 6, and 3. The #12 will be used for the apple, the #6 for the leaves, and the #3 for the stem.
- Line two baking sheets with parchment paper or silicone mat, and place the apple templates underneath. Make sure to print out the regular template and also the reverse template, so you can match the apples together later to form the sandwich. If you make apples in only one direction the apple sandwiches won't match later.
- Measure out all of the ingredients.
- Sift the powdered sugar and almond flour together. Set aside.
- Place the egg whites and granulated sugar in a heat proof bowl or in a double boiler. Over a pan of simmering water, whisk the whites and sugar until frothy and sugar completely melted. It will take a couple minutes. You can test by touching the mixture between your fingers, and if you feel any sugar granules just keep whisking mixture over the water bath.
- Make sure the bottom of the bowl isn’t touching the simmering water.
- Transfer the mixture to the bowl of a stand mixer.
- With the whisk attachment, start whisking the mixture on low for about 30 seconds, then gradually start increasing speed to medium. Whisk on medium for one to two minutes, until mixture is white and starting to become fluffy. Raise speed to medium-high and finish whipping for a few more minutes until stiff peaks are formed. Best way to check this is to keep your eye on the whites. Once they get glossy and you start seeing streaks formed by the whisk, it might be time to stop.
- Whisk until stiff peaks have formed. When you pull your whip up, the peaks should be shooting straight up, not bent down.
- Pour the sifted powdered sugar and almond flour into stiff whites.
- Start folding the batter.
- Fold the dry ingredients with the meringue until just incorporated.
- Once you can see no more streaks of dry ingredients in the batter, separate it into three different bowls, you will need just a little bit of green and brown batters, and the majority of the batter should be red.
- Work with one batch at a time, and cover the other bowls with a towel so the batter doesn’t start drying.
- Add red food coloring to the batter, and fold until it reaches the proper consistency, flowing effortlessly off the spatula. Read below on tips for identifying the right consistency.
- Then, transfer the red batter to a piping bag, fitted with the #12 tip. Secure the top so the batter doesn’t leak out, and set it aside.
- Next, it’s time to color the remaining batter.
- Add green food coloring to one of the bowls, fold until the proper consistency is achieved. Transfer that batter to the piping bag fitted with the #6 tip, and set it aside.
- Do the same with the brown batter, add food coloring, fold it, transfer to the piping bag fitted with the #3 tip, and set it aside.
- How to know when to stop folding the batter: It’s time to stop folding when the batter is glossy and has a thick and flowing consistency. There are several ways to test this.
- First, pick up some batter with the spatula and try to draw a figure 8 with the batter that is dripping off the spatula. If you can form several 8 figures without the batter breaking up, that’s one indication that it might be ready.
- There’s another test you can do. I call it the Teaspoon test.
- Grab a teaspoon of batter and spoon onto the parchment paper or silicon mat. Wait a minute to see how it behaves.
- If the batter stays stiff, forming a point and doesn’t spread out a bit, start folding a little bit more, about 3 folds.
- Test again.
- Once the batter spreads out a bit and starts to look glossy and smooth on top, on the baking sheet, transfer it to the piping bag.
- You don’t want the batter to be too runny either. So be careful not to over mix. It’s always best to under mix and test several times until the proper consistency has been achieved.
- The best way I can describe this stage being perfect is when you hold the spatula with batter on top of the bowl and the batter falls off the spatula slowly but effortlessly. The batter will keep flowing off the spatula non-stop, but not too quickly.
- It’s time to pipe!
- Begin by piping the apples. Place the piping bag with the red batter directly 90 degrees over the top left corner of the apple template. Pipe a bit of batter down to the bottom of the apple, then cross the bag over to the top right corner, and then pipe some more batter as you move the bag down to the bottom of the right side of the apple.
- It will really help if you watch my video on YouTube showing this piping technique.
- Then use a toothpick to spread out the batter to the outline of the template.
- I like to pipe a couple of apples, then use the toothpick to spread out the batter. This way the batter won’t start drying before I get a chance to spread it out.
- Once you’ve piped a tray full of apples, bang the trays against the counter. This will release air bubbles that are in the batter and prevent your macaron shells from cracking.
- Use a toothpick to pop any air bubbles on the surface of the shells.
- Time to pipe the leaves, grab the green batter, pipe each leaf, and then use a toothpick to spread out the batter to the outlines.
- Lastly pipe the brown batter on the stem.
- A very important tip here is to pipe the leaves and the stem the same thickness as you pipe the apples.
- Let the trays sit for a while so the shells will dry out a little bit. I usually leave about 20-40 minutes, depending on how humid the day is. You’ll know they’re ready when you gently touch the surface of a macaron and it seems dry.
- Pre-heat the oven to 300ºF.
- Bake one tray at a time.
- Bake for 5 minutes, rotate tray.
- I bake each tray for about 15 to 20 minutes.
- When baked, the macarons will have a deeper color and formed feet. If you try to move a macaron, it shouldn’t feel jiggly. If the macaron is still jiggly, keep baking.
- Remove from the oven and bake the other tray.
- Let the macarons cool down before proceeding with the filling.
Apple Pie Filling
- Place the apples, brown sugar, lemon juice, cinnamon, and nutmeg in a small saucepan.
- Cook the apples over medium heat until softened.
- Depending on what kind of apple you are using, it might take less or more time to cook them. Softer apples will cook faster. I used Macintosh apples.
- Add more water if the apples are too dry.
- Add 2 teaspoons of water to 1/2 teaspoon of cornstarch, and mix to dissolve the cornstarch.
- Add this mixture to the pan.
- Cook for 1-2 minutes until the apple filling becomes thick.
- Remove to a bowl. Let it cool down in the fridge all the way before using.
Salted Caramel Sauce
- Place the sugar in a medium saucepan with a heavy bottom, over medium heat.
- Stir constantly to help the sugar melt evenly.
- As soon as the sugar has melted entirely, and the last bit of sugar crystals have dissolved, quickly add the heavy cream. Be careful because it will bubble up.
- After a few seconds the bubbles should subside. Add the butter.
- Mix until the butter has melted. Add the salt. As soon as the last bit of butter has melted, immediately remove it from the heat. If you overcook this caramel sauce at any stage it will become too hard when it cools down.
- Pour into a glass jar. Let it cool completely.
Salted Caramel Buttercream
- Place the butter in the bowl of a mixer. Mix on medium high until creamy, for about 1 minute.
- Add the caramel sauce, and mix briefly to combine.
- With the mixer off, add 1 1/2 cups of the powdered sugar. Mix on low until incorporated.
- Raise the speed and cream for 1 minute until the buttercream is fluffy and smooth. Scrape the sides of the bowl. If necessary add more powdered sugar, if the mixture is too runny.
- And if the buttercream is too stiff, add a teaspoon of water or milk to thin it out. Continue to adjust the consistency as needed, by adding more sugar or some liquid.
- Place the frosting in a piping bag.
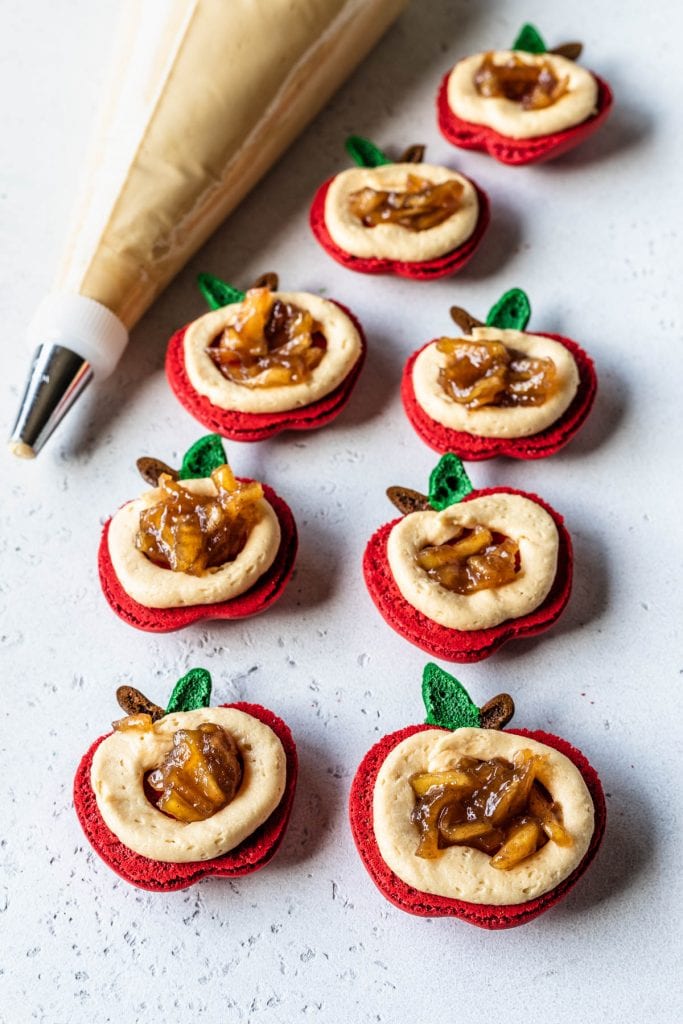
To assemble
- Pipe a ring of frosting around the edges of a bottom macaron shell.
- Spoon a small amount of apple filling in the middle.
- Top with another shell.
Storage
- Let the macarons mature for 24 hours before serving.
- Store the macarons in the fridge for up to 5 days, or in the freezer for up to 1 month. They may become soggy or softened after a while because of the apple filling.
Camilla, I bought your book! Amazing. Well explained. But I do have one question. You mentioned in it brushing the inside of the shell with chocolate to avoid soggy macarons when using wet fillings. Does white chocolate works as well? I’m wondering because I’m gonna do rasberry jam and rasberry Swiss buttercream and don’t think chocolate will interfere with the taste and white chocolate would probably be neutral. Thoughts or tips? Please!
Yes it definitely works!! I do it all the time!
Thank you so much for getting the book! So glad you enjoy it!
Hi! Can these macarons be placed in the freezer? If so, for how long?
yes, up to 2 months
I made a form of these yesterday with the same apple filling but the honey cream cheese frosting from the honey macaron recipe. They were for Rosh Hashanah and they were a big hit! Thank you for the great recipes and technique!
These macarons are so good!! I made them as a gift for my daughter’s teacher. The combination of caramel buttercream with the apple filling was delicious!! Thank you for sharing your recipes!!
Hi!
Can we use a normal macaron template instead of the apple? Would we need to adjust the recipe at all if we pipped on normal size round template?
yes you can use whatever template you’d like, the recipe remains the same.
If I use store bought Carmel, how much of it do I use? 🙂
1/4 cup for the buttecream and about 3 tbsp for the filling
Why do you heat the egg whites and sugar? I’ve never seen french macarons done this way I’ve only ever tried it with adding the sugar to the egg whites once they are frothy. Just curious since I want to try your recipe for a family dinner!
This is the swiss method, we heat up the sugar and egg whites together and that helps create a more stable meringue, since the introduction of heat makes the proteins in the whites unfold more easily during whipping. and also by introducing heat, the sugar melts which increases the viscosity of the syrup that coats the air bubbles, helping make an even stronger meringue.
Hi!! Great recipe!
How long can I store the apple filling?
Thank you
for quite a few days in the fridge, something like 5 to 7 days
Hi do I need to fridge these to store them?
yes you do
Made this recipe. They came out amazing. Made it twice though, the first trial was undermixed the red batter so the surface didn’t smooth out at all. So tried it again the second time and also with 2A tip, they came out beautiful.
Anyway, this is my first time making different shape macaron beside round and heart shape. I was very happy lol. Hope I can share the pictures somewhere. Thanks for the recipe and tips.
Ohhh I’d love to see pics!! You could share with me on instagram if you have an account there if you tag me in your stories I share them to my own stories! 🙂
I love it, I hope to learn many recipes and tips. Kisses you from Mozambique
Hi Camila! Thank you so much for sharing your knowledge and efforts with us. Can you tell me the size of each apple template?
I believe they are about 2 inches wide. I do have a template available to be printed up there on the post 🙂
Making now… Like apple pie… should we peel the apples first?
yes you should
Thank you so much for sharing this delicious recipe and template! I have a question, how long do you think we can save/store leftover apple filling?
for 10 to 15 days in the fridge, and up to 2 months in the freezer 🙂 so happy you liked the recipe
Macarons perfeitos, ficaram fantásticos!!!!!!