Turkey Macarons
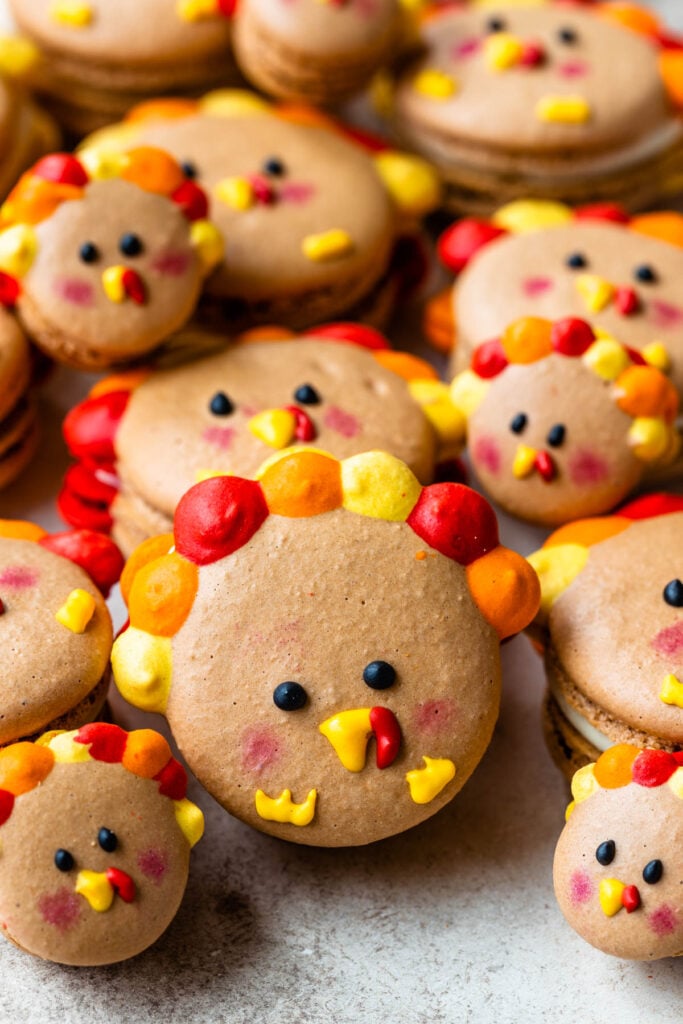
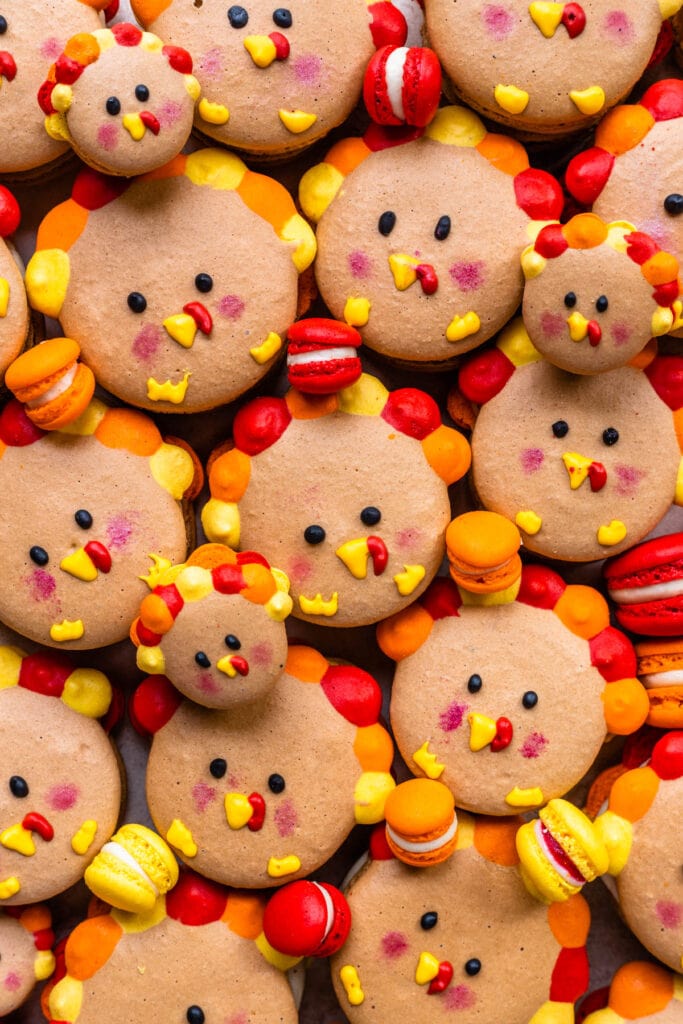
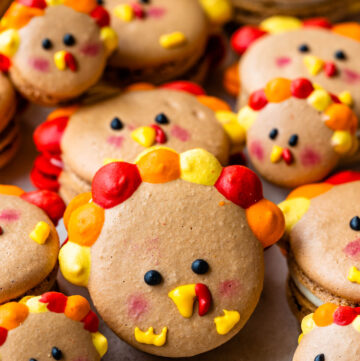
Hello friends, today I am here to show you these lovely Turkey Macarons for Thanksgiving! I offer a free template that you can download and place under your mat or parchment paper to make your own Turkey Macarons!
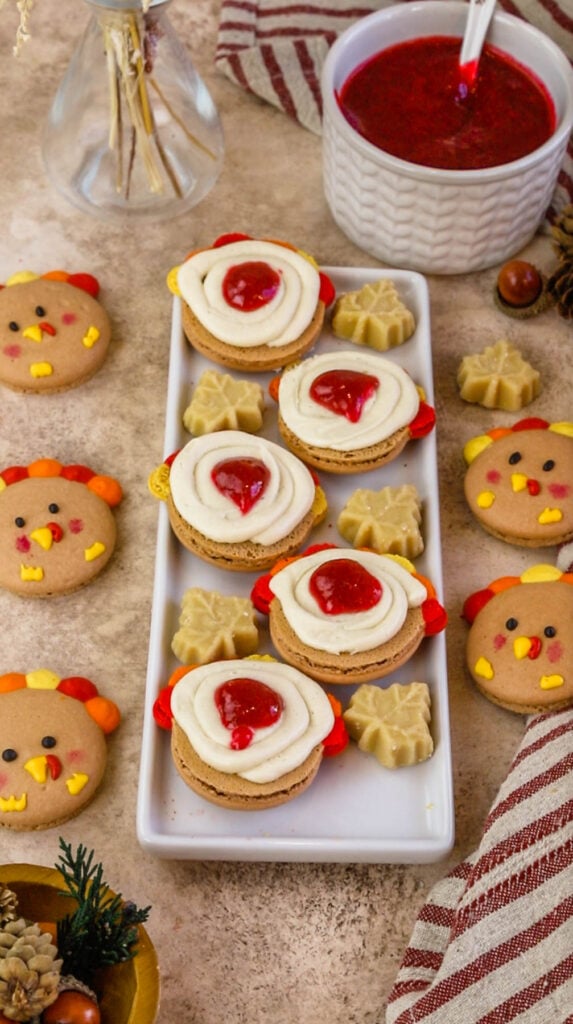
The macarons are filled with Maple Buttercream and Cranberry Sauce.
Turkey Macaron Template
Here are the Turkey Macaron Templates you can download for free, place under your baking mat, and pipe the turkeys.
This post may contain affiliate links. I earn a commission from qualified purchases. Please read our Privacy policy here.
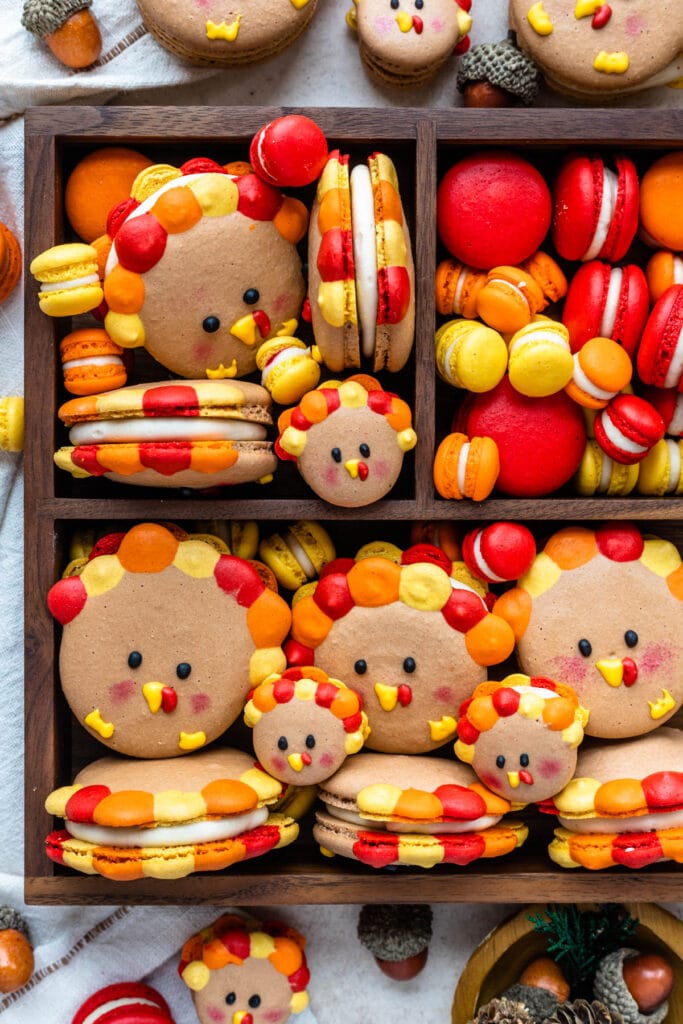
To pipe the baby turkeys, I didn’t use a template, I piped a small brown circle, and then piped dots of the colorful batter on top to make the feathers.
I’ve been wanting to make some Turkey Macarons for a long time, so I finally decided to make them for Thanksgiving.
Making the shells is fun, but can be a little bit of work, because you are working with a few different color batters, and working with shapes always takes longer.
First, you will have to split the batter in order to make the different colors.
The method I use for splitting the batter is to simply mix the meringue and dry ingredients (almond flour, powdered sugar) until they are incorporated. The second I see no more dry ingredients in the bowl, I split the batter between different bowls.
I made a double batch for this recipe, and I also miscalculated the amount of batter I needed for each colors, so I ended up just piping some colorful mini macaron shells with the leftover batter.
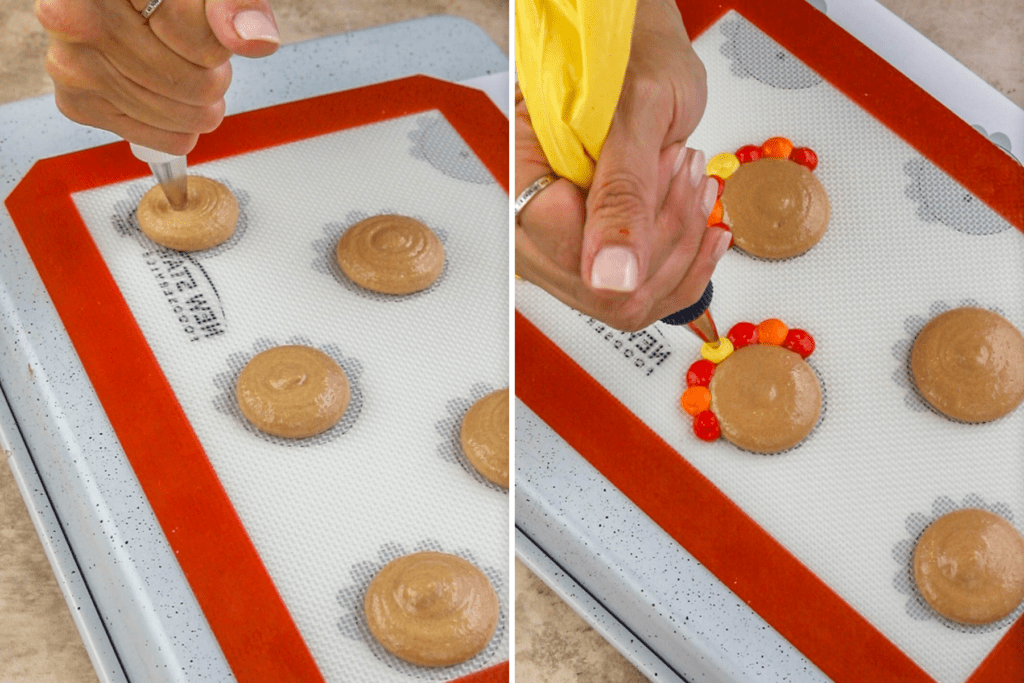
First, pipe the main circle which is the head of the turkey with the brown batter.
Then pipe each feather on top alternating the colors.
Make sure to let these macarons rest before baking. Shaped macarons always have to rest before baking in my experience, or they crack when you bake them.
Once the macarons are done baking, you can decorate them with the royal icing.
You could get those icing bags from the store too that have the icing already made, you barely will be able to taste it since it’s so little that goes on top of the macarons.
An edible marker is also a good alternative to decorate the turkeys.
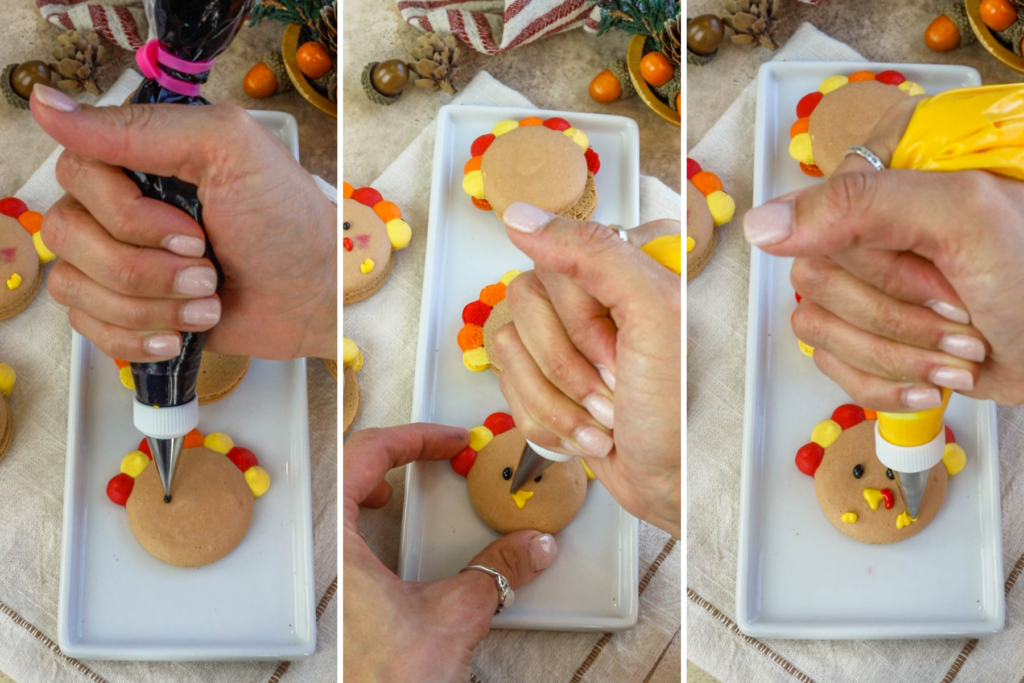
Make sure to let the royal icing dry completely before filling the macarons. If you place it in the fridge, might speed things up a bit.
Making royal icing is really easy, but if you can’t find meringue powder, substitute with a recipe using egg whites, there are tons online! You can even make vegan royal icing!

For the filling, I picked a Maple Buttercream, made with maple syrup and maple extract.
I also filled the middle of the macarons with Cranberry Sauce, from my Cranberry Macarons recipe.
The Maple Buttercream is fairly simple to make. Honey could be substituted if you don’t have maple syrup where you live. I know some places outside of the US can be hard to find maple syrup, which is why I am offering the substitution.
I use maple extract for the buttercream, however, it’s also not easy to find outside the US, so feel free to skip it if you can’t find it. But if you can get some maple extract, do so, it is so delicious!
Pro tip: add 1/4 tsp of maple extract to your meringue when making macarons and it will give your shells amazing taste!
But you can really fill these macarons with anything you want.
If you love these Turkey Macarons, here are some more macarons you may like:
- Cranberry Macarons
- Pumpkin Macarons
- Gingerbread Macarons
- Reindeer Macarons
- Sunflower Macarons
- Caramel Apple Macarons
Thanks for reading!
Turkey Macarons
Ingredients
Turkey shells
- 100 grams white granulated sugar
- 4 grams egg white powder optional read notes below
- 100 grams egg whites
- 105 grams almond flour
- 105 grams powdered sugar
- Food coloring brown, dijon, yellow, orange, red
Royal Icing
- 2 1/2 cups powdered sugar 312 grams
- 2 tbsp meringue powder
- 5 to 6 tbsp water
- Gel food coloring
Maple Buttercream
- 4 tbsp unsalted butter 56 grams
- 1 1/2 cups powdered sugar 187 grams
- 1/4 cup maple syrup 60 ml
- 1 tbsp heavy cream plus more as needed
- 1/4 tsp maple or vanilla extract
Cranberry Sauce
- 1 recipe cranberry filling recipe here
Instructions
Turkey Shells
- Before you start, get all of the ingredients ready. Prepare a large piping pastry bag, fitted with a large round tip, I use a 1/4” diameter tip, or a Wilton 12 of the brown batter. Set aside. You will also need 3 other piping bags fitted with small tips for the red, orange, and yellow batters, anything between a 3 and a 5 piping tip would work well.
- Line two baking sheets with parchment paper or silicone mat. Place the template underneath the mat or parchment.
- Wipe the tools such as bowls, spatulas, and silicone mats with vinegar if desired, this helps getting rid of any grease particles that might be in the tools.
- Measure out all of the ingredients.
- Sift the powdered sugar and almond flour together. Set it aside.
- Start pre-heating the oven. I pre-heat my large oven to 310ºF for 60 to 90 minutes, this helps with temperature fluctuations. I pre-heat the countertop oven for 30 to 45 minutes.
Making the Swiss Meringue
- Place a bowl over a pan with barely simmering water. Add the sugar and egg white powder to the bowl if using. If you’re not using egg white powder simply skip it, nothing needs to be changed in the recipe.
- Whisk the sugar and egg white powder so it doesn’t clump up.
- Add the egg whites to the bowl and whisk until the sugar is completely melted. It will take a couple of minutes. You can test by touching the mixture between your fingers, and if you feel any sugar granules just keep whisking the mixture over the water bath.
- Make sure the bottom of the bowl isn’t touching the simmering water because you don’t want the whites to cook.
- Also, don’t overheat the sugar syrup, you are just looking to melt the sugar, no need to bring it to a certain temperature. Transfer the syrup to the bowl of a stand mixer. Before transferring the syrup, you might consider whipping the bottom of the bowl with a towel so the water doesn’t fall into the mixer bowl.
- With the whisk attachment, start whisking mixture on low (speed 2 of the KitchenAid) for about 30 seconds, then gradually start increasing speed to medium. Whisk on medium (speed 4) for one to two minutes, until the mixture is white and starting to become fluffy. Raise the speed to medium or medium-high and whip for a few minutes until stiff peaks are formed. I like to finish whipping the meringue on speed 6 of the KitchenAid.
- It takes me about 13 to 15 minutes to whip the meringue, but you shouldn’t go by time, go by what the meringue is supposed to look like because a lot of things can affect whipping time, such as the quality of the eggs, the weather, how powerful your mixer is, and more.
- Once the meringue gets glossy and you start seeing streaks formed by the whisk, and the meringue raising in the center of the whisk, it might be time to stop.
- You don’t want to over whip the meringue at this point because that can cause several issues, mainly hollow macarons.
- Whisk until stiff peaks have formed. When you pull the whip up, the peak should be stiff and shooting straight up, with possibly a slight bend at the top, but not bending to the side.
- Also when you swirl the whisk around in the bowl to collect the meringue, you should feel some resistance from the meringue. And when you look on the bottom of the whisk the meringue collected should be forming soft but defined waves.
Macaronage
- Pour the sifted powdered sugar and almond flour into the stiff meringue.
- Add the food coloring at this point, if using. If you were using powder food coloring, you could add it during the final stages of whipping the meringue.
- Start folding gently forming a letter J with a spatula.
- Once the dry ingredients have incorporated with the meringue, stop stirring.
Split the colors
- It’s time to split the colors. You will need the majority to be brown, and you probably only need about 1/2 cup of batter for each color: orange, red, and yellow. You can grab a bit more batter for each, and then pipe some colorful shells if you run out of brown batter to make more turkeys.
- Cover the batter you aren’t using, and work with one at a time.
- Let’s start with the brown batter. I added chocolate brown and dijon to the batter. The dijon goes well with the chocolate brown to make a beige tone.
- Fold the batter until the proper consistency is achieved and transfer the batter to a piping bag fitted with a number 12 tip. Read signs below on how to identify if the batter is at the perfect consistency.
- Repeat with all the remaining batter. Color one red, one orange, and one yellow. Transfer each to its piping bag. Use smaller tips for the colors, a 3, 4, or 5 would work well to pipe the feathers.
How to know when to stop folding the batter
- It’s time to stop folding when the batter is glossy and has a thick and flowing consistency. There are several ways to test this.
- First, pick up some batter with the spatula and try to draw a figure 8 with the batter that is dripping off the spatula. If you can form several 8 figures without the batter breaking up, that’s one indication that it might be ready.
- The batter that’s falling back into the bowl should take 10 to 15 seconds to incorporate with the batter that’s already in the bowl.
- There’s another test you can do. I call it the Teaspoon test. Grab a teaspoon of batter and spoon onto the parchment paper or silicon mat. Wait a minute to see how it behaves.
- If the batter stays stiff, forming a point and doesn’t spread out, fold a little bit more, about 3 folds.
- Test again.
- Once the batter spreads out a bit and starts to look glossy and smooth on top, on the parchment paper or silicone mat, it’s ready.
- You don’t want your batter to be too runny either. So be careful not to over mix. It’s always best to under mix and test several times until the proper consistency has been achieved.
- When you hold the spatula with batter on top of the bowl and the batter falls off the spatula slowly but effortlessly the batter is ready. The batter will keep flowing off the spatula non-stop, but not too quickly.
Piping
- Now that all batters are in a piping bag, let’s begin piping. Place the piping bag with the brown batter directly 90 degrees over the center of each macaron template. Apply gentle pressure and carefully pipe for about 3 to 5 seconds, and then quickly pull the bag up twisting slightly at the top.
- Pipe as many as possible in the baking sheet.
- Pipe the feathers by alternating the red, orange, and yellow batters.
- Bang the trays against the counter or against the palm of your hand a few times each.
- Use a toothpick to pop any air bubbles in the surface of the shells.
- Since this is a shaped macarons, I will rest it for a long time before baking, because if I don’t rest it, they will crack in the oven when I bake them.
- It took about 2 hours for them to fully dry. I tried baking a tray after 1 hour, and a few cracked, so I decided not to risk with the other trays, and just let the macarons rest longer. There’s no problem letting the Swiss batter rest for a long time, either in the piping bag, or already piped, it can go for hours
Baking
- On my large oven I bake the macarons at 310ºF, and on the small countertop oven I bake them at 290ºF. I pre-heat both ovens for quite a bit of time. I pre-heat the large oven for 60 to 90 minutes, and the small oven for 30 minutes or so.
- Bake one tray at a time.
- I bake each tray for about 15 to 20 minutes. In the countertop oven, they can take as long as 30 minutes sometimes.
- When baked, the macarons will have a deeper color and formed feet. If you try to move a macaron, it shouldn’t feel jiggly. If the macaron is still jiggly, keep baking. Also try to touch the top of a macaron and it shouldn’t feel soft, if it’s still soft, keep baking.
- Remove from the oven and bake the other tray.
- Let the macarons cool down before proceeding with the filling and decorating.
Royal Icing
- Beat all ingredients together, except for the food coloring, for about 5 minutes on high speed.
- Divide into different bowls to make different colors. I made black, yellow, and red. Remember to always keep the royal icing covered, or it will start to dry out pretty soon.
- You might need to add more water to adjust the consistency, or maybe even more sifted powdered sugar, if your icing is too thin. The consistency should be flowing but not too liquidy.
- Place the icing in a piping bag and tie the end with a bag tie.
- I used tips number 1, 0, and 00 to pipe the decoration on the turkeys.
Maple Buttercream
- Beat the butter with a mixer on medium high for 2 minutes. Add the powdered sugar and begin to mix on low. Add the maple syrup in and beat the mixture together on medium for one minute. If the frosting is too dry and thick, add the heavy cream. Continue to beat until completely smooth. If the frosting is too runny, add more powdered sugar as needed, and if the frosting is too thick, add more cream to thin it out.
- Add the maple or vanilla extract to the frosting and mix until incorporated, then place the frosting in the prepared piping bag lined with a round tip.
Cranberry Sauce
- Make the Cranberry Sauce, if you want to fill the macarons with it. The recipe can be found here.
Decorating
- To decorate the macarons, first pipe the eyes using the black royal icing. Then pipe the beak and the little feet with the yellow. Lastly, pipe the red wattle.
- Let the decorations dry well for a few hours, or place it in the fridge to speed it up.
Filling
- To fill the macarons, pipe the Maple Buttercream on the bottom shells, and fill the middle with Cranberry Sauce if you wish. Top with a decorated shell.


Adorei os peruzinhos!! Lindos!! Você é muito criativa! Uma artista!!👏👏👏👏😍