Mint Chocolate Macarons
Hello friends! Today’s post is sponsored by Blue Diamond Almond Flour, and we are making Mint Chocolate Macarons!
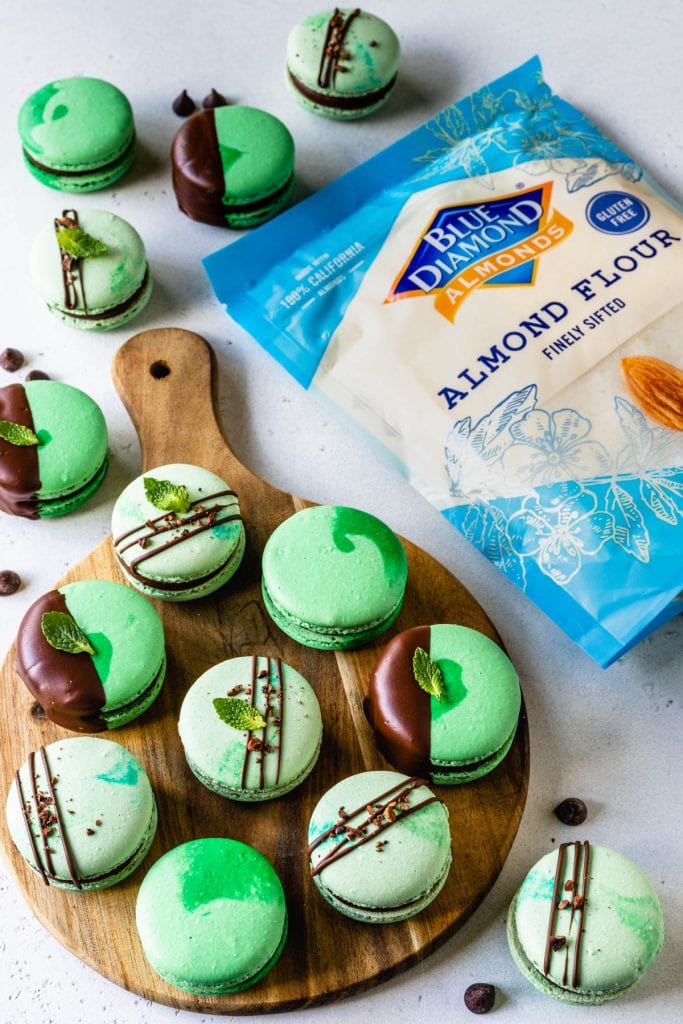
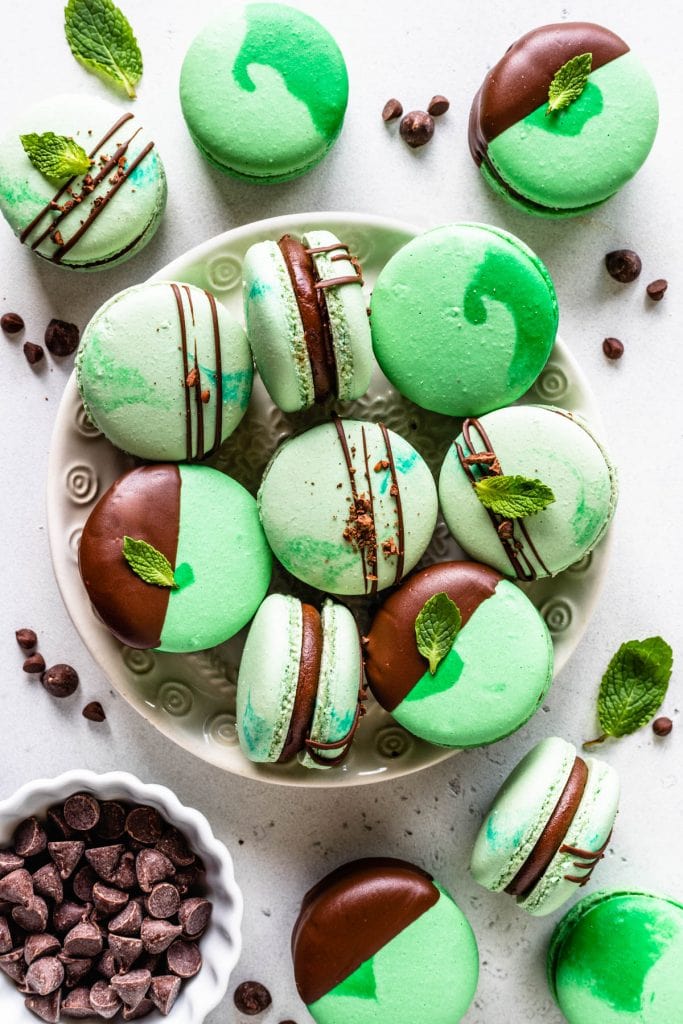
These Mint Chocolate Macarons are filled with Mint Chocolate Ganache, and they have been a highly requested flavor! Make sure to watch the video located on this page, or on YouTube, showing you exactly how to make the macarons.

Let’s talk about almond flour, one of the basic ingredients to make macarons.
This post may contain affiliate links. I earn a commission from qualified purchases. Please read our Privacy policy here.
The quality of the almond flour you use is extremely important when making macarons.
You are looking for a high quality, fine and dry almond flour. Some of the almond flours you find around can be super lumpy, or oily.
Oily almond flour will give you macarons with wrinkles. Lumpy almond flour will make your macarons bumpy, and they won’t have the shiny smooth look that makes them so special and inviting.
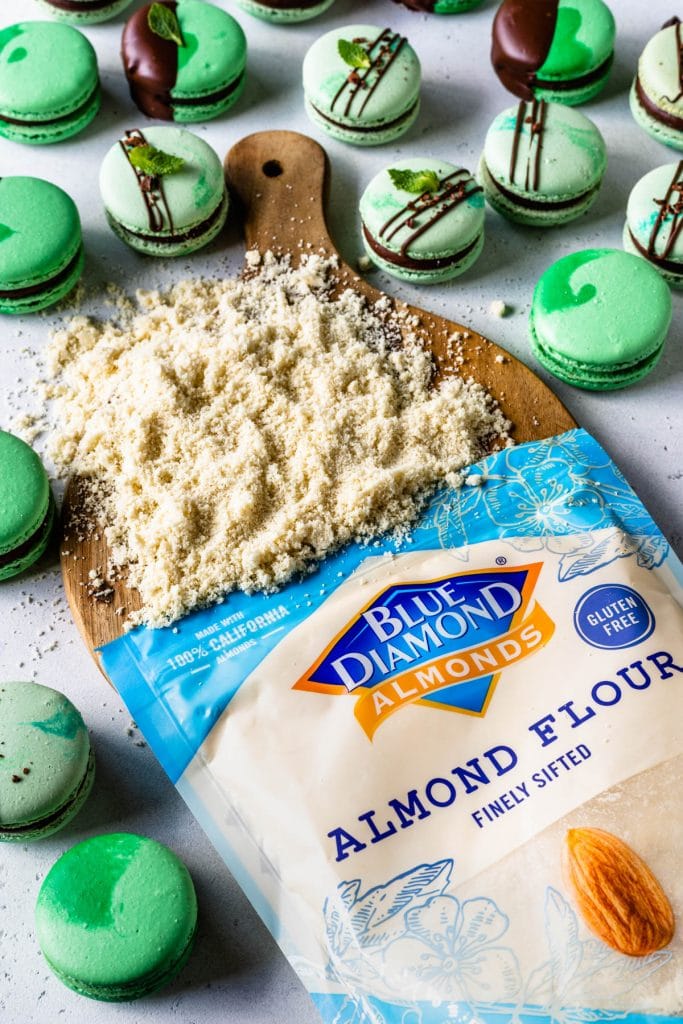
And that’s why I love Blue Diamond Almond Flour so much! It is finely sifted, super dry, not lumpy at all! You can ask any macaron baker that has experimented with Blue Diamond Almond Flour and they will say the same.
I am a part of a large macaron group on Facebook, and a great part of the bakers there vouch for the superior quality of Blue Diamond for their macarons.
If you are a macaron baker, you know how much love and care we put into these cookies, how many hours of learning and skill development goes into mastering macarons. And you know that you absolutely have to use the best ingredients, so you don’t leave anything to chance!
So Blue Diamond Almond Flour is my go-to flour to bake macarons recently. I spend hours and hours per week replying to questions about macarons via DM’s on Instagram, emails, and comments on my blog and YouTube, and I give so much advice and help so many bakers troubleshoot their batches of macarons, so you can be sure that the tips I give you are legitimate and they come after a lot of testing and years of experience.
Here are some more tips on how to make smooth macaron shells:
- First, as I have been saying, make sure to use a finely sifted almond flour such as Blue Diamond Almond Flour. The best way to tell the almond flour is fine enough is that, when you sift the flour, you will be left with almost nothing in the sifter. If the almond flour you are using is leaving a lot of large pieces of ground almonds behind when you sift it, that means it’s too lumpy to be used for macarons and most baked goods.
- Use Italian or Swiss method for the macaron shells (I use the Swiss) instead of the French, because the Italian and Swiss methods require you to melt the granulated sugar before whipping the meringue, which will also make a much more stable meringue.
- Make sure to do the macaronage until the batter is flowing. Under mixed batter can cause bumpy shells. Check my videos, and the tips below on the recipe, on how to make sure the macaronage is at the right stage.
- Bang the trays against the counter after piping, to release air bubbles.
- Use a toothpick to poke any remaining air bubbles on the surface of the macarons.
- Wipe mats and equipment clean with vinegar before starting, to remove any grease particles that could interfere with your shells and make them grainy, or wrinkly.
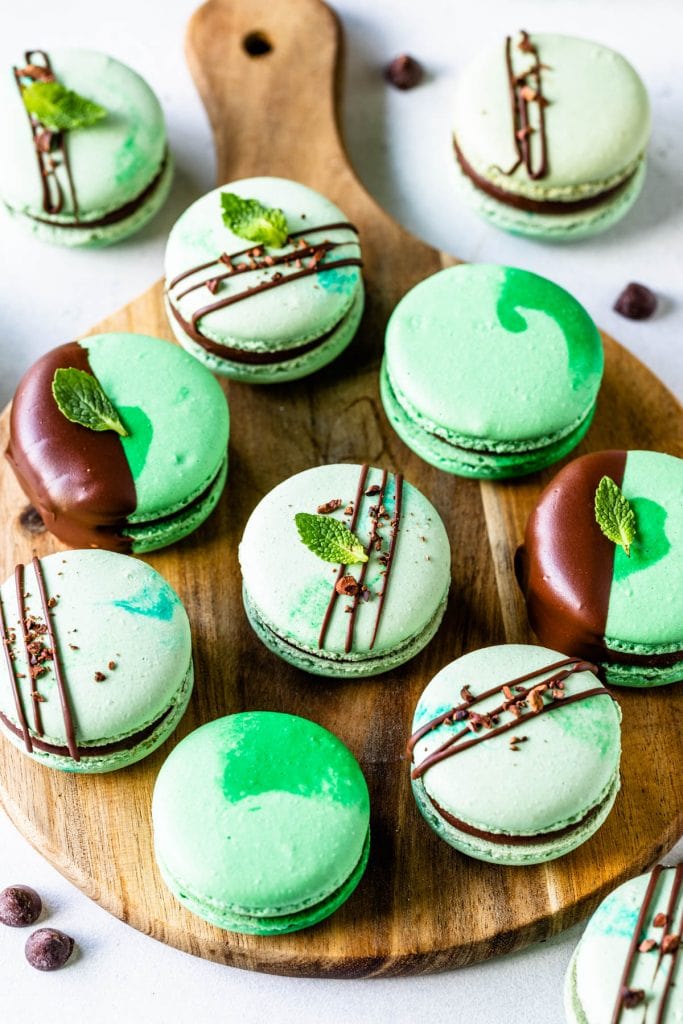
These Mint Chocolate Macarons are super delicious! The mint in the Mint Chocolate Ganache brings a refreshing feel to these macarons, and it cuts right through the rich dark chocolate, in the perfect balance.
That being said, the ganache and the explosion of the heavenly chocolate-mint combo will still work with semi-sweet, and even milk chocolate!
I have used coconut cream in the ganache, to make it a dairy-free option, and you can’t taste the coconut in the ganache at all.
However, if you wish to use regular heavy cream, feel free to substitute for the same amount.
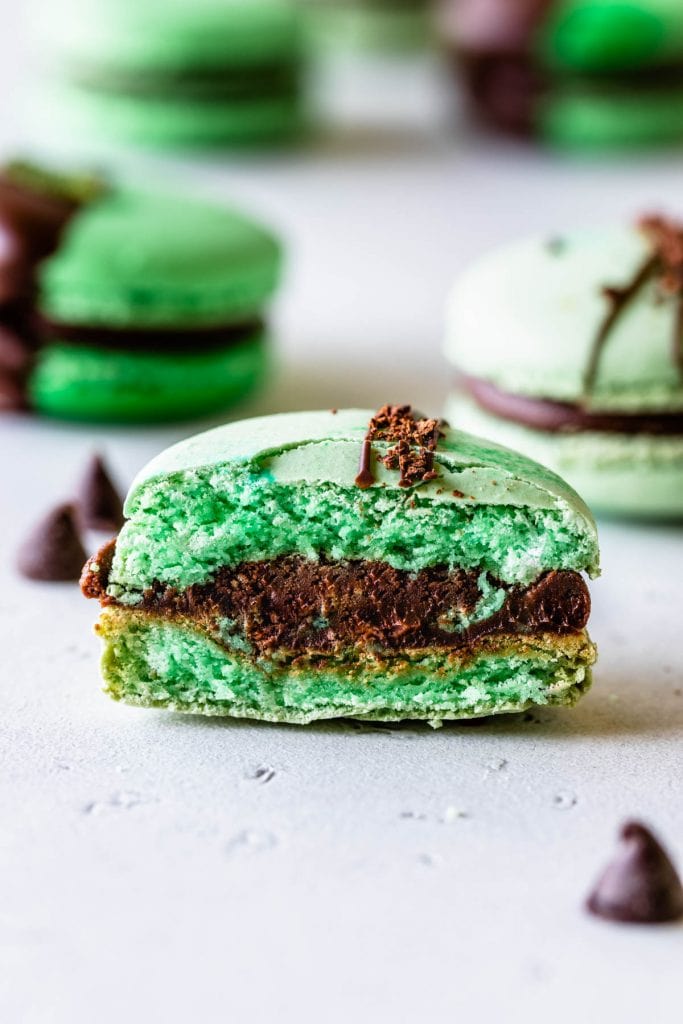
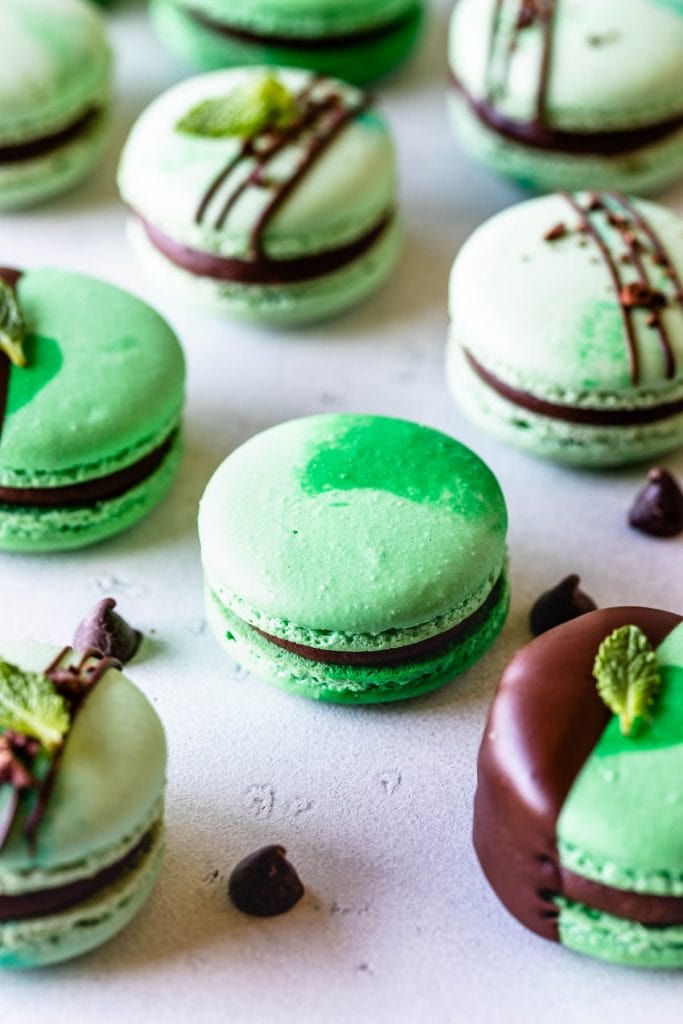
And the quality of almond flour you use will also impact how full your macarons can be, so if you are experiencing lots of hollows, consider switching and trying out Blue Diamond Almond Flour, to obtain nice and full shells like these ones!
If you like these Mint Chocolate Macarons, here are some more recipes you may enjoy:
- Chocolate Macarons
- S’mores Macarons
- Earl Grey Macarons
- Strawberry Mint Macarons
- Pistachio Macarons
- Nutella Macarons
- Lemon Macarons
- Watermelon Macarons
- Orange Macarons
And I have over 80 macaron recipes, different macaron flavors and ideas on the blog. Click here to see the full list.
Thank you for reading my blog! I hope these tips from today were helpful, and I hope you enjoyed the Mint Chocolate Macarons! If you make this recipe please consider leaving a review below, and tag me on Instagram, I love to see your creations!
Mint Chocolate Macarons
Ingredients
Macaron Shells
- 100 grams egg whites 3.5 oz
- 100 grams granulated sugar 3.5 oz
- 105 grams Blue Diamond Almond Flour 3.7 oz
- 105 grams powdered sugar 3.7 oz
- Food coloring I used green and teal
Mint Chocolate Ganache
- 200 grams chopped chocolate or chocolate chips (7 oz)
- 2/3 cup coconut cream 160 ml
- 1 tsp mint extract or more to taste
To decorate
- 3 oz chopped chocolate 85 grams, 1/2 cup
Instructions
Macaron Shells
- Before you start, get all of the ingredients ready. Prepare a large piping bag, fitted with a large round tip, I use a 0.5” tip. Set aside.
- Line two baking sheets with parchment paper or silicone mat.
- I use a baking mat with the macaron template already in it. You can make your own or print it from the internet, and just place it under silicone mat, or parchment paper. I recommend using a silicone mat.
- Measure out all of the ingredients.
- Sift the powdered sugar and almond flour together. Set aside.
- Place the egg whites and granulated sugar in a heat proof bowl or in a double boiler. Over a pan of simmering water, whisk the whites and sugar until frothy and sugar completely melted. It will take a couple minutes. You can test by touching the mixture between your fingers, and if you feel any sugar granules just keep whisking mixture over the water bath.
- Make sure the bottom of the bowl isn’t touching the simmering water.
- Transfer the mixture to the bowl of a stand mixer.
- With the whisk attachment, start whisking the mixture on low for about 30 seconds, then gradually start increasing speed to medium. Whisk on medium for one to two minutes, until mixture is white and starting to become fluffy. Raise speed to medium-high and finish whipping for a few more minutes until stiff peaks are formed. Best way to check this is to keep your eye on the whites. Once they get glossy and you start seeing streaks formed by the whisk, it might be time to stop.
- Whisk until stiff peaks have formed. When you pull your whip up, the peaks should be shooting straight up, not bent down.
- Pour the sifted powdered sugar and almond flour into stiff whites.
- Start folding gently forming a letter J with a spatula.
- Add the food coloring at this point, if using. In the case of these Mint Macarons, I used two different colors.
- To make the two color shells, follow these instructions.
- Add a little bit of green and teal to the meringue.
- Fold the dry ingredients with the meringue until just incorporated.
- Once you can see no more streaks of dry ingredients in the batter, separate it into two different bowls.
- Cover one bowl with a towel so the batter doesn’t start drying, and work with one batch at a time.
- Fold the first batter until it reaches the proper consistency, flowing effortlessly off the spatula. Read below on tips for identifying the right consistency.
- Then, transfer this batter to a piping bag, secure the top so the batter doesn’t leak out, and set it aside.
- Next, it’s time to color the remaining batter. I wanted to do a swirl effect with a darker green color, so grab the second bowl, and add a bit more green to the batter, to make a stronger more vibrant color. Fold until the proper consistency is achieved, and transfer the batter to another piping bag.
- How to know when to stop folding the batter: It’s time to stop folding when the batter is glossy and has a thick and flowing consistency. There are several ways to test this.
- First, pick up some batter with the spatula and try to draw a figure 8 with the batter that is dripping off the spatula. If you can form several 8 figures without the batter breaking up, that’s one indication that it might be ready.
- There’s another test you can do. I call it the Teaspoon test.
- Grab a teaspoon of batter and spoon onto the parchment paper or silicon mat. Wait a minute to see how it behaves.
- If the batter stays stiff, forming a point and doesn’t spread out a bit, start folding a little bit more, about 3 folds.
- Test again.
- Once the batter spreads out a bit and starts to look glossy and smooth on top, on the baking sheet, transfer it to the piping bag.
- You don’t want the batter to be too runny either. So be careful not to over mix. It’s always best to under mix and test several times until the proper consistency has been achieved.
- The best way I can describe this stage being perfect is when you hold the spatula with batter on top of the bowl and the batter falls off the spatula slowly but effortlessly. The batter will keep flowing off the spatula non-stop, but not too quickly.
- So, when both batters are ready and inside piping bags, snip the end of the piping bags with scissors, and place both piping bags in the piping bag fitted with the large round tip. (watching the video located on this page, or on Youtube will help you see how this was done)
- Place the piping bag containing both batters directly 90 degrees over the center of each macaron template. Apply gentle pressure and carefully pipe for about 3 seconds, and then quickly pull the bag up twisting slightly.
- Once you’ve piped as many circles as you could, bang the trays against the counter a few times each. This will release air bubbles that are in the batter and prevent your macaron shells from cracking.
- Use a toothpick to pop any air bubbles in the surface of the shells.
- Let the trays sit for a while so the shells will dry out a little bit. I usually leave about 20-40 minutes, depending on how humid the day is. You’ll know they’re ready when you gently touch the surface of a macaron and it seems dry.
- Pre-heat the oven to 300ºF.
- Bake one tray at a time.
- Bake for 5 minutes, rotate tray.
- I bake each tray for about 18 minutes.
- When baked, the macarons will have a deeper color and formed feet. If you try to move a macaron, it shouldn’t feel jiggly. If the macaron is still jiggly, keep baking.
- Remove from the oven and bake the other tray.
- Let the macarons cool down before proceeding with the filling.
Mint Chocolate Ganache
- Chop dark chocolate very finely. Place it in a bowl. If you are using chocolate chips no need to chop them, simply place them in a bowl.
- Heat the coconut cream in a small pan over medium heat, or in the microwave. No matter what method you choose, be very careful not to boil the cream.
- Pour hot cream over chopped chocolate. Let it stand for a minute.
- Start whisking gently until completely melted.
- Add the mint extract and stir to combine.
- Let it come to room temperature. Refrigerate for about 20 minutes before using, until it has piping consistency.
- If the ganache stays in the fridge for too long, and it’s too thick and hard to pipe, insert it in the microwave for a few quick seconds, and stir it again. Test for consistency and keep going until you achieve the desired consistency.
- To be pipeable, the ganache should be thick, but easy to spread.
- If it happens that the ganache is too thin, you might want to put it in the fridge for a few minutes so it will harden up.
To assemble
- Place the ganache in a piping bag.
- Pipe a bit of frosting in the middle of each bottom shell.
- Top with another shell.
To decorate
- If you wish to dip the macarons in chocolate, as I’ve done with some of mine, first place them in the fridge for at least 30 minutes, so the ganache filling will have a chance to set.
- Then remove the macarons from the fridge, melt 3 oz. of chocolate.
- Dip half of each macaron in the chocolate, and then place it on the baking sheet.
- You can also place the melted chocolate in a piping bag and snip the end with scissors, and drizzle on top of the shells, and then top with chopped chocolate.
- Let the macarons chill in the fridge.
- It’s always best to let the macarons mature overnight before serving.
Storage
- These Mint Macarons will stay well in the fridge for 5 to 7 days, and they will also keep well if frozen for 1 to 2 months, in an airtight container.
These were TOO good! Definitely will make again!
I am so glad to hear!!
Hi! Will the scent of mint affect other flavored macarons if we put them in a box? Thanks in advance!
I feel like it could.
Could I have the ingredient measurements in cups and tablespoons? I don’t have a scale. Thanks!
HI,
I absolutely LOVE your recipes! It always works perfectly, but I don’t have much of a shine to them. Is there something I could be doing to add shine?
Thanks!
AM
not resting will add the shine 🙂
Trying these tomorrow. ❤️ Do you not put mint extract in the macaron mix? It’s just for the ganache?
You could, but I wouldn’t add more than 1/4 tsp or so, add at the final stage of whipping the meringue.
Omg I was today’s years old when I learned that peppermint extract is different from mint extract 😂😂 waiting for them to chill in the fridge haha
They’re still pretty similar, just peppermint has more menthol taste lol
Didn’t even know mint and peppermint were different. I have the peppermint one. How much should i use then? Thanks
same amount
Hi Camilla do you think this tastes similar to the Girl Scout thin mint cookies? This sounds delicious! The Girl Scout says thin mint are crispy chocolate wafers dipped in a mint fudge coating!
for sure. maybe if you made the chocolate shells also chocolate, and also use semi-sweet chocolate instead of dark, it would resemble it even more.
Great point! For the ganache, do you think we should still use the coconut cream or heavy cream?
I will update you when I try! Thanks for sharing awesome recipes with us & being so helpful!!
I prefer using heavy cream, but I decided to make a coconut cream one to offer a dairy free option since I already have so many regular ganache recipes here on the blog. You can use either, I just prefer heavy cream.
Can you use Andes mint chips instead of the mint extract?
sure I dont see why not!
Thanks I’ll try it!
Isn’t there dairy in the chocolate?? If not I’m super excited to have a dairy free recipe!
there are a lot of dairy free chocolate brands out there.
Do I add 100g egg whites plus 4g egg white powder together? Seen another article where you mention adding the EWP but don’t see it mentioned in this ingredient list.
anytime you use egg white powder it’s simply in addition to everything else, it doesn’t change anything else in the recipe. If you wanna add it to the shells just add 4 grams of egg white powder per 100 grams of egg whites. I don’t use it on all of my recipes, specially if the weather is super dry. It’s not mandatory to use egg white powder, it’s just optional to improve the fullness of the shells, the stability of the meringue, etc.
Your macarons look so perfect. What kind of baking sheet do you use to bake your macarons?
I use nordic ware.
Hi, I saw you included mint extract in ganache ingredient list. When shoud I add that when making ganache?
ops sorry about that!! you add the mint extract right after mixing the heavy cream with the chocolate, once the chocolate melts, add the extract and mix. Thanks for pointing it out, I’ve fixed it!
Hi if I wanted to put sprinkles on my macarons when would I do it?
once you pipe them, after banging the tray against the counter. Be mindful of the sprinkles you are using, some melt, or sink down on the shell. I find that the ones that work better are the nonpareils sprinkles. If the sprinkles are chocolate based, they will melt. If they are heavy, they will sink on the shell of the macarons and make them crack.
Made this filling today. Wonderful!
Hi, I love all your recipes and blog!
quick question, can i substitute coconut cream with heavy whipping cream?
absolutely
Parabéns Ca, suas receitas são sempre maravilhosas!!!!!!