Challah Bread
Hello friends! Today let’s make this recipe for homemade Challah Bread! It’s super delicious, and the braiding is easier than it seems.
I will show you how to braid a 4 strand challah bread. Also make sure to watch the video on this page or on Youtube, showing you exactly how to do that! It’s so much easier to understand and follow along with the video! But I will include pictures and instructions below.

I used to work at a Jewish-American style bakery. And everyday, I made loaves and loaves of challah bread. Braiding challah bread is so much fun, and kind of therapeutical in a way. This 4 strand challah bread is my favorite variety of the braids.
This post may contain affiliate links. I earn a commission from qualified purchases. Please read our Privacy policy here.
And I really recommend watching the video to learn how to braid the challah, however, I am going to show you some pictures below that can be helpful.
Basically, you will begin by lining up the four strands of challah next to each other.
Then pinch them together at the top.
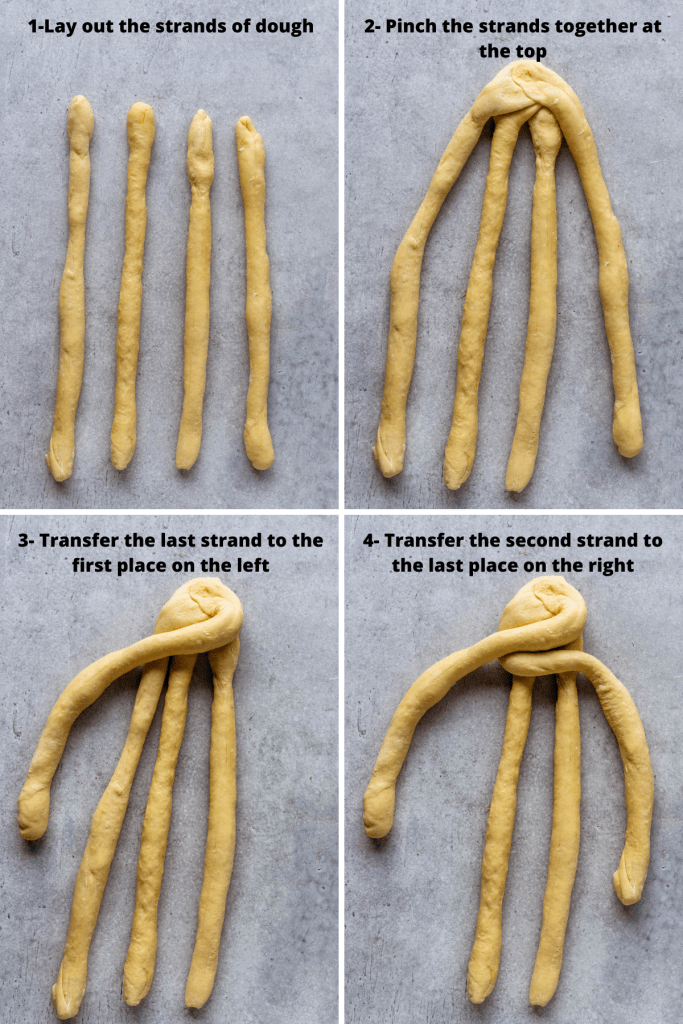
First move is to cross over the first and last strands, by bringing the last strand to the first place on the left, and the first strand (which now became second) will move over to the last spot, all the way to the right.
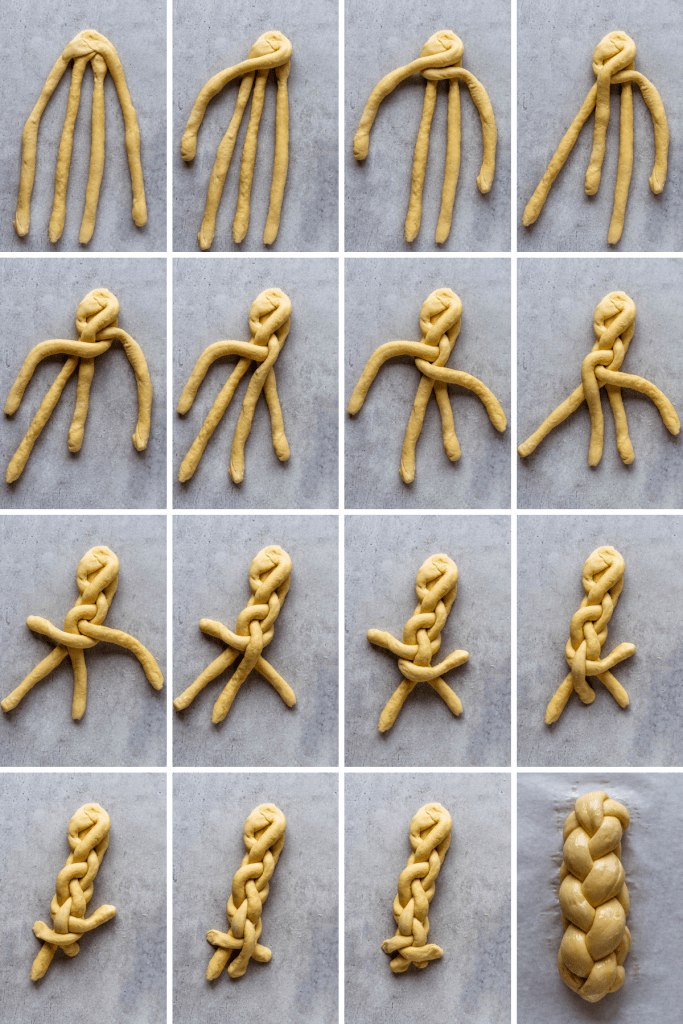
From now on, the movements will be the same set of 4 actions over and over until you reach the end of the braid.
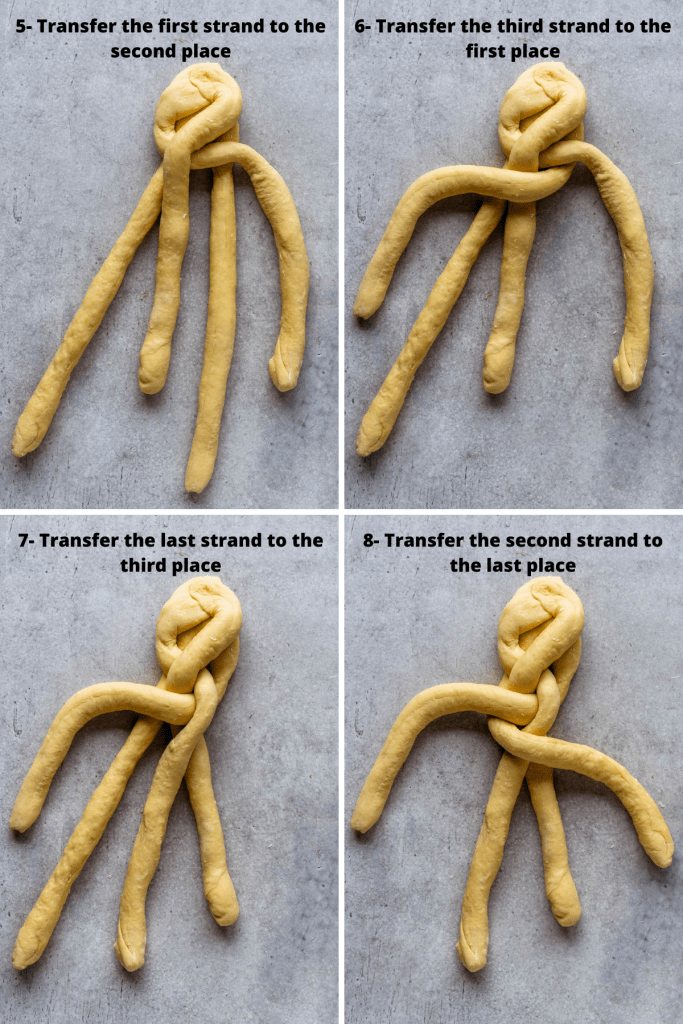
Transfer the first strand to the middle.
Then replace it with the third strand.
Transfer the last strand to the middle.
And replace it with the second strand.
Now go back to the top and repeat. First to the middle, replace with the third. Last to the middle, replace it with the second.
I will say it again, watch the video on Youtube, or on this channel, and follow along as you are braiding, it will be a breeze!
It is much easier once you have the strands of challah in front of you and you follow along as you watch the video.
There are many challah recipes out there, and each has its own twist or technique. I believe in keeping it simple, straight forward, so that’s what I am focusing on.
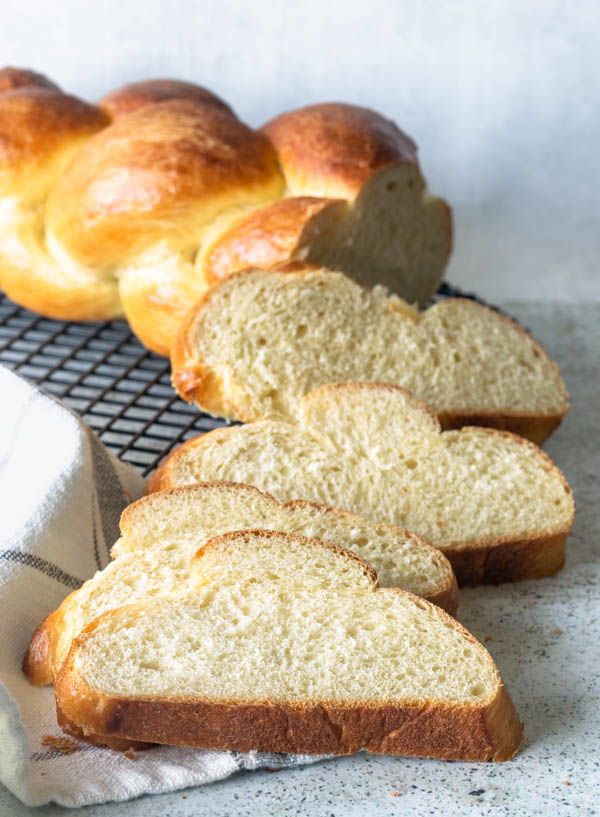
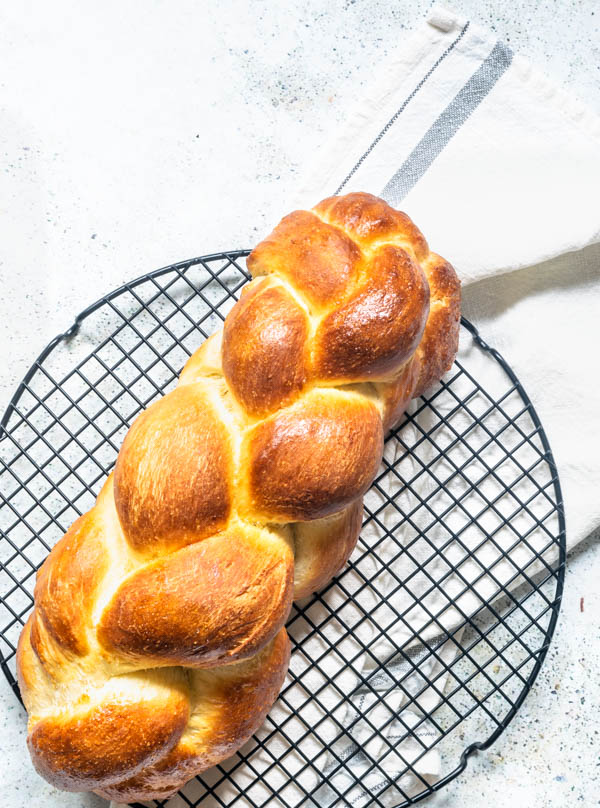
Challah bread is simple and easy to make. From beginning to end it can take only 2 hours to make the bread, if you are familiar with yeast breads, and with the braiding. With practice you can get there! But again, even being a beginner baking, following along the video and my detailed instructions, you will succeed at making this delicious soft challah bread.
Tips on making Challah Bread
- You can use a stand mixer or your hands to make the bread. I like doing both, though the stand mixer does save some time. Kneading by hand will take about 10 to 12 minutes, and half of that time by using the stand mixer.
- Use instant yeast, not active. If all you have at hand is active yeast, then make sure to proof it first. To proof active yeast, make sure the water is warm (90 to 110ºF), and then mix the water, sugar, and yeast. Let this mixture sit for 5 to 10 minutes until it bubbles up. Then add all of the other ingredients to the bowl and proceed with the regular mixing/kneading described in the recipe below.
- You can make the dough, and then immediately place it in the fridge (without letting it rise), and then remove on the next day, and proceed with shaping it into the loaves, let it rise again, and then bake.
Keep reading below for more tips!
This recipe makes 1 large loaf, 2 medium loaves, or 3 smaller ones. You can even make rolls with this recipe. Baking time for the smaller ones will be lower than for the larger loaves.
The bread is done baking once the internal temperature measures 190 to 200ºF. Don’t over bake or it will be dry and hard.

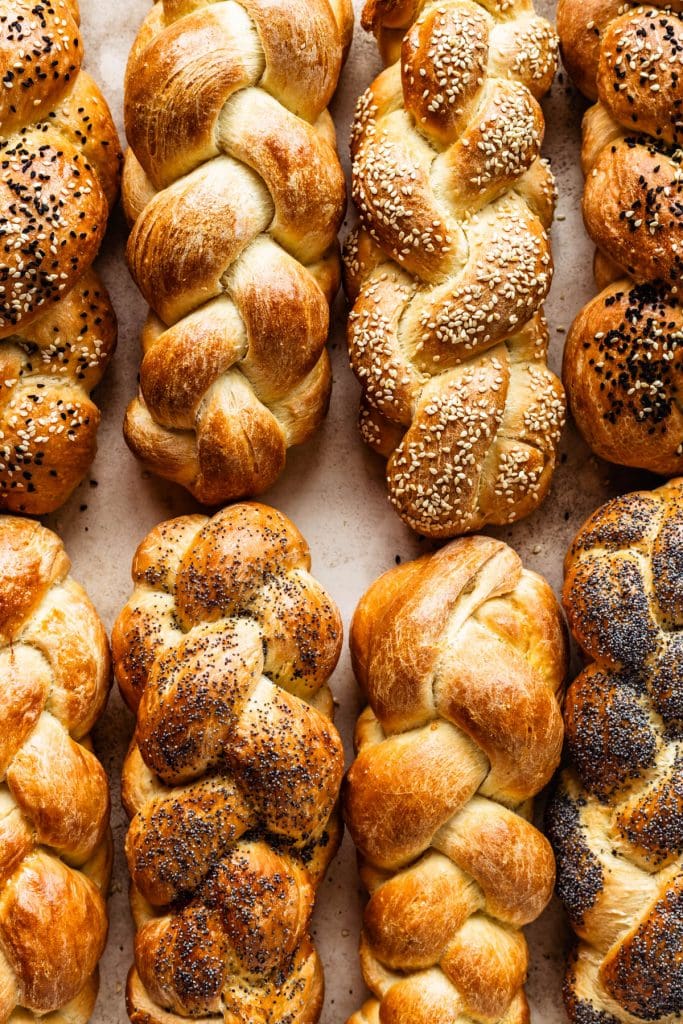
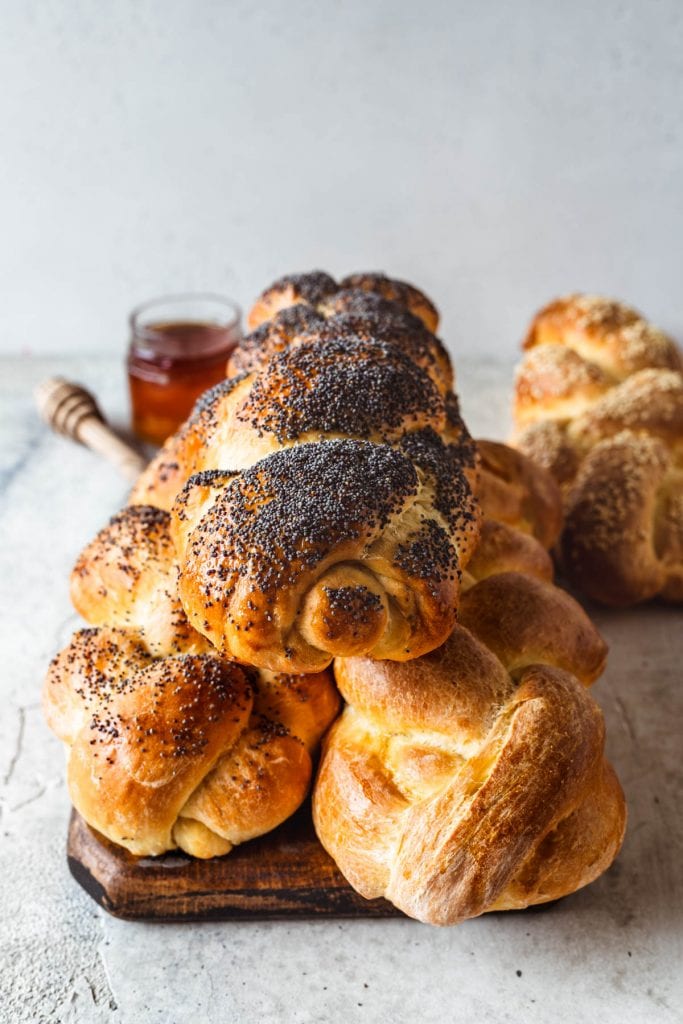
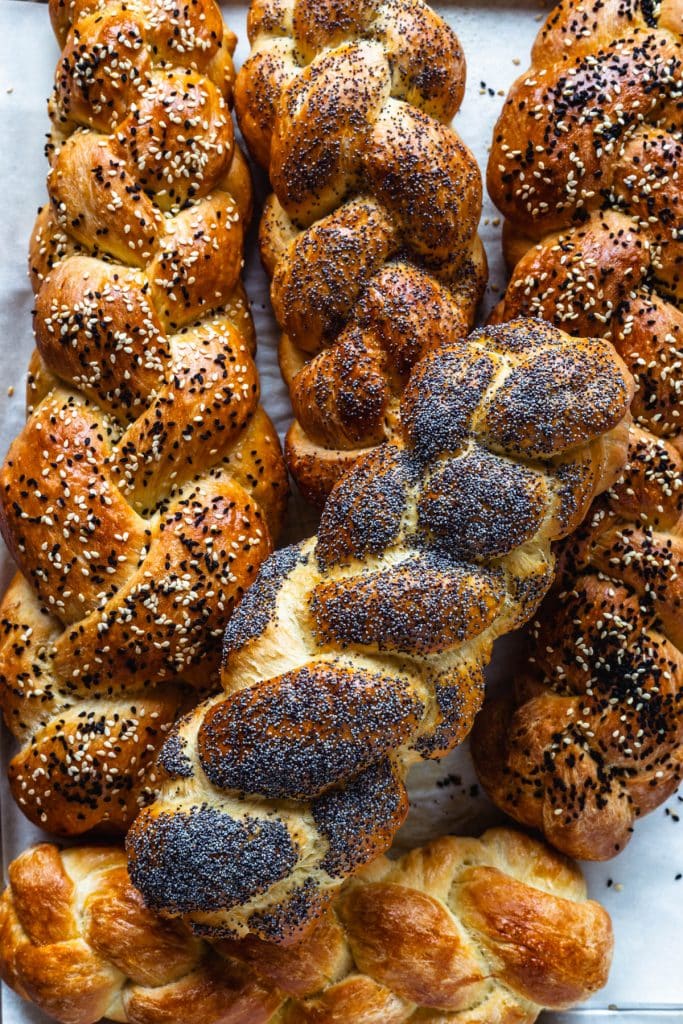
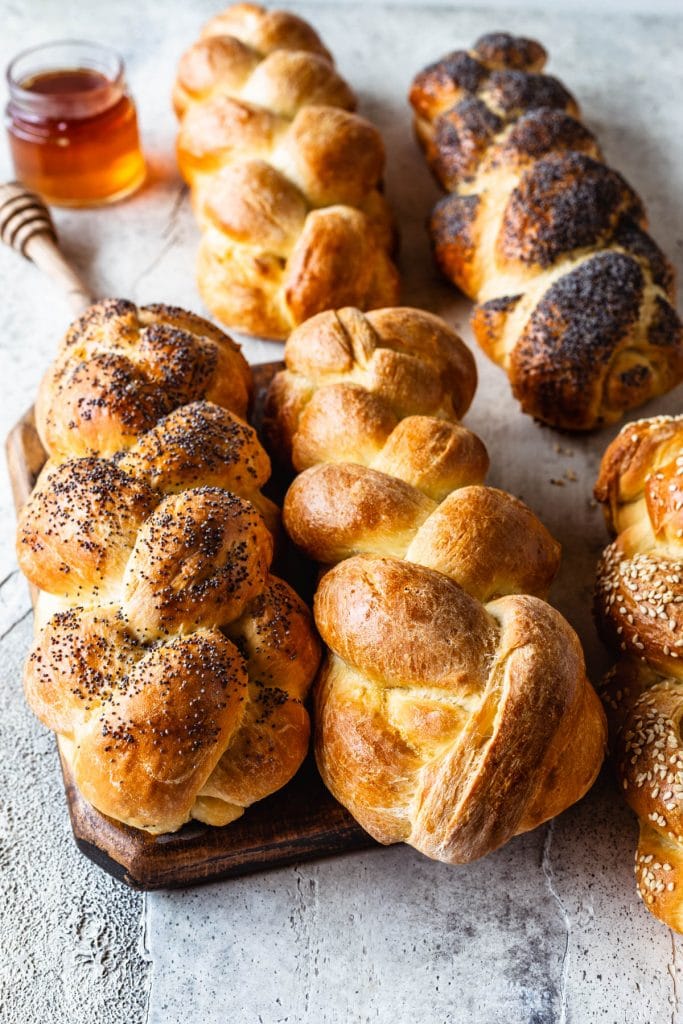
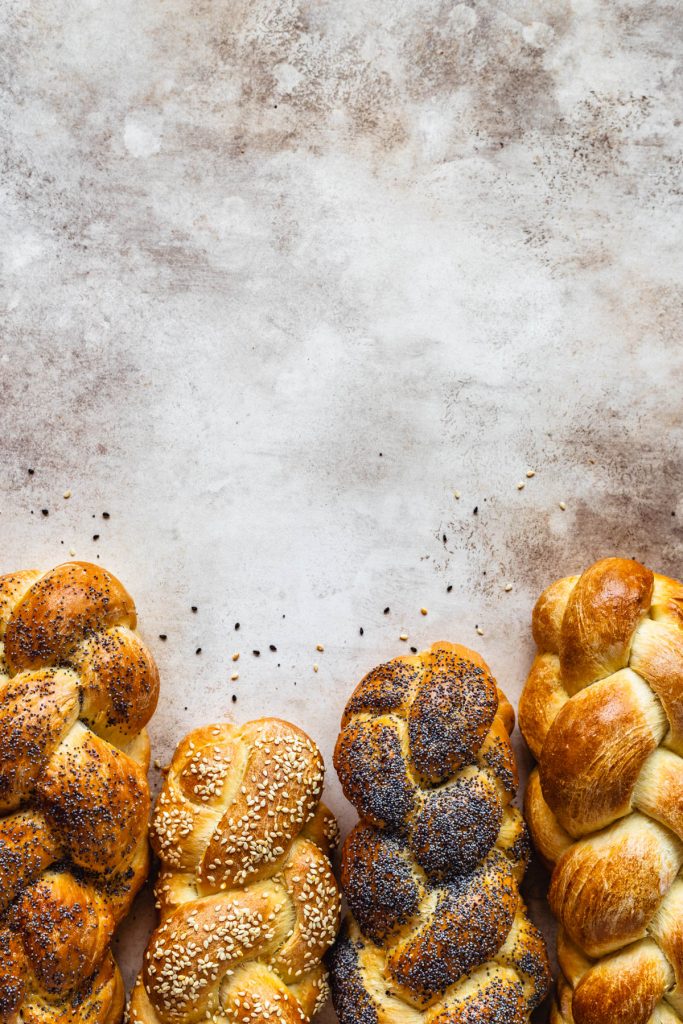
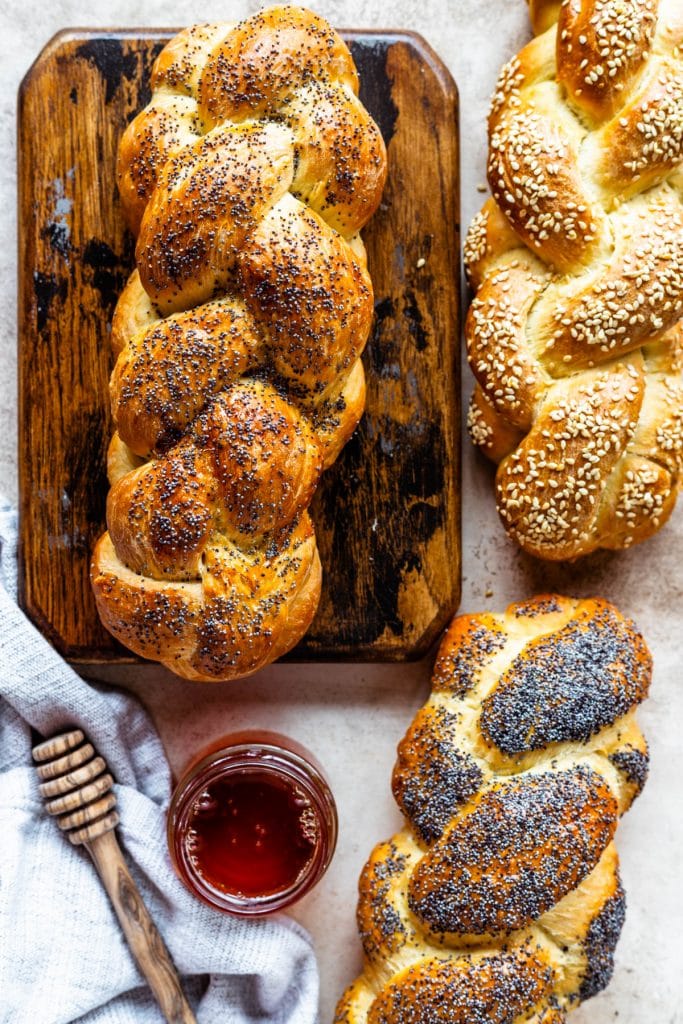
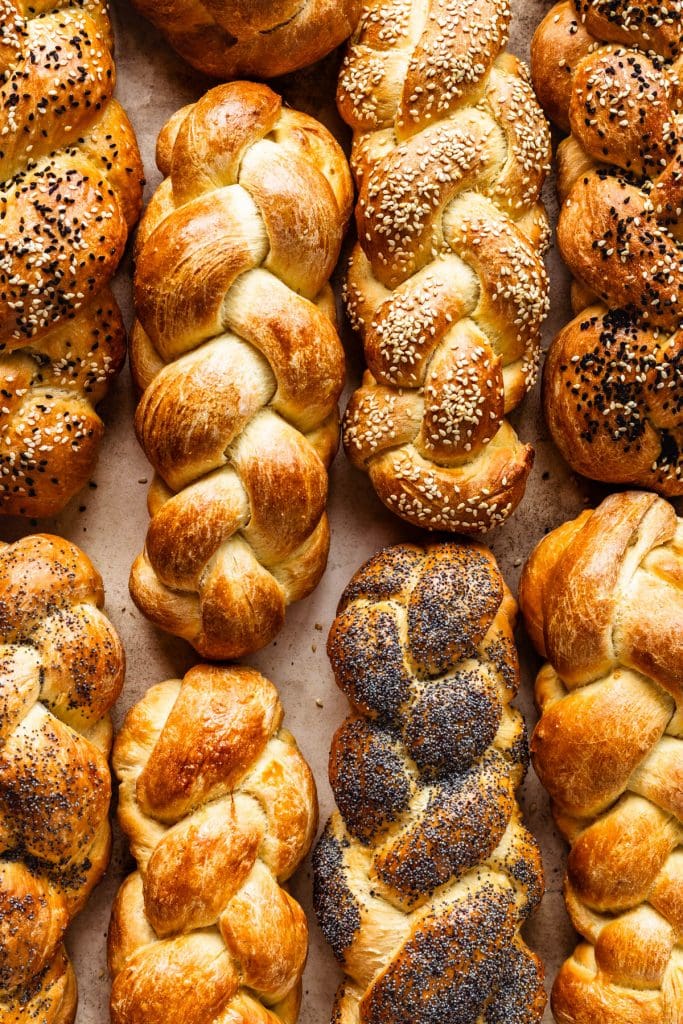
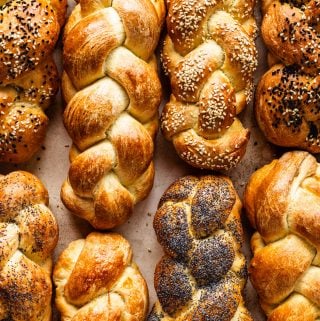
Feel free to top the challah with any toppings of your liking, such as sesame seeds, poppy seeds, and even EBTB.
My favorite topping is the poppy seeds!
I like to brush the challah bread with egg wash twice before baking.
Brush the loaf with egg wash before proofing, and then once again after proofing.
We brush the loaves with egg wash before rising because at that point the dough will be more sturdy, and you will be able to get into all the crevices. Once the dough rises, it will be softer, and you will have to be more gentle with the brushing not to deflate the dough.
You can use whole egg wash to brush on the bread before baking, instead of egg white wash, as I indicate. The bread will have a more yellow color if using whole eggs. I prefer the looks with just the egg whites.
How to serve Challah Bread
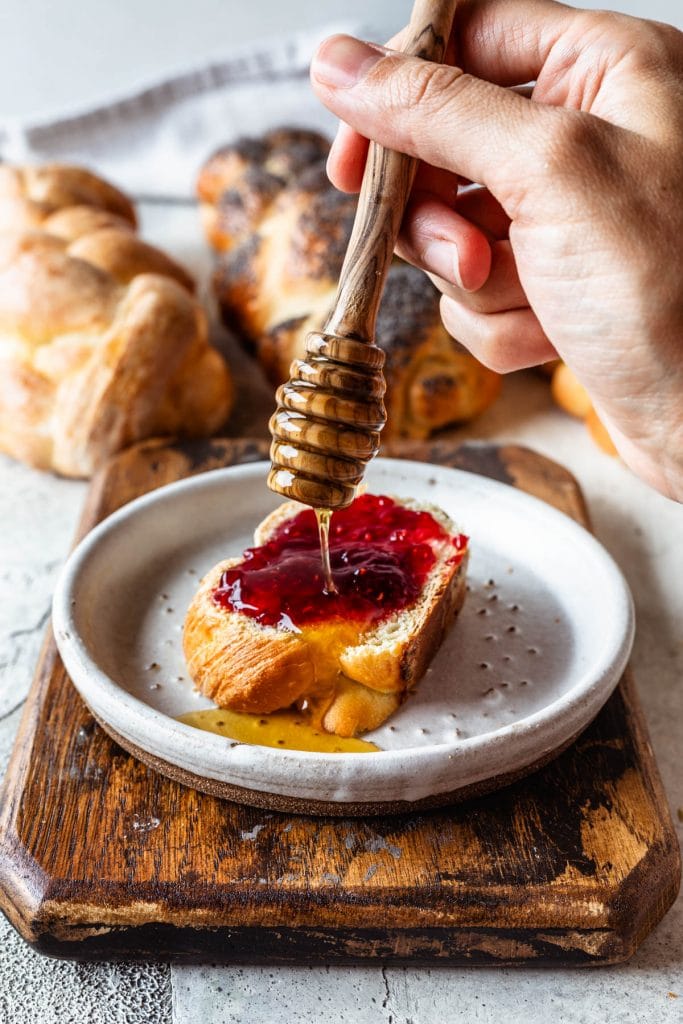
My favorite way to serve Challah Bread is to toast the slices, and then serve them with jam spread on top and a drizzle of honey.
Challah bread is great for sandwiches, actually at the Jewish Bakery I used to work at, we made them into rolls for the sandwiches that we served at the deli.
Since I made 9 loaves of challah for the video and for the pictures for this post, I have turned one loaf into garlic croutons to eat with soup yesterday.
I sliced the loaf into crouton size pieces, then mixed in a bowl with olive oil and a touch of pink salt.
Then I baked in the 350ºF oven for 20 minutes, stirring in between to bake evenly. And then I removed from the oven and mixed the croutons with garlic powder, and some other spices!
We have also made french toast yesterday, and other suggestions are:
- bread pudding
- baked french toast casserole
- toasts
- sandwiches
- panzanella
- Brown betty (seriously yummy, pieces of bread, apples, sugar and butter baked into a casserole! Here is a recipe by the Pioneer Woman)
Can you freeze Challah Bread?
Most certainly you can freeze challah bread!
Wrap the baked loaves, or place them in freezer ziploc bags, and place them in the freezer for about 1 to 2 months. To thaw, simply place them in the fridge overnight. Then remove them from the fridge and serve.

If you like this Challah Bread recipe, here are some more recipes you might enjoy:
- Lemon Raspberry Rolls
- Sourdough Everything Bagels
- Cashew Caramel Babka
- Cranberry Pistachio Babka
- Cheddar Jalapeno Sourdough Bread
- Vegan Rolls (a vegan alternative, without eggs that would actually shape a nice challah!)
If you make this recipe please leave a review below! The reviews really help out the blog and other readers! Also tag me on instagram, I love to see your creations, and I am always so honored.
Thank you for reading!
Challah Bread
Ingredients
Challah Bread
- 4 to 4 1/2 cups all-purpose flour (18 oz to 20.25 oz, 510 grams to 574 grams)
- 2 tbsp sugar (0.88 oz, 25 grams)
- 1 tsp kosher salt (0.2 oz, 6 grams)
- 1 1/2 tsp instant yeast (0.16 oz, 4.65 grams)
- 2 tbsp butter softened (1 oz, 28 grams)
- 3 large eggs
- 1 large yolk
- 6 oz water (170 grams)
For egg wash
- 2 egg whites whisked until frothy
Instructions
- Stir 18 oz of flour (4 cups), sugar, salt and yeast in a large bowl, or in the bowl of a stand mixer. Leave the 1/2 cup of flour on the side.
- In a measuring cup, mix butter, eggs, yolk and water.
- Pour the wet ingredients over the dry ingredients.
- Mix with a spoon or with the paddle attachment of a stand mixer.
- Once the dough is incorporated, start kneading. You can do this either by hand or with the dough hook attachment of your mixer.
- Knead by hand for about 10 to 12 minutes (or 6 by machine, on medium-low).
- Add the remaining 1/2 cup of flour only as necessary, if the dough is too sticky.
- When done kneading, the dough should be soft, with no lumps, coming together into a smooth ball, not sticky to the touch.
- Lightly oil a large bowl. Transfer dough to the bowl. Cover with plastic wrap or a towel and let dough rise for 45 minutes to 1 hour, depending on how warm the kitchen is.
- You will know when the dough is ready by touching it. If it springs right back, it's ready.
- It's time to start braiding.
- You have the options of making this into one large loaf, two medium loaves, or 3 smaller ones. Divide the dough evenly between the amount of loaves you want to make, or keep it as is if you want to make one large loaf.
- Now divide each piece of dough you will turn into a loaf into 4 equal pieces, for our 4 strands. I like to do this by weighing with a scale, this way all strands will have the same length and thickness.
- Roll each piece of dough into a long strand, with both hands, by rolling from the middle out to the ends, against the counter. Make sure to watch the video above or on YouTube to see how this is done. The thinner you roll the strands, the thinner and longer your loaf will be.
- Line up each strand next to each other.
- Pinch the strands together at the top.
- Begin by crossing over the first and last strand. First, move the last strand to the first place. And then, the first strand (which became second now) will move over to the last spot.
- From now on, the movements will be a repeating set of 4 actions, as follows:
- Move the first strand to the middle (between 2nd and 3rd strand), and then move the second to last strand to the first spot.
- Then move the last strand to the middle (between 2nd and 3rd strand), and then move the second strand to the last spot.
- Now back to the first strand. Move the first strand to the middle, and replace it with the third strand.
- Then move the last strand to the middle, and replace it with the second strand.
- Repeat this until you reach the bottom of the dough and can't braid anymore.
- Make sure to watch the video to see exactly how this is done and follow along to make it so much easier for you.
- Now make sure to tuck the ends under the loaf nice and tight.
- Lightly whisk the egg whites for the egg wash.
- Brush the frothy egg white all over the bread, including all the crevices.
- Cover with a towel or plastic and let it rise for another 45 minutes to one hour, until the dough has puffed up.
- Meanwhile, pre-heat oven to 350F.
- Once the loaf has puffed up, and you can gently touch the top with a finger and it springs right back, brush it again with egg wash. At this point, you can also sprinkle the bread with some sesame seeds or poppy seeds.
- Bake the loaf for about 15 minutes. Rotate the pan for even baking. Continue to bake for another 15 minutes or so.
- The bread will be a deep golden color and the center should register between 190F and 200F.
- Let the bread cool completely before slicing it.
Storage
- Store in an air tight container or bread bag for up to 4 days at room temperature. Or wrap tightly and freeze for 1 to 2 months.
Notes
Nutrition
SaveSave
I would like to know if this recipe can be made in a bread maker.
Thank you.
Ellie
For sure. Follow the instructions from the manufacturer, but for sure.