Home » Blog » Bread

Vegan Dinner Rolls

Hey friends! Let’s do some baking today! I mean, over here, there’s baking going on pretty much on the daily. And last week I made these incredible Vegan Dinner Rolls! Check it out!

I made these rolls with my 3 year old son Luke as you can see on the video on this page. We usually have a ton of fun baking together in the kitchen!

Vegan Dinner Rolls

Anyway, let’s talk about these Vegan Rolls.

This post may contain affiliate links. I earn a commission from qualified purchases. Please read our Privacy policy here.

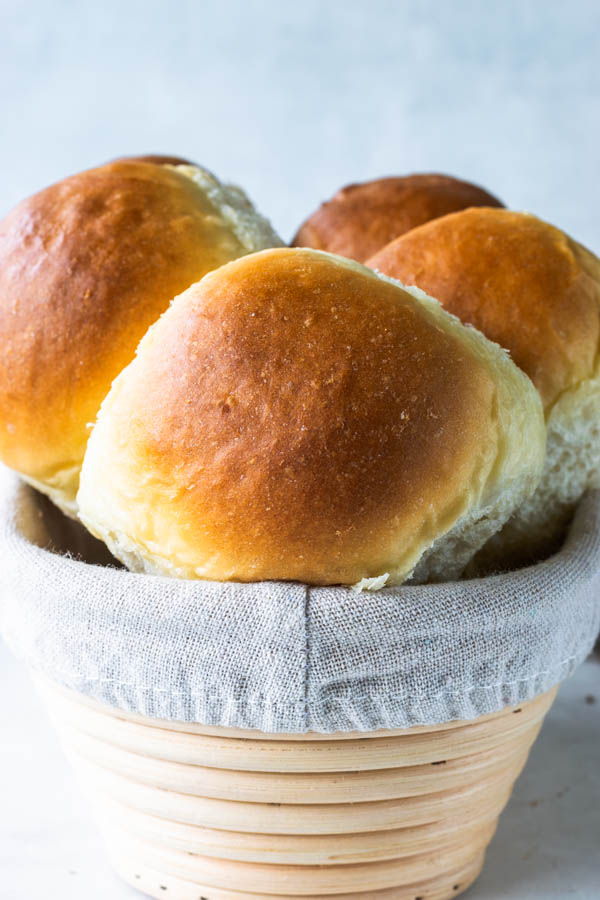
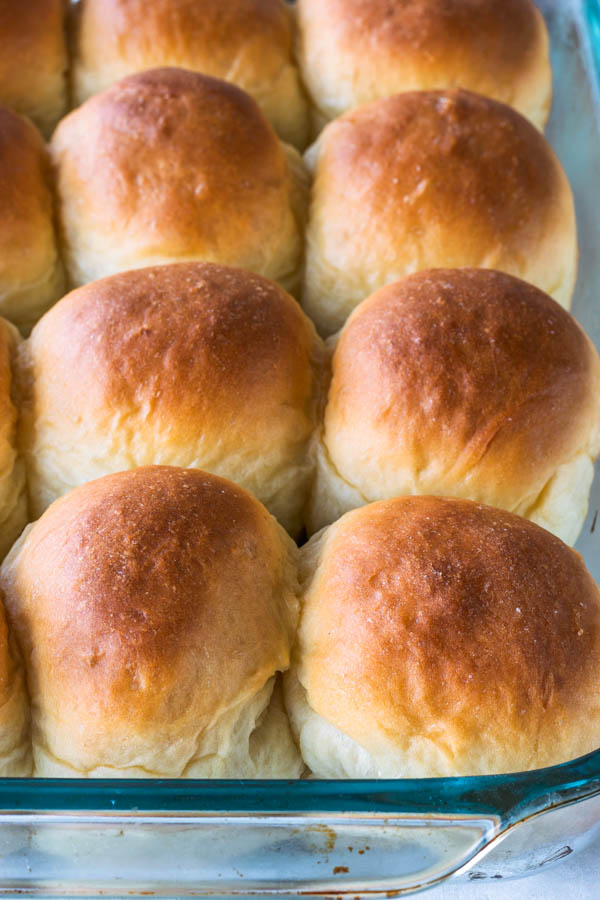
These are dinner rolls without eggs, without cow’s milk. Made with vegan butter. You can try substituting the butter for coconut oil in the recipe, but I don’t recommend brushing the rolls with coconut oil as they get out of the oven.

Vegan Dinner Rolls

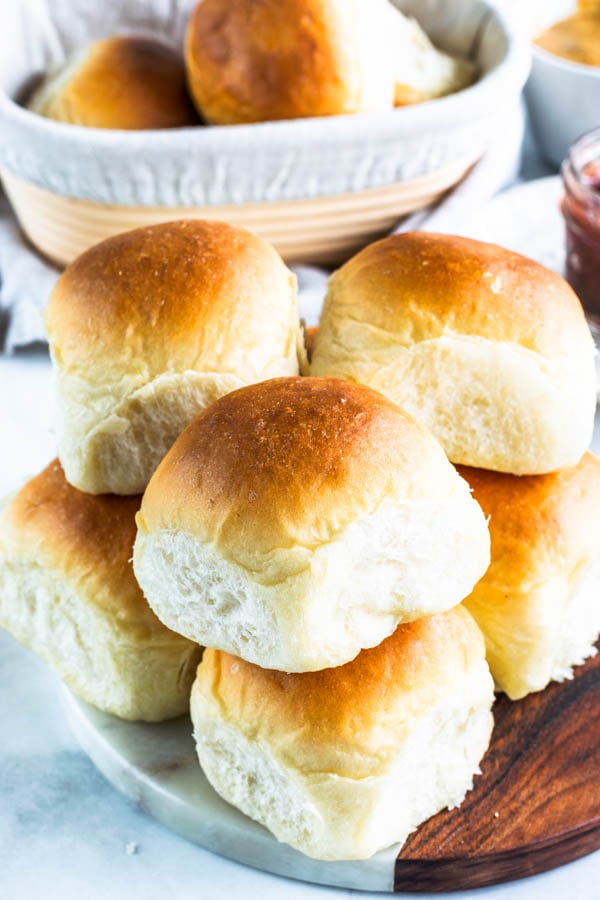
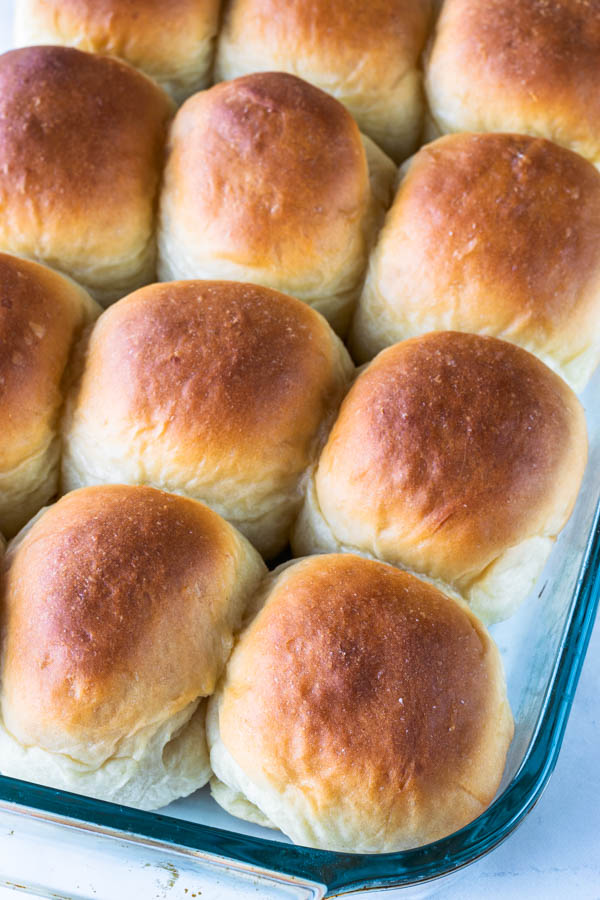
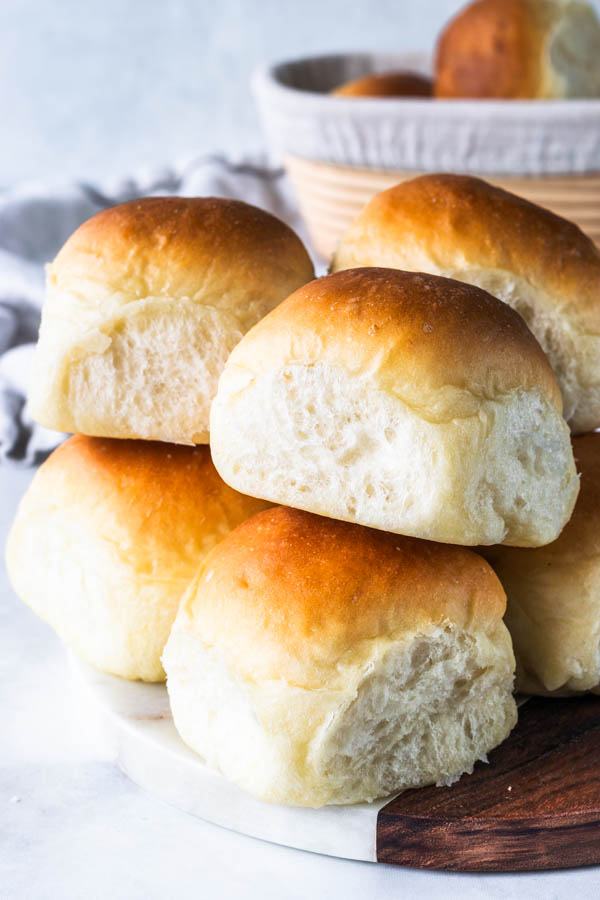
These vegan rolls were absolutely fluffy and delicious!

You should check it out for yourself and make them! If you watch my video of me making this with my son, you will see these rolls aren’t hard to make at all. The only thing that takes time is waiting for the rolls to rise, really. Besides that, it’s a walk in the park.

Vegan Dinner Rolls

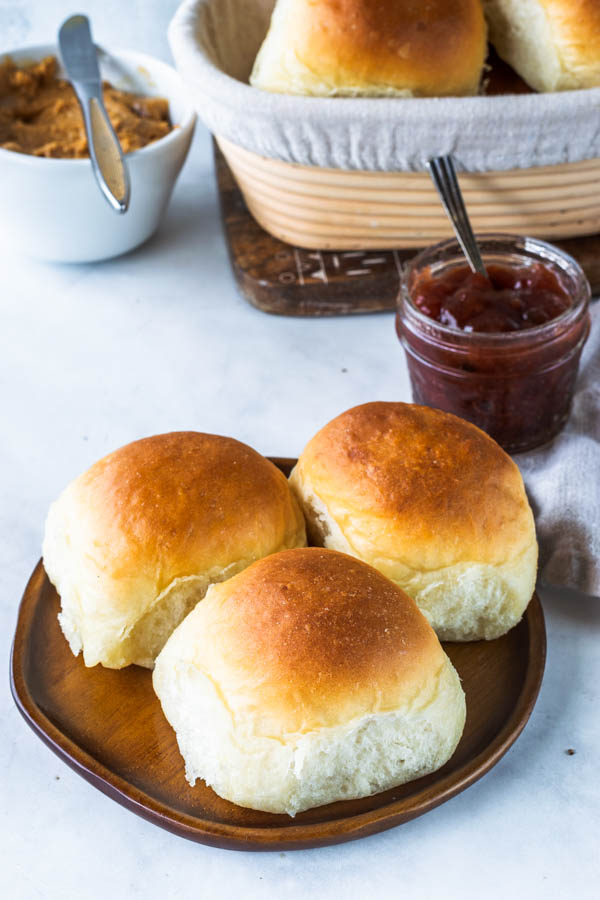
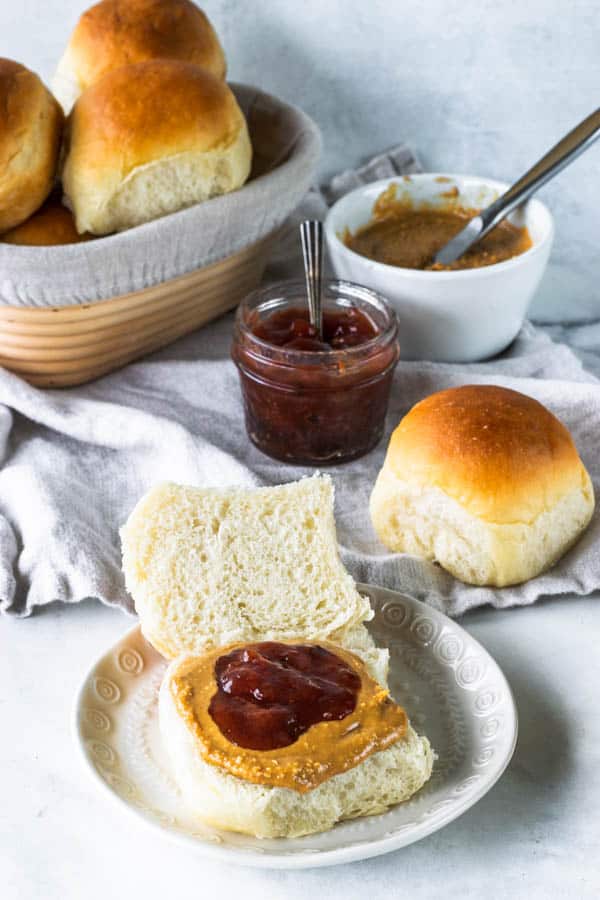
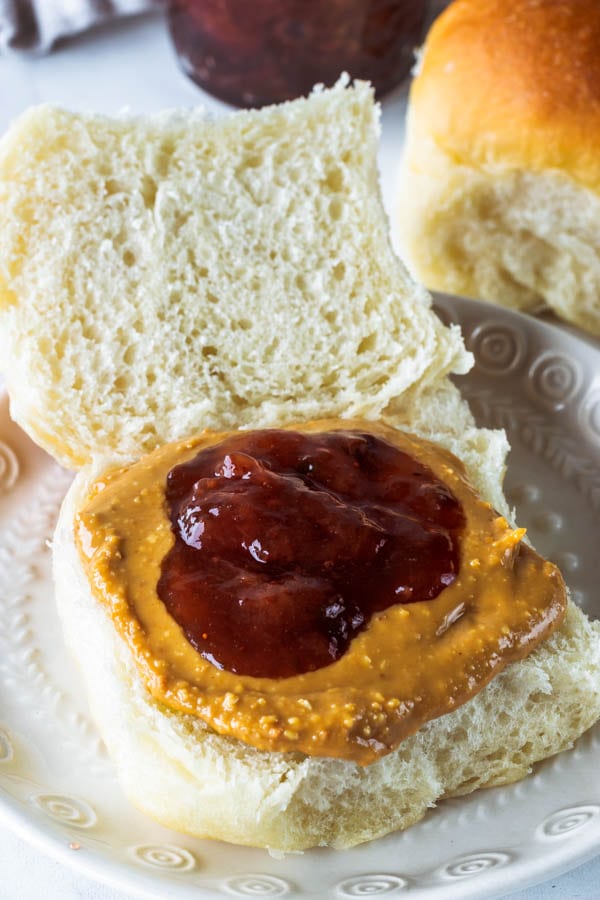
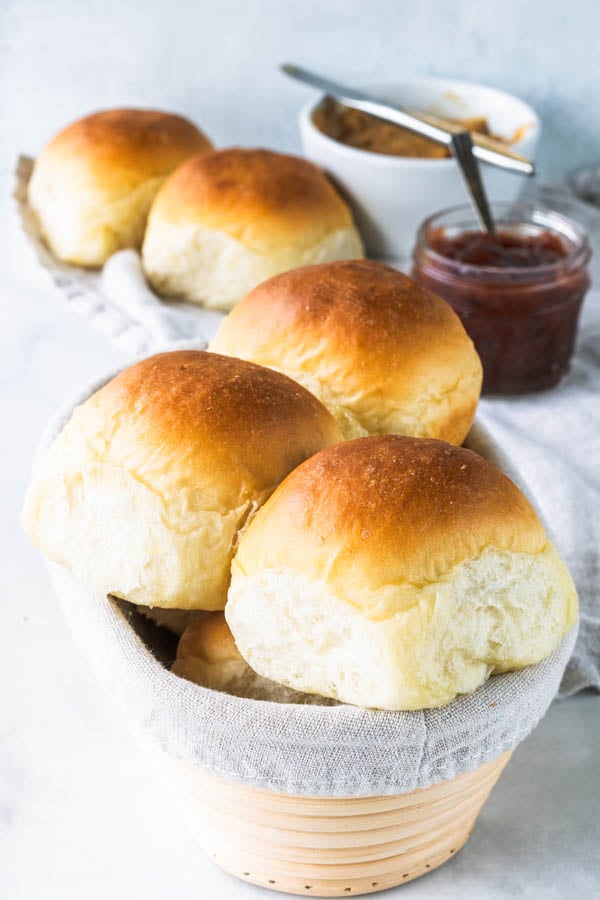
My favorite way to serve these Vegan Dinner Rolls was to make vegan Peanut Butter and Jelly sandwiches with them.

Vegan Dinner Rolls

Reasons why you should make these Vegan Dinner Rolls:

  • These are super fluffy Vegan Dinner Rolls
  • They are made with the best ingredients if you have any allergies to eggs, milk, or simply choose to have a vegan diet
  • These are the fluffiest Vegan Dinner Rolls ever, forget vegan, these are THE fluffiest Dinner Rolls ever
  • They are easy and quick to make
  • These Vegan Dinner Rolls store for quite a bit of time in the fridge, and can even be frozen (after baked)
  • Have I mentioned… FLUFFY?
Vegan Dinner Rolls

No excuses, get in the kitchen and bake these! You will love them!

Vegan Dinner Rolls

You can serve these Vegan Rolls with Peanut Butter and Jelly like I did, or you can eat them plain, like my son! Or you can even make sandwiches! So many options!

Vegan Dinner Rolls

I’ve been baking some vegan bread lately, I just published this Vegan Cinnamon Babka not too long ago.

Here are some more vegan recipes you might be interested in:

Check out my sweet vegan recipes here. Here are some of the savory vegan recipes.

Vegan Dinner Rolls

I hope you enjoyed today’s recipe. And I hope you enjoy vegan baking as much as you do, which you probably do if you made it reading until the end of the post.

Vegan Dinner Rolls

Have a lovely day! Thank you for stopping by!!

Vegan Dinner Rolls

Vegan Dinner Rolls

Vegan Dinner Rolls made dairy free, egg free, so fluffy, and delicious!
5 from 6 votes
Prep Time 20 minutes
Cook Time 25 minutes
Resting time 2 hours
Course Appetizer
Cuisine American, vegan
Servings 12 rolls
Calories 110 kcal

Ingredients
  

  • 1/2 cup warm water
  • 1 cup warm dairy-free milk almond, oat, or any other
  • 1/4 cup vegan butter melted
  • 1 tablespoon instant yeast
  • 3 tablespoons sugar coconut, or granulated
  • 1 1/2 teaspoon fine sea salt
  • 4 1/2 cups all-purpose flour
  • 2 tablespoons vegan butter melted

Instructions
 

  • Water and milk should be at 90F-100Place both in a bowl.
  • Add melted butter to the bowl.
  • Add sugar, yeast, salt, and flour to the bowl.
  • Mix with a spatula or spoon to incorporate ingredients.
  • Knead dough for 6-8 minutes, until it’s tacky, but not sticky, and smooth.
  • If the dough is way too sticky, try adding a bit more flour, but you shouldn’t add way too much more flour to it.
  • Form a smooth ball with the dough and place it in a lightly greased bowl. Cover with a towel or plastic wrap.
  • Let dough rise for 45 min – 1 hour. Depending on how warm your kitchen is, you may need more or less time to rise the dough. Remembering that yeast doughs rise faster in warmer places.
  • Once you can poke the top of the dough lightly with your finger and have the dough spring right back at you, you can consider it fully risen.
  • Remove dough from the bowl.
  • Cut into 12 equal portions. Roll each into a smooth ball.
  • Place rolls in a greased baking pan.
  • Cover and let them rise for 45 minutes – 1 hour.
  • Pre-heat oven to 350Bake for 15-25 minutes.
  • Once they are removed from the oven, brush the top with the 2 tablespoons of vegan melted butter.
Storage
  • Rolls will keep well in the fridge for up to 5 days, and on the counter for up to 3 days in an air tight container.
Keyword bread

Similar Posts

32 Comments

  1. 5 stars
    Made these for Thanksgiving and they were a huge hit! Thank you so much for sharing the recipe. I doubled the recipe, wanting 24 rolls, but the rolls turn out VERY large. You could easily get 24 dinner sized rolls from a single recipe. These are perfect yeast rolls, fluffy and light inside with a soft golden crust. Perfect with honey spread.

      1. The yeast needs the sugar, do you have any honey or maple syrup or anything like that? Because that will work as well in place of the sugar. Or even agave syrup.

  2. 5 stars
    Made these for dinner tonight and added in some dry spices. Divided into 16 still genrous sized buns. Brushed the melted vegan butter (seasoned with Cajun and garlic powder) during the last 10 min of baking to get deep brown on top. Wonderful recipe! Thank you for sharing it! Happy bellies all around the table

  3. 5 stars
    Yum! I made these as a test for Thanksgiving, and they are wonderful! I used Miyokos vegan butter, I used olive oil to grease the bowl and a glass (Pyrex) 9×13, and I added flaked sea salt on top of the melted butter once baked. My husband loved the addition of that flaked slat on top! I live near Denver, CO, so they needed the entire 25 minutes bake time. They are beautiful and large, but they are so GREAT because they are large. They are light and airy, so even though they come out looking impressively big, they are really a lot of air, so you don’t feel like you are eating a huge dense roll. Truly impressed. We’ve enjoyed them with butter and jam, and my husband has made pastrami sandwiches using them. Will make again 🙂

    1. that’s an amazing review! thanks for taking the time to write it! It means a lot to me and makes me so happy that you liked the rolls!!! sounds great to add flaked sea salt on top!!! Fabulous!!!

    1. yes you can, only change you need to do is that you’ll have to proof the yeast first. So, mix the warm water, milk, sugar and yeast in a bowl. Let them sit for about 5 to 10 minutes, until it blooms, or the mixture kinda bubbles up. Note that the water and milk should be at 90 to 100 fahrenheit degrees.
      Then, just add all of the other ingredients to the bowl and proceed regularly as the recipe indicates from step 4 on.
      Thanks Sara!

    1. yes you can. either make the dough, then place it in a lightly oiled bowl. and stick it right in the fridge.
      then you can remove from the oven the next day, divide the dough into rolls, place them on the baking tray, and let them rise before baking.
      Or you can make the dough, let the dough rise for 1 hour, shape it into rolls, place the rolls on the baking tray, cover it tightly and put it in the fridge.
      Then, next day, just pre-heat the oven, take the rolls out, let them sit at room temperature for about 30 min or so while the oven pre-heats, and bake.

  4. I am so ex ire’s to try thirst and they I guy do your recipes! How important is the temp of the ingredients and what can I do without a thermometer?

  5. Regarding the instructions saying “Once you can poke the top of the dough lightly with your finger and have the dough spring right back at you, – I was concerned that my dough left a finger imprint that did not “spring right back.” So I googled to see that that meant and, to my surprise, everything I read said that if it “springs right back”. it means it is NOT READY YET. This one from Food Network is succinct, “Feel: Bread dough that has successfully risen/proofed will spring back slowly when poked and leave an indent. If it snaps back too quickly, it needs more time.”
    So, it seems that you do not want it to “spring right back” actually as that means it is not quite fully risen. Hope that helps.

    1. Oh! I also see this:
      You’ll know it’s ready when you poke your dough with your finger and the indentation doesn’t spring back immediately. It should spring back very slowly. If it doesn’t spring back, it may be over-proofed and you should get it in the oven right away.

      So if it doesn’t spring back at all, it is over-proofed!

      I didn’t look closely at the indent in my first try at this, but perhaps it wasn’t springing back slowly., but not at all.. the rolls turned out dense and much more like biscuits than the fluffy rolls I was expecting. Also, the tops did not brown.

      So going to try a second time and keep a closer eye on proof time and also increase the oven temperature a bit. Thank you so much for sharing this recipe. I hope to get the fluffy outcome soon.

      Peace

      *note: In original post “googled to see that that meant ” should be “googled to see what that meant”.

  6. Has anyone divided the dough into two loaves and made bread instead? I loved the rolls and think it would make a great bread.

Leave a Reply

Your email address will not be published. Required fields are marked *

Recipe Rating


This site uses Akismet to reduce spam. Learn how your comment data is processed.