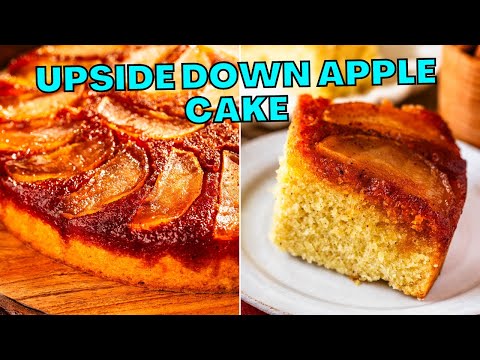
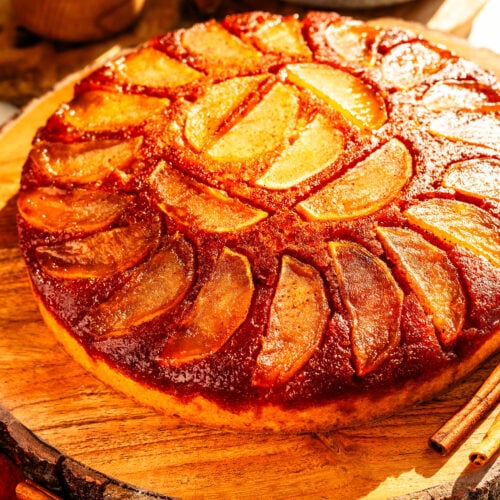
Apple Upside Down Cake
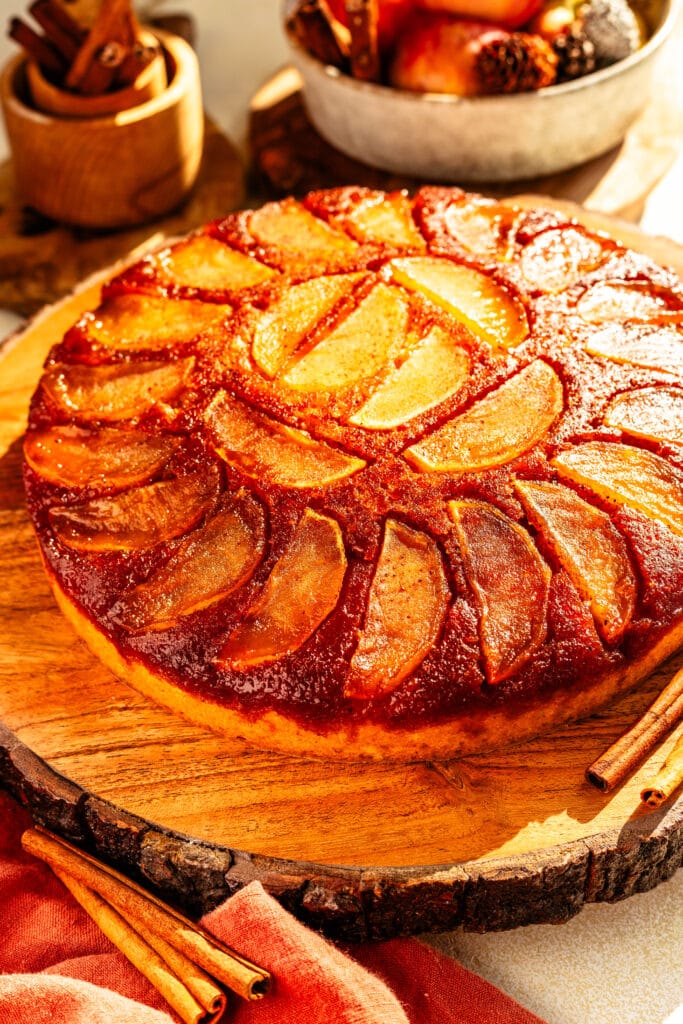
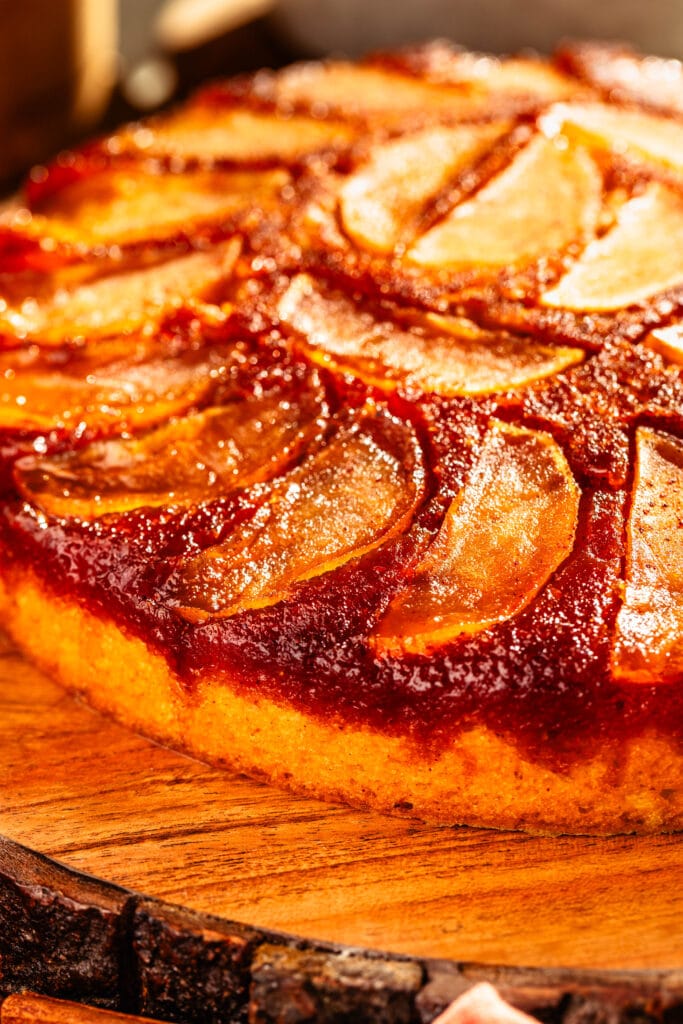
This Apple Upside Down Cake has a glossy caramel-apple topping and a soft, spiced cake that stays moist for days. The caramel melts into the apples as the cake bakes, giving you a buttery, melt-in-your-mouth topping without being overly sweet.
If you’ve ever struggled with caramel crystallizing or burning, this method is almost foolproof — and I’ll walk you through every step.
Why You’ll Love This Recipe
- No tricky dry caramel — this wet caramel is stabilized for success
- Beautiful presentation without complicated steps
- Warm fall flavors from cinnamon and nutmeg
- Reliable results whether you’re a beginner or experienced baker
- Customizable: swap apples for pears, pineapple, or peaches
How to make it
This is not a hard cake to make, the only tricky part really is the caramel, making sure you don’t overcook it, or avoiding the caramel from crystallizing.
This post may contain affiliate links. I earn a commission from qualified purchases. Please read our Privacy policy here.
A successful upside-down cake starts with the right pan setup.
- Use a 9-inch round pan, at least 2–3 inches tall.
- Grease the pan.
- Line the bottom with a circle of parchment paper and grease it again.
(Skipping parchment is the #1 reason upside-down cakes stick.)

Prepare the Apples
- Peel and slice apples into ¼-inch wedges.
- Toss with cinnamon, nutmeg, or any warm spices you like (cardamom, cloves, allspice).
- Arrange the slices in a single, tight layer on the bottom of the prepared pan.
Set the pan beside your stovetop — once the caramel is ready, you need to pour immediately.
Caramel Sauce
This is a wet caramel, which means water is added. It’s slightly more finicky, but with the steps below, it won’t crystallize.
Pour the sugar on a stainless steel saucepan. Add the water and the glucose or corn syrup, stir to combine. I like to gently stir the mixture, to avoid any sugar crystals to be stuck to the side of the pan, which can make the sauce crystallize.
The glucose will act as a stabilizer. You can use light glucose syrup, corn syrup, or invert sugar, which are all types of glucose. The addition of glucose is actually optional, but it helps the caramel not become crystallized. The corn syrup contains long chains of glucose molecules that help keep the sucrose molecules in the candy syrup from crystallizing.

Place the pan over medium high heat. Heat should actually be between medium and medium-high. If the heat is too low, the caramel will crystallize. And if it’s too hot, it can cause some of the syrup starts browning before other bits had a chance to dissolve, which will make the caramel will crystallize.
Let the mixture come to a boil, and let it cook. Don’t stir or move the pan at all. Let the mixture boil undisturbed. At first there will be a lot of bubbles moving very rapid. After a few minutes, the bubbles will subside and the syrup will look thicker.

Once the syrup has a light golden color, immediately remove it from the heat and pour over the apples. If you let the caramel sit in the pan, it will burn because the pan is hot and it will continue to cook the caramel, so in a mater of seconds it can become burnt.
Once you pour the caramel over the apples, set the pan aside and start making the cake batter.

Cake batter
The cake batter is pretty straight forward to make. Mix the flour with the baking powder, salt, and spices. I am using cinnamon and nutmeg, feel free to also add cardamom, ground cloves, or allspice if you like those spices. Add the eggs one at a time, mixing one egg until it’s fully incorporated before adding the next one. Once the eggs are incorporated, add the vanilla.
Next, add half the flour mixture to the bowl. Add the buttermilk and mix to combine.
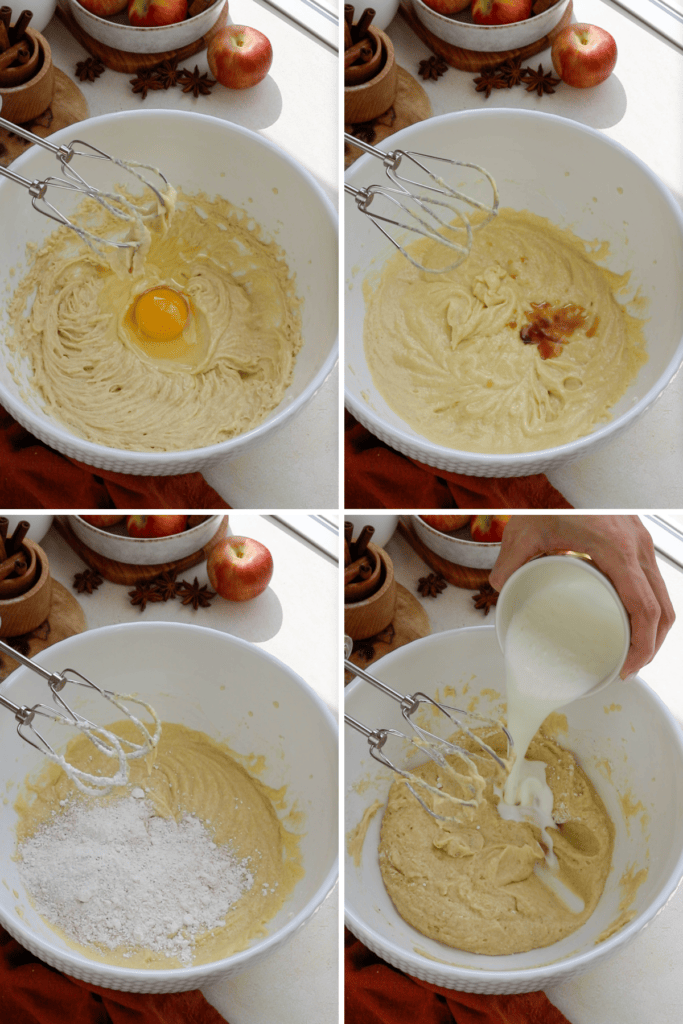
Add the remaining flour mixture and mix to combine.
You can finish mixing with a spatula, to ensure the batter doesn’t get over mixed.

Spread the mixture on the bottom of the cake pan, over the caramel apple slices.
Bake in the oven for about 30 to 40 minutes. Baking time will depend on your oven. Check by inserting a toothpick, and it should come off clean. If there’s batter stuck to the toothpick, keep baking for 5 minute intervals. You can also cover the cake with aluminum foil if it’s browning on the outside but the middle isn’t baking.
Remove the cake from the oven and let it sit for 15 minutes. You should be able to handle the cake pan with your hands, but it should still be warm.

Flip the cake onto a cake plate.
Let it cool down for another 20 minutes or so before slicing and serving.
Tips for making the caramel sauce
- Make sure to use a stainless steel saucepan, with a thick bottom. Don’t use non-stick or aluminum pan. They will likely cause the caramel to crystallize.
- Also ensure the pan is clean, even a bit of grease can make the caramel crystallize. You can even wipe the pan down with vinegar before starting.
- Use pure cane sugar.
- Brush the sides of the pan with water to ensure there are no sugar crystals there.
- Cook the mixture at medium to medium-high heat. You don’t want the heat to be too low or too high, as either can make the caramel crystallize.
- Don’t touch the pan or stir the syrup as it cooks, specially not before all the sugar has melted.
- Once the syrup starts browning in a few spots, gently swirl the pan once or twice only.
- Remove the syrup from the heat when it’s a light golden brown, it shouldn’t have a deep caramel color, but it needs to be way lighter, as it will continue to cook on its own heat when sitting with the apples, and then later when baking the cake.
- Immediately as you remove the mixture from the heat pour it over the apples.
Recipe variations
You can make this same recipe with peaches, or pineapple.
I do have a recipe for a peach upside down cake, and if you have seen that recipe, you know I didn’t line the pan in that recipe with parchment on the bottom. And that’s because when using a bundt pan, the cake will be less likely to stick to the bottom. While the full round pan will be more likely to stick, specially in the very middle.

I really hope you enjoyed this recipe. Let me know in the comments if you make it, or tag me on instagram, I love seeing your creations!
Watch Video
Apple Upside Down Cake
Ingredients
Apple Topping
- 1 apple
- 1/2 tsp cinnamon powder
- 1/4 tsp nutmeg
Caramel
- 1 cup granulated sugar 200 grams
- 1 tbsp corn syrup, or glucose read notes
- 1/4 cup water 60 ml
Cake Batter
- 1 1/2 cup all-purpose flour 191 grams
- 1 tsp baking power
- 1/4 tsp salt
- 1 tsp cinnamon powder
- 1/2 tsp nutmeg
- 3/4 cup unsalted butter room temperature (170 grams)
- 1 cup granulated sugar 200 grams
- 3 large eggs
- 1/2 tbsp vanilla extract
- 1/3 cup buttermilk 78 ml
Instructions
Apples
- Peel the apple, slice into 1/4″ thick slices. Sprinkle the cinnamon and nutmeg over the apples and stir gently to coat them in the spices. Set aside.
- Prepare the cake pan
- Use a 9” cake pan for this recipe.
- Grease the bottom and sides of the pan with oil.
- Place a circle of parchment paper on the bottom of the pan. Grease the parchment paper. It’s very important to line the pan with parchment to prevent the caramel from sticking.
- Place the apples on the bottom of the pan on an even layer, you can arrange them in a circle around the edges, and then in the center of the cake pan.
Caramel
- Read the instructions before starting.
- Place the cake pan, with the apples on the bottom right next to where the caramel is being made, because once the caramel is ready you have to immediately pour it in the pan.
- Use a stainless steel saucepan to make the caramel. Don’t use non-stick or aluminum pan.
- Make sure the pan is clean, with no food residues in its even the tiniest bit of grease can spoil the caramel.
- Add the sugar to the pan. Pour the water in, then add the glucose. Stir gently with a spatula until a wet sand consistency, and the sugar is incorporated with the water. When stirring, avoid getting sugar crystals on the sides of the pan, which can also cause crystallization of the caramel.
- Dip a brush in water and brush the sides of the pan, to make sure there are no sugar crystals there.
- Place the pan over medium high heat.
- Let the mixture come to a boil. Do not move or stir or shake the pan. The sugar will melt, it will become a clear syrup with lots of fast moving bubbles. The next stage will be a slowing down of the bubbling, and that’s when the caramel will start to darken. Pay very close attention to it, as it can go from barely golden to burnt in just a few seconds if you aren’t careful.
- Once you see the caramel starting to brown in certain spots, you can gently swirl the pan once or twice. Keep cooking it until the syrup is a light golden color.
- Immediately remove it from the heat and pour over the apples.
- Set the pan aside for the caramel to cool slightly.
- Start making the cake batter.
Cake Batter
- Pre-heat the oven to 350ºF.
- In a medium bowl, whisk together the flour, baking powder, salt, cinnamon, and nutmeg powder. Set it aside.
- Use an electric mixer to beat the butter at medium speed for 1 minute. You can use a stand mixer or a hand mixer.
- Add the sugar and beat together with the butter for another minute, until the mixture is light and fluffy.
- Scrape the bowl every so often to ensure everything is getting nicely incorporated together.
- Add the eggs, one at a time, mixing until incorporated before adding the next egg.
- Add the vanilla and mix to combine.
- Add half of the dry ingredient mixture to the bowl and mix on low.
- Pour the buttermilk in and mix until incorporated.
- Add the remaining dry ingredient mixture and mix on low to combine. You can also use the spatula instead of the mixer to fold the batter during this final stage. Avoid over mixing, to prevent the cake from turning out dry.
- Spread the batter on the bottom of the prepared cake pan, over the cooled caramel and apple mixture.
- Use a spatula to spread out the batter evenly.
Baking
- Bake the cake in pre-heated oven for about 35 minutes (depending on your oven it can take longer). If the cake is browning too much towards the final 5 minutes, and the center is not yet cooked, cover it with a piece of aluminum foil.
- You will know the cake is done baking when you touch the top of the cake and doesn’t feel soft or jiggly, and your finger doesn’t sink in. Also insert a toothpick in the cake, and should come out clean, without any gooey batter attached.
- Let the cake cool down for about 15 minutes, then flip onto a plate. It’s important to remove the cake from the pan before the caramel has a chance to harden, but the cake can’t be too hot either. You should be able to hold the pan in your hands, but it should still feel warm.
- Let the cake cool down another 20 to 25 minutes before slicing and serving.
Storage
- Store the cake in an air tight container at room temperature for 1 to 2 days.
- You can also store it in the fridge, in an airtight container for up to 4 days. If storing in the fridge, let the cake come to room temperature before serving.
The cake turns out beautiful. It tastes like apple pie. Making it for the second time.
Hi,
Can we use whole wheat flour for this recipe ?
You can, it might make the cake slightly denser.
How can this be made with just one apple? Is it one pound?
The apple is sliced thin, it’s what fits on the bottom of the pan
Instead of making caramel sauce, could you use store bought caramel sauce?
This caramel is different than that, it’s not a cream and butter based caramel so im not sure how it will work. It could work but I cant say for certain since I havent tried it that way.
Would you adjust the time or temperature if using a bundt pan for this recipe?
not the temperature but time probably, start checking after 30 minutes, and set 5 minute interval timers, and then remove the cake whenever a toothpick inserted in the cake comes out clean.
Is there an ideal type of apple to use for this recipe?
I prefer honey crisp. You can also use granny smith if you like a more tart apple taste.
I wonder if this could be made with 1 for 1 gluten free flour.
yes I do believe so. I have very similar recipes to this that people have made with gluten free flour 1 for 1 and worked out 👍
Should the Carmel over the apples be soft or hardened before pouring cake batter in and baking? I noticed some/most was hard/brittle before baking. Will it turn out okay?
It does harden, but some of it may stay soft. Depends the temp of the kitchen, or how long you took to make the batter. It will be ok.
Thanks, it did turn out just fine and was a hit for family dinner night.