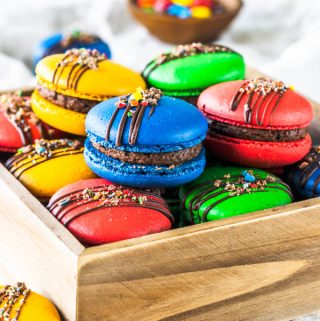
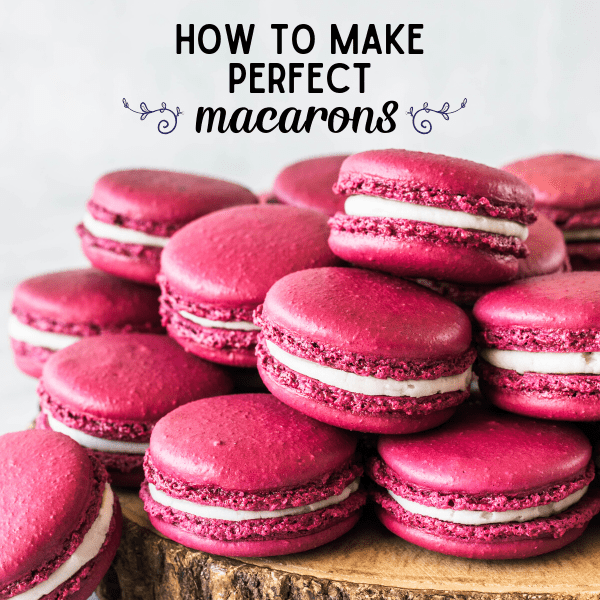
M&M’s Macarons (plus video tutorial on how to make different color shells from one batch)
Hello there, friends! Today we are making these awesome colorful M&M’s Macarons, filled with M&M’s buttercream!
And also, in this post, we are going to learn how to color one batch of macarons different colors, so you can make different color shells from just one batch! It’s very easy! Just watch the video I’ve made for you!
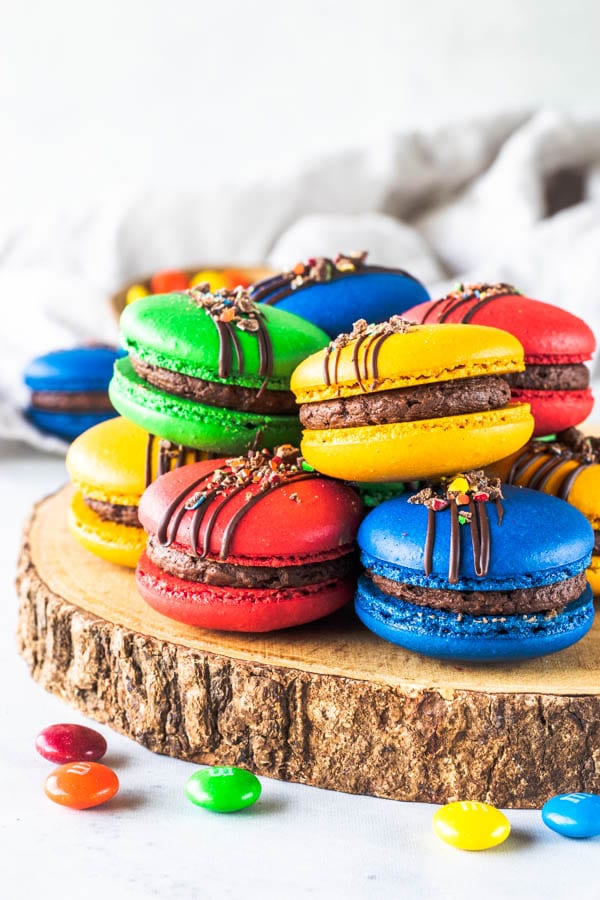
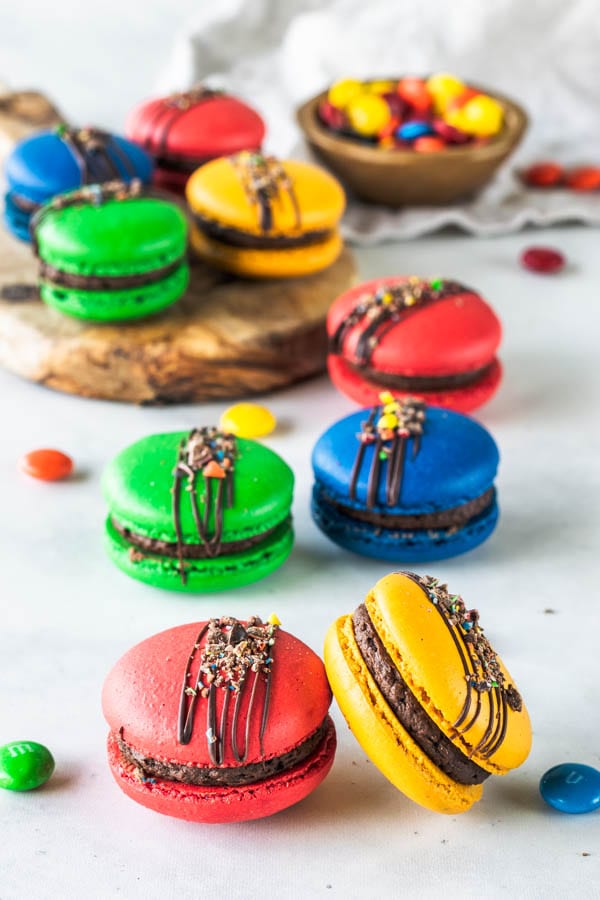
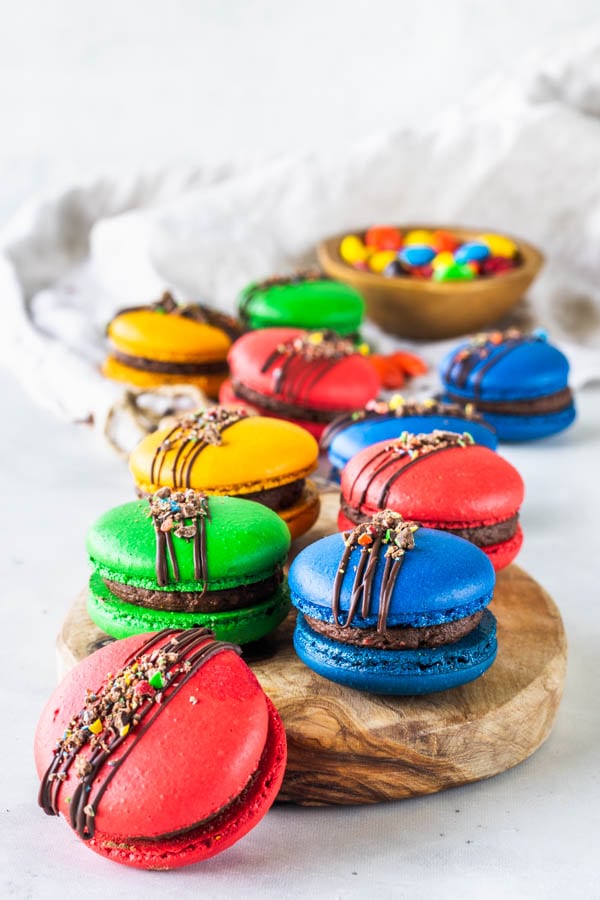
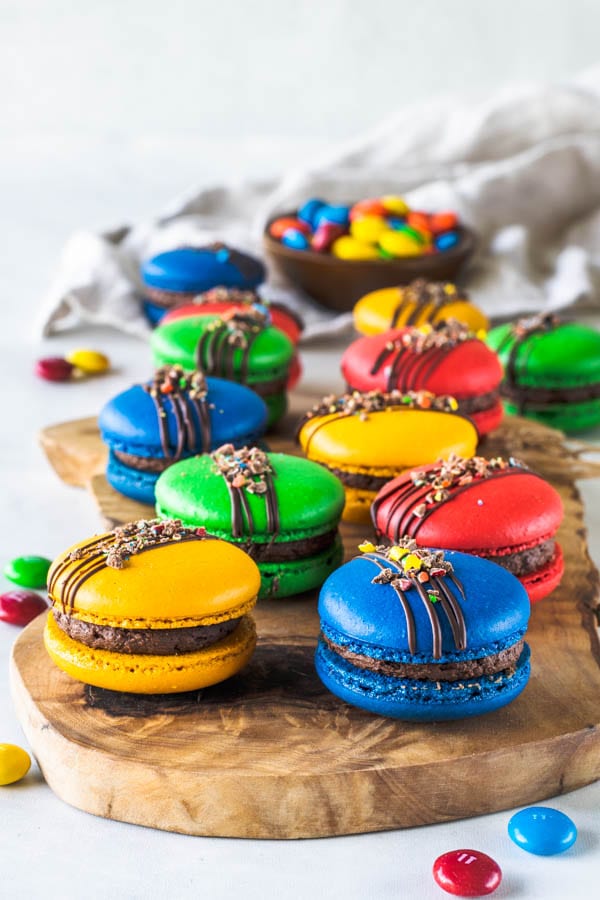
Anyway, people, let’s just take a second to look at these gorgeous colors here!
This post may contain affiliate links. I earn a commission from qualified purchases. Please read our Privacy policy here.
I get this question all the time: what food coloring to use to color macarons?
You want to use gel base food coloring, since the water based ones might ruin your macarons, since water doesn’t interact really well with egg whites.
I use Wilton Gel-Based Food Color, which you can find pretty much anywhere if you are in the States.![]()

![]()
I used a big dollop of each color, as you can see on my video!
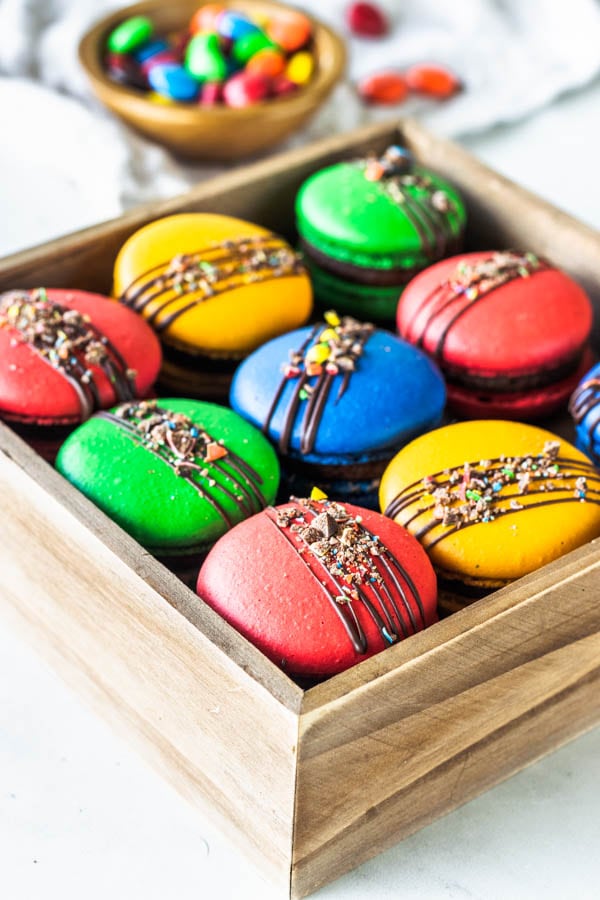
These M&M’s macarons were super fun to make, and even more fun to eat!
For the M&M’s buttercream, I crushed some M&M’s on my food processor, to make the buttercream, and added together with the butter, powdered sugar, and cocoa powder. It tasted exactly like an M&M!!
For the top, I drizzled some melted chocolate, and sprinkled with chopped M&M’s before the chocolate could set.
I ended up bringing some of these to my mother-in-law’s house, and everyone seemed to enjoy them!
So basically, to make one batch of macarons into different colors, what you have to do it to whip your meringue until it reaches stiff peaks. If you have trouble identifying that stage, make sure to read my post How to Make Macarons: the Meringue Stage.
In that post, you can learn how to identify when to stop whipping the meringue. I use the Swiss method to make my macarons, but the tips for identifying when to stop whipping the meringue when making macarons will work for all stages. You are looking for a peak shape that resembles a bird’s beak, as you can see on the video in this page, and in the video tutorial on my Meringue Stage post that I linked on the paragraph above.
After the meringue has been whipped to stiff peaks, you can add the sifted dry ingredients in (almond flour + powdered sugar), and start to stir the mixture JUST until you see no more dry ingredients in. Stop stirring as soon as you don’t see any more dry ingredients in.
Then, you want to divide the batter between the amount of bowls correspondent to the amount of colors you want to color the batch. In the video, I am making 4 different colors: green, yellow, blue, and red.
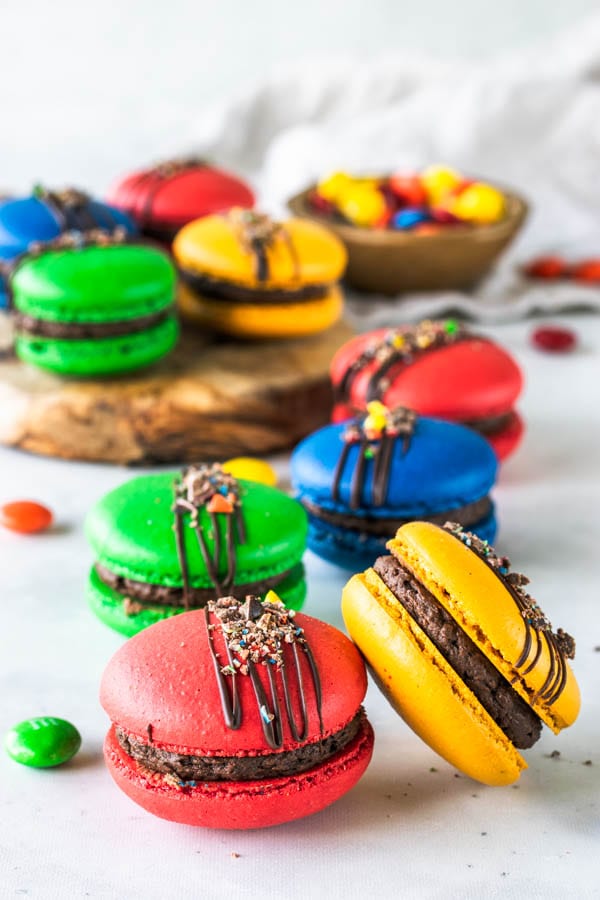
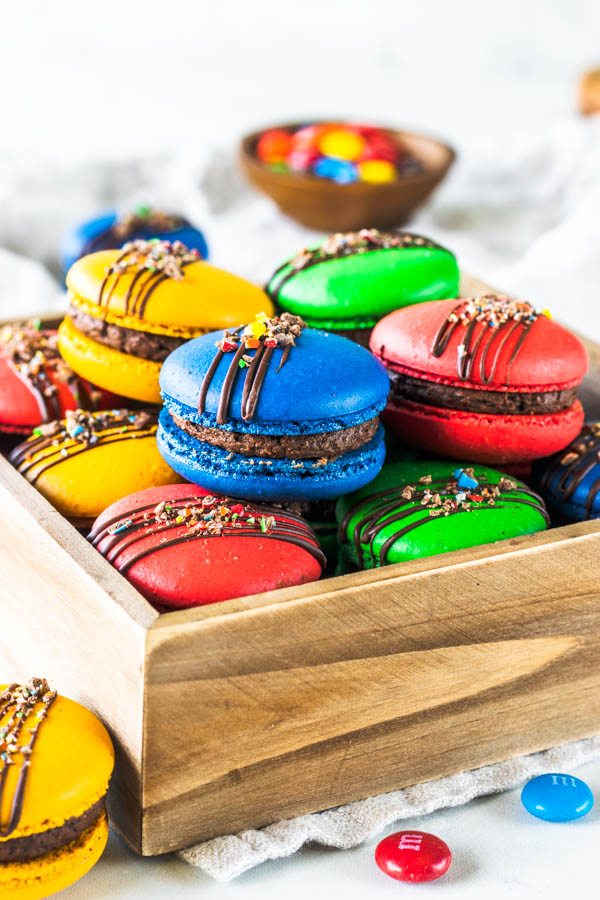
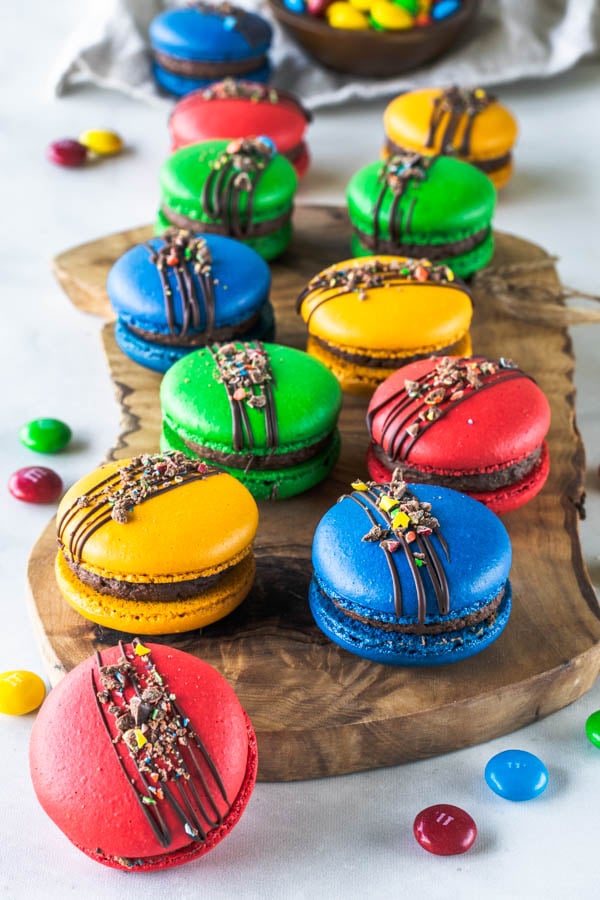
These are some beautiful and colorful macarons! I love my M&M’s macarons!
Anyway, once you divide the batter between the amount of bowls needed, you can color one at a time, and make sure to place each batter portion in the piping bag, so it doesn’t start to dry out and set.
Once all portions are colored, you can start piping the macarons.
If you want more macaron ideas, make sure to check my section with Macaron recipes. I have tons and tons of macaron ideas, different flavors, colors, and etc!
If you are new to making macarons, you may also find some helpful information throughout all of my posts, because I always try to give some tips, answer frequently asked questions, etc. And as always, don’t hesitate to contact me via email, or via instagram dm.
Here are some of my favorite macaron recipes and macaron ideas:
- Cherry Macarons
- Cookie Dough Macarons
- Dulce de Leche Pecan Macarons
- Chocolate Macarons
- Toffee Macarons
- Blackberry Macarons
- Samoa Cookie Macarons
- Brigadeiro Macarons
- Pecan Macarons
Make sure to check them out. If you love these M&M’s Macarons, I am sure you will love some of the ones above too!

I hope you liked today’s post, as much as I loved writing it!
Thank you for reading my blog! Have a lovely day! Happy baking, fellow macaron lover!
Here are some of the materials I love for baking macarons.
M&M’s Macarons
Equipment
- https://amzn.to/2MpjcZv
- https://amzn.to/2WiEkFb
Ingredients
Macaron Shells
- 100 grams egg whites
- 100 grams white granulated sugar
- 105 grams almond flour
- 105 grams powdered sugar
- Food coloring optional
M&M’s Buttercream
- 4 tbsp unsalted butter room temperature (2 oz, 56 grams)
- 1 1/2 cups powdered sugar 6.75 oz, 191 grams
- 1/3 cup unsweetened cocoa powder 1.5 oz, 42 grams
- 1/4 cup powdered M&M’s from about 1/2 cup whole candies
- 2-4 tbsp milk
Instructions
Macaron Shells
- Before you start, get all of the ingredients ready. Prepare a large piping bag, fitted with a large round tip (or as many piping bags as the number of colors you want to divide your batter in)
- Line two baking sheets with parchment paper or silicone mat.
- Measure out all of the ingredients.
- Sift the powdered sugar and almond flour together. Set aside.
- Place the egg whites and granulated sugar in a heat proof bowl or in a double boiler. Over a pan of simmering water, whisk the whites and sugar until frothy and sugar completely melted. It will take a couple minutes. You can test by touching the mixture between your fingers, and if you feel any sugar granules just keep whisking mixture over the water bath.
- Make sure the bottom of the bowl isn’t touching the simmering water.
- Transfer mixture to the bowl of a stand mixer.
- With the whisk attachment, whisk the mixture on low, and gradually increase the speed over the next 2 minutes, until you achieve high speed. Then continue to whip for a few minutes until stiff peaks are formed.
- Best way to check this is to keep your eye on the whites. Once they get glossy and you start seeing streaks formed by the whisk, it might be time to stop.
- Whisk until stiff peaks have formed. When you pull your whip up, the peaks should be shooting straight up. The peak should be stiff, forming a slightly curved shape at the top, but not bending down to the side.
- Pour the powdered sugar and almond flour into stiff whites.
- Start folding gently forming a letter J with a spatula. Add the food coloring at this point, if making just one color. If not, follow the instructions below.
- If using multiple colors to color one batter, start folding the dry ingredients into the batter and mix them just until you don’t see any streaks of dry ingredients any longer. Once that happens, you can split the batter between the number of bowls correspondent to the colors you want to use in your batter.
- Work quickly, with each color, one at a time. Keep all the other bowls covered in the meantime, so they don't dry out. Start folding, and continue to fold until the batter is ready, then transfer it to a piping bag. Move on to the next color and do this until the entire batter is ready. Then you can start piping.
- It’s time to stop folding when the batter is glossy and has a thick and flowing consistency. There are several ways to test this.
- First, pick up some batter with the spatula and try to form a figure 8 a few times. If you can draw a figure 8 with the batter falling off the spatula a few times, without the batter breaking up, that’s one indication that it might be ready.
- Then, you can perform what I call the Teaspoon Test. Grab a teaspoon of batter and spoon onto the parchment paper or silicon mat, then tap the tray gently against the counter and wait one minute.
- If the batter stays stiff and doesn’t spread out a bit, fold the batter a bit more, then test again.
- You don’t want your batter to be too runny either. So be careful not to overmix. It’s always best to undermix and test several times until the proper consistency has been achieved.
- Once the batter spreads out a bit and starts to look glossy on the parchment paper, I transfer my mixture to the piping bag.
- Once you’ve piped as many 1 1/2” circles as you could, bang the trays against the counter a few times each.
- Let the trays sit for a while so the shells will dry out a little bit. I usually leave about 20-40 minutes, depending on how humid the day is. You’ll know they’re ready when you gently touch the surface of a macaron and it seems dry.
- Pre-heat the oven to 300°F.
- Bake one tray at a time.
- Bake for 5 minutes, rotate tray.
- I bake for a total of 15 to 20 minutes. Until you try to move a macaron and it doesn't feel jiggly.
- Remove from the oven and bake the other tray.
- Let the macarons cool down before proceeding with the filling.
M&M’s Buttercream
- Put the M&M’s candy in a small food processor and process until finely ground.
- Place butter, sifted powdered sugar, and cocoa powder in the bowl of an electric mixer. Mix on low until ingredients are combined. Raise speed to medium high and cream for one minute.
- Add M&M’s powder and milk. Add more milk if frosting seems too stiff, about 1/2 teaspoon at a time. And add some more sifted powdered sugar if the frosting needs to be thicker.
To assemble
- Place frosting in a piping bag. Pipe a dollop of M&M’s buttercream on each bottom shell. Top with another shell. Drizzle with melted chocolate and chopped M&M’s if desired. Let macarons rest in the fridge for 24 hours before serving, in order to let them mature.
Storage
- These will store beautifully in the freezer for up to 1 month, if very well packaged. And they will store nicely in the fridge for up to 1 week.

Sensacional!!!!!!!!! Aliás, como tudo o que você faz, parabéns Ca!!!!!!
Obrigada pai!! 🙂
Can you tell us about the type of food coloring you use? Mine turned out dull at best, but they taste good!
I use Wilton gel food coloring. I use quite a bit of it to obtain that color. a big dollop, probably about 1/2 teaspoon for each separate batter.
These are some of my favorite macarons to make! As a chocolate lover, these hit the spot and are so pretty to look at, too!
Thank you so much Stacy!!!
This is now my go to recipe. Also can you double this or should I make two separate batches?
Thank you Elizabeth! And you can for sure double it.
I’ve just made these and cannot stop smiling at how well they turned out! Thank you!
That’s so so lovely to hear!!!
This recipe makes macarons feel so approachable! These were a success on my first attempt! I did not venture into multiple colors, so I made mine all one color, but they looked great and tasted even better! Great recipe!
Oh that is soooo amazing to hear!! Thank you so much Liz!