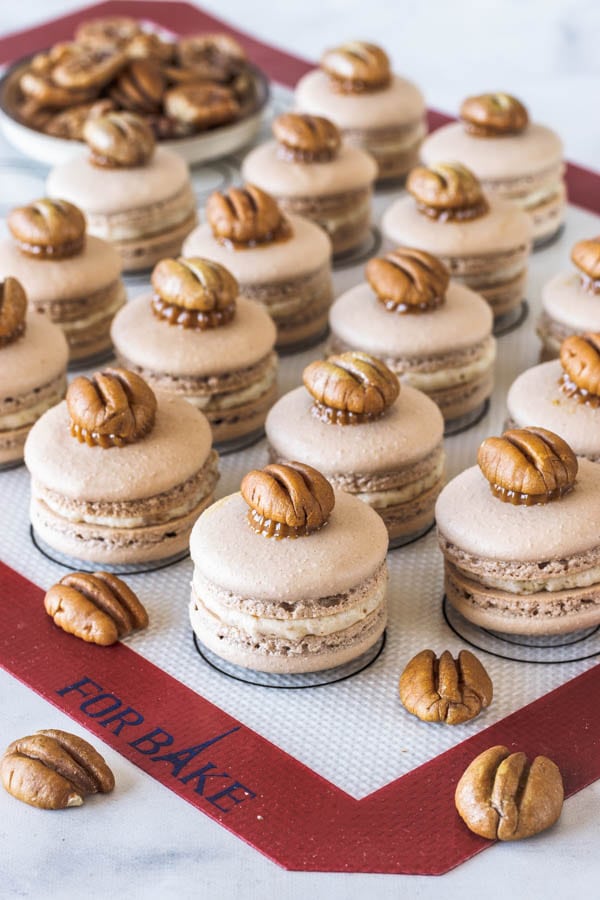
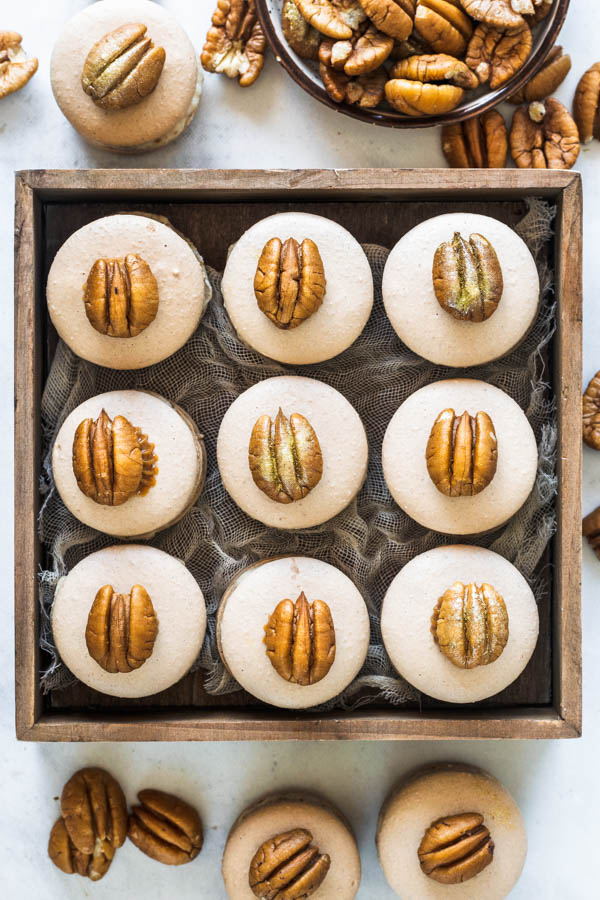
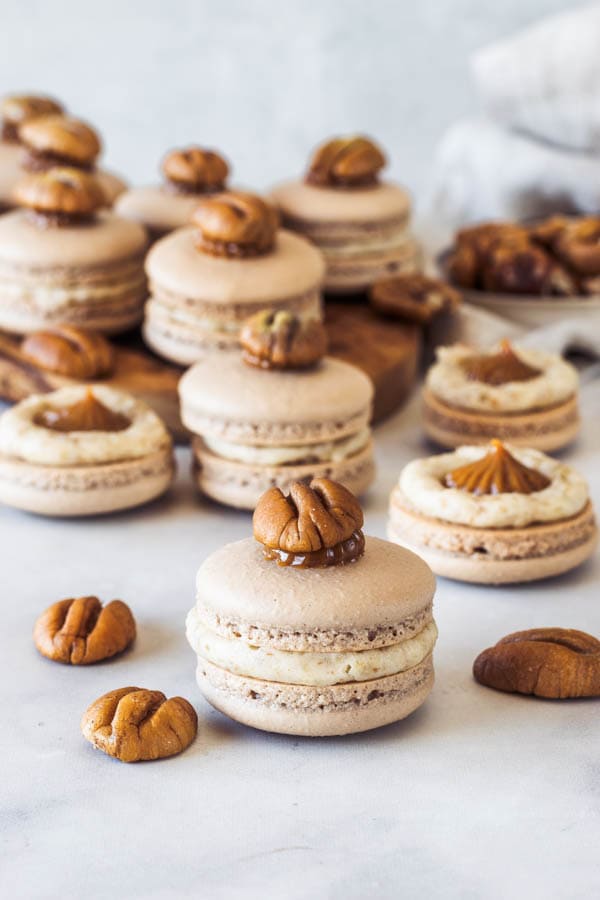
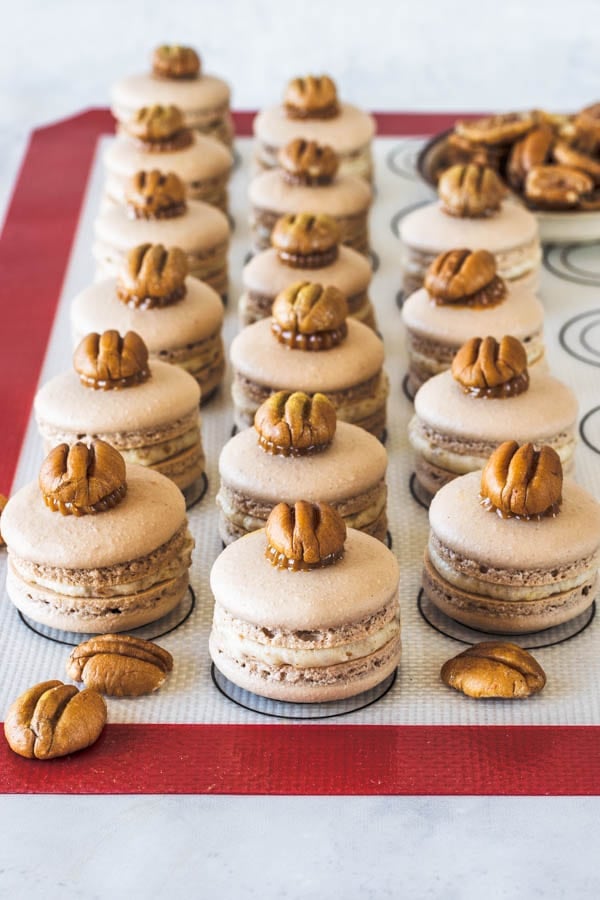
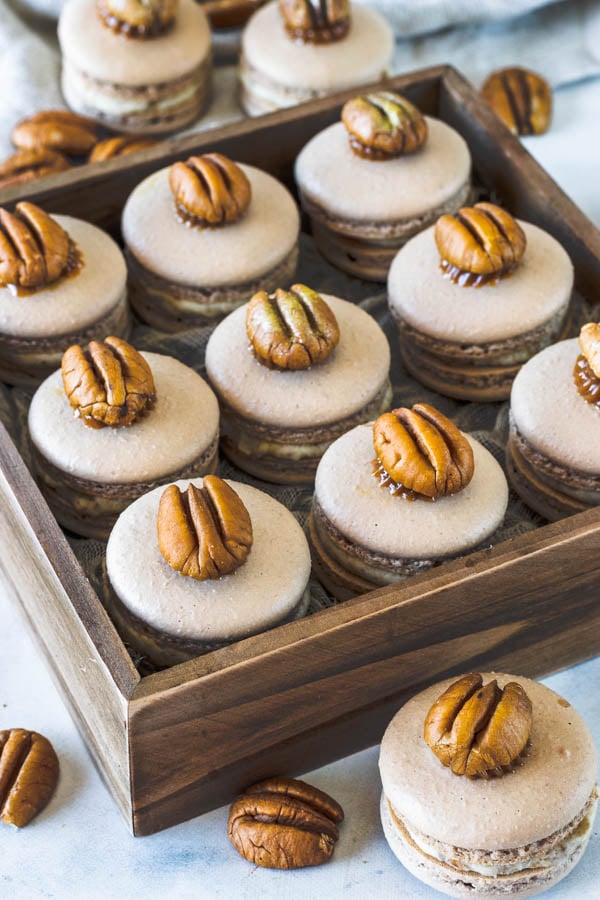
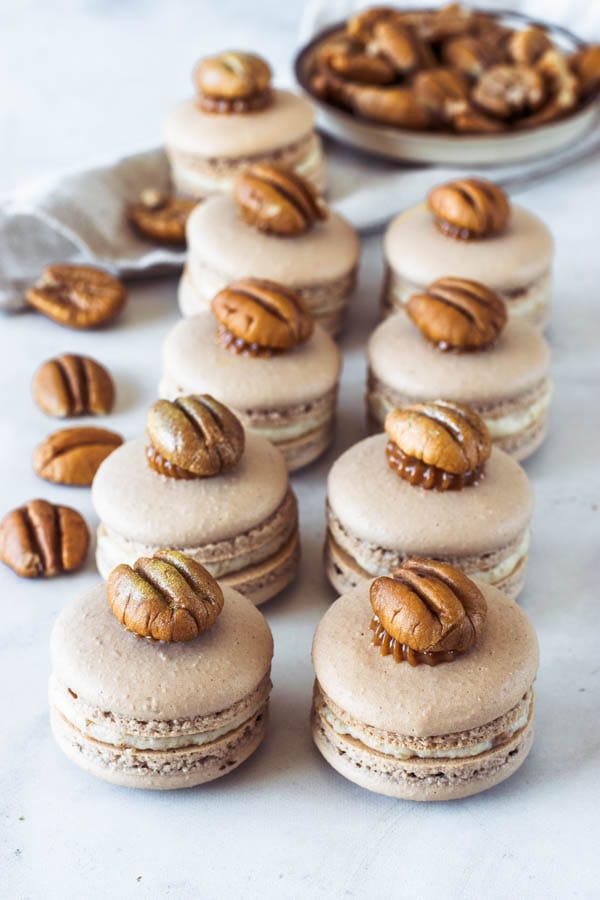
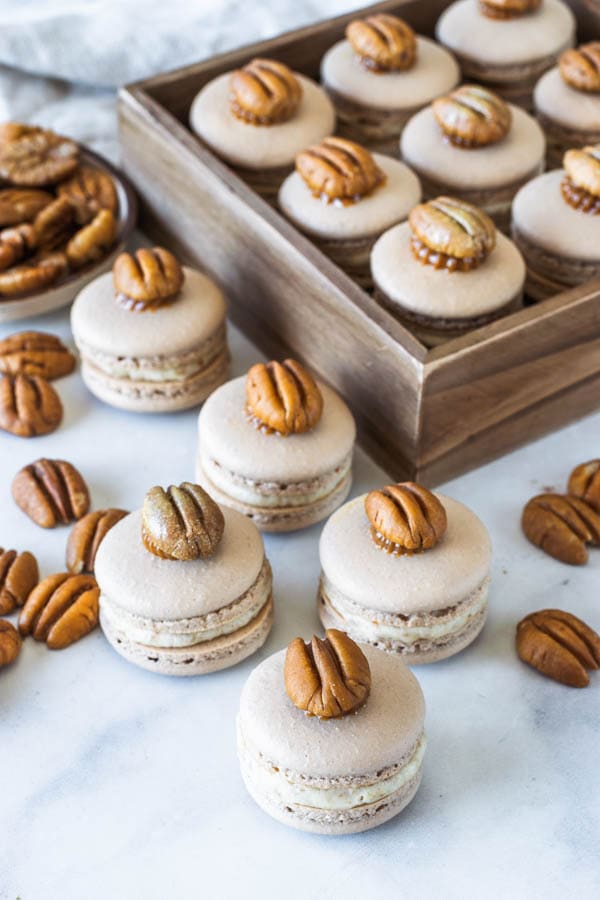
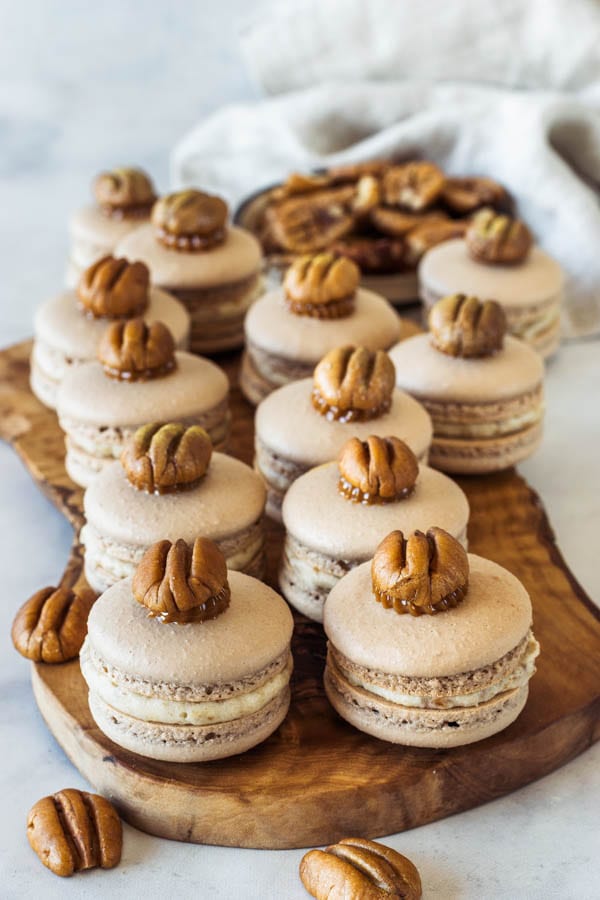
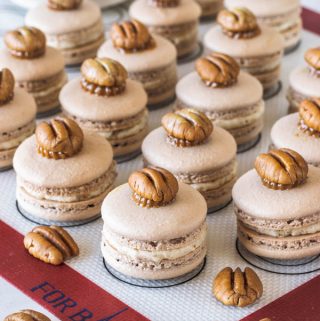
Dulce de Leche Pecan Macarons
Today we are making these super fancy macarons. My newest macaron recipe is for these delicious Dulce de Leche Pecan Macarons.
The reason I’ve been posting so many macaron recipes lately is because I am writing a macaron ebook.
My goal with this ebook, is to compile the best, most detailed tips and steps that help me everyday to get the macarons I’ve always dreamed of.
This post may contain affiliate links. I earn a commission from qualified purchases. Please read our Privacy policy here.
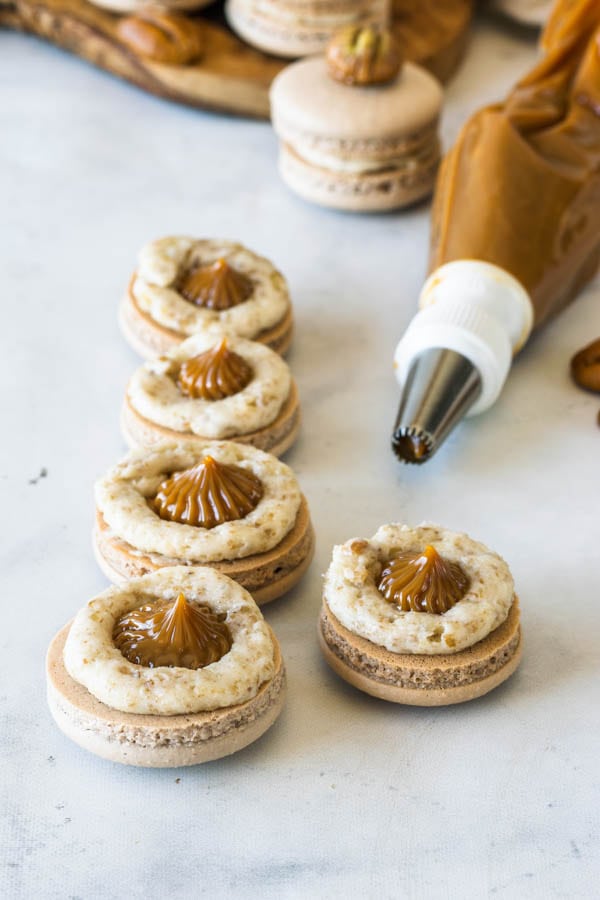
Since I was feeling fancy when I made these macarons, some of them got a little sprinkle of golden powder over the pecan on top.
A little golden touch will go a long way, just like in my Dulce de Leche Macarons.
These Dulce de Leche Pecan macarons I bring today are kind of similar to my Dulce de Leche macarons, but this time, I didn’t make a chocolate shell, and also added the pecan buttercream to the filling.
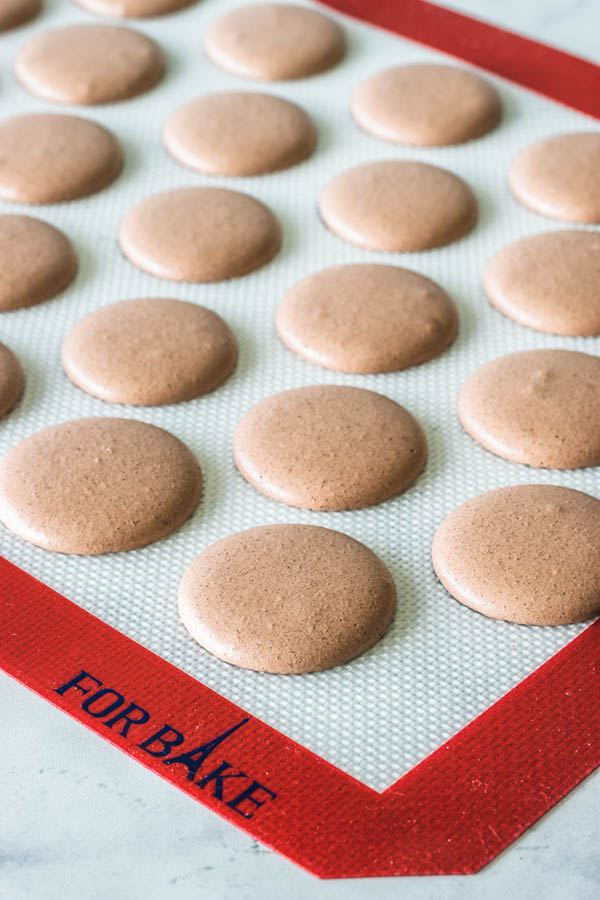
Actually, about the shells, I added 1/2 teaspoon of cocoa powder to the shells. Just because I wanted a little tan color to my shells, I didn’t want my macarons to have that super bright cream color.
Since I was just looking for a slight tan, I added just a touch of cocoa powder to the batter. You can use food coloring if you want to, but the cocoa powder worked just like I wanted.
Ideas for Macaron Fillings
That’s a question I get a lot. Where do I get my ideas for macaron fillings?
I research a lot, I look at macaron/dessert pictures pretty much all day long, like it’s my job. Well, it is my job, actually lol.
And I keep a list of macaron flavors around me. Everyday, I add some new ideas to the list. It may be ideas that never really get accomplished. But somehow, writing down ideas every day, allows my creative process to flow better.
The pecans and dulce de leche were two separate ideas on my list, that ended up merging together. I was planning on making dulce de leche and banana macarons, and a separate pecan one.
Anyway, I have many more ideas for macaron flavors on my list, to which I add everyday.
If you would like some macaron filling ideas, check out my Macaron section on my recipes.
I can give you a few ideas, some of my favorites:
- Neapolitan Macarons
- Toffee Macarons
- Blackberry Macarons
- Samoa Cookie Macarons
- Brigadeiro Macarons
- French Vanilla Macarons
- Coffee Macarons
- Espresso Chocolate and Peanut Butter Macarons
- Pecan Macarons
Now, let’s talk about the filling of the Dulce de Leche Macarons.
If you want, you can use store-bought dulce de leche, or make your own.
It’s very simple to make your own dulce de leche.
HOW TO MAKE DULCE DE LECHE WITH CONDENSED MILK
Simply start with a can of condensed milk. Now, there are several options here.
- Making dulce de leche in the oven– Pour the inside of the condensed milk can in an oven-proof pan, and bake over a water bath for about 2-3 hours, stirring in between, covered with foil, at 350F.
- Making dulce de leche on the stove top– there are two ways to make dulce de leche on the stove top with a sealed can of condensed milk.
- First is to use a pressure cooker, which is the fastest way. Place sealed can in a pressure cooker full of water, covering the can by at least 2 inches. Cook under pressure for 30 minutes. Let pressure release naturally and let can and water both cool down all the way before removing and opening the can.
- If you just want to use a regular pot, make sure it’s a large pot of water, where the can will be submerged the whole time. Boil sealed can for about 2 1/2 hours. Let can and water cool down all the way before removing and opening the can.
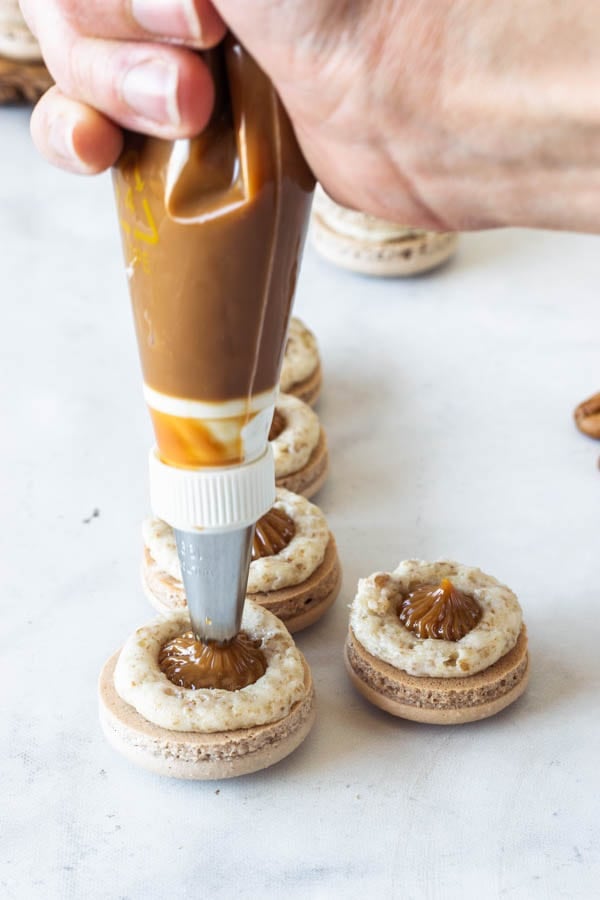
Regardless of the method you choose to make your dulce de leche, make sure to always let it cool down before handling it. And leave it in the fridge for a few hours before piping so dulce de leche will be cold and have proper texture.
If you would like any tips on how to make french macarons, you can read the instructions very carefully down below, as I try to be super into the details.
Also, I have a tone of information on my other macaron recipes, I am always giving tips, or different information on my posts. Make sure to check them out.
And you can wait for my ebook, also, since should be ready soon (how soon? that’s a question I am also asking myself, as I am trying to stick to my deadline, but sometimes, it’s a bit tricky)
I hope you liked today’s recipe, and I also hope you’re looking forward to the ebook, as much as I am!
Keep baking, keep practicing, keep evolving, growing, learning, shining! I see you, beautiful soul! Thank you for being here, for the support, for the love, and for spending your time learning how to bake with me!
Dulce de Leche Pecan Macarons
Ingredients
Macaron Shells
- 100 grams egg whites
- 100 grams granulated sugar
- 105 grams almond flour
- 105 grams powdered sugar
- 1/2 teaspoon cocoa powder optional, to give the macarons a slightly tan color
Pecan Buttercream
- 1/3 cup pecans shelled
- 4 tbsp unsalted butter 56 grams, 2 oz
- 1/2 cup powdered sugar 63 grams, 2.75 oz
- 1/4 tsp vanilla extract
Dulce de Leche
- 1 can condensed milk or
- 1/3 cup dulce de leche
Instructions
Macaron Shells
- Before you start, get all of the ingredients ready. Prepare a large piping bag, fitted with a large round tip.
- Line two baking sheets with parchment paper or silicone mat.
- Measure out all of the ingredients.
- Sift powdered sugar, almond flour, and cocoa powder (if using) together. Set aside.
- Place the egg whites and granulated sugar in a heat proof bowl or in a double boiler. Over a pan of barely simmering water, whisk the whites and sugar until frothy and the sugar is completely melted. It will take a couple of minutes. You can test by touching the mixture between your fingers, and if you feel any sugar granules just keep whisking the mixture over the water bath.
- Make sure the bottom of the bowl isn’t touching the simmering water.
- Transfer the mixture to the bowl of a stand mixer.
- With the whisk attachment, start whisking mixture on low for about 30 seconds, then gradually start increasing speed to medium. Whisk on medium for one to two minutes, until the mixture is white and starting to become fluffy. Raise the speed to high for a few minutes until stiff peaks are formed. Best way to check this is to keep your eye on the whites. Once they get glossy and you start seeing streaks formed by the whisk, it might be time to stop.
- Whisk until stiff peaks have formed. When you pull your whip up, the peak should be stiff and shooting straight up, with possibly a slight bend at the top, but not bending to the side.
- Pour the sifted powdered sugar and almond flour into the stiff meringue.
- Start folding gently forming a letter J with a spatula. Add the food coloring at this point if you would like to use any.
- It’s time to stop folding when the batter is glossy and has a thick and flowing consistency. There are several ways to test this.
- First, pick up some batter with the spatula and try to draw a figure 8 with the batter that is dripping off the spatula. If you can form several 8 figures without the batter breaking up, that’s one indication that it might be ready.
- There’s another test you can do. I call it the Teaspoon test.
- Grab a teaspoon of batter and spoon onto the parchment paper or silicon mat. Wait a minute to see how it behaves.
- If the batter stays stiff, forming a point and doesn’t spread out, fold a little bit more, about 3 folds. Test again.
- Once the batter spreads out a bit and starts to look glossy and smooth on top, on the parchment paper, the batter is ready.
- You don’t want your batter to be too runny either. So be careful not to overmix. It’s always best to undermix and test several times until the proper consistency has been achieved.
- When you hold the spatula with batter on top of the bowl and the batter falls off the spatula slowly but effortlessly the batter is ready. The batter will keep flowing off the spatula non-stop, but not too quickly.
- Transfer the batter to a piping bag.
- Place the piping bag directly 90 degrees over the center of each macaron template. Apply gentle pressure and carefully pipe for about 3 seconds, and then quickly pull the bag up twisting slightly.
- Once you’ve piped as many 1 1/2” circles as you could, bang the trays against the counter a few times each. This will release air bubbles that are in the batter and prevent the macaron shells from cracking.
- Use a toothpick to pop any air bubbles in the surface of the shells.
- Let the trays sit for a while so the shells will dry out a little bit. I usually leave about 20-40 minutes, depending on how humid the day is. You’ll know they’re ready when you gently touch the surface of a macaron and it seems dry.
- Pre-heat the oven to 300°F.
- Bake one tray at a time.
- Bake for 5 minutes, rotate tray.
- Bake for 5 more minutes. Rotate again. I bake each tray for about 15 to 20 minutes.
- When baked, the macarons will have a deeper color and formed feet. If you try to move a macaron, it shouldn’t feel jiggly. If the macaron is still jiggly, keep baking.
- Remove from the oven and bake the other tray.
- Let the macarons cool down before proceeding with the filling.
Pecan Buttercream
- Process the pecans in the food processor, until finely ground. Set aside.
- Cream the butter in the electric mixer, for 1 minute.
- Sift the powdered sugar. Add to the mixer. Also add the finely ground pecans. Mix on low until combined.
- Then, turn the speed to high, and cream for 1 min.
- Add the vanilla. Mix until combined.
- Place the filling in a piping bag lined with a small round tip.
Dulce de leche
- To make dulce de leche at home, you take many different approaches. Check the post above to read 3 different approaches on how to make dulce de leche from a can of condensed milk.
- My favorite way to make dulce de leche starts with an unopened can of condensed milk. Place sealed can in a pressure cooker with enough water to cover it plus at least 2 inches.
- Then, bring the water to a boil and cook under pressure for 30 minutes.
- Let pressure release naturally and let can and water cool down all the way before removing and opening the can.
- When you open the can, it will be a thick darkened caramel inside.
- Place contents in a container and put it in the fridge until cold and firm.
How to assemble
- Pipe a circle of buttercream around the edges of the macaron, in a way that you have a little hole in the middle. Fill the middle with a bit of dulce de leche. Don’t over fill it. Place another shell on top.
Storage
- These Dulce de Leche Pecan Macarons are best stored for up to 7 days in the fridge. If you want to freeze them, just make sure to package them really well, in a container in the freezer, and keep it for 1 month.
hey! did you mean pecan in the buttercram instruction instead of walnuts:)
fixed thanks!
Made as directed other than using the French method for meringue and using pre-made Dulce de Leche from the grocery, and they turned out amazingly- wish it would let me post a photo! Thanks for a great recipe. Especially appreciated the appropriate amount of frosting- I feel like most recipes leave you with tons of leftover icing!
Awesome thank you Clare!!!
Thanks for sharing your recipe. How much is the total baking time for each tray?
It depends on your oven, how wet your macaron batter is, etc, but an average of 15-18 minutes per tray, I would say
Los imagino con dulce de leche San Ignacio de Argentina, insuperable
Ohhh!!! Que rico! Me encanta dulce de leche de Argentina! Muchas gracias!! 🙂