Harry Potter Hogwarts House Sorting Macarons
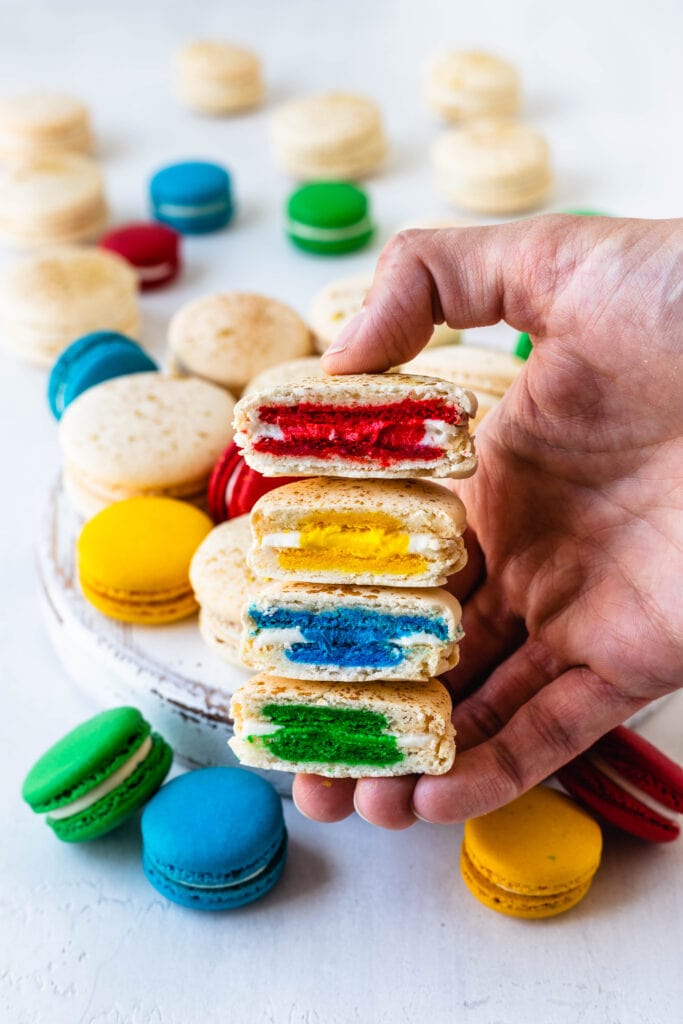
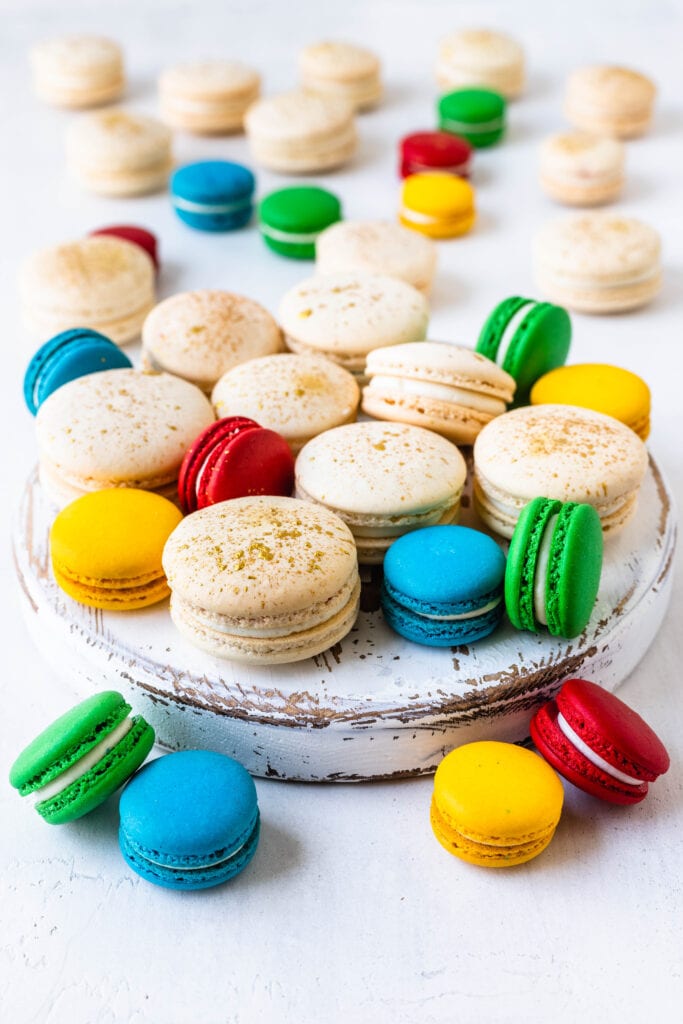
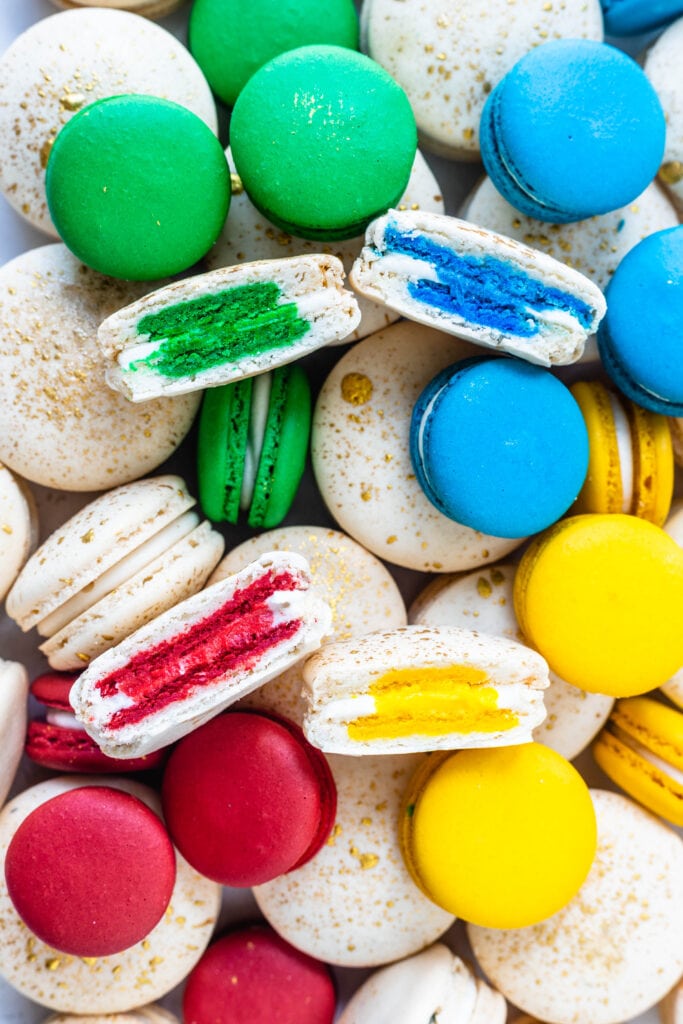
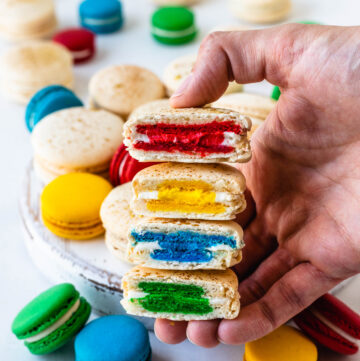
Hello friends, today I will show you how to make these super cool Harry Potter Hogwarts House Sorting Macarons. These are perfect for a Harry Potter themed party. The macarons are seemingly white on the outside, but once you bite into them, you’ll find out which Hogwarts house you belong to.
Make sure to watch the video on YouTube or on this page, which will show you exactly how to make the macarons, and I make important notes about the recipe and the process as well.
I got the idea for making these from Indulge with Mimi’s gender reveal macarons. However, her technique didn’t work so well for these Harry Potter Hogwarts House Sorting Macarons.
This post may contain affiliate links. I earn a commission from qualified purchases. Please read our Privacy policy here.
In her technique, she pipes the center of the macarons, and after they are dry, she piped the outside batter on top by making a circular motion, starting from the outer edges of the center shell, and moving to the middle on a spiral movement.
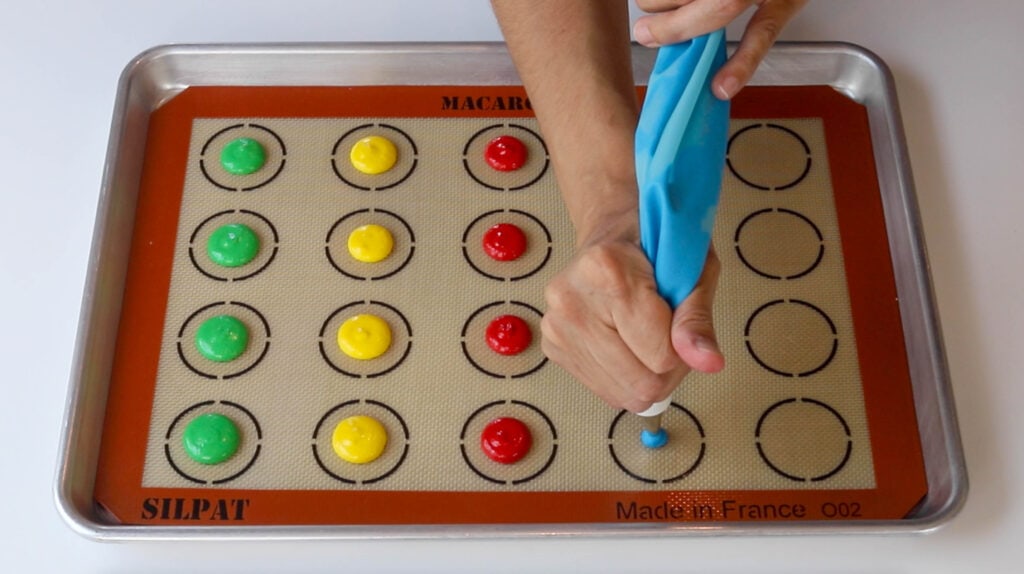
That didn’t work for me, because the macarons were coming out wonky, so I decided to just pipe up and down, positioning the piping bag directly over the center of the bottom shell, as you can see in the pictures below or on the video.
Once the small shells dry, you can pipe the white batter on top. Hold the bag steady right over the center of the small shell. And apply pressure to release batter, then pull the bag up and twist at the top.
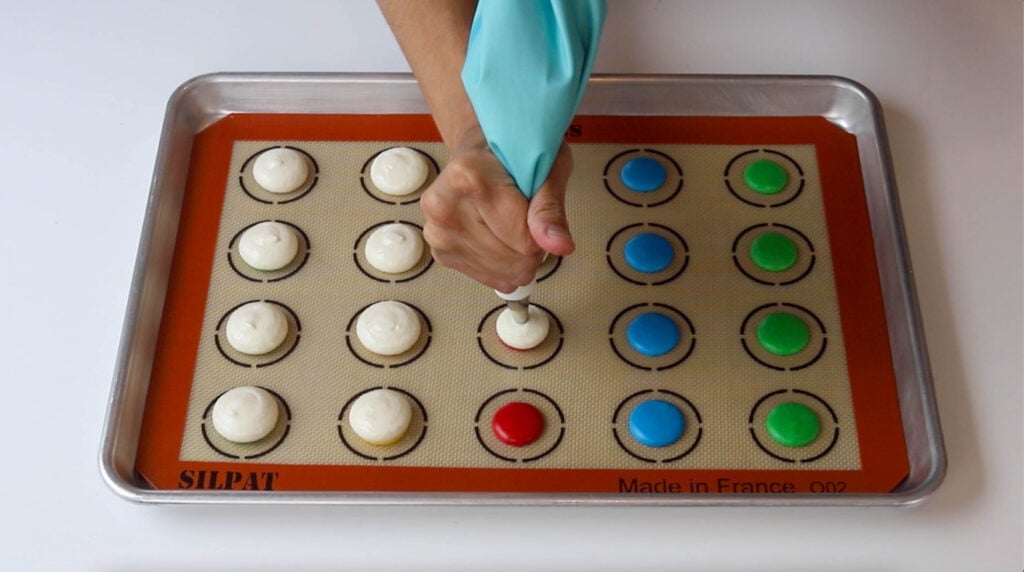
Then, tap the trays against the counter or against the palm of your hands immediately, this will help the white batter spread out and cover the bottom colorful batter completely.
How to minimize inconsistent oven issues
If you follow my journey on instagram and watch my stories you’ll know I moved to Florida, where it’s hot and humid this time of year, way more than back in New York. So lately I have been learning how to bake macarons in this new kitchen and new climate. The oven I have isn’t quite reliable, it spikes up and down in temperature dramatically, which is very harmful for the macarons.
To minimize this, I have taken a few steps to work around my inconsistent oven:
- Place pizza stones on the bottom rack of the oven. The pizza stones will act as a radiator, because they will absorb a lot of heat and when you open the oven door, the pizza stones will radiate heat, which will help keep the temperature stable in case your oven fluctuate the temperatures a lot like the one I am using.
- Pre-heat the oven for a long time (1 hour+, with the pizza stone inside). This will also help keep the temperature fluctuation at bay, since the oven will have a chance to spike up and down until it finds a happy medium.
- Use rimless baking sheets like this one. You may see me piping on a regular baking tray with the tall rims, but I am not using them to bake, I transfer the mat to a rimless sheet before baking. I only have two of them right now so I have to pipe the shells on another surface while they rest. Remember to only place macarons on top of room temperature baking sheets, not hot. If you just removed the baking sheet from the oven, wait for it to cool down before transferring your mat to it, because your macarons will most likely crack if you use a hot or warm baking tray to bake the macarons. Additionally, the rimless baking sheet allows for the air to circulate evenly throughout the shells, which means even heat is reaching the shells, which will minimize hot spots issues, and results like lopsided or cracked macarons.
- Rest the macarons. The no-rest method hasn’t been working on my inconsistent oven. The macarons have cracked, or the ones that didn’t crack had the a weird crack between the top of the shell and the feet. The cracks only went away once I started resting the macarons fully, which can take over an hour in my current humid climate.

Tips for baking in humid climates
I will dedicate a full post talking about baking in humid climates once I have habituated with it.
There are a few things I have been doing that are helping, and here they are:
- Two hours before making macarons, turn the ac temperature down, make it cold in there. If you don’t have ac, try to get a fan or two and turn them on before making macarons, and then rest the macarons by the fans, but don’t blow the wind directly on the macarons, unless it’s a ceiling fan. Ceiling fans work great for drying macarons.
- Turn the dehumidifier on, if you have it. This is the one I’ve purchased after many recommendations from my audience on Instagram, who are following the process I am going through with figuring out my oven.
- Use egg white powder. I use 4 grams per 100 grams of egg whites. Experiment around with different amounts. If the macarons are drying too fast, or becoming lopsided, it could be that you are adding too much egg white powder. I use Judee’s Dried Egg White Protein Powder.
- Often I recommend people search for a no-rest method in humid climates, because if the weather is too humid, the macarons will end up absorbing moisture during the resting process, instead of drying. However, if your oven is unreliable such as mine is right now and no-rest doesn’t work, you can try the options above.
If you like these Harry Potter Hogwarts House Sorting Macarons, check out these other recipes that you may also enjoy:
- Butterbeer Macarons (how awesome would these be at a Harry Potter themed party!)
- Beer Macarons
- Gold Macarons
- Pot of Gold Macarons (could be cauldrons!)
- Minecraft Macarons
- Black and White Macarons with Rainbow Drizzle
And to learn more about how to make macarons, check out Macaron School, where I share the best tips for perfecting and leveling up your macaron game! From troubleshooting guides, to guides for beginners, the best tools to use, and much more!
And check out my book, which is also called Macaron School, because it will be such a valuable asset in your macaron making journey! It will be released March 1st 2022, but you can already pre-order here.
If you make my recipes tag me on Instagram, I love to see your creations and connecting with you!
Harry Potter Hogwarts House Sorting Macarons
Ingredients
Macaron Shells
- 4 grams egg white powder
- 100 grams white granulated sugar
- 100 grams egg whites
- 105 grams almond flour
- 105 grams powdered sugar
- A few drops of food coloring red, blue, yellow, and green
Cream Cheese Frosting
- 85 grams cream cheese softened 6 tbsp
- 42.5 grams unsalted butter softened 3 tbsp
- 125 grams powdered sugar
- 1/4 tsp vanilla extract or vanilla bean paste
- food coloring (I used powder food coloring, red, yellow, green, and blue)
Decoration
- Golden luster dust
- Water or alcohol, or vinegar
Instructions
Macaron shells
- Before you start, get all of the ingredients ready. Prepare five piping bags, four fitted with a Wilton tip #8, and one fitted with a tip #12 for the white batter.
- Line two baking sheets with parchment paper or silicone mat.
- Measure out all of the ingredients.
- Sift the powdered sugar and almond flour. Set it aside.
- Whisk the sugar and the egg white powder (if using) in a bowl, and place it over a pan with barely simmering water.
- Add the egg whites to the sugar and whisk the mixture until frothy and the sugar is completely melted. It will take a couple of minutes. You can test by touching the mixture between your fingers, and if you feel any sugar granules just keep whisking the mixture over the water bath.
- Make sure the bottom of the bowl isn’t touching the simmering water because you don’t want the whites to cook.
- Also, don’t overheat the sugar syrup, this may cause issues down the line, such as wrinkly macarons.
- Transfer the syrup to the bowl of a stand mixer.
- With the whisk attachment, start whisking the syrup on low for about 30 seconds, then gradually start increasing speed to medium. Whisk on medium for one to two minutes, until the mixture is white and starting to become fluffy. Raise the speed to medium-high and whisk for a few minutes until stiff peaks are formed. Best way to check this is to keep your eye on the whites. Once they get glossy and you start seeing streaks formed by the whisk, it might be time to stop.
- Whip until stiff peaks have formed. When you pull your whisk up, the peak should be stiff and shooting straight up, with possibly a slight bend at the top, but not bending down to the side.
- Pour the sifted powdered sugar and almond flour into the stiff meringue.
- Start folding gently forming a letter J with a spatula.
- Fold the dry ingredients with the meringue just until you see no more dry ingredients in the meringue.
- As soon as you see no more dry ingredients in the meringue, stop stirring. Divide the batter between five different bowls.
- Work with one bowl at a time, leaving the other ones covered meanwhile. You will want the white batter to have the largest amount because it will use about 3-4 times more white batter than colorful batter per shell.
- To the first batter add white powder food coloring (or just skip and don’t add any) and stir until the perfect consistency is achieved. The batter should be flowing slowly and effortlessly off the spatula, you should be able to pick up some batter with the spatula and draw several figure 8s with the batter that’s flowing, without having the batter break up. And even after the batter breaks up, it should still continue to flow off the spatula slowly.
- There’s another test you can do. I call it the Teaspoon test.
- Grab a teaspoon of batter and spoon onto the parchment paper or silicon mat. Wait a minute to see how it behaves.
- If the batter stays stiff, forming a point and doesn’t spread out, fold a little bit more, about 3 folds.
- Test again.
- Once the batter spreads out a bit and starts to look glossy and smooth on top, on the parchment paper, it’s ready.
- You don’t want your batter to be too runny either. So be careful not to over mix. It’s always best to under mix and test several times until the proper consistency has been achieved.
- Once the first batter achieves the perfect consistency, transfer it to a piping bag. Secure the top with a tie, so the batter doesn’t scape while piping, and to keep the batter from drying out while you work with the remaining batter. Set the piping bag aside.
- Now, it’s time to work with the second batter. I colored the second batter yellow, I added a bit of gold and also egg yolk gel food coloring from americolor. After adding food coloring, stir until the perfect consistency is achieved, like I’ve explained above.
- Transfer the yellow batter to the piping bag. And secure the top with a tie.
- Now, it’s time to work with the green batter. I added quite a bit of leaf green gel food coloring also by Americolor. After adding food coloring, stir until the perfect consistency is achieved, like I’ve explained above.
- Transfer the green batter to a piping bag. And secure the top with a tie.
- Next, let’s make the blue batter. I added some royal blue food coloring from Americolor.
- After adding food coloring, stir until the perfect consistency is achieved, like I’ve explained above. Transfer the blue batter to a piping bag and secure the top with a tie.
- Lastly, make the red batter. Add red food coloring, you might need quite a bit in order to make a vibrant red. Just be careful not to overmix the batter as you continue to add color in order to achieve the desired tone.
- Time to start piping! We are going to pipe a dollop of batter that’s about 3/4 inch in diameter. I used a wilton 8 to pipe them.
- After piping the batter, tap the tray against the counter or against the palm of your hand to release any air bubbles and let it dry completely before proceeding.
- Once the batter dries, you can pipe the white batter on top. I used a larger tip to pipe the white batter. This was a wilton 12.
- Place the piping bag on top of the mini macaron you’ve piped previously, right on the center. Then start applying pressure until enough batter gets released to cover the entire surface of the colorful batter on the bottom.
- Try to apply uniform pressure so the batter is dispensed evenly over the surface of the bottom shell.
- Immediately tap the tray against the counter or against the palm of your hand to release air bubbles, and to help the white batter spread out and cover the entire mini shell.
- Use a toothpick to pop any bubbles from the surface of the shells.
- Let the trays sit for a while so the shells will dry out a little bit. I usually leave about 20-40 minutes, depending on how humid the day is, how much food coloring you have added, and on the consistency of the batter. You’ll know the macarons are ready to be baked. when you gently touch the surface of a macaron and it seems dry, and doesn’t stick to your finger.
- I baked mine at a 315 Fahrenheit oven for about 20 minutes. I pre-heated my oven for about 1 hour before starting, and I also have a pizza stone on the bottom rack of my oven in an attempt to control temperature fluctuations. I have been baking my macarons on a rimless baking sheet for best results and better air circulation, to help the macarons bake evenly.
- Bake one tray at a time.
- Bake for 5 minutes, rotate the tray in the oven to bake evenly on all sides. And then continue baking.
- I bake each tray for about 15 to 20 minutes, rotating after the first five minutes baking. This means to simply turn the tray around in the oven 180 degrees, so it’s making sure the heat is distributed evenly since the back and the front of the oven often have different temperatures.
- When baked, the macarons will have a deeper color and formed feet. If you try to move a macaron, it shouldn’t feel jiggly. If the macaron is still jiggly, keep baking.
- Remove from the oven and bake the other tray.
- Let the macarons cool down before proceeding with the filling.
Cream Cheese Frosting
- For the filling, we will make a simple cream cheese frosting, which also has to be divided into 5 different colors.
- Beat the butter and cream cheese until fluffy and creamy together.
- With the mixer off, add the powdered sugar and mix on low until incorporated.
- If the frosting is too soft, add more powdered sugar, and if it’s too stiff, add some liquid such as water, milk, or heavy cream to thin it out. Raise the speed to medium high and beat for a minute or two until fluffy and smooth.
- Add vanilla extract and mix to combine.
- Now let’s divide the frosting between 5 different bowls.
- Color each portion of the frosting with a different color correspondent to a Hogwarts house. Here I am using powdered food coloring because is it much better for buttercream, since it doesn’t add any more moisture to it.
- Start by piping a ring of the white frosting around the edges of each macaron shell. Then pipe a bit of the colorful frosting in the center of each shell.
- Top with another shell.
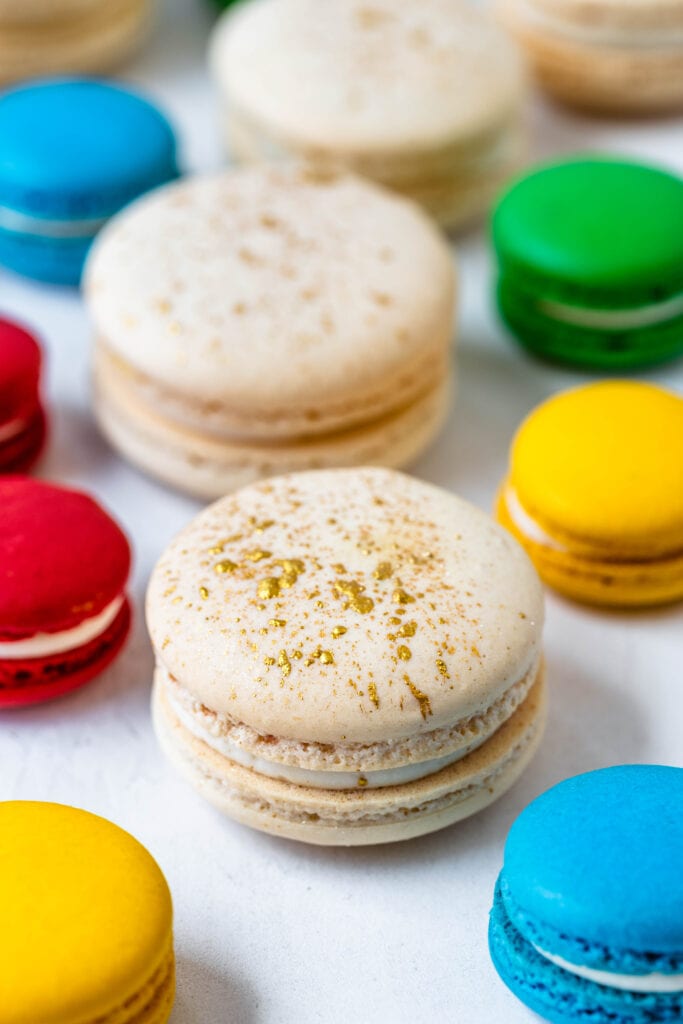
Golden decoration
- To add an extra decoration, I’ve mixed some gold luster dust with a bit of water. You can use clear alcohol such as vodka if you wish, the alcohol is actually better because it evaporates faster, preventing the shell from getting soggy and soaked.
- Once the gold powder has been diluted, dip the brush in the liquid and flick it against a fork to create the splatter effect on the shells.
- Let the shells mature in the fridge overnight before serving.
Parabéns!! Adorei a sua ideia!! Você é muito criativa!!
Ideia genial, ficaram mágicos!!!!!!!