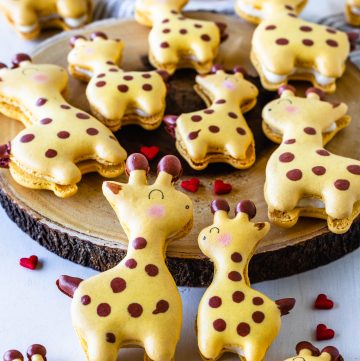
Giraffe Macarons
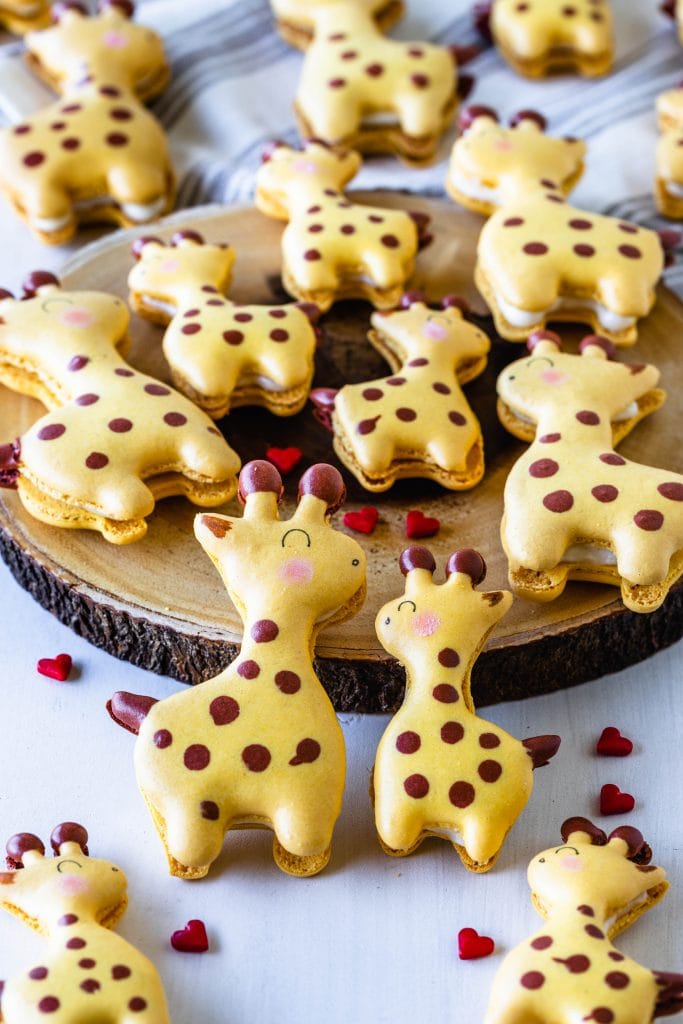
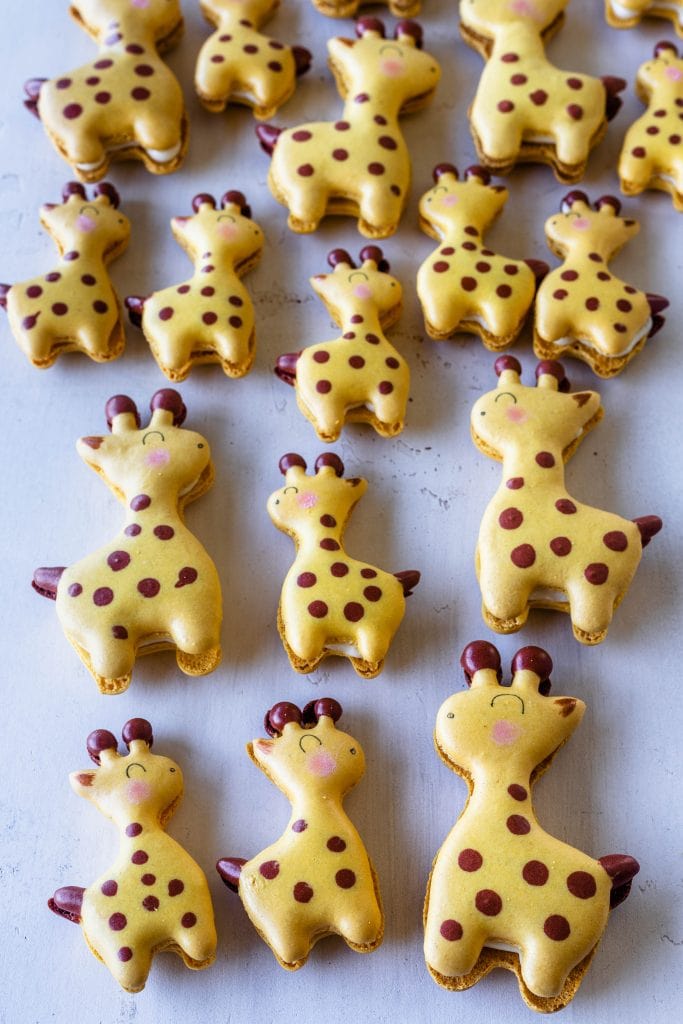
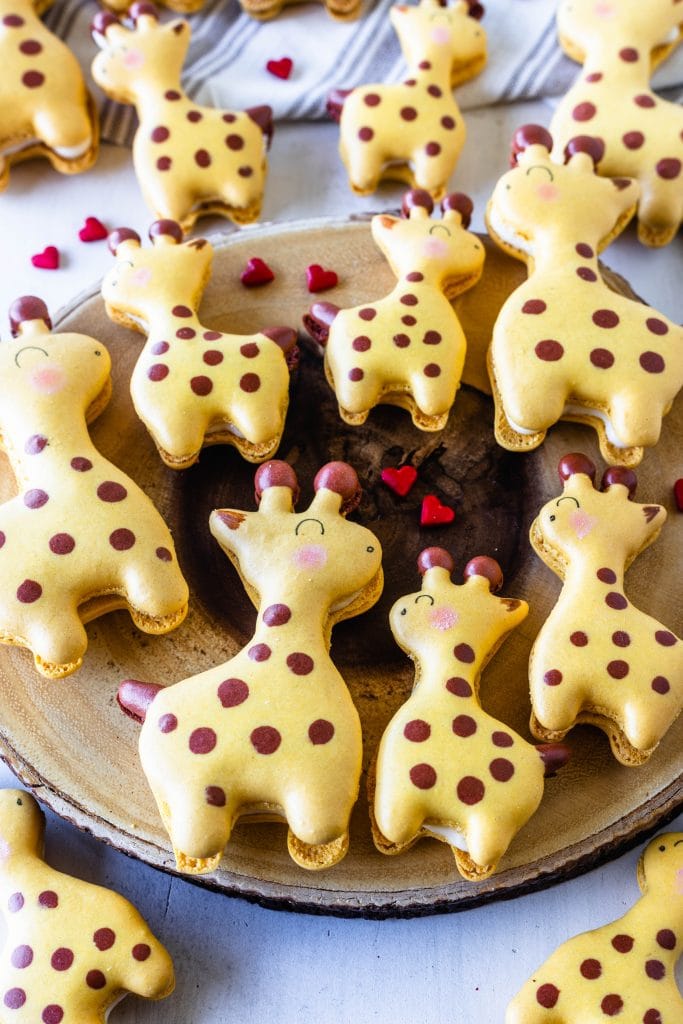
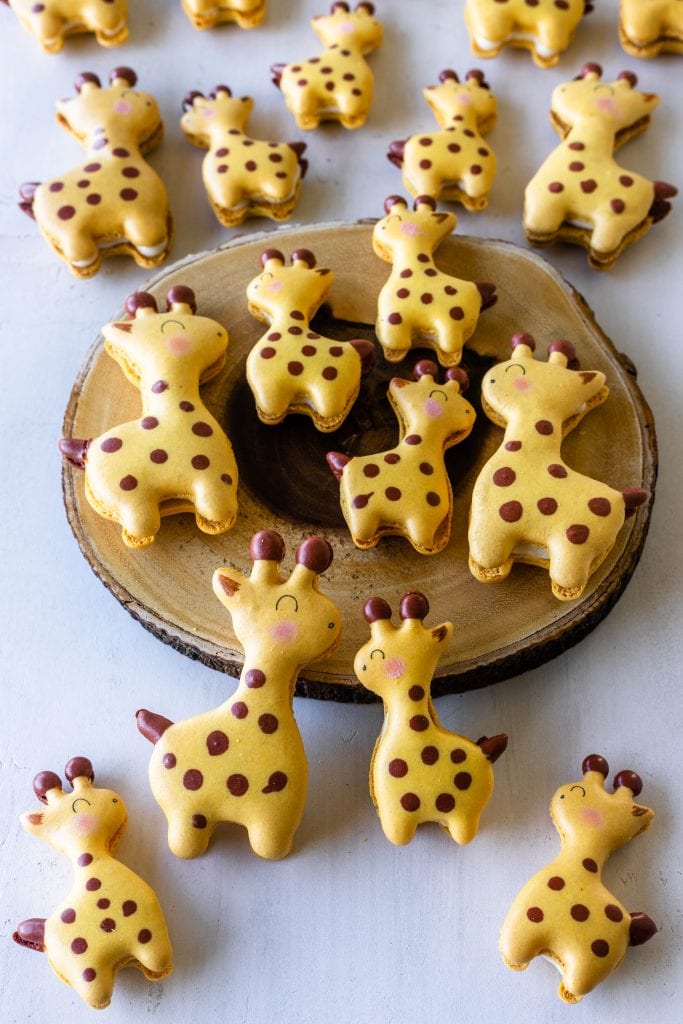
Hello friends! Today we are making Giraffe Macarons! Giraffes are my favorite animal ever! And I am also making these macarons as a tribute to Mother’s Day! So I made a mama giraffe and a baby giraffe! How cute!
Make sure to grab the template down below, and watch the video on this page or on YouTube showing you how to pipe the giraffes!
Piping the giraffes really isn’t too hard. This shape is actually super easy and perfect for beginners, if you are just getting started with shapes.
This post may contain affiliate links. I earn a commission from qualified purchases. Please read our Privacy policy here.
I will also give you some tips down below that can help you
But first let’s get to the template
Giraffe Macaron Template
Below you will find 4 templates. Two for the mama giraffe and two for the baby giraffe.
Remember that the macarons have to be sandwiched together, so half of the giraffes have to be piped inverted, so the two halves will match once you pipe the filling and combine the bottom and top shell.
Simply click on download and you will be able to print the templates to place under your baking mat.
The baby giraffe is a little over 3 inches in height, and the mama giraffe is a little over 4 inches in height.
Tips on how to pipe the Giraffe Macarons
- The batter can’t be under-mixed. If the batter is too thick, it will form streaks in the batter and the shell won’t come out smooth.
- Pipe one giraffe at a time. If you pipe the body of several giraffes at a time before popping the air bubbles, or before adding the brown spots, the batter may dry, and then the brown spots won’t incorporate with the batter, or the shells will be bumpy if you try to smooth out a semi-dry batter as opposed to a “wet” freshly piped batter.
- Constantly tap the trays against the counter or against the palm of your hand to release air bubbles, and most importantly, to help the batter smooth out.
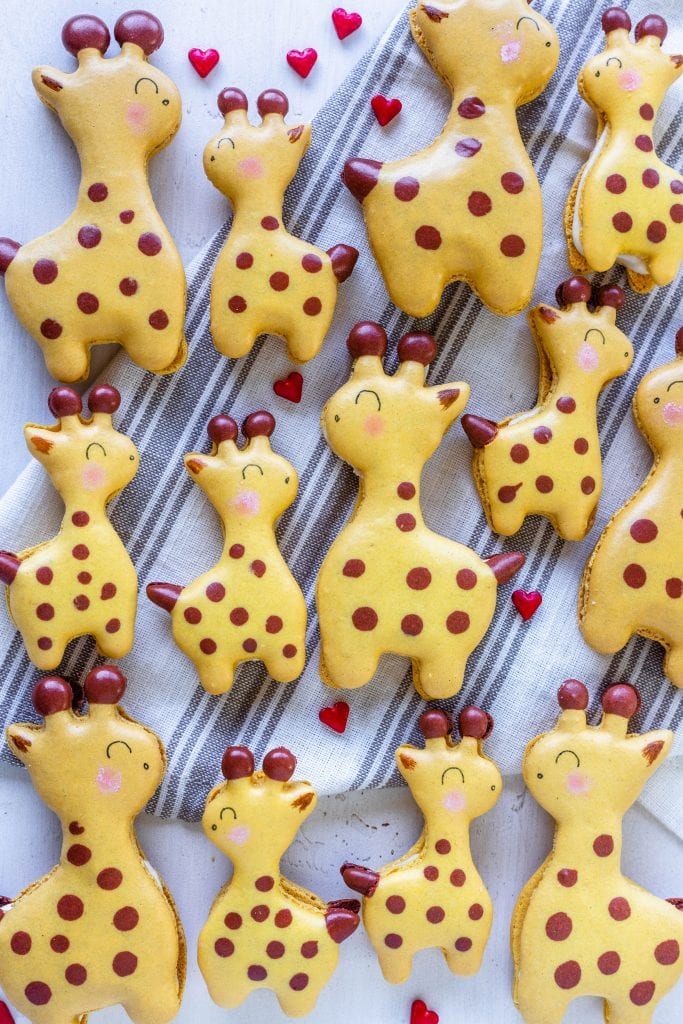
- Make sure the brown and yellow batters are connected at the spot where they meet, if the ossicones (the giraffes’s horns) and the tails are not connected by a good amount of batter, they will break off after baking. So pipe the brown batter closely to the body, and also use a toothpick to spread the batter out.
For the filling I used my White Chocolate Buttercream frosting. You can grab the recipe here.
Or use any recipe you would like. I have over 100 recipes for fillings here on this Macaron flavor list.
I am back using egg white powder in my recipes. If you follow me you know that over winter I stopped using egg white powder because it would make the batter way too dry since the climate was so dry. The batter would be drying by the time I piped it, which wouldn’t even give me time to pop any air bubbles without turning out with a bumpy and streaky shell.
But now humidity has been in the 40%, which isn’t super high of course, but enough for me to add egg white powder back into my recipe!
Egg white powder is completely optional, I love it because it makes my meringue more stable, the shells fuller and less temperamental.
Materials used
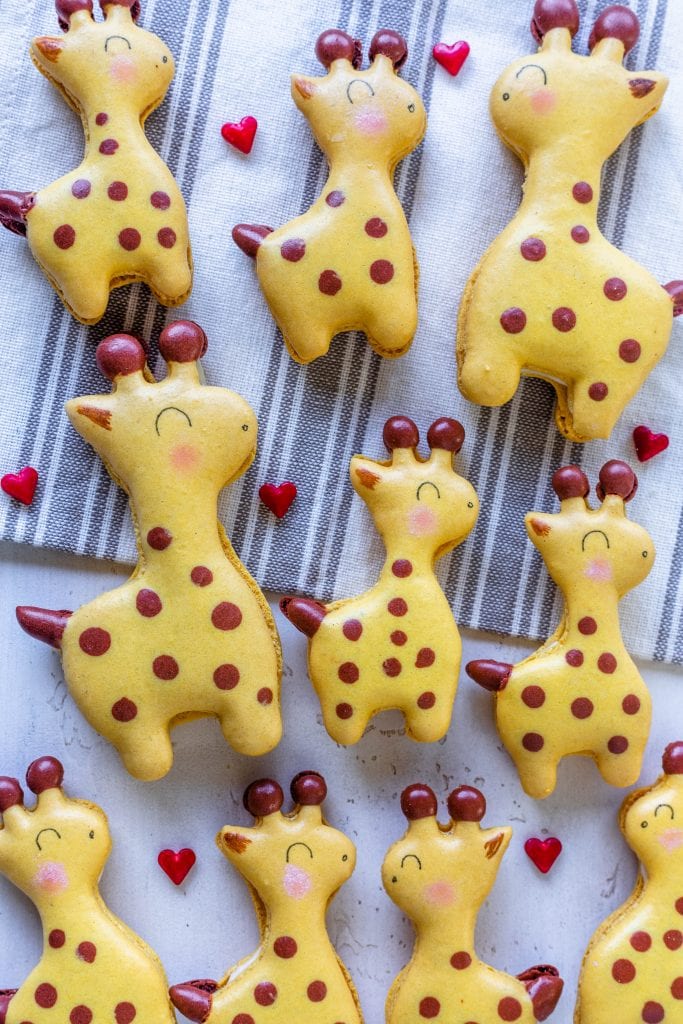
I used a fine edible marker to make the eyes and nose of the giraffes:
And this is the Pink Luster Dust I used to make the cheeks of the giraffes. You only need to dip the brush in the powder, no need to mix it with water or another liquid.
I really recommend the color Egg Yellow by Americolor. It is so much prettier than regular yellow by other brands, which often turns out like lemon yellow. Well not this color! The Egg Yellow by Americolor has a deeper tone, duller, and more towards an orange hue rather than a green hue.
Those are some of the products I used. For the brown parts I used just regular brown gel food coloring also by Americolor, and some cocoa powder, because it helps deepen the colors without having to add so much food coloring.
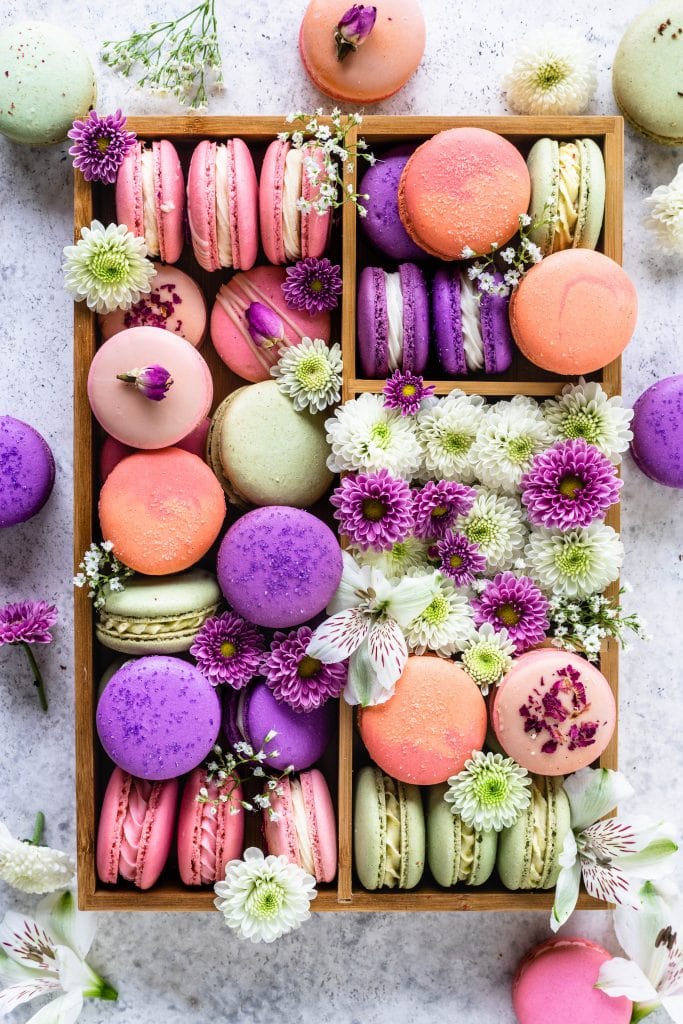
If you like this recipe, check out some other animal shaped macarons I’ve done recently:
And other ideas for Mother’s Day macarons:
- Champagne Macarons
- Raspberry White Chocolate Macarons
- Hazelnut Macarons
- Earl Grey Macarons
- Cinnamon roll Macarons
- Mango Raspberry Macarons
- Spring Macarons
- Lavender Macarons
- Brownie Stuffed Heart Macarons
- Passionfruit Macarons
- Strawberry Macarons
And besides these cute Giraffe Macarons, here is the other creation I made for Mother’s Day this year.
Anyway, I hope you enjoyed today’s recipe as much as I did!! Thank you so much for following along!
Much love!
Giraffe Macarons
Ingredients
- 100 grams egg whites
- 100 grams granulated sugar
- 4 grams egg white powder optional read notes
- 105 grams almond flour
- 105 grams powdered sugar
- 2 grams cocoa powder
- Yellow and brown food coloring
To decorate
- Edible Marker
- Brown food coloring plus water
- Pink Luster Dust
Instructions
Macaron Shells
- Before you start, get all of the ingredients ready. Prepare 2 piping bags fitted with piping tips. To pipe the large giraffes, I used a Wilton #8 for the body, and Wilton #4 for the spots, the tail and the ossicones, which are the little horns the giraffe has. And to pipe the small giraffes, I used Wilton #6 for the body and #3 for the brown areas. You can use the same piping bag, and switch the tips when you go to pipe the other size giraffes.
- Line two baking sheets with parchment paper or silicone mat.
- Have the printed out templates ready to go. You will need two templates for each size. Don’t forget to print the reverse of the template, so you have two cookies that will be able to match and be sandwiched together.
- Measure out all of the ingredients.
- Sift the powdered sugar and almond flour together.
- Whisk the sugar and the egg white powder (if using) in a bowl, and place it over a pan with barely simmering water. Add the egg whites to the sugar and whisk the mixture until frothy and the sugar is completely melted. It will take a couple of minutes. You can test by touching the mixture between your fingers, and if you feel any sugar granules just keep whisking the mixture over the water bath.
- Make sure the bottom of the bowl isn’t touching the simmering water.
- Also, don’t overheat the sugar syrup, this may cause issues down the line, such as wrinkly macarons.
- Transfer the syrup to the bowl of a stand mixer.
- With the whisk attachment, start whisking the mixture on low for about 30 seconds, then gradually increase the speed to medium. Whisk on medium for one to two minutes, until the meringue is white and starting to become fluffy. Raise the speed to medium-high for a few minutes until stiff peaks are formed. Best way to check this is to keep your eye on the whites. Once they get glossy and you start seeing streaks formed by the whisk, it might be time to stop.
- Whisk until stiff peaks have formed. The peaks should be shooting straight up, not bent down to the side.
- Pour the sifted powdered sugar and almond flour into stiff whites.
- Fold the dry ingredients with the meringue until just incorporated. When you can’t see any more streaks of dry ingredients in the batter, separate the batter into two different bowls.
- I scooped about 1/4 of the batter into one bowl to dye it brown and make the giraffes spots, ossicones, and tail.
- The remaining batter will be used for the body, so we will dye it yellow.
- Work with one bowl at a time, and keep the remaining one covered so the batter doesn’t dry out.
- Let’s begin by coloring the batter yellow. I used egg yellow gel food coloring by americolor. After adding the food coloring, start the macaronage, folding until the proper consistency.
- How to know when to stop folding the batter: It’s time to stop folding when the batter is glossy and has a thick and flowing consistency. There are several ways to test this.
- First, pick up some batter with the spatula and try to draw a figure 8 with the batter that is dripping off the spatula. If you can form several 8 figures without the batter breaking up, that’s one indication that it might be ready.
- There’s another test you can do. I call it the Teaspoon test.
- Grab a teaspoon of batter and spoon onto the parchment paper or silicon mat. Wait a minute to see how it behaves.
- If the batter stays stiff, forming a point and doesn’t spread out a bit, start folding a little bit more, about 3 folds.
- Test again.
- Once the batter spreads out a bit and starts to look glossy and smooth on top, it’s ready to go.
- You don’t want the batter to be too runny either. So be careful not to over mix. It’s always best to under mix and test several times until the proper consistency has been achieved.
- Pick up some batter with the spatula and hold it on top of the bowl, the batter should fall off the spatula slowly but effortlessly. The batter will continue to flow off the spatula non-stop, but not too quickly.
- Once you achieve the perfect consistency, transfer the batter to a piping bag fitted with a wilton number 8 if piping the large giraffes, or wilton number 6 if piping the small giraffes.
- Use a bag tie to secure the top of the bag closed, to ensure the batter won’t dry out. Set that bag aside.
- Move on to the brown color batter. I added a bit of cocoa powder for color, and brown food coloring. Fold until the perfect consistency is achieved, and the batter is falling off the spatula slowly and effortlessly.
- Transfer the batter to a piping bag fitted with a #4 piping tip if making the large giraffes, or a piping tip number 3 if making the small giraffes.
- Once both batters are ready, begin piping.
- Pipe the yellow part of the body first by carefully following the template. I like to pipe one giraffe at a time this way the batter won’t start drying making it hard to make the brown details later.
- Tap the trays against the counter or against the palm of your hand, which will help the batter smooth out. And use a toothpick to make the ears more defined, and to pop any air bubbles.
- Pipe the ossicones, which are the horns, then the tail, and the spots on the giraffe’s body.
- Use a toothpick again just to pop any air bubbles, or make the tail more defined.
- Always make sure the two batters, the yellow and the brown are connected where they meet, because if they have too much room between them, the tail or the horns will break after baked.
- Dont forget to pipe the reverse giraffe, so you have a top and a bottom cookie to be able to make the cookie sandwiches later.
- Now to pipe the small giraffes, simply change the piping tip to a smaller size. For the body we will use a number 6, and for the brown details a piping tip number 3.
- Let the trays sit for a while so the shells will dry out. You’ll know they’re ready to be baked when you gently touch the surface of a macaron and it seems dry.
- Pre-heat the oven to 300ºF.
- Bake one tray at a time.
- Bake for 5 minutes, rotate tray.
- Bake for 5 more minutes. Rotate again.
- I baked each tray for 15 to 18 minutes total for the small giraffes, and about 20 minutes for the large giraffes.
- When baked, the macarons will have a deeper color and formed feet. If you try to move a macaron, it shouldn’t feel jiggly. If the macaron is still jiggly, keep baking.
- Remove from the oven and bake the other tray.
- Let the macarons cool down before proceeding with the filling.
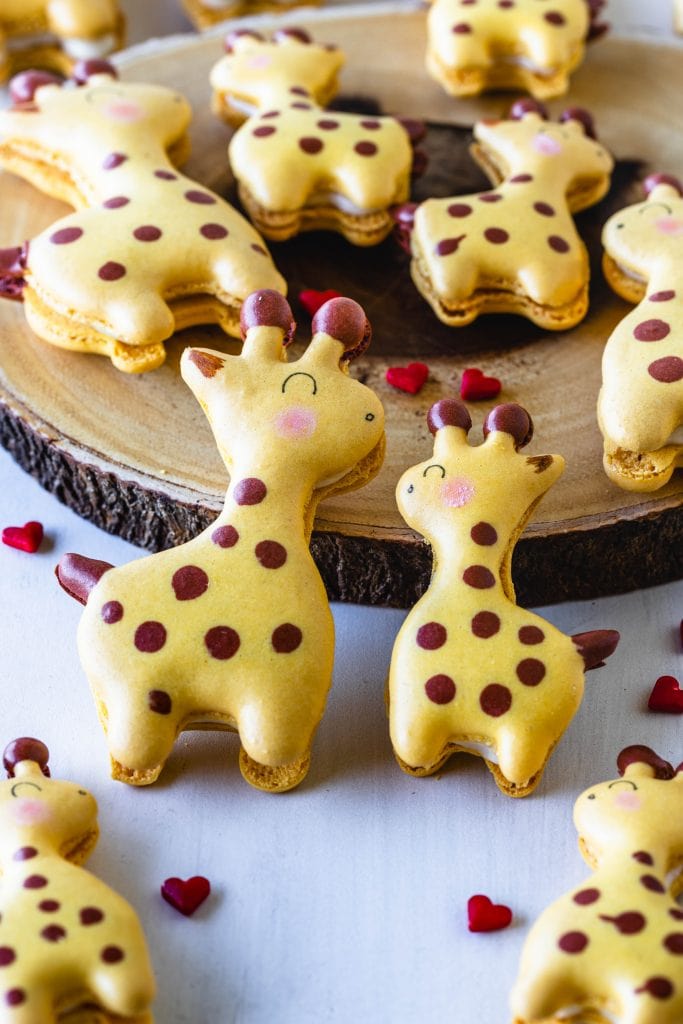
- After the macarons are cool, I used an Edible Ink Marker to draw the eyes on the giraffes, and the nose. Then I dipped a small brush in brown food coloring dissolved with a drop of water, and used it to paint the inside of the ears. And with a brush dipped in pink luster dust, I made the cheeks of the giraffes.
To assemble
- Pipe some of the frosting on each bottom giraffe shell. Top with another giraffe.
Storage
- Store the macarons in the fridge for up to 5 days, or in the freezer for 1 month.
Do you have a version of the recipe using cups ?
I had just started watching your giraffe macarons video when advertisements and videos of other cooks cut in, and I couldn’t get back to your demo of making the giraffe macarons. Could you please advise how I could get around this? I want to make the giraffe macarons as a birthday present, and I have only 2 days to do it. Thanks very much!
https://www.youtube.com/watch?v=jRfNG_tdXPE&t=9s here is the full video on youtube
These are so cute! If I were to trace the giraffe shapes onto my silpat, would I need a special edible pencil?
I dont recommend drawing on your silpat. An edible marker probably won’t even take on the silpat.
OK, thanks for the reply. I thought that in your video you had traced the shapes onto the mat. But I rewatched and see now that the template shows through. Thanks for the great recipes! I had so many failed batches until a friend pointed me to your blog! 🙂
Yes you can print the template its available for download 🙂
Fantásticos, perfeitos!!!!!!
These are amazing!!
Thank you so much Dylan!!!