12 Cupcake Tips: How to Make Perfect Cupcakes
Hello friends! Today we will uncover some of the best cupcake tips, and how they can help you make perfect cupcakes every time.
Becoming a great baker is a matter of developing your skills. The best way to develop your baking skills is to practice and get knowledge. Fortunately, with the internet, it’s very accessible to learn pretty much anything!
This blog post is a comprehensive guide containing 12 cupcake tips that will certainly help you advance in your craft and improve your baking skills!
This post may contain affiliate links. I earn a commission from qualified purchases. Please read our Privacy policy here.
1. Oven Thermometer
Always have an oven thermometer in your oven. This is not only one of the best cupcake tips I can give you, but it goes for pretty much anything you bake in your kitchen.
Home ovens are not accurate at keeping the temperature you set them to, they just aren’t. Even my brand new oven that we got not even a year ago, just a month after getting it, the thermometer was reading a different temperature than the dial.
On this article, you can read all about how ovens work and an in-depth explanation of the reasons why you should have an oven thermometer. I wrote that article to explain why it’s so important to have an oven thermometer when baking macarons, but it will all apply for cupcakes as well.
Without an oven thermometer, you will never be able to tell what is the exact temperature inside the oven. Most home ovens are off by 30 to 90 degrees Fahrenheit! That’s a LOT! Often times, my oven temperature will start spiking, and even though the temperature is set to 325 Fahrenheit, the thermometer will read 375.
And imagine what that does to your baked goods! If you are supposed to be baking cupcakes at 350ºF, but the temperature is spiking, you could end up with disastrous results, such as cupcakes that are erupting on top, aka volcano cupcakes, or over-baked cupcakes that become dry after they cool down.
If the case is that the heat is too low and you don’t know because you don’t have an oven thermometer, you could end up with flat cupcakes.
See all about cupcake issues and how to fix them here on my Cupcake Troubleshooting Guide.
2. Quality Ingredients
Quality matters when learning how to make perfect cupcakes! The brands you use matter a lot in the final product! I am not saying you have to use the most expensive brands out there, but you should pay attention to the quality of the ingredients you are using.
Also, I am not saying to get European butter to make cupcake batter, however, it might be worth it to invest in a high quality butter for your buttercream frosting for example, since the taste and texture of the butter will be so evident in the buttercream.
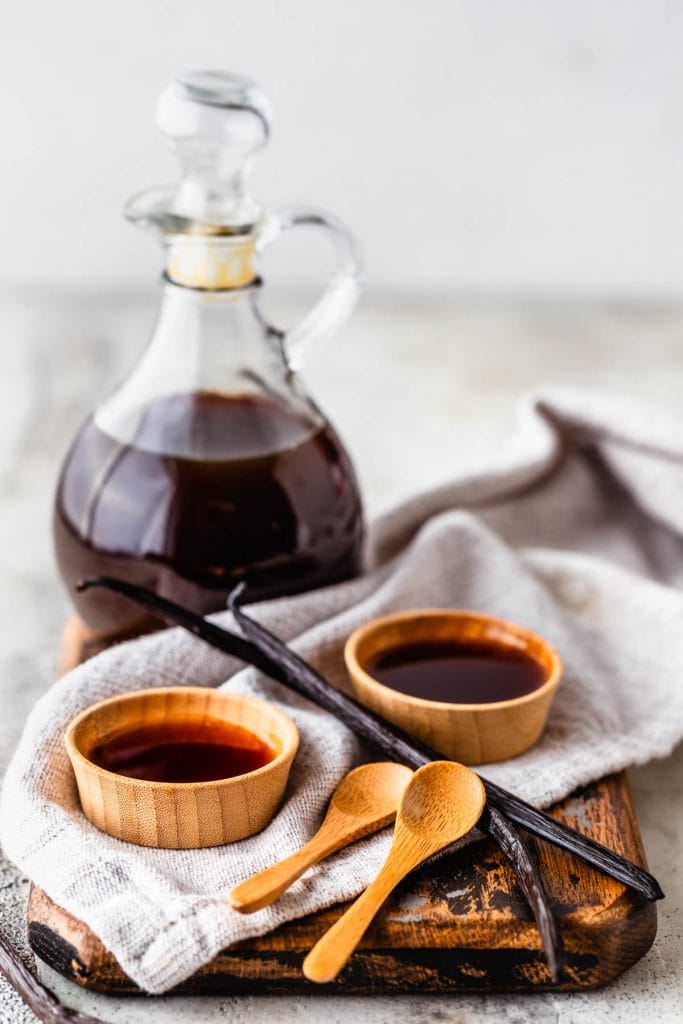
Always make sure to use real vanilla extract, and not vanilla imitation for your cupcakes. This is extremely important. Real vanilla will indeed cost more than imitation vanilla, but it’s so worth it, the taste is undeniably better than the imitation counterpart.
I would probably prefer to not use anything than to use imitation vanilla. In the oven, the taste gets often baked off, but in the frosting you will really be able to identify a weird aftertaste from the imitation vanilla.
The quality of the ingredients you use in the recipe will affect the overall result. One of the best cupcake tips I can give you is: pay attention to the quality of each ingredient you are adding to your recipe.
Other ingredients besides butter and vanilla that you need to pay attention to the quality before adding to your recipe:
- Cocoa powder: depending on the cocoa powder you use it can affect the taste and color of your baked goods. And some cocoa powders have a higher ratio of fat than others. Also, make sure to use regular cocoa powder when needed, and dutch-processed if the recipe says so.
- Chocolate: wether it’s on the frosting or on the batter itself, using good quality chocolate in your recipes is very important. The quality of the chocolate you use will affect directly the taste and overall looks of your final product. Use a chocolate that you also enjoy eating when it comes to baking (unless the recipe calls for unsweetened, cause then nobody likes to eat that by itself 😅).
- White chocolate: if you are using white chocolate in the cupcake batter itself, or in the frosting, make absolute sure to use real white chocolate. Most of the white chocolate chip brands you get at the store are NOT real white chocolate. Real white chocolate must contain at least 20% cocoa butter. The “fake” white chocolate won’t taste good, won’t make a good ganache, and won’t melt properly, it will separate or harden up if you try to melt it to make frosting.

As far as the brands of flour and sugar, I have used from King Arthur Flour brand to store brands, and they work the same for me. I prefer King Arthur Flour, so that’s what I usually get, but I also don’t notice a striking difference if I use something else.
Also pay attention to the quality of the products you are using such as:
- Paper liners– some tend to stick to the cupcakes, or get wrinkled, or peel off. Find a sturdy and reliable brand to use. I like Wilton liners.
- Baking pans– dark pans tend to produce brown cupcakes, because they retain more heat and cook the outside of the cupcakes more.
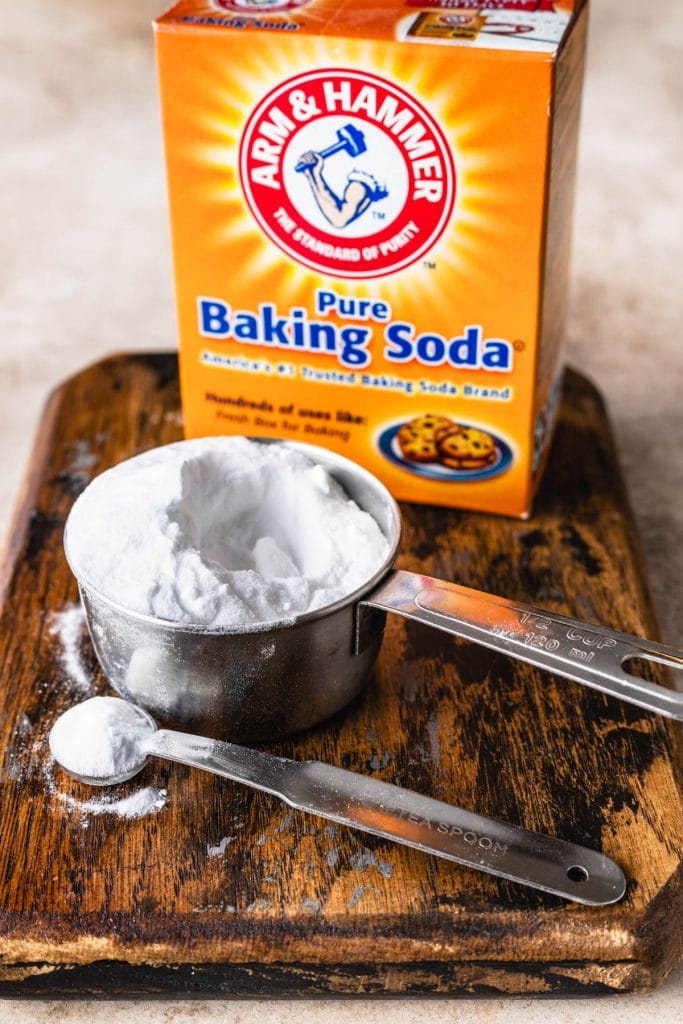
3.Fresh Leavening Agents
Tip number 3 in our Cupcake Tips Guide: make sure the baking soda and baking powder you are using in your recipe are fresh.
Expired leavening agents won’t allow for the chemical reactions that are necessary to give the cupcake lift to happen.
The results: dense cupcakes, flat cupcakes, sunken cupcakes.
To check if the baking powder you are using is fresh, add 1/2 tsp of baking powder to 1/4 cup of warm water and mix. If the mixture fizzes and bubbles, you are good to go. If not, toss it.
And for the baking soda, add 1/2 tsp of baking soda to 1/4 cup of white vinegar. The mixture should also cause a reaction and fizz. If nothing happens, toss it.
4.Room Temperature
This is probably one of those overstated cupcake tips by bakers and bloggers. Why do we need to use room temperature butter, eggs, and milk when baking?
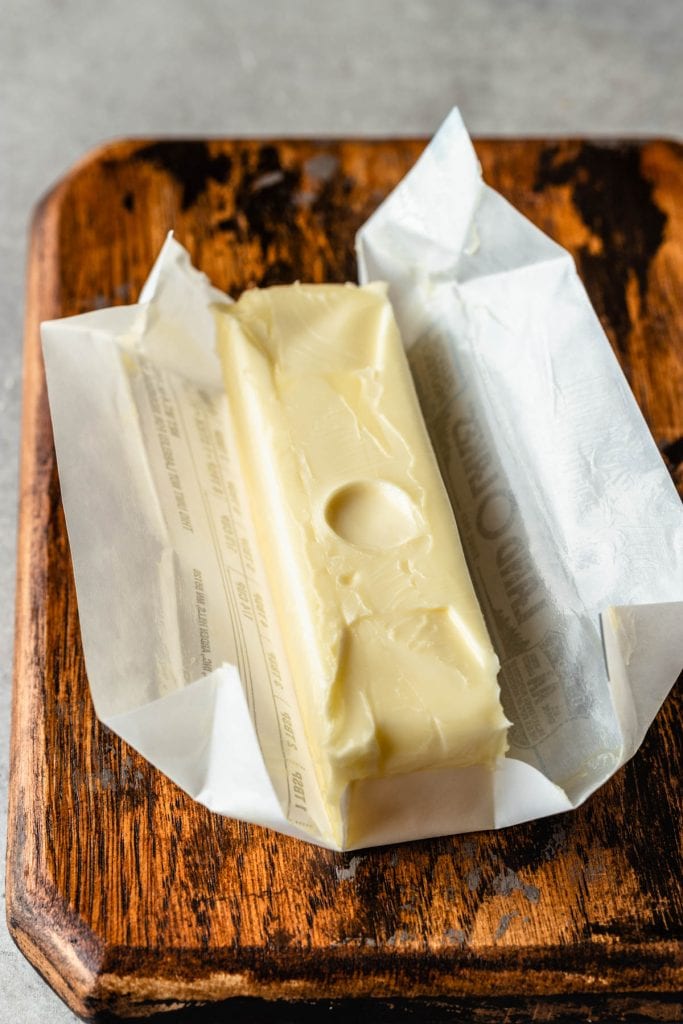
Ok, let’s talk about the butter first. Creaming the butter and sugar together is usually the first step of a butter based cupcake recipe. This step beats air into the butter, with the help of the sugar, and forms pockets of air, or bubbles that will then capture gasses released by the baking powder or baking soda, giving the baked goods lift and fluffiness.
If the butter is cold, it will be lumpy, and won’t be able to incorporate well with the sugar in order to form those air pockets. And if the butter is too soft and melty, the air pockets will melt and won’t be able to hold their shape. The results: dense, flat, sad cupcakes.
The butter should be between 68 and 70 Fahrenheit. And if you touch it with your finger, it shouldn’t go right through the butter, it should form a dent, but remain firm, like it shows in the picture below,
How to bring butter to room temperature: take it out of the fridge 1 to 2 hours before beginning to bake, depending on how warm the kitchen is. A trick is: chop the butter on a plate. Then place a cup of water in the microwave and microwave it until very hot, then quickly open the microwave door, remove the water, and stick the chopped cold butter in there. Leave for 5 minutes.
The eggs should be at room temperature as well. Room temperature eggs will incorporate better and faster with the batter, minimizing mixing time. For cupcakes that use whole eggs, it’s really not THAT important that the eggs be at room temperature.
But if the recipe calls for whipped whites, definitely make sure it’s at room temperature. You should always whip egg whites at room temperature, because of something called the denaturation process, which is the unraveling of the proteins in the egg whites.
The proteins uncurl as air gets added into them by the whipping process, and the hydrophobic amino acids in the proteins stick to the air bubbles, and the hydrophilic ones stick to the water particles, forming a strong structure that results in foam, then in peaks. And this process is way harder to occur if the whites are cold, providing a weaker network in the whipped whites. The results are: dense baked goods, without so much lift.
How to quickly bring eggs to room temperature: place them in a bowl with slightly warm water (around 110ºF) and let them sit for 5 minutes or so.

Lastly, the milk, or yogurt, or sour cream, or any dairy you are adding to your cupcake recipe. They also need to be at room temperature.
If you add cold milk to a cupcake recipe, it may cause the butter in the recipe to curdle. It will also interfere with the emulsification of the batter, and it won’t allow for the ingredients to dissolve and incorporate together properly as they should. We aren’t making biscuits here, we don’t want layers, we are making fluffy cupcakes, we want a smooth batter!
To quickly bring milk to room temperature microwave it for 5 to 10 second intervals, making sure to check and stir in between because you don’t want it to get warm, just up to 70 degrees Fahrenheit in temperature.

5.Mix Just Right
Sounds silly saying it, but this is one of the most important cupcake tips: mix just right, not too little and not too much. Several issues can come from not mixing the appropriate amount. And I will disclose them below.
And I am talking about the butter, the eggs, and also the dry ingredients!
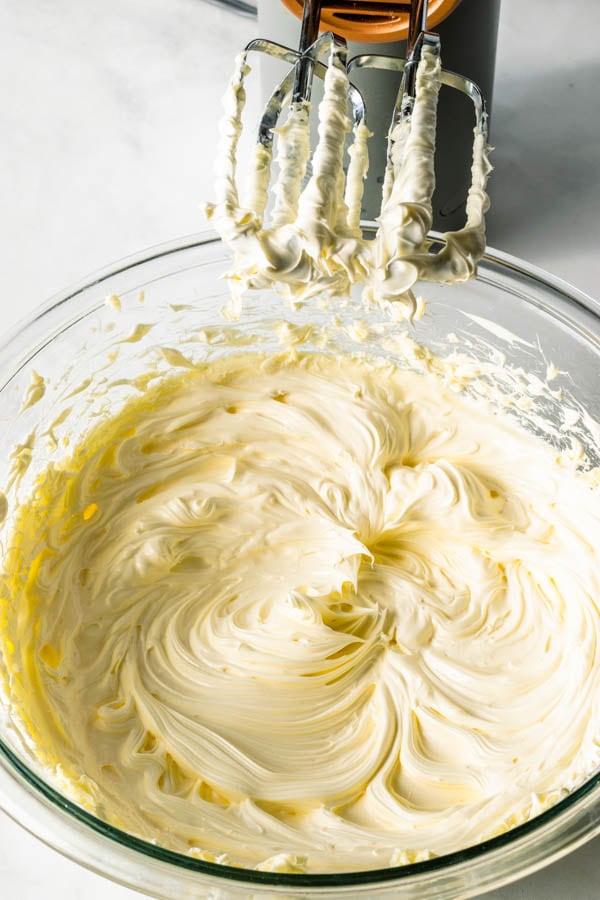
Butter
You don’t want to over-cream the butter, but you also don’t want to under-cream it.
Over whipping the butter ends up adding too much air to the batter, which can cause it to rise a lot in the beginning portion of the baking process, making it spill out of the pan, or just create a volcano top.
Under whipping the butter may cause the cupcakes to be dry and dense. You want to whip the butter for 2 to 3 minutes, to the point where it’s fluffy and airy, the air in the butter will provide lift, and fluffiness to the final product.
Eggs
The eggs should be mixed just until incorporated, unless the recipe states otherwise.
Which is why you add one egg at a time, in order to make sure one egg is incorporated before adding the next one. Or you whisk all the eggs together in a small bowl before adding to the batter, this minimizes mixing time.
Over mixing the eggs may cause too much air to be added to the batter, which can cause it to rise a lot in the beginning portion of the baking process, making it spill out of the pan. And under mixing the eggs will leave you with streaks of egg whites in the batter, and you surely don’t want that. You are looking for a smooth incorporated batter.
Flour
Probably one of the best cupcake tips I can give you is: don’t over mix the dough once you add the dry ingredients in.
Over mixing the dough once you add the dry ingredients will cause a dry and tough crumb. That’s because once you add flour to the wet ingredients and begin to stir, it will develop gluten. The more you mix, the stronger and longer those gluten strands become, which will make for a tougher crumb later on.
6.Follow the Recipe
There’s a reason why recipe developers write recipes the way they do. So of course, one of my cupcake tips is: follow the recipe, specially if you are a beginner.
If you are a beginner baker avoid making substitutions or changing a recipe. I am all for experimenting and rarely do I follow a recipe exactly the way it is, but I am aware of how substitutions work, and I do this for a job, I actually enjoy experimenting with recipes, even if they don’t work.
However, if you aren’t baking for the sake of experimenting, if you are actually baking something to serve to someone, you might want to stick to what the recipe is saying.
Ok, what if the recipe is asking for 1/2 cup of oil and you only have 1/4 cup, or maybe not any oil at all? Could you use butter instead? Maybe! But have in mind that anytime you substitute something, you run the risk of having the recipe not turn out as expected.
So feel totally free to change a recipe, but be ready for the possible consequences. Here are a couple of examples where substituting, or not following the recipe might cause undesired results:
Cocoa powder
Another thing is, for example, if the recipe is calling for dutch-process cocoa, and not regular, there’s a reason for that. Follow what the recipe is saying. Dutch-process cocoa doesn’t react with baking soda, because it’s alkalized. So the substitutions will alter the reactions that are needed for optimal rise and flavor.

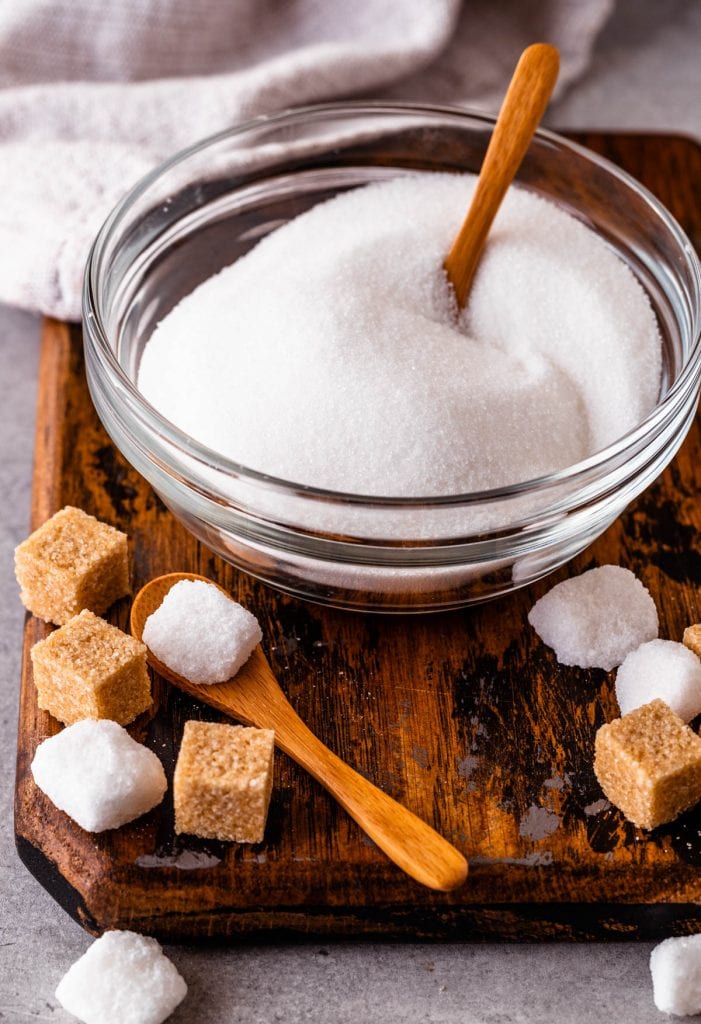
Sugar
I probably get this question every other day: can I reduce the amount of sugar in the recipe?
The answer is probably not! For recipes like banana bread, some cookies, brownies, you could probably get away with substituting granulated sugar for brown sugar, or something like that. You could even get away with reducing some of the sugar, depending on the recipe and how much sugar it asks for to begin with.
However, for recipes like cupcakes, macarons, and cakes, the answer is probably no. Sugar is not there just for sweetness. Sugar is necessary for the structure of the baked good.
Sugar has hygroscopic properties, so it provides moisture to recipes. Brown sugar provides more moisture to recipes than granulated, which is why it might make the cake too fluffy, or have a weakened structure if you choose to substitute it for granulated.
Sugar also tenderizes the baked goods, because it weakens gluten development.
If you choose to reduce the sugar, that might cause the cupcakes to be dense, not have as much lift, moisture, and fluffiness.
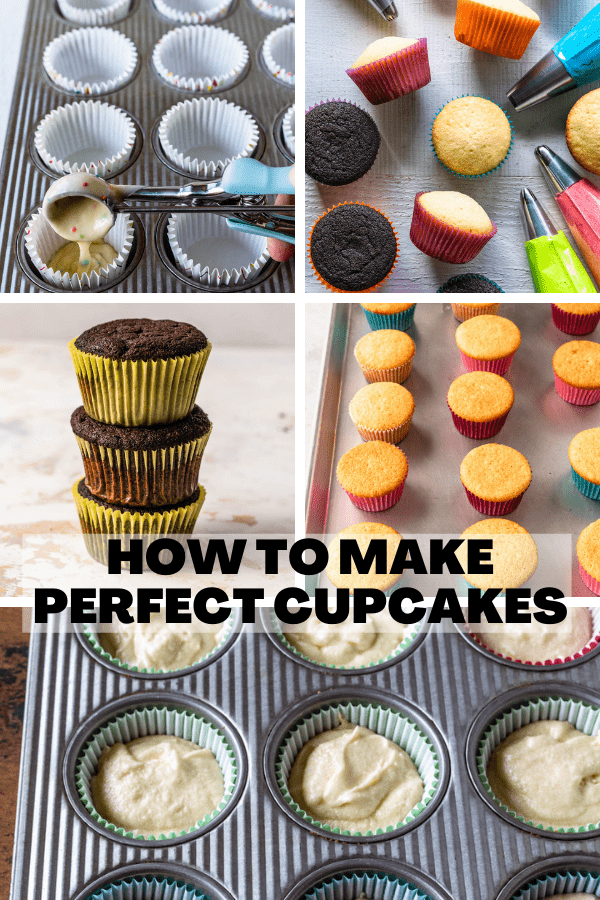
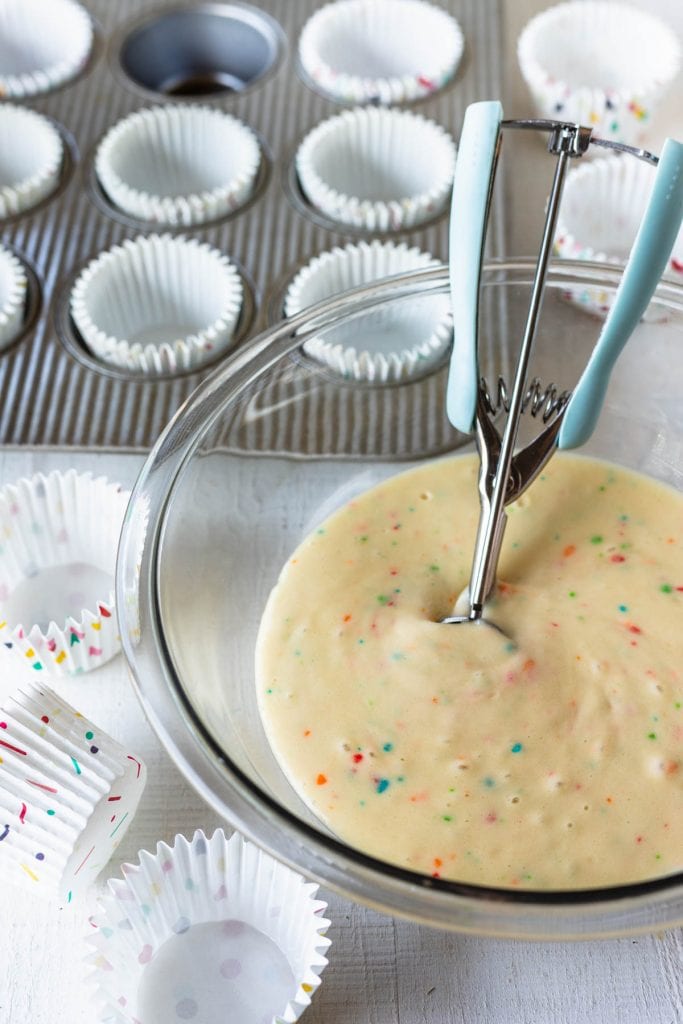
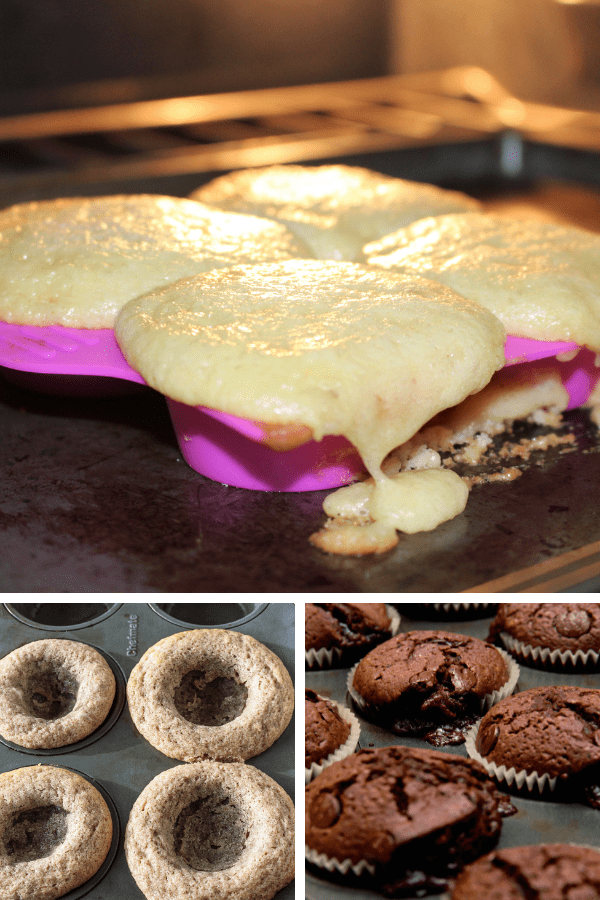
7.Don’t Overfill
Make sure to follow recipe’s instructions such as: how much each cupcake cavity should be filled. Most recipes require the cupcake cavities to be filled up to 2/3 of the way with batter. However, on my Chocolate Cupcakes recipe, for example, the instruction is to fill the cavity halfway up with batter, otherwise it will overflow.
If the recipe doesn’t specify, go for 2/3 of the way full.

Overfilling the cupcake tins can cause several issues, from volcano cupcakes, to spilling batter, and sunken middles.
You can read all about these issues on my Cupcake Troubleshooting Guide.
8.Scale
It’s very important to use a kitchen scale when baking. Again, this is not just one of the best cupcake tips you will get, but also a great baking tip in general. Getting a kitchen scale will completely transform your baking experience.
When you scoop a cup of flour with a measuring cup, it won’t have an accurate measurement of how much a cup should weigh. Then next time you scoop another cup, it will be something else. It’s inaccurate, inconsistent, and will lead to issues when baking.
Too much flour can cause your cupcakes to become dense, tough, and who wants that? Too much sugar can also alter your batter significantly, as sugar is an ingredient that’s very important to the structure of the baked goods as well as the flavor, as we have discussed above.
And there is also the fact that, depending on where the recipe developer is based, a cup could mean different things, one cup in UK is not the same as one cup in the USA, and not the same as 1 cup in Brazil.
So why risk it? Why take the chance of wasting ingredients and time on a recipe that might not turn out as good as it could because of a simple thing such as using a scale.
Make the investment, get a kitchen scale, and it will pay off with better quality baked goods.
Most recipe bloggers out there are already putting their recipes in grams or ounces, I have started doing that a while ago, and I still have to go back and change some old recipes where I was still using cup measurements, but I know it will be very helpful to many bakers around the world to have the accurate measurements.

9.Don’t Open the Oven Door
Opening the oven door too early may cause cupcakes to fall flat, since heat will scape, and cold air will go in the oven, causing the cupcakes to either deflate or not be able to rise at all.
Don’t open the oven door during the first 10 to 12 minutes of baking, and only do so if you need to rotate the pan around, in case your oven has hot spots of uneven heat distribution.
And if you do have to open the oven door to rotate it, make sure to do it quickly.
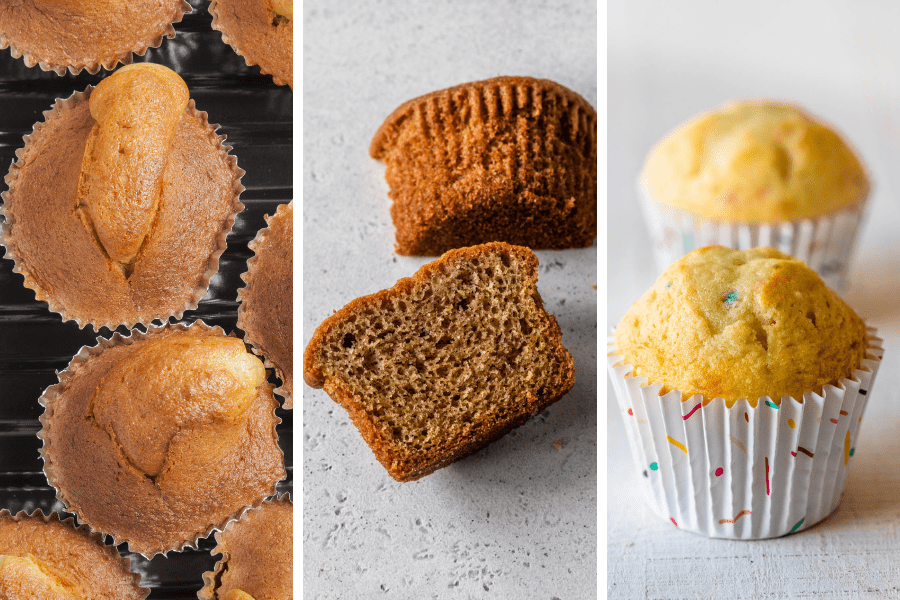
10.Test for doneness
You don’t want to under-bake your cupcakes, and you certainly don’t want to over-bake them.
Under-baked cupcakes will sink in the middle, and over-baked cupcakes will be dry and tough.
A recipe will usually give you a time frame for how long the cupcakes should be baked for. This will vary a lot depending on your oven. For example, convection ovens may bake things faster, because they tend to be stronger. And ovens are just naturally different from one another anyway, even if they are the same style, even brand.
Start checking if the cupcakes are done a couple of minutes or so before the suggested time in the recipe.
You can either use a toothpick and insert it in a cupcake, if it comes out clean, you are good to go. But my favorite fool-proof way to check if the cupcakes are done baking, is to gently touch the top of a cupcake with my finger, and if the cupcake springs right back, it’s done baking. If my finger forms an indentation that won’t spring back, means the cupcakes need a couple more minutes baking.

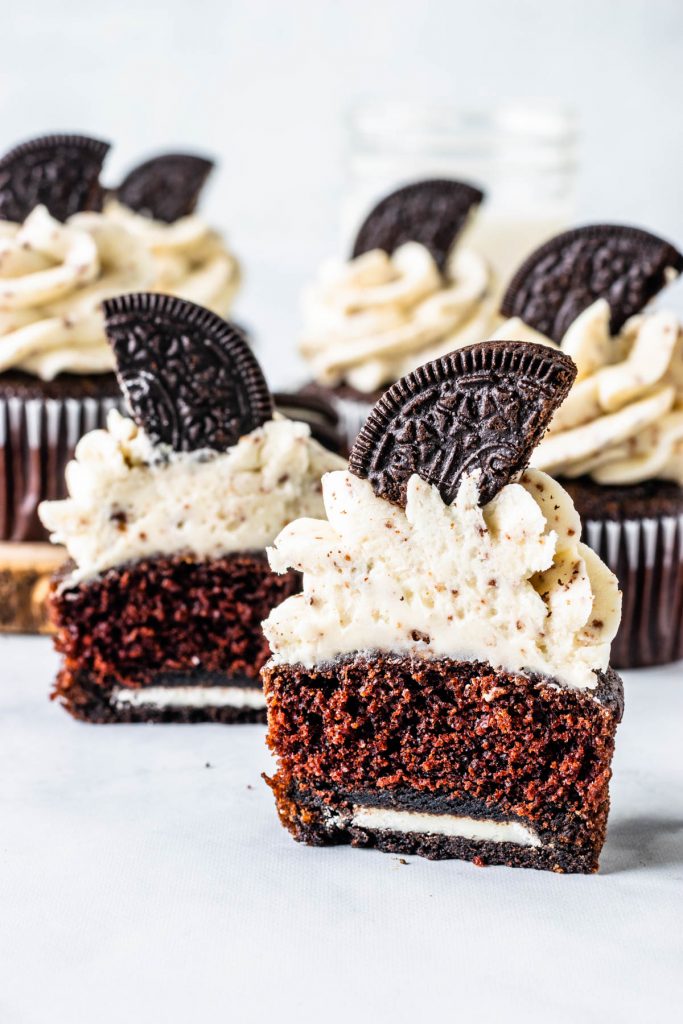
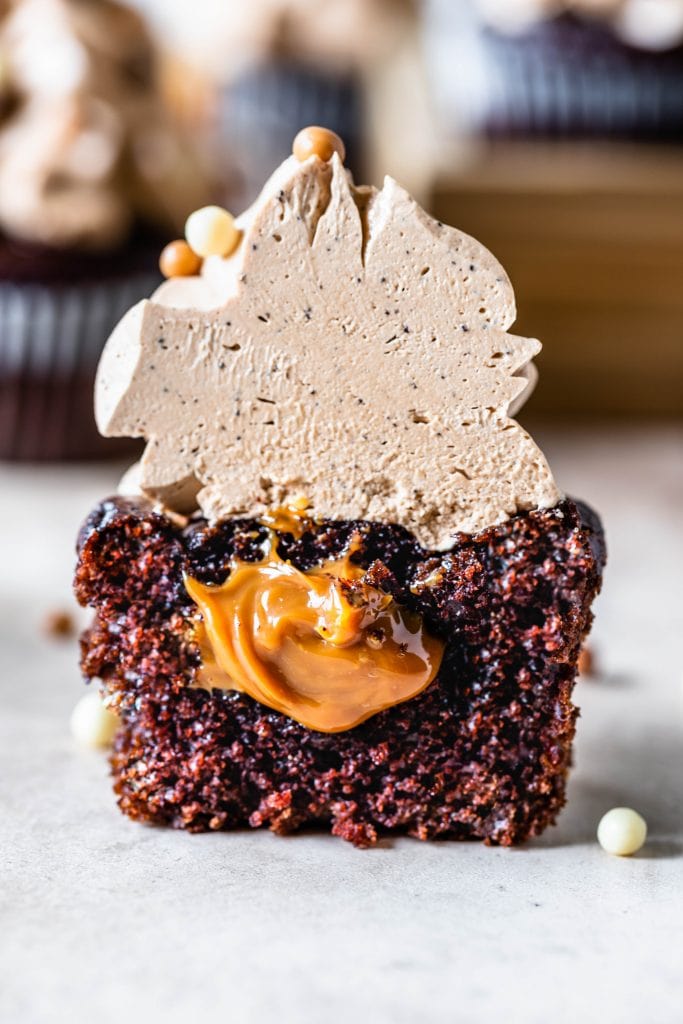
11.Serving
If you are making filled cupcakes, for example, it’s always a good idea to let them “mature” in the fridge for a few hours or overnight before serving, so the flavors and textures of the filling and the cupcake can come together.
Regardless of what kind of cupcake you are serving, let it sit at room temperature for about 10 minutes or so before serving. Specially if it’s a butter based cupcake, or if the cupcake has a butter/cream cheese based frosting.
12.Cupcake tips: Storage
There are always lots of questions concerning the storage of cupcakes. Not only is important to know how to make perfect cupcakes, but also how to store them in a manner that will keep them fresh for as long as possible.
Cupcakes can be tricky to store, because they tend to get dry in the fridge with time. So it’s important to store them covered, as best as possible.
Depending on the filling and on the frosting, they can have a shelf-life of even up to 7 days, but by then, they won’t be fresh, and will be likely hardened and dried out. But you can extend the freshness of the cupcakes by storing them in a tightly closed container such as this one.

This is the caddy I am using in the picture above. It can be found on Amazon. It stores 24 cupcakes, or you can remove the inserts to store cakes.
And if you would like to freeze the cupcakes, I recommend placing them in a similar container, cover with plastic, then seal the container, and store in the freezer for 1 to 2 months.
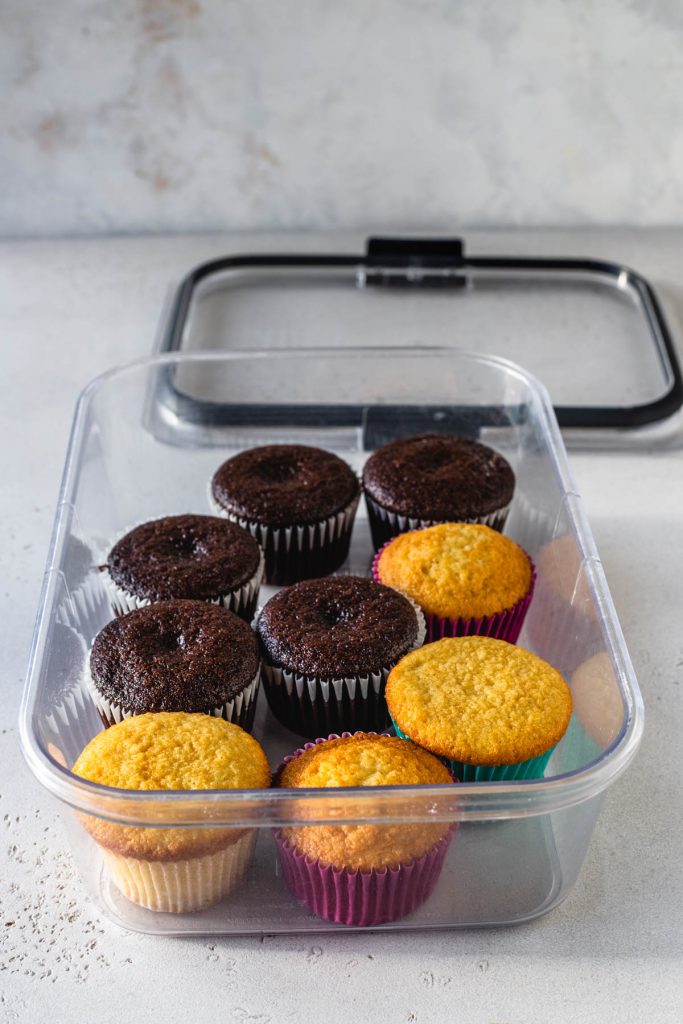
The container above is my favorite to store macarons and cupcakes in the freezer.
Let them thaw in the fridge for a few hours or overnight before filling and frosting.

I hope you enjoyed all of my cupcake tips, and that they can help you learn how to make perfect cupcakes every time!
It’s all a matter of practice and getting comfortable in the kitchen, gaining confidence as you evolve in your baking skills. And the best ways to improve your skills is by getting knowledge, and practicing!
So I hope my cupcake tips helped you today.
Thanks for reading!
Hi Camila , I’m a seasoned baker for long time but recently tries to bake vanilla cupcakes with no success. No matter what I do the tops always becomes sticky after completely cool .any comments on this ? Thanks
I had followed all the tips you wrote?
Do you live in a very humid place? If so, that might be the issue. Another thing I can think of is: your recipe is too moist. Does that happen with every recipe you try? Do they get sticky right after they’re baked, or after storage?
Thanks for your response. The recipes I tried do have quite a bit of liquid like milk .finally I tried the cupcake recipe from Nigella Lawson which looks like a normal butter cake recipe . It turned out perfect . Just can’t understand why all the other vanilla cupcakes recipes does not work. I live in Melbourne.the cupcakes becomes sticky after completely cool and becomes worse the next day.
Thank you, that’s a really good idea.
I have been a baker and cake decorator for over 32 years and I added cookie decorating about 6 yrs ago. I always stayed away from cupcakes because I had a lady order 60 and she stored them in the fridge after I told her not to and she complained because they were dry. She was asking for her money back and I refused. What container do you use when delivering to a customer?
Hi Beth, I don’t take orders or sell anymore, but when I did, I used a regular cupcake box from the store. Maybe have a care guide card or let the customer know to store the cupcakes in an air tight container, or in the freezer. You can make a little care guide card with the written instructions to attach to your orders so this way people can remember later.
What is the tool that is used in the piuctures to fill the cupcake liners?
a cookie scoop
Muito instrutivo esse post!!!!!