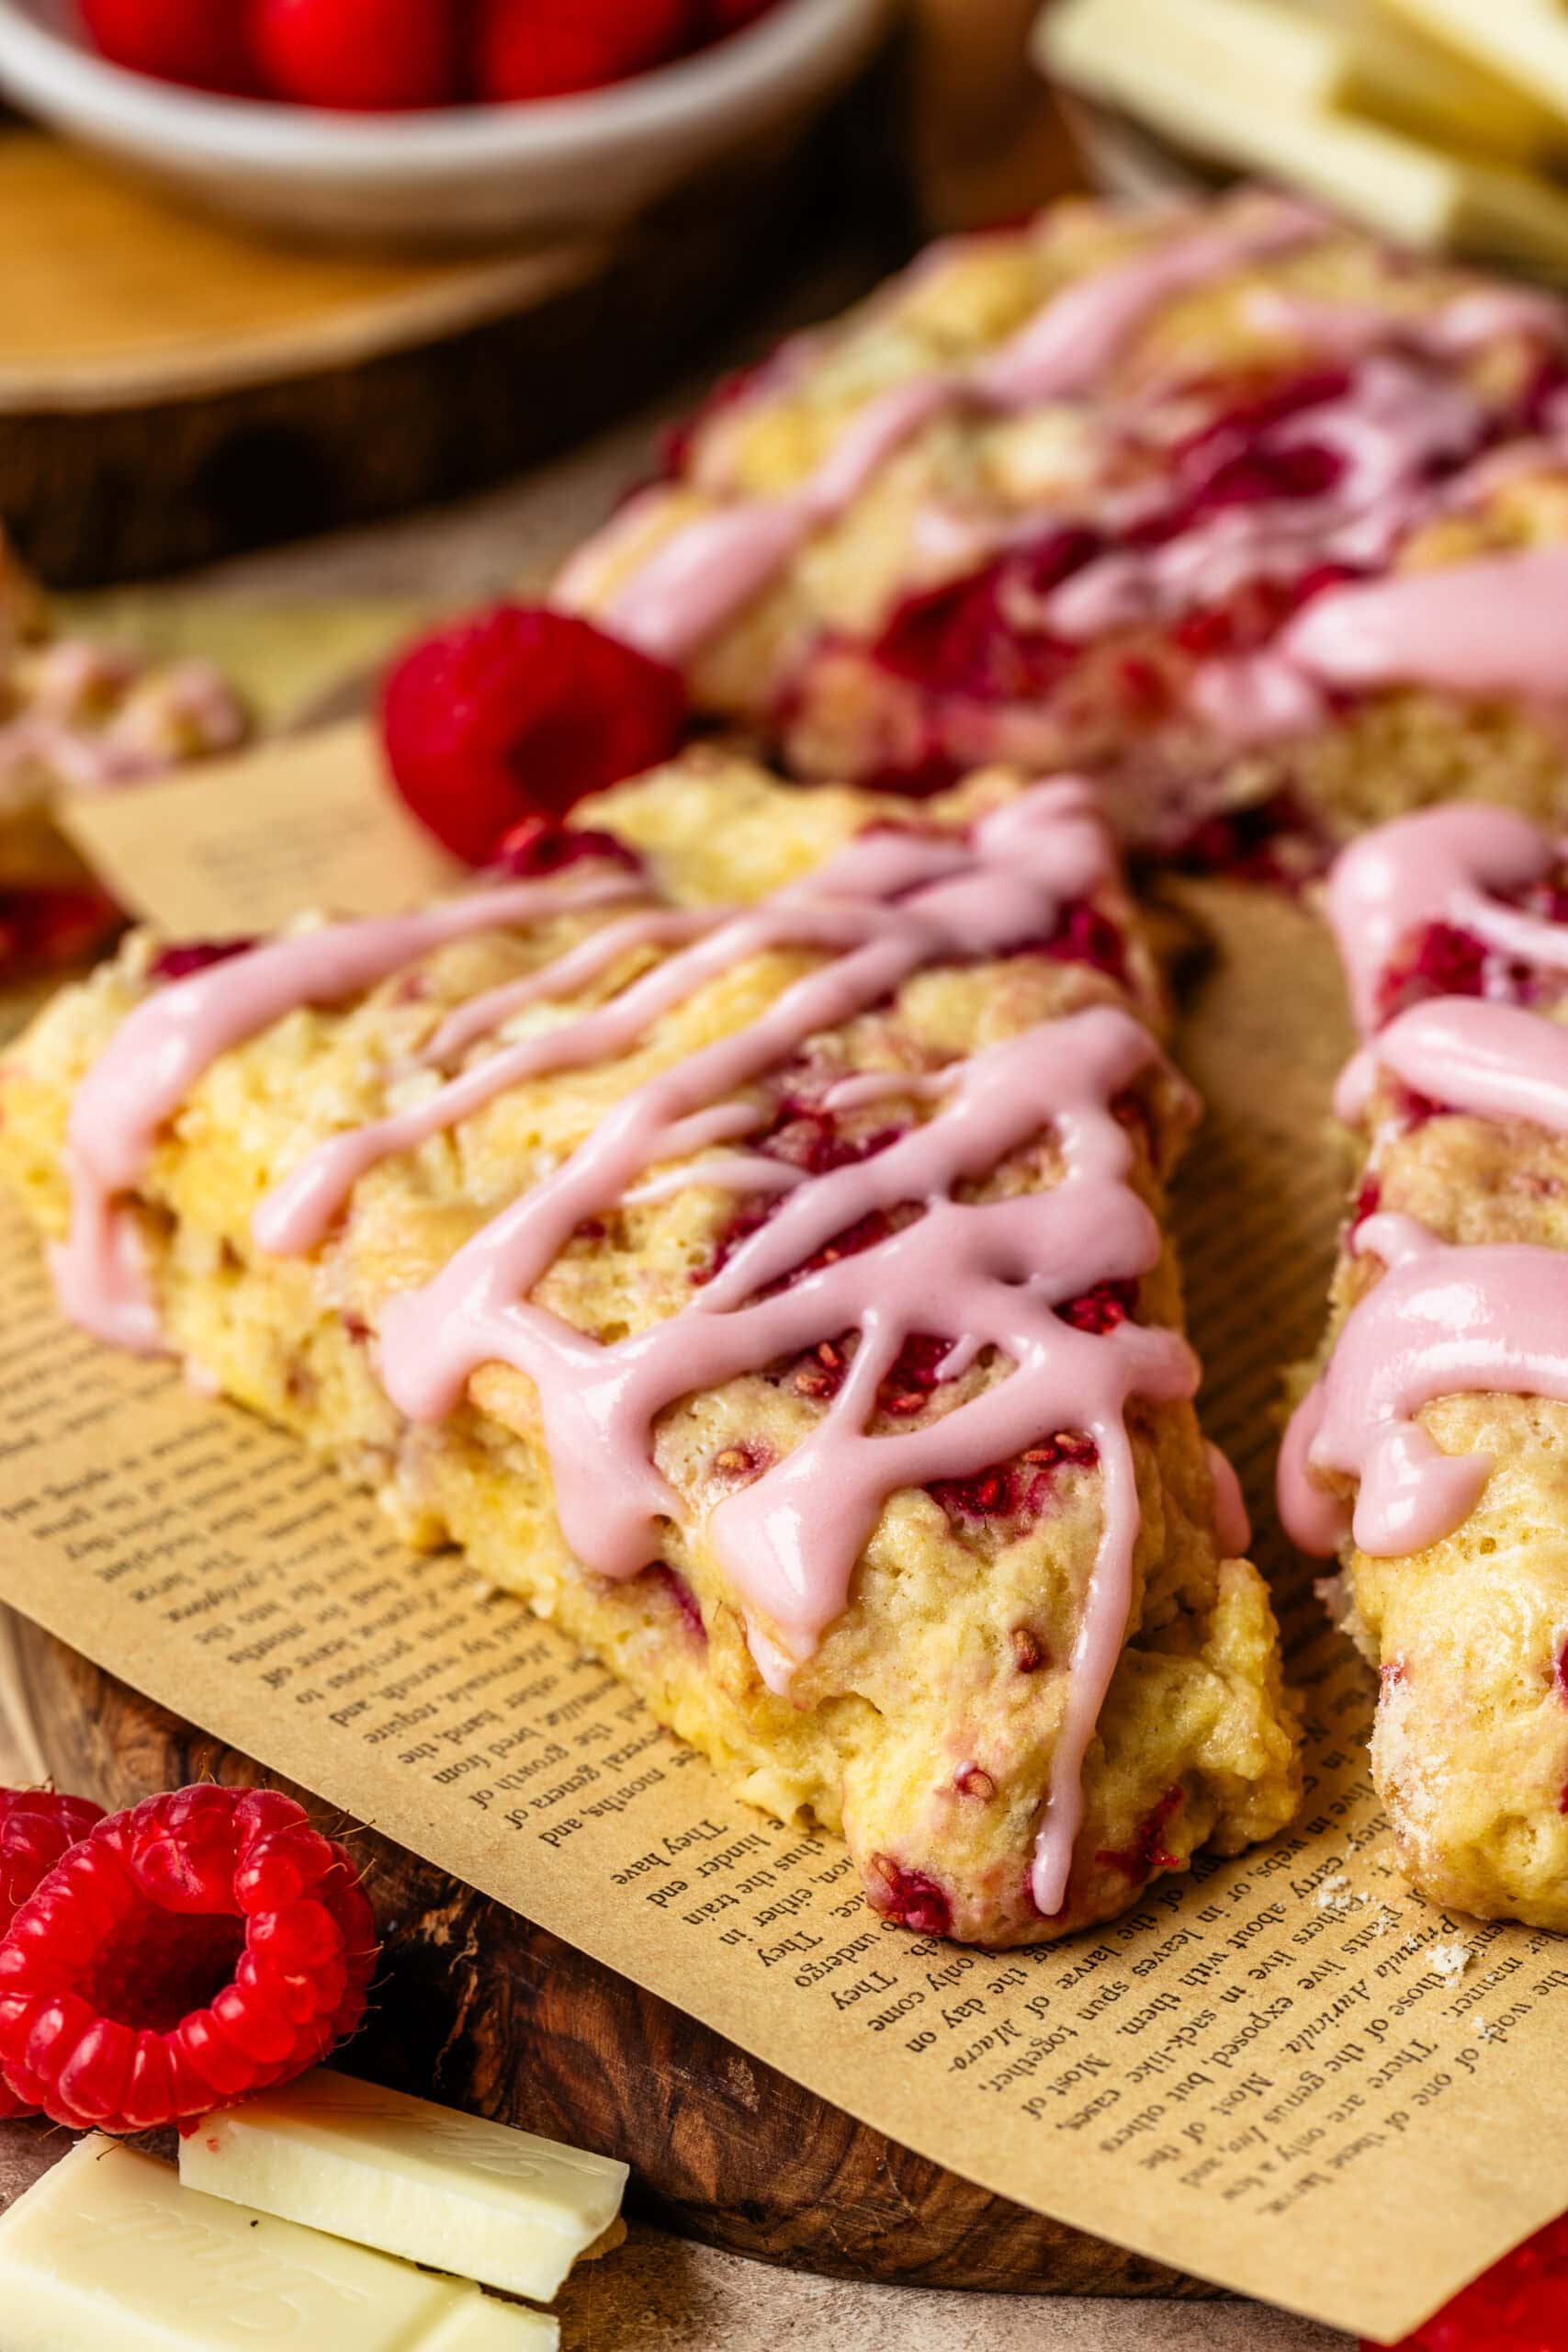
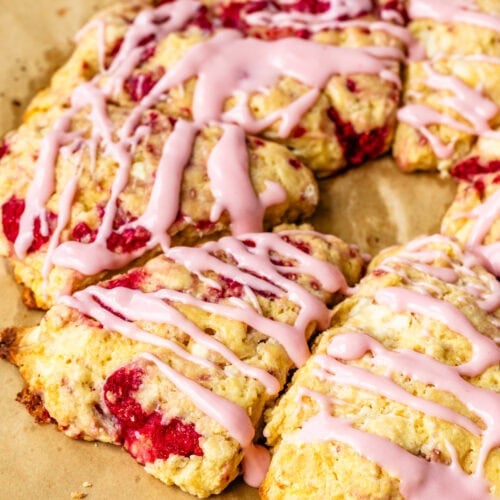
Raspberry Scones
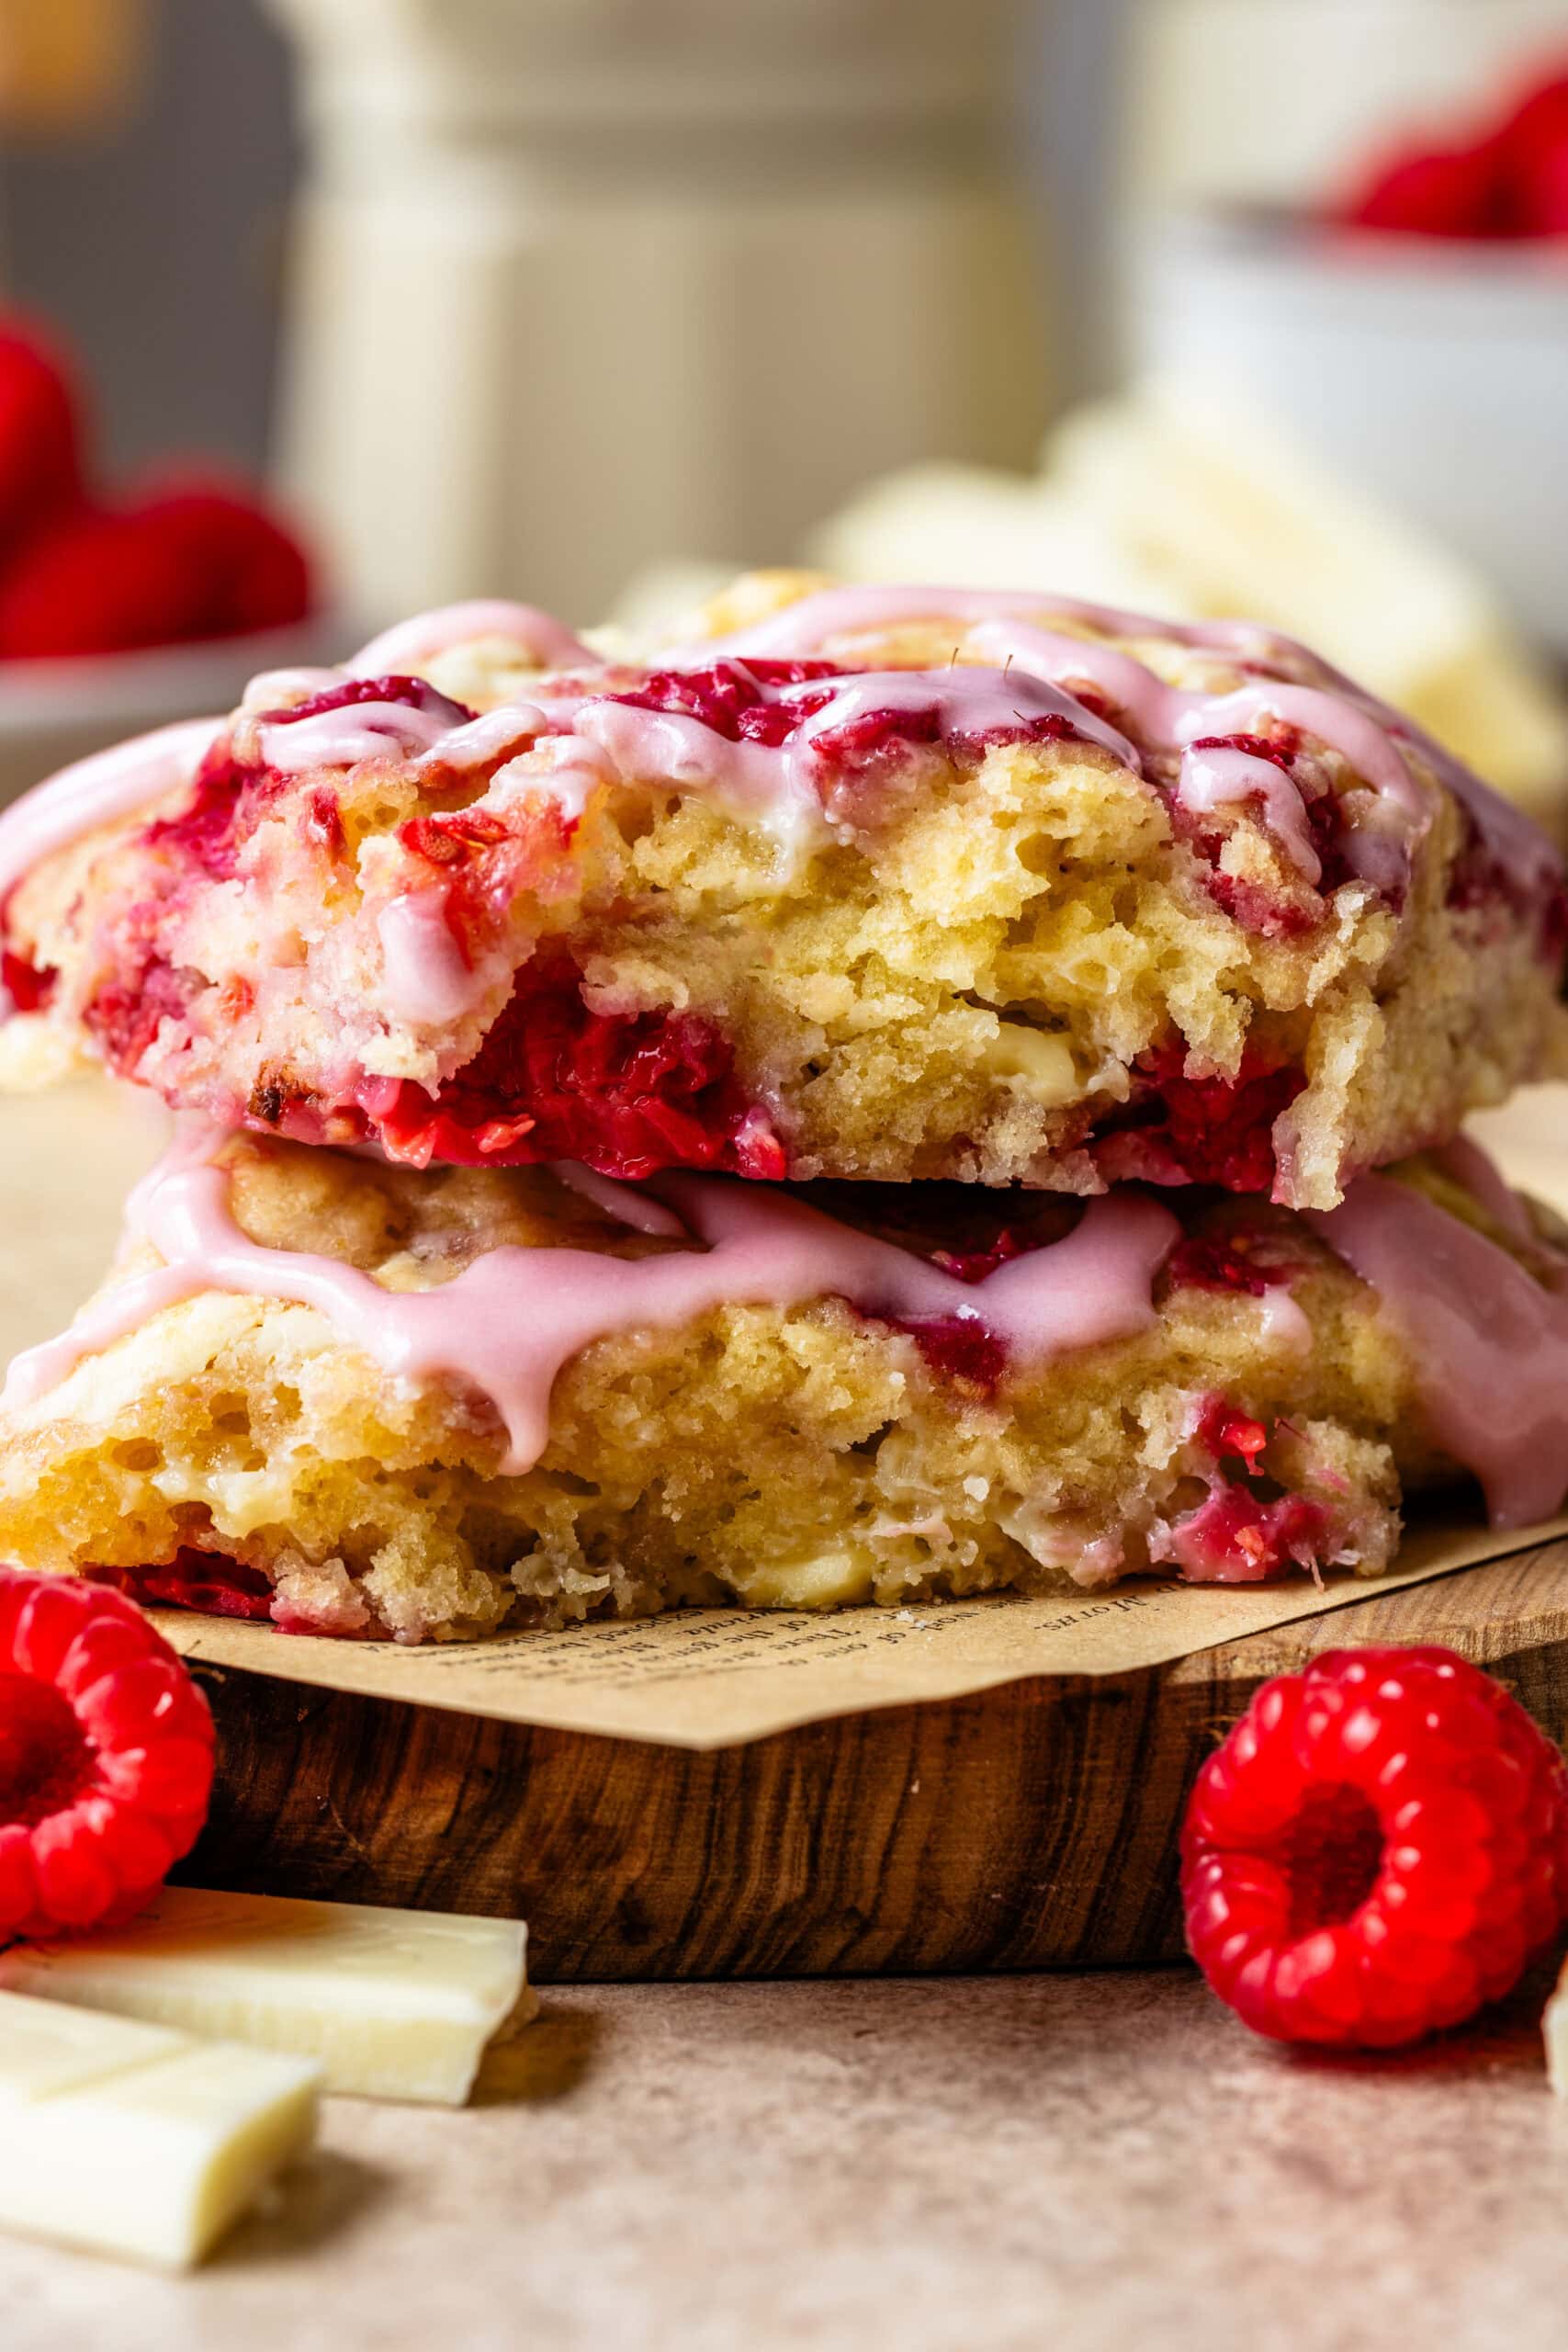
Just last week, two different people requested a raspberry scone recipe, and I took it as a sign that it was time to make one. For my version, I added white chocolate to the dough and topped the scones with an easy raspberry cream cheese glaze that’s sweet, tangy, and packed with raspberry flavor. The recipe comes together in just a few minutes and bakes up beautifully every time. Unlike many scones that can be dry and crumbly, these are soft, tender, buttery, and full of juicy raspberries in every bite.

I’ve made a lot of scone recipes over the years, and I’ve found that the secret to a great scone isn’t adding more ingredients; it’s paying attention to texture. Cold butter, gentle mixing, and a little patience create tall, flaky scones that stay tender instead of turning dense or dry. If you’ve already made my Blueberry Scones or Lemon Strawberry Scones, you’ll notice that I use the same approach here. Once you learn how to handle scone dough properly, it’s easy to create endless variations.
Why You’ll Love These Raspberry White Chocolate Scones
There are plenty of scone recipes out there, but this one has become a favorite for several reasons:
This post may contain affiliate links. I earn a commission from qualified purchases. Please read our Privacy policy here.
- Soft, tender texture instead of dry and crumbly.
- Juicy raspberries in every bite.
- White chocolate adds sweetness without overpowering the berries.
- The raspberry cream cheese glaze comes together in minutes.
- Frozen raspberries work beautifully, so you can make these year-round.
- Great for breakfast, brunch, afternoon coffee, or gifting.
- Ready in about 30 minutes of active time.
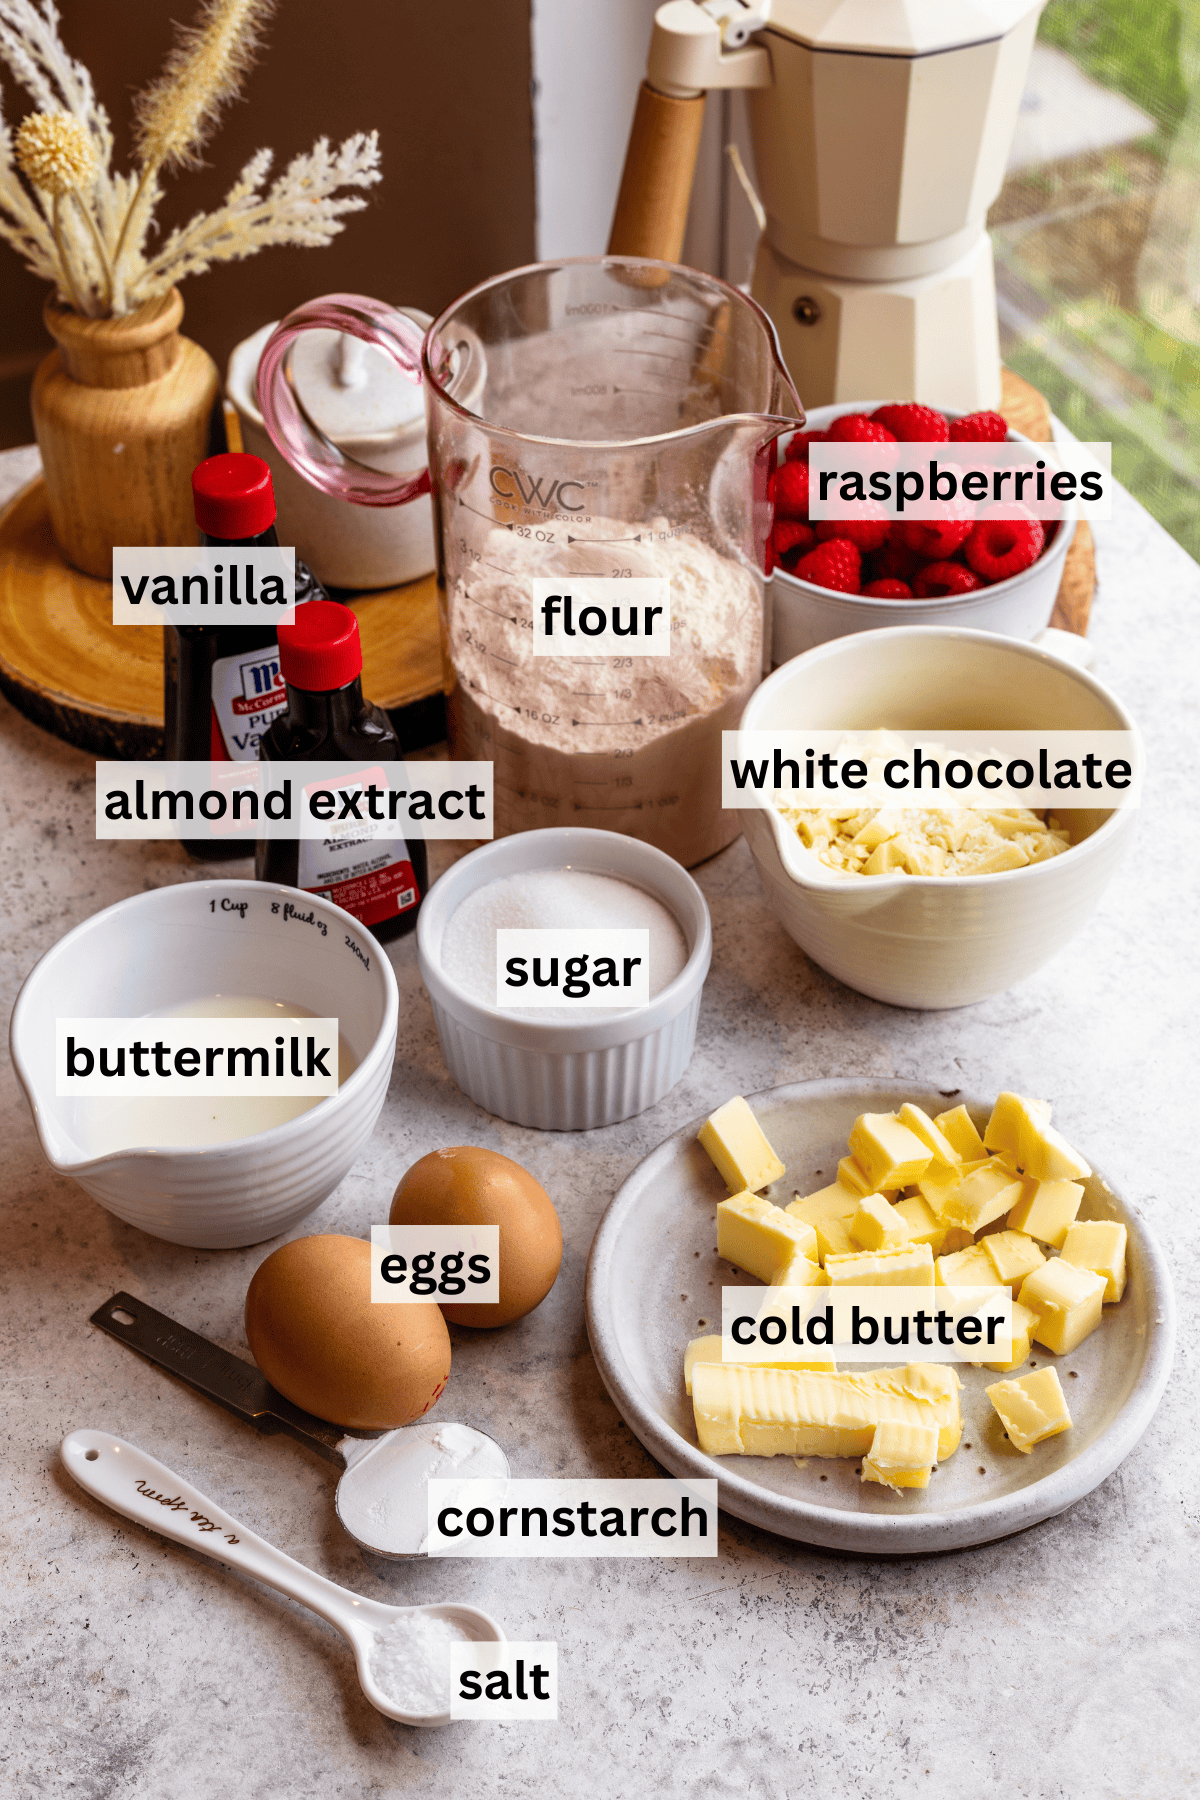
The Ingredients That Matter Most
Cold Butter: I always start with very cold butter when making scones. This is one of those ingredients that does most of the heavy lifting. As the butter melts in the oven, it creates steam pockets that help the scones rise and develop flaky layers. If the butter gets too warm while you’re working, the scones will spread instead of rising tall. Whenever my kitchen is warm, I don’t hesitate to chill the dough before baking.
Buttermilk: I prefer buttermilk in my scones because it helps create a soft crumb while adding just enough tang to balance the sweetness. Combined with the baking powder, it helps create a lighter texture without making the scones cakey.
Raspberries: Raspberries are the star of the recipe. They bring a bright tart flavor that balances the sweetness of both the white chocolate and the glaze. I’ve tested this recipe with both fresh and frozen raspberries, and I actually prefer frozen. They hold their shape better while mixing and are much less likely to break apart and stain the dough.
If you’re a raspberry fan, you might also enjoy my Raspberry and White Chocolate Muffins. The flavor combination is similar, but the texture is completely different. My Raspberry Cookies and Raspberry Cake are also great options when raspberries are in season.
White Chocolate: I love pairing white chocolate with raspberries. The sweetness softens the tartness of the berries without making the scones overly sweet. White chocolate chips work perfectly well here, but I usually reach for a chopped white chocolate bar when I have one on hand. The larger pieces create little pockets of melted chocolate throughout the scones.
Raspberry Cream Cheese Glaze: The glaze is what takes these from a simple breakfast scone to something that feels bakery-worthy. I use real raspberries instead of extracts because I prefer the natural flavor and color. The cream cheese adds richness while keeping the glaze from becoming overly sweet.
How to Make Raspberry White Chocolate Scones
The full recipe card is below, but here’s exactly how I make these step by step.
Prep & Mix the Dry Ingredients
Preheat the oven to 375°F (190°C). Line a baking sheet with parchment paper.
Before I begin mixing, I make sure all of my ingredients are cold. This step seems small, but it makes a noticeable difference in the finished texture.
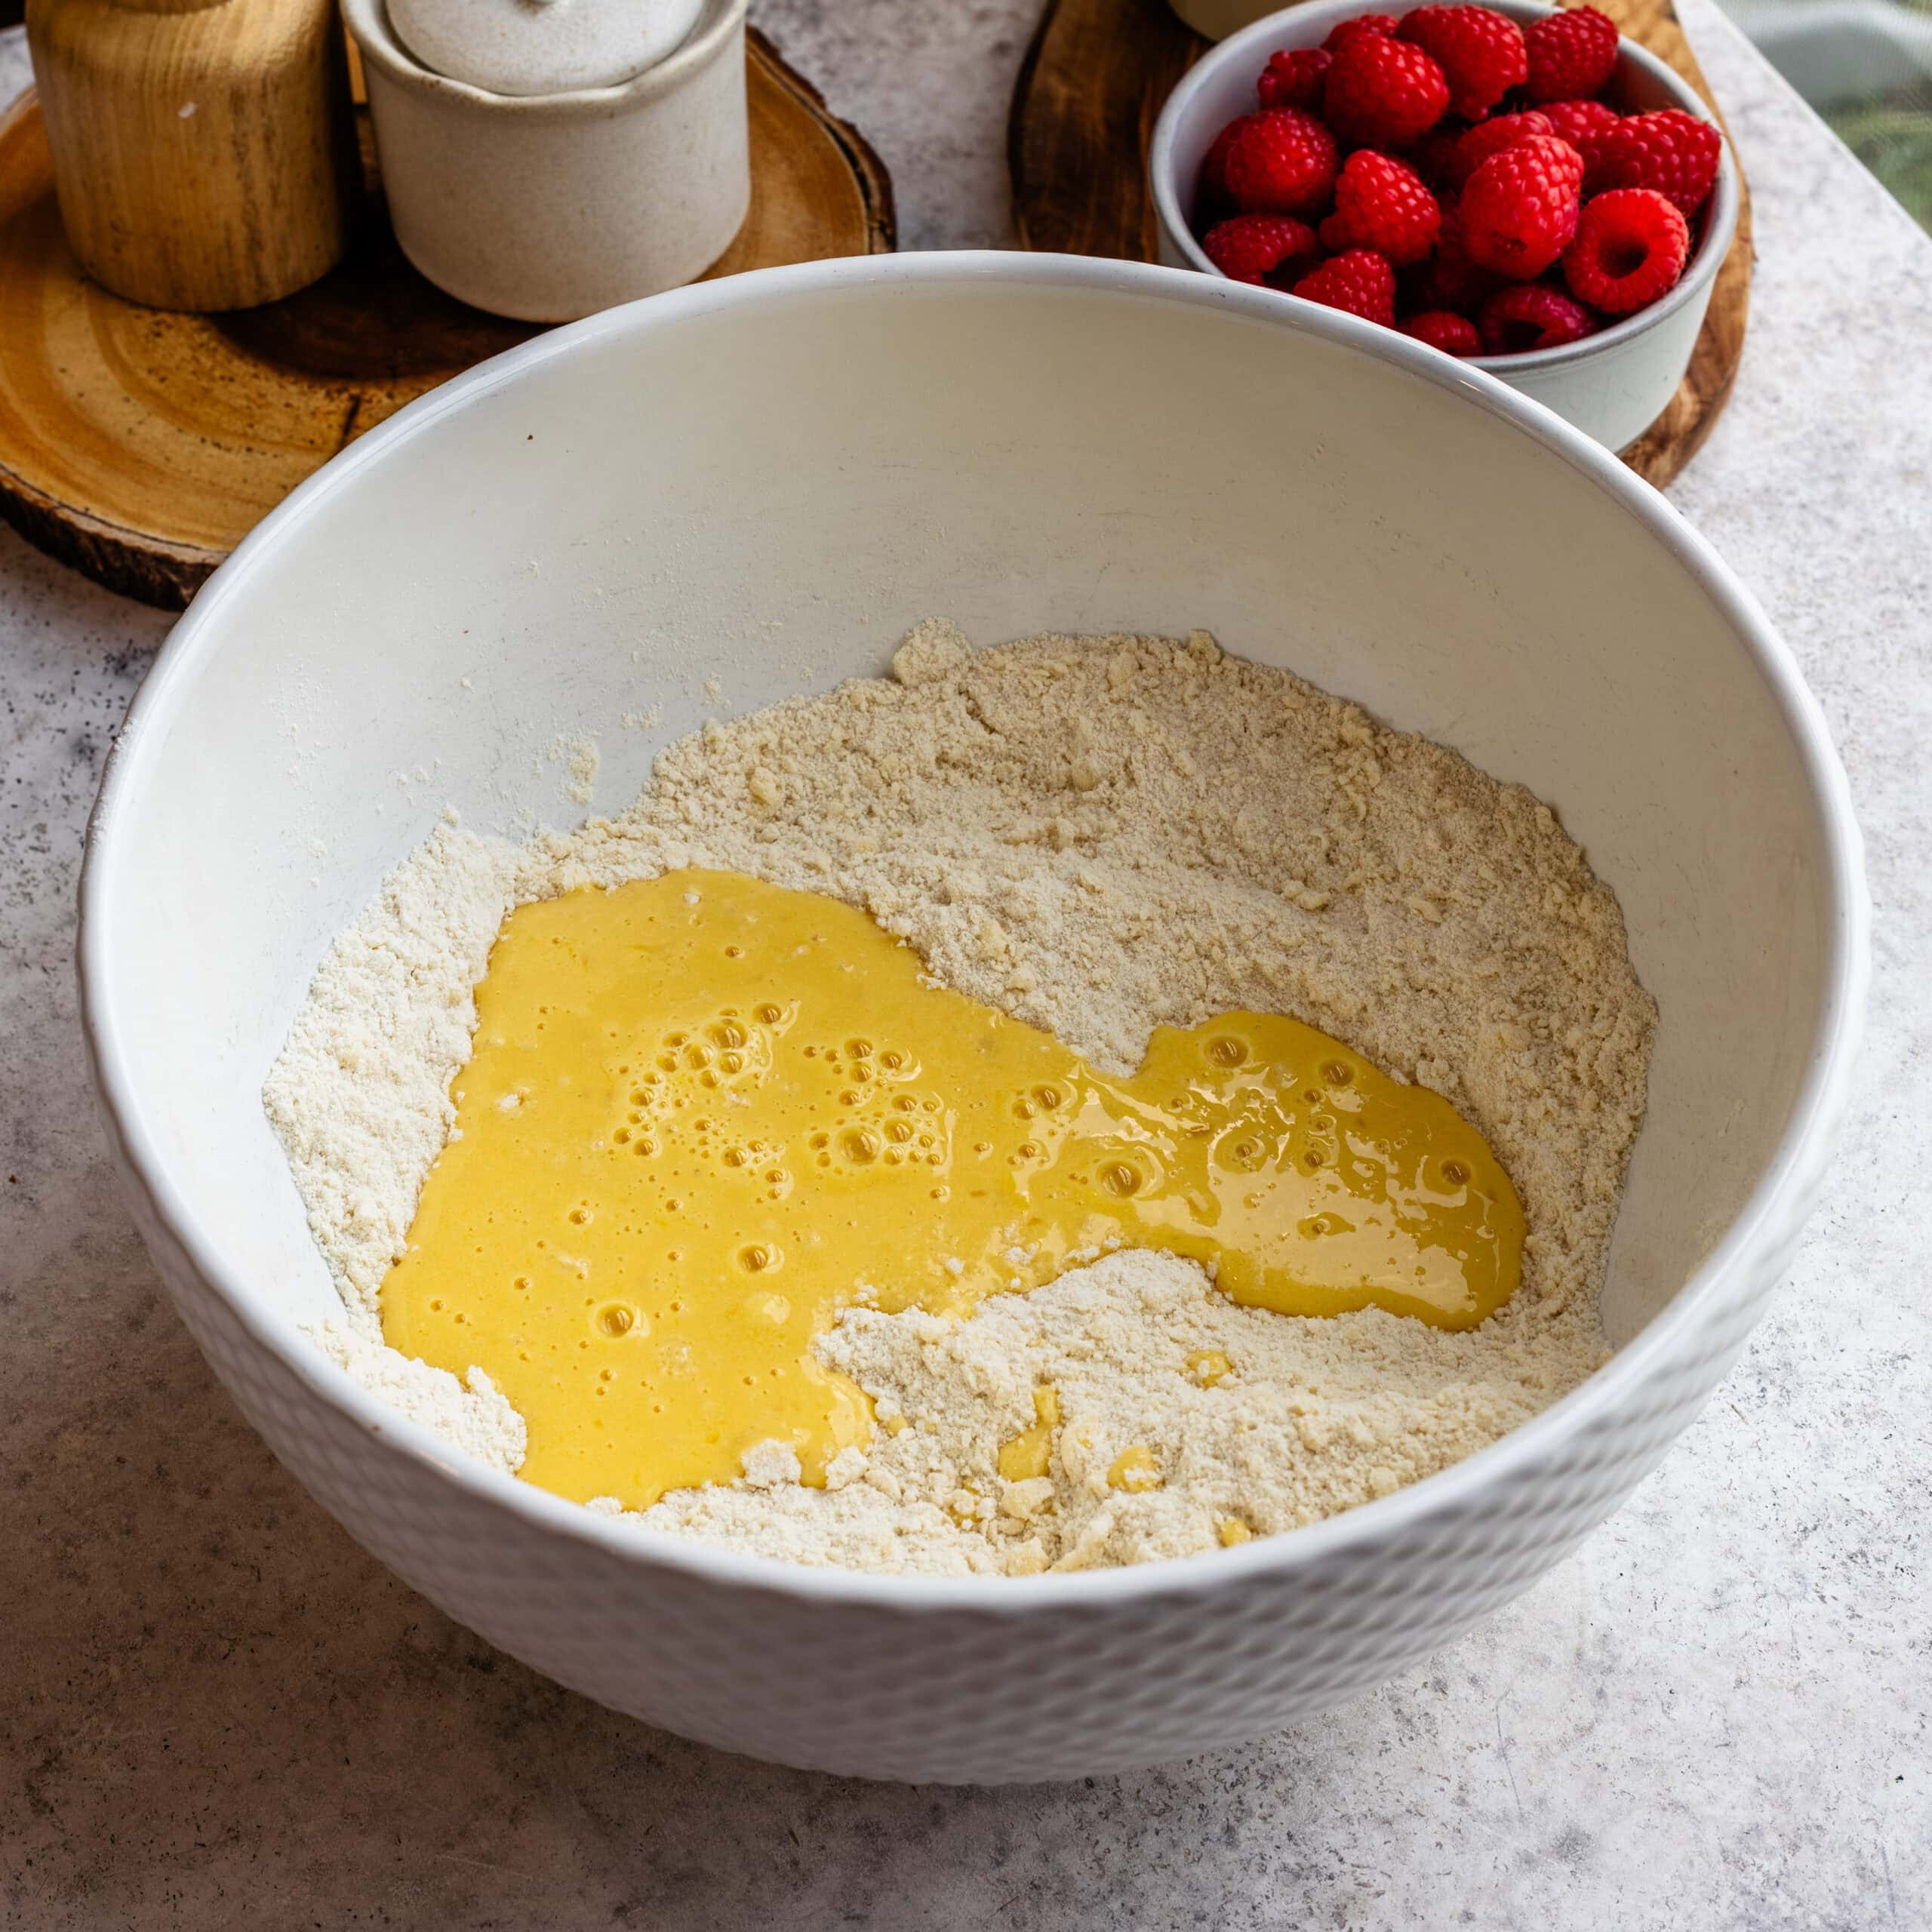
In a large bowl, whisk together the flour, sugar, baking powder, and salt. I like to whisk thoroughly here to ensure the baking powder is evenly distributed throughout the flour mixture. Add the cold butter cubes to the flour mixture.
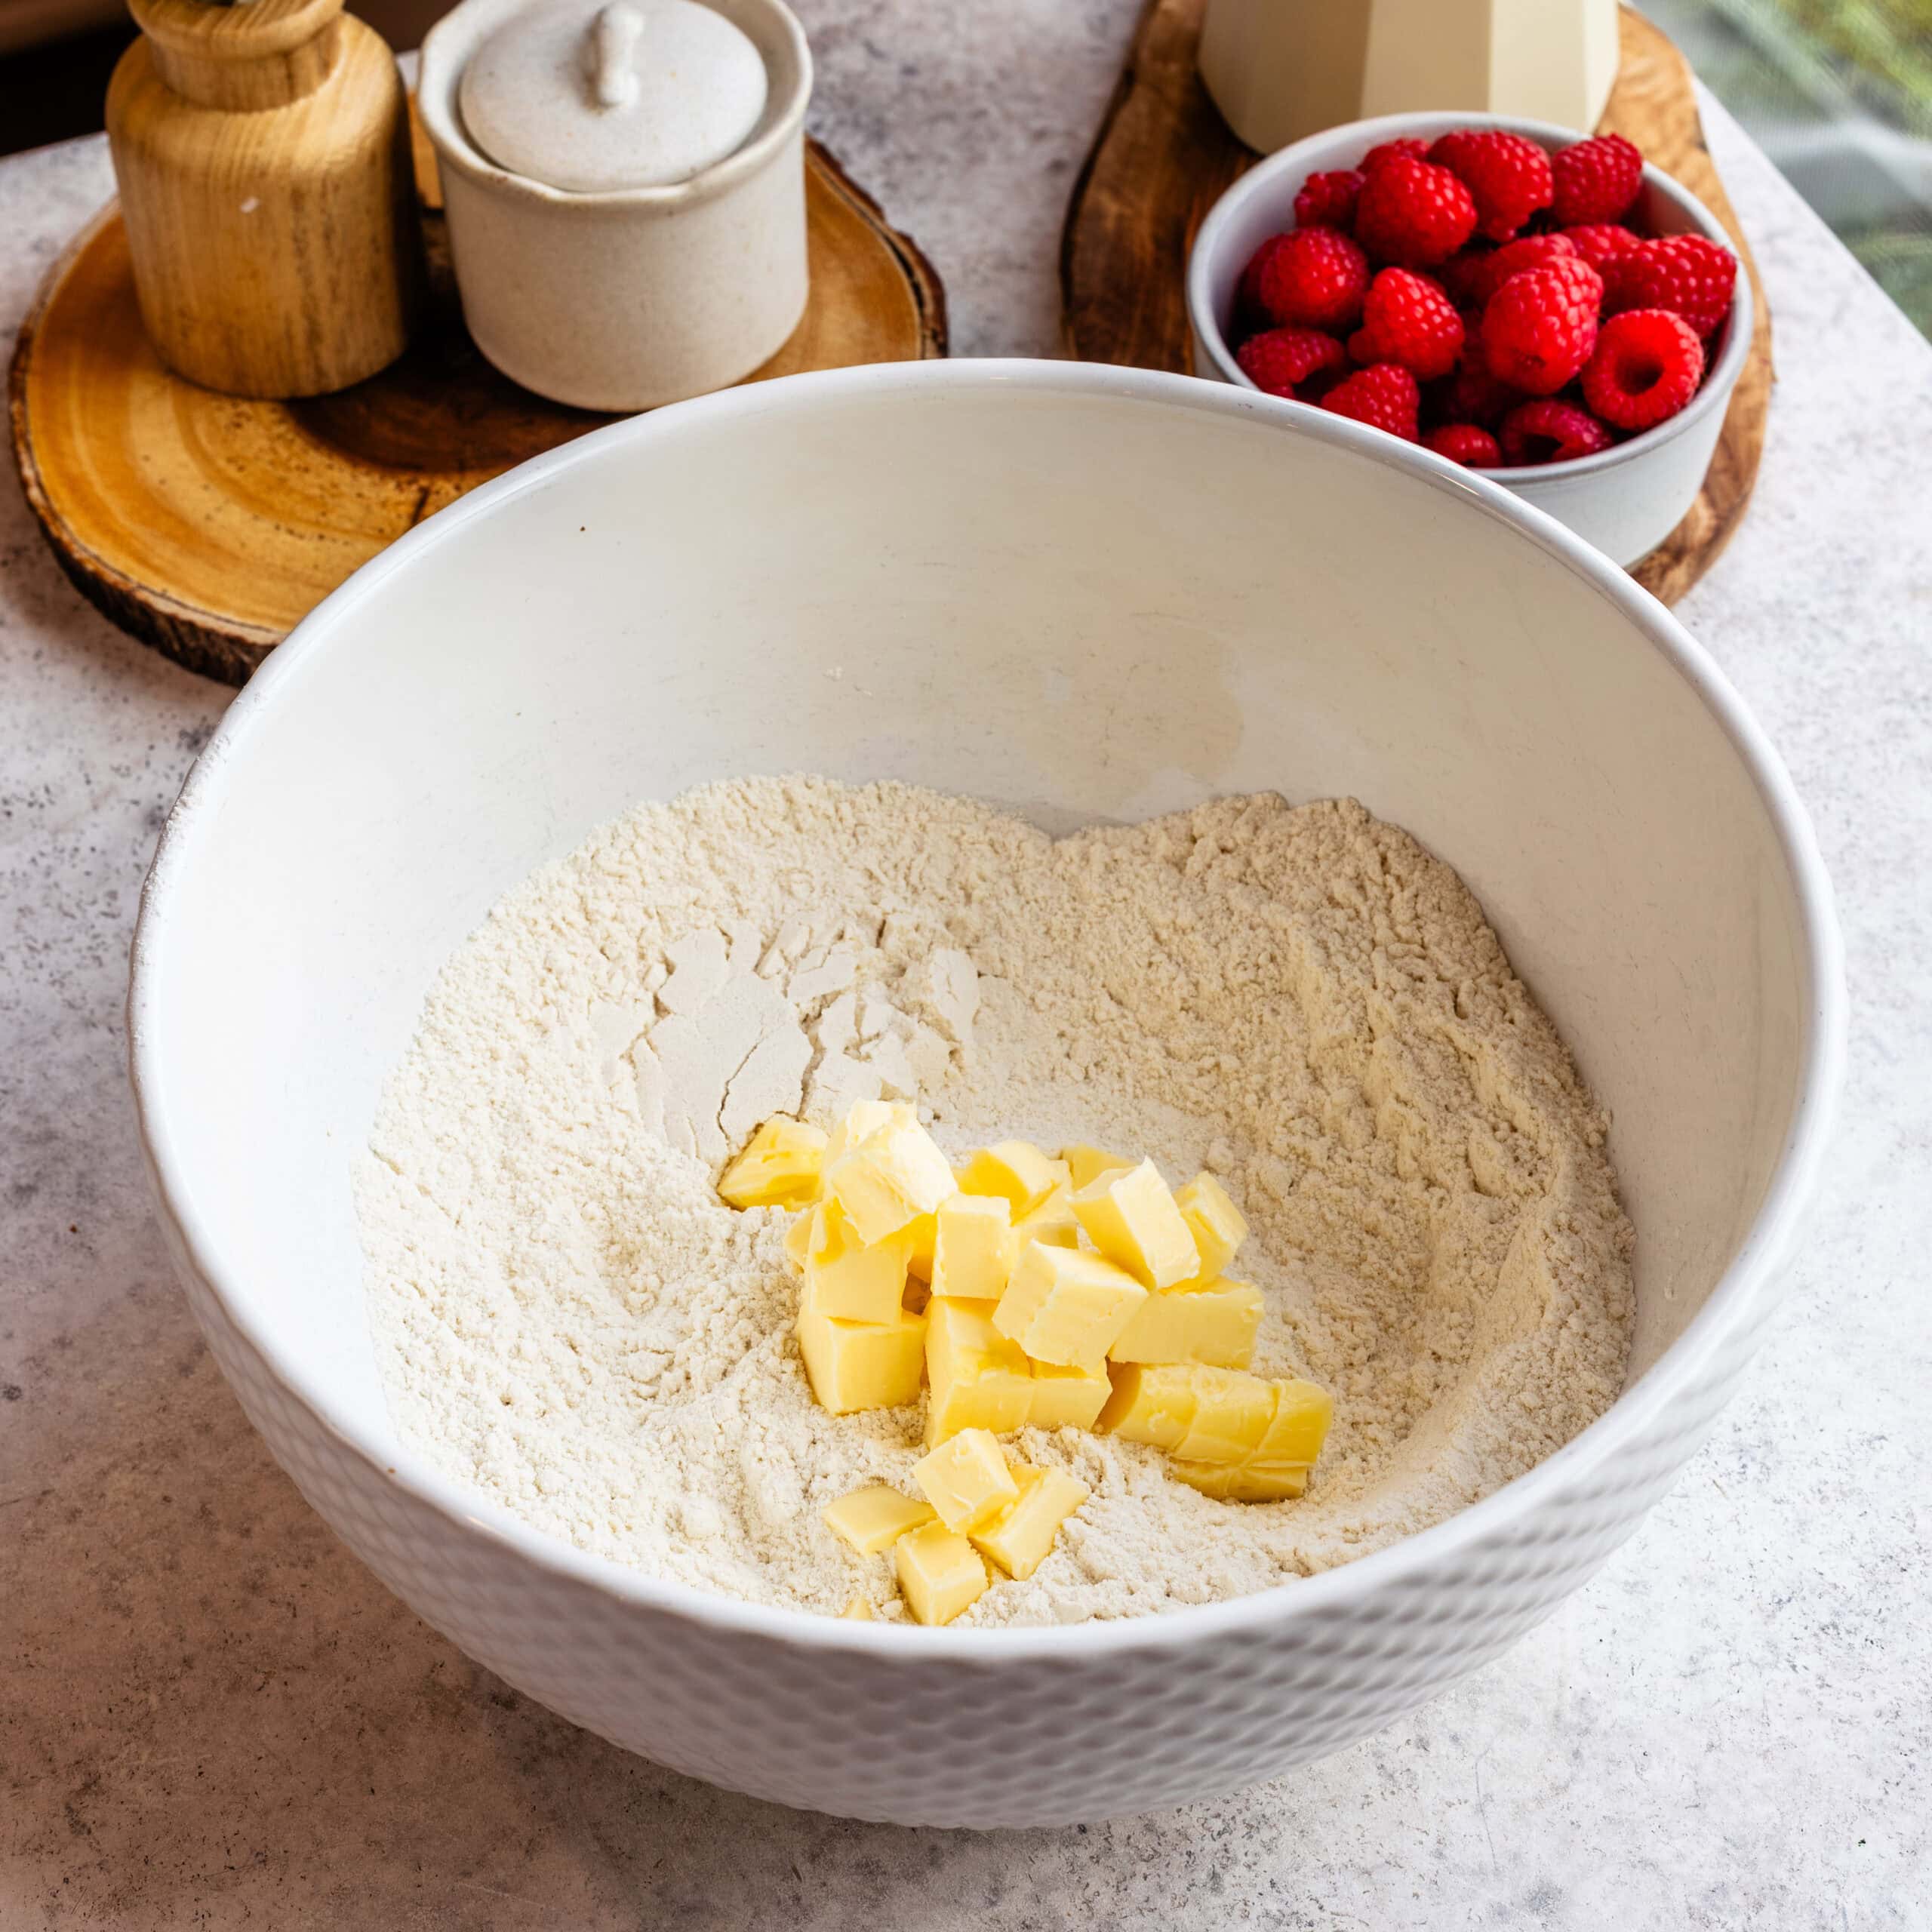
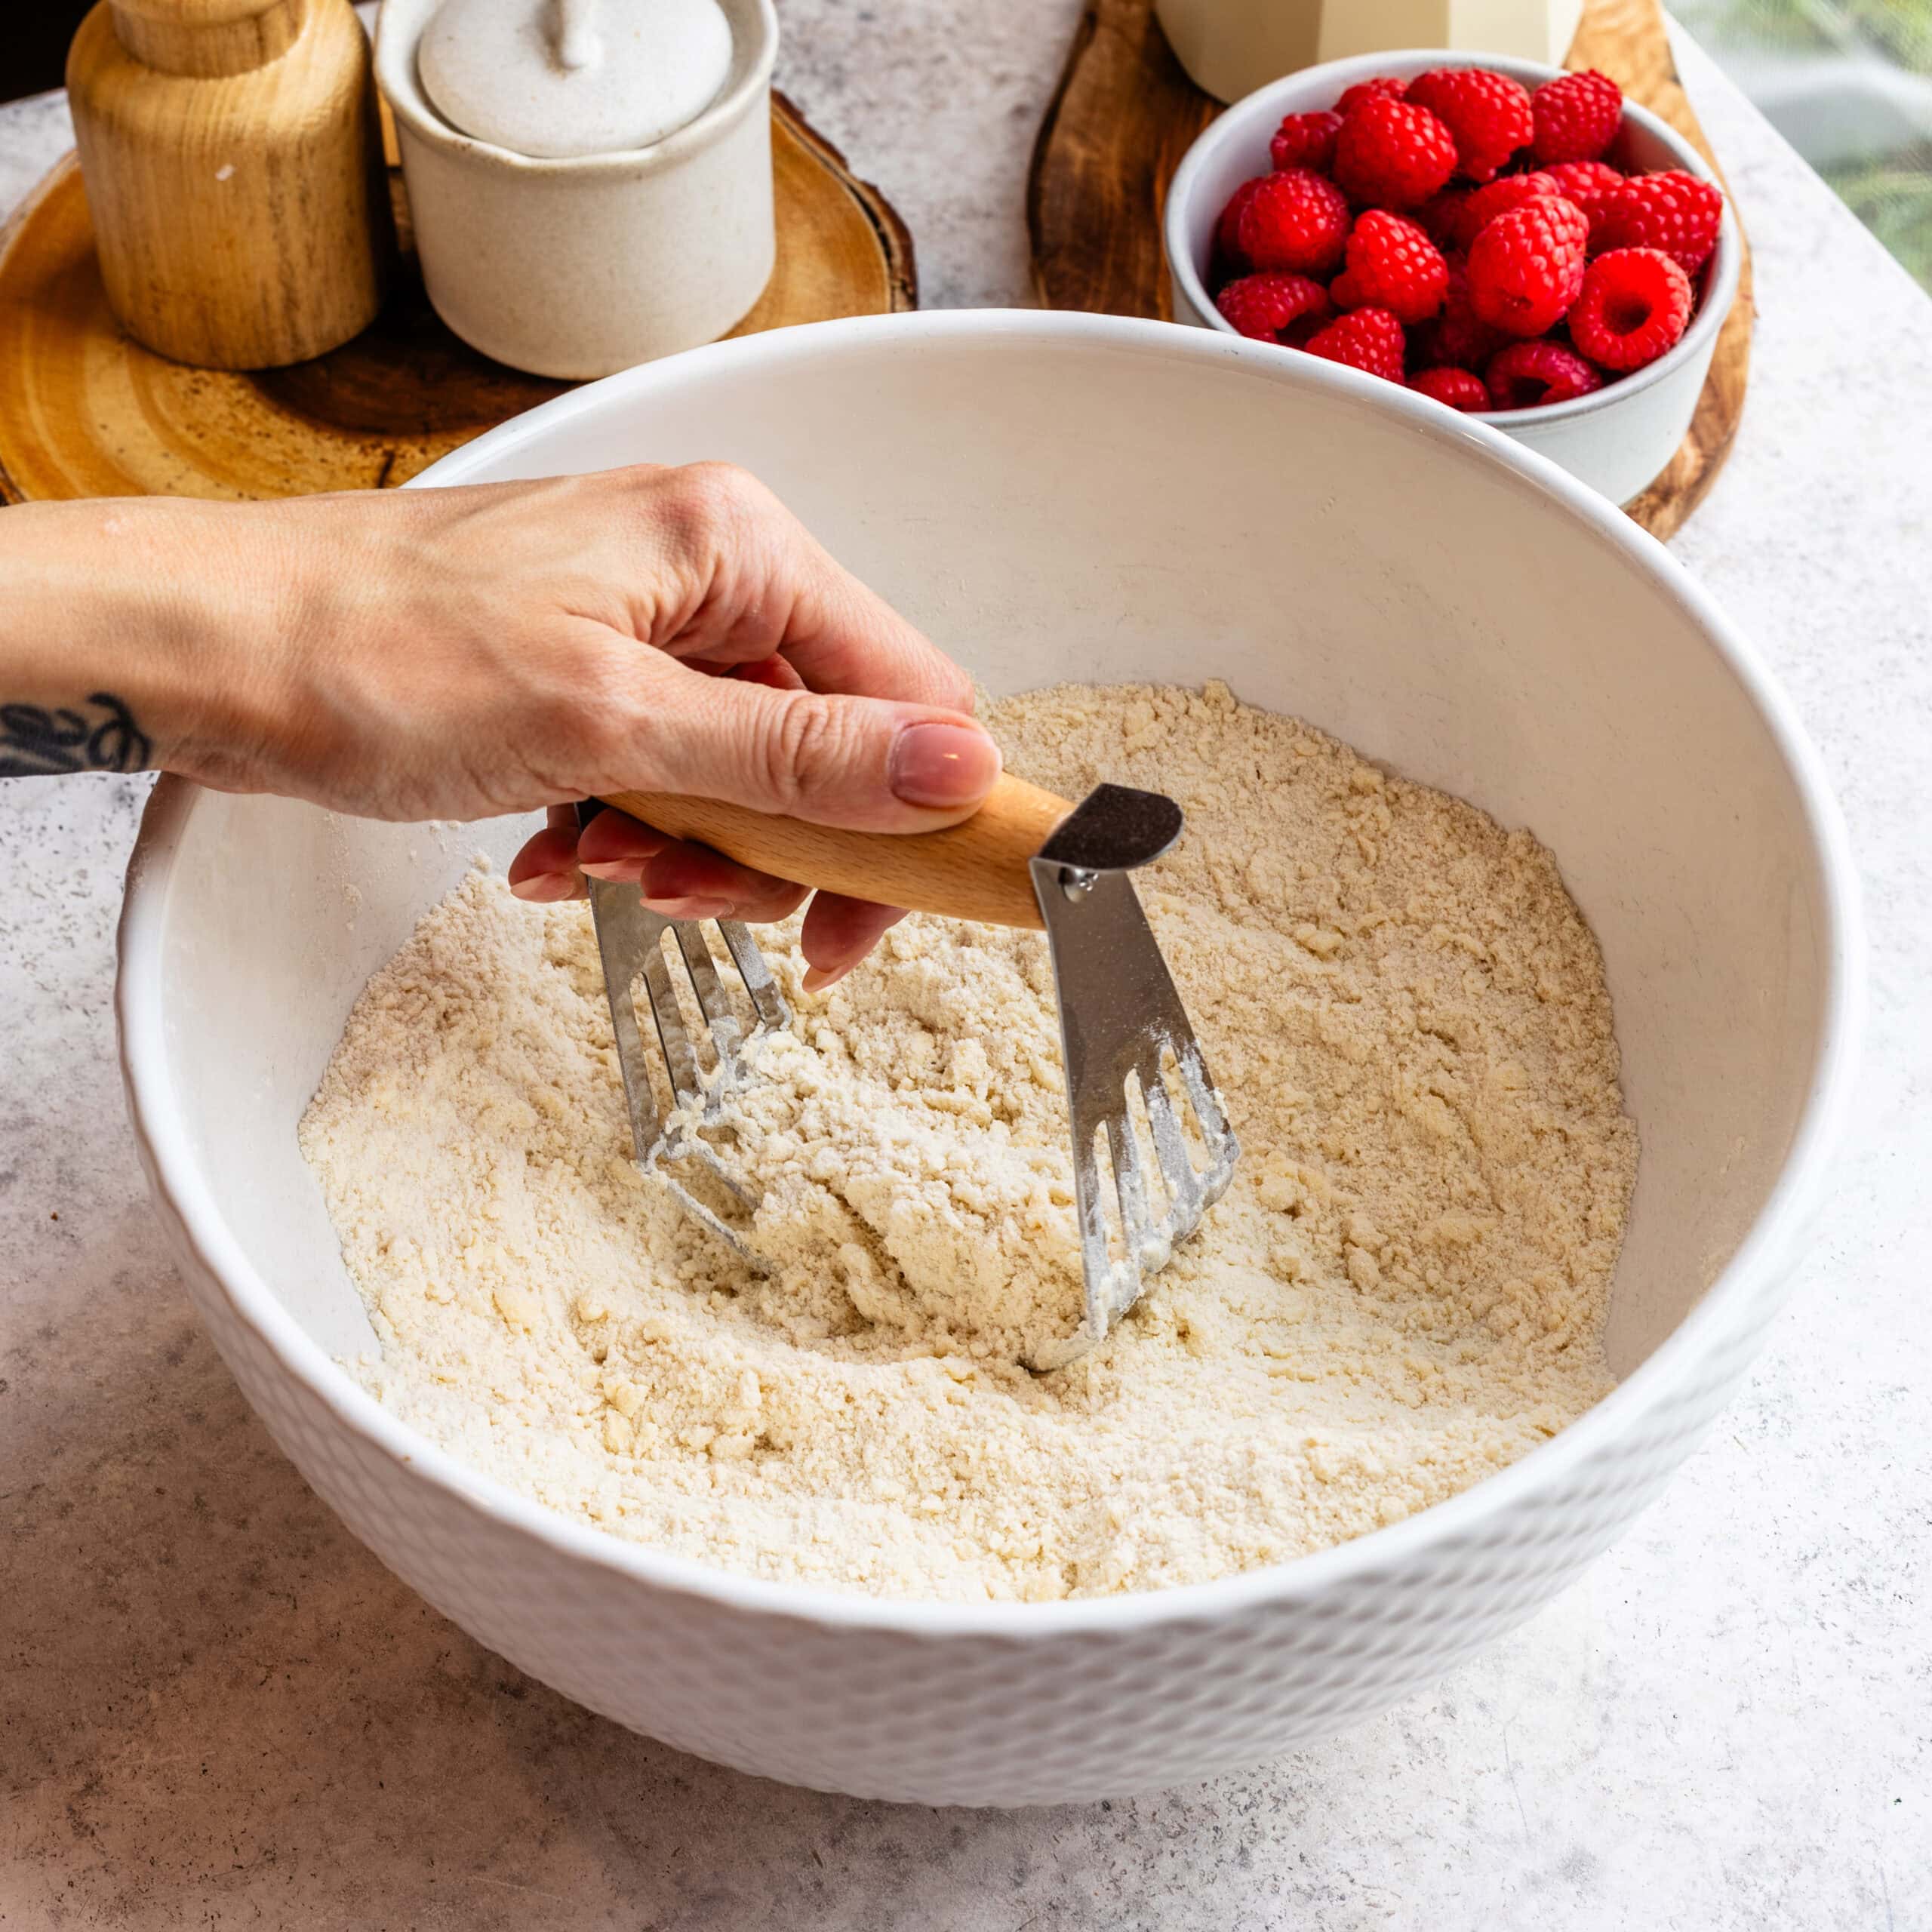
Cut in the Butter
Using a pastry cutter, two forks, or your fingertips, work the butter into the flour until the mixture resembles coarse crumbs with some pea-sized pieces of butter remaining.
I never try to completely blend the butter into the flour. Those visible pieces are exactly what create flaky layers later.
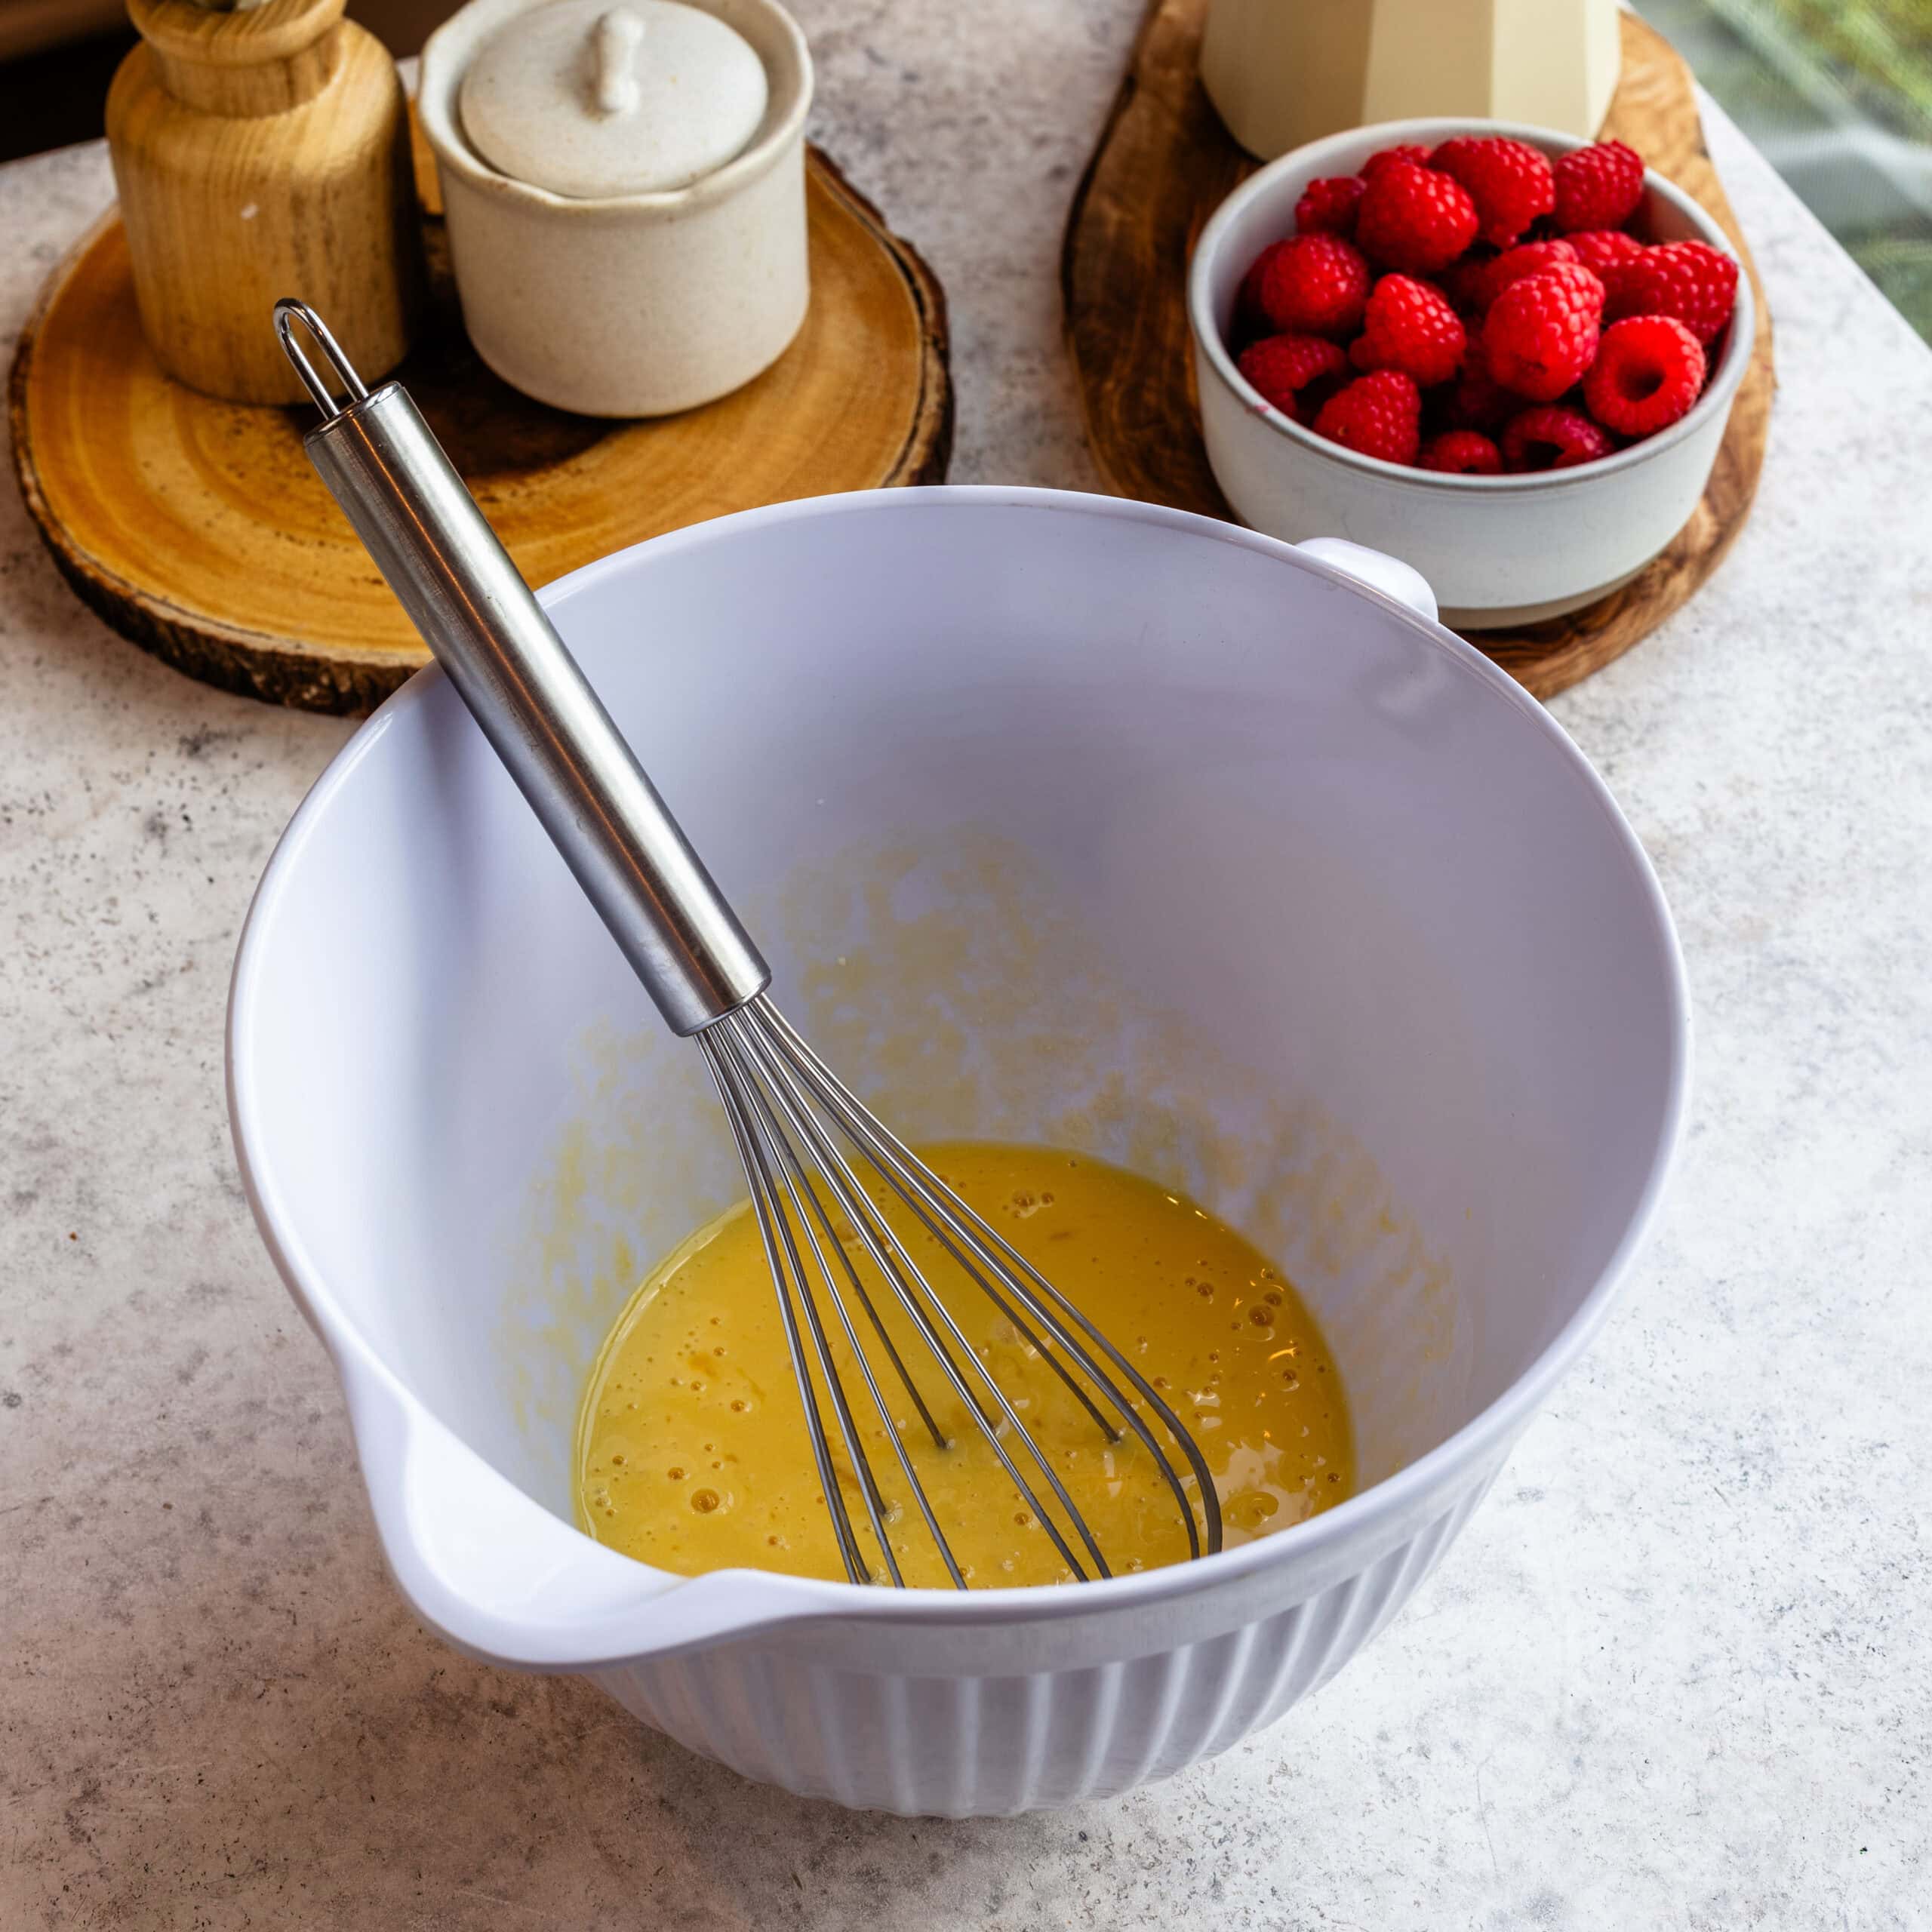
Mix the Wet Ingredients
In a separate bowl, whisk together the buttermilk, eggs, vanilla extract, and almond extract.
The almond extract is subtle but adds a wonderful flavor that pairs beautifully with both raspberries and white chocolate.
Bring the Dough Together
Pour the wet ingredients into the dry ingredients. Using a spatula, gently fold everything together until the dough is mostly combined, and only a few dry streaks remain.
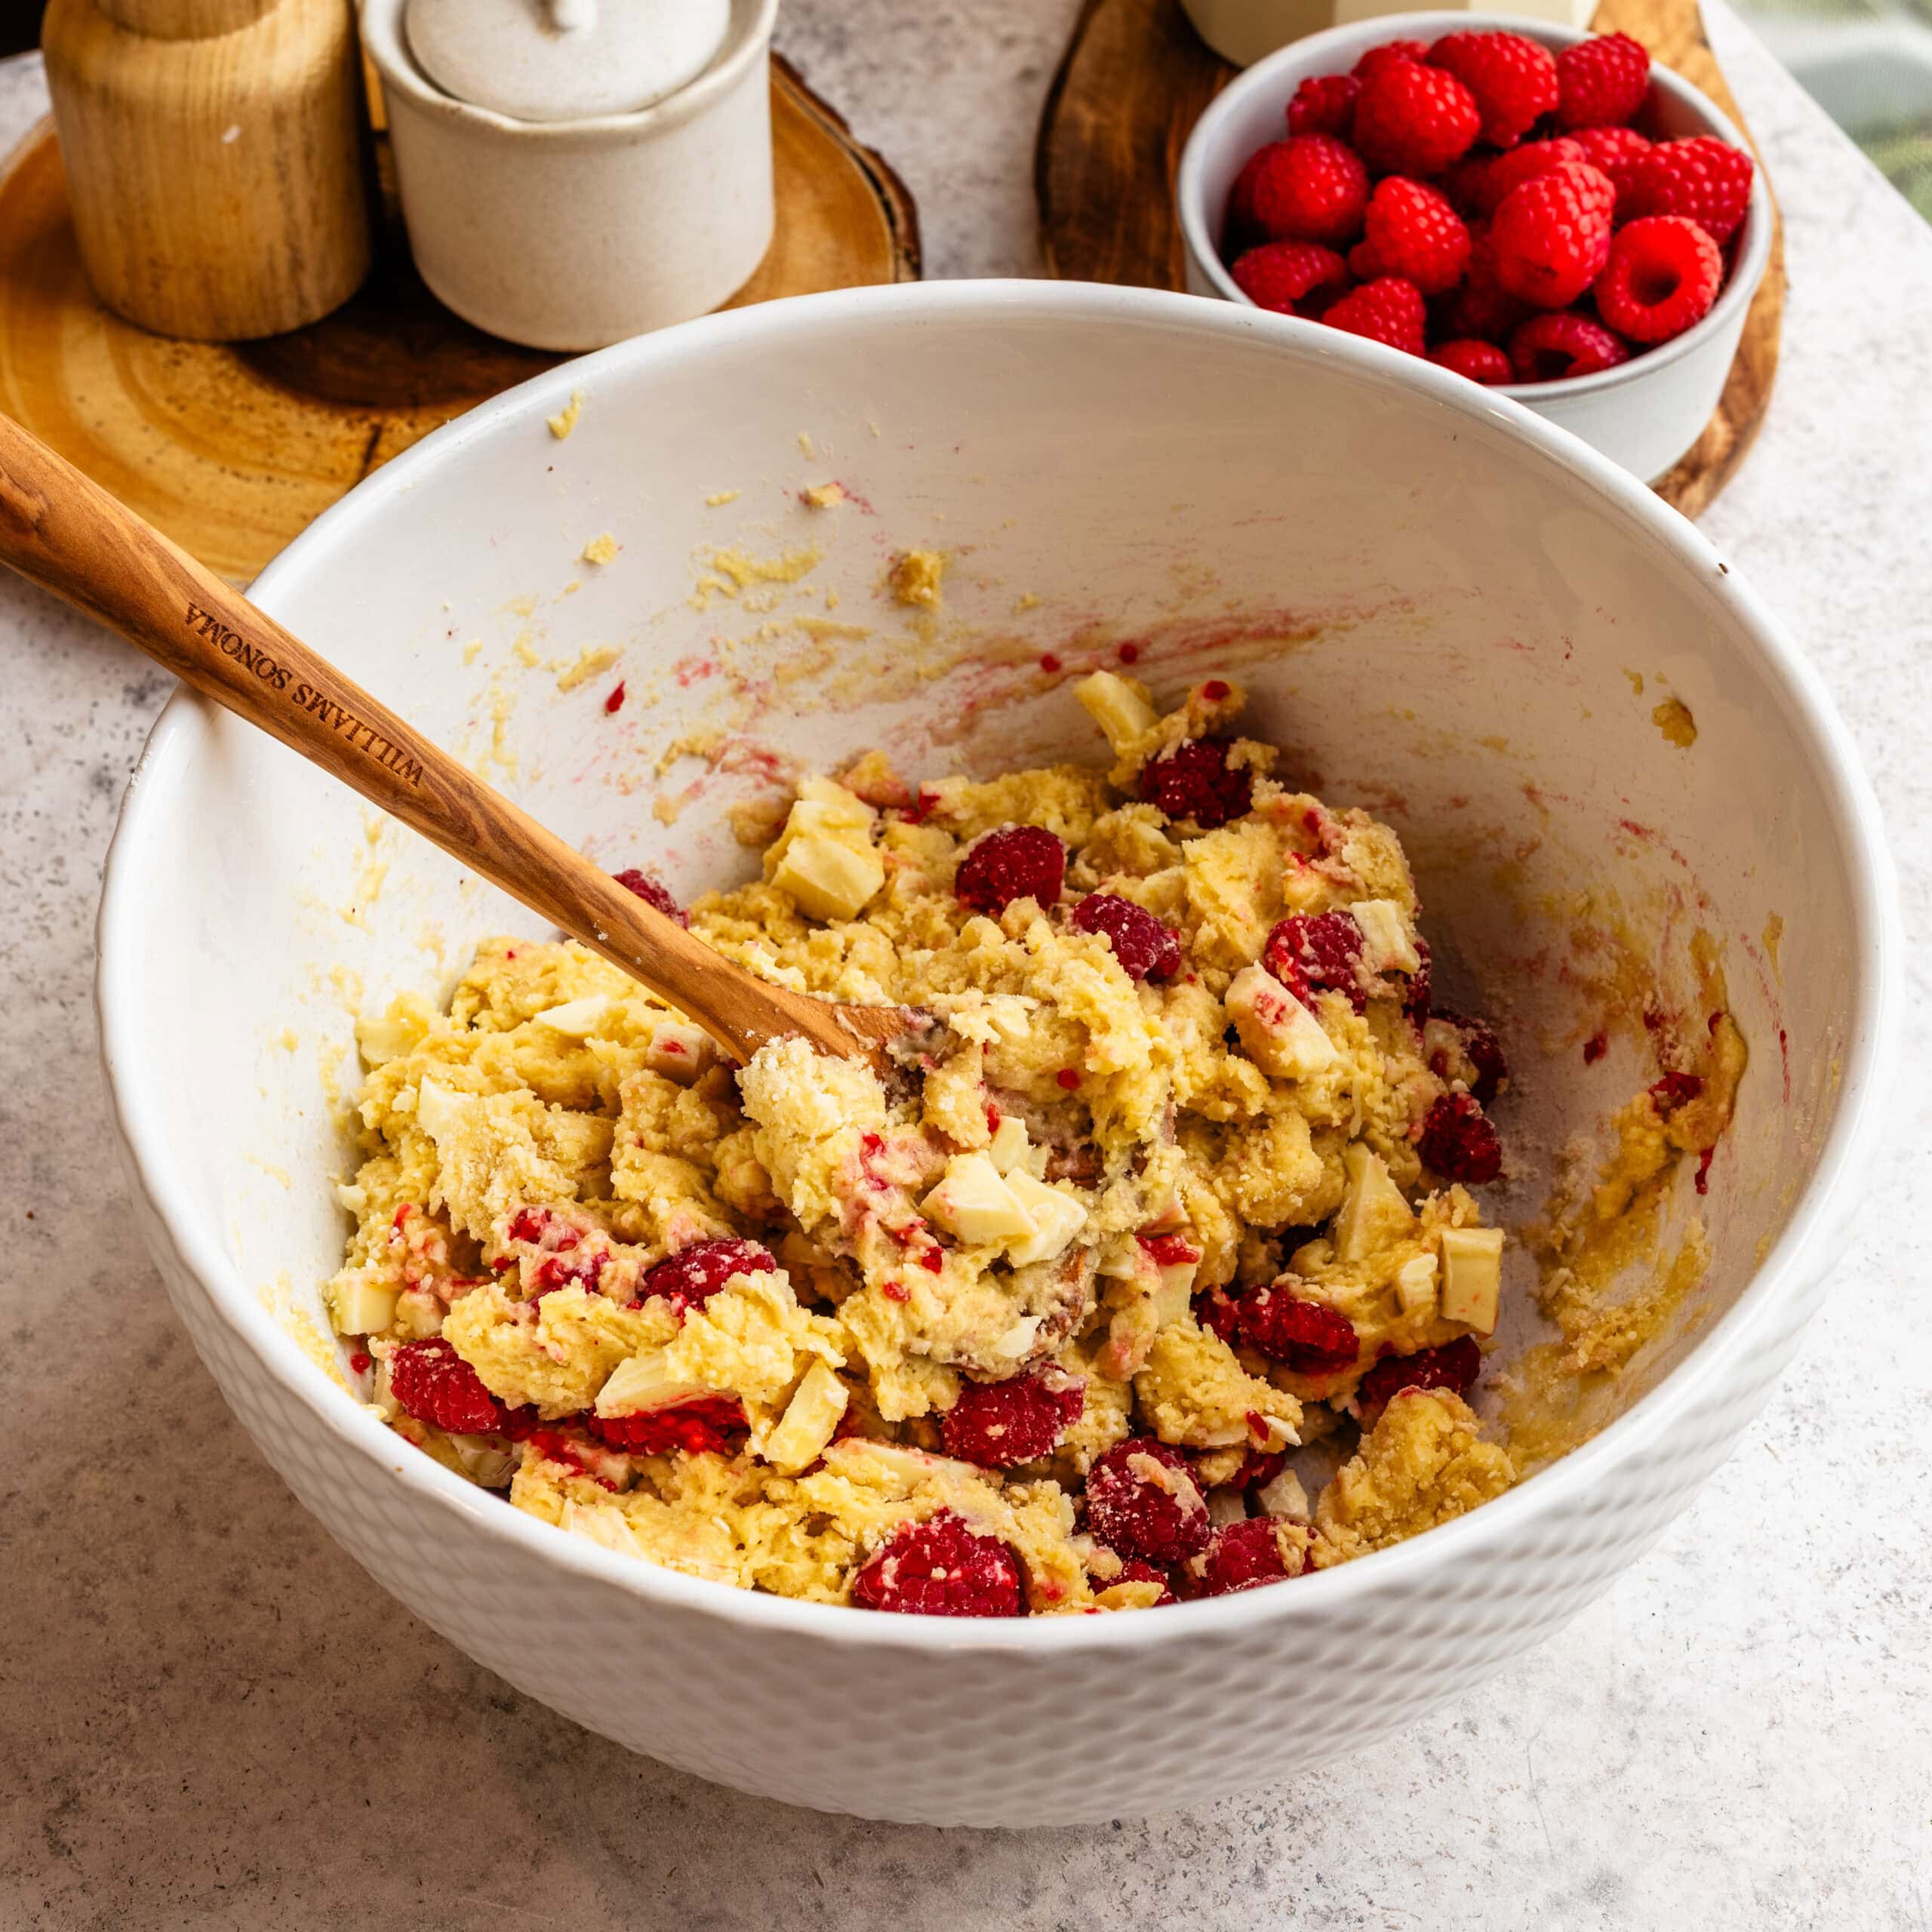
This is where many people accidentally overmix. I stop much earlier than most people expect because the dough will continue coming together once the raspberries and white chocolate are added.
Add the Raspberries and White Chocolate
Add the raspberries and white chocolate. Gently fold until evenly distributed throughout the dough.
If you’re using fresh raspberries, work carefully. They’re more delicate and can break apart easily. Frozen raspberries are much more forgiving.
Shape the Dough
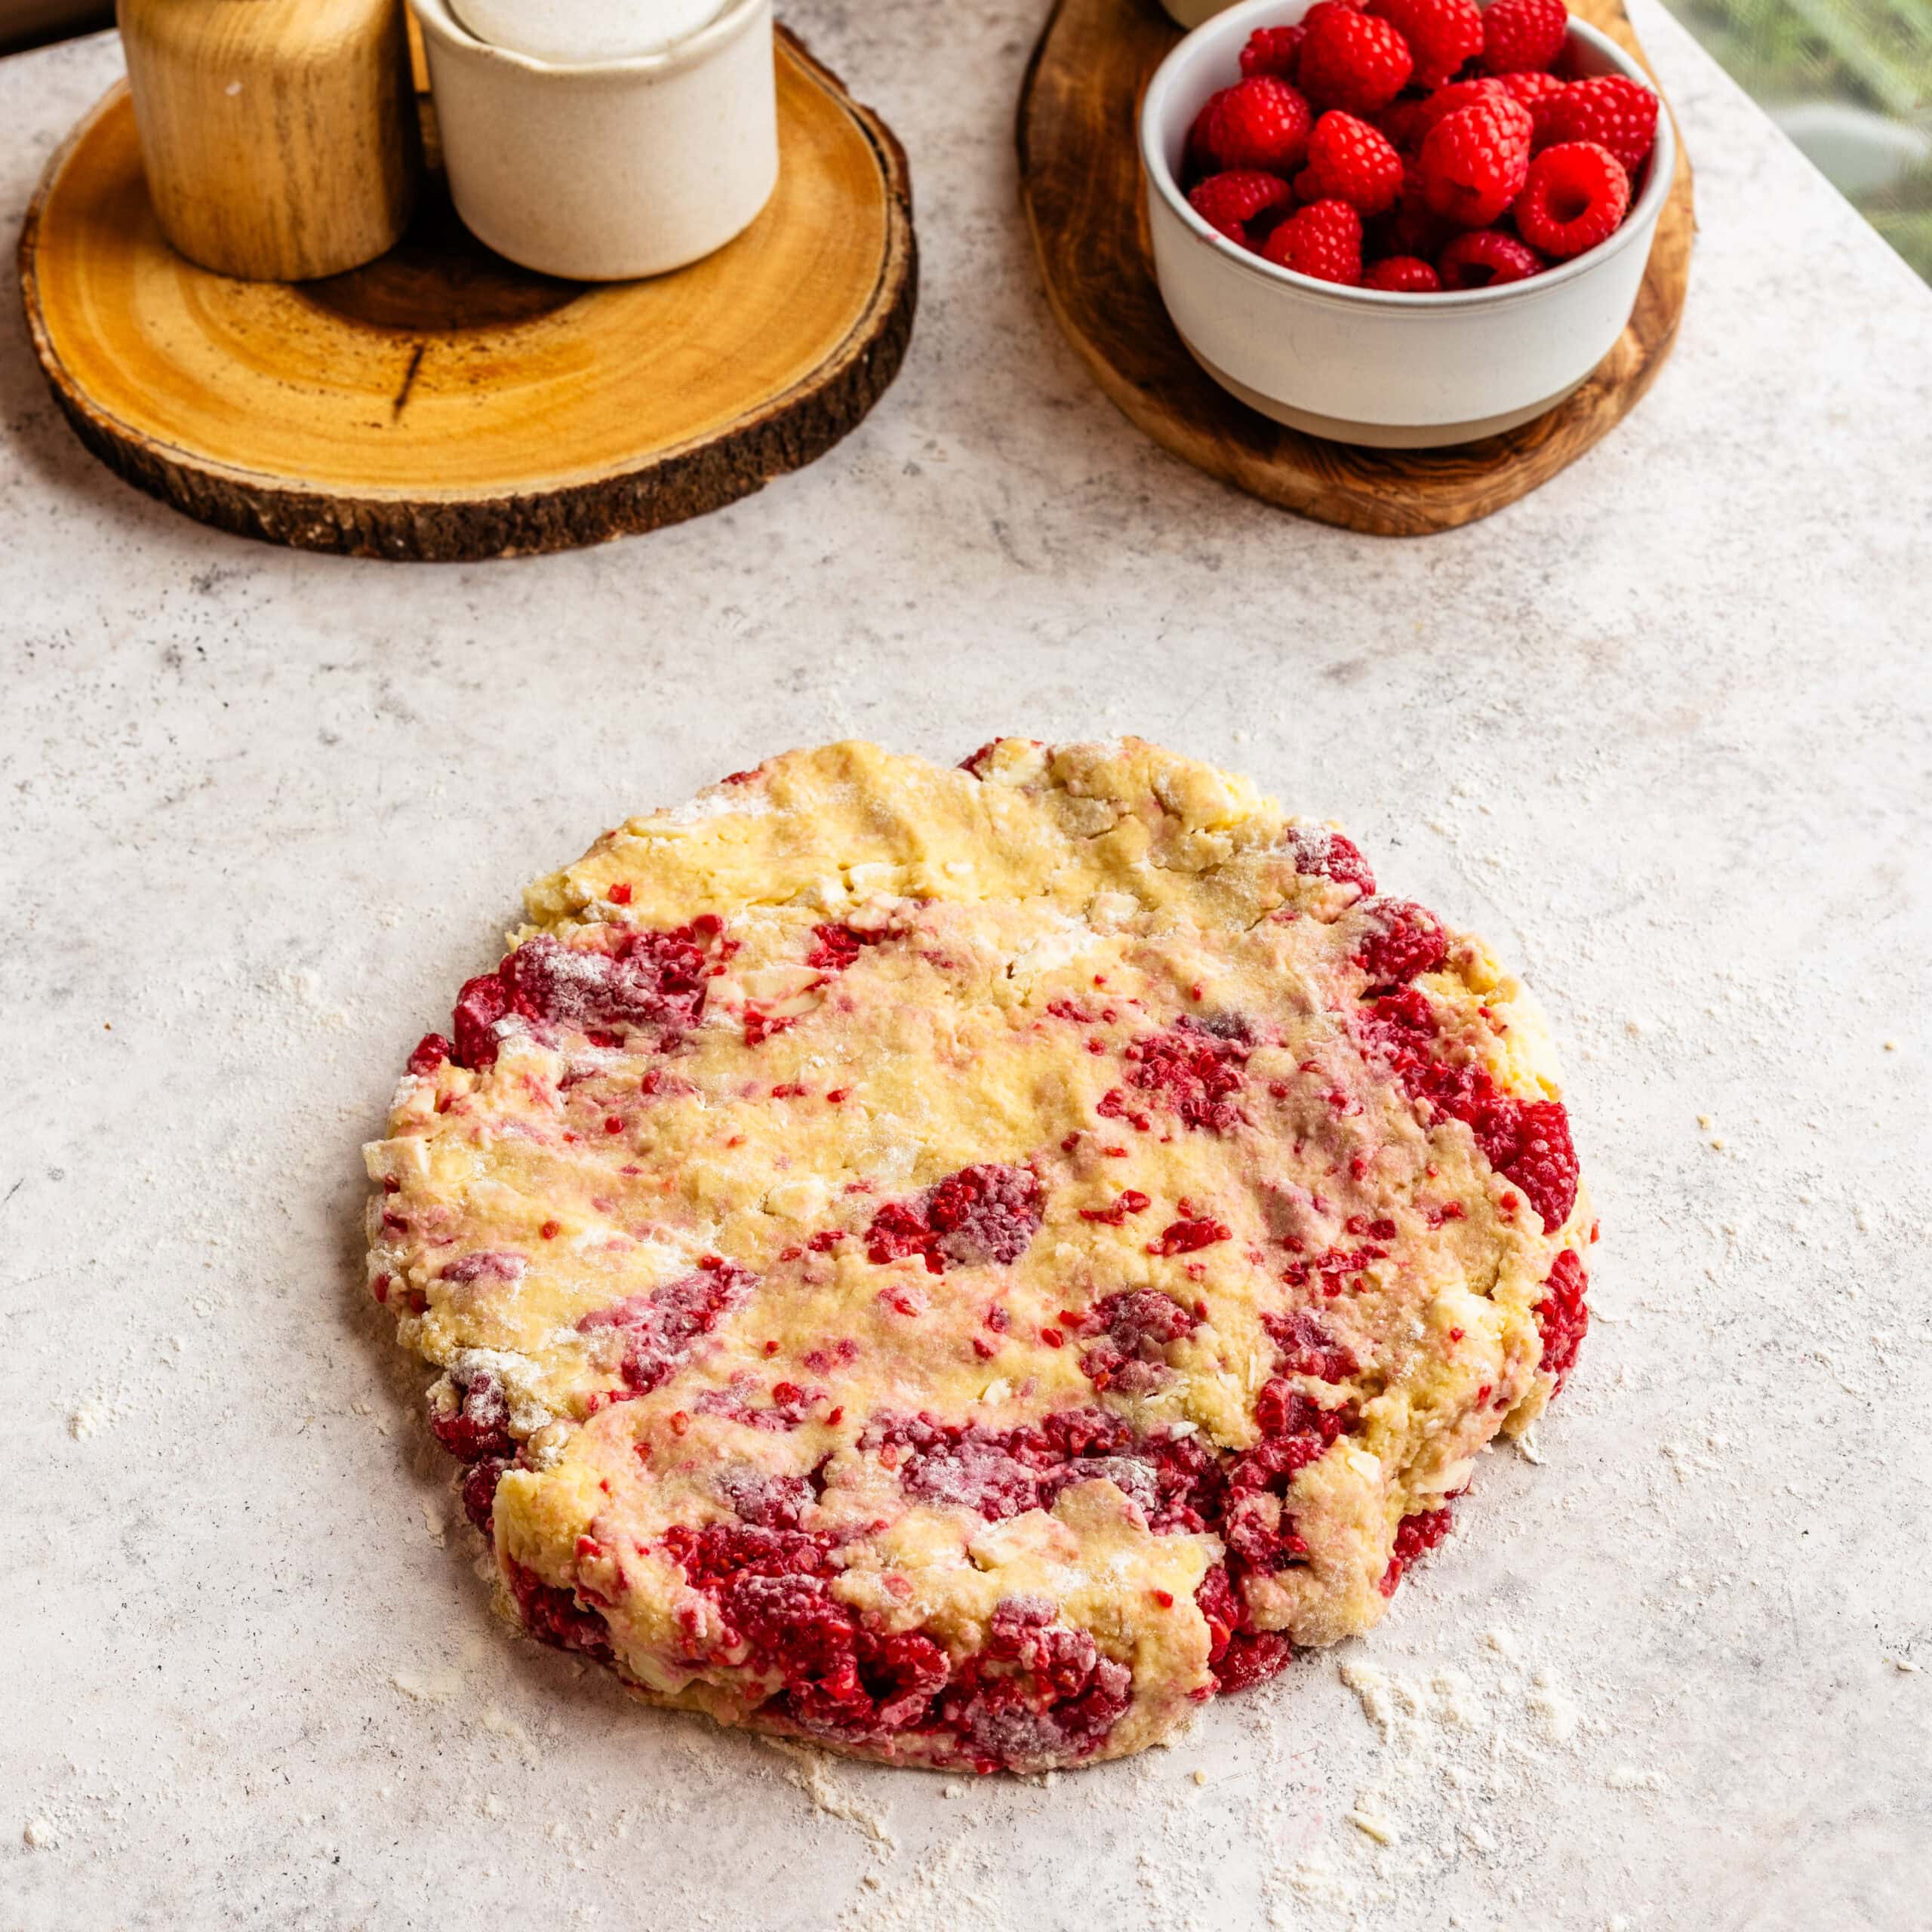
Turn the dough out onto a lightly floured work surface.
Gently press it together and pat it into a circle about 1 inch thick.
For extra flaky layers, I like to flatten the dough slightly, fold it in half once, and then gently pat it back into shape. This simple fold creates additional layers without requiring extra work.
If there are dry bits of dough, tuck them between folds rather than kneading everything together.
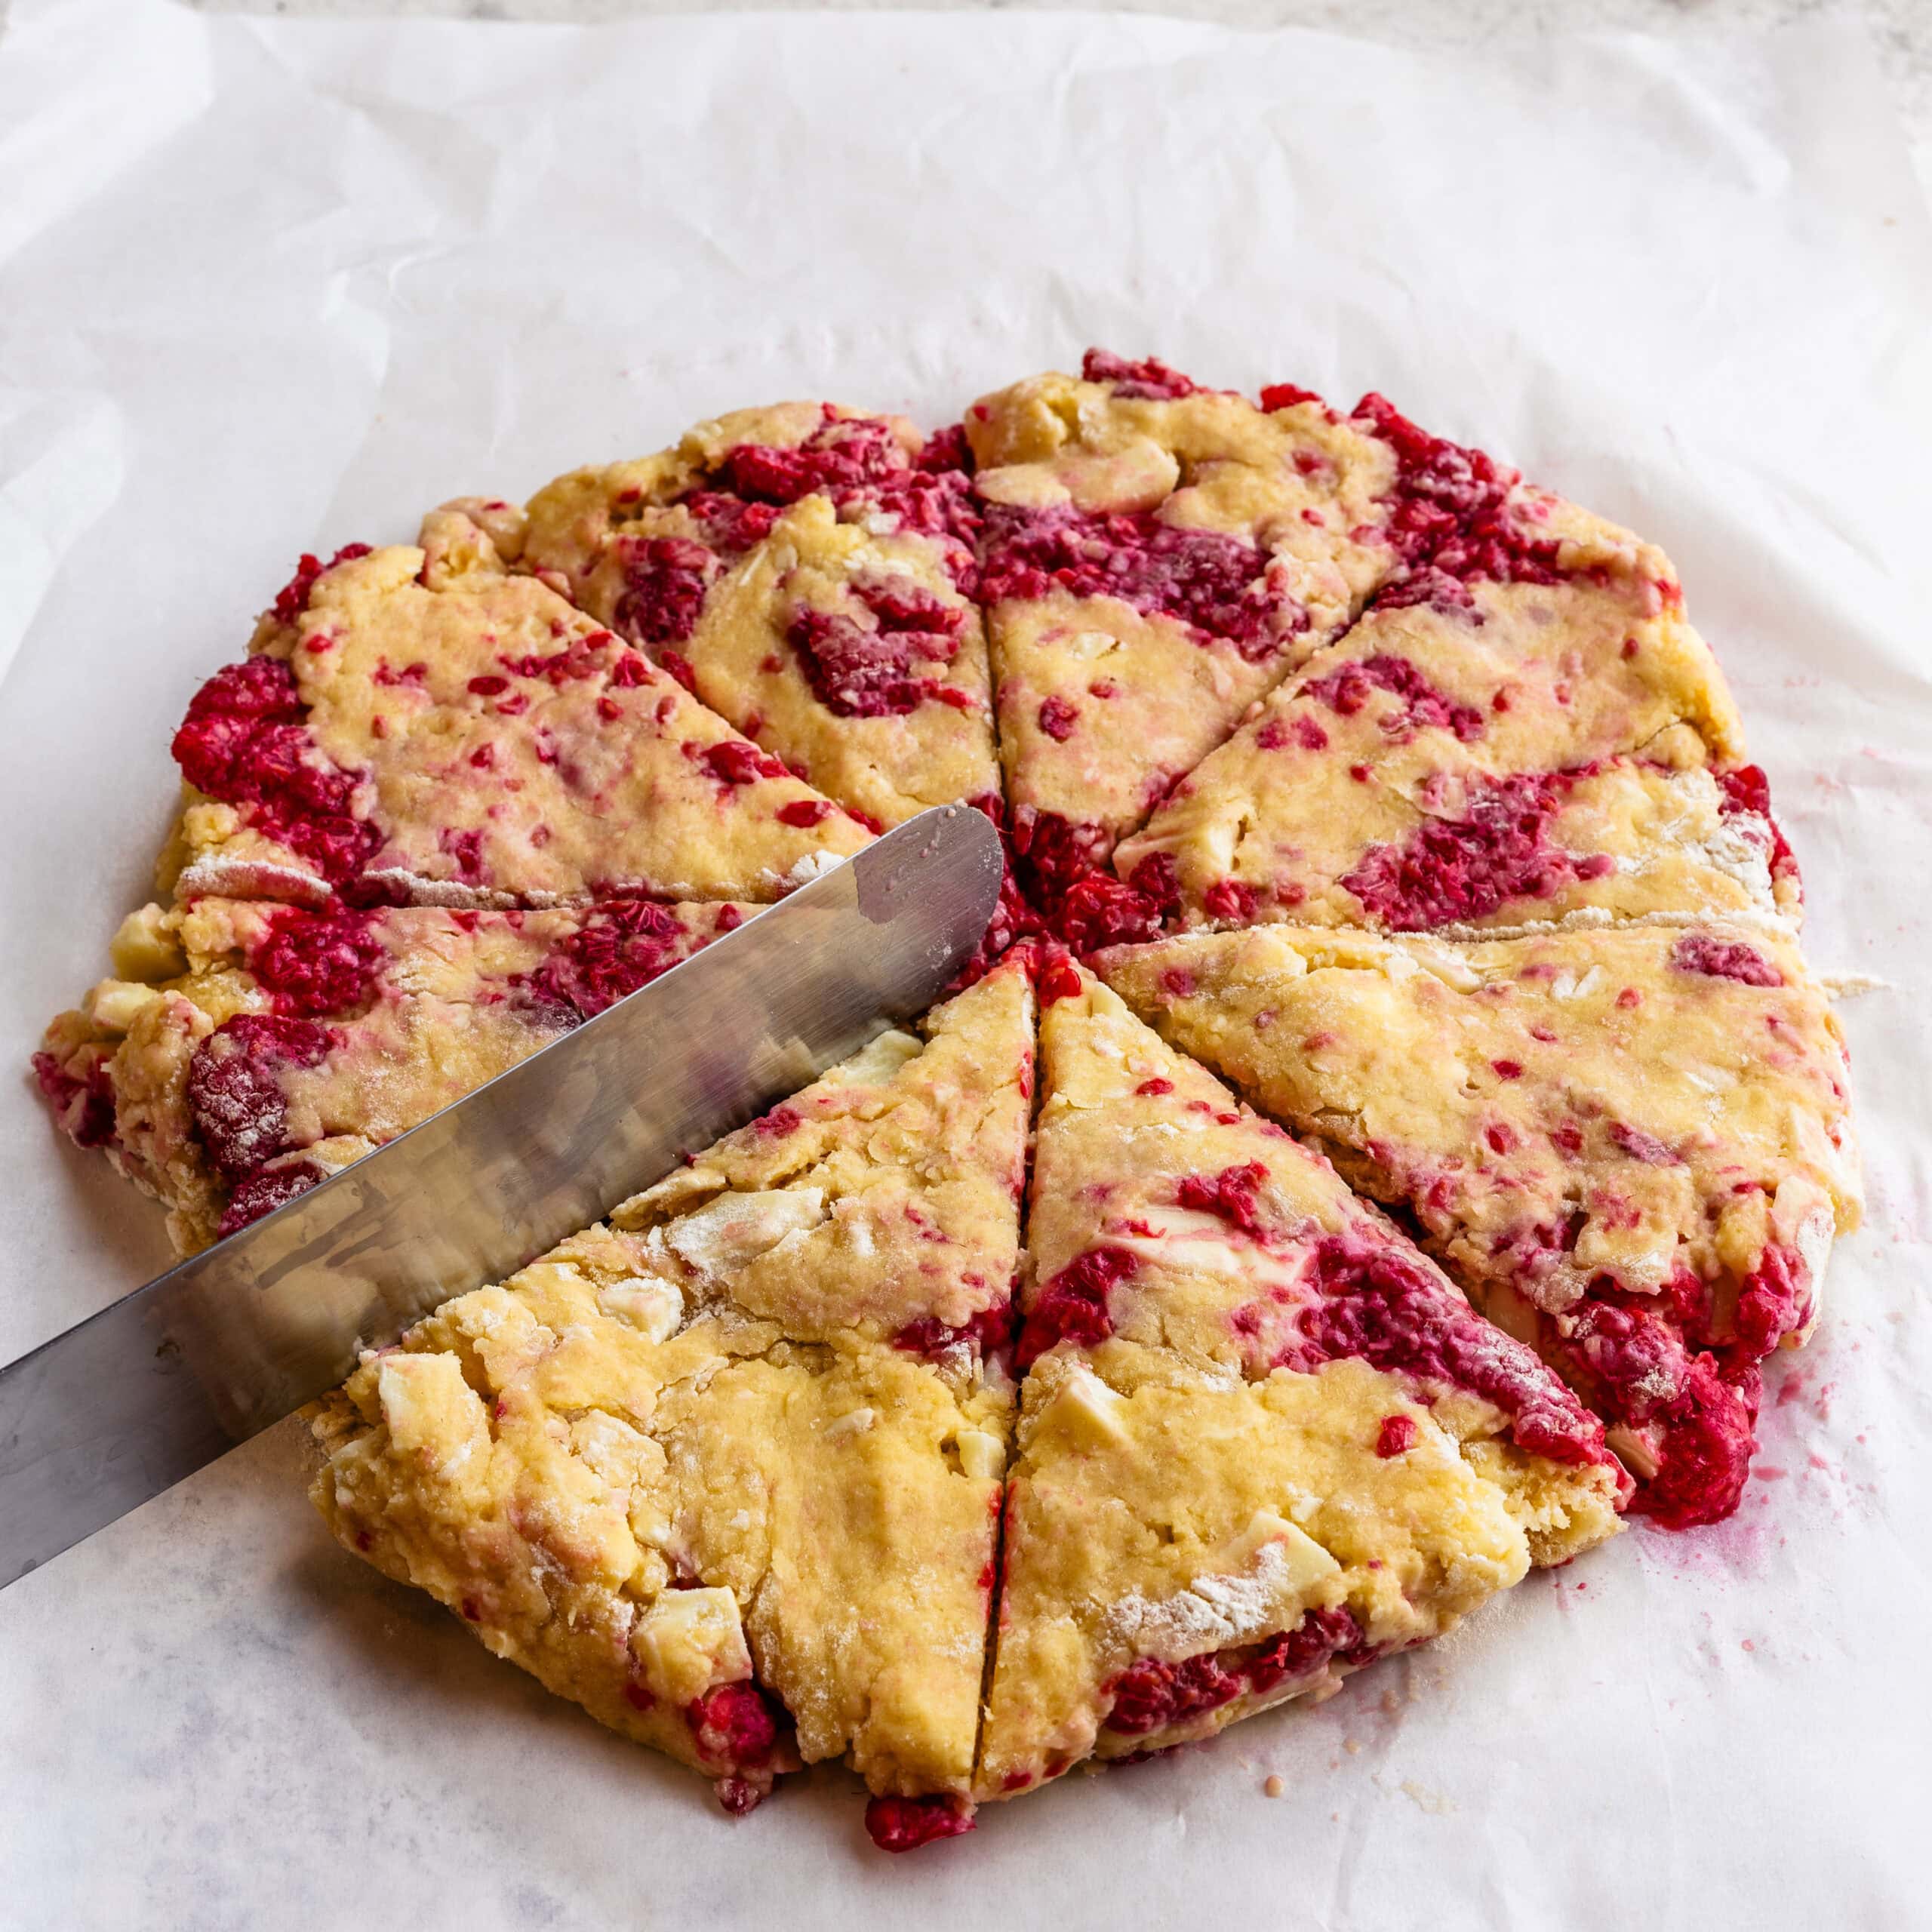
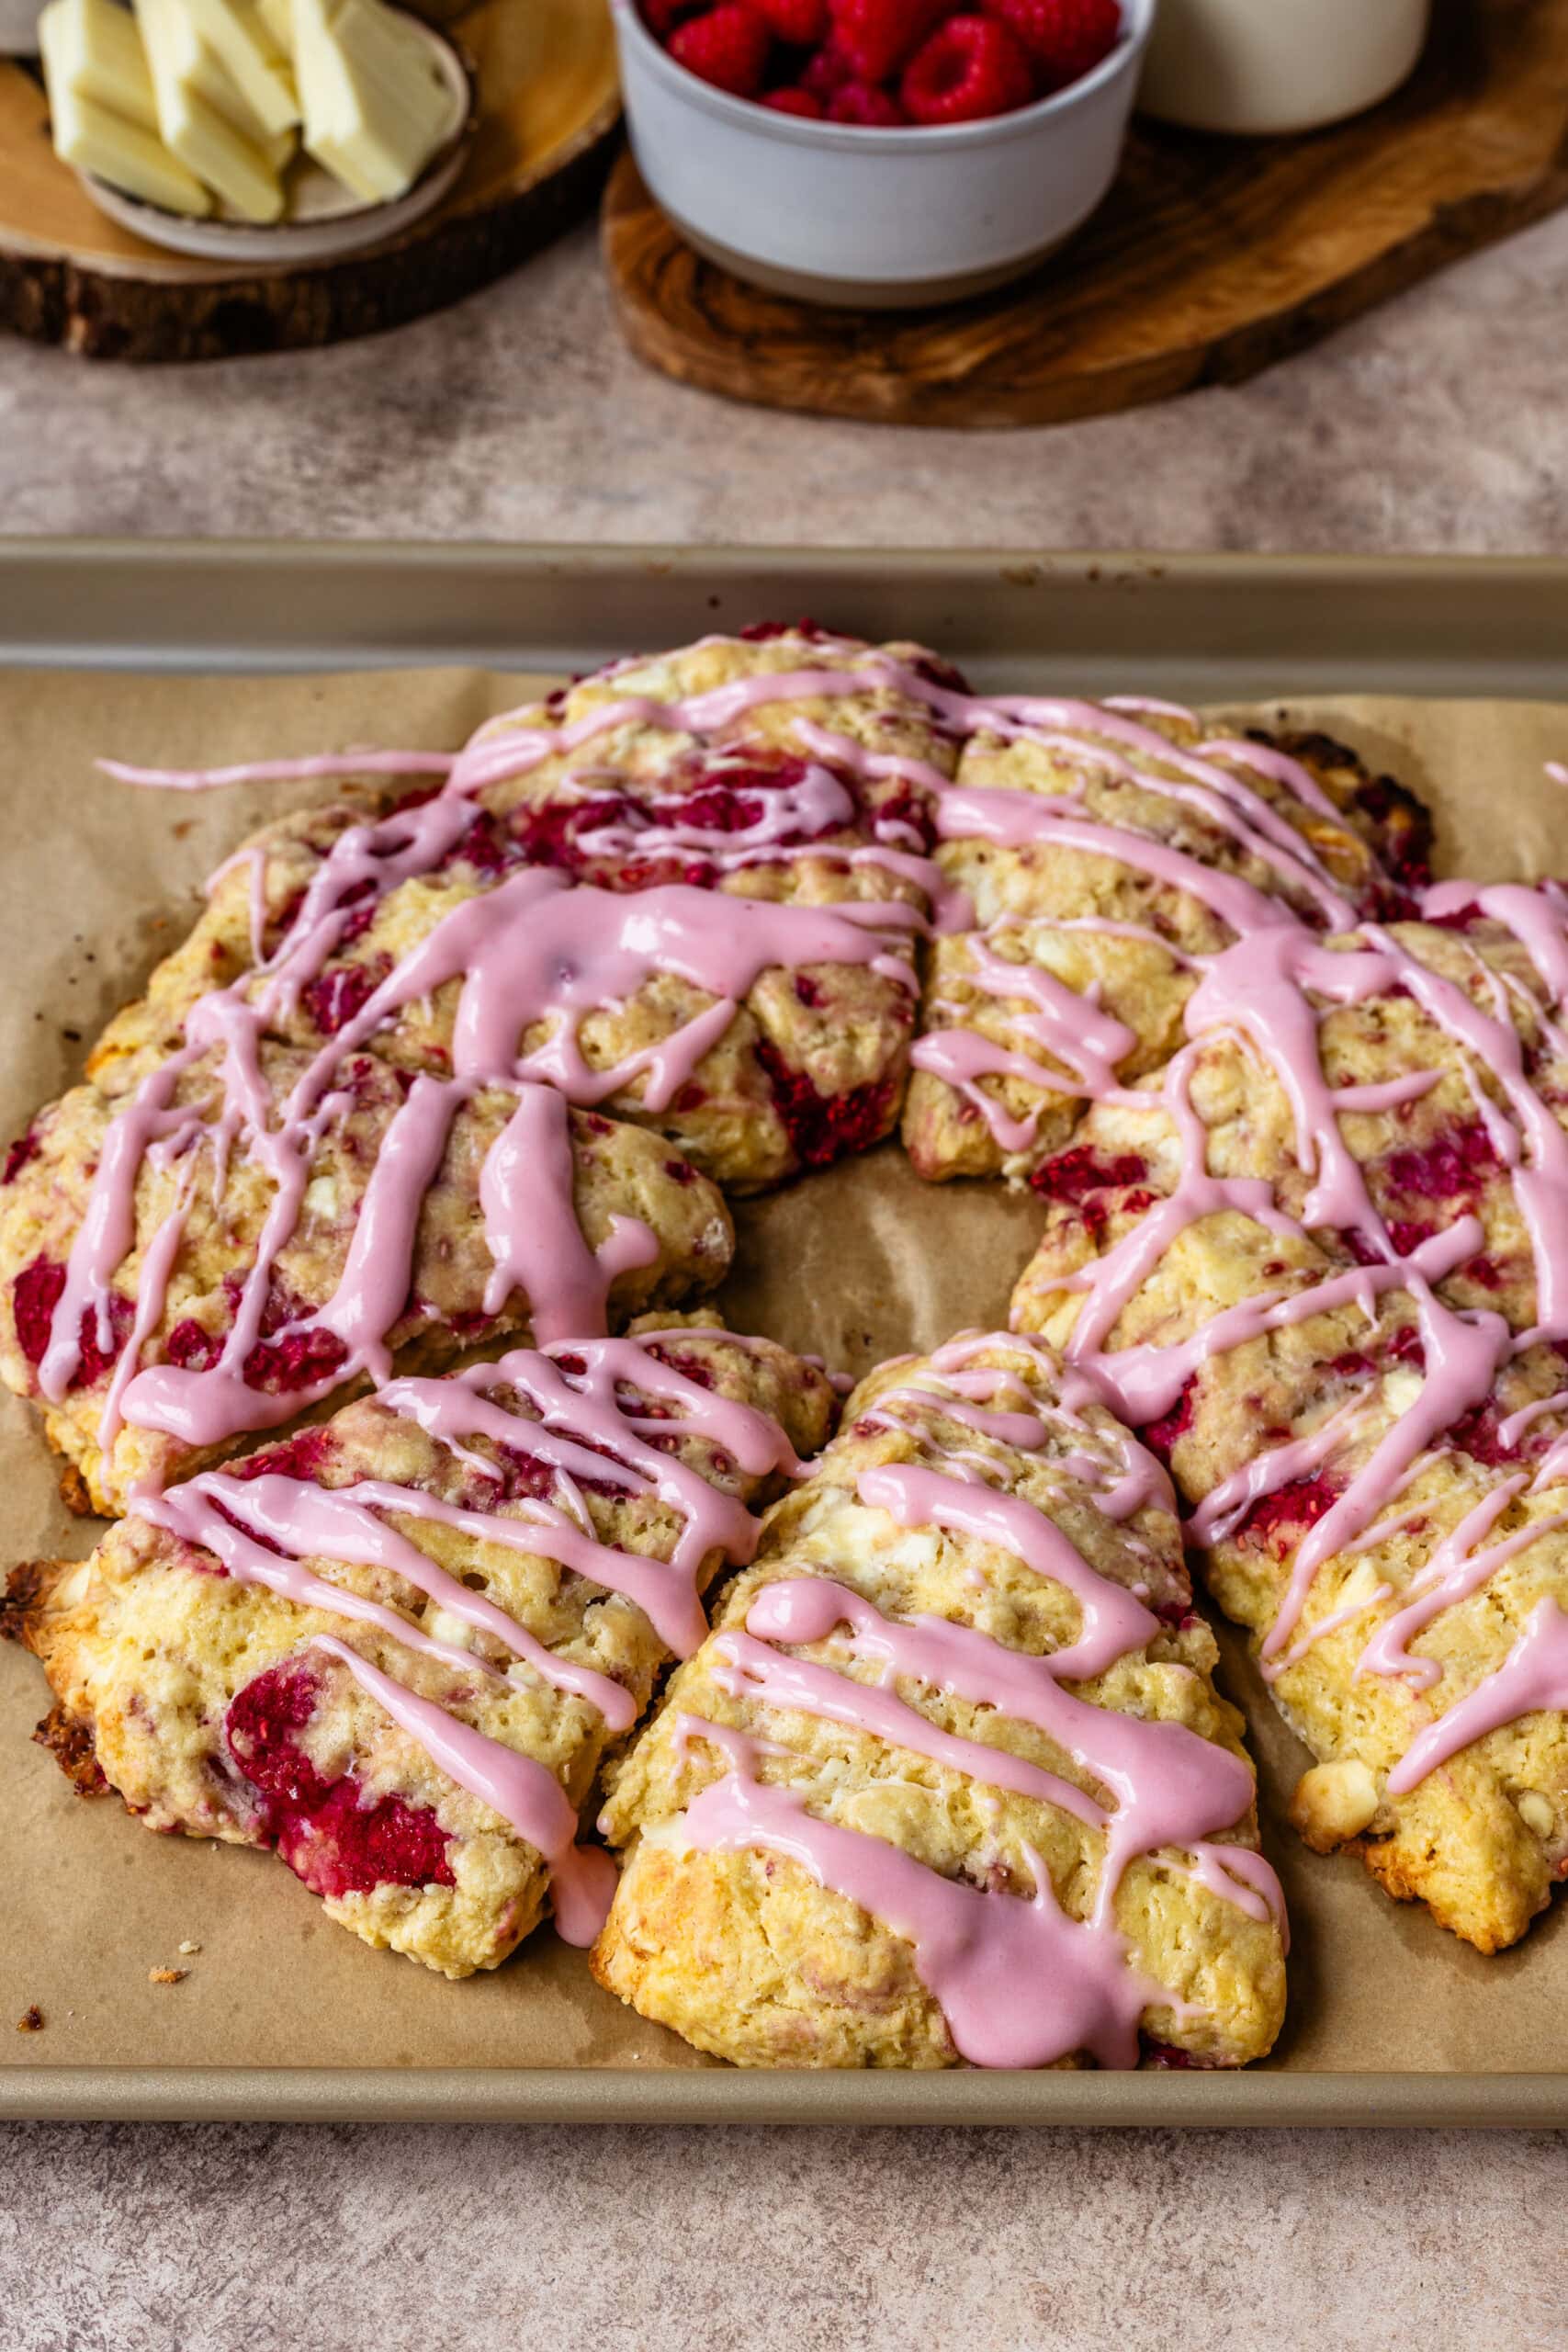
Cut & Chill
Using a sharp knife or bench scraper, cut the dough into 8 wedges. Transfer the wedges to the prepared baking sheet, leaving a little space between them.
If the dough feels soft or sticky, place the tray in the refrigerator for 15 minutes or the freezer for about 30 minutes. This is one of the easiest ways to improve your scones. Cold dough equals taller scones.
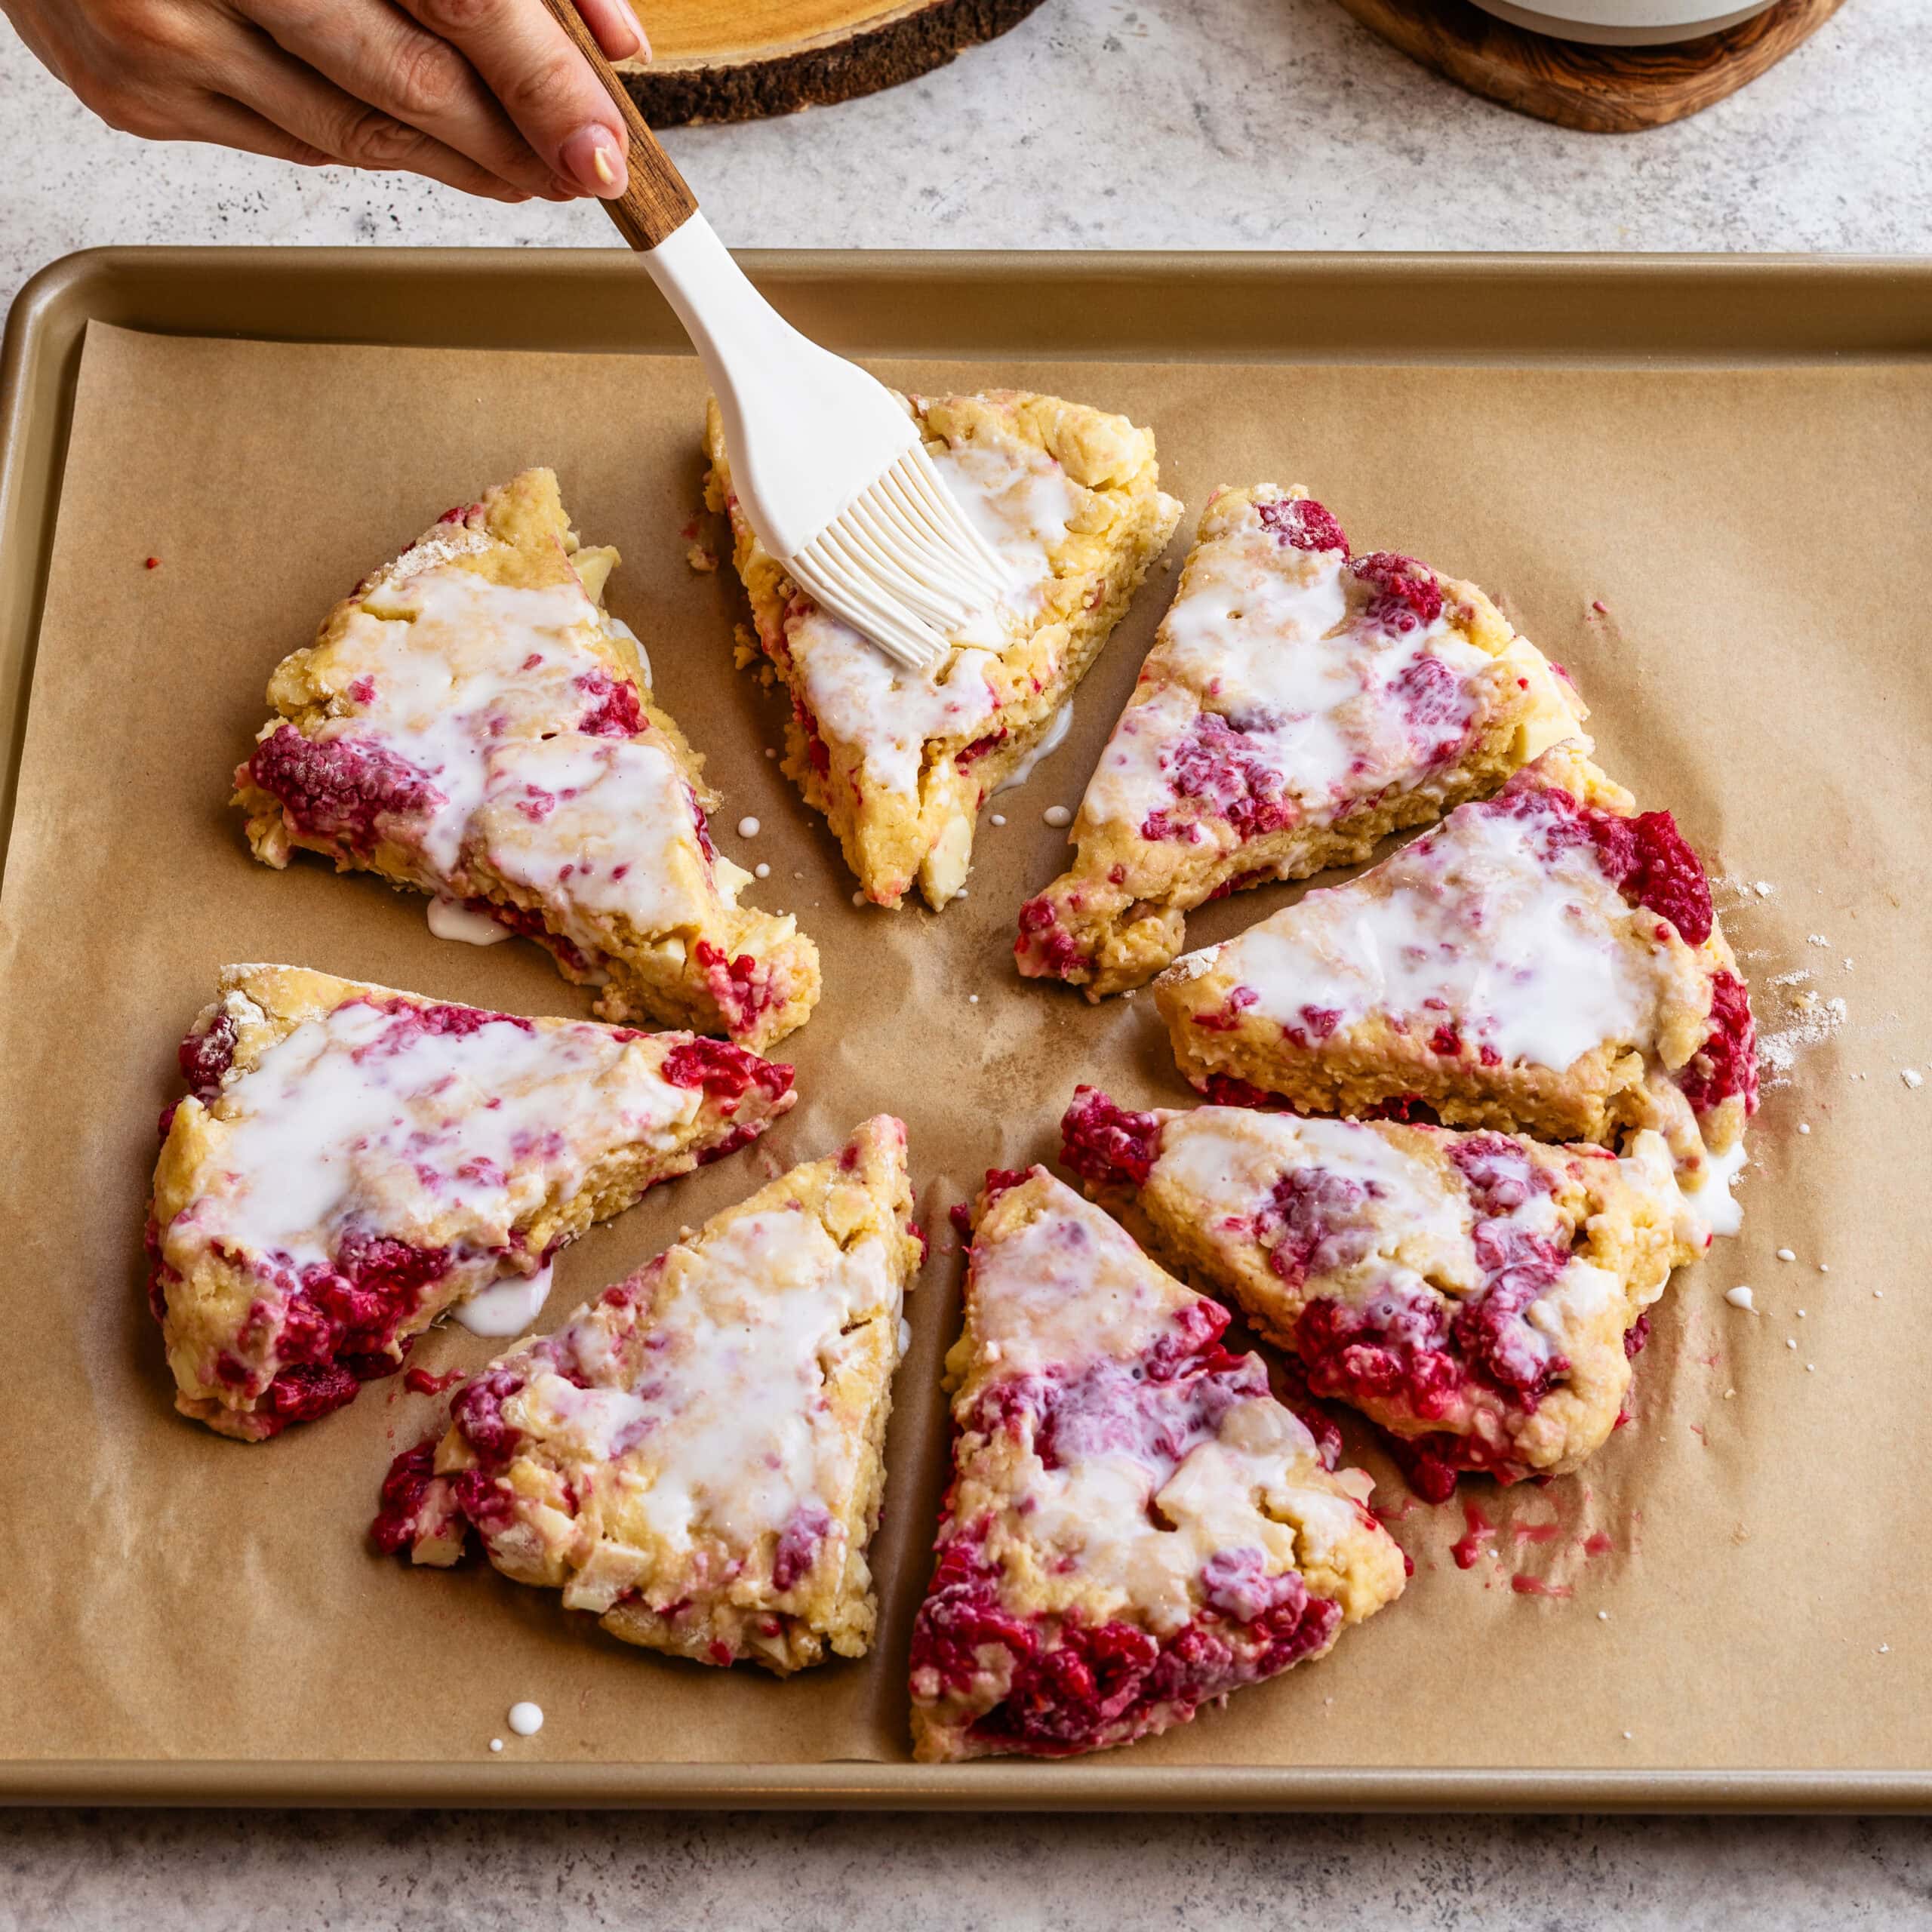
Brush & Bake
Brush the tops with cream, milk, or buttermilk. Bake for 18 to 22 minutes, until the tops are lightly golden and the bottoms are nicely browned.
I usually start checking around 18 minutes, but most batches take closer to 20 minutes in my oven. Allow the scones to cool on the baking sheet for about 10 minutes before transferring them to a cooling rack.
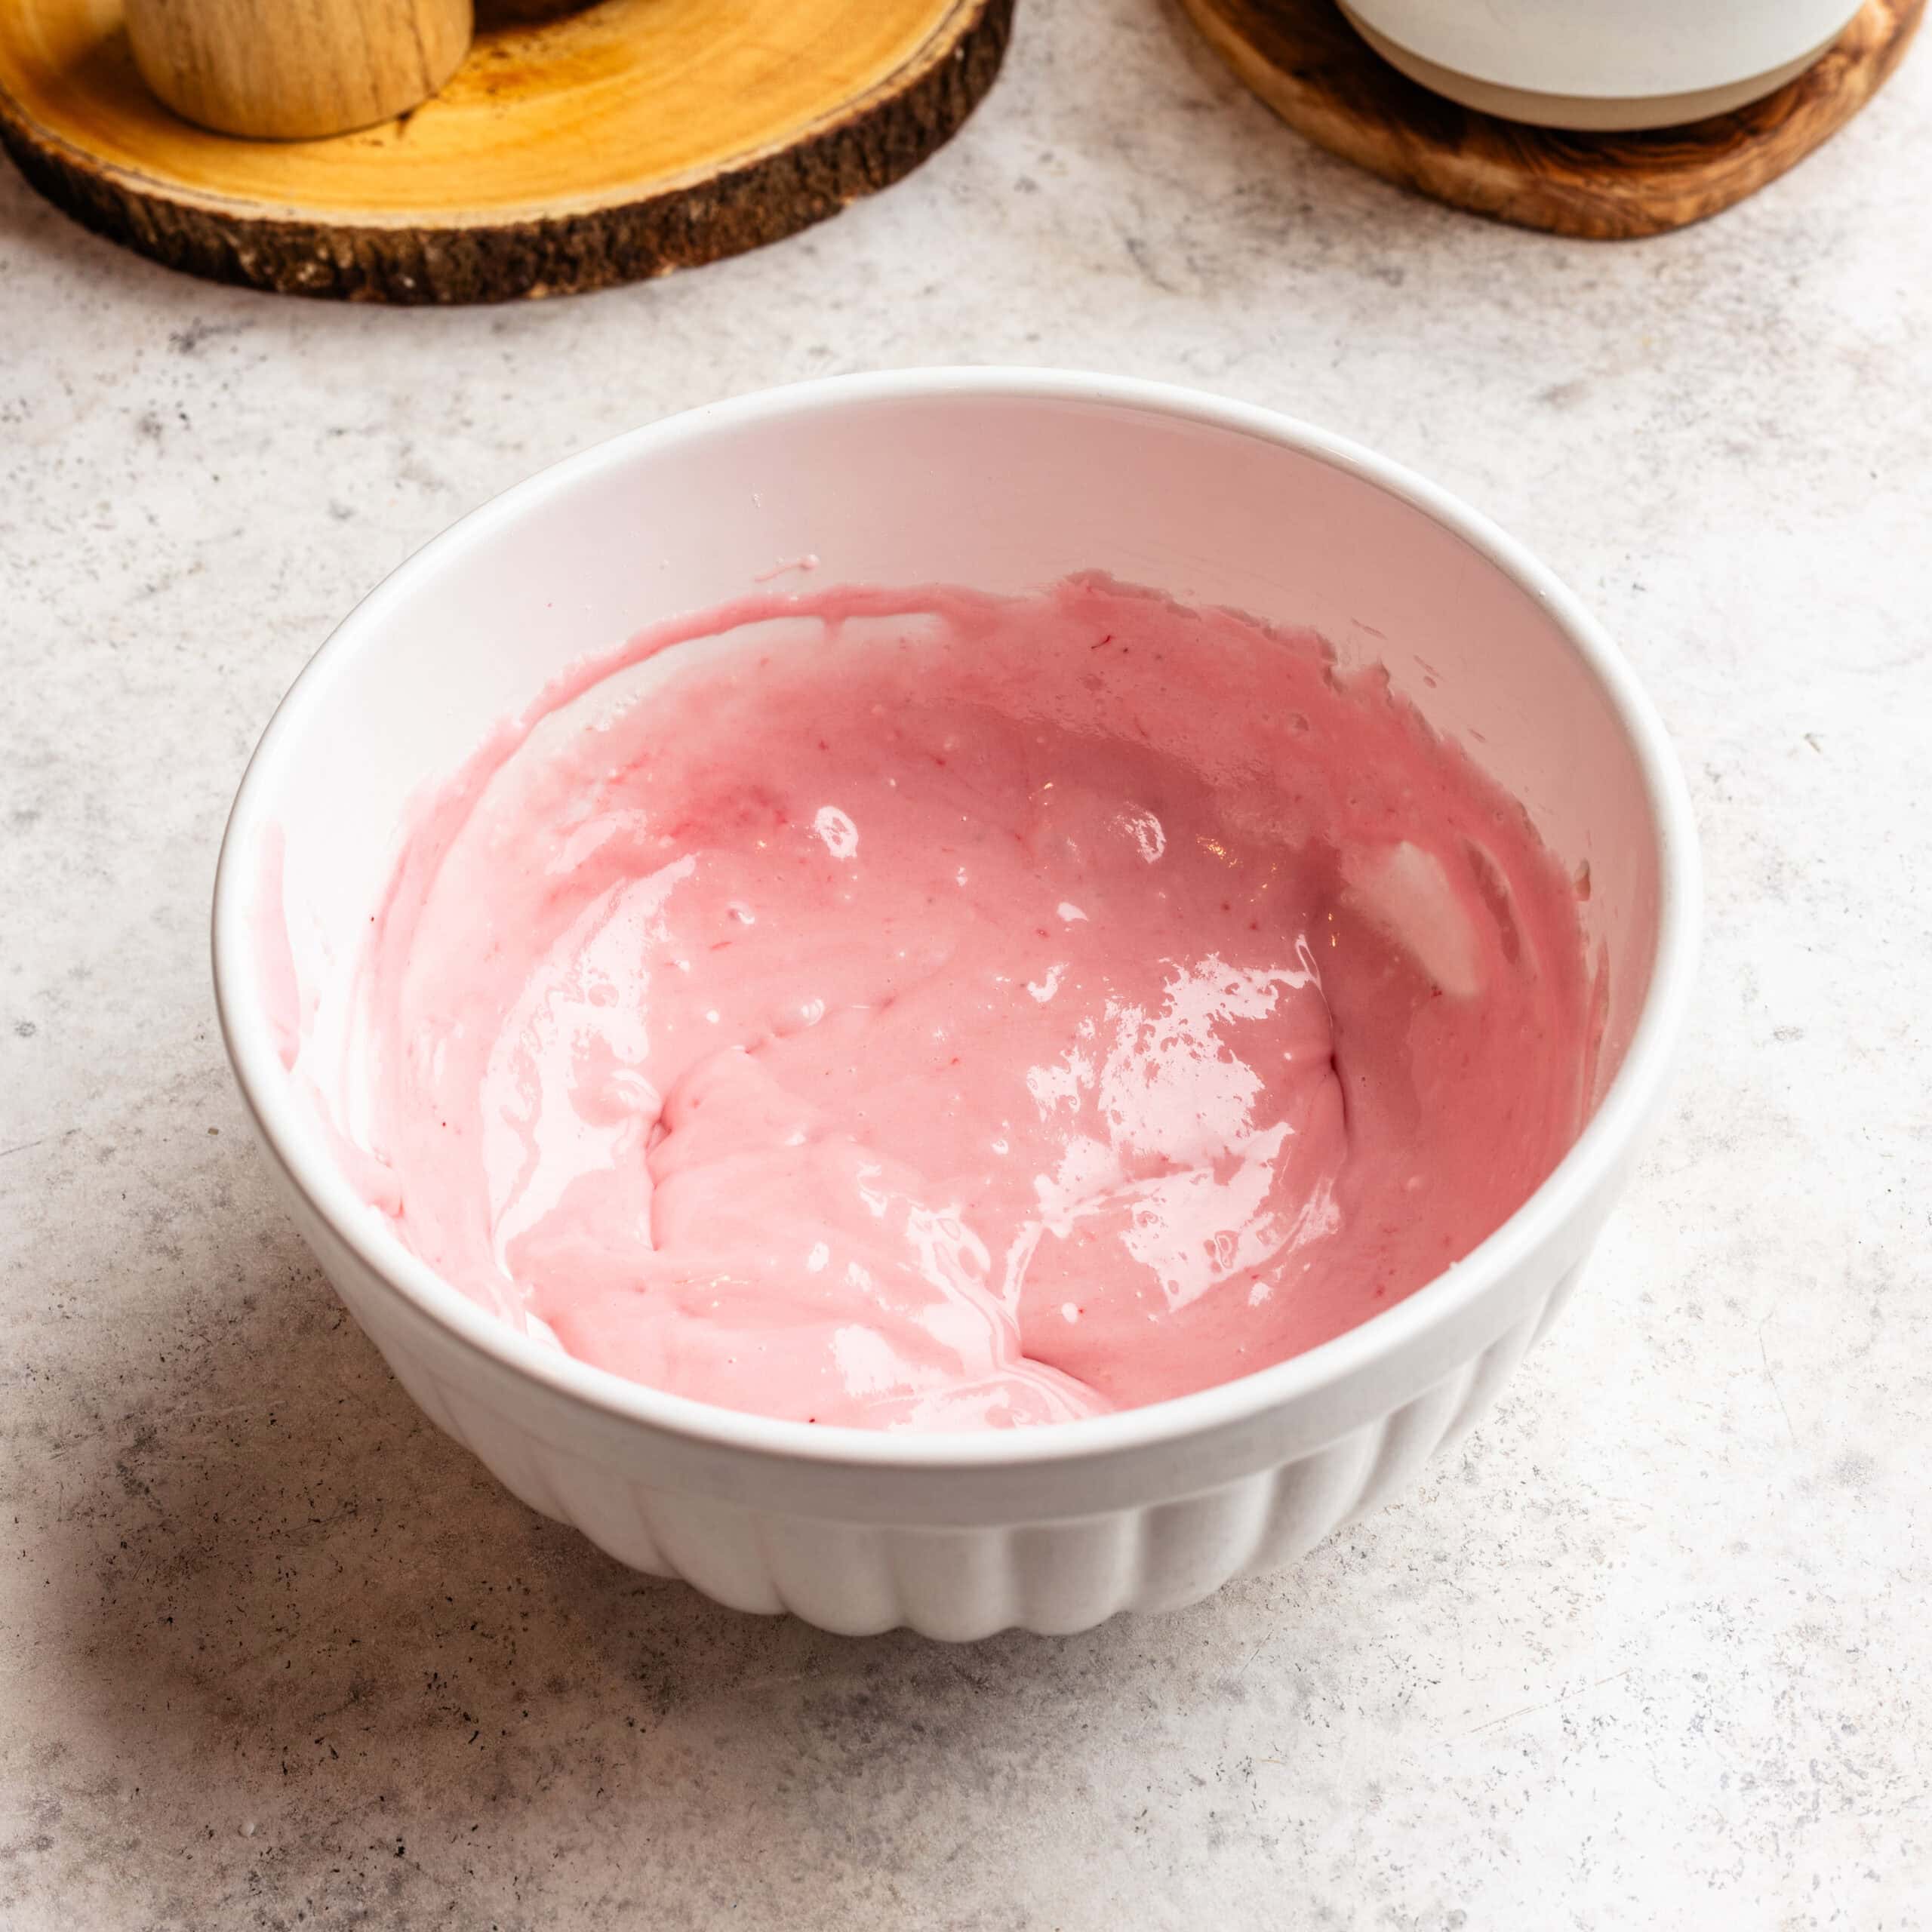
Make the Raspberry Cream Cheese Glaze
Mash the raspberries and press them through a fine mesh sieve to remove the seeds. Measure out 2 tablespoons of the strained raspberry puree. Beat the cream cheese, powdered sugar, and raspberry puree together until smooth and creamy.
Glaze the Scones
Once the scones have cooled, drizzle the glaze over the top and let it set for about 10 minutes before serving.
A Few Tips I’ve Learned After Making Lots of Scones
Scones are actually very simple, but a few small details make a huge difference.
- Keep the butter, eggs, and buttermilk cold.
- Don’t overwork the dough. Leave visible pieces of butter in the mixture.
- Chill the dough if it starts feeling soft.
- Use frozen raspberries if possible.
- Bake until the bottoms are nicely browned, not just the tops.
The single most important tip: If your dough feels warm, stop and chill it before baking. This one step can completely change the texture of your scones.
Storage and Make-Ahead Tips
I store leftover glazed scones in an airtight container in the refrigerator for up to 3 days.
Before serving, I like to let them come to room temperature or warm them slightly. The texture softens beautifully and the flavors become even more pronounced.
If I want fresh scones later in the week, I usually freeze them before baking. Simply place the shaped scones on a baking sheet until frozen solid, then transfer them to a freezer bag.
You can bake them directly from frozen, adding 2 to 4 extra minutes to the baking time. Baked, unglazed scones can also be frozen for up to 2 months. Reheat them in a 300°F oven until warm, then add the glaze before serving.
A Few Ways to Change Them Up
I love this recipe exactly as written, but here are a few variations I make from time to time:
- Add lemon zest to the dough for a flavor combination similar to my Lemon Strawberry Scones.
- Swap the raspberries for blueberries, like I do in my Blueberry Scones.
- Replace the raspberries with diced apples and a pinch of cinnamon for a variation inspired by my Apple Scones.
- Skip the glaze and sprinkle coarse sugar over the tops before baking.
FAQ
Yes, and I actually recommend them. Frozen raspberries hold their shape much better while mixing and are less likely to turn the dough pink.
Dense scones are usually caused by overmixing or using ingredients that became too warm. I always stop mixing as soon as the dough comes together and chill it whenever necessary.
Absolutely. I often freeze the shaped scones and bake them directly from frozen whenever I want fresh scones.
Yes. The almond extract adds a subtle flavor, but the recipe works perfectly with vanilla extract alone.
Definitely. Blueberries, blackberries, or chopped strawberries all work well. If you love blueberry scones, you may want to try my Blueberry Scones recipe, which follows a very similar method.
More Scone and Raspberry Recipes
If you enjoyed these Raspberry White Chocolate Scones, I think you’ll also love my Apple Scones & Lemon Strawberry Scones. They all use a similar technique but offer completely different flavors depending on the season.
For more raspberry baking inspiration, take a look at my Raspberry and White Chocolate Muffins, Raspberry Cookies, and Raspberry Cake. They’re some of my favorite raspberry recipes and a great way to make the most of fresh berries.
If you make these Raspberry White Chocolate Scones, I’d love to hear how they turned out. Leave a comment below and a rating if you enjoyed the recipe. And if you share them on Instagram, be sure to tag me @piesandtacos so I can see your creations!
Raspberry Scones
Ingredients
Scones
- 2½ cups all-purpose flour 280g
- ½ cup granulated sugar 100g
- 1 tbsp baking powder
- 1 tsp salt
- 6 tbsp cold unsalted butter 85g, cut into cubes
- 5 tbsp cold buttermilk 75g
- 2 cold eggs lightly beaten
- ½ tsp vanilla extract
- 1/4 tsp almond extract
- 1 cup raspberries 140g, fresh or frozen
- ¾ cup white chocolate chips or chopped white chocolate 130g
- ⅓ cup heavy cream milk, or buttermilk, for brushing
Raspberry Cream Cheese Glaze
- 2 ounces cream cheese 57g or ¼ cup, softened
- 1 cup powdered sugar 125g, sifted
- ½ cup fresh raspberries (should yield 2tbsp of strained puree)
Instructions
- Preheat the oven to 375°F (190°C). Line a baking sheet with parchment paper.
- Keep the butter in the refrigerator until ready to use. Cold butter creates flaky layers and helps the scones rise tall.
- In a large bowl, whisk together the flour, sugar, baking powder, and salt.
- Add the cold butter cubes to the flour mixture. Using a pastry blender, two forks, or your fingertips, work the butter into the flour until the mixture resembles coarse crumbs with some pea-sized pieces remaining.
- In a separate bowl, whisk together the buttermilk, eggs, vanilla extract, and almond extract.
- Pour the wet ingredients into the dry ingredients. Using a spatula, gently fold until the dough is mostly combined and only a few dry streaks remain.
- Add the raspberries and white chocolate. Fold gently just until evenly distributed. Avoid overmixing, especially if using fresh raspberries, as they can break apart and streak the dough.
- Turn the dough onto a lightly floured surface. Gently bring it together and pat it into a circle about 1 inch thick. For extra flaky layers, flatten the dough, fold it in half once, and gently pat it back into shape. If there are any dry bits that aren’t fully incorporated, place them between two pieces of dough and gently press or fold the dough over them. Repeat as needed until all of the dry bits are incorporated. Avoid kneading the dough, as this can make the scones tough.
- Cut into 8 wedges or squares using a sharp knife or bench scraper. If the scones are too soft or sticky, place the whole tray in the freezer for about thirty minutes before continuing.
- Transfer the scones to the prepared baking sheet, leaving a little space between them. If the dough feels soft or sticky, chill the shaped scones in the refrigerator for 15 minutes before baking.
- Brush the tops with cream, milk, or buttermilk.
- Bake for 18 to 22 minutes, until the tops are lightly golden and the bottoms are nicely browned. Let cool on the baking sheet for 10 minutes before transferring to a wire rack.
- Allow the scones to cool before glazing.
Raspberry Cream Cheese Glaze
- Mash the raspberries and press them through a fine-mesh sieve to remove the seeds. Measure out 2 tablespoons of strained raspberry puree.
- Beat the cream cheese with the powdered sugar and raspberry puree. Mix until creamy and smooth.
- Drizzle the glaze over the cooled scones and let it set for about 10 minutes before serving.