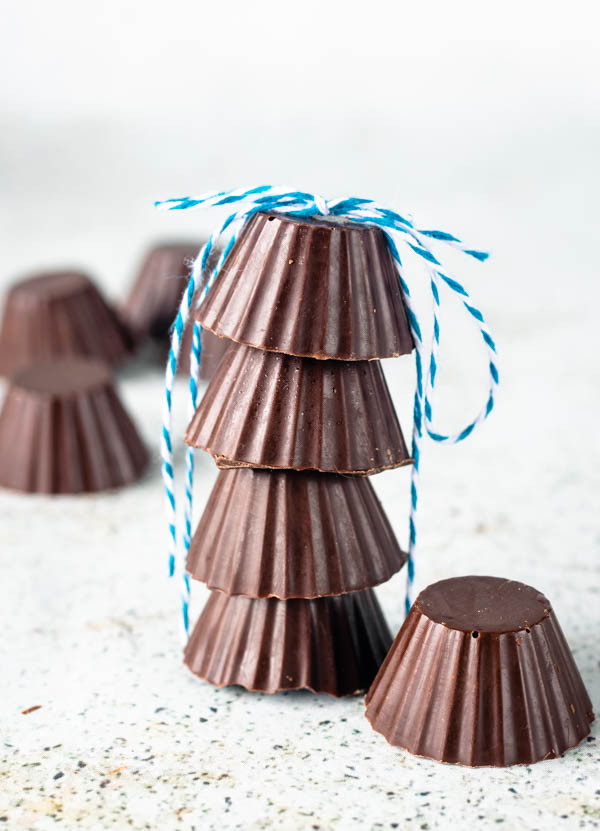
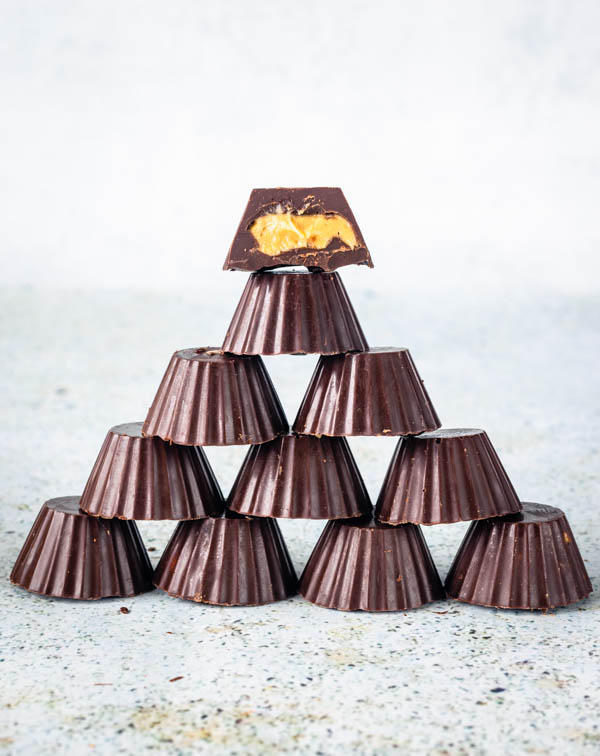
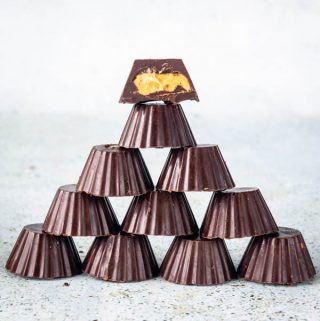
Peanut Butter Cups
Peanut Butter Cups. Homemade is always best. And I’ll say that about everything, really!
It wouldn’t be any different with these peanut butter cups.
My version is very simple. All you need to do is temper the chocolate first.
This post may contain affiliate links. I earn a commission from qualified purchases. Please read our Privacy policy here.
I see some recipes that melt the chocolate with some sort of fat (coconut oil) and use as is, without tempering.
The reason why I like to temper my chocolate is because this process provides a beautiful shine, and proper texture and snap to our final product. Another great benefit to tempered chocolate is that it melts at a higher temperature, so your truffles, molded chocolates, etc, won’t be losing shape or shine any time soon!
Tempering is a very simple process, but can intimidate a few people. First because it involves a thermometer. Second because I believe that not a lot of people really understand why or how tempering actually works.
Basically, tempering is the process that allows very specific cocoa butter crystals to form. The cocoa butter in chocolate can crystalize in 6 different forms. Because of that, you are looking for a very specific temperature in which your desired crystal type will form. They are called beta crystals. And they are the ones that will provide your final product with all those great qualities we’ve mentioned above (shine, texture, snap).
The process is straight forward. First, you must melt 2/3 of your chocolate and bring it to 120F (for dark chocolate), and this will melt all types of crystals.
Once that temperature has been reached, you are supposed to add the remaining 1/3 of chocolate and stir until your mixture cools down to 82F, to allow certain crystals to form.
After you’ve reached 82F, you are supposed to re-heat the chocolate to 88-90F (again, for dark chocolate). And that’s the optimal temperature for the crystals that you are looking for to form.
For milk and white chocolate, temperatures will be different. Initially you will melt the milk or white chocolate until they reach 105F. After cooling down to 82F, both chocolates will have to be reheated to 85F-87F.
If you don’t have a thermometer, you can always check out this post by The Kitchn about how to temper chocolate without a thermometer.
Tempering chocolate seems like a big deal, but it’s really easy and simple.
A few tips about tempering chocolate:
-Make sure to chop your chocolate very finely. You want the chocolate to melt fast and evenly. You don’t want huge chunks of chocolate in your smooth, velvety tempered chocolate.
-Keep an eye on the thermometer and don’t look away. The chocolate will reach high temperatures Really fast, don’t give your chocolate a chance to burn or overheat, or the process might be irreversible.
-Don’t let any water droplets get in touch with the chocolate. Water will completely ruin your chocolate. It will react with the sugar and cause the cocoa particles to clump up.
-Work fast. Your chocolate can leave temperature and get out of temper in a second. So keep a close eye on it. You will have to re-temper the chocolate if it gets out of temper.
This post is my third one in the Peanut Butter Week at Pies and Tacos.
So far we’ve made a PB&J cake and Vegan Tofu Tacos. There’s more to come tomorrow!!
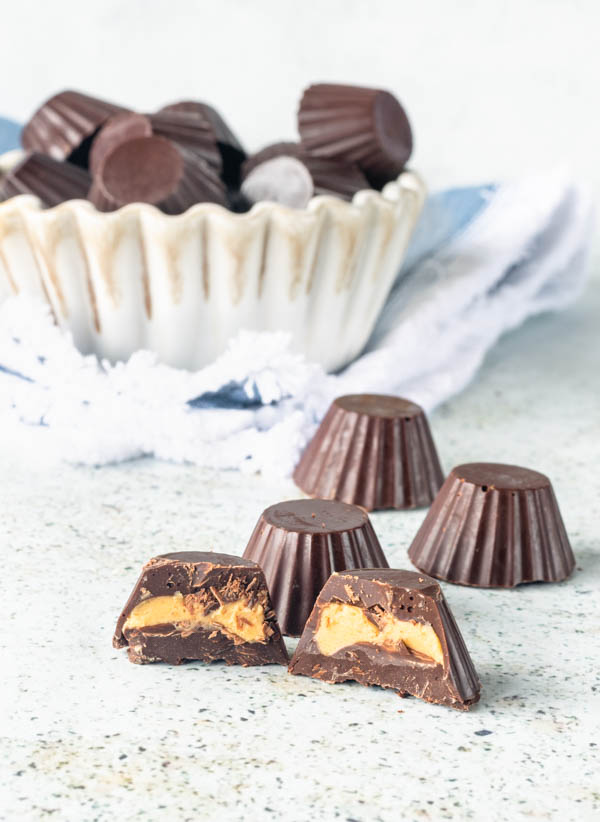
This is the chocolate I use, it’s Scharffen Berger, 70%.
Also, I only use natural Peanut Butter. Either by making it at home, or I’ll purchase this brand. It’s my favorite natural PB. Natural Peanut butter has no sugar added, oils, or anything! It’s just 100%peanuts. That’s the good stuff!
Peanut Butter Cups
Ingredients
Chocolate
- 1 1/2 lb dark good quality chocolate
Peanut Butter Filling
- 1/2 cup peanut butter
- 2 tablespoons butter room temperature
- 5 tablespoons powdered sugar sifted
- 1/2 teaspoon vanilla extract
Instructions
Chocolate
- You will need about 1 1/2 lb of dark, good quality chocolate and a thermometer.
- First, you have to temper the chocolate.
- It’s important that your chocolate is chopped small, to help it melt evenly and makes it easier to control the temperature.
- Place 2/3 of the chocolate in a double boiler, or over a pot with simmering water.
- Bring temperature of the chocolate in the double boiler up to 120F-122F.
- I usually remove the chocolate from the double boiler when I see it reaching 120F.
- Add the remaining 1/3 of the chopped chocolate.
- Stir until everything is melted.
- You are looking to cool the chocolate to 82F.
- Keep stirring until it reaches this temperature.
- Once the chocolate has reached 82F, you may place the bowl back in the double boiler over simmering water and stir until it reaches anywhere from 88F-90F.
- That will happen really fast. It will literally take seconds. Don’t overheat the chocolate.
- Once it reaches 90F, it’s in temper.
- To test, spread a thin amount of chocolate on a piece of parchment paper. If the chocolate dries shiny, it’s because it’s in temper.
- If not, you might have to re-temper the chocolate.
- To keep chocolate in temper, you need to keep it in this range of temperature. Keep stirring chocolate and try to move fast, or you might need to re-temper it.
Peanut Butter Filling
- Cream peanut butter and butter for about 30 seconds on medium high, with an electric mixer. Add sugar and vanilla. Beat until creamy and fluffy.
To assemble
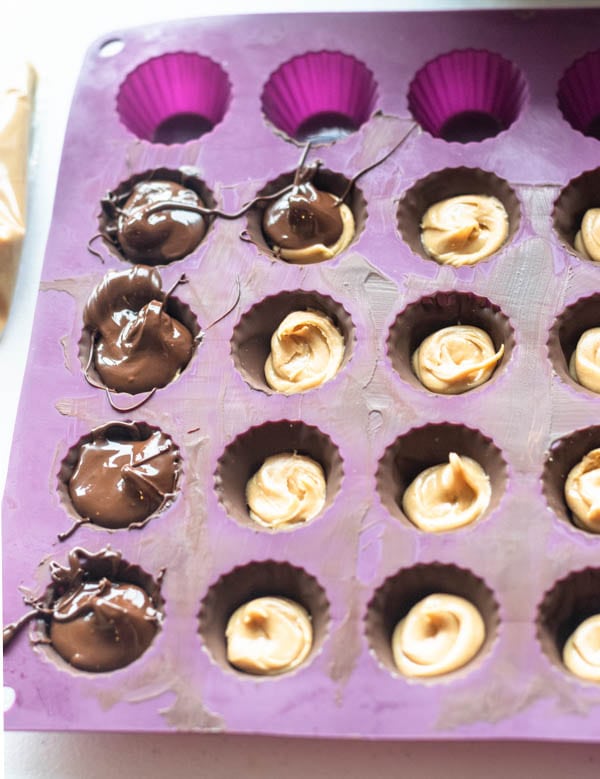
- Start by scooping a small amount of tempered chocolate inside your molds. Spread it around with a spoon so it covers the entire surface of the mold.
- Place molds in the freezer for about 5 minutes.
- Remove from freezer. Pipe a small amount of peanut butter filling in each mold.
- Pour some more tempered chocolate over peanut butter filling. Scrape top with a spatula so the bottom of your cups is smooth. Place in freezer for another 10 minutes. Remove chocolates from molds.
- I like to store mine in the fridge. They will last in the fridge for a week or so, except that it never lasts that long in my house, for obvious reasons.
Notes
Nutrition
Thank you so much for sharing. I haven’t had a peanut butter cup in over 17 years, I’m allergic to peanuts, but.because.of you I.can make my own with soy butter. Can’t thank you enough. I will definitely be.making these.
Oh that’s incredible to hear. Yes you can use soy butter. Have you every tried with sunflower butter? Or maybe any other nut butter, are you allergic to cashews, almonds, etc? I am happy you are trying to make them. Thank you for writing,
Have a great day!!
Thank you for all the tips, this post was very helpful!! I have never tried making my own sweets but you make it look easy.
I hope you give it a try! Thanks, Allison!
Peanut butter and chocolate could be the best flavor combo ever! These are beautiful!
Thank you, Nicole!
I always thought tempering chocolate is hard but you have explained it so clearly that even I feel confident that I could do it.The little chocolate cups are adorable and I am sure they taste fabulous too.
I like to make little treats and freeze them for a sweet tooth emergency. Can’t wait to give these a try!
What a marvelous idea!
Wow, it really does make a difference. I definitely want to try this tempering of chocolate out for myself!!
I love this post! I’ve always been unsure of how to temper chocolate, but you’ve cleared that up for me! I’ll definitely be trying this soon 🙂 I also LOVE PB cups!
Thanks, Steph!! Have fun tempering chocolate!
Anything homemade is always best. I do agree 100 percent. Your recipe sounds like these peanut butter cups are taken to a whole new level. Grea combination. I have never made peanut butter cups. always been scared of how ti will turn out. I”ll use your recipe and give it a try.
Yay, I hope you do. They are easy to make and delicious!!
Peanut butter cups are literally my favorite candy ever! I think I can actually live off them. Haha! I am with you, homemade is always best, as nowadays they put so much junk in store bought candy. Can’t wait to try these! I am obsessed with making chocolate lately 🙂
Exactly. at least at home I know exactly what I am putting in our treats!
I love this recipe already. I never tried combining chocolate and peanut butter yet that’s why can’t wait to try this. Thanks for this recipe and tips about tempering chocolate.
Thank you so much!
Peanut butter and chocolate is the ultimate combination. I love that you have showed us how to make these treats on our own. Thank you!
Thank you, Sondria!
Love your information on tempering.
Thank you, Yvonne!
Thanks for explaining tempering, I’ve never done it but will try soon! And the peanut butter cups look so good!
Thanks, Lisa!
Good info on tempering chocolate. Your peanut butter cups look super yummy.
Thank you 🙂
LOVE LOVE LOVE!!!
Perfect combination.
Thank you so much, Sherry!!