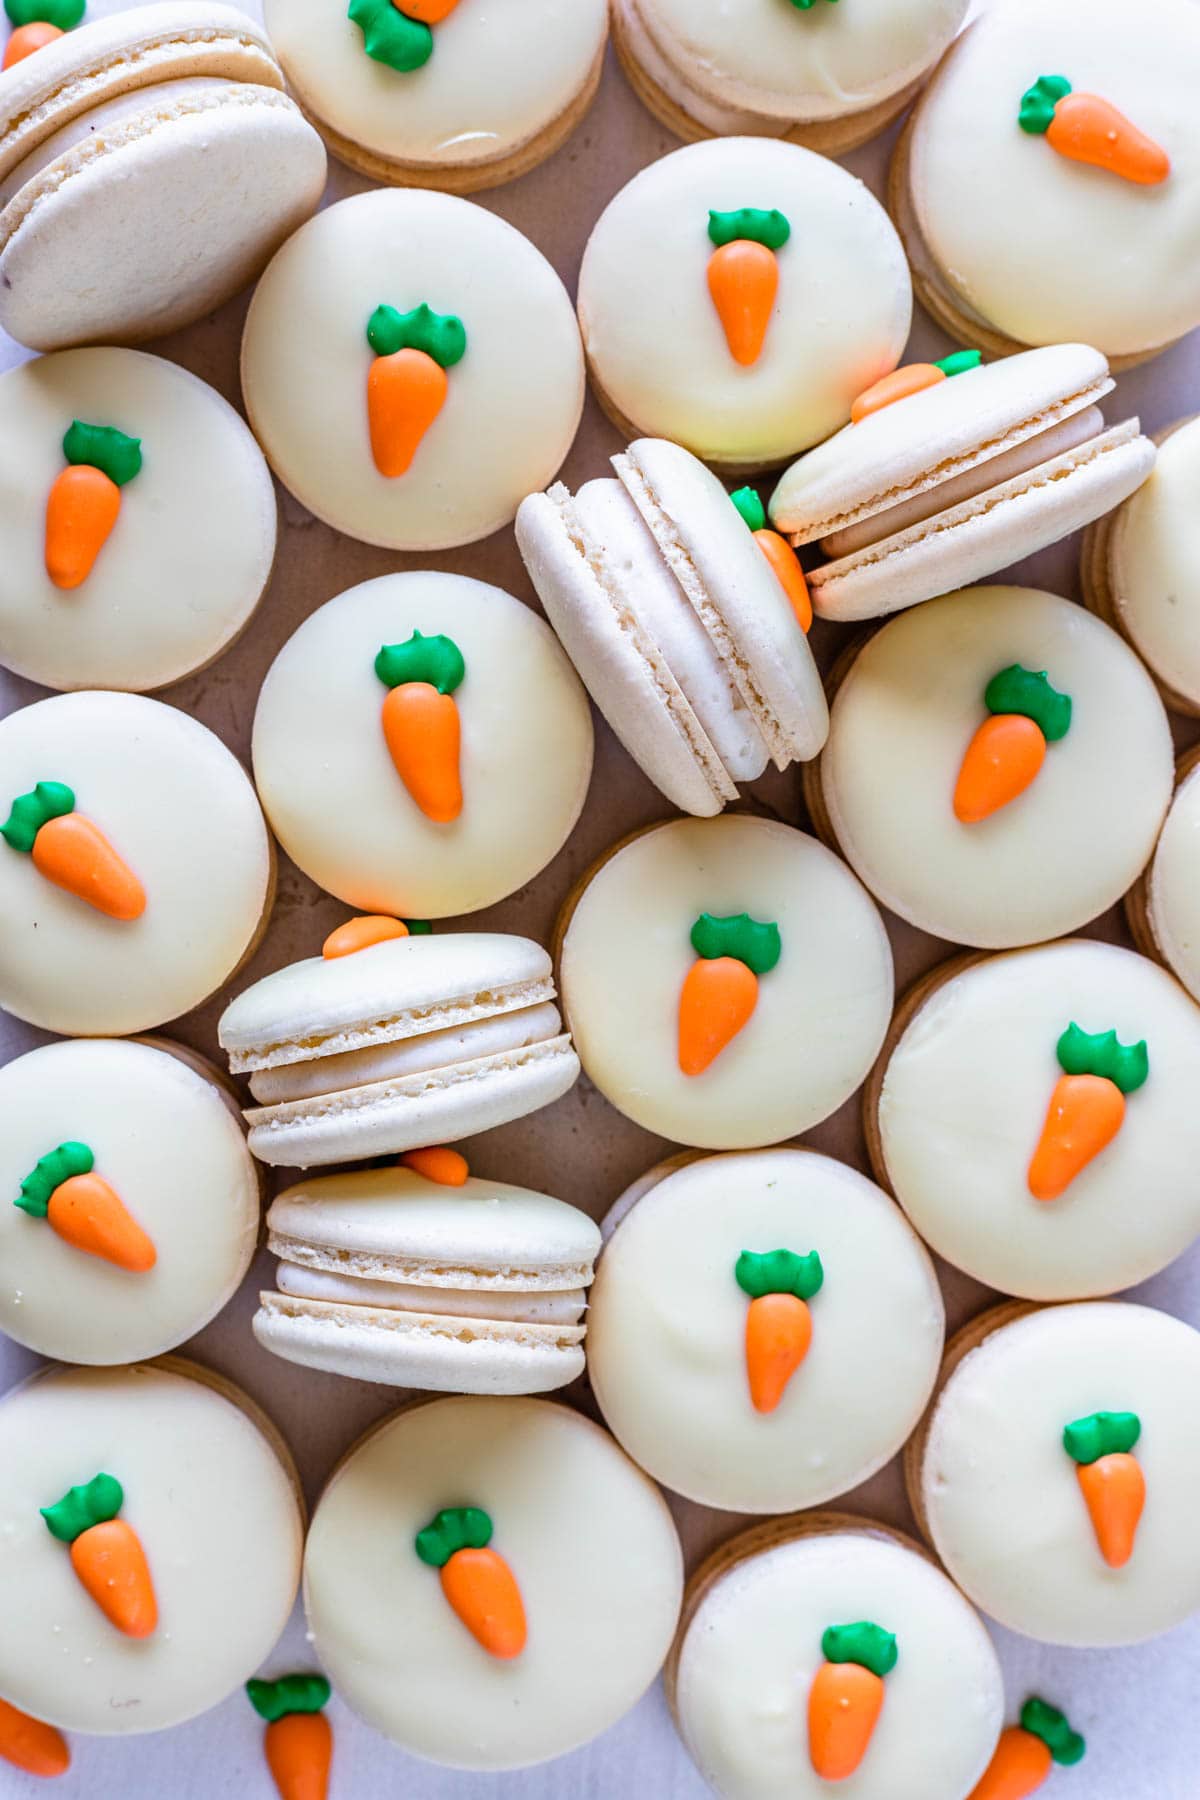
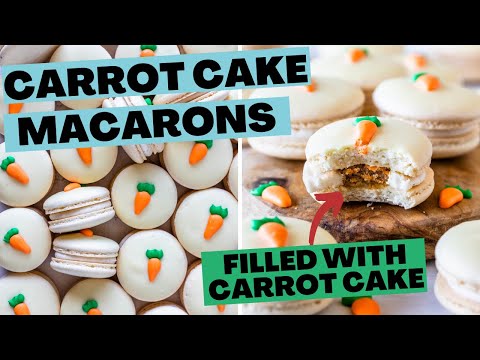
Carrot Cake Macarons
Hello friends! Let’s make these super fun Carrot Cake Macarons today! They are filled with Carrot Cake, and with Cream Cheese Frosting, and are topped with a lovely cute carrot made out of royal icing!
Watch the video on how to make these Carrot Cake Macarons on this page or on my YouTube channel. And if you click on this link, you’ll be able to watch how to make the carrot shaped macarons.
These Carrot Cake Macarons are perfect for Easter. They are fun to make and will surprise everyone when they realize there’s actual cake in the middle of the macarons!
This post may contain affiliate links. I earn a commission from qualified purchases. Please read our Privacy policy here.
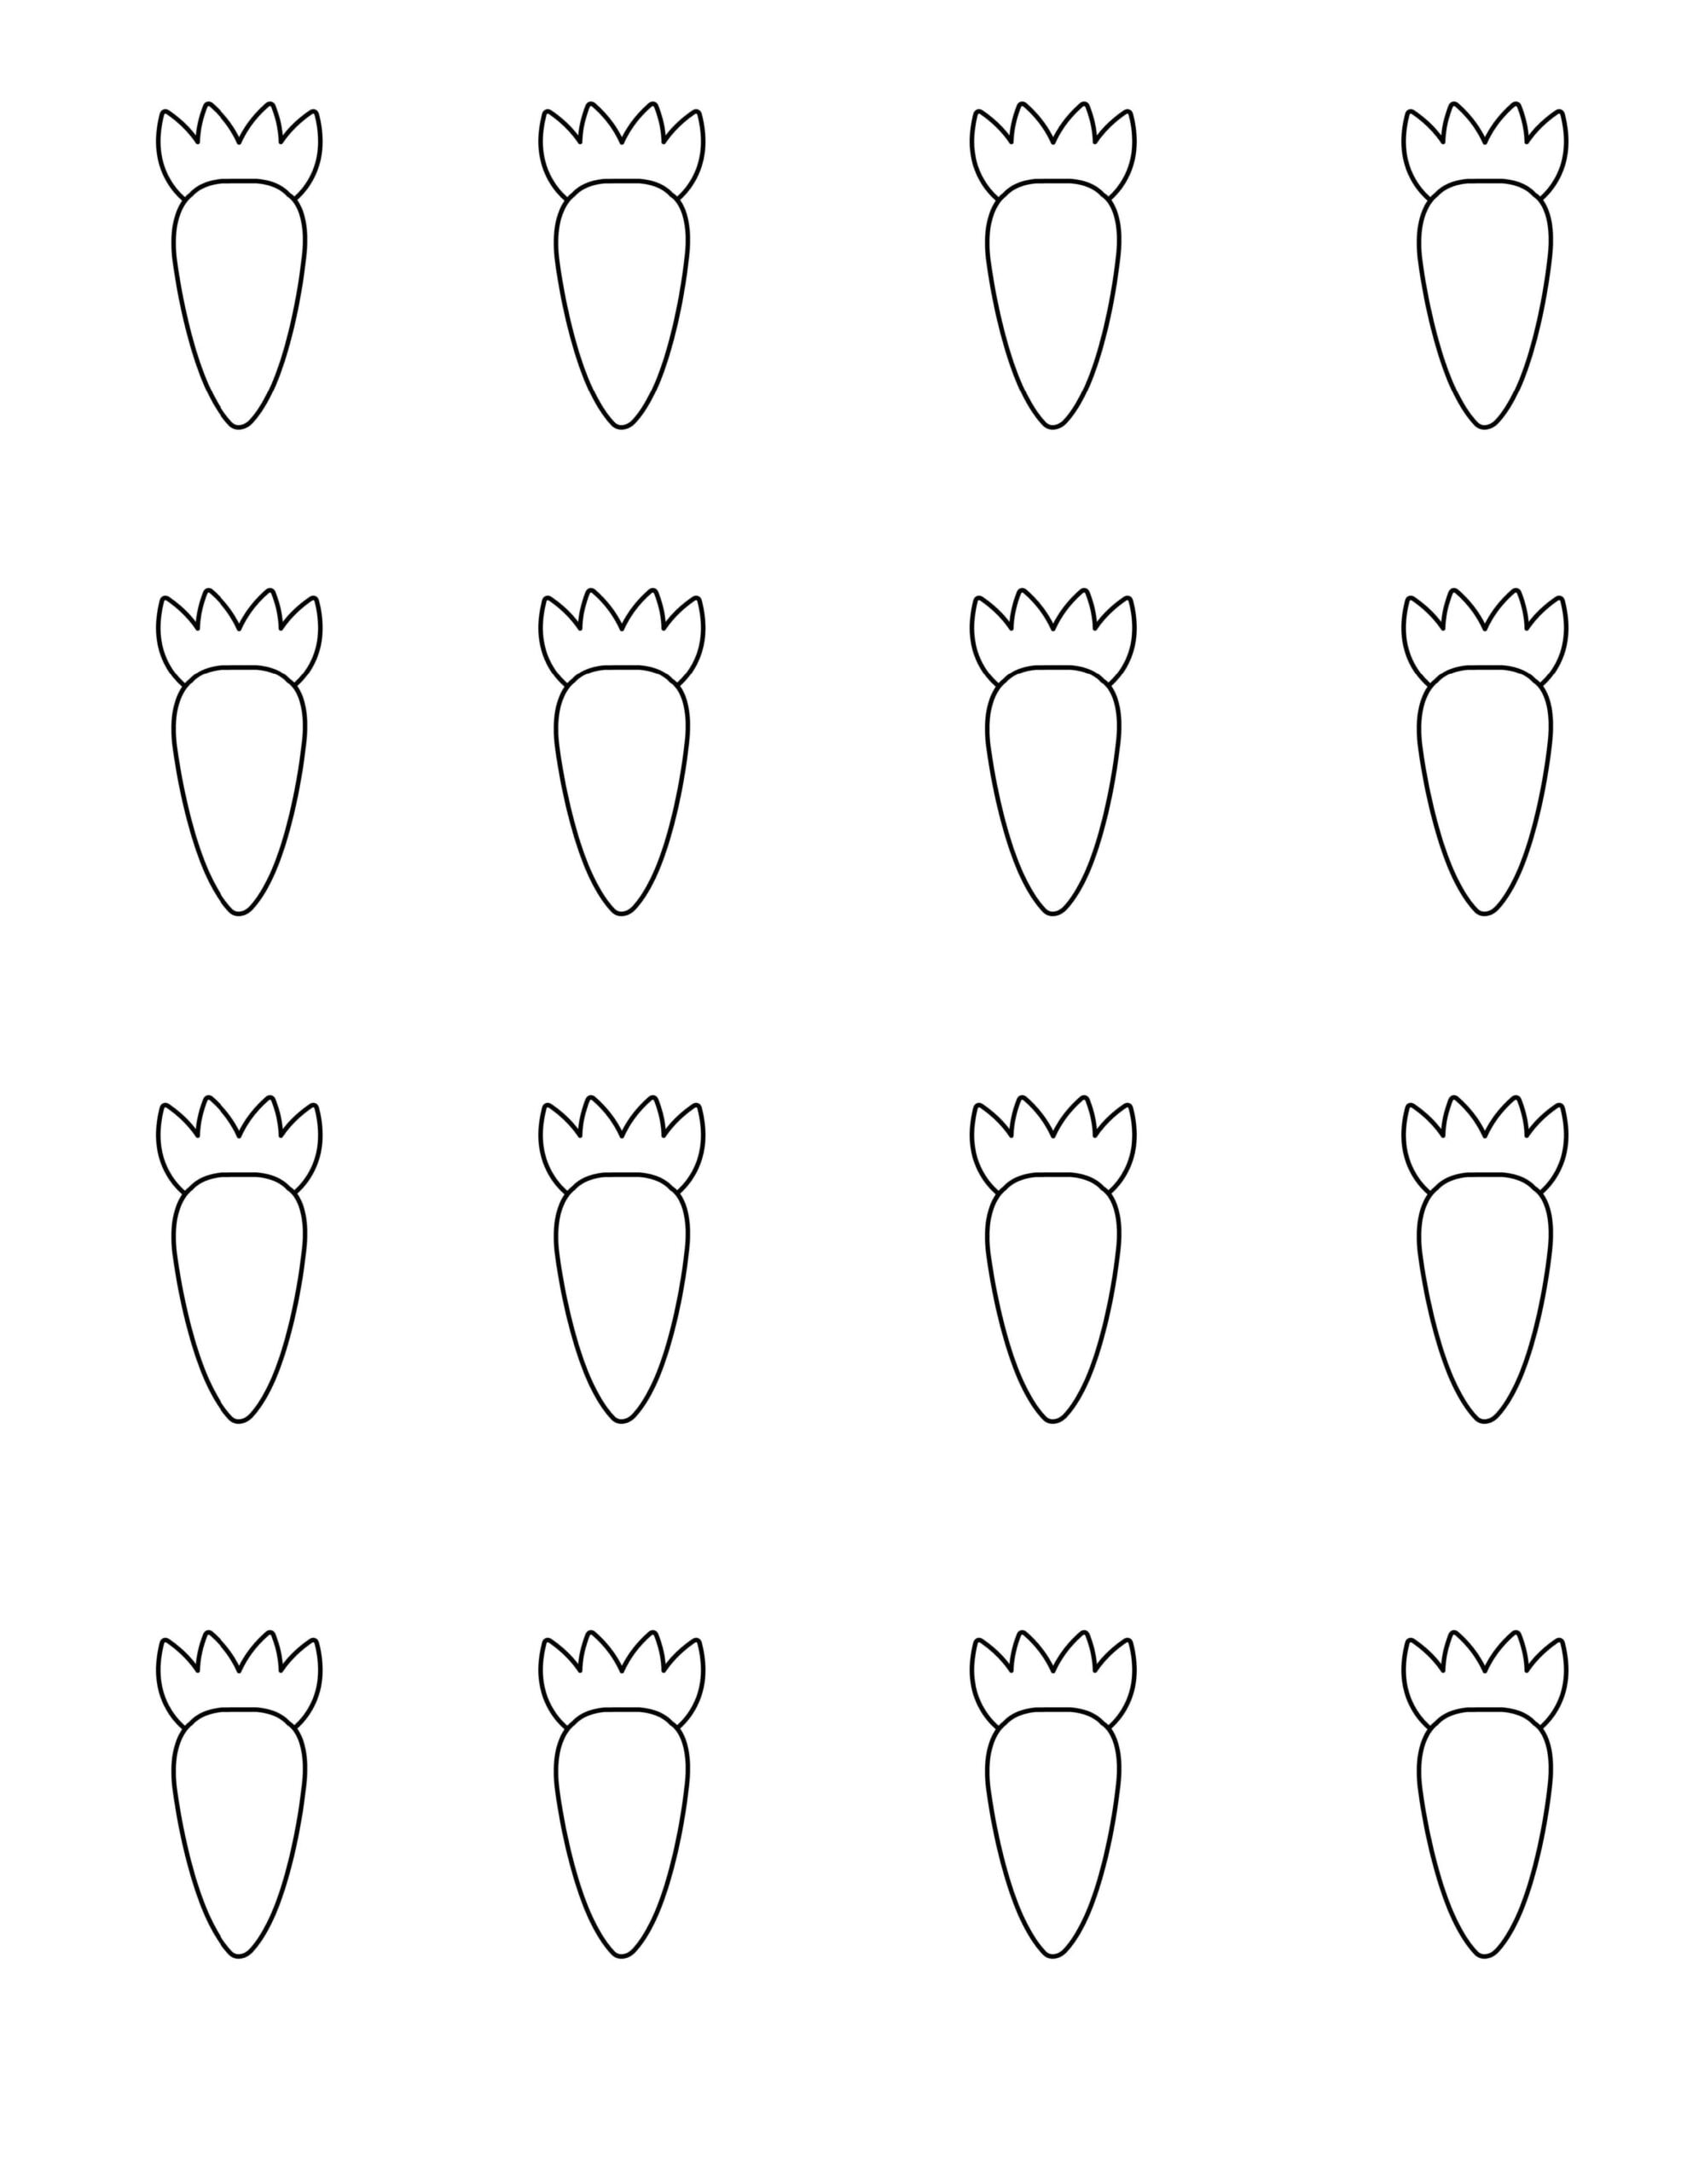
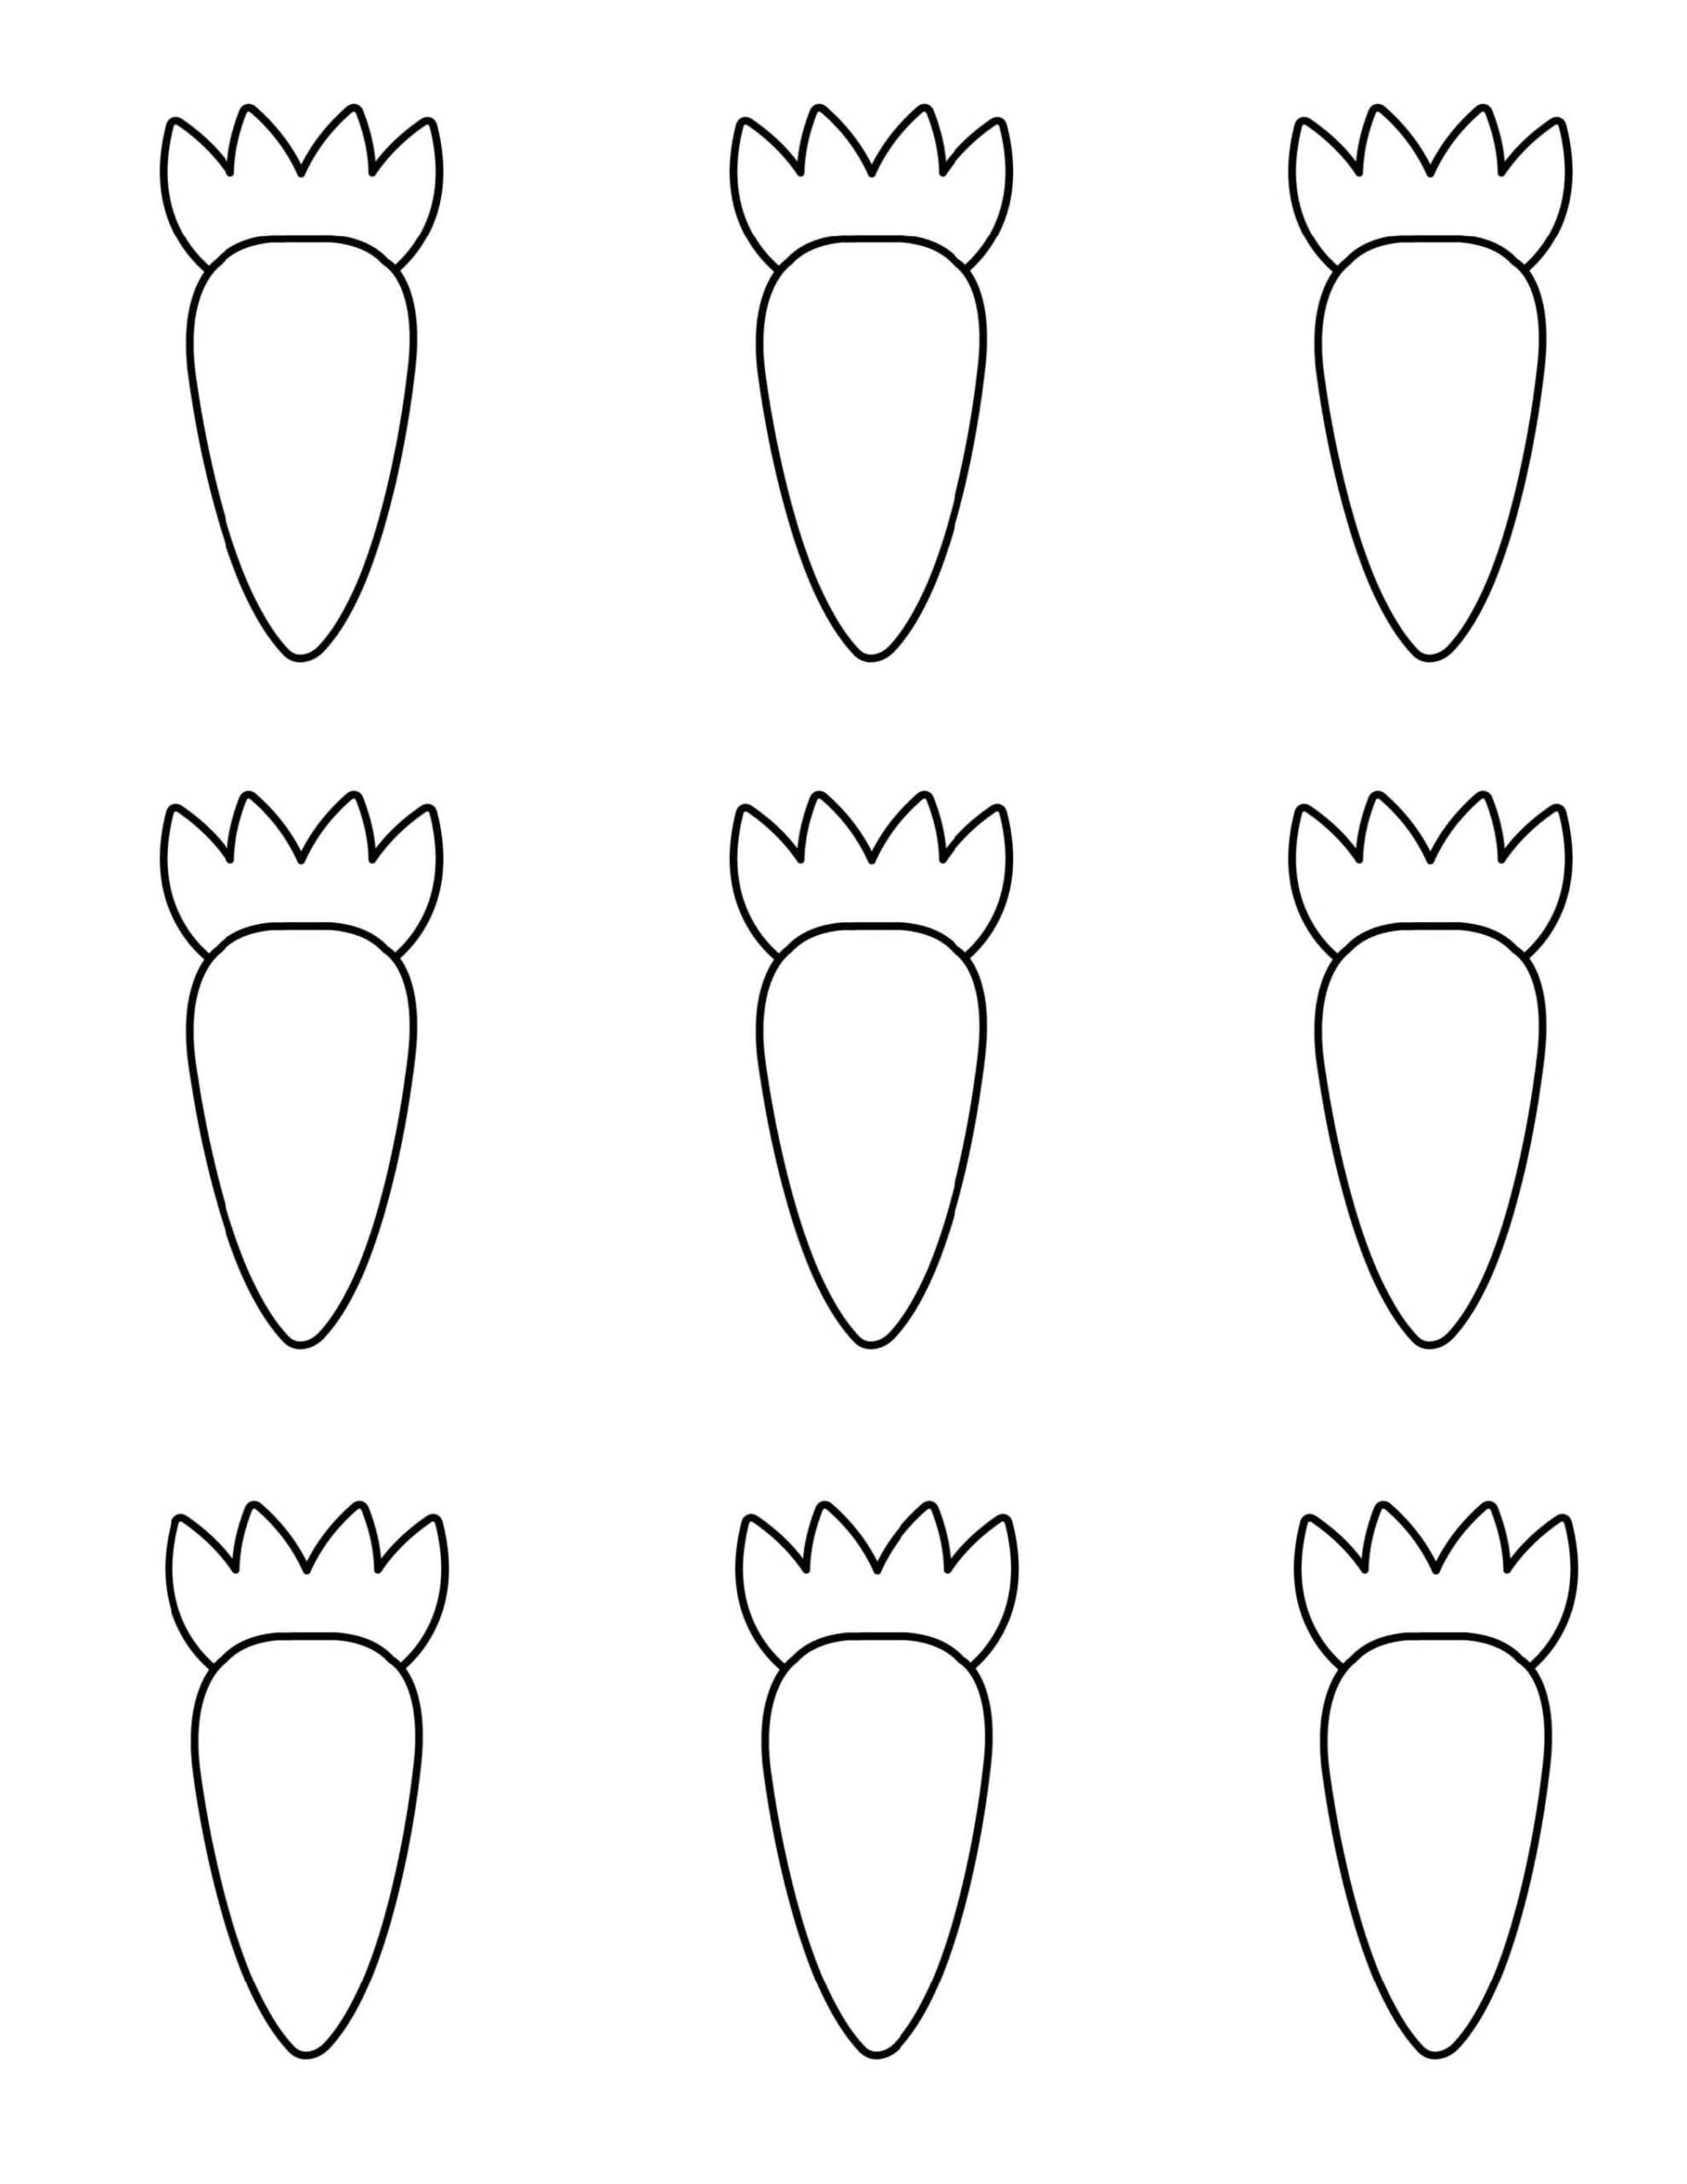
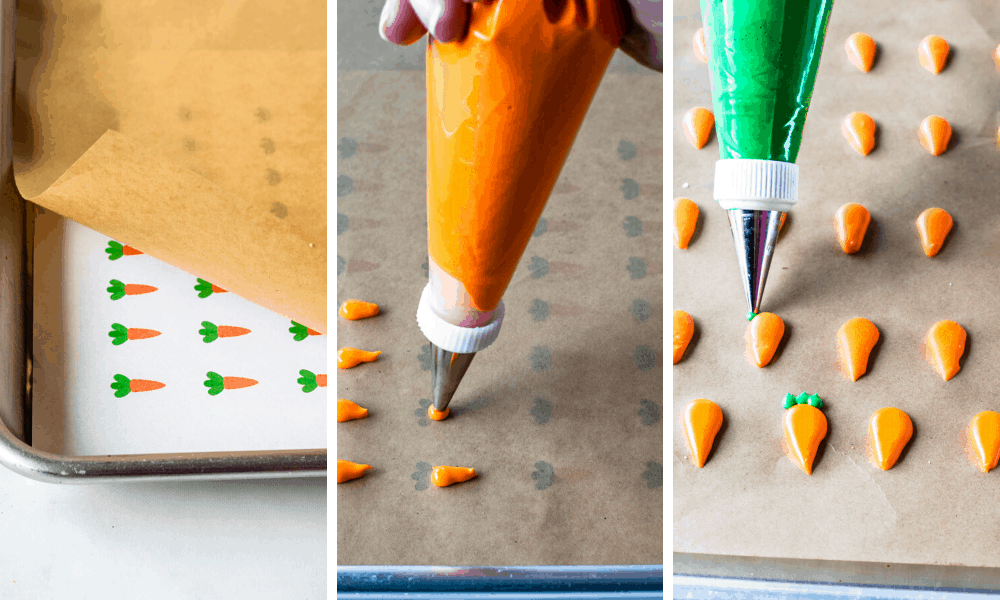
I offer a template down below that you can download, print and place under your parchment or silicone to pipe the royal icing carrots! And you can also find a template below to pipe the carrot shaped macarons, in the regular and also mini size.
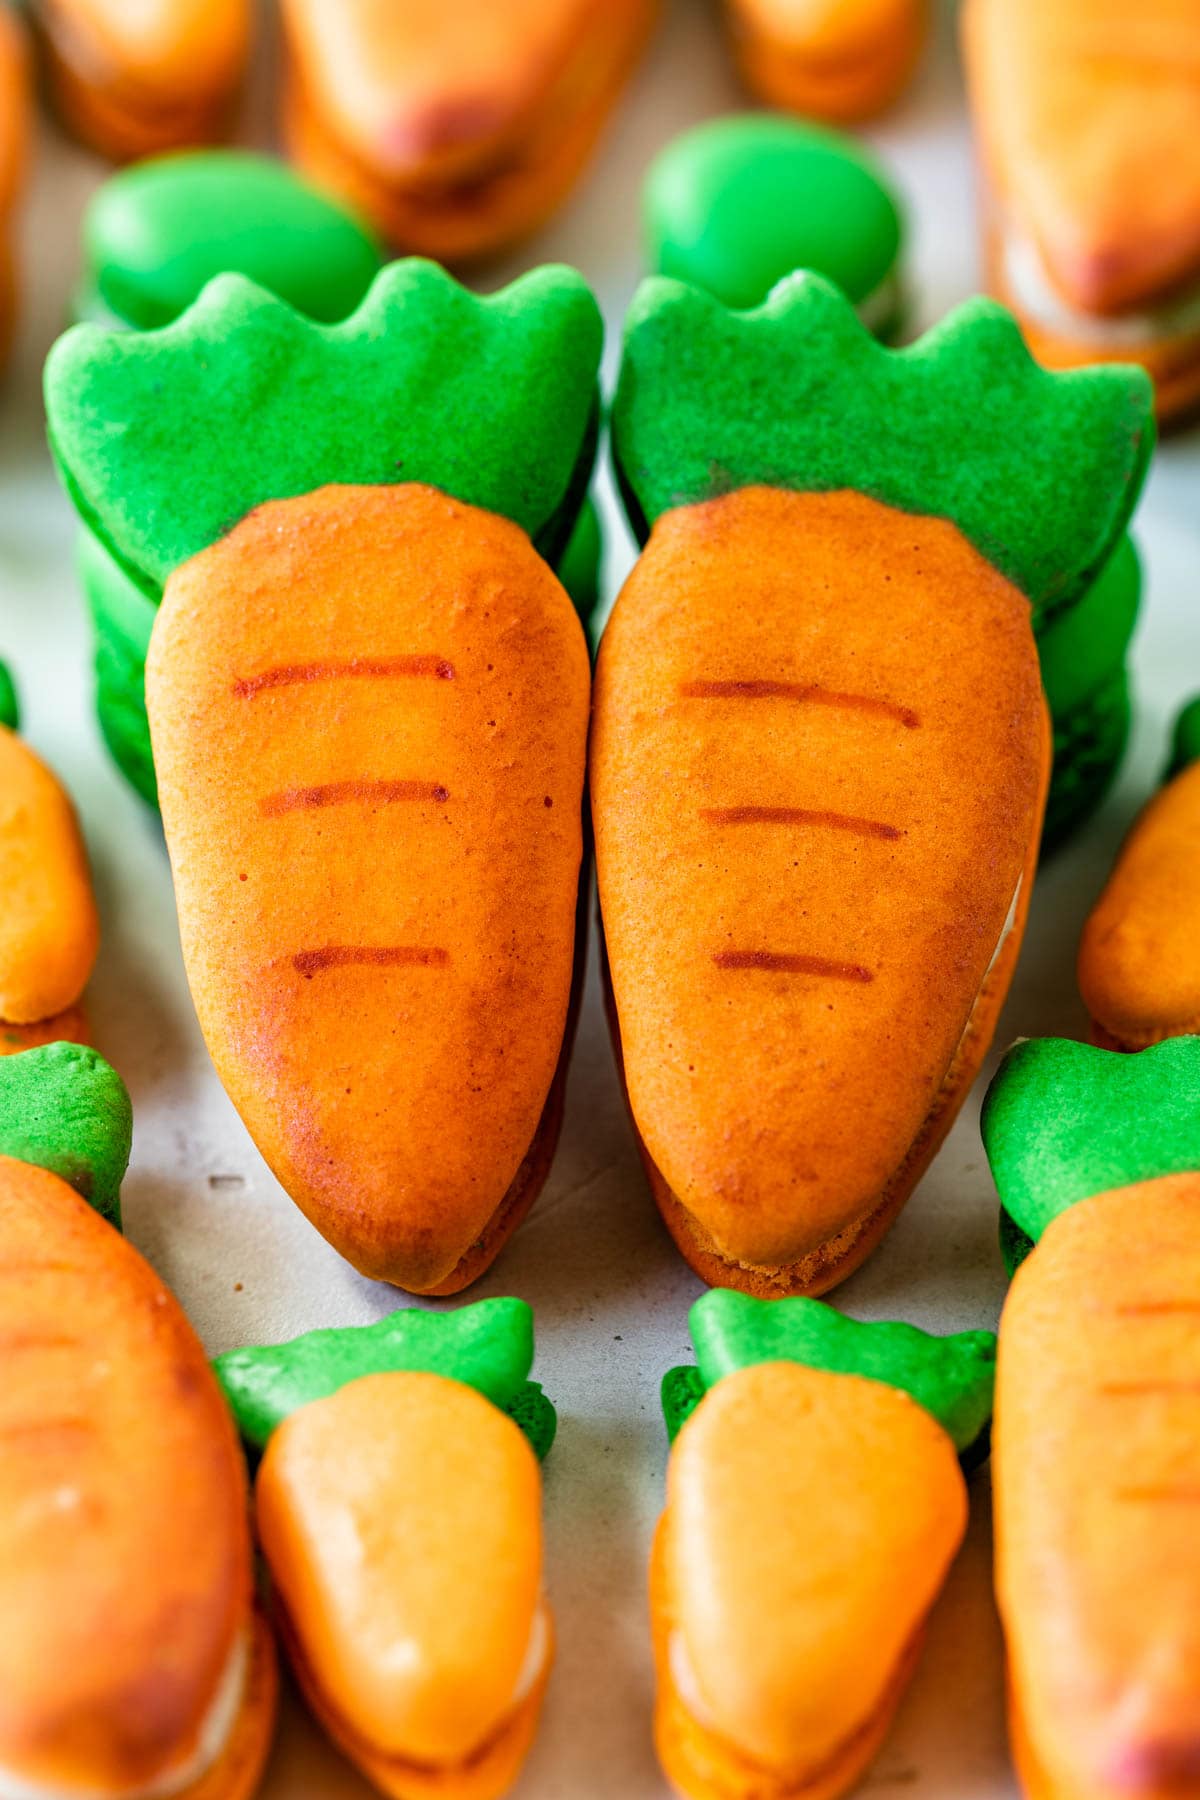
These carrot macarons are perfect for Easter, I will teach you how to make the carrot shapes and also the design with the royal icing carrot on top.
I’ve filled both with carrot cake, which makes these carrot macarons even more delicious and perfect for Easter.
You can find out how to pipe the carrot shaped macarons by watching my YouTube video here.

To make these Carrot Cake Macarons, there are a few steps involved, such as making the macaron shells themselves, the Carrot Cake for the filling, the Cream Cheese Frosting, and the Carrots made out of Royal Icing for the top!
But it’s super worth it! Everyone that has tried this recipe has loved it!
For these Carrot Cake Macarons, I have made a Carrot Cake, and filled them with the cake and Cream Cheese Frosting.
I did something similar to the Brownie Macarons, by filling them with baked brownie, and chocolate frosting.
And also with my Red Velvet Macarons, which are filled with red velvet cake and cream cheese frosting.
The texture of the soft and fluffy cake, with the frosting, and the macaron, it works so wonderfully!

To bake the carrot cake, it’s best to use a 9×13″ pan or a jelly roll pan. Be aware that the batter will be very thin in the pan. And that’s ok, because you don’t want the cake to be too thick when filling the macarons.
I like to place a circle on the bottom shell, and then pipe the frosting around it, which will help secure it. Take a look.
I mean how amazing is this, carrot cake and macaron all in one!

The top decoration for the macarons is completely optional, but it’s not too hard to make, and you can make a long time in advance, as the royal icing decorations will keep for a while.
Royal Icing Carrot Template and Carrot Macaron Templates
Here is the template for you to print and put under your parchment paper or silicone mat to pipe the carrot decorations:
To make the royal icing carrots, have included below royal icing recipe. Make sure the icing is in a pipeable consistency that isn’t too runny, but not too stiff. It should hold its shape but at the same time, not form a pointy tip as you lift the piping bag.
If the consistency is too stiff, add a tad more water. And if the consistency of the royal icing is too runny, add more sifted powdered sugar.
Let the decorations dry completely before placing them on the macarons. It may take a few hours, or maybe leave them overnight, to make sure they are nice and dry.
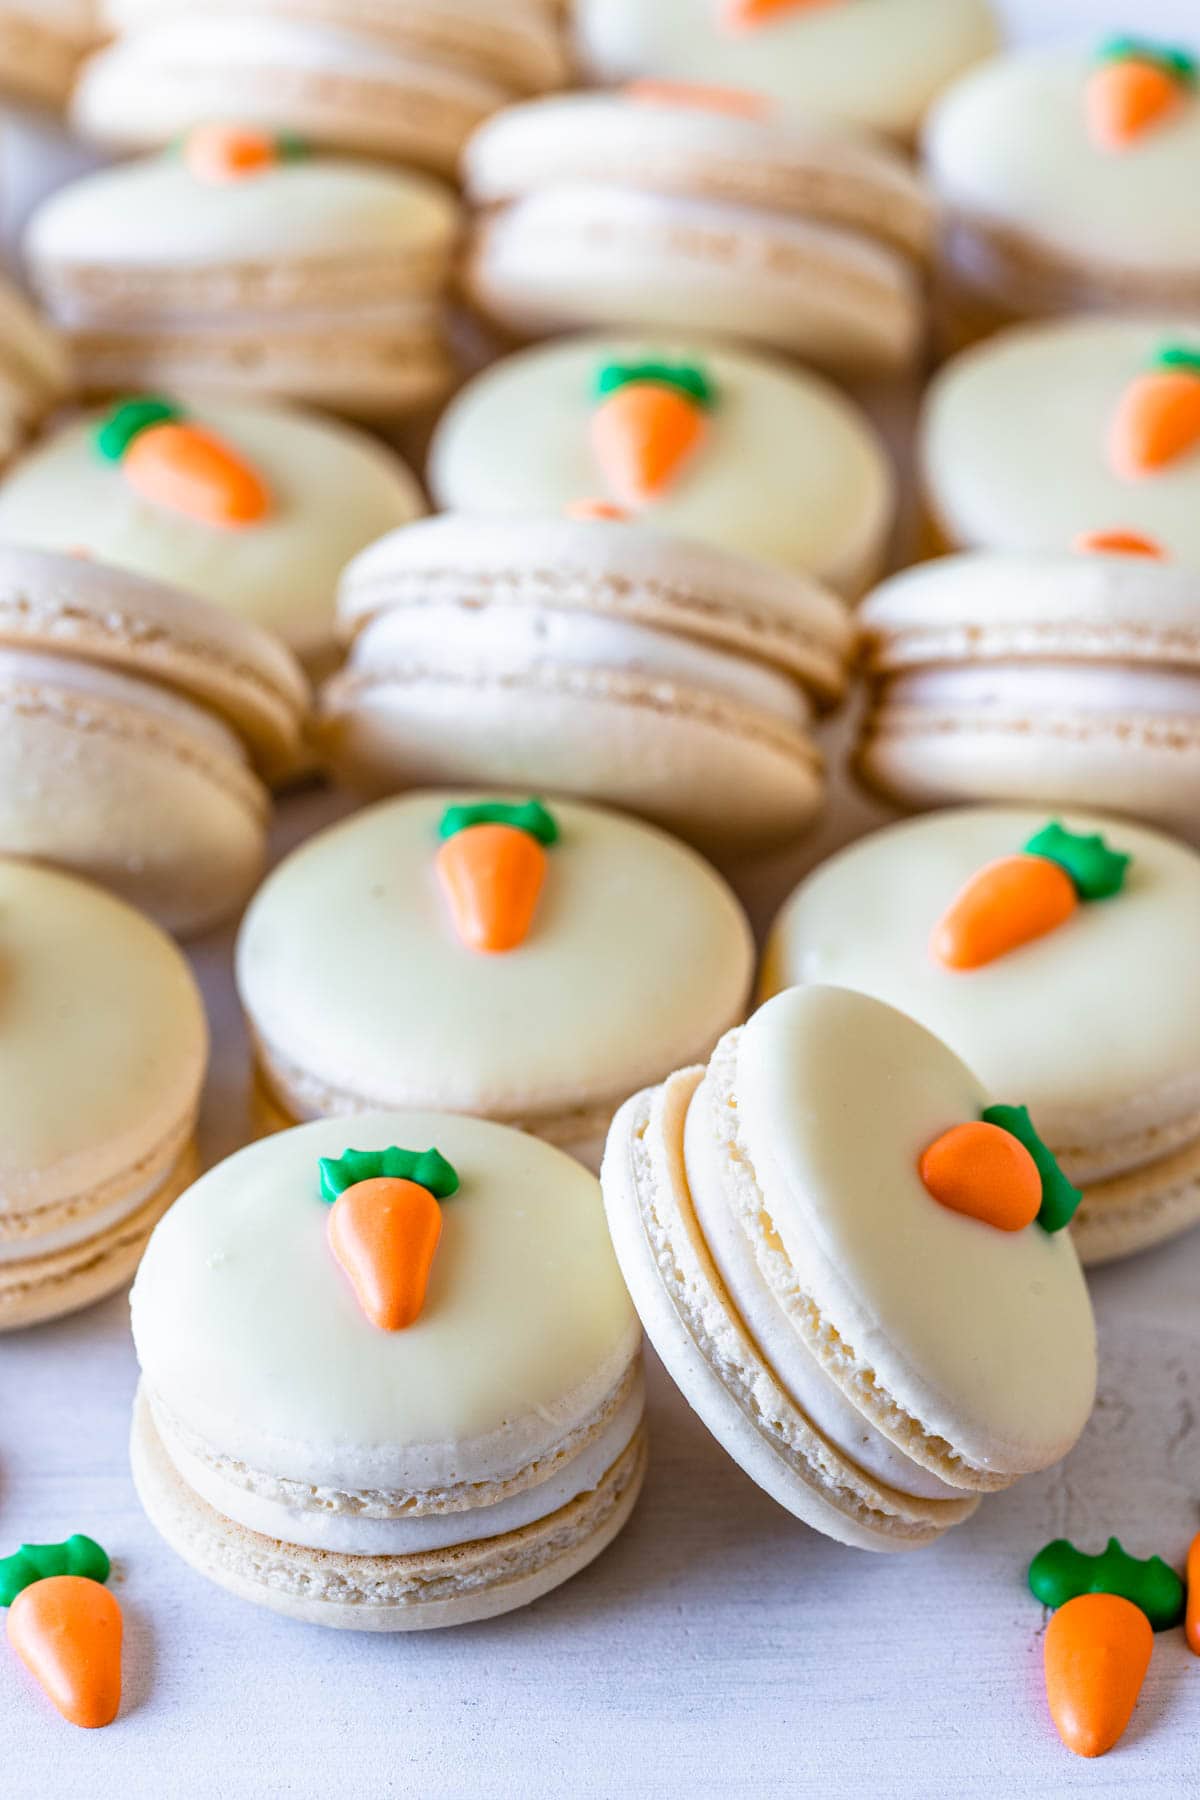
About placing the Carrot decorations on top of the Carrot Cake Macarons, there are a few different approaches:
- Dip the top shells in melted white chocolate, place a carrot on top. Let it dry before proceeding with assembling the macarons.
- Or dip the top shells in flood consistency royal icing, then place a carrot on top, and also let it dry before proceeding with assembling the macarons.
- Another option is to simply pipe a bit of frosting on top of the macarons and place the carrot on top.
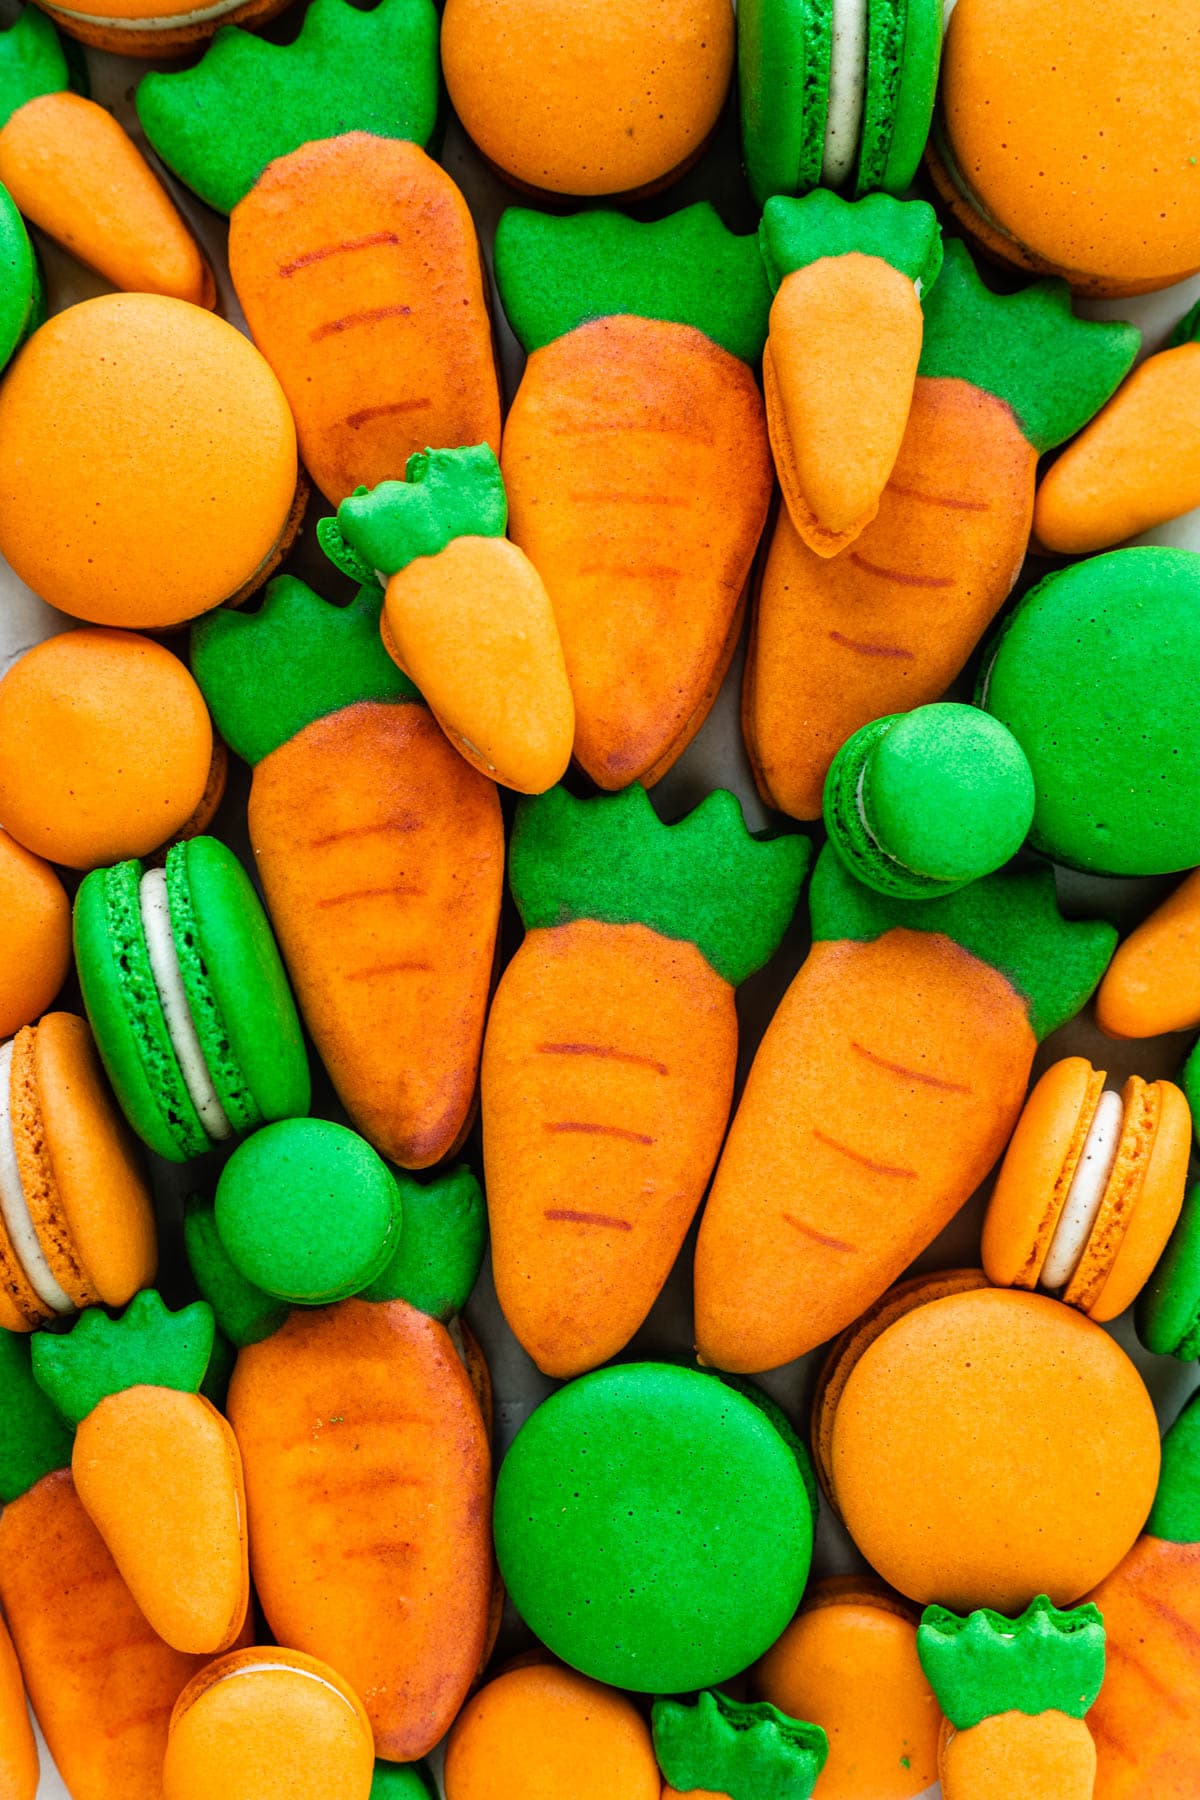
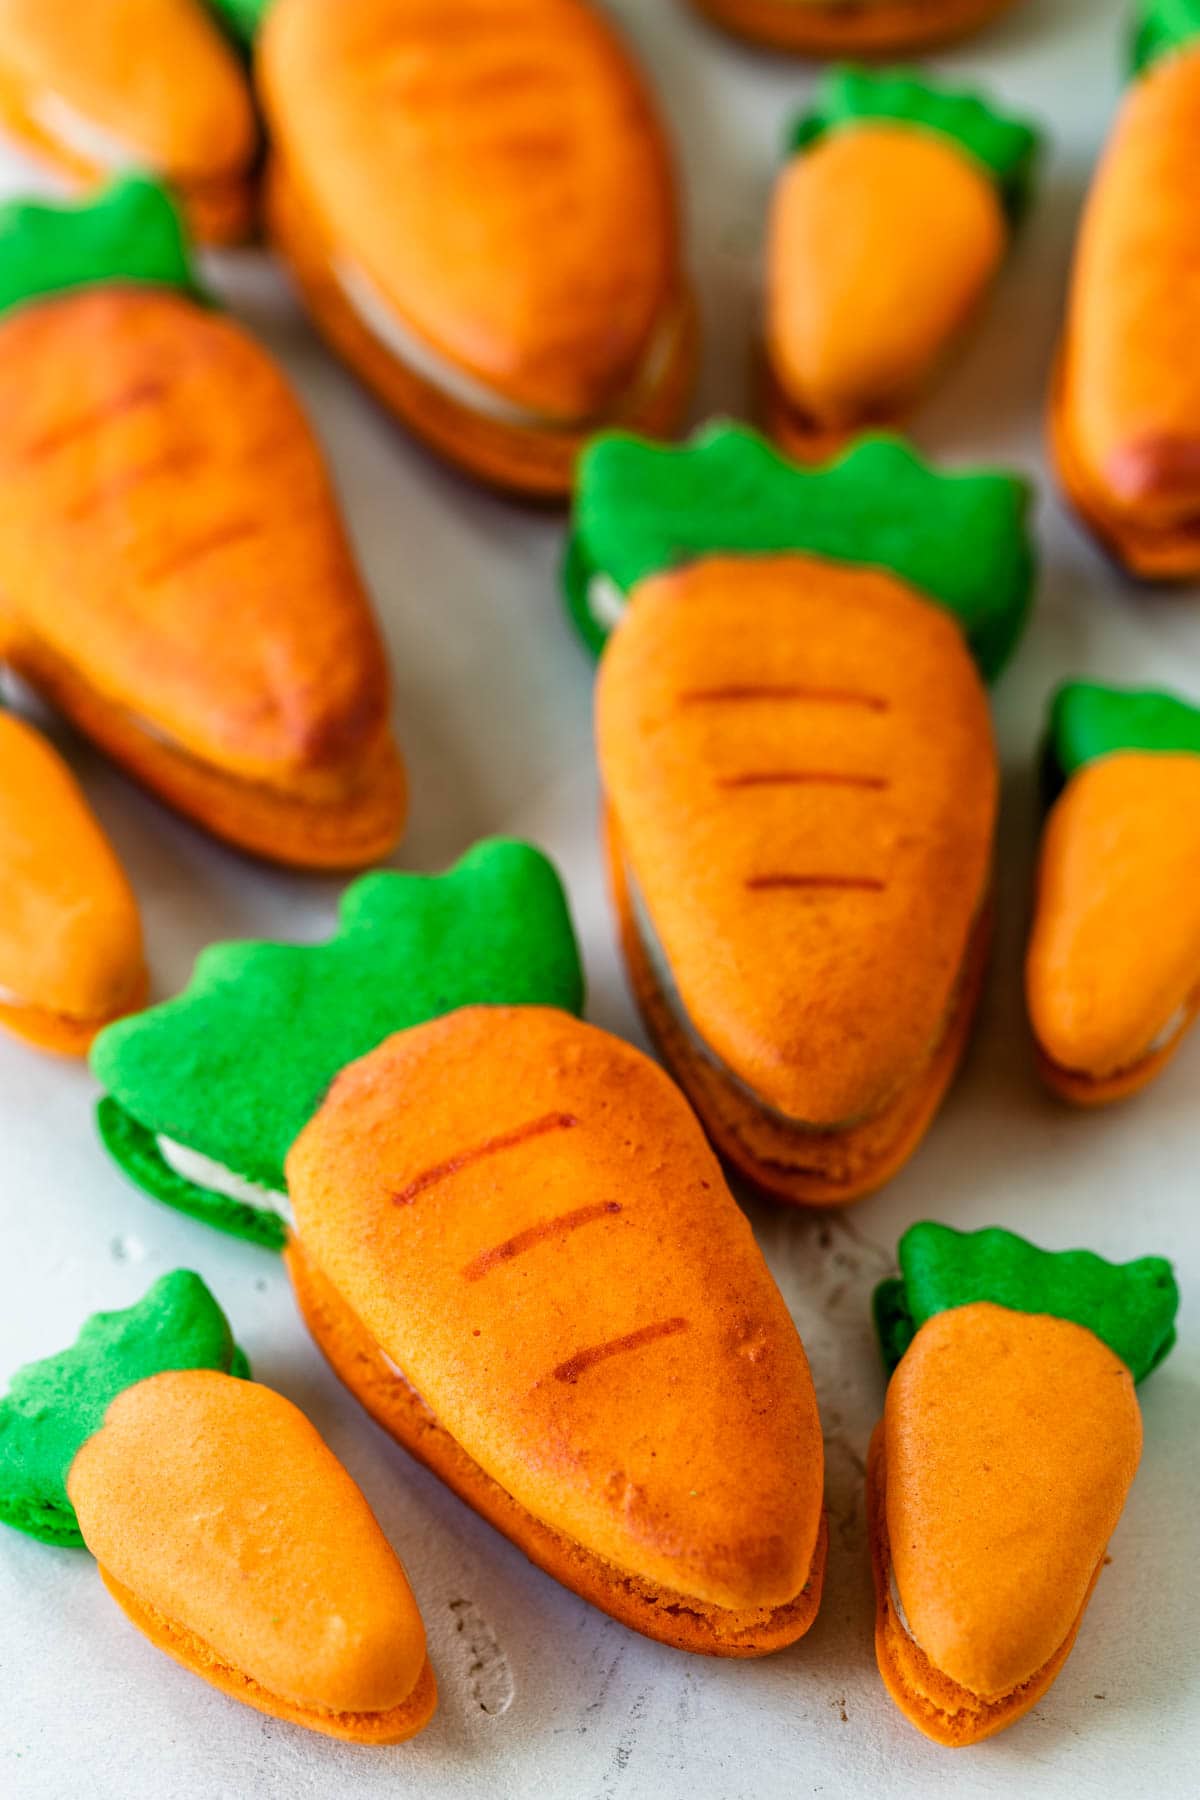
Tips to pipe the carrot shaped macarons
You can use a tip 8 or 10 to pipe the orange part of the carrot for the large carrot macarons. I’ve tried with both and it worked great. I actually preferred the 10, but you can use the 8 as well if you don’t have the 10 at home.
Start at the bottom and apply pressure to dispense batter as you drag the piping bag up and around back to where you started.
To pipe the green leaves, I used a tip number 3. A number 4 would also work in this case.
Simply pipe each leaf one at a time.
Pipe a few carrots at a time, using the toothpick to help spread the batter to the outlines, to form the bottom tip of the carrot and the top of the leaves.
If you dont use the toothpick, the points of the shape will naturally round out as the macarons bake.
It important to only pipe a few carrots at a time, fix them with the toothpick before moving on to the next few carrots, or the batter may start to dry out and you wont get a chance to make the shape defined, the shells will be bumpy and not smooth on top.
Remove the paper from under the mats as soon as you’re done piping.
Piping the mini carrot macarons
I made some mini carrots also, you can find the template for the mini ones on my blog as well.
The tips I used to pipe the mini carrots were 3 for the orange part and 2 for the leaves.
Watch the video on YouTube on how to pipe the carrot shaped macarons.
To see more Easter Macarons, check out these Easter macaron ideas:
Plus over 100 more macaron flavors and ideas on the blog.

If you are interested in learning more about macarons, check out Macaron School, a place where I share the best tips, articles, troubleshooting guides, the science behind macarons, and much more!
I hope you liked these Carrot Cake Macarons, I had a lot of fun making them!
If you make this recipe tag me on instagram or leave a comment below, I love hearing from you.
Watch Video

Carrot Cake Macarons
Ingredients
Macaron Shells
- 100 grams egg whites
- 100 grams granulated sugar
- 105 grams almond flour
- 105 grams powdered sugar
- Food coloring if using
Carrot Cake
- 1/2 cup vegetable oil 120 ml
- 1 large egg
- 3/4 cup granulated sugar 150 grams
- 1 cup all-purpose flour 127 grams
- 1 tsp ground cinnamon
- 1/2 tsp baking soda
- 1/4 tsp baking powder
- 1/4 tsp salt
- 1 1/2 cup shredded carrots 160 grams
Cream Cheese Frosting
- 125 grams powdered sugar
- 1/4 tsp cinnamon powder or more to taste
- 85 grams cream cheese softened 6 tablespoons
- 42.5 grams unsalted butter softened 3 tablespoons
- 1/4 tsp vanilla extract
Royal Icing Carrots
- 1 cup powdered sugar 125 grams
- 2 tsp meringue powder
- 1-3 tbsp water
- Food coloring orange and green
To decorate
- 56 grams white chocolate
Instructions
Macaron Shells
- Before you start, get all of the ingredients ready. Prepare a large piping bag, fitted with a large round tip, I use a 1/2” diameter tip. Set aside.
- Line two baking sheets with parchment paper or silicone mat.
- Measure out all of the ingredients.
- Sift the powdered sugar and almond flour together. Set it aside.
- Place a bowl over a pan with barely simmering water, add the sugar and egg whites to the bowl. Whisk the mixture until frothy and the sugar is completely melted. It will take a couple of minutes. You can test by touching the mixture between your fingers, and if you feel any sugar granules just keep whisking the mixture over the water bath.
- Make sure the bottom of the bowl isn’t touching the simmering water because you don’t want the whites to cook.
- Also, don’t overheat the sugar syrup, this may cause issues down the line, such as wrinkly macarons.
- Transfer the syrup to the bowl of a stand mixer.
- With the whisk attachment, start whisking mixture on low for about 30 seconds, then gradually start increasing speed to medium. Whisk on medium for one to two minutes, until the mixture is white and starting to become fluffy. Raise the speed to high, or medium-high and whisk for a few minutes until stiff peaks are formed. Best way to check this is to keep your eye on the whites. Once they get glossy and you start seeing streaks formed by the whisk, it might be time to stop.
- Whisk until stiff peaks have formed. When you pull your whip up, the peak should be stiff and shooting straight up, with possibly a slight bend at the top, but not bending down to the side.
- Pour the sifted powdered sugar and almond flour into the stiff meringue.
- Add the food coloring at this point, if using. I didn't add any.
- Start folding gently forming a letter J with a spatula.
- How to know when to stop folding the batter: It’s time to stop folding when the batter is glossy and has a thick and flowing consistency. There are several ways to test this.
- First, pick up some batter with the spatula and try to draw a figure 8 with the batter that is dripping off the spatula. If you can form several 8 figures without the batter breaking up, that’s one indication that it might be ready.
- There’s another test you can do. I call it the Teaspoon test.
- Grab a teaspoon of batter and spoon onto the parchment paper or silicon mat. Wait a minute to see how it behaves.
- If the batter stays stiff, forming a point and doesn’t spread out, fold a little bit more, about 3 folds. Test again.
- Once the batter spreads out a bit and starts to look glossy and smooth on top, on the parchment paper or silicone mat, it’s ready.
- You don’t want your batter to be too runny either. So be careful not to over mix. It’s always best to under mix and test several times until the proper consistency has been achieved.
- When you hold the spatula with batter on top of the bowl and the batter falls off the spatula slowly but effortlessly the batter is ready. The batter will keep flowing off the spatula non-stop, but not too quickly.
- Transfer the batter to the piping bag.
- Place the piping bag directly 90 degrees over the center of each macaron template. Apply gentle pressure and carefully pipe for about 3 seconds, and then quickly pull the bag up twisting slightly.
- Once you’ve piped as many circles as you could, bang the trays against the counter a few times each. This will release air bubbles that are in the batter and prevent your macaron shells from cracking.
- Use a toothpick to pop any air bubbles in the surface of the shells.
- Let the trays sit for a while so the shells will dry out a little bit. I usually leave about 20-40 minutes, depending on how humid the day is. You’ll know they’re ready when you gently touch the surface of a macaron and it seems dry.
- Pre-heat the oven to 300ºF.
- Bake one tray at a time.
- Bake for 5 minutes, rotate tray.
- Bake for 5 more minutes. Rotate again.
- I bake each tray for about 15 to 20 minutes.
- When baked, the macarons will have a deeper color and formed feet. If you try to move a macaron, it shouldn’t feel jiggly. If the macaron is still jiggly, keep baking.
- Remove from the oven and bake the other tray.
- Let the macarons cool down before proceeding with the filling.
- You can also place a piece of foil or parchment paper halfway through baking to prevent the macarons from browning too much.
Carrot Cake
- Pre-heat oven to 350ºF. Grease and line a 9×13” pan with parchment paper.
- In a bowl, whisk the oil, egg, and sugar together. Sift the flour, cinnamon, baking powder, baking soda, and salt.
- Add the dry ingredients to the oil, egg and sugar, and whisk until smooth.
- Add the shredded carrots and stir.
- Pour the batter on the bottom of the pan. Bake in the oven for 10 to 12 minutes. If you touch the top of the cake with your finger, it should spring back when done baking.
- Let it cool down completely.
- You can store this cake at room temperature for up to 1 day, or in the fridge for up to 4 days. And you can also freeze this cake for up to 2 months, well packaged. Thaw in the fridge before using.
Cream Cheese Frosting
- Start by sifting the powdered sugar with the cinnamon. Set it aside.
- Now, beat the softened cream cheese and butter together in the bowl of an electric mixer, for about 2 minutes, until light and fluffy.
- Add vanilla extract. Mix to combine.
- With the mixer off, add powdered sugar/cinnamon mixture to the bowl.
- Turn mixer on low to incorporate the powdered sugar with the cream cheese and butter.
- Once you see no streaks of dry powdered sugar, beat mixture on medium high for one minute.
- If the frosting is too runny, add more powdered sugar as needed. And if the frosting is too stiff, add a teaspoon of water or milk to thin it out.
- This frosting will store well in the fridge for up to 5 days, covered.
- Make sure to always leave your frosting covered. Cover the bowl with a lid or plastic wrap, because otherwise, the surface will dry out and get hard.
Royal Icing Carrots
- Beat all ingredients together, except for the food coloring, for about 5 minutes on high speed.
- Divide into two bowls. Color one bowl orange, and the other green. Remember to always keep the royal icing covered, or it will start to dry out pretty soon.
- You might need to add more water to adjust the consistency, or maybe even more sifted powdered sugar, if your icing is too thin. The consistency should be flowing but not too liquidy.
- Place the icing in a piping bag fitted with a small round tip.
- Place the template on this page on a baking sheet, and top with a parchment paper, or with silicone mat. Pipe the orange part of the carrot. After a few minutes, pipe the green leaves.
- Let it dry for a few hours, maybe overnight until completely set.
To assemble
- I dipped some of the top shells into melted white chocolate, to stick the carrot on top. You can even use white royal icing in flooding consistency to do this. Then, while the white chocolate or icing is still wet, stick a Royal Icing Carrot on top of the shell. Or you can choose to decorate the shells by piping a dollop of cream cheese frosting on top of the shell, and then placing the carrot on top. I’ve done both ways as you can see on the post above.
- If you choose to dip the shells in the white chocolate, or icing, make sure to let them dry before proceeding to assemble the macarons. Sticking the shells in the fridge for a few minutes will help speed this up.
- Use a round cutter, that’s smaller than the diameter of your macaron to cut out circles of Carrot Cake.
- Place each carrot cake circle on top of a bottom shell.
- Place the Cream Cheese Frosting in a piping bag fitted with a medium round piping tip.
- Pipe a ring of frosting around the edges of the macaron, which will also help stick the carrot cake on the shell. Then top with another shell.
- Let the macarons mature in the fridge overnight before serving.
Storage
- Store these macarons in the fridge for up to 5 days.
- You can freeze these macarons for up to 2 months in an air tight container.
I tried making the carrot cake part today in advance. I had to throw it away. I measured everything with a scale. My carrots were not as wet as yours which probably made a difference. The cake was very oily tho & it stuck to the parchment. I baked for 17 minutes but it was not as dark as yours in the video. I will have to make these with a different carrot cake in the center.
Can you pipe the carrot decorations directly onto the macaroons once they are cooled?
sure
The flavor of these is out-of-this-world good. I like carrot cake just fine, but something about putting it in a macaron makes it amazing. I used the French method for my shells because that’s what I’m used to, but followed the cake and frosting recipes here as well as the royal icing one. Colored mine light green and made royal icing carrots and royal icing bunny faces because I filled some with just the frosting for people who are weirdly against carrot cake (so the bunnies went on the frosting-only ones). I had the same issue as someone else with the cake not filling the pan, but I am assuming I did something wrong, because my cake batter was more like cookie dough. But it didn’t matter in the end, it came out fine – a little chewy because I overbaked it slightly, but it softened up once everything was assembled and hung out in the fridge overnight. I attached my carrots/bunny faces with some small dots of royal icing. Thank you for this great recipe!
Thank you so much for the review! Yes it might be tricky the cake part, did you watch the video? Was the consistency similar to what I had in the video?
Hope we can figure this out so it works for everyone!
Thank you so much!!!!
Thanks for your response! My cake batter definitely did not look like yours, mine was much thicker, kind of like cookie dough. I’m not sure what I did wrong, I’ll have to try it again. But it still tasted amazing!
Is the cake batter supposed to have some sort of liquid added to it? Mine is awfully thick as well.
It’s a very thick batter
Tão lindos, tão delicados e tão deliciosos!!😍😋😋😋😋
Obrigada mae!!!
I’m not sure where i went wrong on the carrot cake. I chose a 9×15 pan like you said but I was only able to fill it 3/4 of the way across and even then I was spreading the cake really thin. I prob needed double the batter to get an even layer all the way across.
hmmm not sure why, I am going to revisit this recipe this upcoming week. It is supposed to be a very thin layer though because you can’t have a thick layer of cake when filling the macarons, it’s supposed to be very very thin.
Camilla used a 9 x 13 inch pan not a 9 x 15 inch.
Nossa, Camila!!! Você está sempre fazendo delícias de macarons!!😋😋😋
Achei a ideia fantástica e a apresentação perfeita, muito legal!!!!!
Ebaaa! Obrigada 🥕🐰
Can we reduce the amount of powered sugar to 50 g and compensate the thickness of the batter by putting in more cornstarch? I’m just trying to figure out a way to reduce the sweetness of macarons for my tastes. Please let me know. Thanks for the recipe!
Hello I have not tried to do that, but I would not recommend adding more cornstarch. Perhaps more almond flour in place of the powdered sugar but I can’t guarantee that will work either, since most recipes usually use the same amounts of powdered sugar and almond flour. Have you tried making a less sweet filling like a dark chocolate ganache for the filling?
Thanks Camila!
I have tried to make less sweet fillings like cream cheese fillings. Thanks for the helpful info! I’ll try increasing almond flour and see what happens. 🙂
Thank you so much Karen!