Biscoff Pie
I’ve been wanting a Biscoff dessert that sits somewhere between a cheesecake and a pie—something creamy, sliceable, and a little easier to pull together. This is the version I came up with and it’s so good! It has that rich, smooth filling you expect from a cheesecake, but baked into a Biscoff cookie crust and finished with a simple cookie butter topping. It’s straightforward, but still feels like something special.
Why I love this pie
This is one of those desserts that looks more involved than it actually is.
- The filling is smooth, creamy, and easy to make, similar to my Eggnog Pie and Coconut Cream Pie
- The Biscoff flavor comes through clearly without being overwhelming
- It bakes gently and sets up beautifully in the fridge
- The cookie butter topping adds just enough richness, as it does with my Biscoff Cheesecake and Biscoff Cake
- Works well for make-ahead desserts
Key ingredients & why I use them
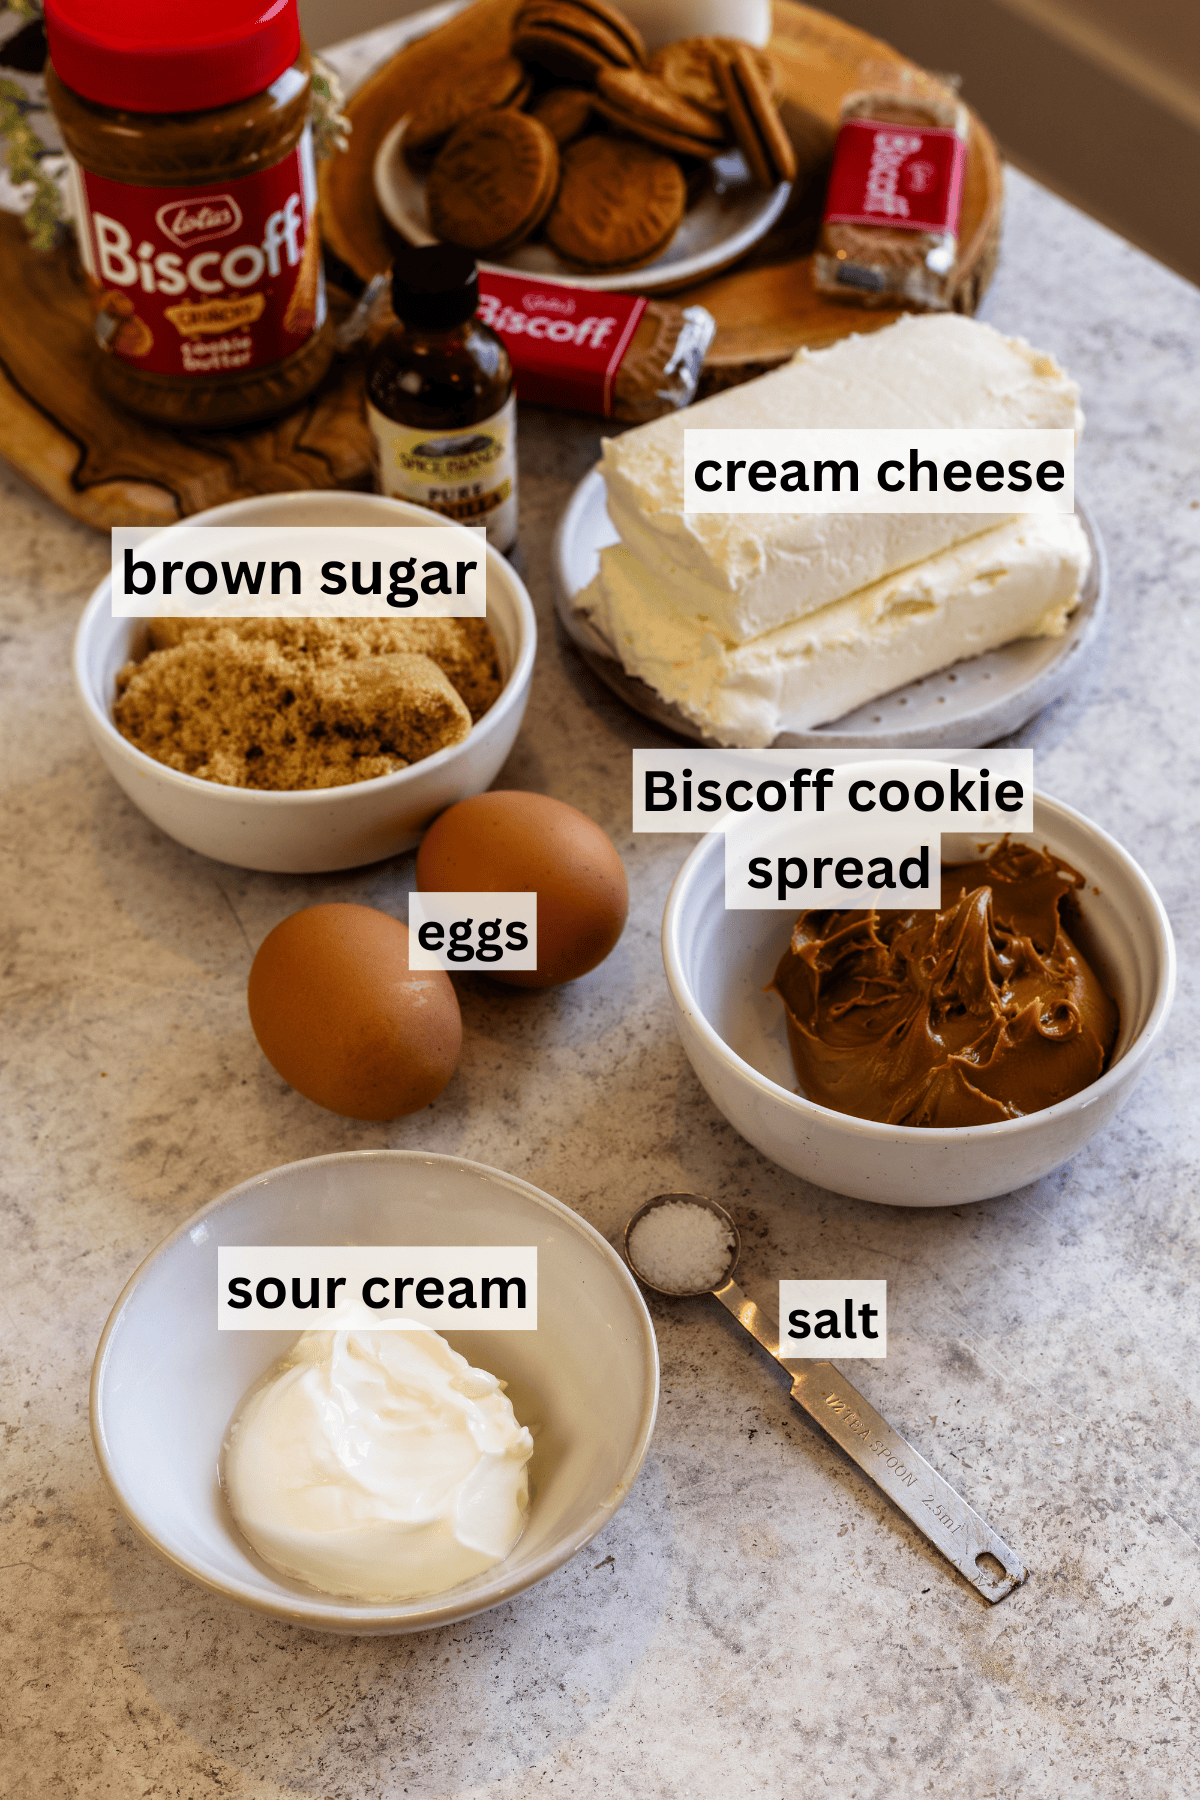
Cream cheese: This is the base of the filling. I always use block-style cream cheese for the best texture.
This post may contain affiliate links. I earn a commission from qualified purchases. Please read our Privacy policy here.
Brown sugar: Adds a deeper flavor that works really well with Biscoff.
Biscoff cookie butter: This is where all the flavor comes from. I use creamy for a smooth filling.
Sour cream: Helps loosen the filling slightly and keeps it from feeling too dense.
Eggs: Give structure to the pie. I mix them in gently so the texture stays smooth.
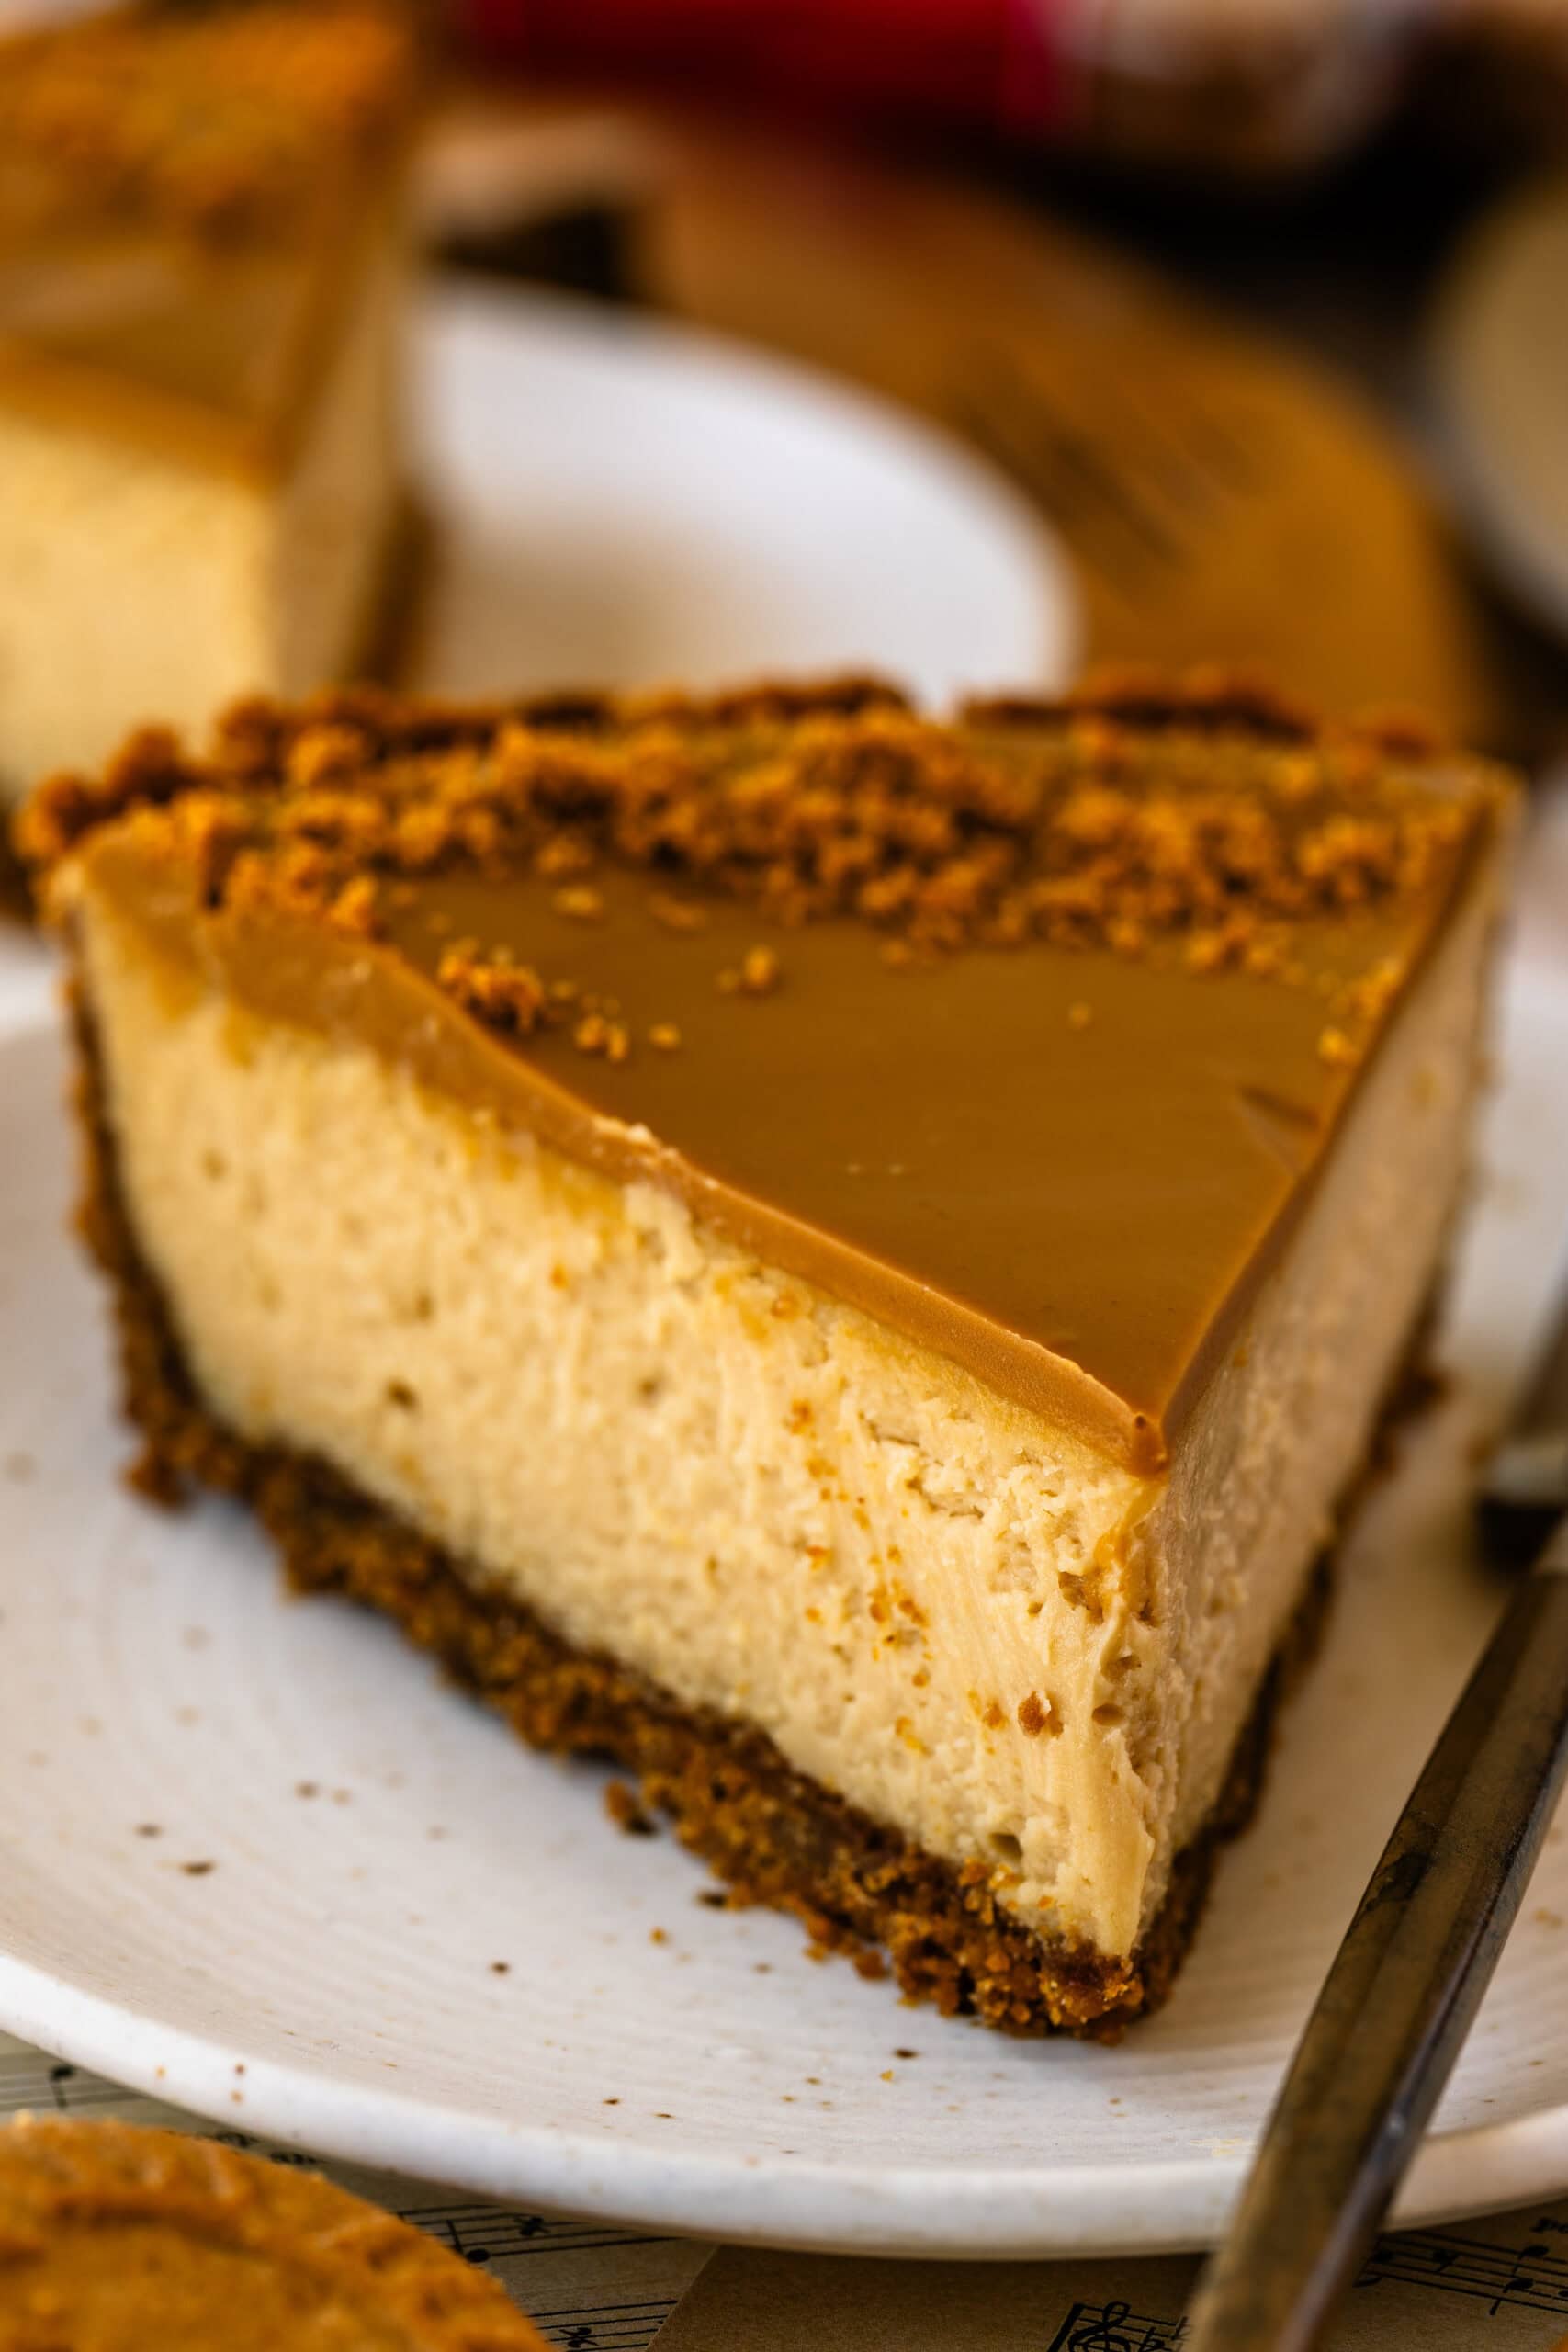
Biscoff cookie crust: This ties everything together. It adds texture and reinforces the flavor throughout.
How to make this pie
Pies like this can be a little tricky to set, so follow my detailed instructions to get you going in the right direction. Full ingredients and instructions can be found at the bottom of this post in the recipe card.
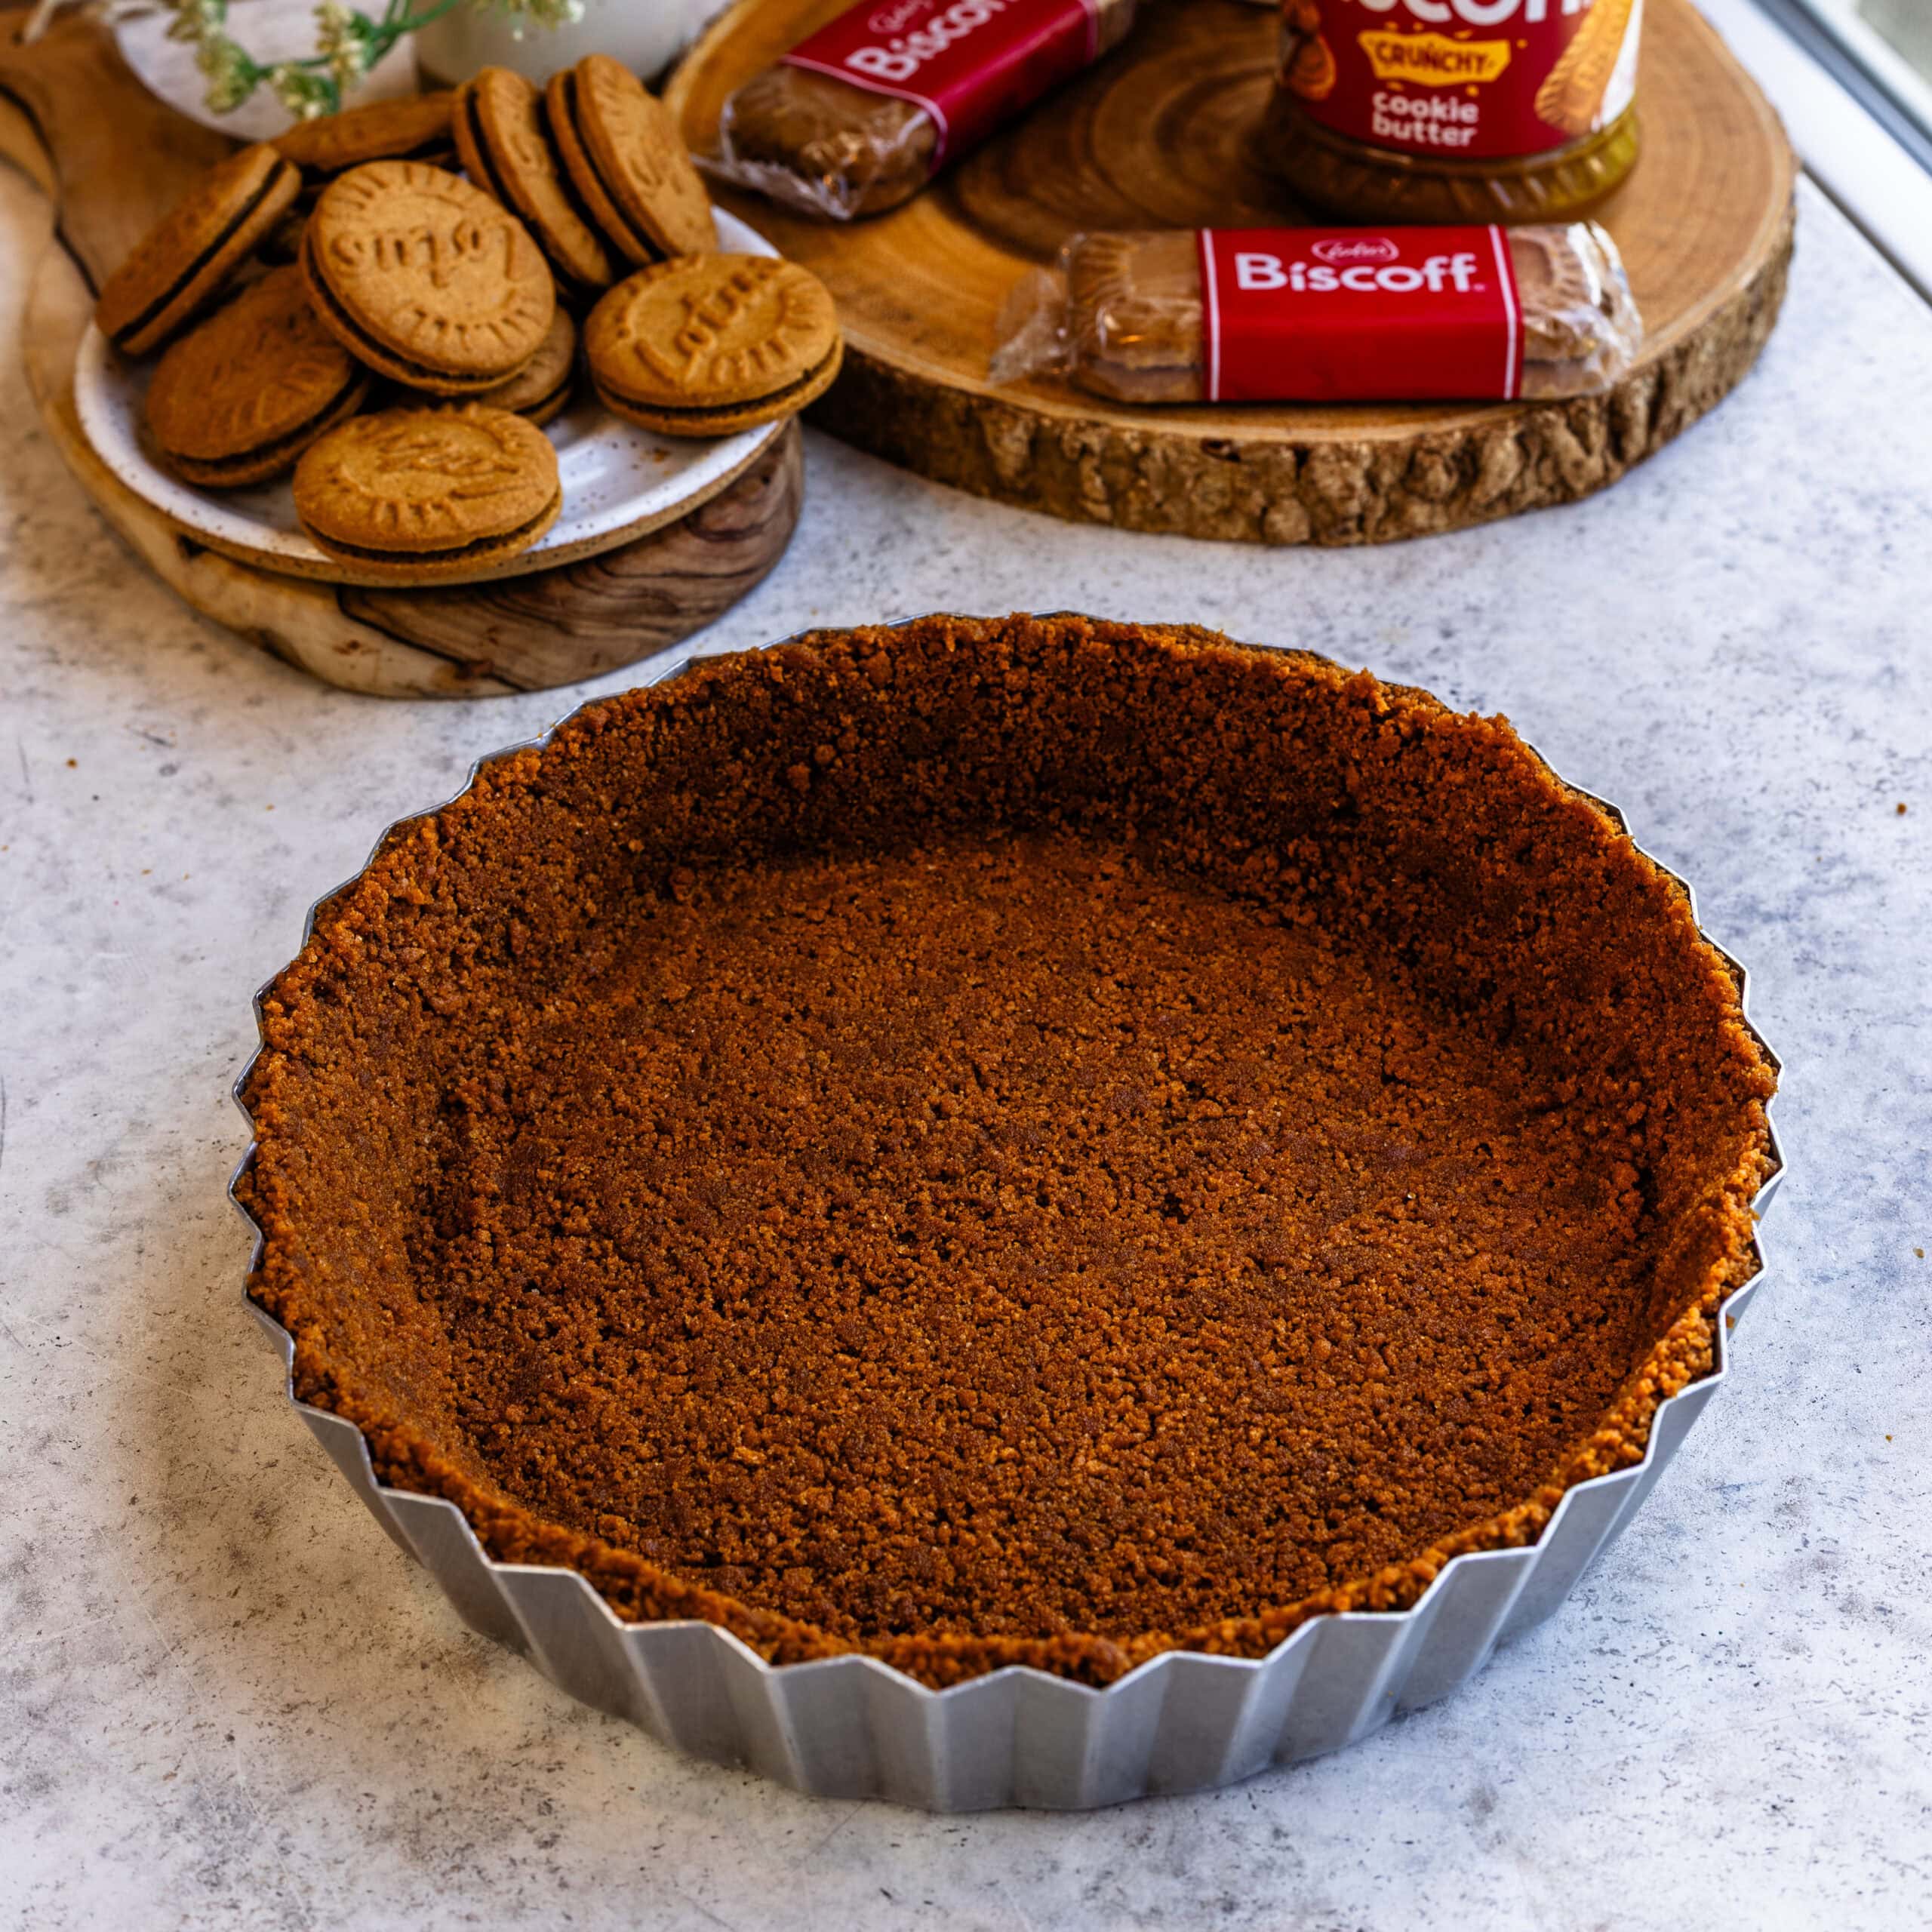
Step 1: Prepare the crust
Preheat your oven to 325°F (160°C).
Make this Biscoff cookie crust according to the recipe and press it firmly into the bottom and up the sides of your pan. I don’t grease the pan here—the butter in the crust is enough.
Bake the crust as per the recipe instructions, then set it aside to cool slightly.
Step 2: Start the filling
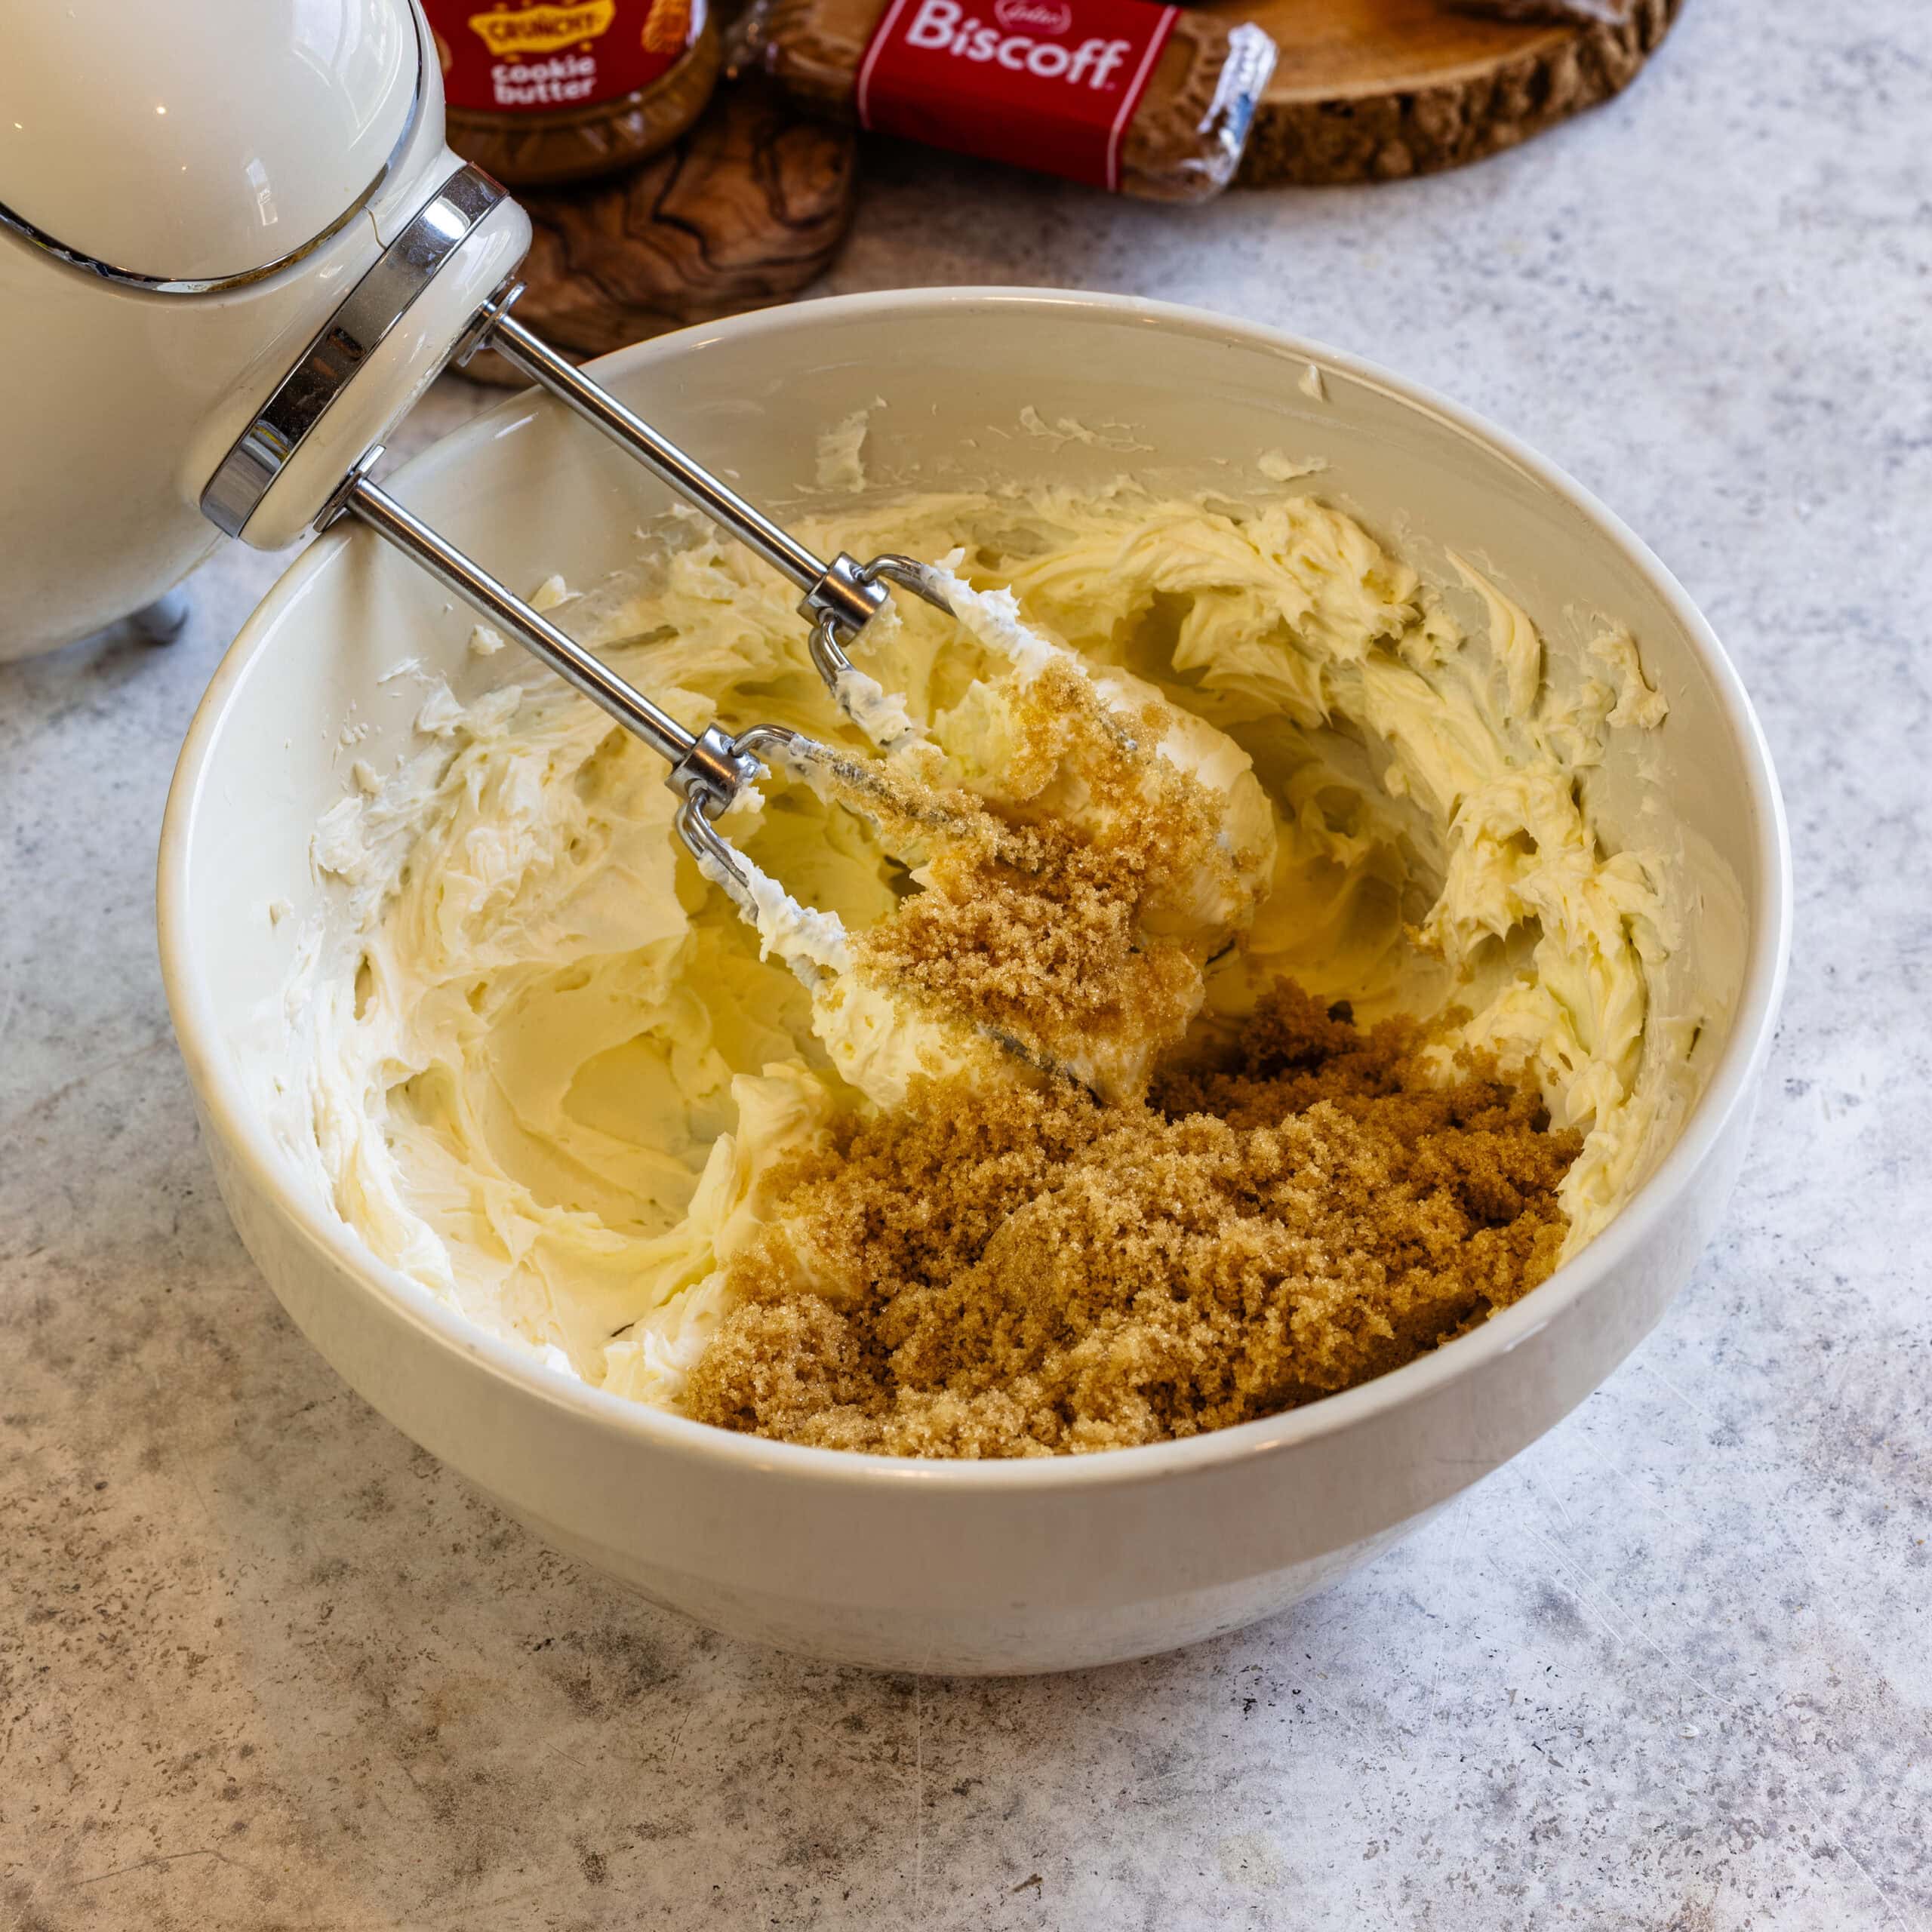
In a large bowl, beat the cream cheese for about 1 minute until smooth.
Add the brown sugar and mix for 2–3 minutes, until creamy and fully combined.
Step 3: Add the Biscoff cookie butter
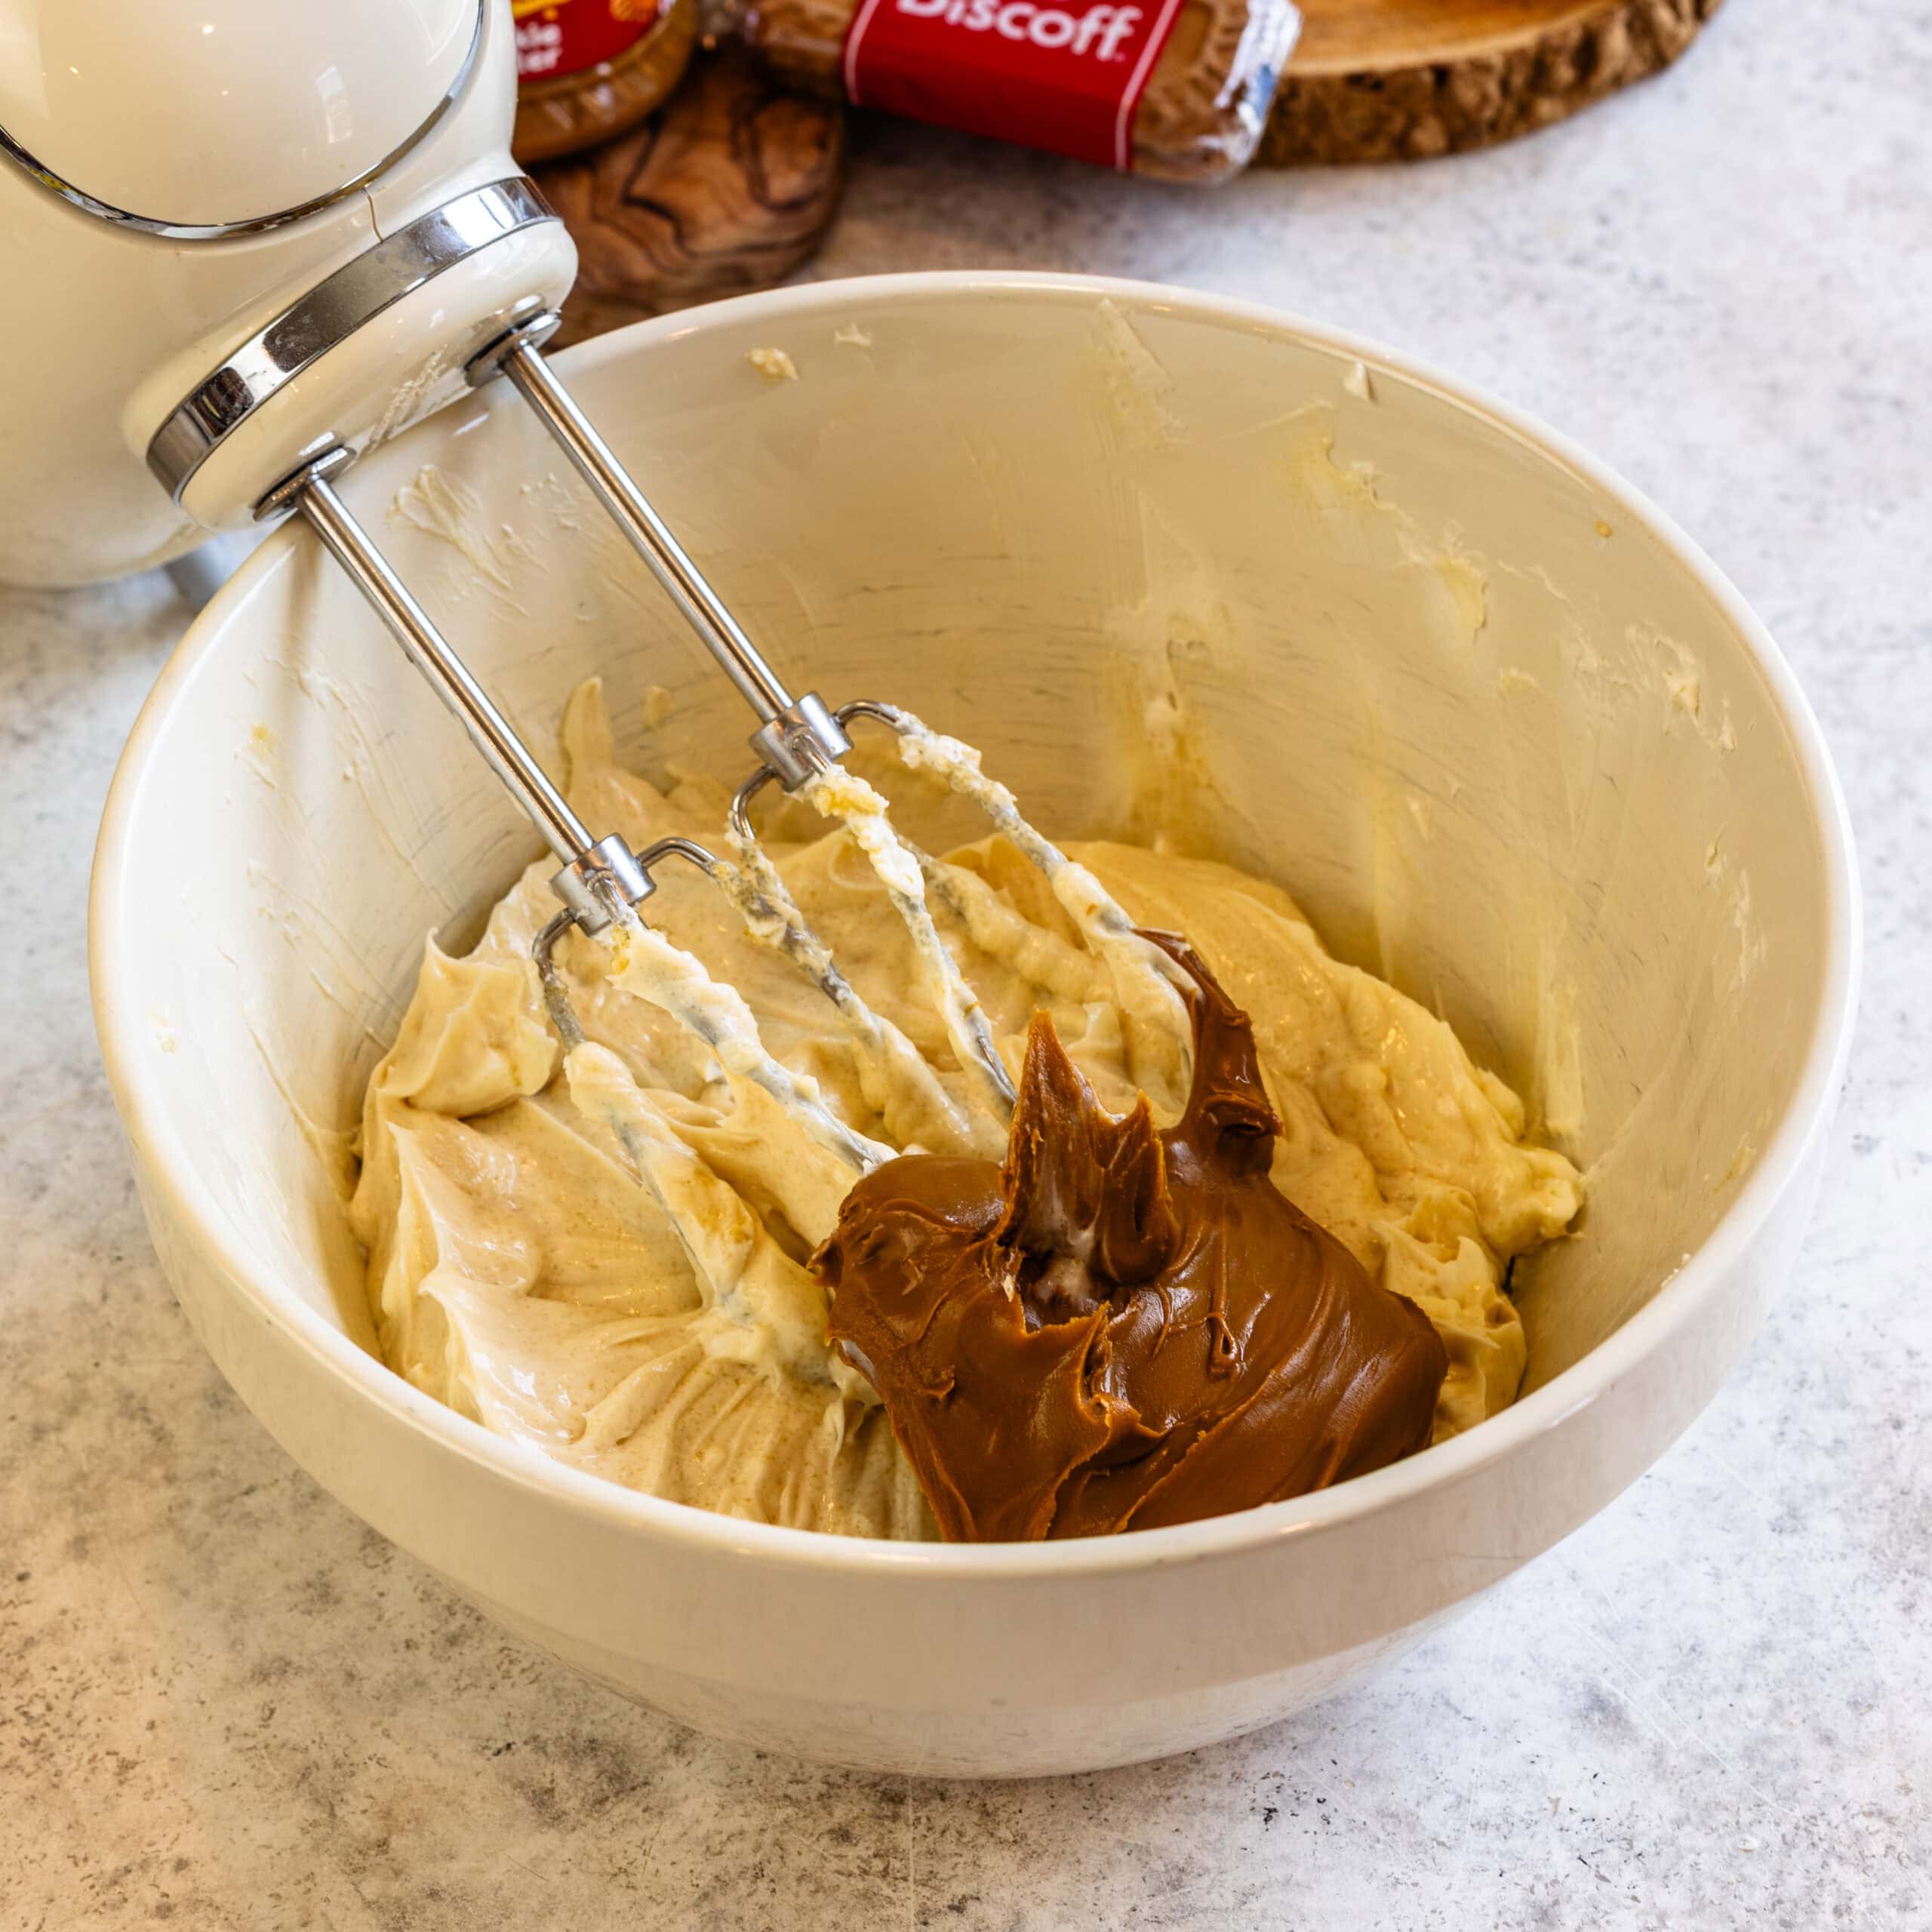
Add the Biscoff cookie butter and mix again.
Step 4: Add the sour cream
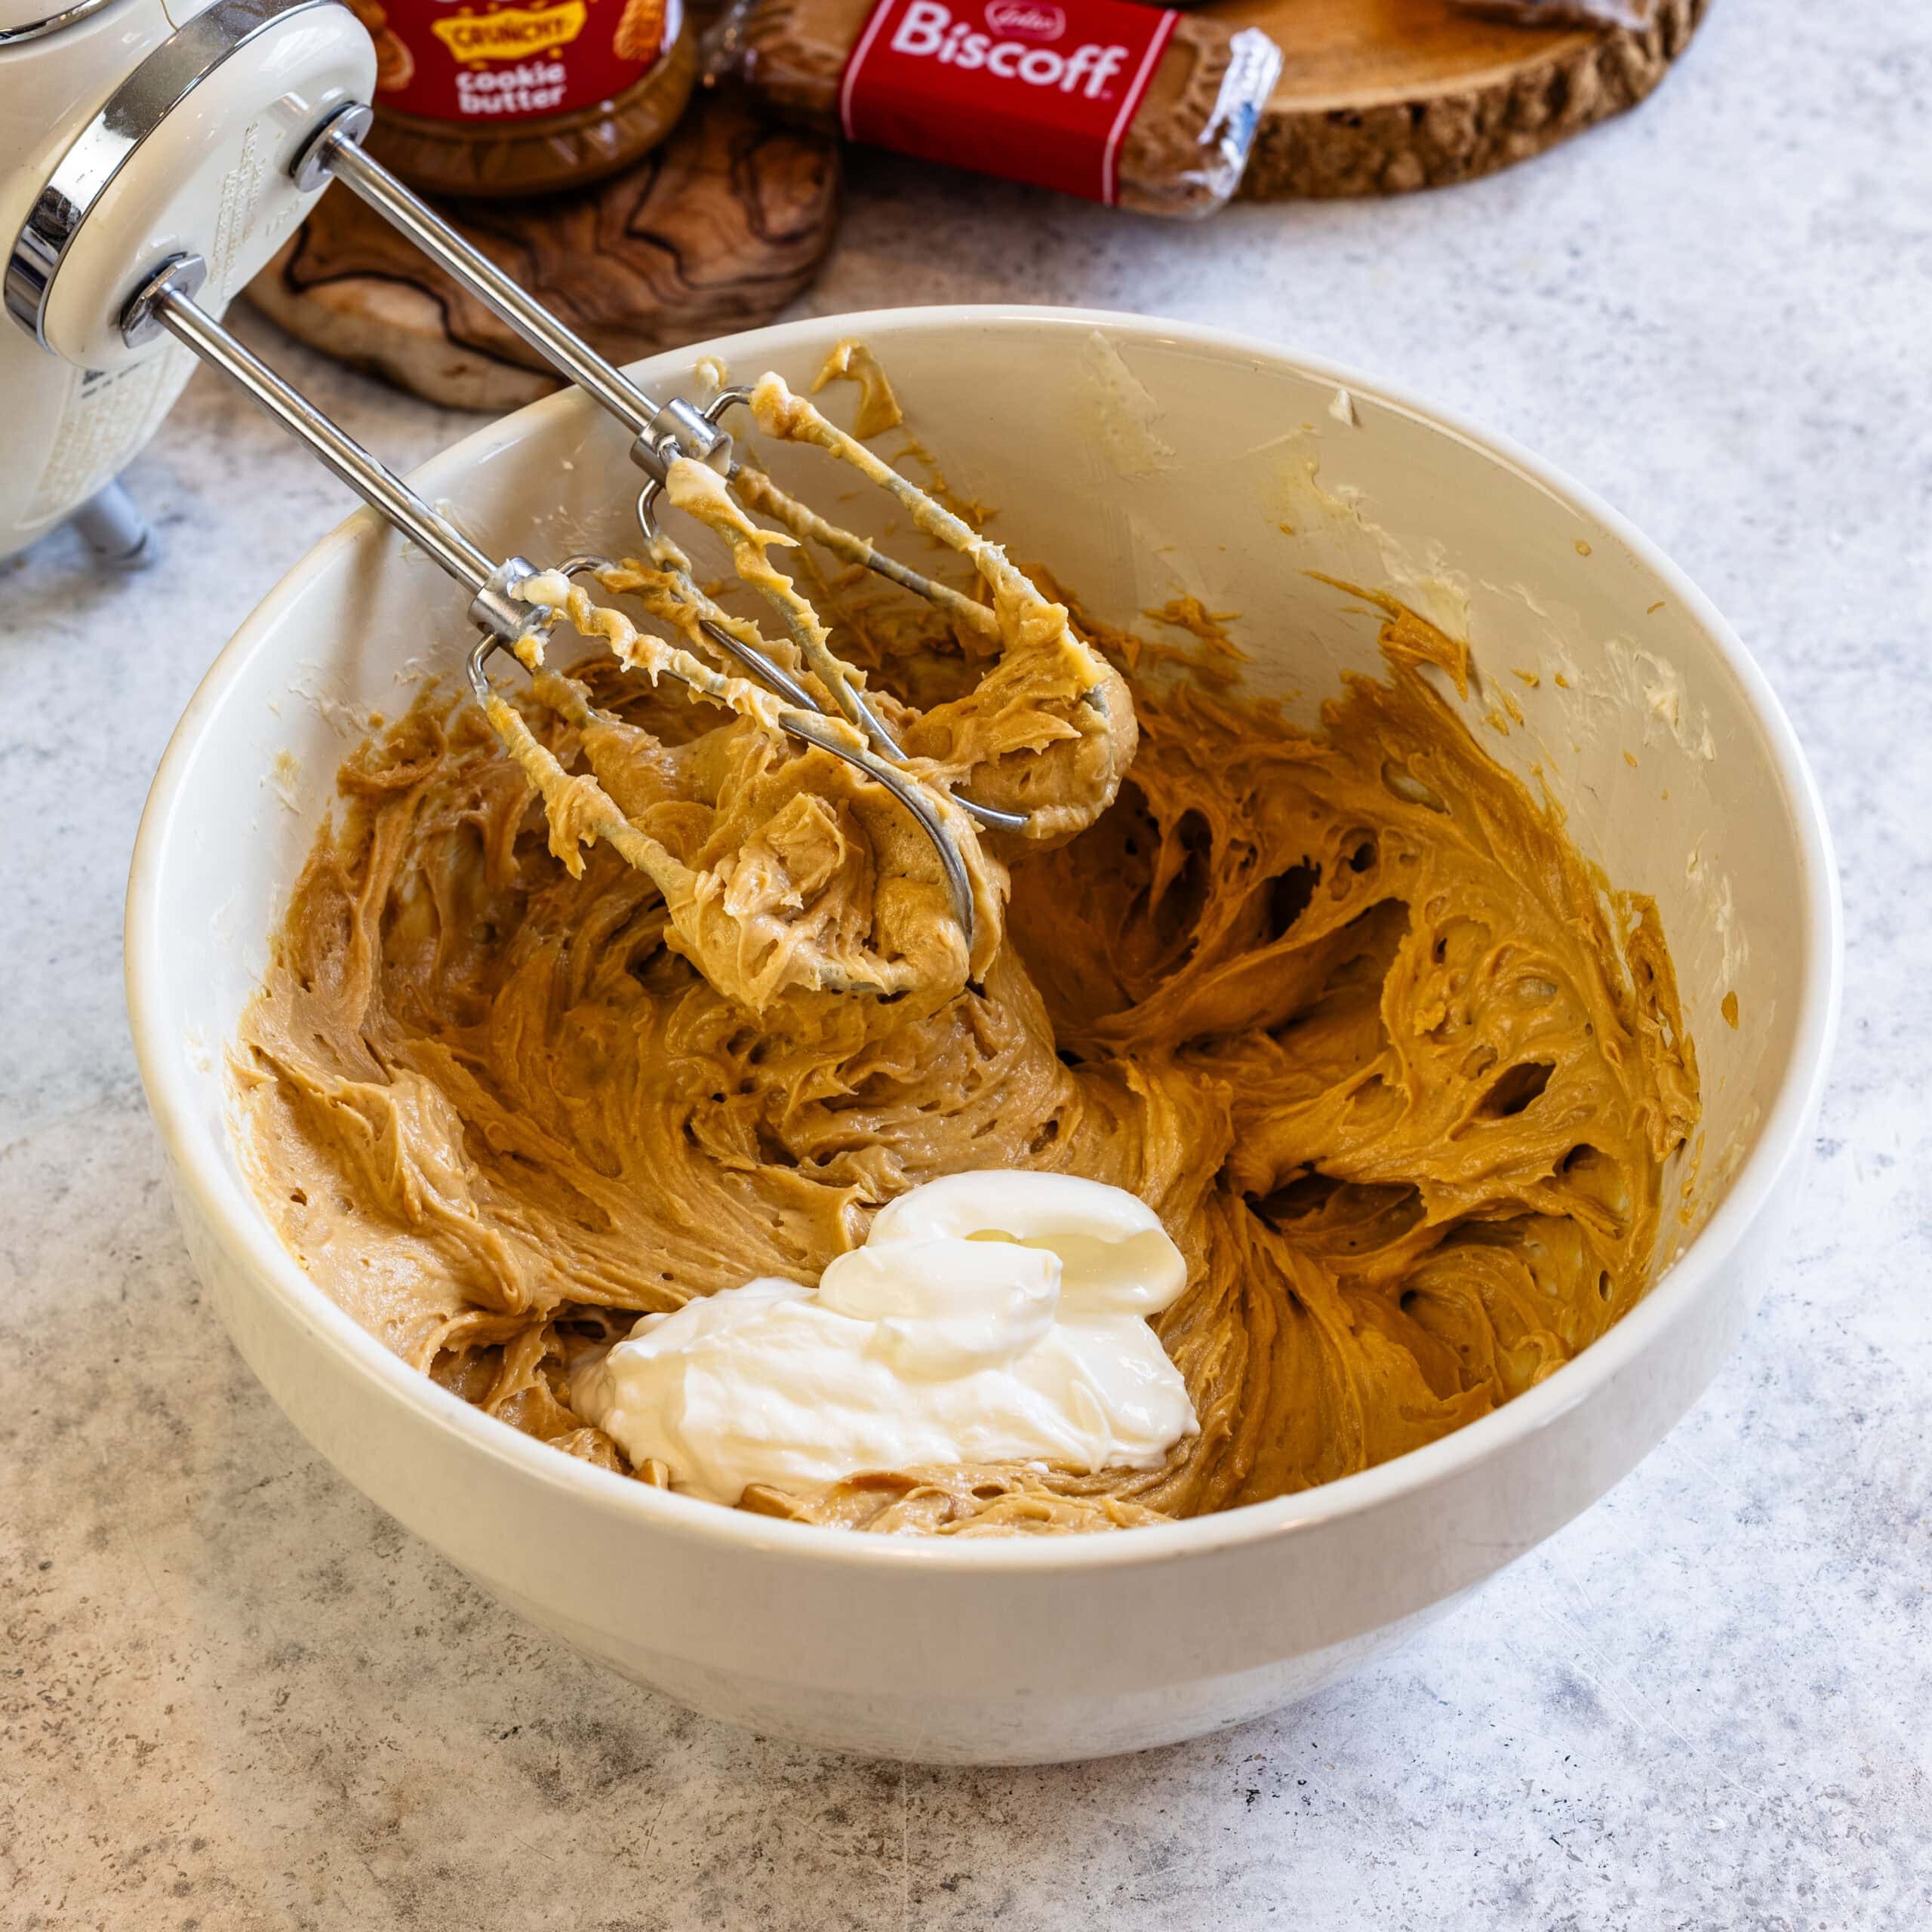
Then add the sour cream and mix until smooth, scraping the bowl as needed.
Step 5: Add the eggs
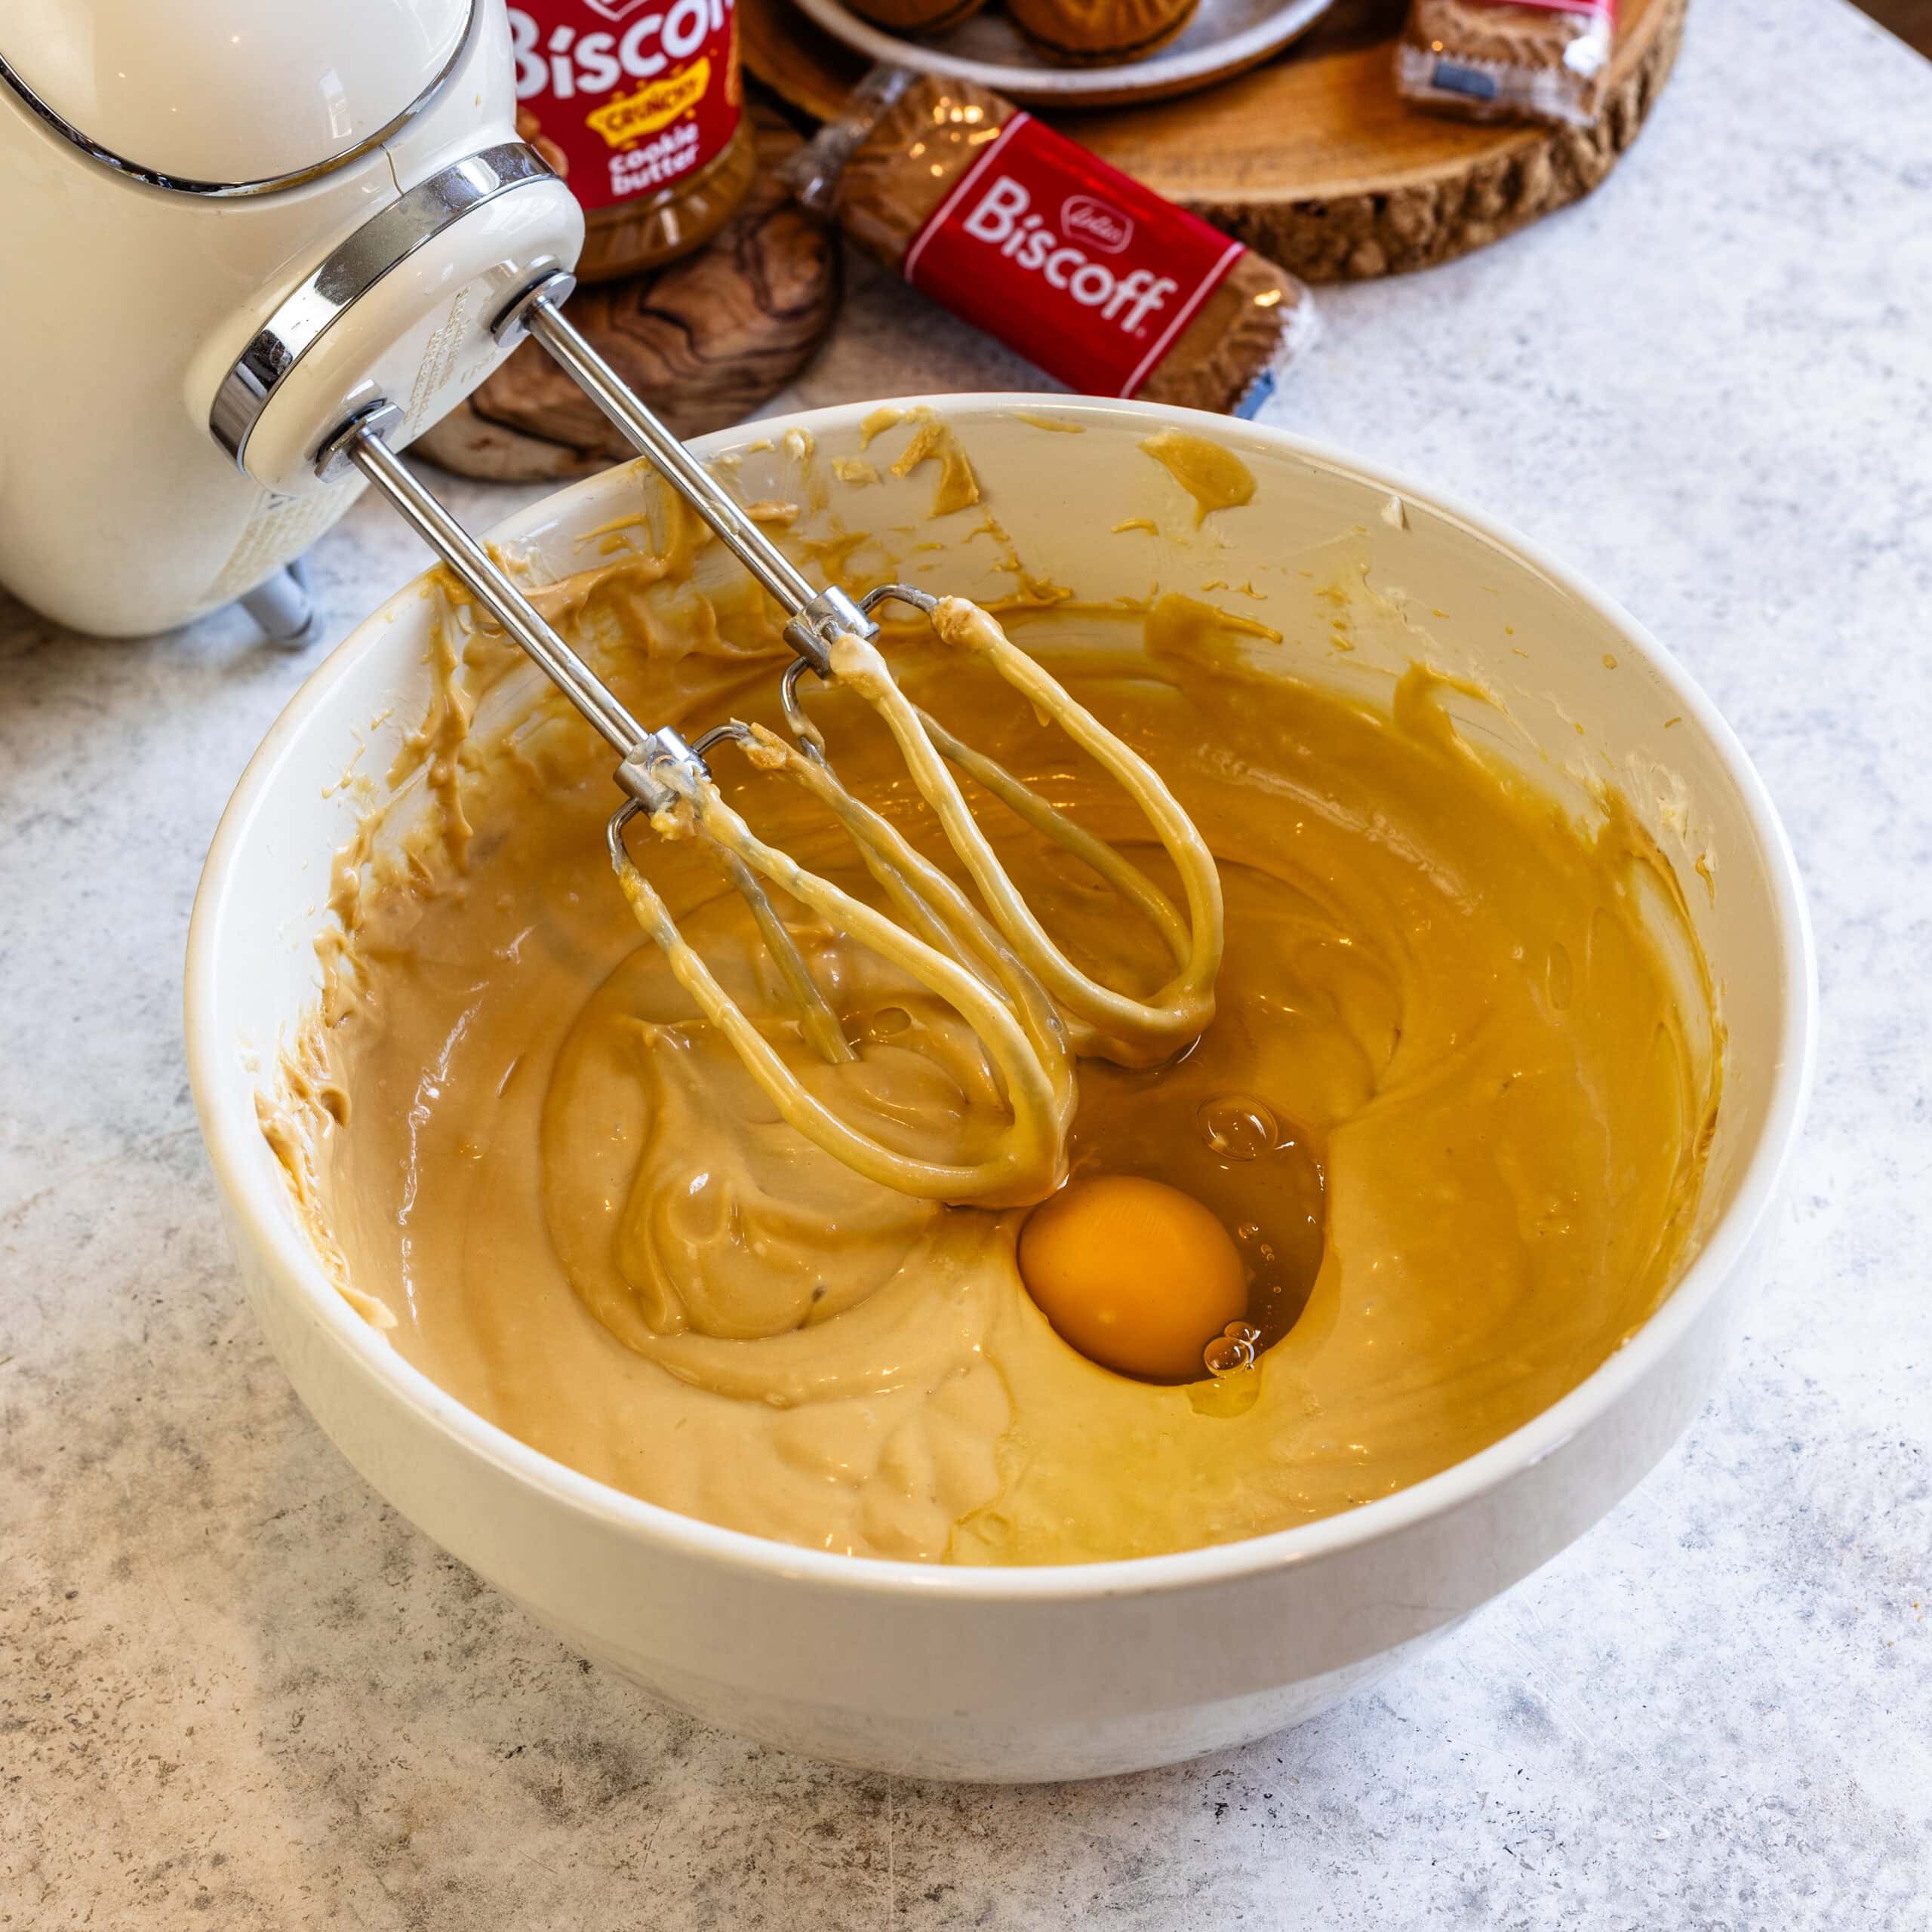
Add the eggs one at a time, mixing on low speed just until incorporated. With the second egg, add the vanilla and salt.
At this stage, I’m careful not to overmix—just enough to bring everything together. This helps prevent cracks and keeps the texture silky.
Step 6: Bake
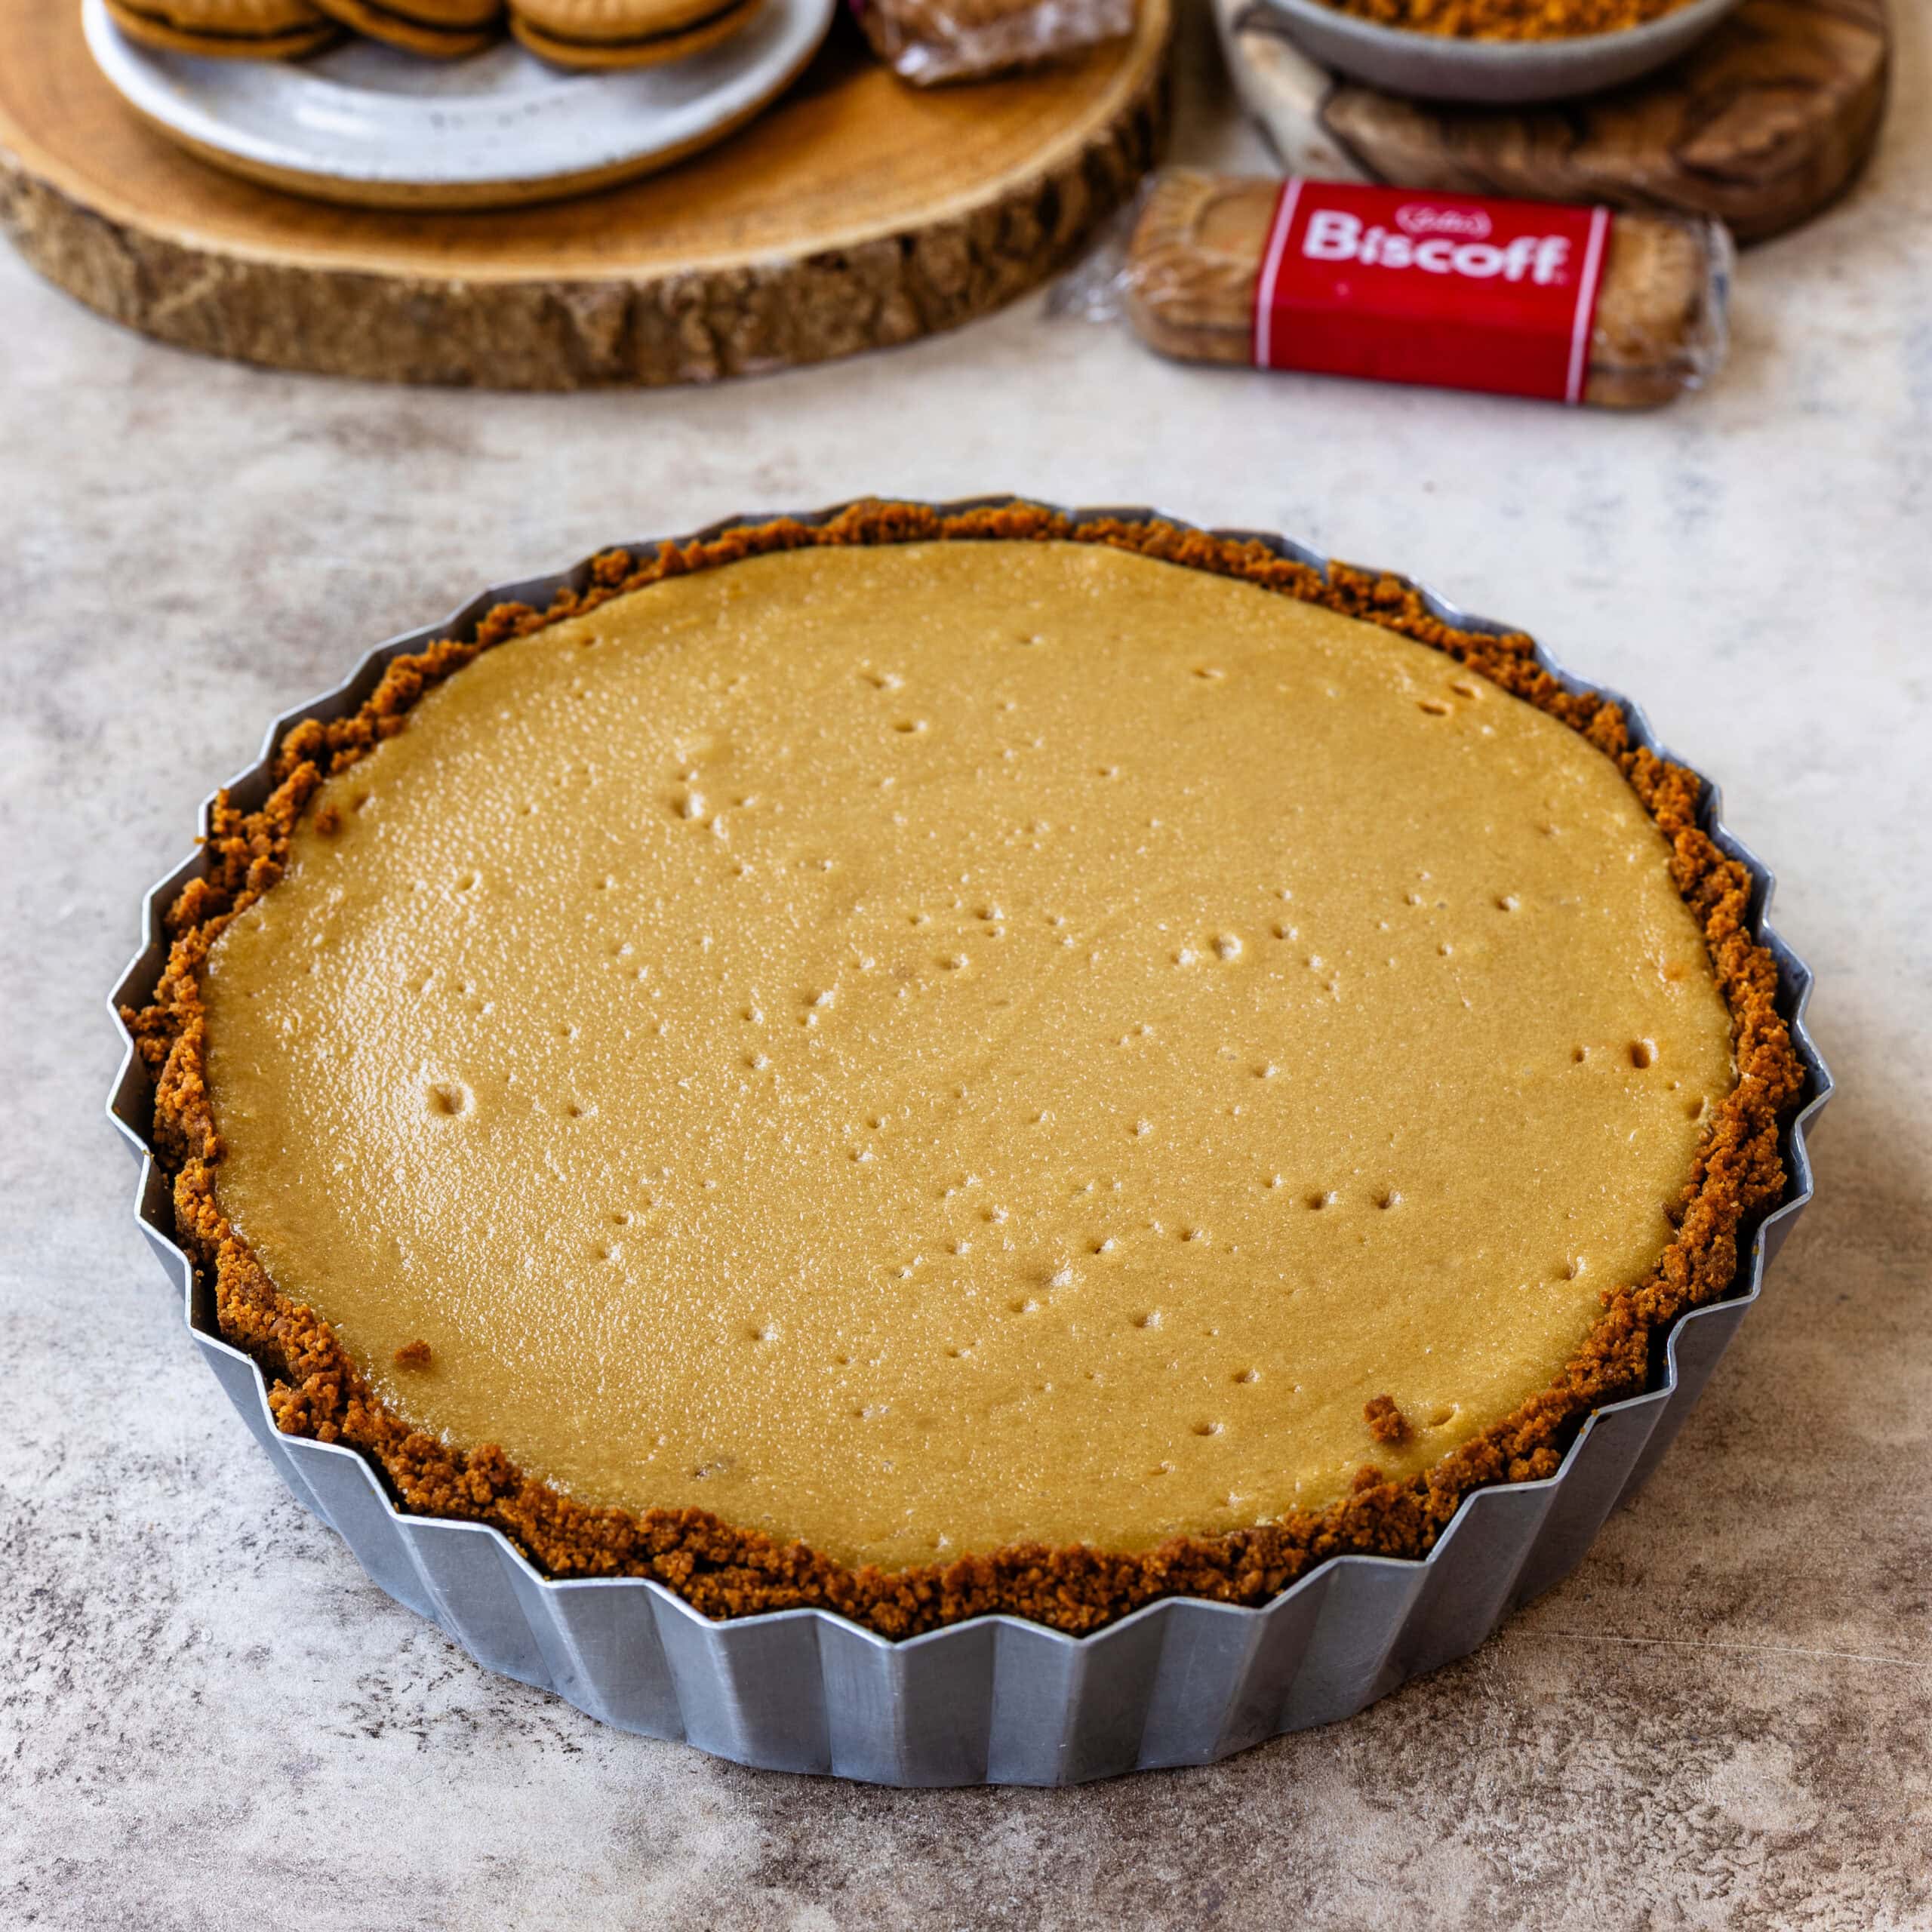
Pour the filling into the prepared crust and smooth the top. Bake for 40–50 minutes, until the edges are set, but the center still has a slight jiggle.
Turn the oven off, crack the door open, and leave the pie inside for 20 minutes. This helps it cool gradually and keeps the texture smooth.
Remove from the oven and let it cool completely at room temperature. Then transfer to the fridge and chill for at least 6 hours, or overnight. This step really matters—the pie needs time to fully set.
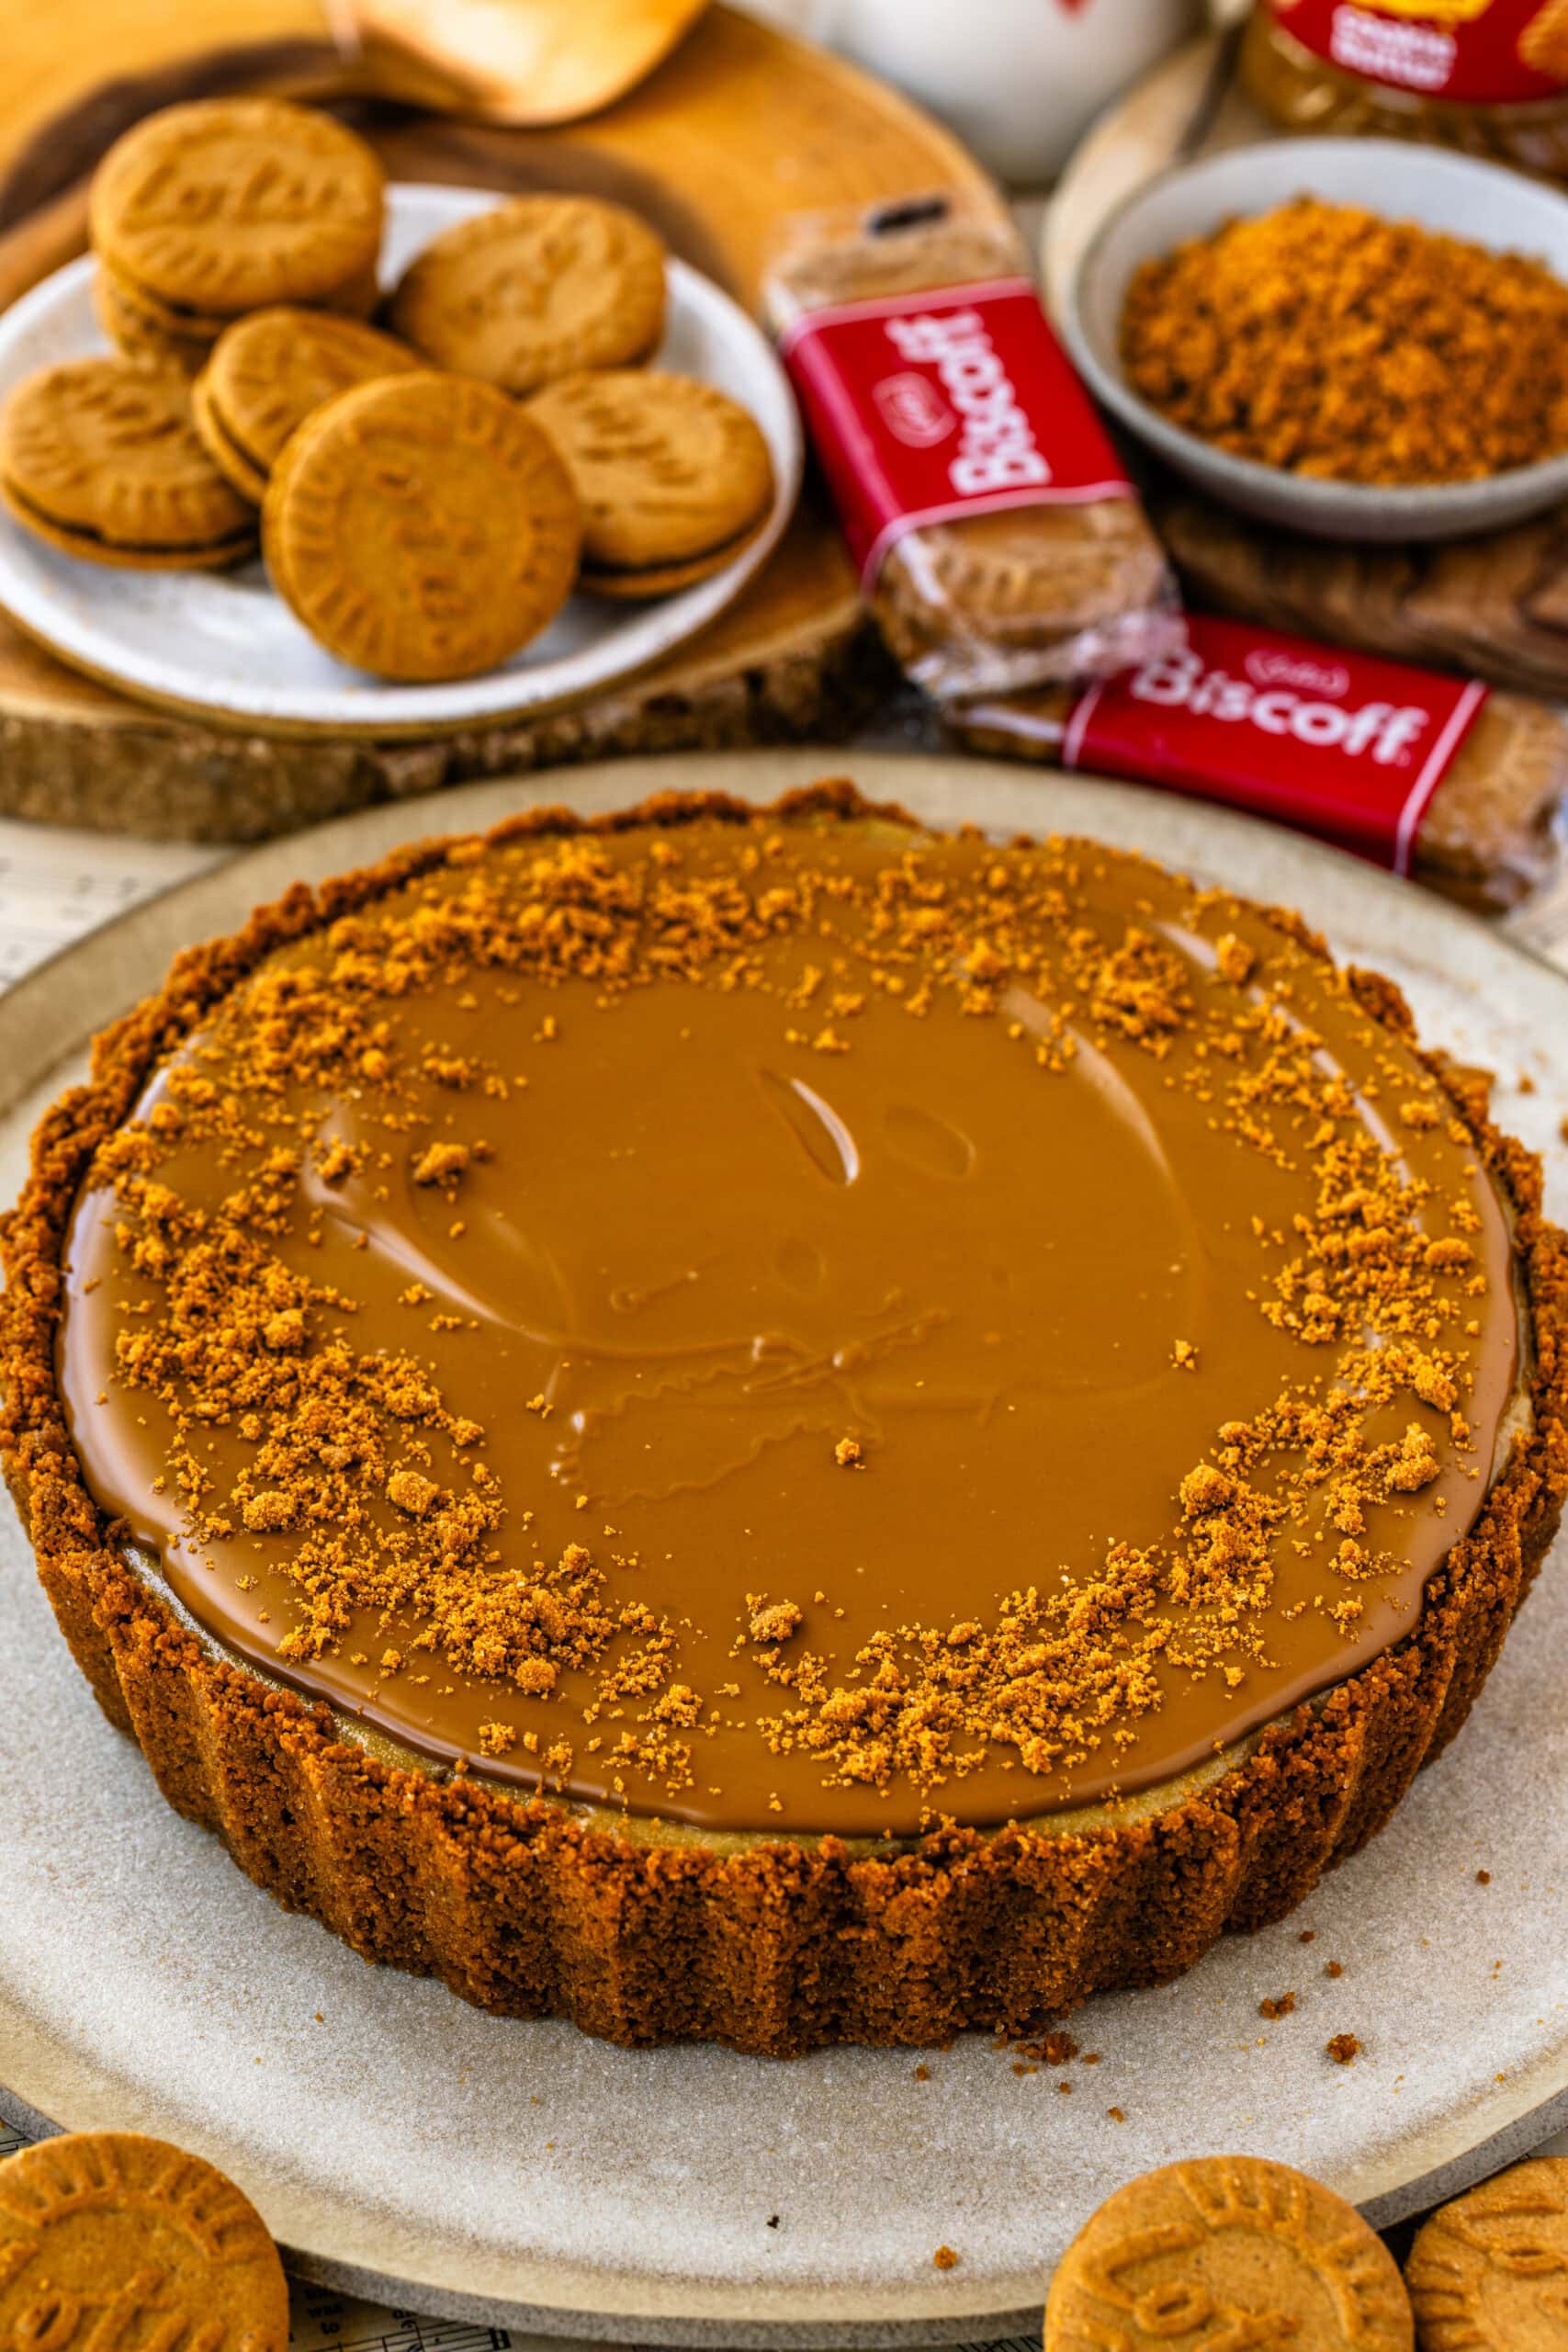
Step 7: Melt the cookie butter and finish the pie
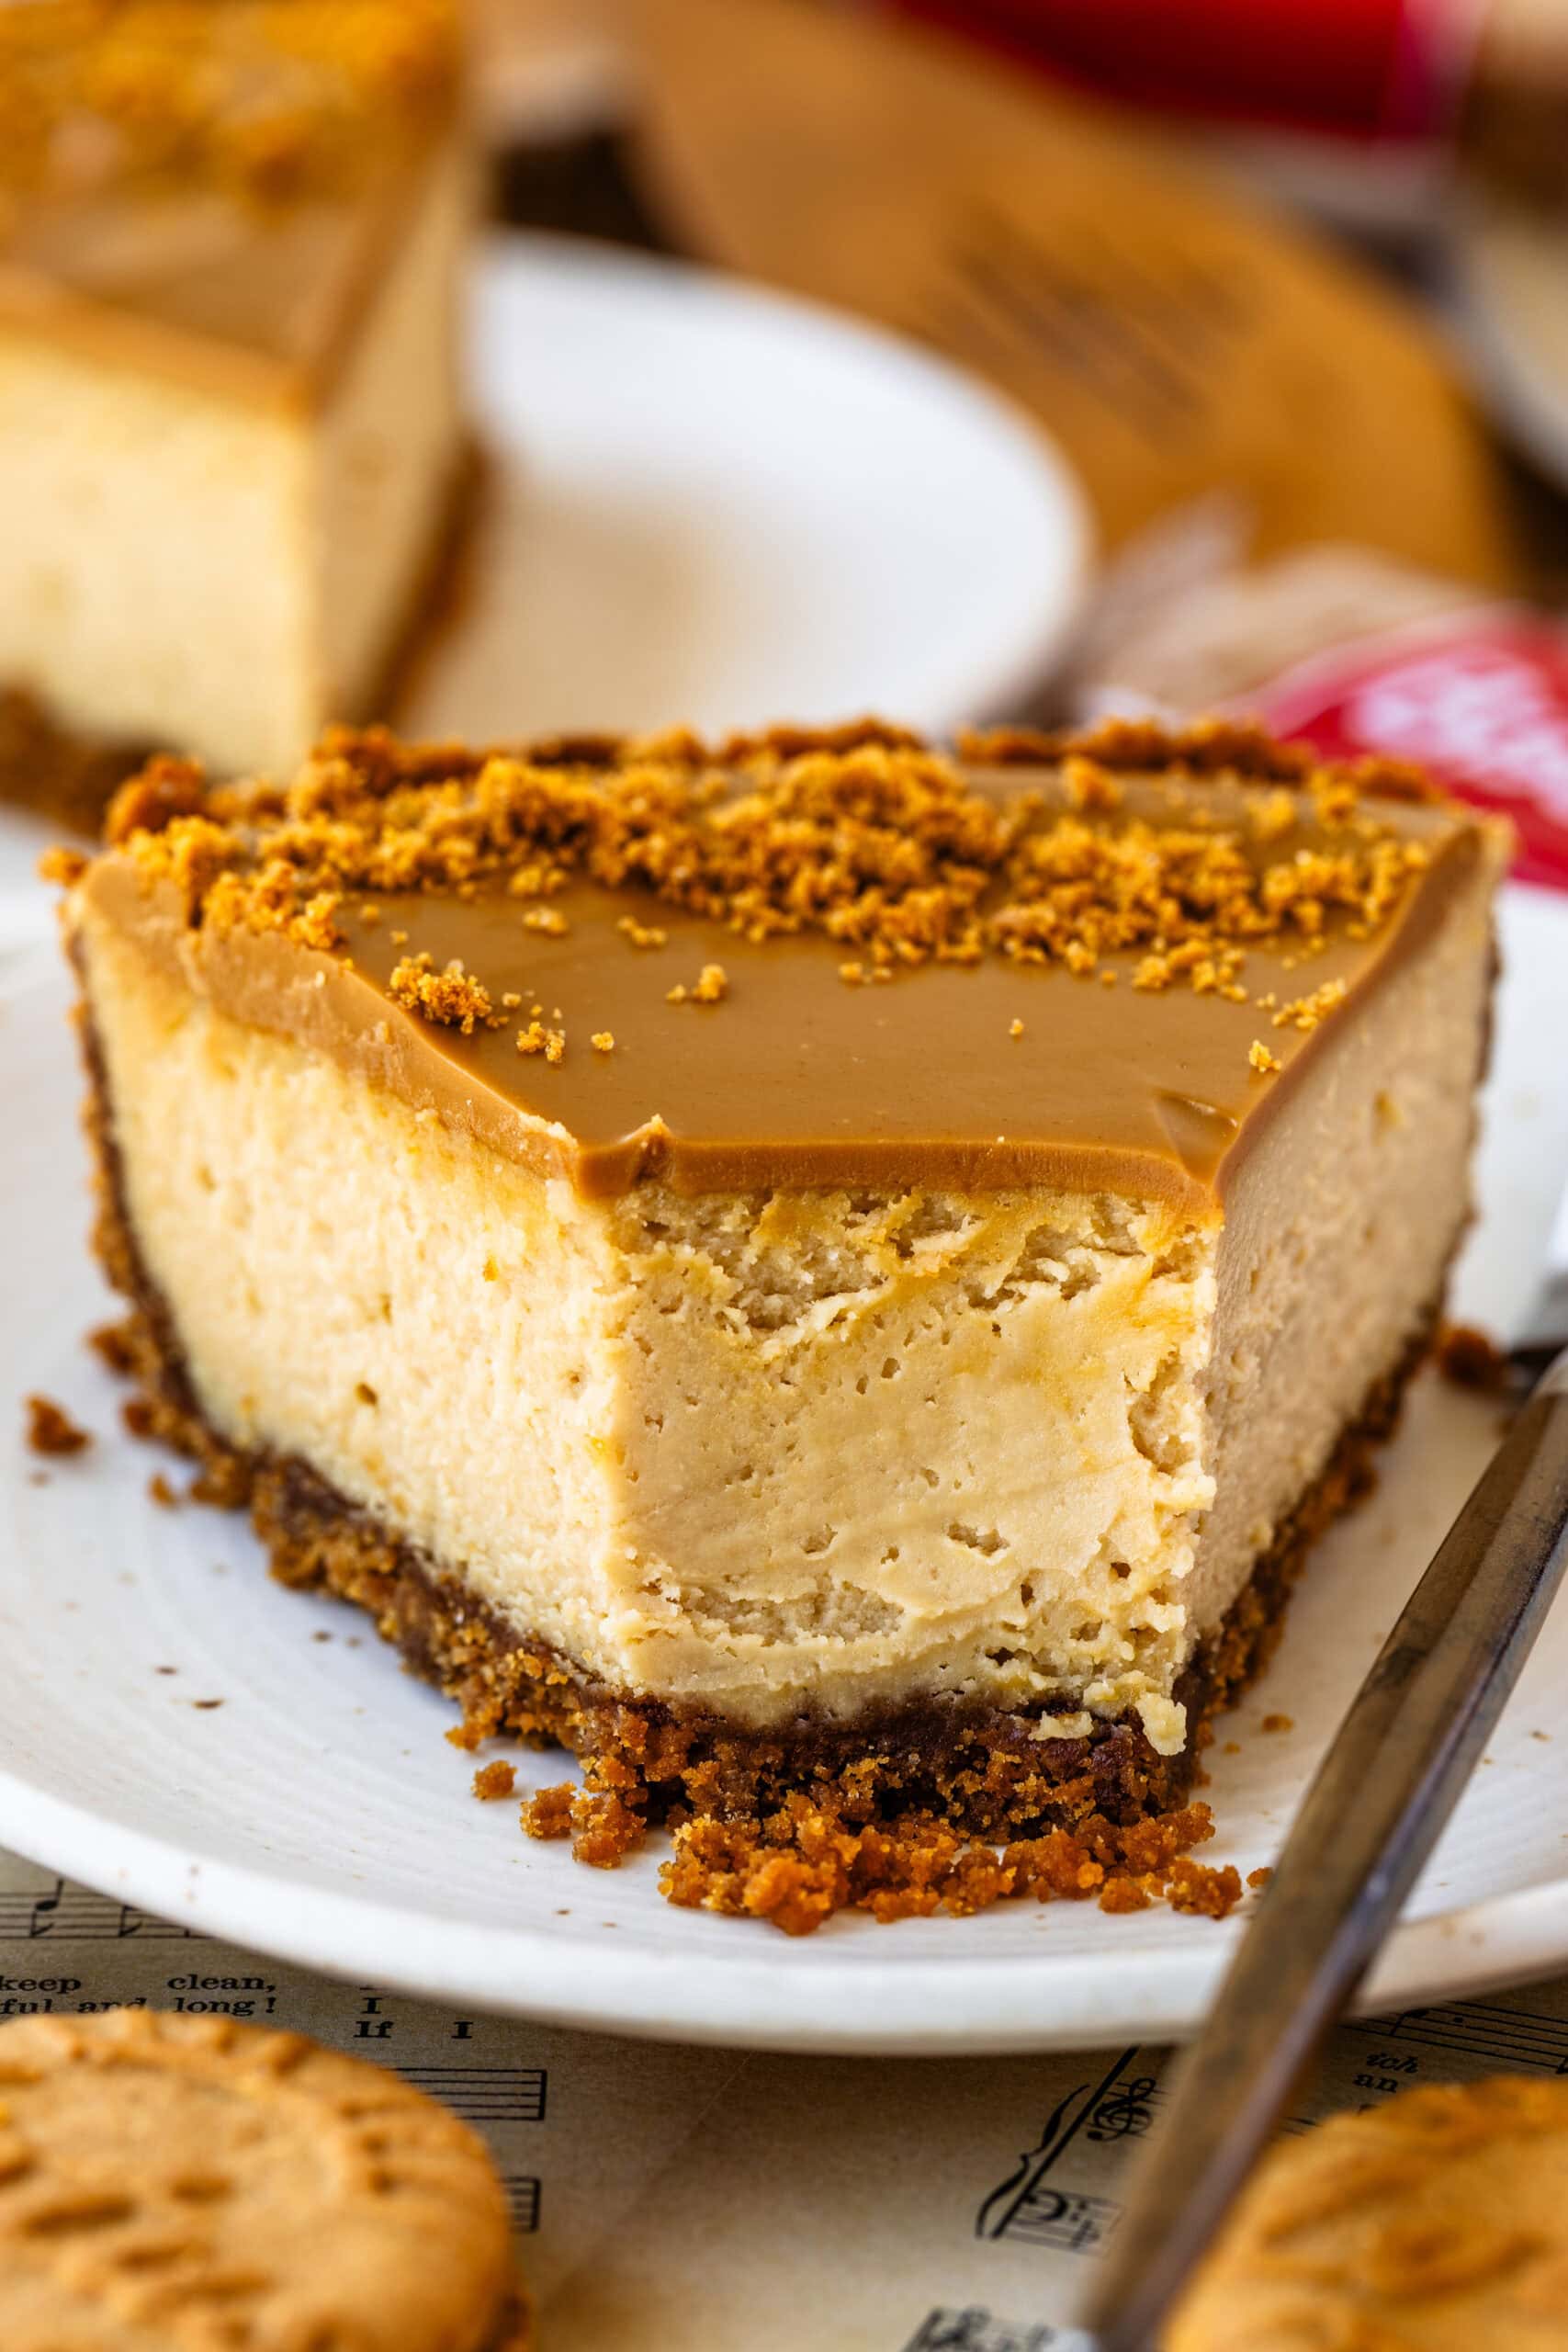
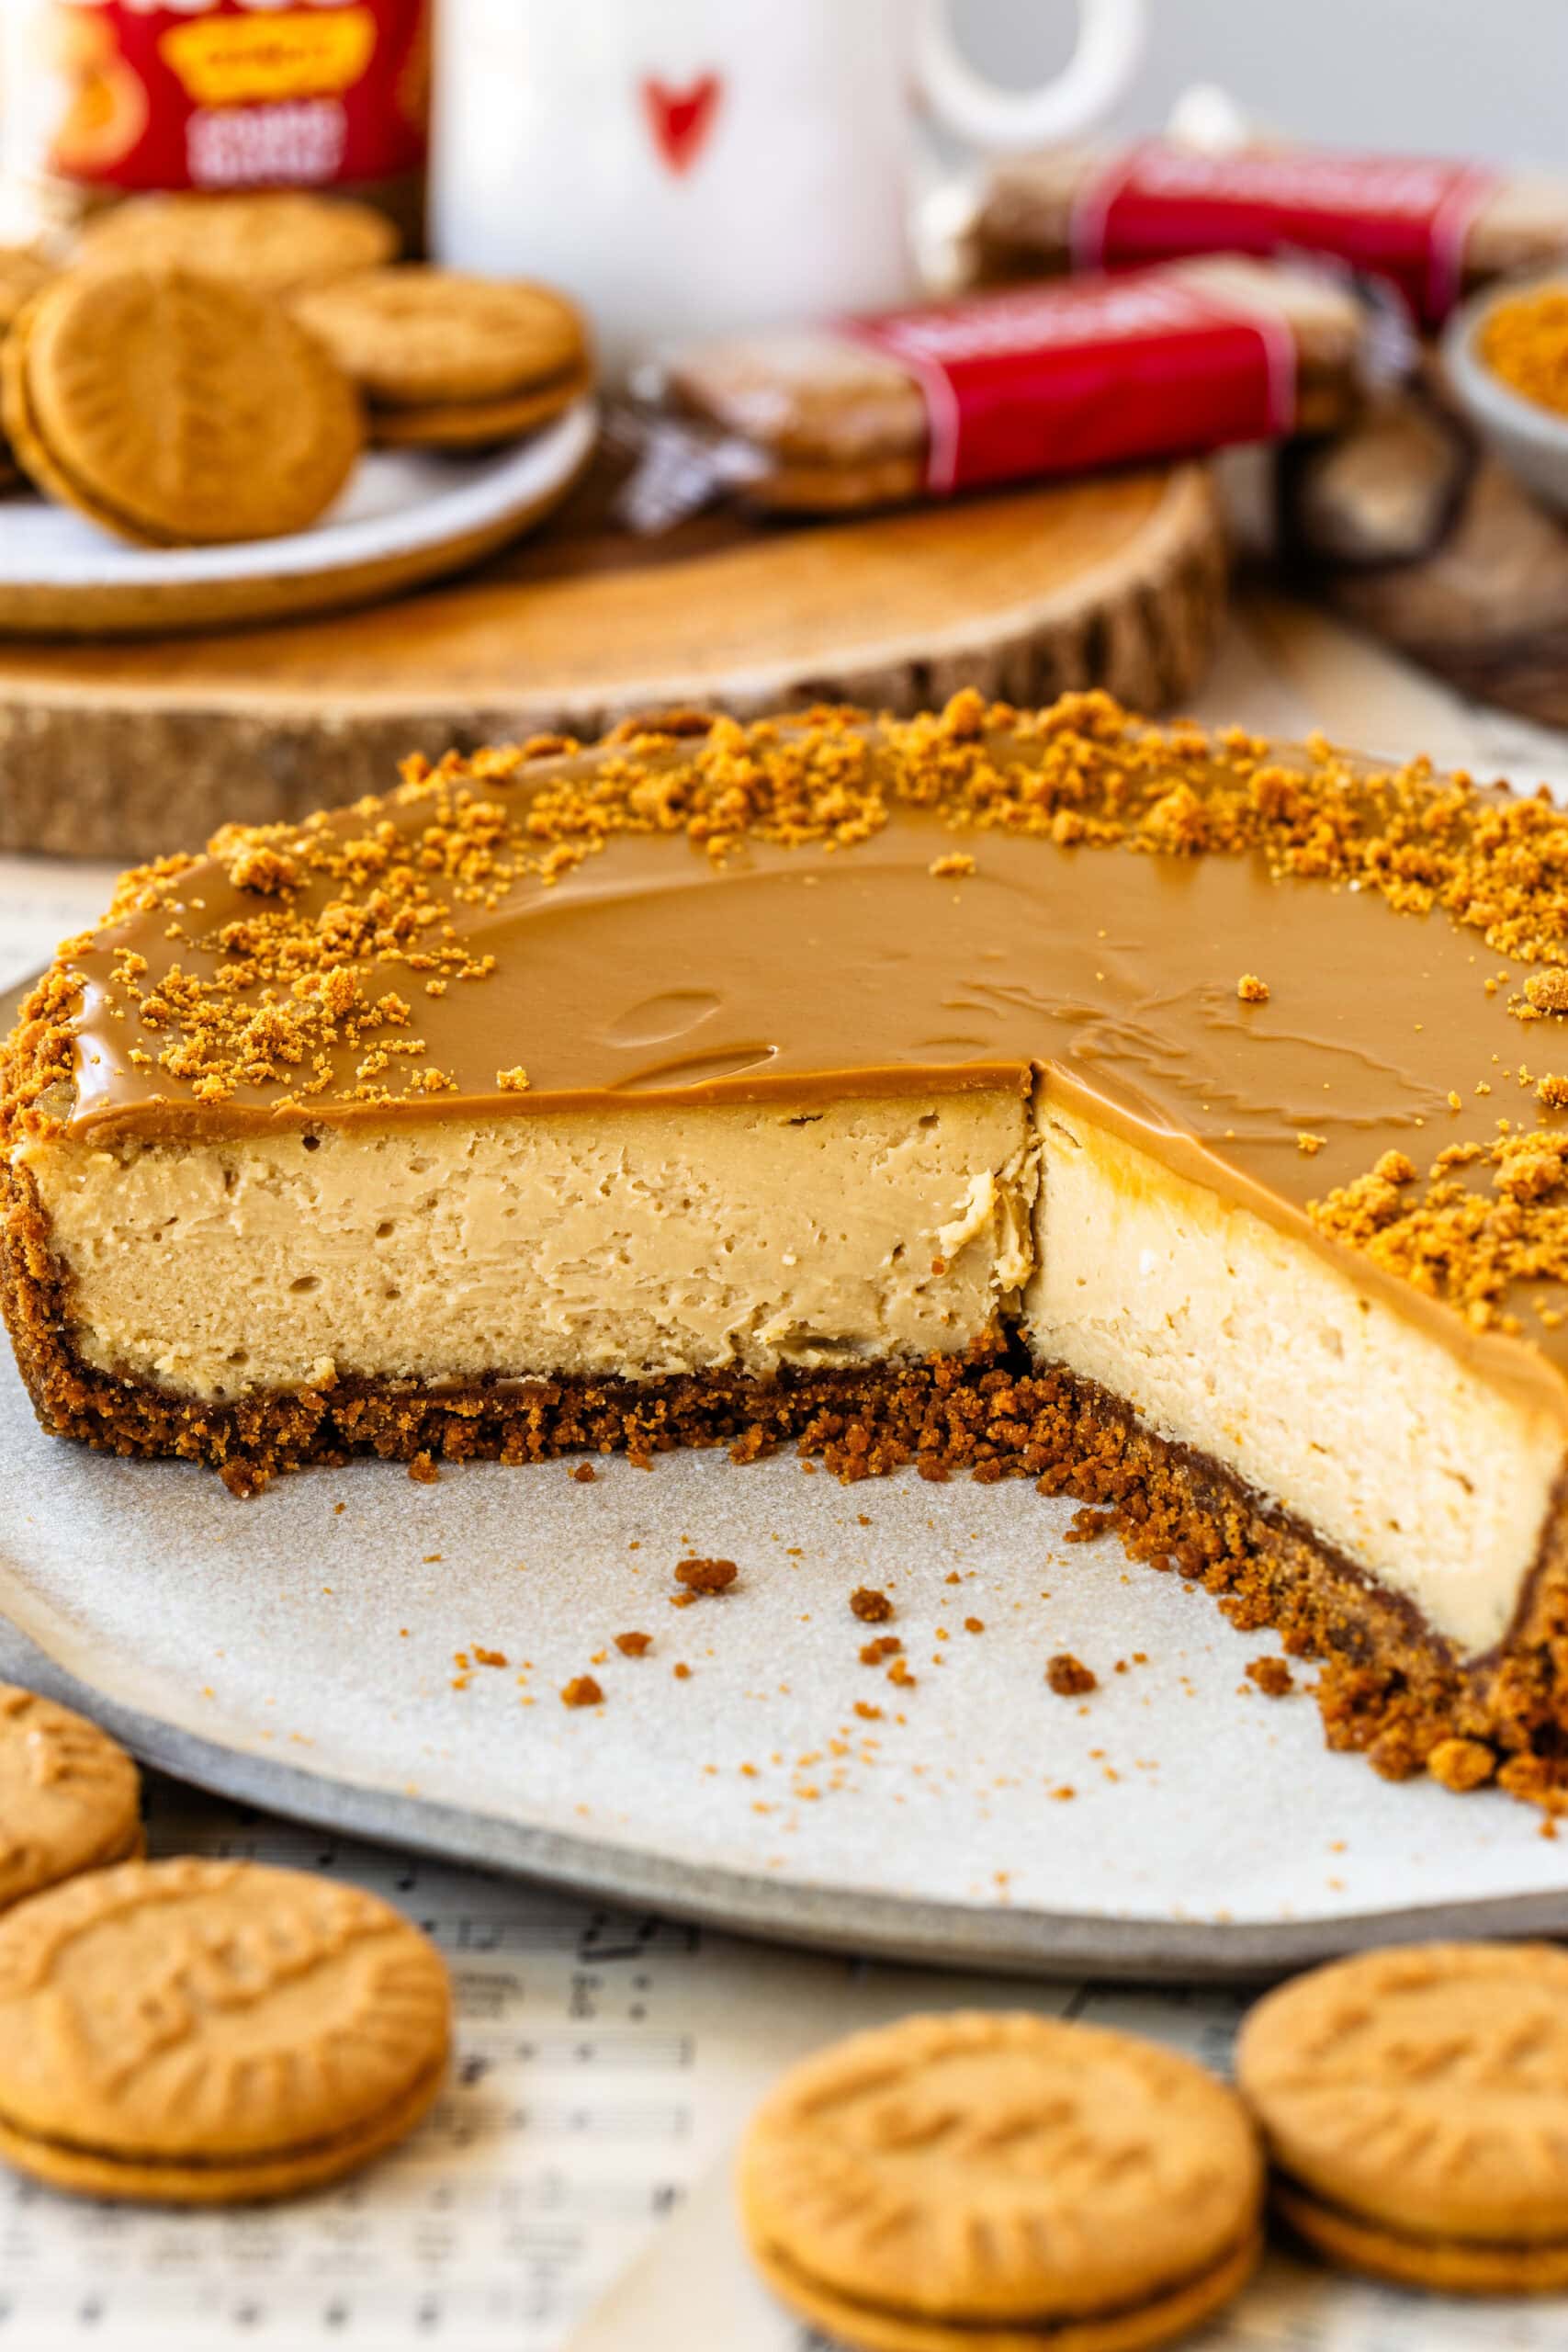
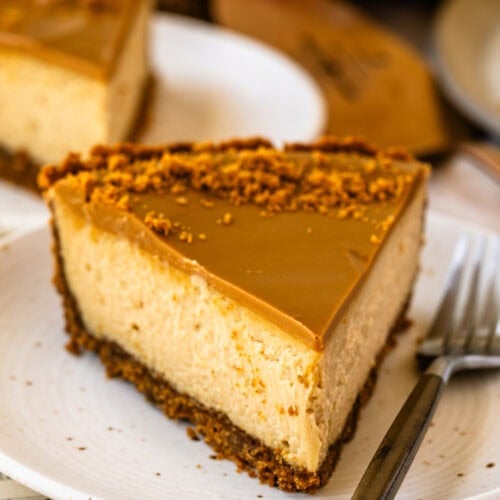
Before serving, pour melted Biscoff cookie butter over the top and spread it gently.
Sprinkle with Biscoff cookie crumbs. Slice and serve chilled or slightly softened.
Expert tips
A few small things make a big difference here:
- Make sure your cream cheese is fully softened before mixing
- Mix the eggs on low speed to avoid adding too much air
- Don’t overbake—the center should still jiggle slightly
- Let it chill fully before slicing for clean cuts
If the texture ever feels off, it’s usually from overmixing or under-chilling.
Storage / Make ahead
I usually make this a day ahead. Store it in the fridge for up to 4–5 days. Keep it covered so it doesn’t dry out. You can also freeze it (without the topping) for up to 1 month and thaw in the fridge.
Variations
I keep this version simple, but here are a few ways I change it:
- Add a thin layer of chocolate ganache or chocolate frosting under the topping
- Swirl extra Biscoff into the filling before baking
- Use a graham crust for a lighter flavor
- Turn it into mini cheesecakes using the same filling
FAQ
Yes, it actually works best when made the day before.
This is usually from overmixing the eggs or baking too long.
Yes, an 8-inch or 9-inch tart pan or a springform pan all work.
Yes, full-fat yogurt works well.
More recipes you might like
If you like this pie, you’ll probably also enjoy my Biscoff cheesecake for a more classic version, or my no-bake Biscoff cheesecake if you want something even easier. For something richer, my Biscoff chocolate cheesecake adds a deeper, more indulgent layer of flavor.
Final thoughts
This is one of those desserts that feels a little elevated but is actually very straightforward once you make it. If you try it, let me know how it turns out or tag me so I can see your version.
Biscoff Pie
Ingredients
Biscoff Pie Filling
- 2 8 oz packages cream cheese, softened
- ⅔ cup brown sugar 145g
- ¼ cup sour cream 60g
- ½ cup Biscoff cookie butter use creamy (125g)
- 2 tsp vanilla extract
- ¼ tsp salt
- 2 large eggs room temperature
Topping
- ½ cup Biscoff cookie butter use creamy (125g)
- ¼ cup Biscoff cookie crumbs
Instructions
Biscoff Cookie Crust
- Preheat the oven to 325°F (160°C).
- Prepare the Biscoff cookie crust according to this recipe. Press the crust firmly into the bottom and up the sides of an 8-inch deep tart pan (see notes below for pan options). Do not grease the pan before adding the crust.
- Bake the crust for about 10-12 minutes. Set it aside to cool.
Biscoff Filling
- In a large bowl, beat the softened cream cheese for one minute. Add the brown sugar and beat until smooth and creamy, about 2–3 minutes.
- Add the Biscoff cookie butter and mix to combine.
- Add the sour cream and mix until fully combined and smooth, scraping down the sides of the bowl as needed.
- Add the eggs one at a time, mixing on low speed just until incorporated after each addition. Along with the second egg, add the vanilla and salt. Mix to combine.
- Pour the filling over the prepared crust and smooth the top.
To Bake
- Bake for 40–50 minutes, until the edges are set but the center still has a slight jiggle.
- Turn the oven off, crack the door open, and leave the pie inside for 20 minutes.
- Remove from the oven and let it cool completely at room temperature. Then transfer to the refrigerator and chill for at least 6 hours, or overnight, until fully set.
To Decorate
- Before serving, pour about ½ cup of melted Biscoff cookie butter over the top and sprinkle with Biscoff cookie crumbs. To melt the cookie butter, simply place it in the microwave for 5-10 seconds at a time, stirring to ensure even melting.
- Other options for decorating this pie are: whipped cream, filled Biscoff cookies, chocolate shavings, candied pecans.