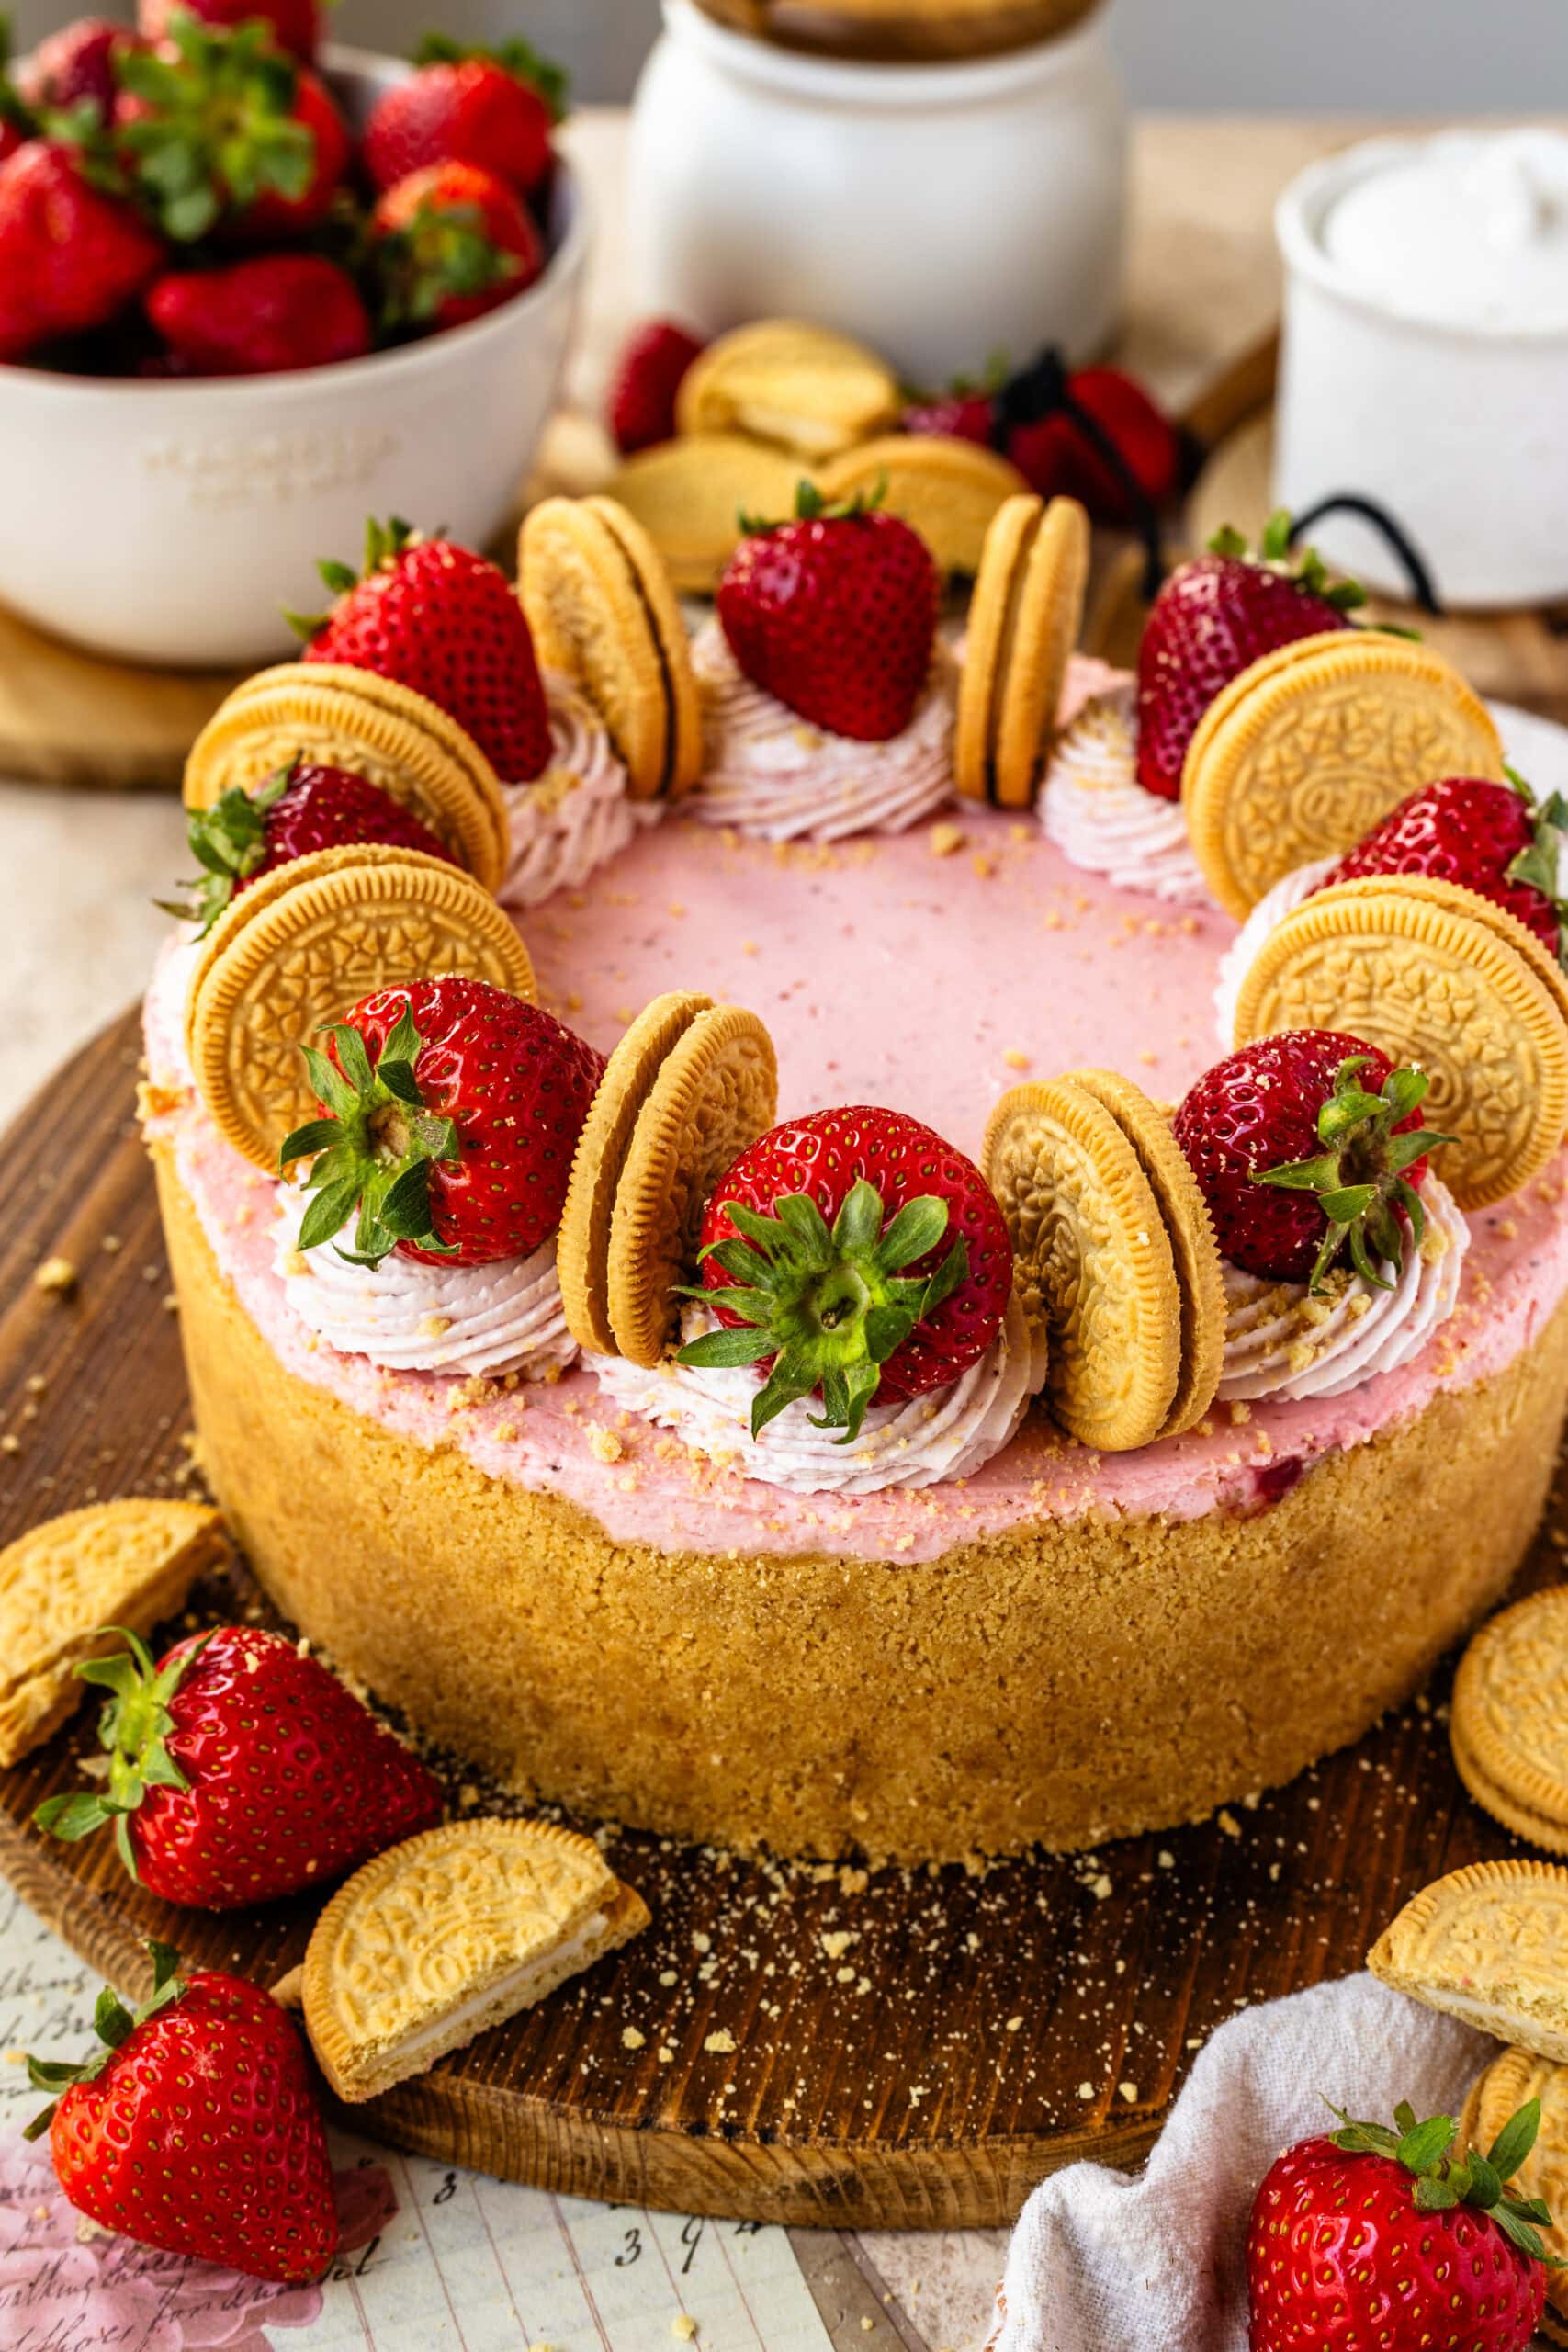
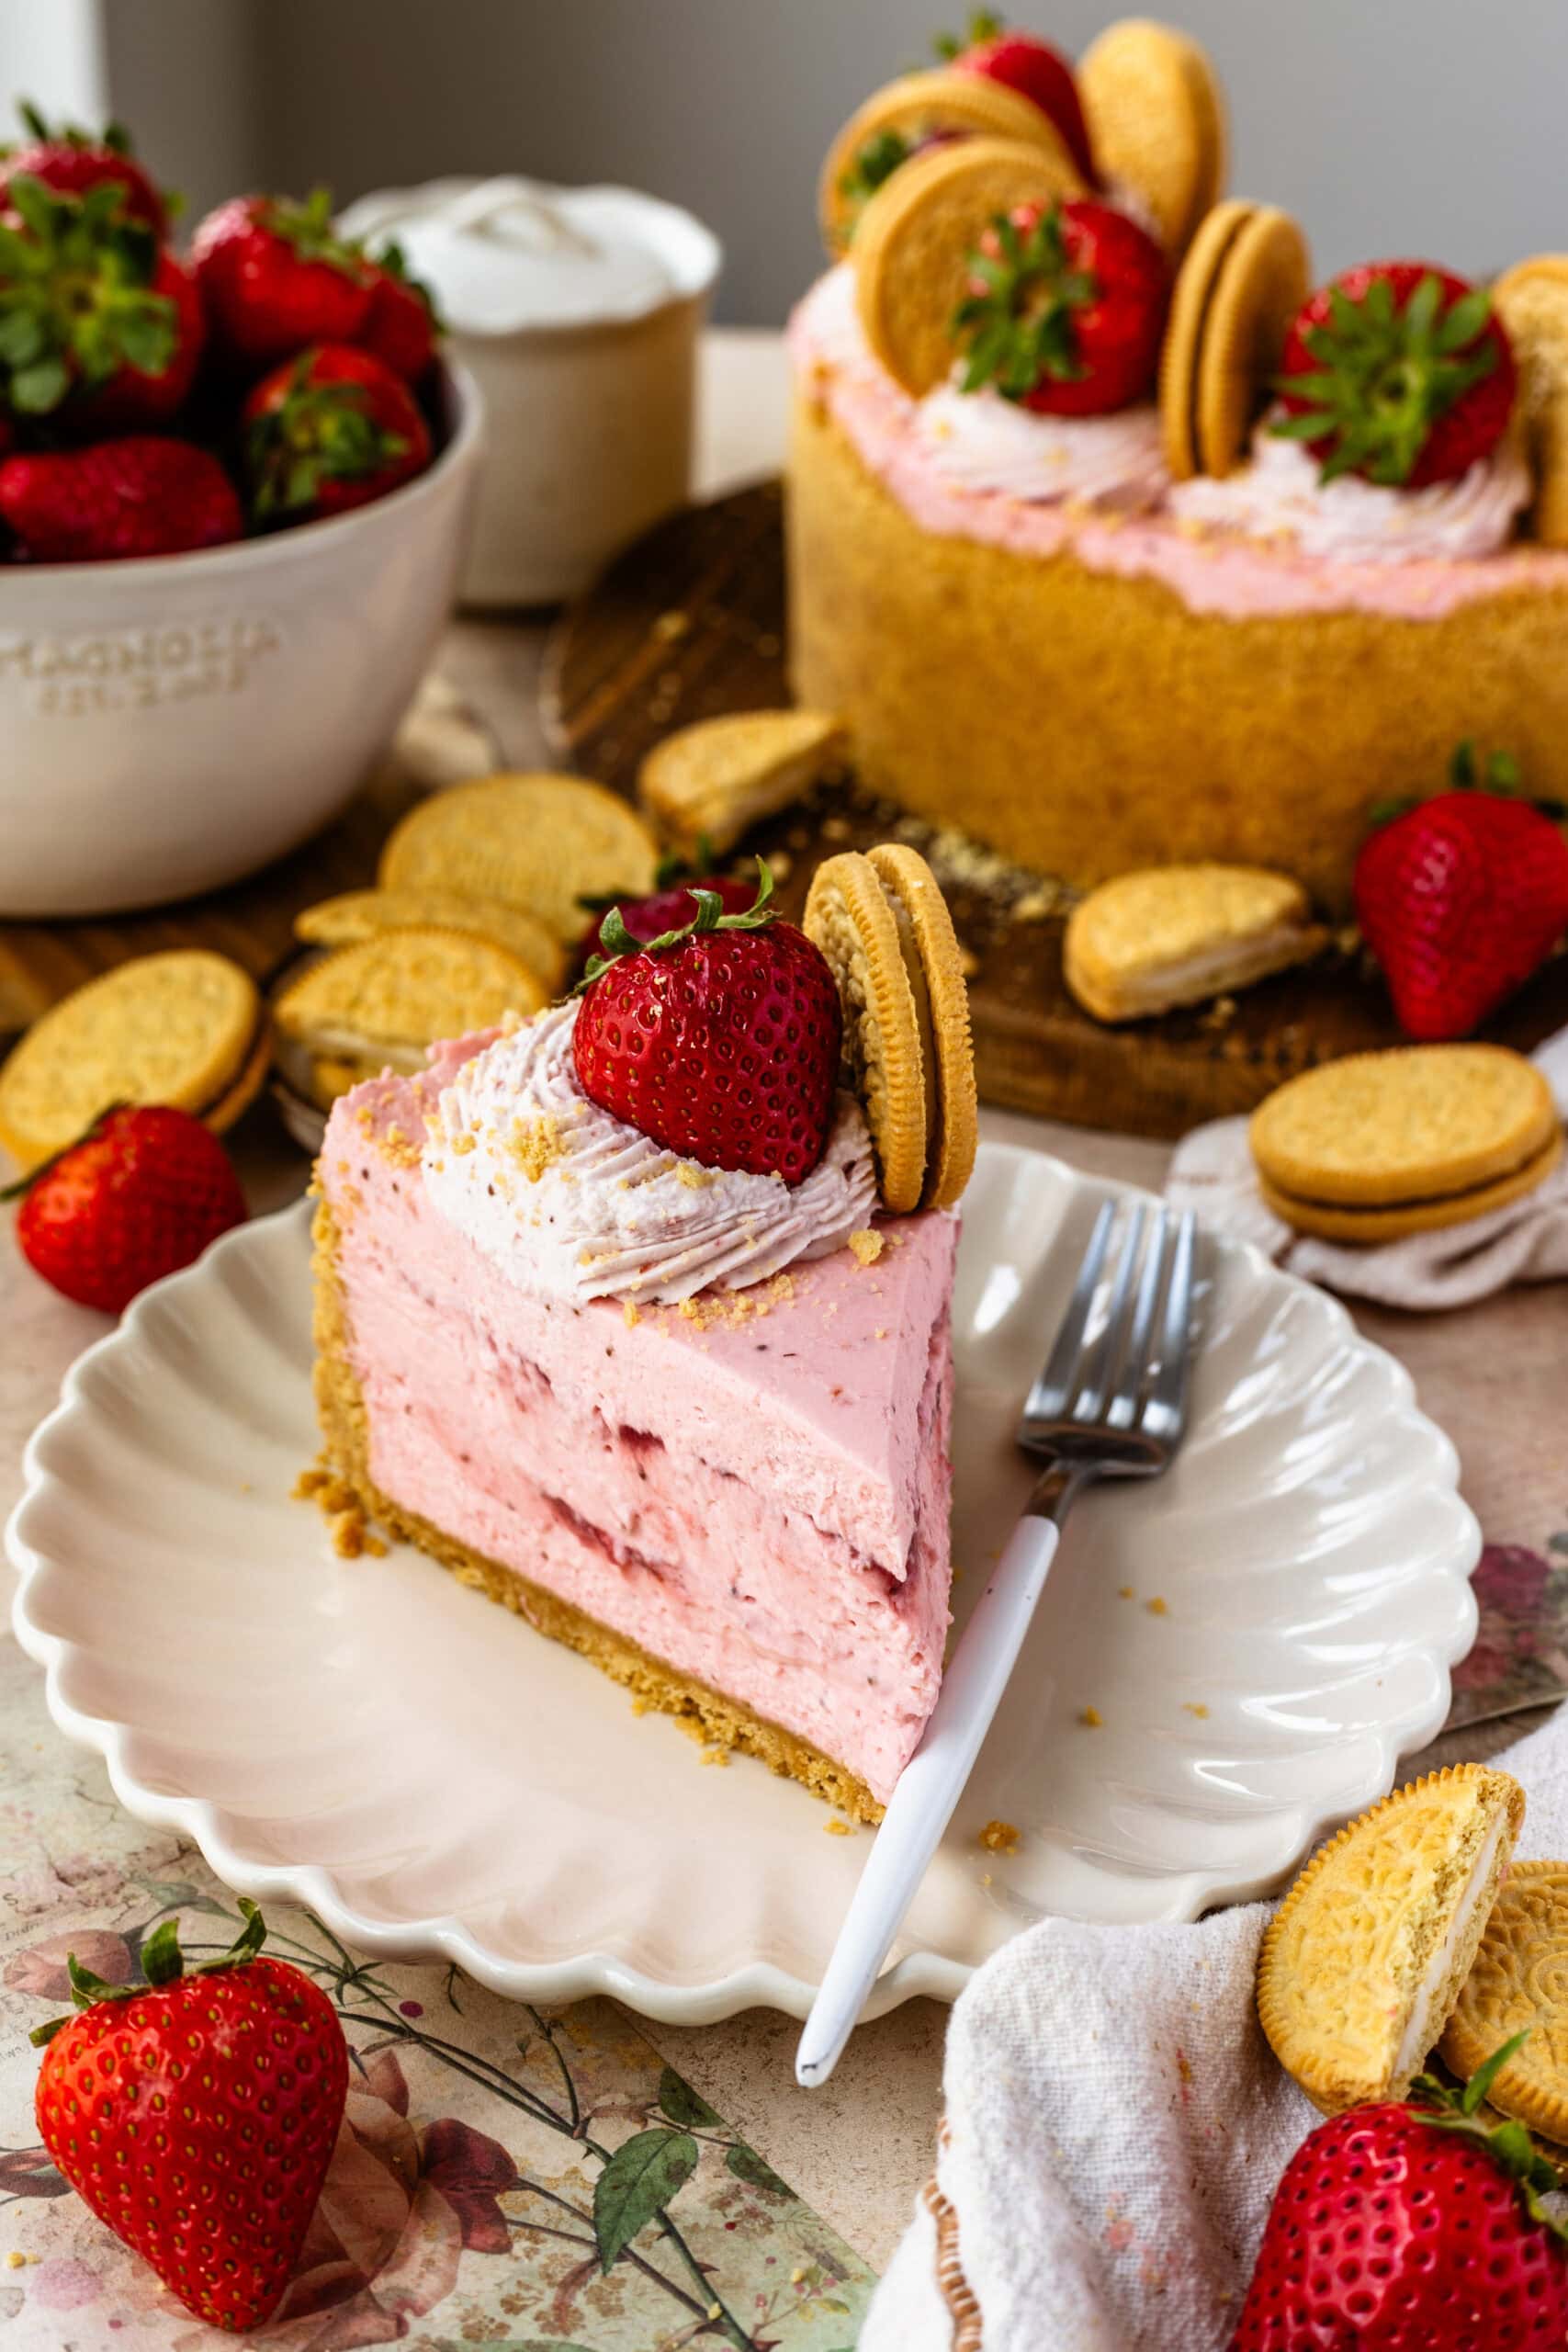
No-Bake Strawberry Cheesecake
Strawberry cheesecake is one of those desserts I’m surprisingly particular about. The flavor needs to be unmistakably strawberry—bright, fragrant, and fresh—without tipping into artificial or overly sweet. That’s why, while developing this no-bake version, I took the extra step of cooking down fresh strawberries into a concentrated puree and weaving it directly into the filling.
I’ve made plenty of strawberry cheesecake variations over the years, both baked and no-bake, and this one sits right at the center of what I like most about the flavor. I’m currently working on a cheesecake book and have written well over one hundred cheesecake recipes, which has made me very aware of how easily strawberry can fade once it’s mixed into cream cheese. This version keeps the strawberry front and center while still delivering the creamy, light texture I expect from a no-bake cheesecake.
Why I Love This NO-BAKE Version:
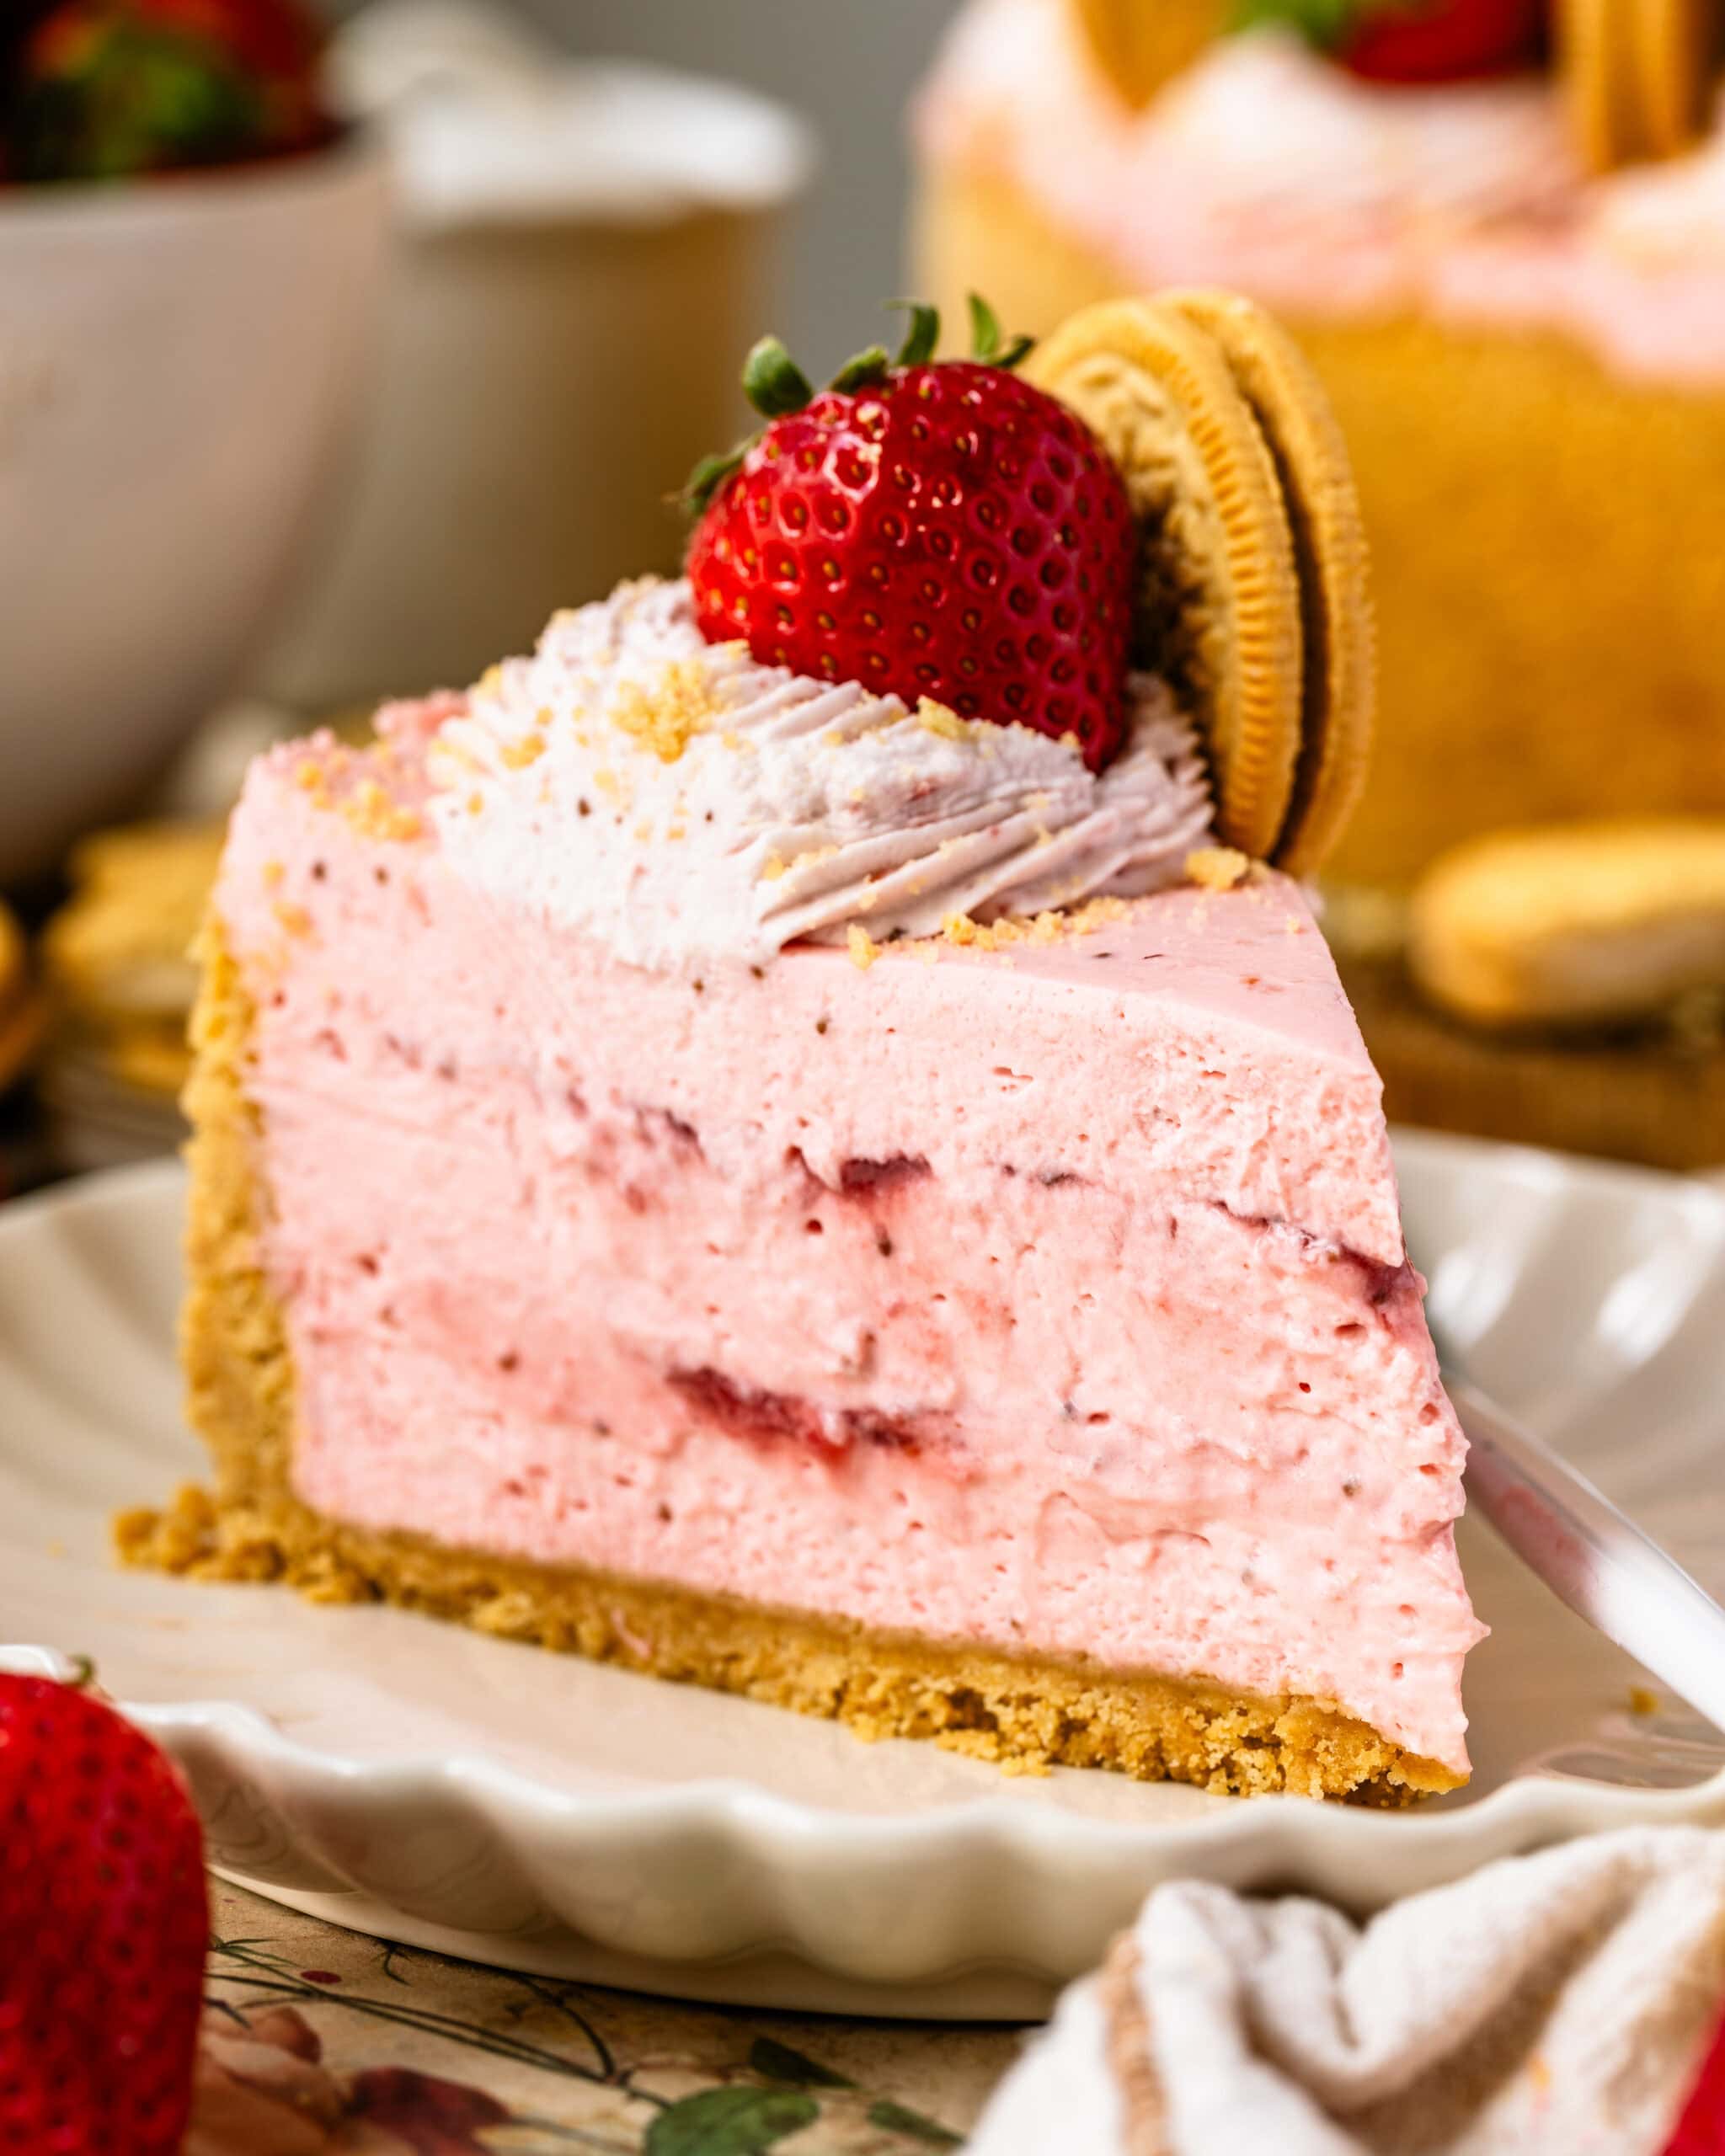
This cheesecake is completely no-bake, making it ideal for warm weather or busy days. The strawberry flavor comes from a reduced fresh strawberry puree, which gives the filling real depth instead of a faint berry note. The swirl of sauce adds contrast, while the golden Oreo crust keeps everything balanced and nostalgic. I turn to this recipe every summer when I want something refreshing, but also impressive!
This post may contain affiliate links. I earn a commission from qualified purchases. Please read our Privacy policy here.
Key Ingredients & Why I Use Them
Getting the ingredients down is the most important step it getting a perfect cheesecake.
- Fresh strawberries are cooked down into a thick, concentrated puree, which intensifies flavor and helps the cheesecake set properly. I always use fresh for the most flavor.
- Cream cheese and sour cream create a smooth, tangy base while whipped cream lightens the texture.
- Gelatin gives the cheesecake structure without making it stiff.
- Golden Oreos add sweetness and a subtle vanilla note that pairs especially well with strawberries.
How To Make This Cheesecake
In this post I will show you how to make this no-bake strawberry cheesecake The full recipe card is at the bottom of this post, but here you can enjoy my detailed instructions with pictures to help set you up for success.
Step 1: Strawberry Sauce
First we should make the strawberry sauce, since it has to cool down before using it in the recipe, and it takes about 40 minutes to reduce. Place the strawberries in a food processor or blender and process until it’s a puree.
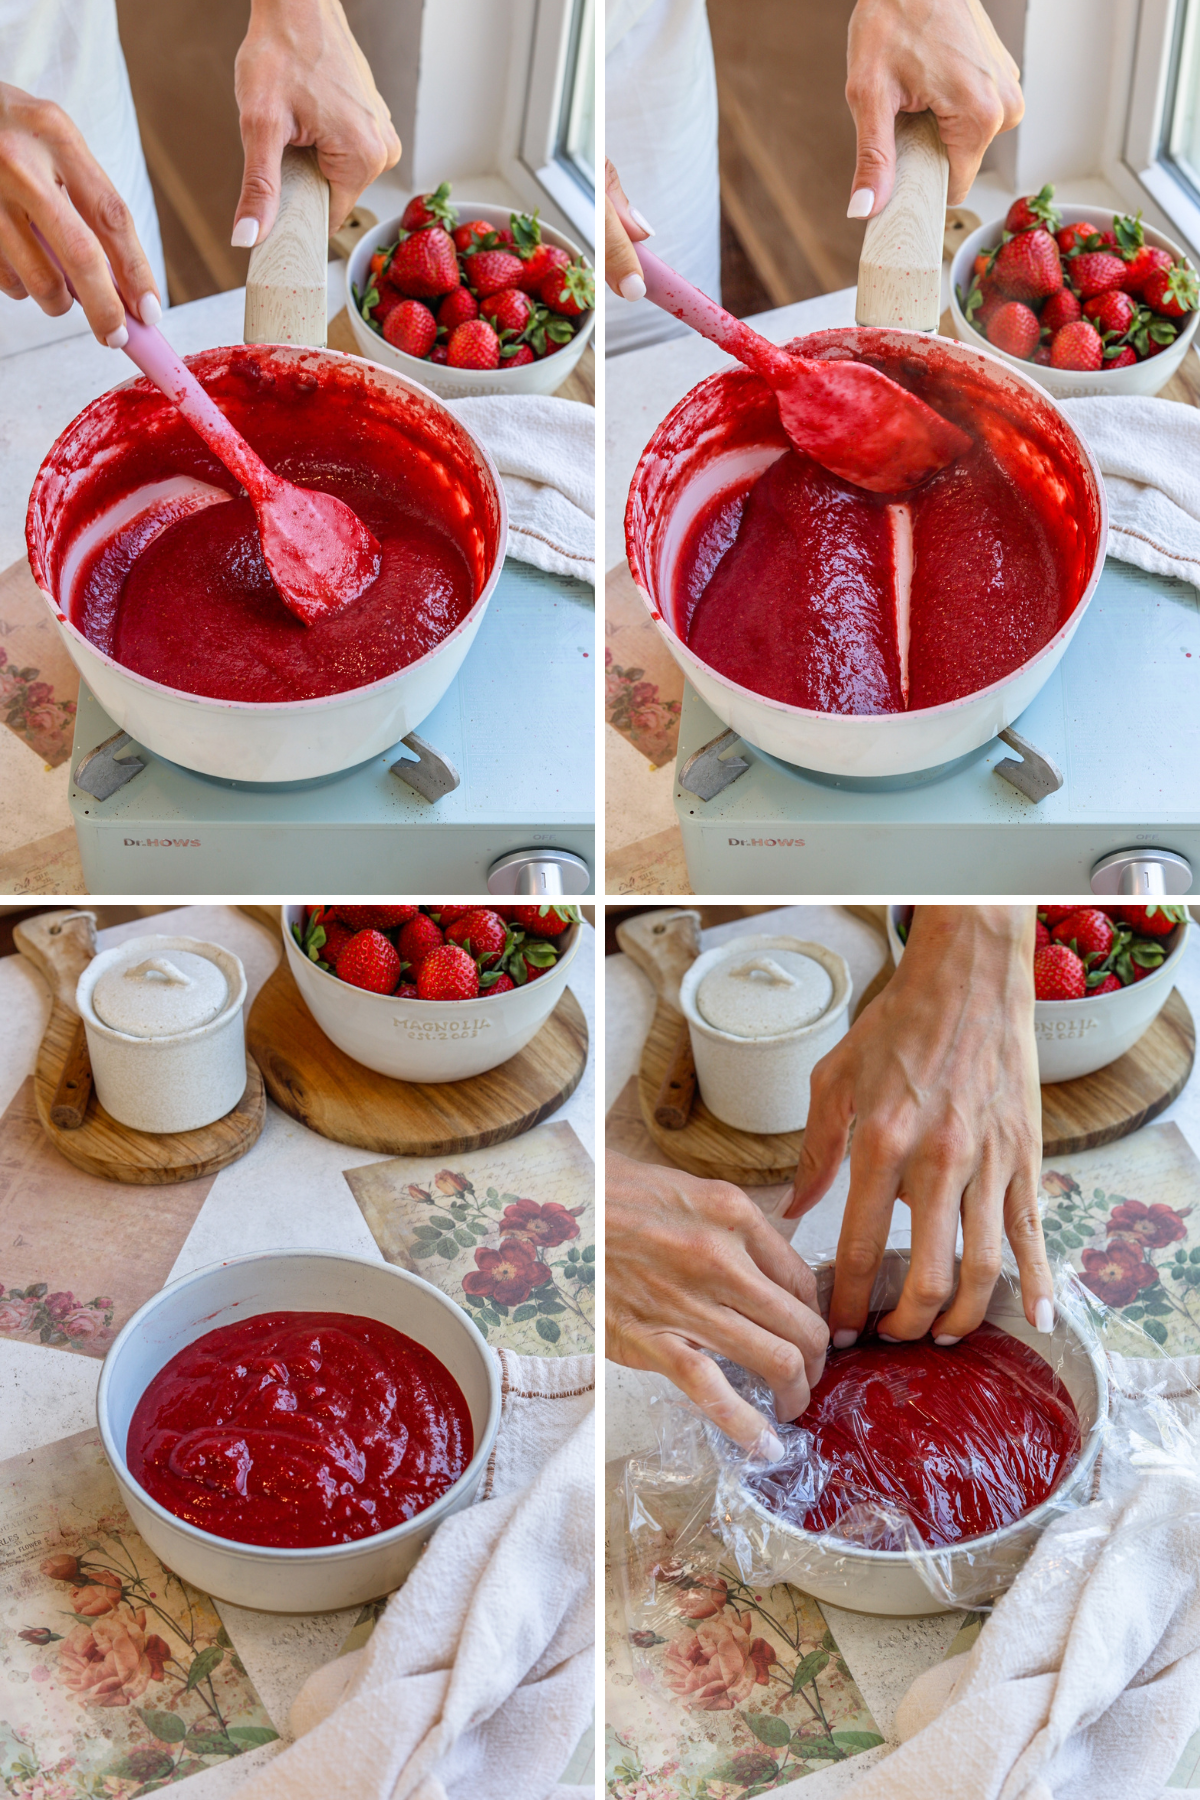
Add to a saucepan with the sugar, and cook over medium heat for about 40 minutes. Remember to stir occasionally.
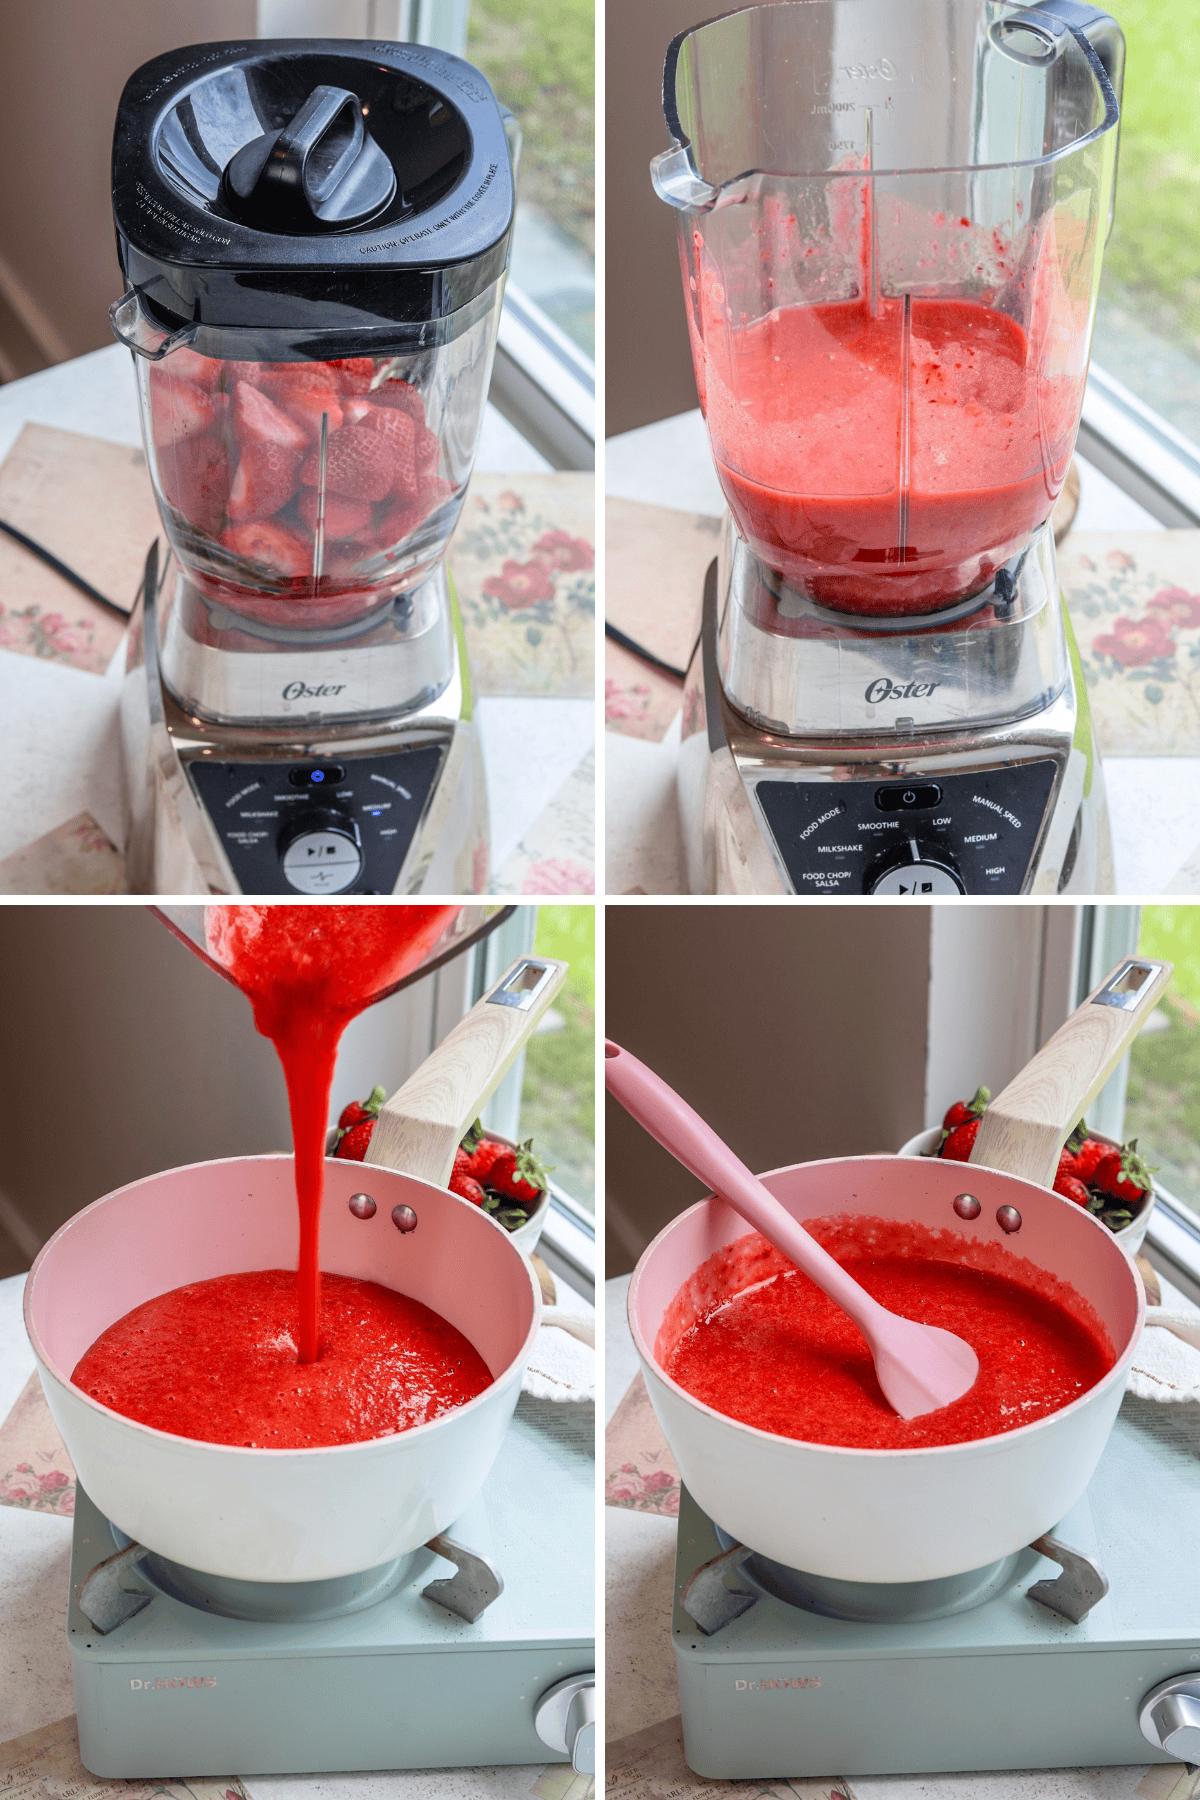
Cook until the puree is reduced to 1 1/4 cup, because that’s about how much you will need for the recipe. You will need 3/4 cup for the cheesecake batter, 1/3 cup for the swirl, and 2 tbsp for the Strawberry Whipped Cream. Pour the sauce into a bowl. Cover with plastic wrap, let it cool down completely, and place it in the fridge until ready to use.
Step 2: Golden Oreo Crust
This Golden Oreo Crust compliments the strawberry cheesecake so well. But if you can’t find golden Oreos, a graham cracker crust works just as well. Check out that recipe here.
Add the Oreos to your food processor, and pulse into crumbs. Then add them to a bowl with melted butter and mix to combine.
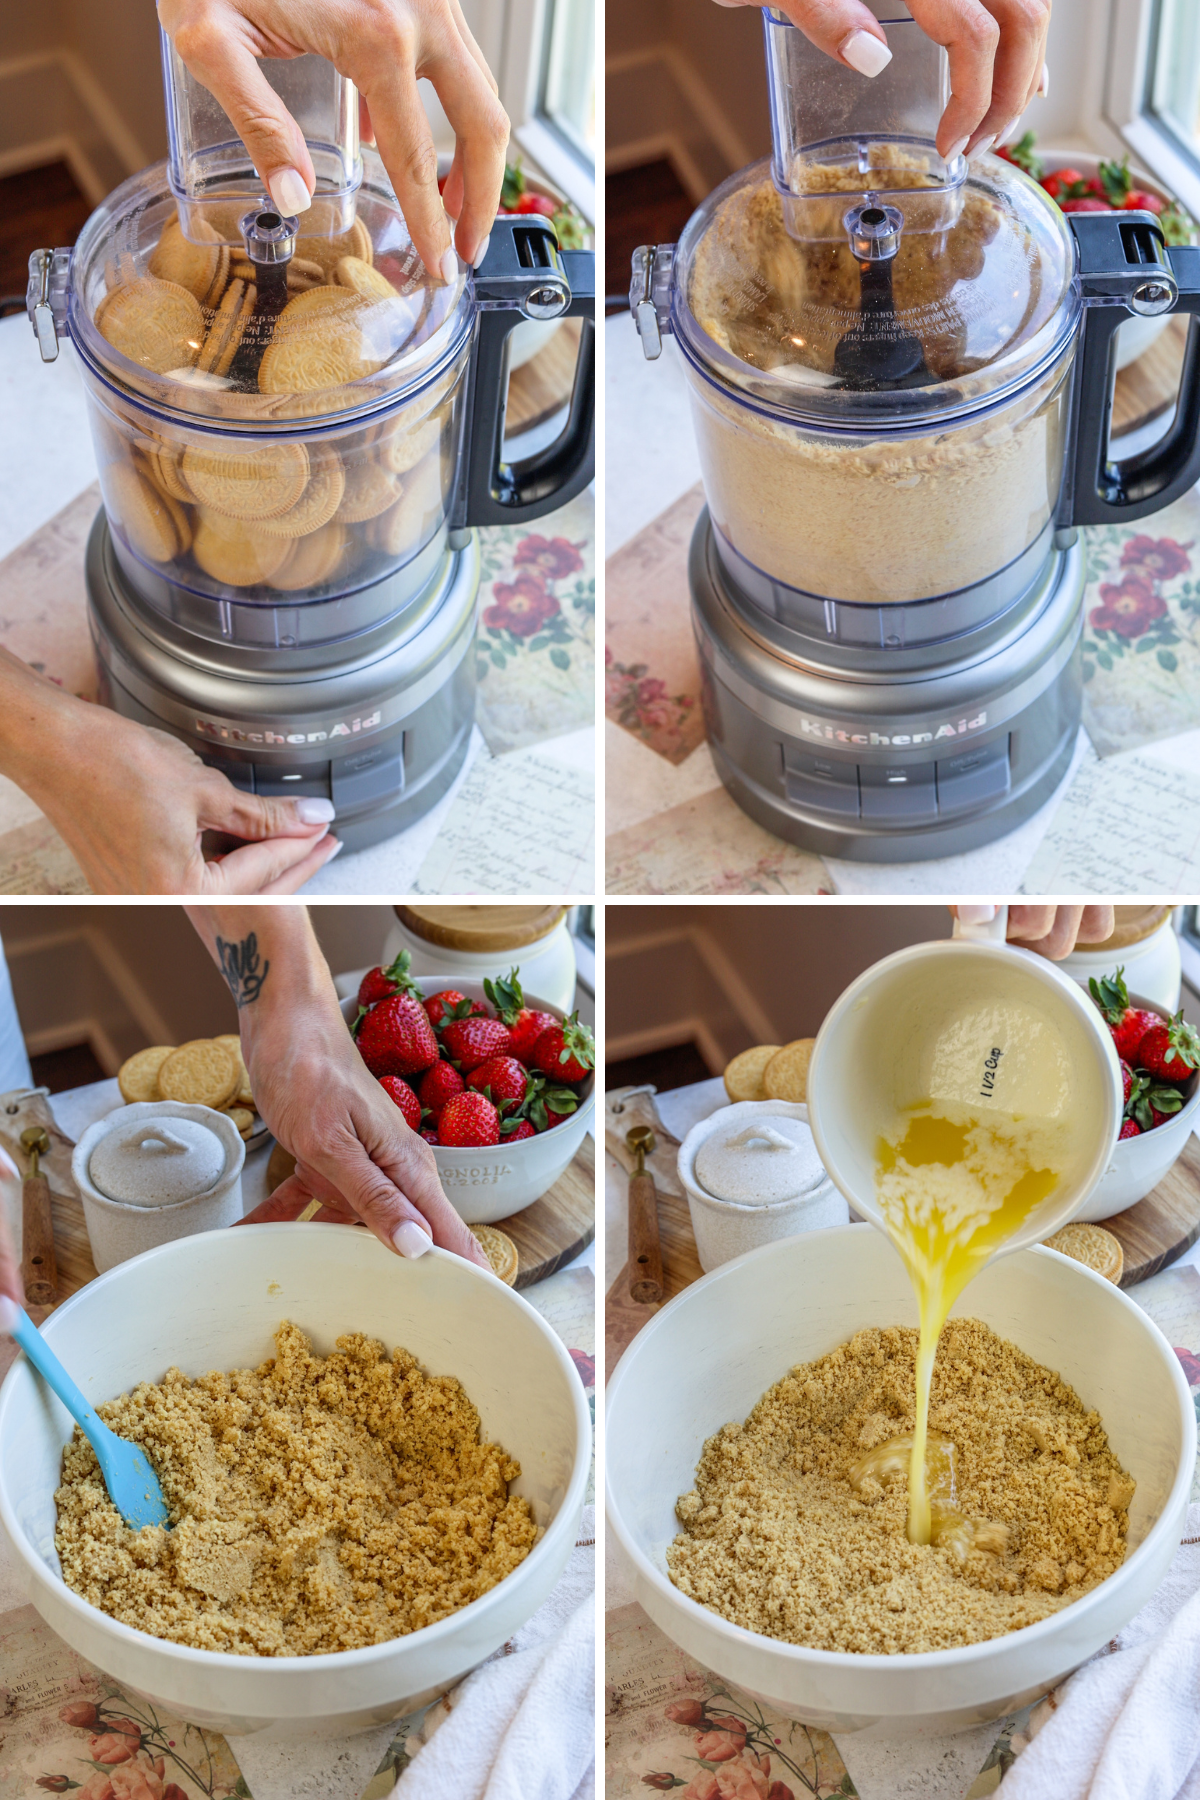
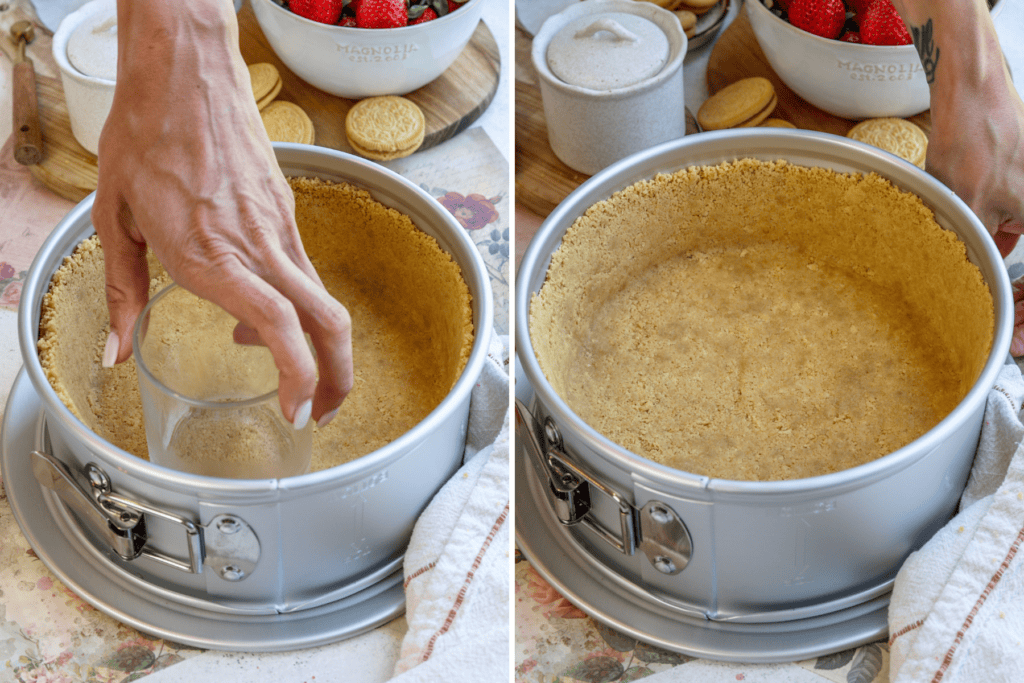
Pour the crust on the bottom of the springform pan and press it down the bottom and up the sides of the pan. I use a Fat Daddio 8-inch pan that is 3″ tall. You can use also use a 9-inch pan to make this recipe. But if you are using an 8″, make sure it’s at least 3″ deep.
Next, freeze the crust until you’re ready to fill it.
Step 3: Blooming the Gelatin & Making the Strawberry Batter
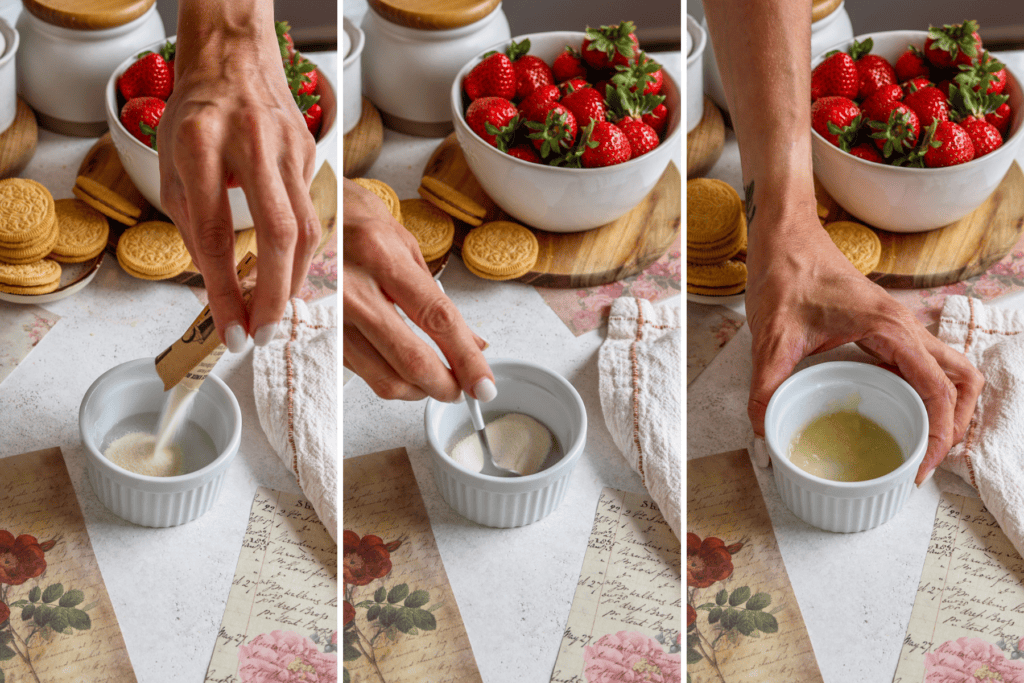
Because this is a no-bake recipe, I use gelatin to get the cheesecake to set. Add the water and gelatin to a small bowl. Mix to combine. Let it bloom for one minute. Once somewhat dissolved, microwave the gelatin for a few seconds until it melts. Don’t microwave too long, or the gelatin will bubble up and spill all over the microwave. Just microwave 5 to 10 seconds at a time to melt. Set it aside to cool down.
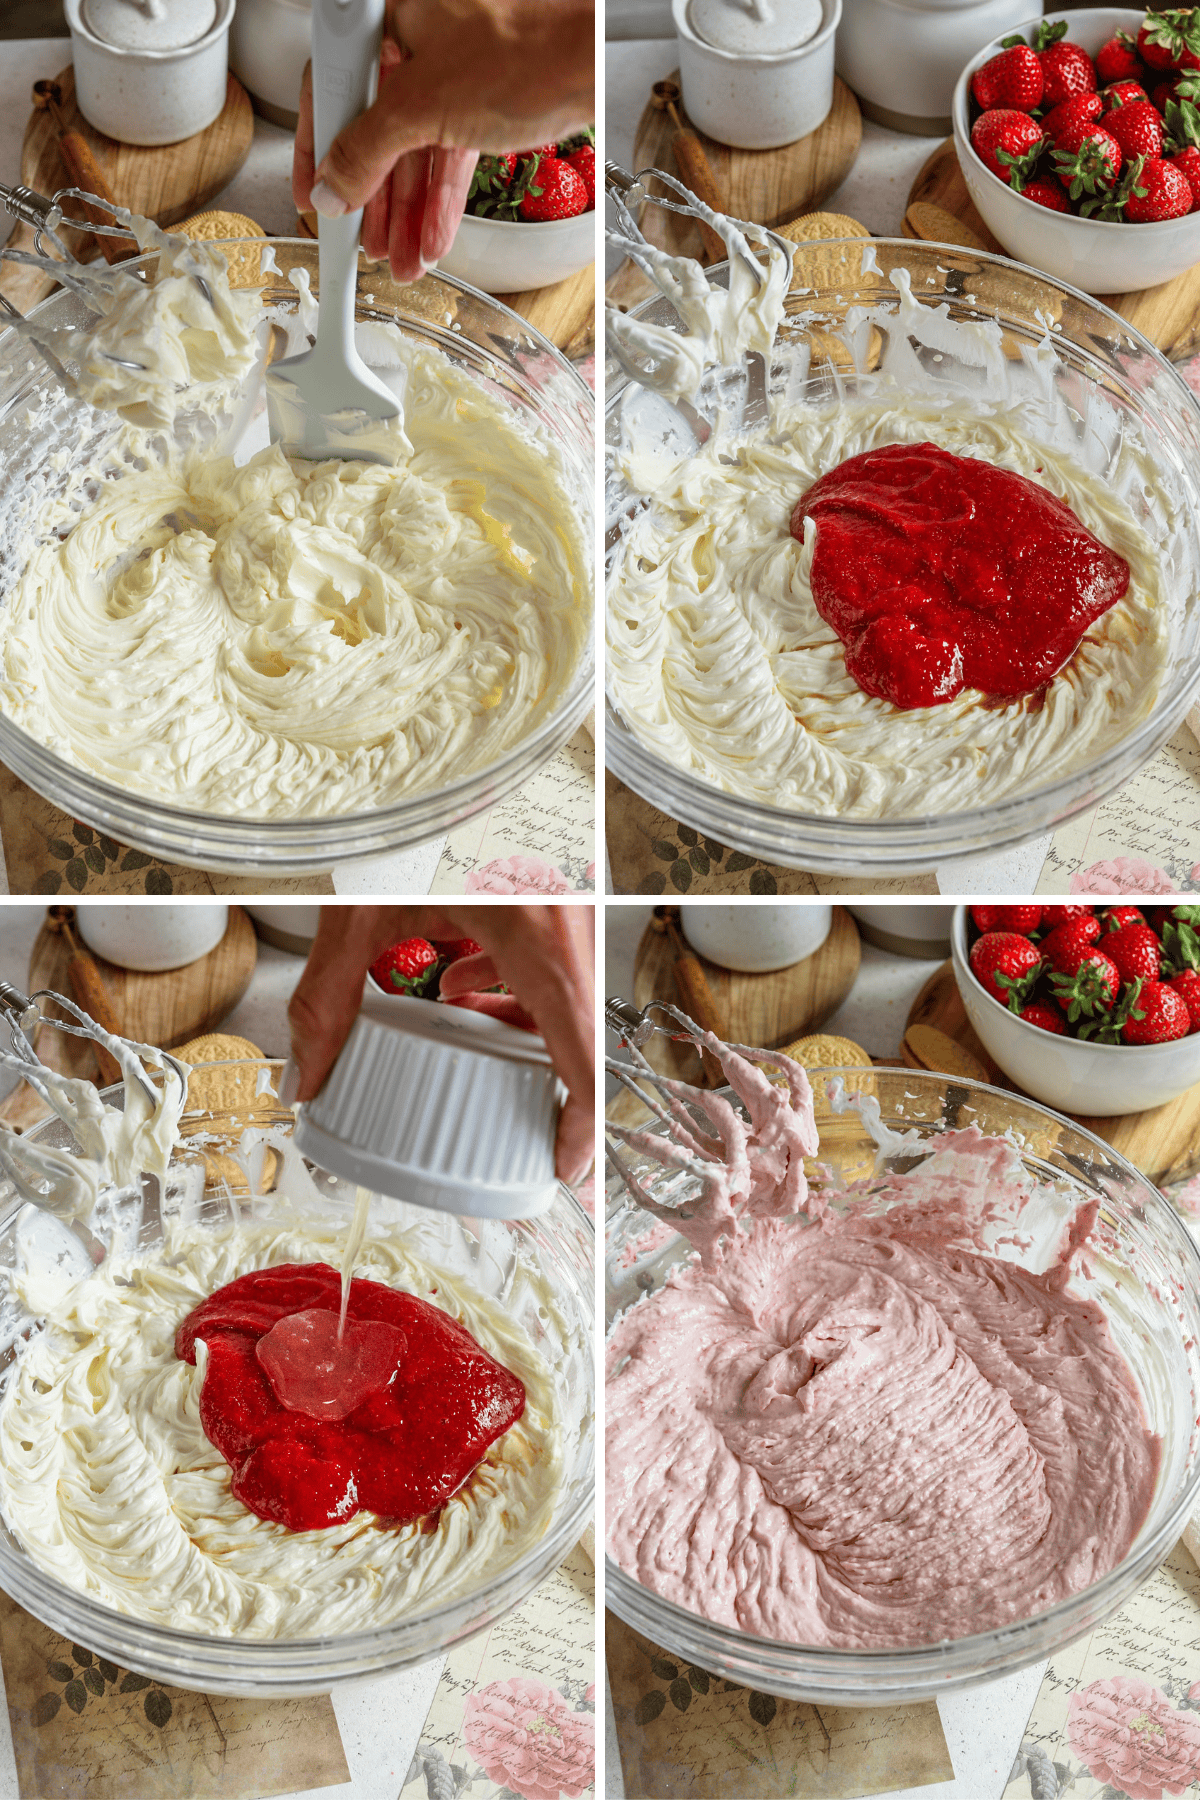
In a separate bowl, I then beat the cream cheese until smooth with an electric mixer for about 2 minutes. Once fluffy, I add half of the powdered sugar. Once incorporated, I add the sour cream, vanilla, strawberry puree, and the cooled gelatin. Make sure all your ingredients are room temperature so they incorporate evenly. This is especially important for a no-bake cheesecake.
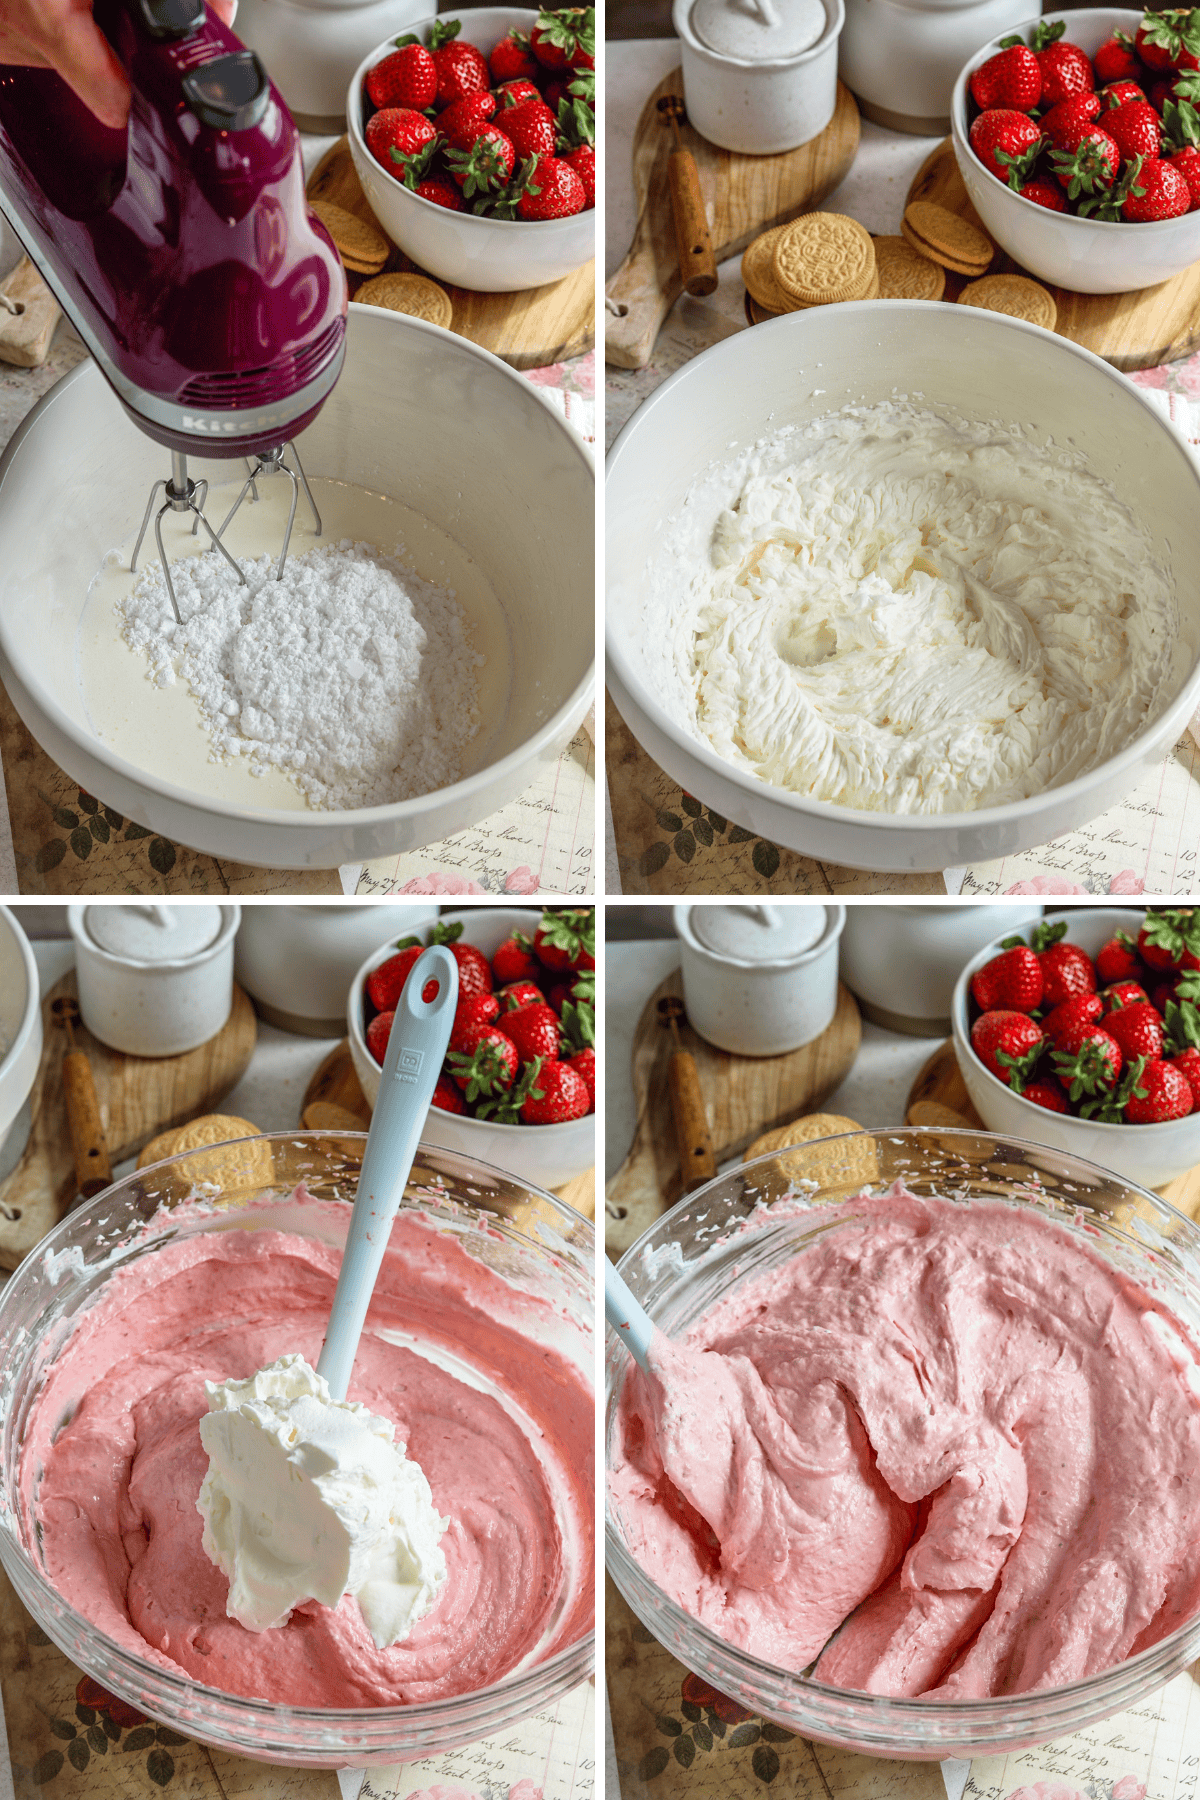
Step 4: Whip Cream & Add to Batter
Beat the heavy cream and remaining powdered sugar in a separate bowl until stiff peaks form. Add half of the whipped cream to the strawberry cream cheese mixture. Fold with a spatula until combined. Add the remaining whipped cream and fold again until the batter is smooth.
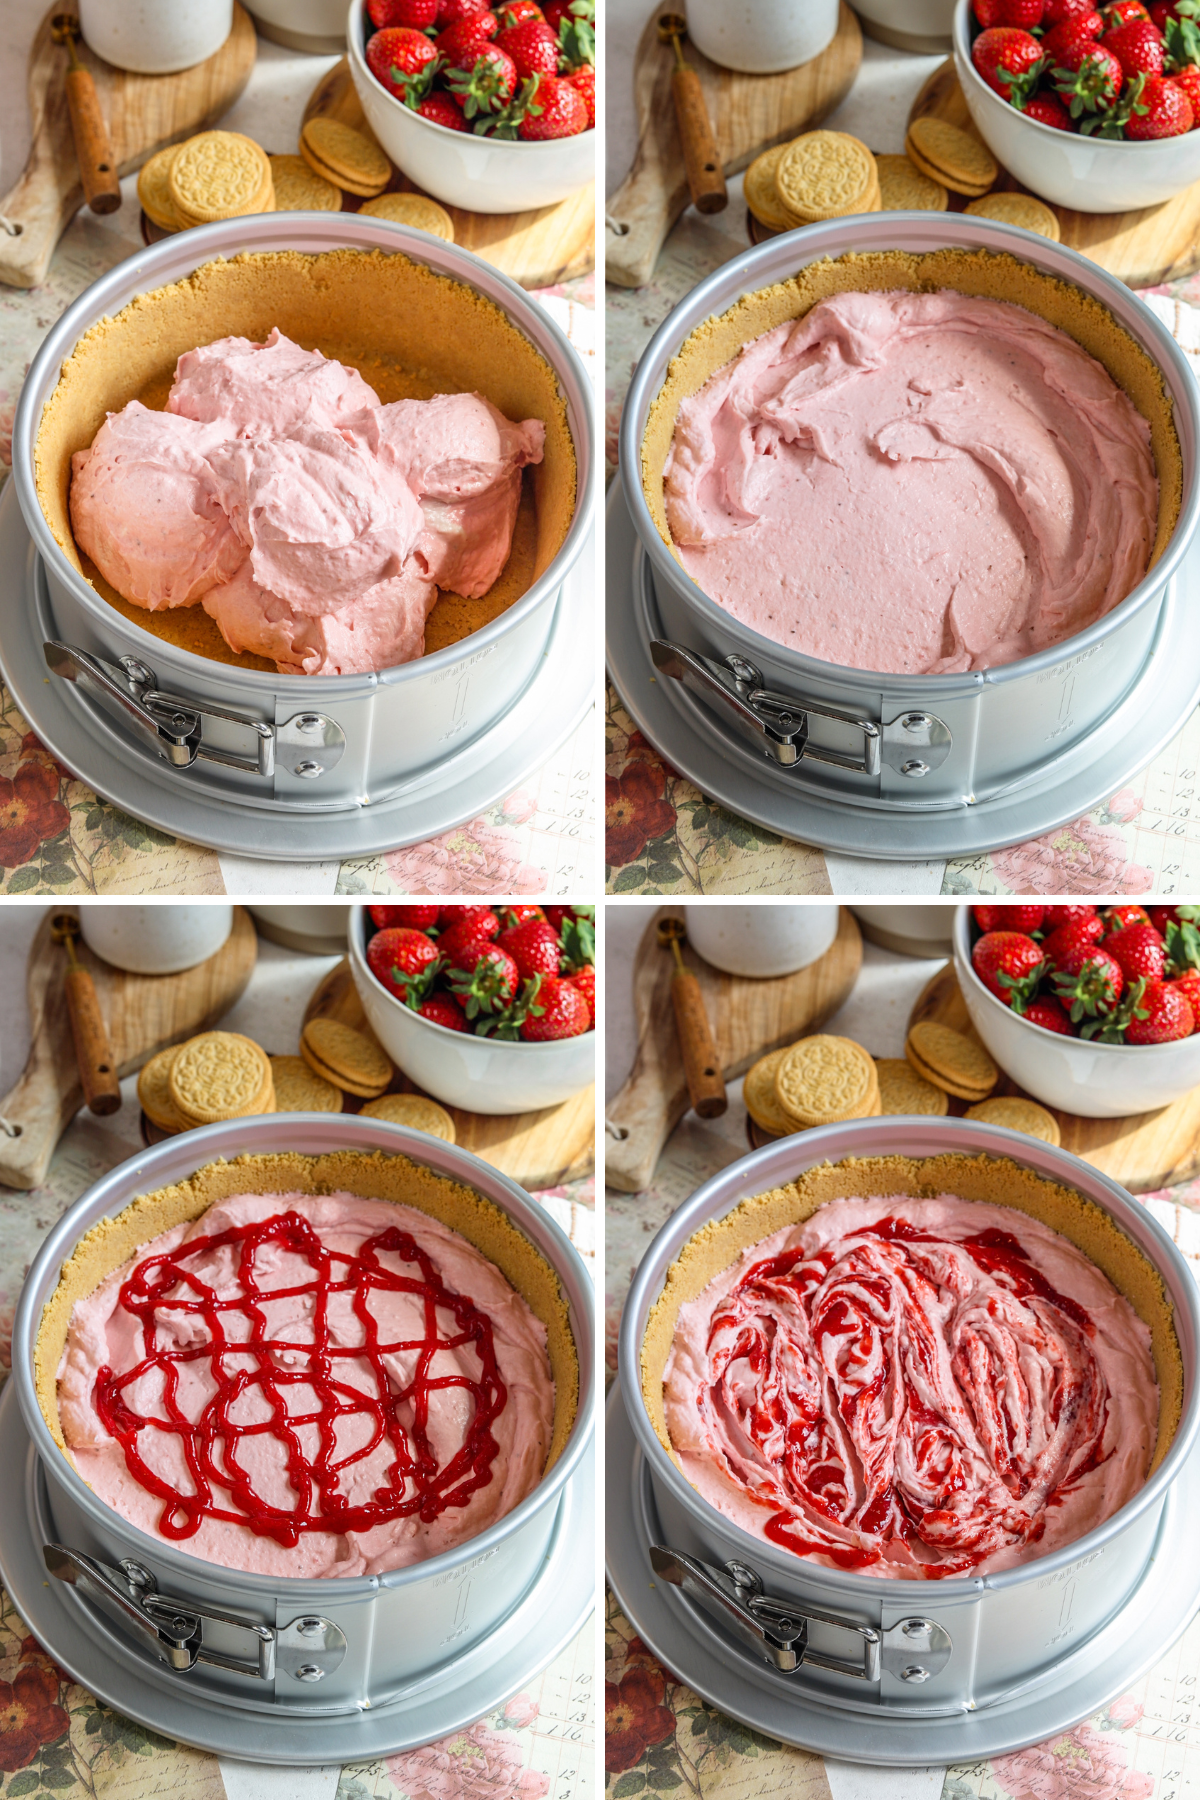
Step 5: Assembly & Chill
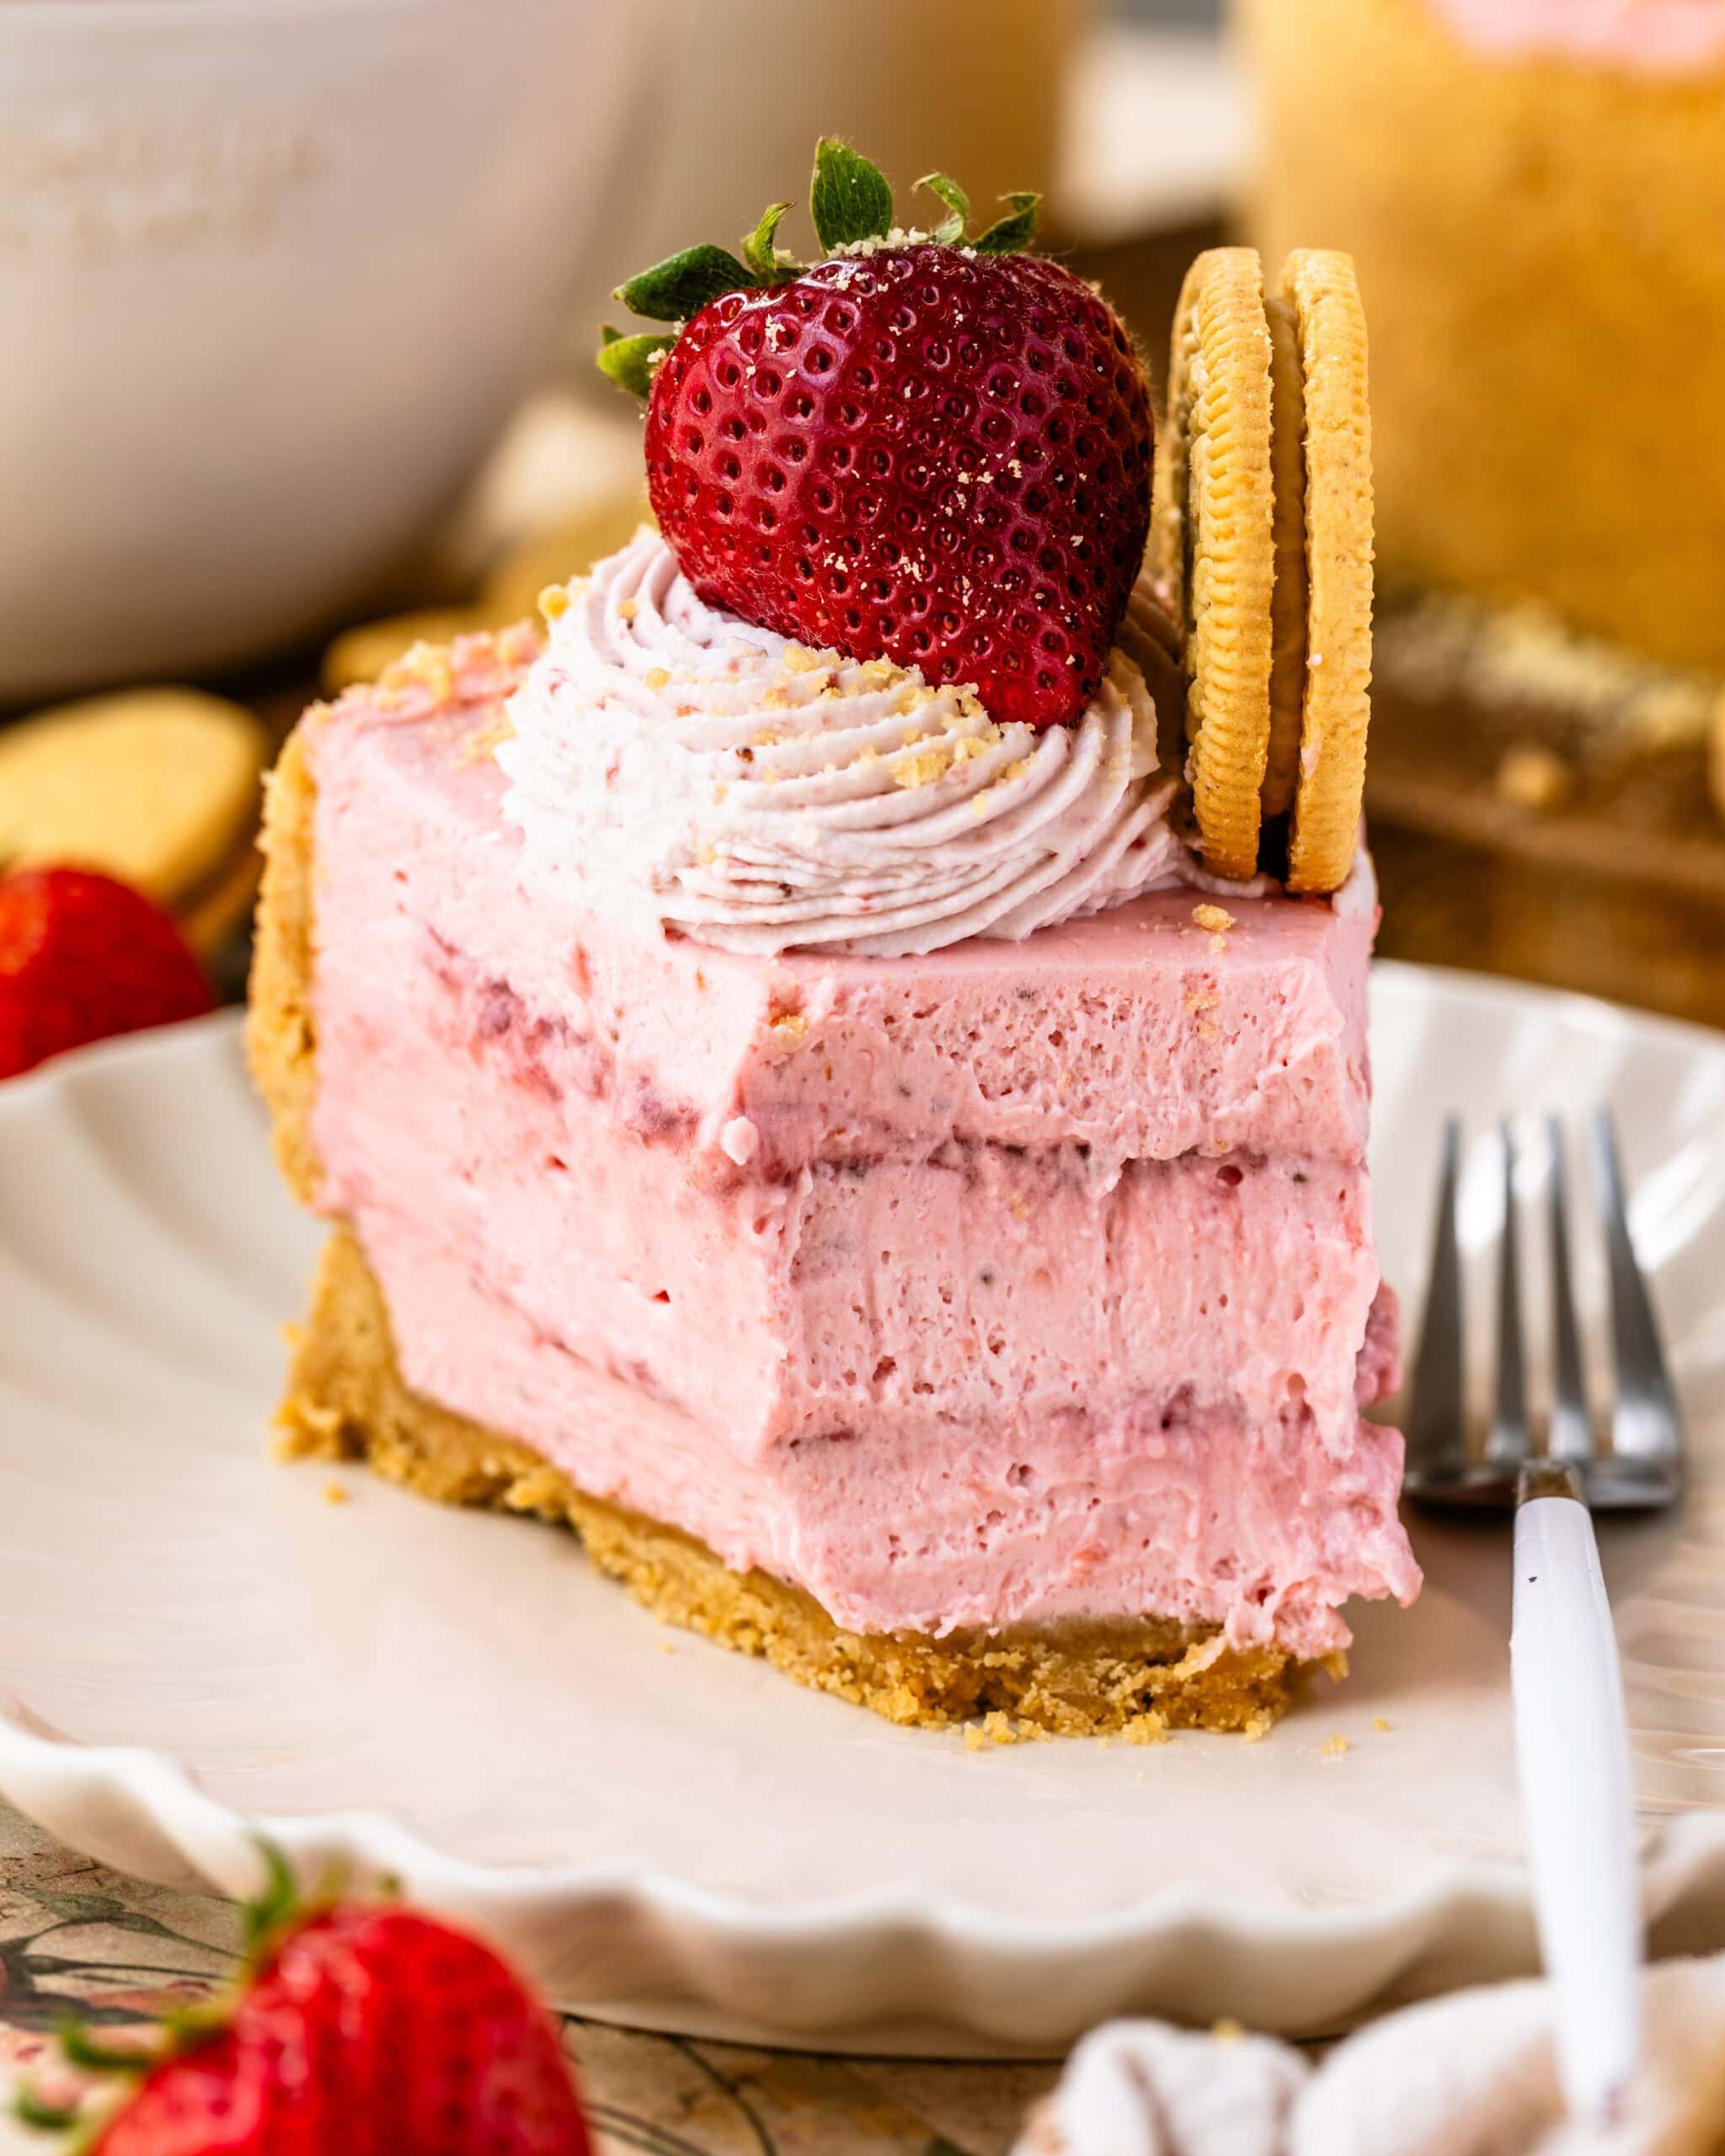
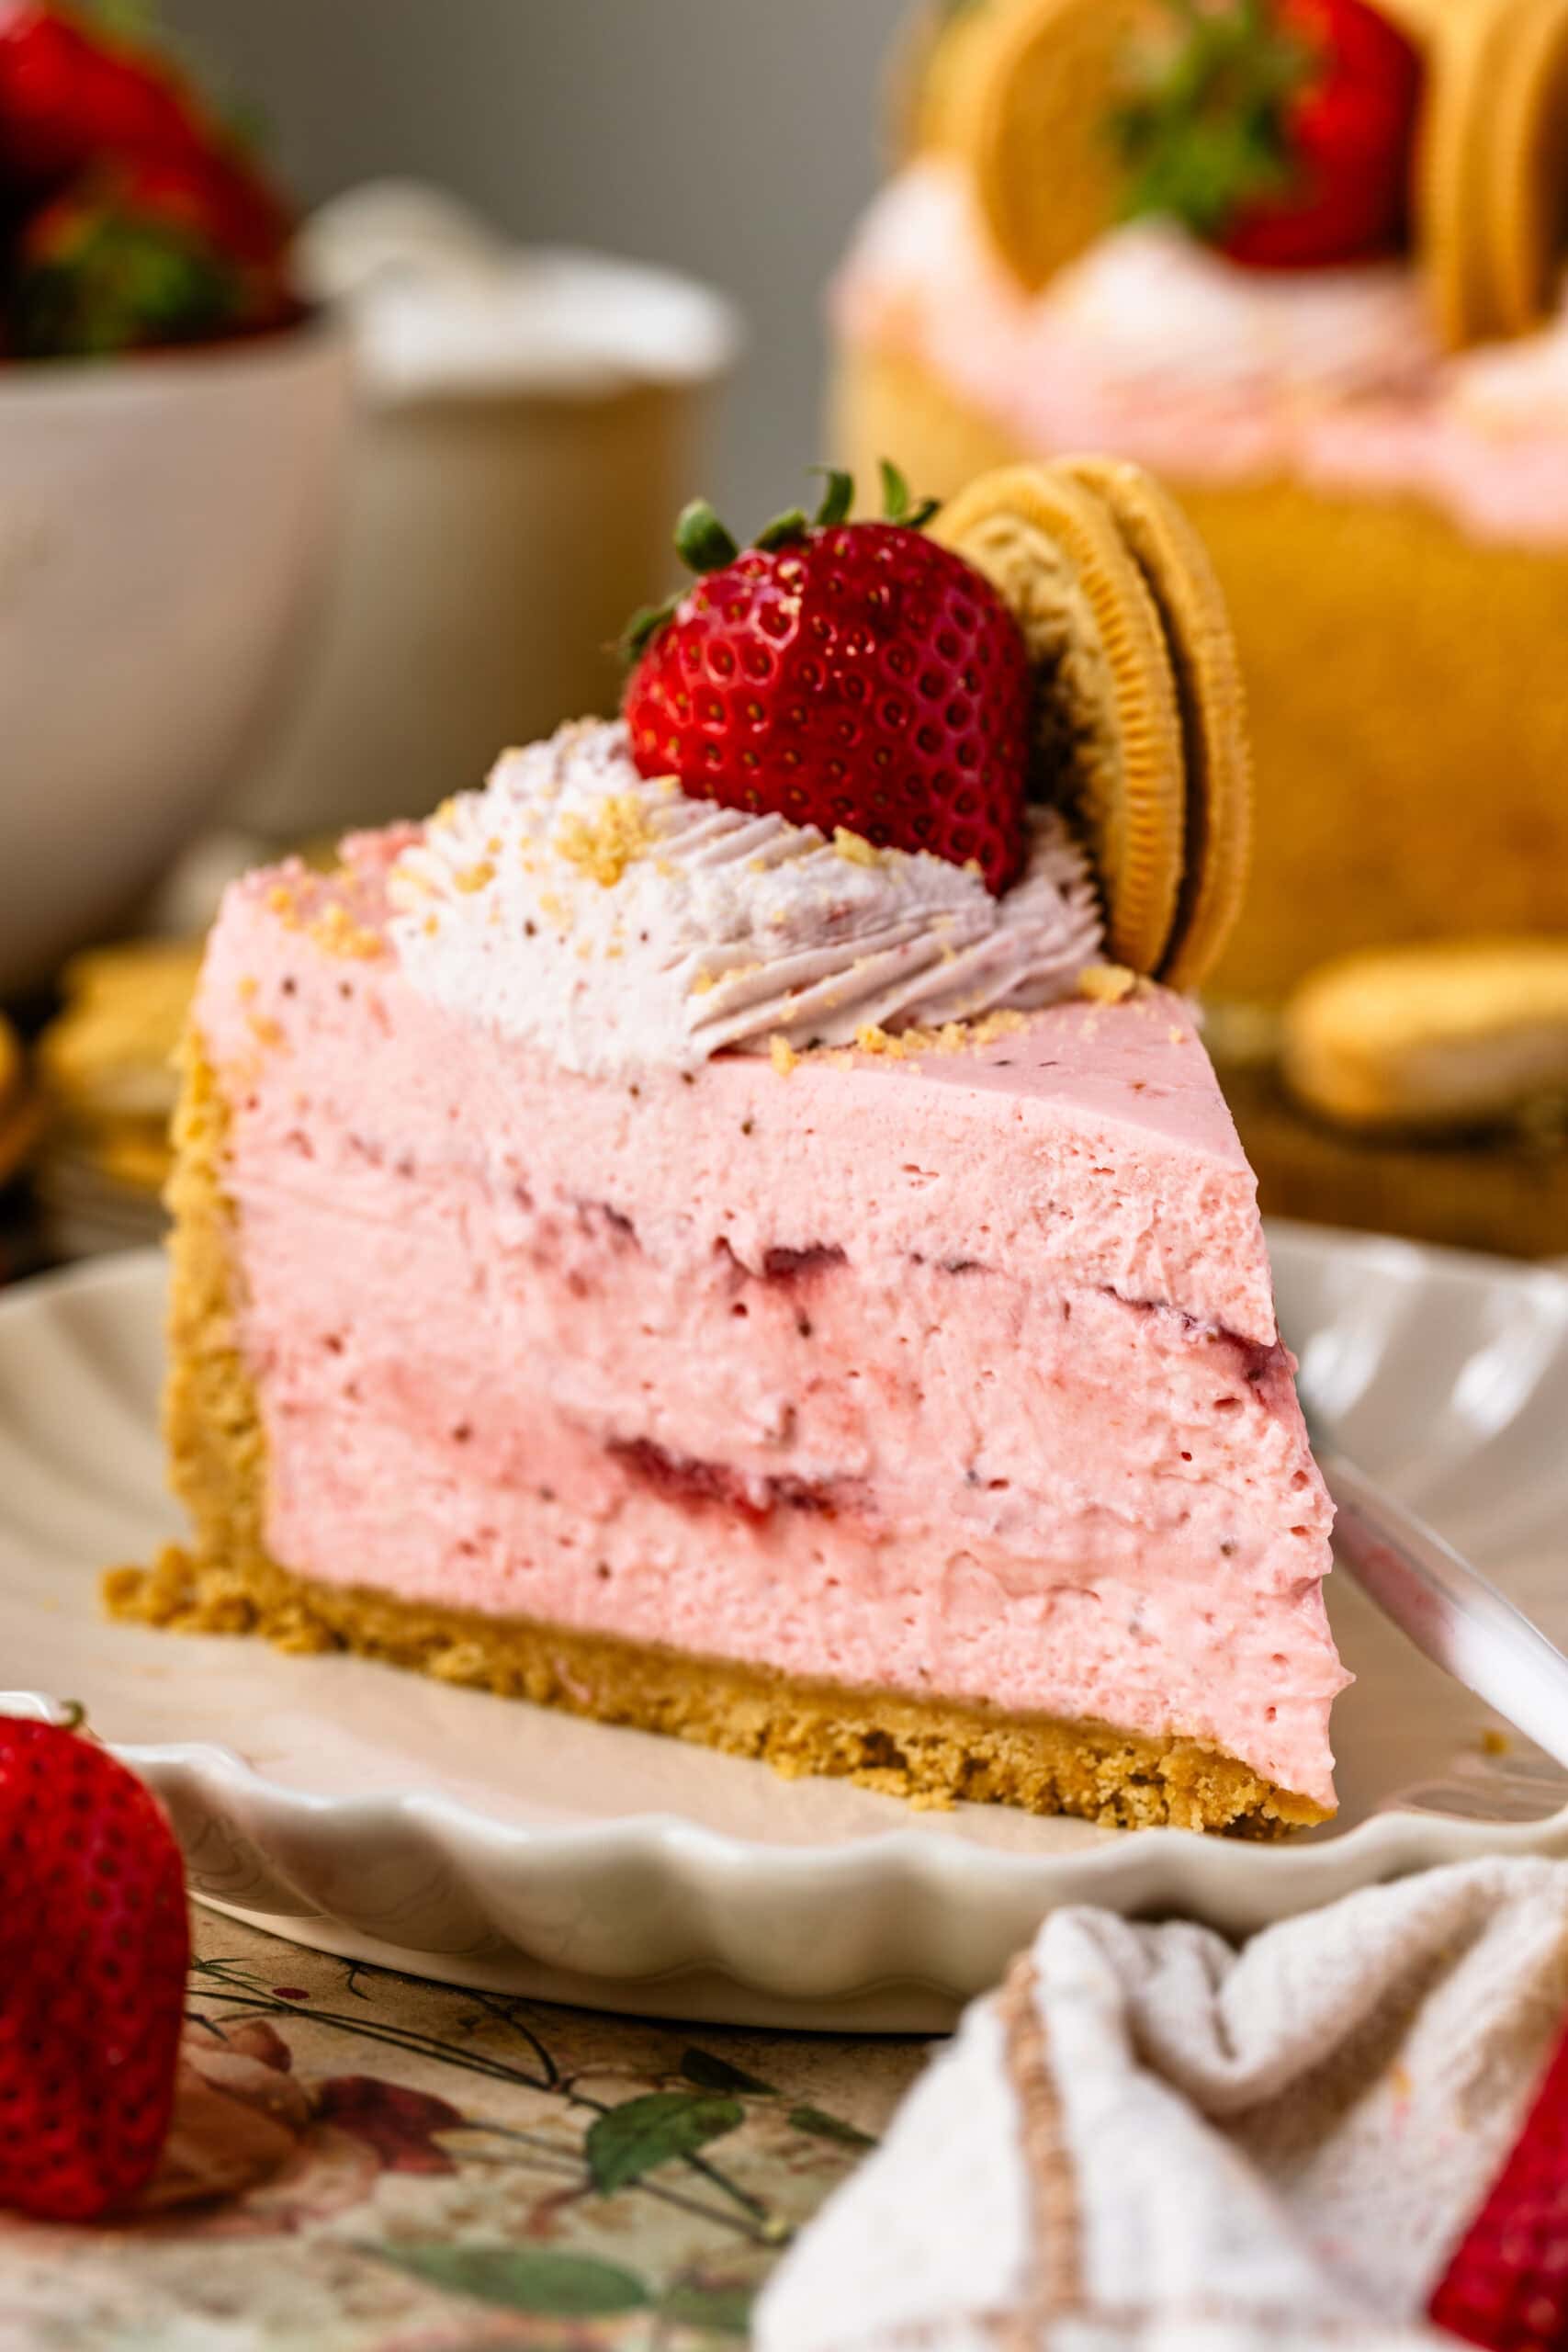
To assemble, it’s quite easy, but we want to get even more strawberry flavor in there! First, spoon 1/3 of the batter on the bottom of the prepared crust. Smooth it out with a spatula and then drizzle two tablespoons of strawberry sauce on top. Swirl gently.
Repeat with the remaining 2/3 in this manner. Then place it in the fridge to chill and set for at least 6 hours.
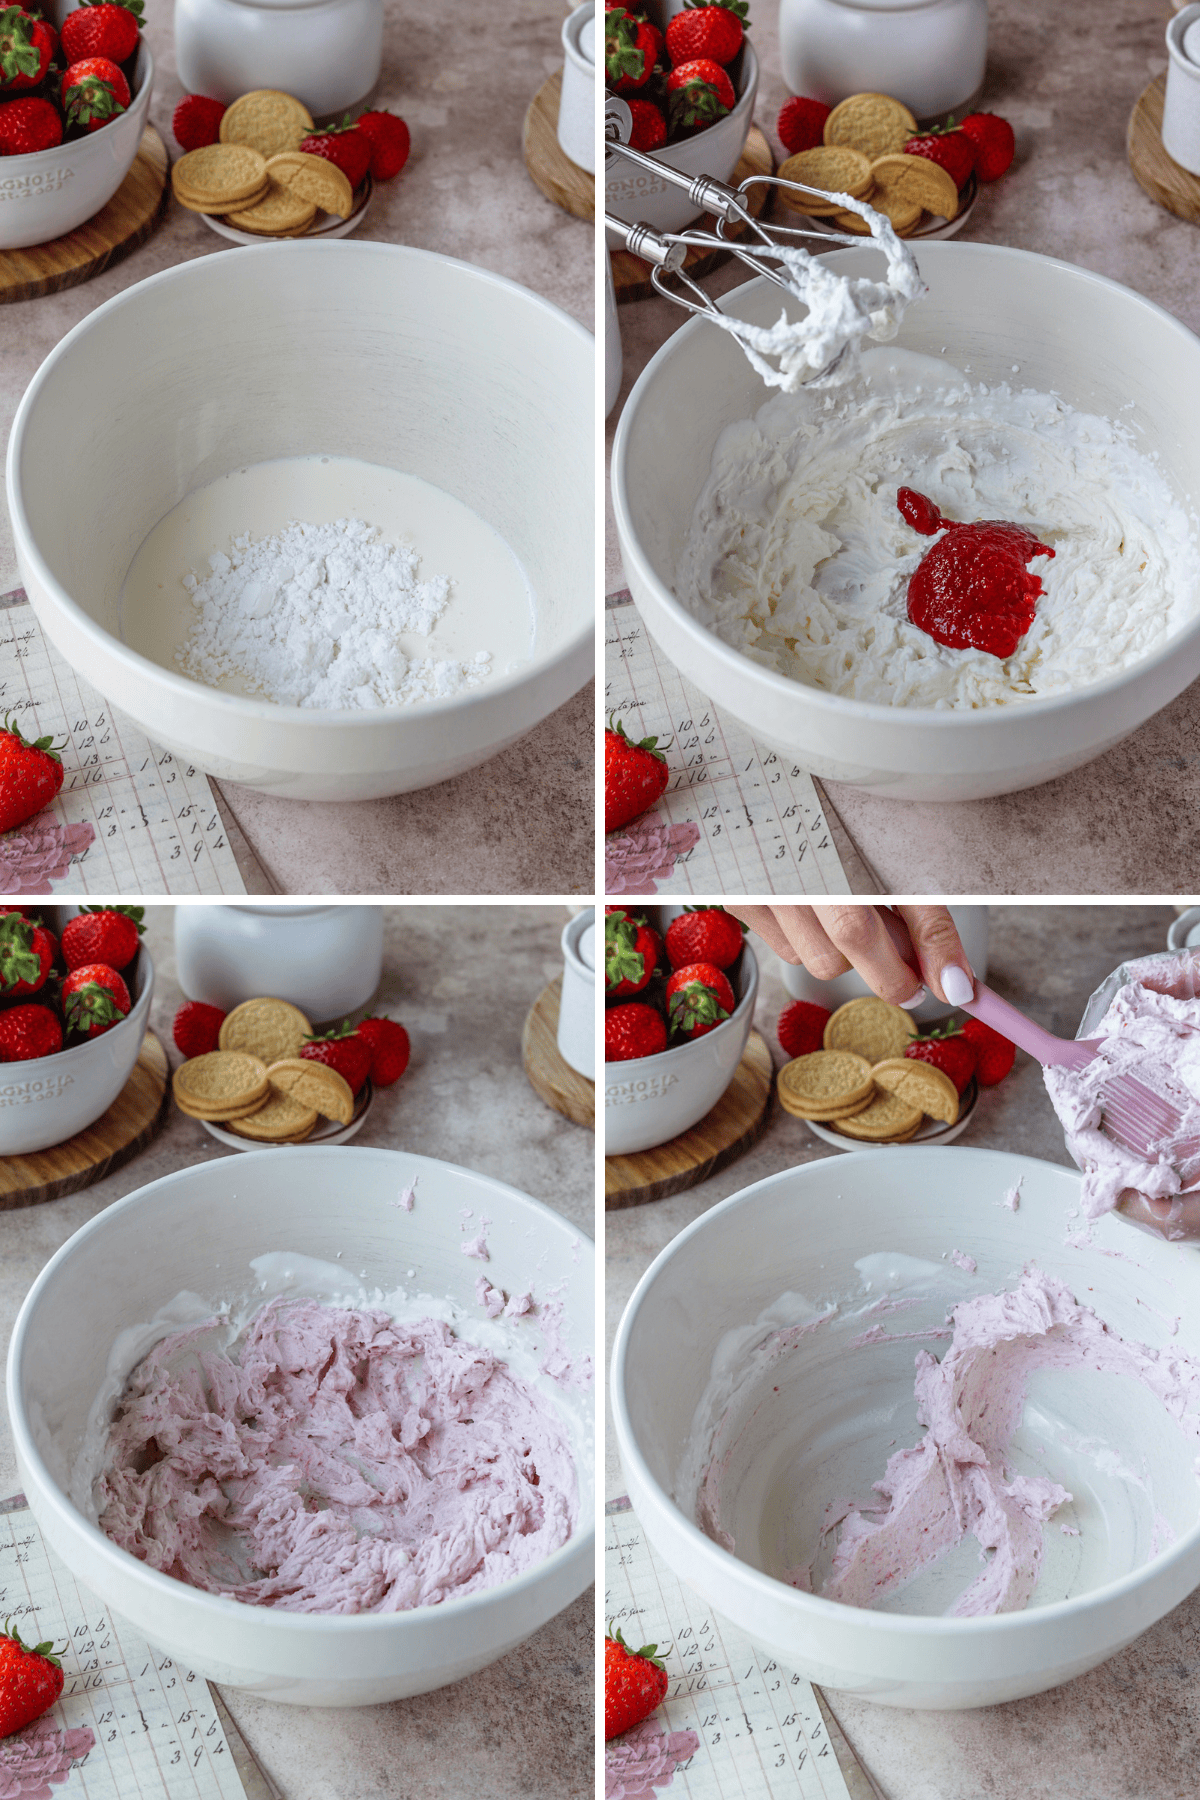
Step 6: Strawberry Whipped Cream
To make the whipped cream, beat the heavy cream and powdered sugar with a mixer for about 2 minutes, until stiff peaks form. Add two tablespoons of strawberry sauce to the whipped cream, mix to combine. Place the whipped cream in a piping bag.
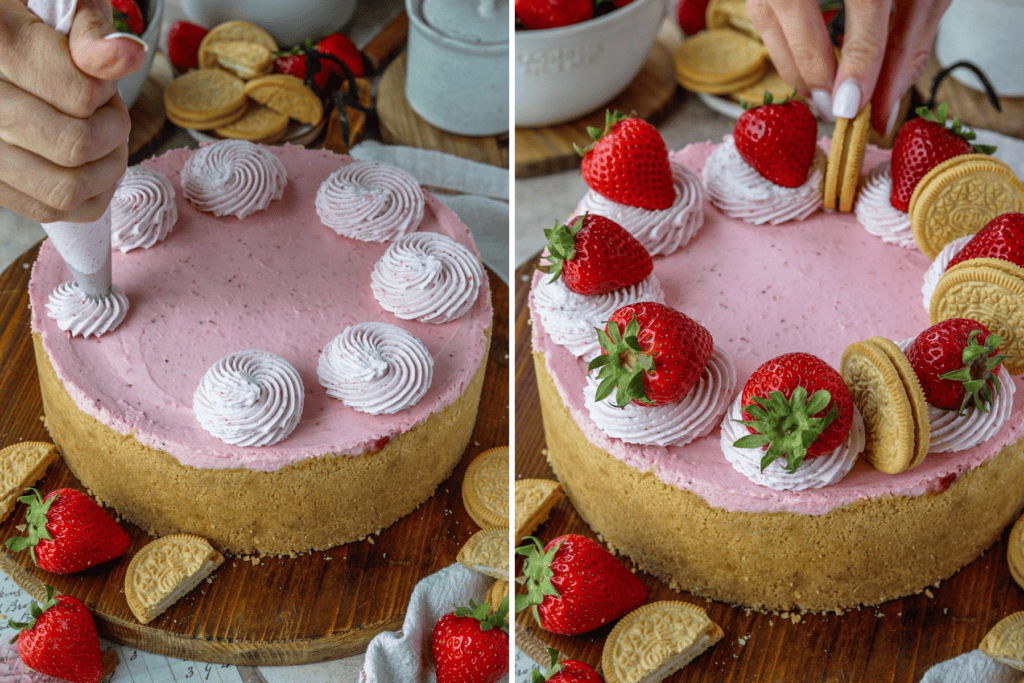
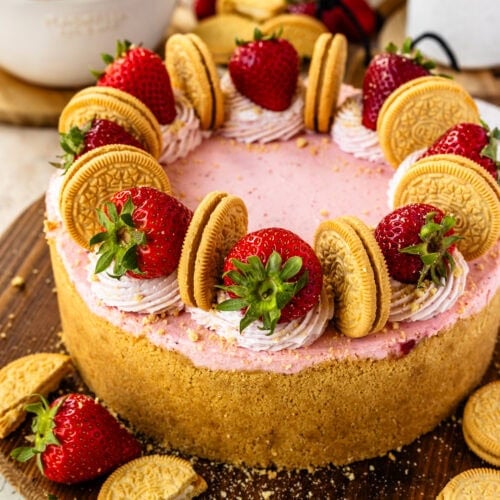
Once the cake is done chilling, pipe the cream on top of the cheesecake to decorate. Top with strawberries and more golden Oreo cookies, and cookie crumbs if desired.
Tips For Making This Cheesecake…
Making no-bake cheesecakes is certainly easier than making baked cheesecakes, but like with any recipe, there are some things to pay close attention to. Here are some tips to help you make this cheesecake:
- Be sure to measure the amount of puree you have and that is properly reduced, because if the puree isn’t reduced enough it can make the cheesecake watery.
- Make sure the ingredients such as sour cream and cream cheese are at room temperature before starting.
- When making the cheesecake batter, scrape the bowl several times in between mixing.
- Microwave the gelatin with the water for only a few seconds at a time. Otherwise, it can rapidly boil and spill over in the microwave.
- Pipe the whipped cream as soon as you make it, because whipped cream can deflate in the piping bag. However, once piped it can hold its shape well.
- Chill the cheesecake for at least 6 hours before serving.
- Store leftovers in an airtight container in the refrigerator, or in the freezer.
Variations
This is a delicious but also versatile recipe. Here are some variations you can make to this recipe:
- Use a graham cracker crust, find the recipe here.
- Instead of golden Oreos, use can use regular Oreos for the crust.
- You can use store-bought jam in place of the strawberry sauce.
- Add about 12 chopped Oreos to the batter if desired.
- Use can use what ever other berries you want to make this recipe.
- Top the cheesecake with a white chocolate ganache, it would be delicious!
FAQs
Yes, but fresh strawberries give the brightest flavor. If using frozen, thaw them completely and reduce the puree well to remove excess moisture.
No. Gelatin is essential for structure in this no-bake cheesecake and ensures it sets firmly enough to slice.
This usually happens when the cream cheese or sour cream is too cold. Make sure all ingredients are at room temperature before mixing.
Yes. Freeze once fully set and tightly wrapped. Thaw overnight in the refrigerator before serving for best texture.
Try Some Other Recipes of Mine…
If you like this No-Bake Strawberry Cheesecake recipe, you’ll love this simple No-Bake Cheesecake or No-Bake Chocolate Cheesecake Pie. If you want to stick with the fruit theme, try this Lemon Cheesecake or Blackberry Cheesecake. Or better yet, these Strawberry Cheesecake Cupcakes.
Let me know!
I hope you liked this recipe. If you make it, leave a comment below, or tag me on instagram. I love seeing your creations.
Watch Video

No Bake Strawberry Cheesecake
Ingredients
Strawberry Sauce
- 1.5 lb strawberries quartered (4 cups)
- 1/2 cup granulated sugar 100 grams
Golden Oreo Crust
- 36 golden Oreos 406 grams
- 5 tbsp unsalted butter melted (70 grams)
No-Bake Strawberry Cheesecake Filling
- 2 1/2 teaspoons unflavored gelatin 7 grams
- 2 tbsp cold water
- 3 blocks cream cheese softened 24 oz, 680 grams
- 1 cup powdered sugar divided (125 grams)
- 1/3 cup sour cream 80 grams
- 2 tsp vanilla extract
- 3/4 cup strawberry puree
- 1 1/2 cups cold heavy whipping cream 360 ml
Strawberry Whipped Cream
- 3/4 cup cold heavy whipping cream 180 ml
- 1 tbsp powdered sugar
- 2 tbsp strawberry sauce
To decorate
- Fresh strawberries
- Golden Oreo cookies
Instructions
Strawberry Sauce
- Place the strawberries in a food processor. Process until it becomes a puree.
- Pour the puree into a medium-saucepan. Add the granulated sugar. Cook at medium-low heat, stirring occasionally, for about 40 minutes, until the sauce reduces to 1 1/4 cup. It will be thick and darkened in color.
- Remove from the saucepan and pour into a bowl, cover with plastic wrap and let it cool down completely. Place in the fridge until you are ready to use.
- You will need 3/4 cup of the sauce for the cheesecake batter, 1/4 cup to swirl with the cheesecake, and another 2 tbsp for the Strawberry Whipped Cream.
Golden Oreo Crust
- Place the Oreos in the food processor and process until they become a fine powder. Add the melted butter to the Oreos and stir to combine.
- Pour the mixture on the bottom of a 9” or 8” springform pan or cheesecake pan. If using an 8” pan, it must be deep.
- Use a spatula to press the crumb up the sides of the pan. Press hard to make the crumb stick to the sides. If it falls off, just keep repeating and working the crust up the sides of the pan
- Then use a cup to press the crust on the bottom of the pan. You can also use the sides of the cup to press the crust on the sides. Make sure the crust is very packed. Take your time packing it. This will prevent the crust from falling apart when you are ready to serve the cheesecake.
- Place the crust in the freezer for at least 15 minutes.
- Alternatively, you can bake the crust for about 12 minutes on the pre-heated 325ºF oven if desired.
No-Bake Strawberry Cheesecake Filling
- Add the water and gelatin to a small bowl. Mix to combine. Let it sit for one minute. Microwave the gelatin for a few seconds until it melts. Don’t microwave too long, or the gelatin will bubble up and spill all over the microwave. Just microwave 5 to 10 seconds at a time to melt. Set it aside to cool down.
- Add the cream cheese to a large mixing bowl. Beat the cream cheese with a mixer. You can use a stand mixer with the paddle attachment, or a hand mixer. Beating time should be around 2 minutes, until the cream cheese is smooth.
- Add half of the powdered sugar (1/2 cup) and beat for another minute at medium speed until combined.
- Remember to scrape the sides of the bowl in between.
- Add the sour cream and mix to combine.
- Add the vanilla, 3/4 cup of the cooled strawberry puree, and the dissolved gelatin to the bowl.
- Mix on low with the mixer, until incorporated.
- Set the bowl aside.
- In separate large bowl, whip the heavy cream with the remaining 1/2 cup of powdered sugar by beating with a mixer at medium speed for about 3 minutes, until stiff peaks form. If using a stand mixer, use the whisk attachment.
- Add half of the whipped cream to the strawberry cream cheese mixture, fold with a spatula to combine.
- Once the first half is incorporated, add the remaining whipped cream to the mixture. Fold again until the batter is smooth and creamy.
- Remove the cheesecake pan from the freezer.
- Pour one third of the batter on the bottom of the crust lined pan. Smooth it out with a spatula.
- Drizzle a couple of tablespoons of the strawberry puree on top. Use a spatula to swirl it gently with the batter.
- Pour another 1/3 of the batter over the strawberry puree. Smooth it out.
- Drizzle another 2 to 3 tbsp of the sauce on top. Swirl with a spatula.
- Pour the remaining batter on top and use a spatula to smooth it out completely.
- Place the cheesecake in the fridge for 6 hours or overnight.
Strawberry Whipped Cream
- Beat the whipping cream and powdered sugar with a mixer for 2 to 3 minutes, until stiff peaks form. Add the strawberry puree at the end and mix to combine. Place the whipping cream in a piping bag fitted with the tip of your choice, I used a 4B.
To decorate
- Remove the cheesecake from the fridge. Run a knife around the edges of the cake. Remove the ring.
- Pipe the whipped cream on top of the cheesecake, and top with the strawberries, golden Oreos, and Oreo crumbs.
- Slice and serve.
- See the notes section for more options on toppings.
Storage
- Store the cheesecake in the fridge for up to 4 days. You can freeze the cheesecake as well. To freeze, wrap it tightly in plastic, and place it in an air tight container. Sometimes it can be easier to cut into slices before freezing, making sure the plastic wrap is directly placed on the surface of the cheesecake, so it doesn’t form a skin.
- Freeze for up to 2 months. To thaw, simply place it in the fridge overnight.
What kind of pan would you use for mini cheesecakes?
Usually just cupcake pans, or ramekins.
My granddaughter l2 year’s old now . They both had birthday and spur their uncle , their best friend and their mom . Lovely cake with strawberry , make their party happily .
I made it for my grandchildren birthday they both l3 year’s old now and they spur their best friend , their uncle and their mom too . They not patient often look their cake .
Amazing recipe!! I made it into individual dessert shooter cups for a school fundraiser and they were a hit. Love all your recipes!
Wow! Sounds amazing! Thank you so much, Jessica!
Hey Camilla could I please ask, if I wanted to make this in a 9 inch tin how much would I increase the recipe by? 25%?
Thanks in advance 🙂
It works the same for a 9″ because I use a deep 8″ pan.
WOW! The result is the best cheesecake! I used gluten free graham crumb (baked it) and a strawberry and raspberry puree I made a few weeks ago that needed using up. It smells and tastes of summer air and happy memories. Thank you Camila, this recipe is going into the family treasure chest of recipes to be made again and again, absolutely perfect for the 40th birthday I made it for. You’re a gem.
That’s so wonderful to hear Ella!
I really appreciate you making my recipe! Thank you!! 🙂 Have a wonderful day!
How soon before serving should I remove from the freezer and thaw at room temperature? I won’t be in town the day prior and won’t be able to defrost in the fridge overnight.
To thaw at room temp should take about 2 to 3 hours before serving. If you slice it prior, you can thaw the slices for about 1 hour instead.
It was amazing! I made it for my daughters birthday and everyone loved it!
That’s so wonderful to hear, thank you so much!
Hi, so I know this is probably a stupid question but could I make this with raspberries instead of strawberries?
No such thing as a stupid question. You absolutely can 🙂
I used a mix of strawberries and raspberries because I wanted to use up some I puréed and froze a few weeks ago. It didn’t affect at all, delicious!
Can gelatin shets be used instead of the gelatin method in the recipe?
Yes, gelatin sheets could be used instead of powdered gelatin in this no-bake strawberry cheesecake recipe, but there are a few adjustments you’ll need to make.
Typically, one sheet of gelatin equals about 2.5 grams of powdered gelatin. For this recipe, which calls for 2.5 teaspoons (7 grams) of powdered gelatin, you will need about 3 gelatin sheets (if using standard-sized sheets).
Hydrate the Gelatin Sheets: Soak the gelatin sheets in cold water for 5–10 minutes until they soften and become pliable.
Dissolve the Gelatin: Remove the softened gelatin sheets from the water and gently squeeze out excess liquid.
Add the sheets to a small saucepan with a bit of warm liquid (e.g., a tablespoon or two of the strawberry puree or water) and heat gently until the gelatin fully dissolves. Do not let the mixture boil.
Incorporate into the Recipe: Allow the dissolved gelatin mixture to cool slightly (to prevent curdling) and then add it to the cream cheese mixture as directed in the recipe, mixing thoroughly to combine.
Would it be crazy to make this recipe in a 9×13 recipe? I’ve made it as is in a springform pam several times, always love it, just thinking I could double it and use a 9×13?
For the filling i think you should be fine with this amount in the recipe. But for the crust, you’ll probably have to make 1.5x the amount.
Can you substitute the gelatin with anything else?
No, sorry.
Can you use frozen strawberries? If so, should you thaw them first?
no need to thaw them first, and yes you can use them.
I made this beautiful cheesecake for a friend today. It was easy to make but a little preplanning is required because I wanted to make the strawberry sauce the day before. I used frozen strawberries instead of fresh strawberries. It was rich but not too sweet, which is how Ilike it. I would definitely make it again.