

Espresso Cheesecake
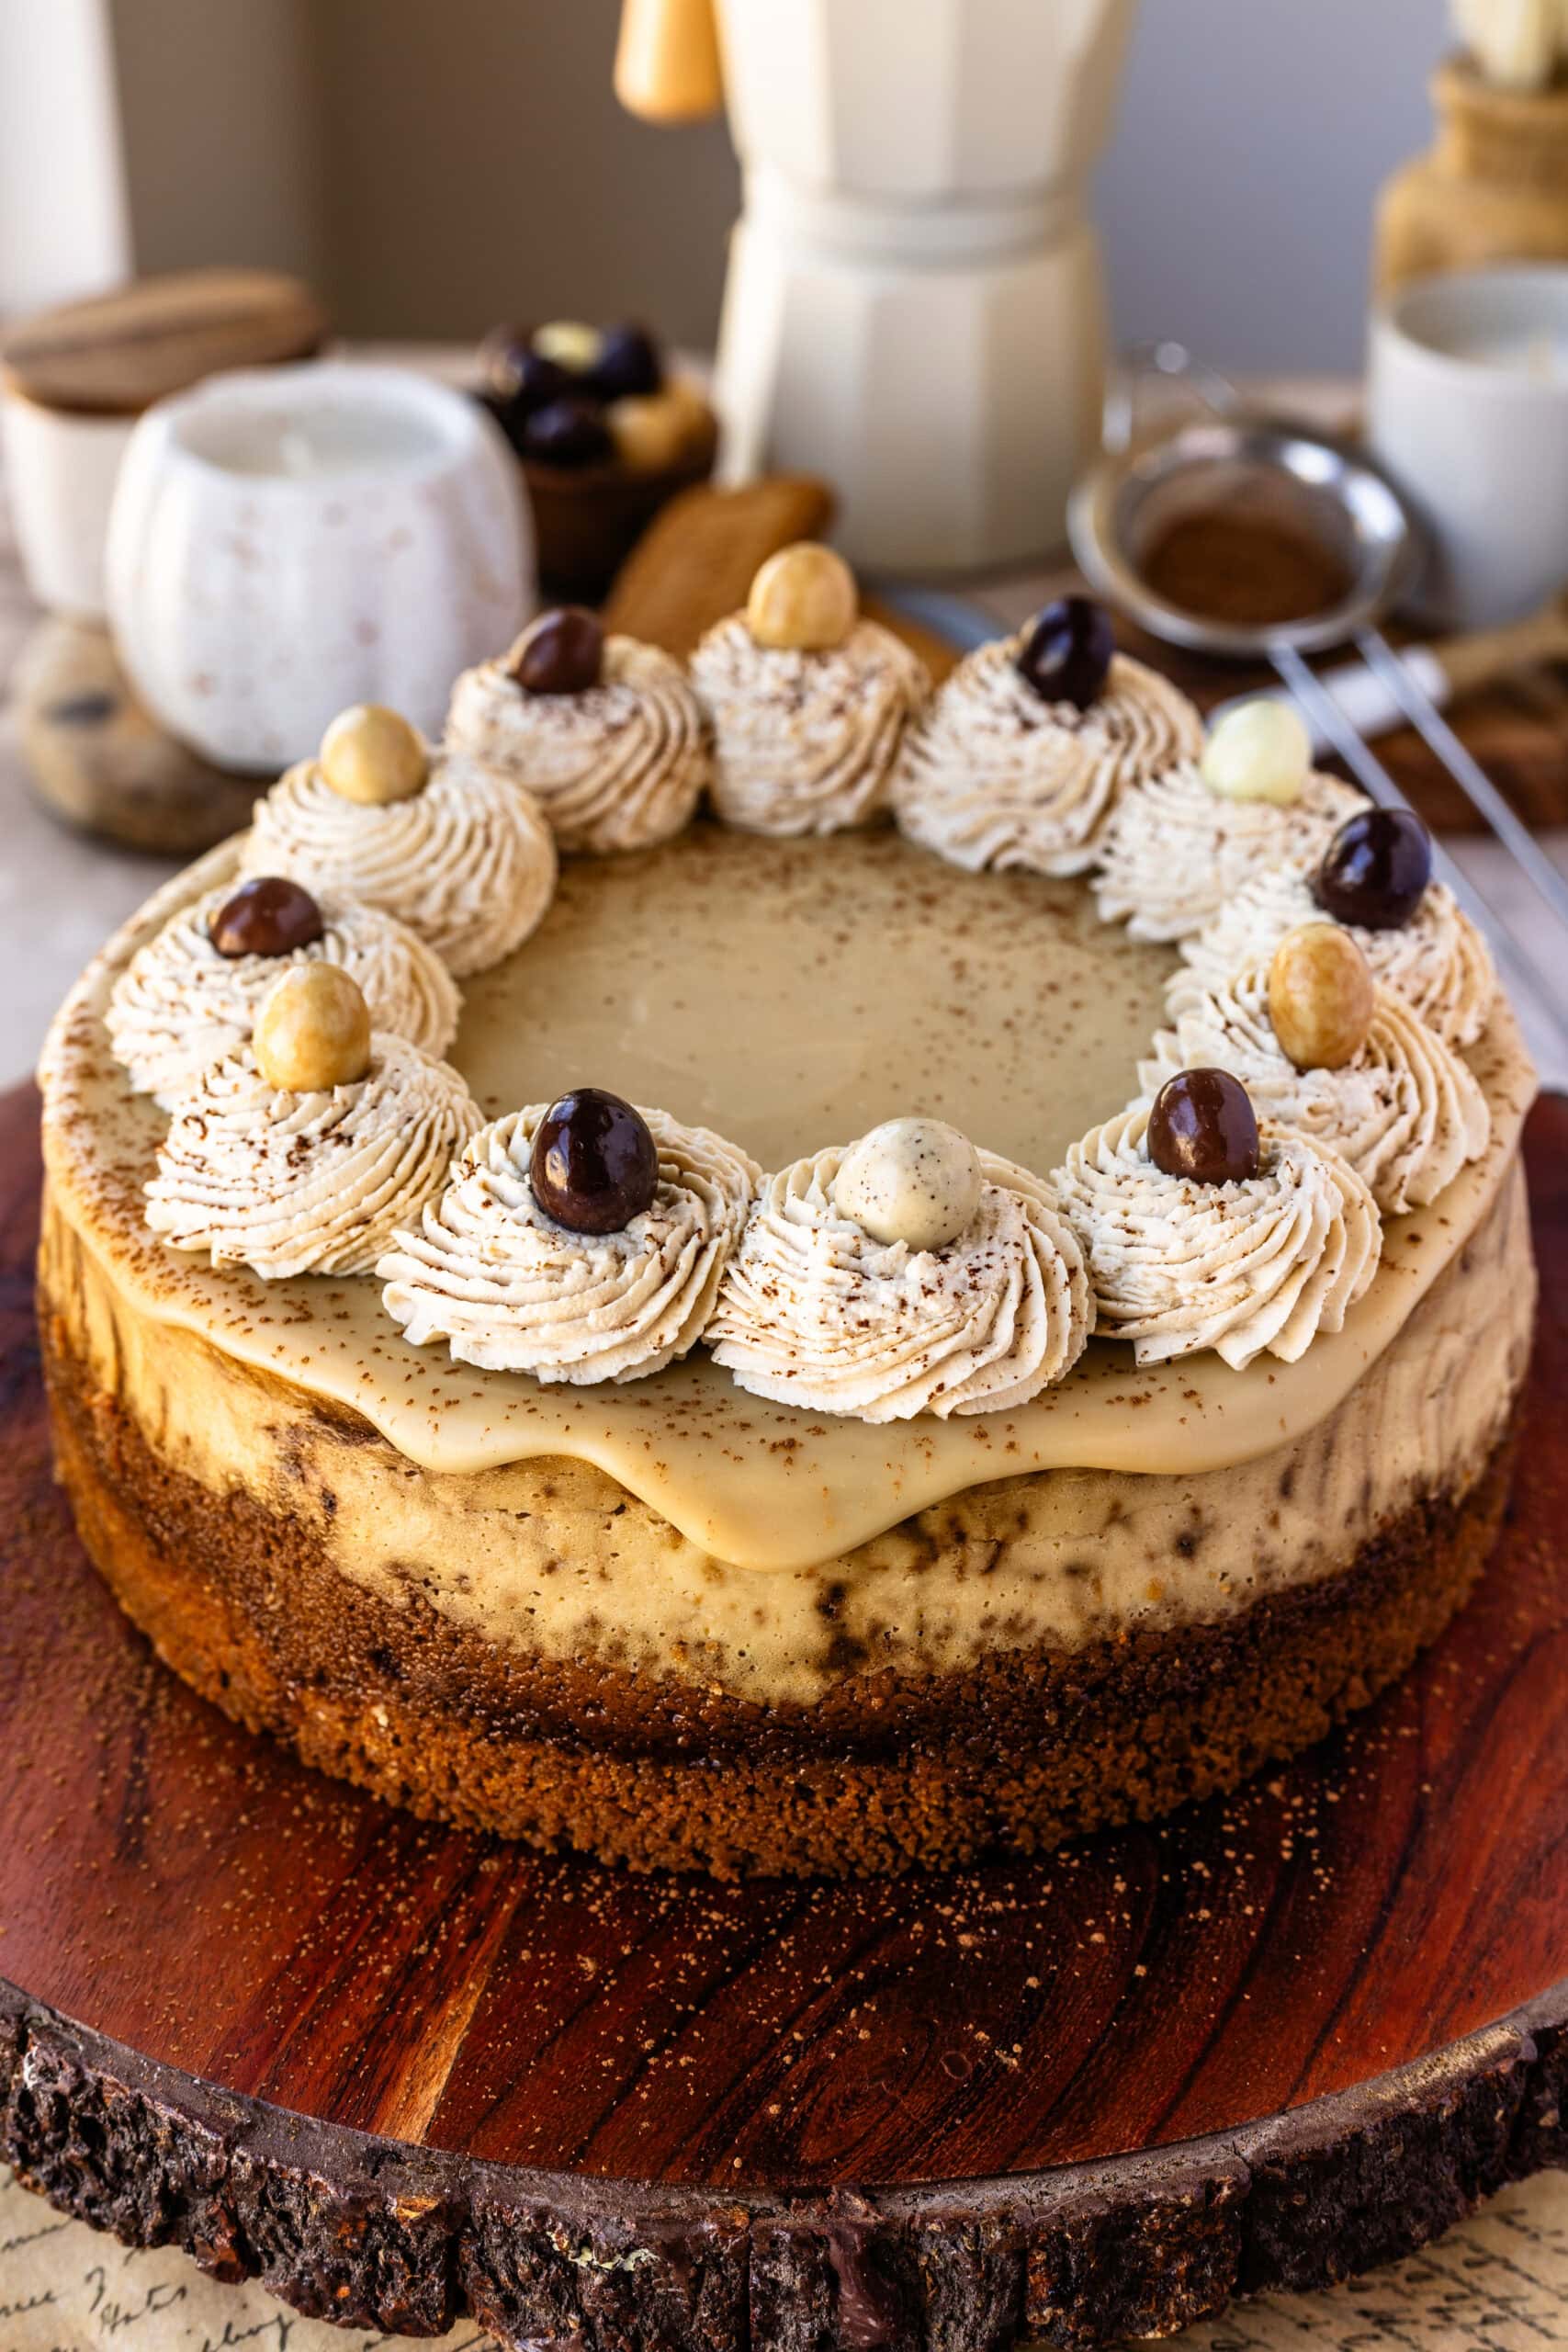
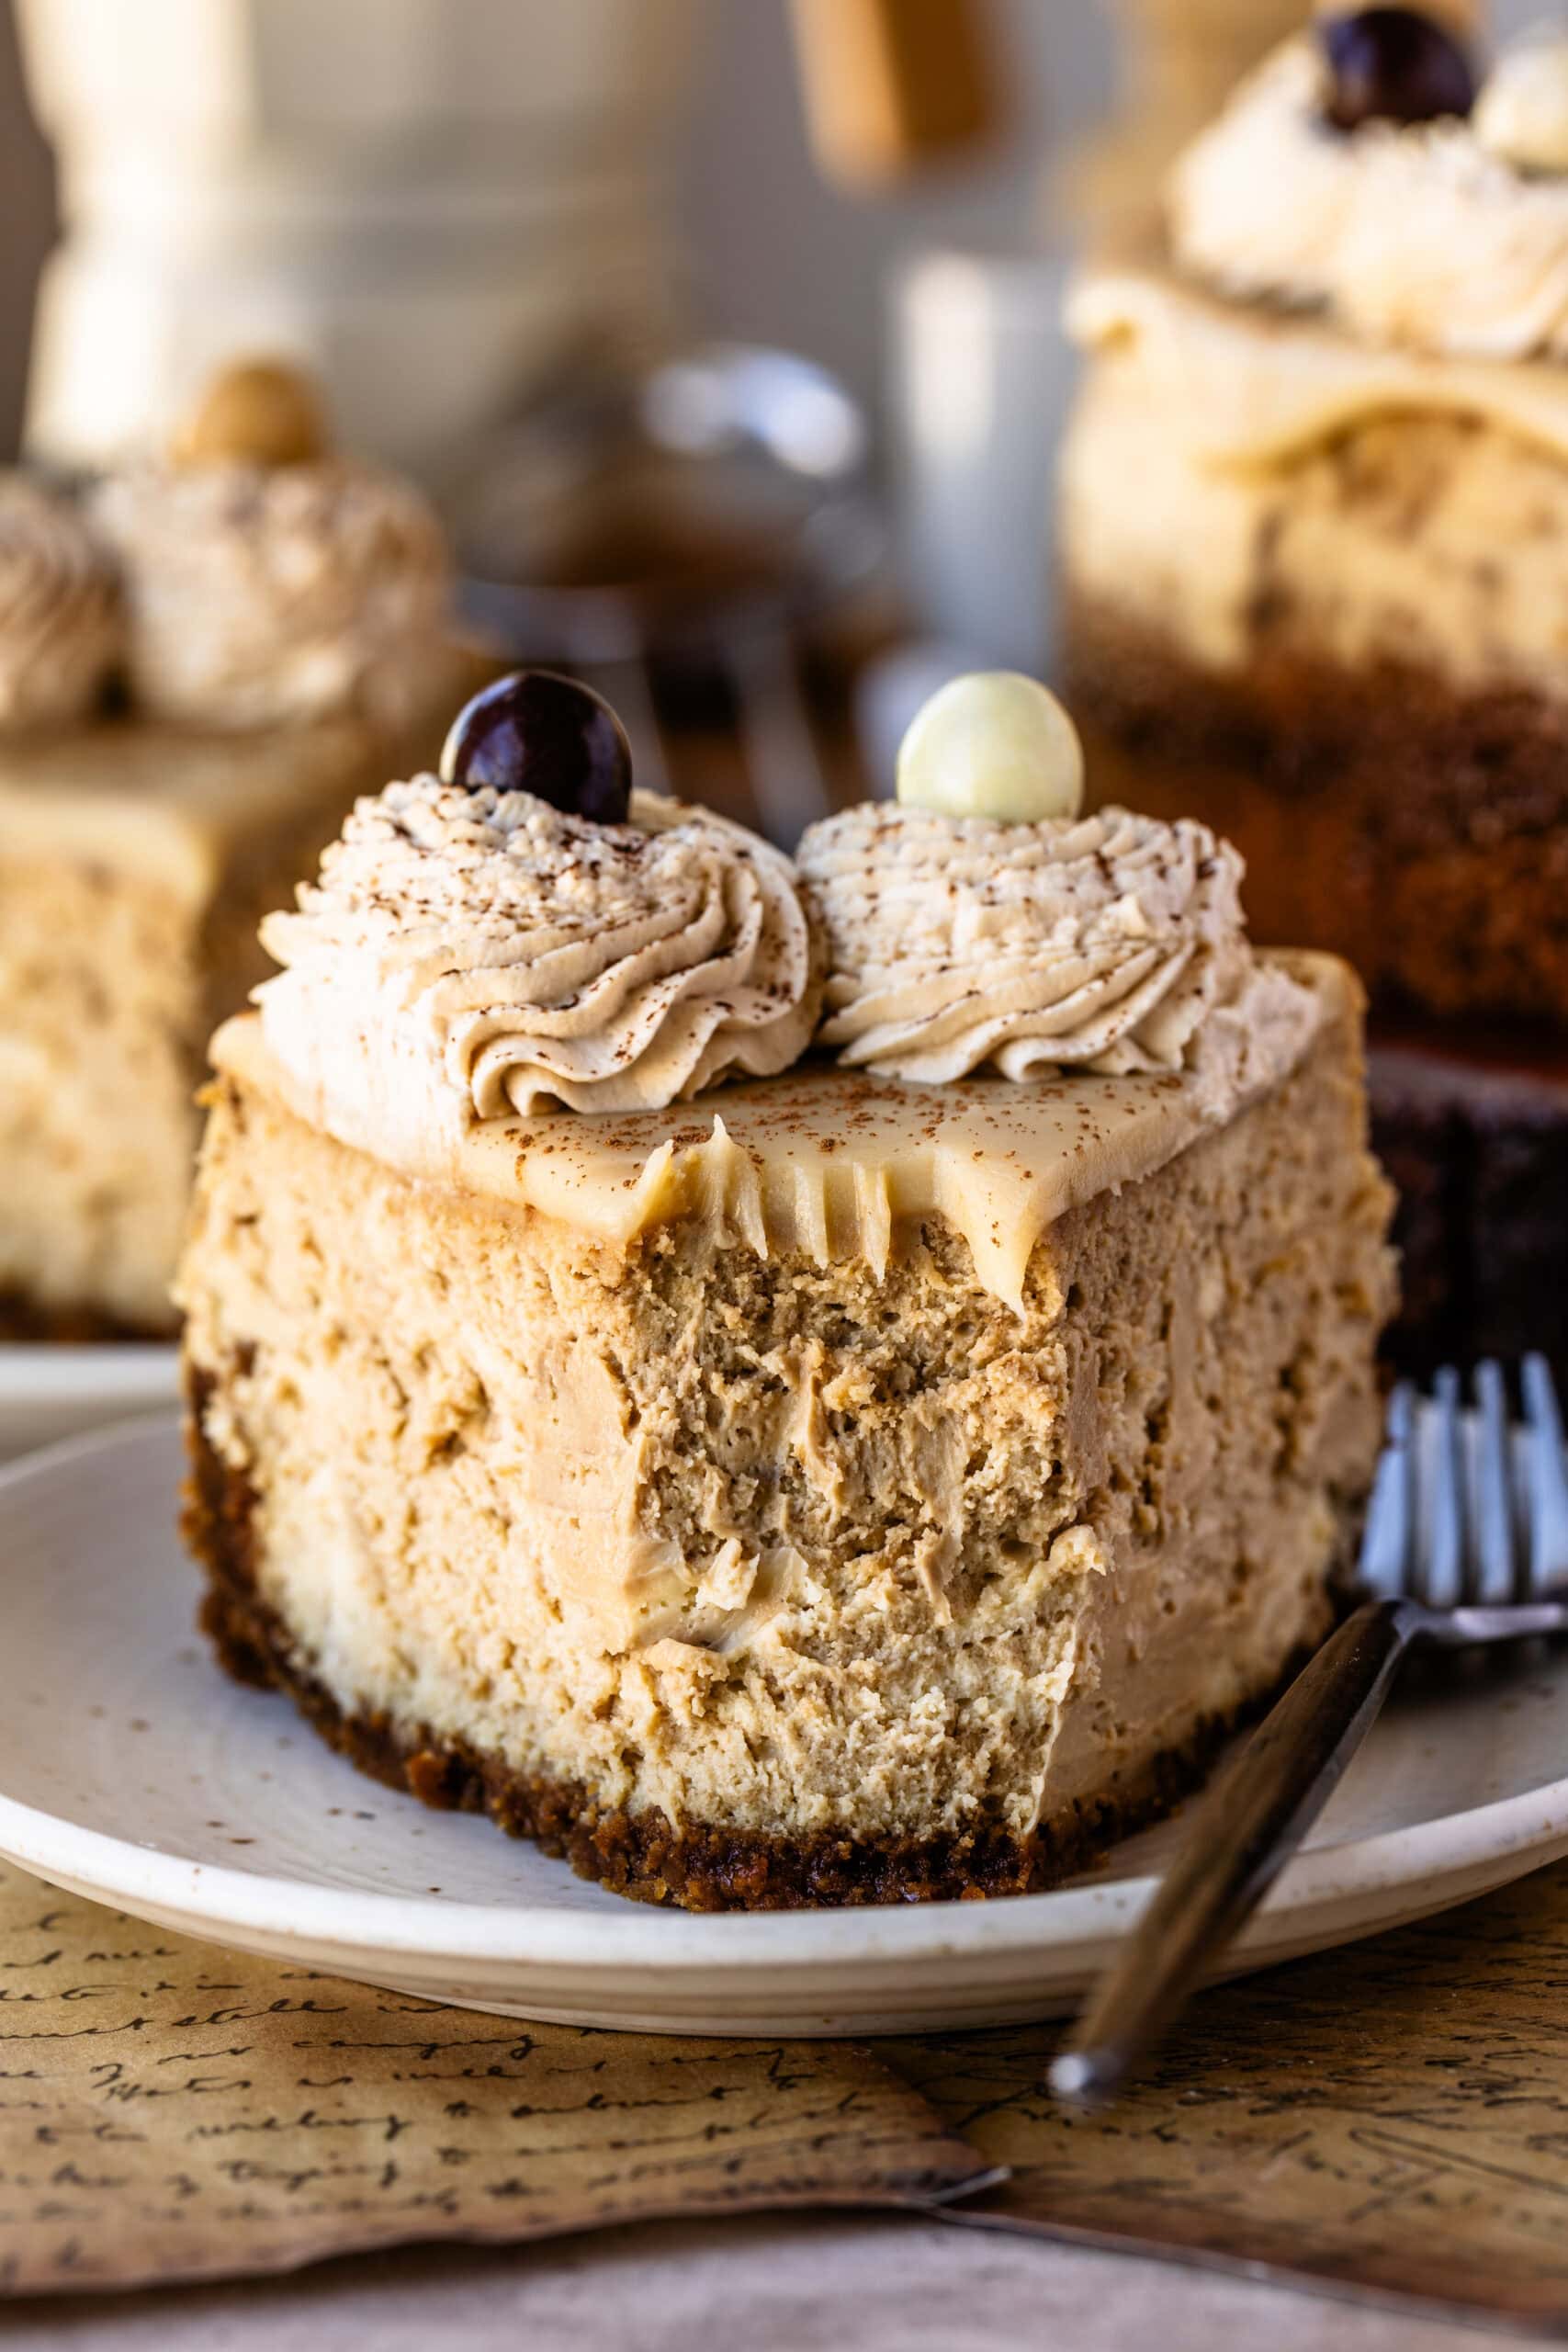
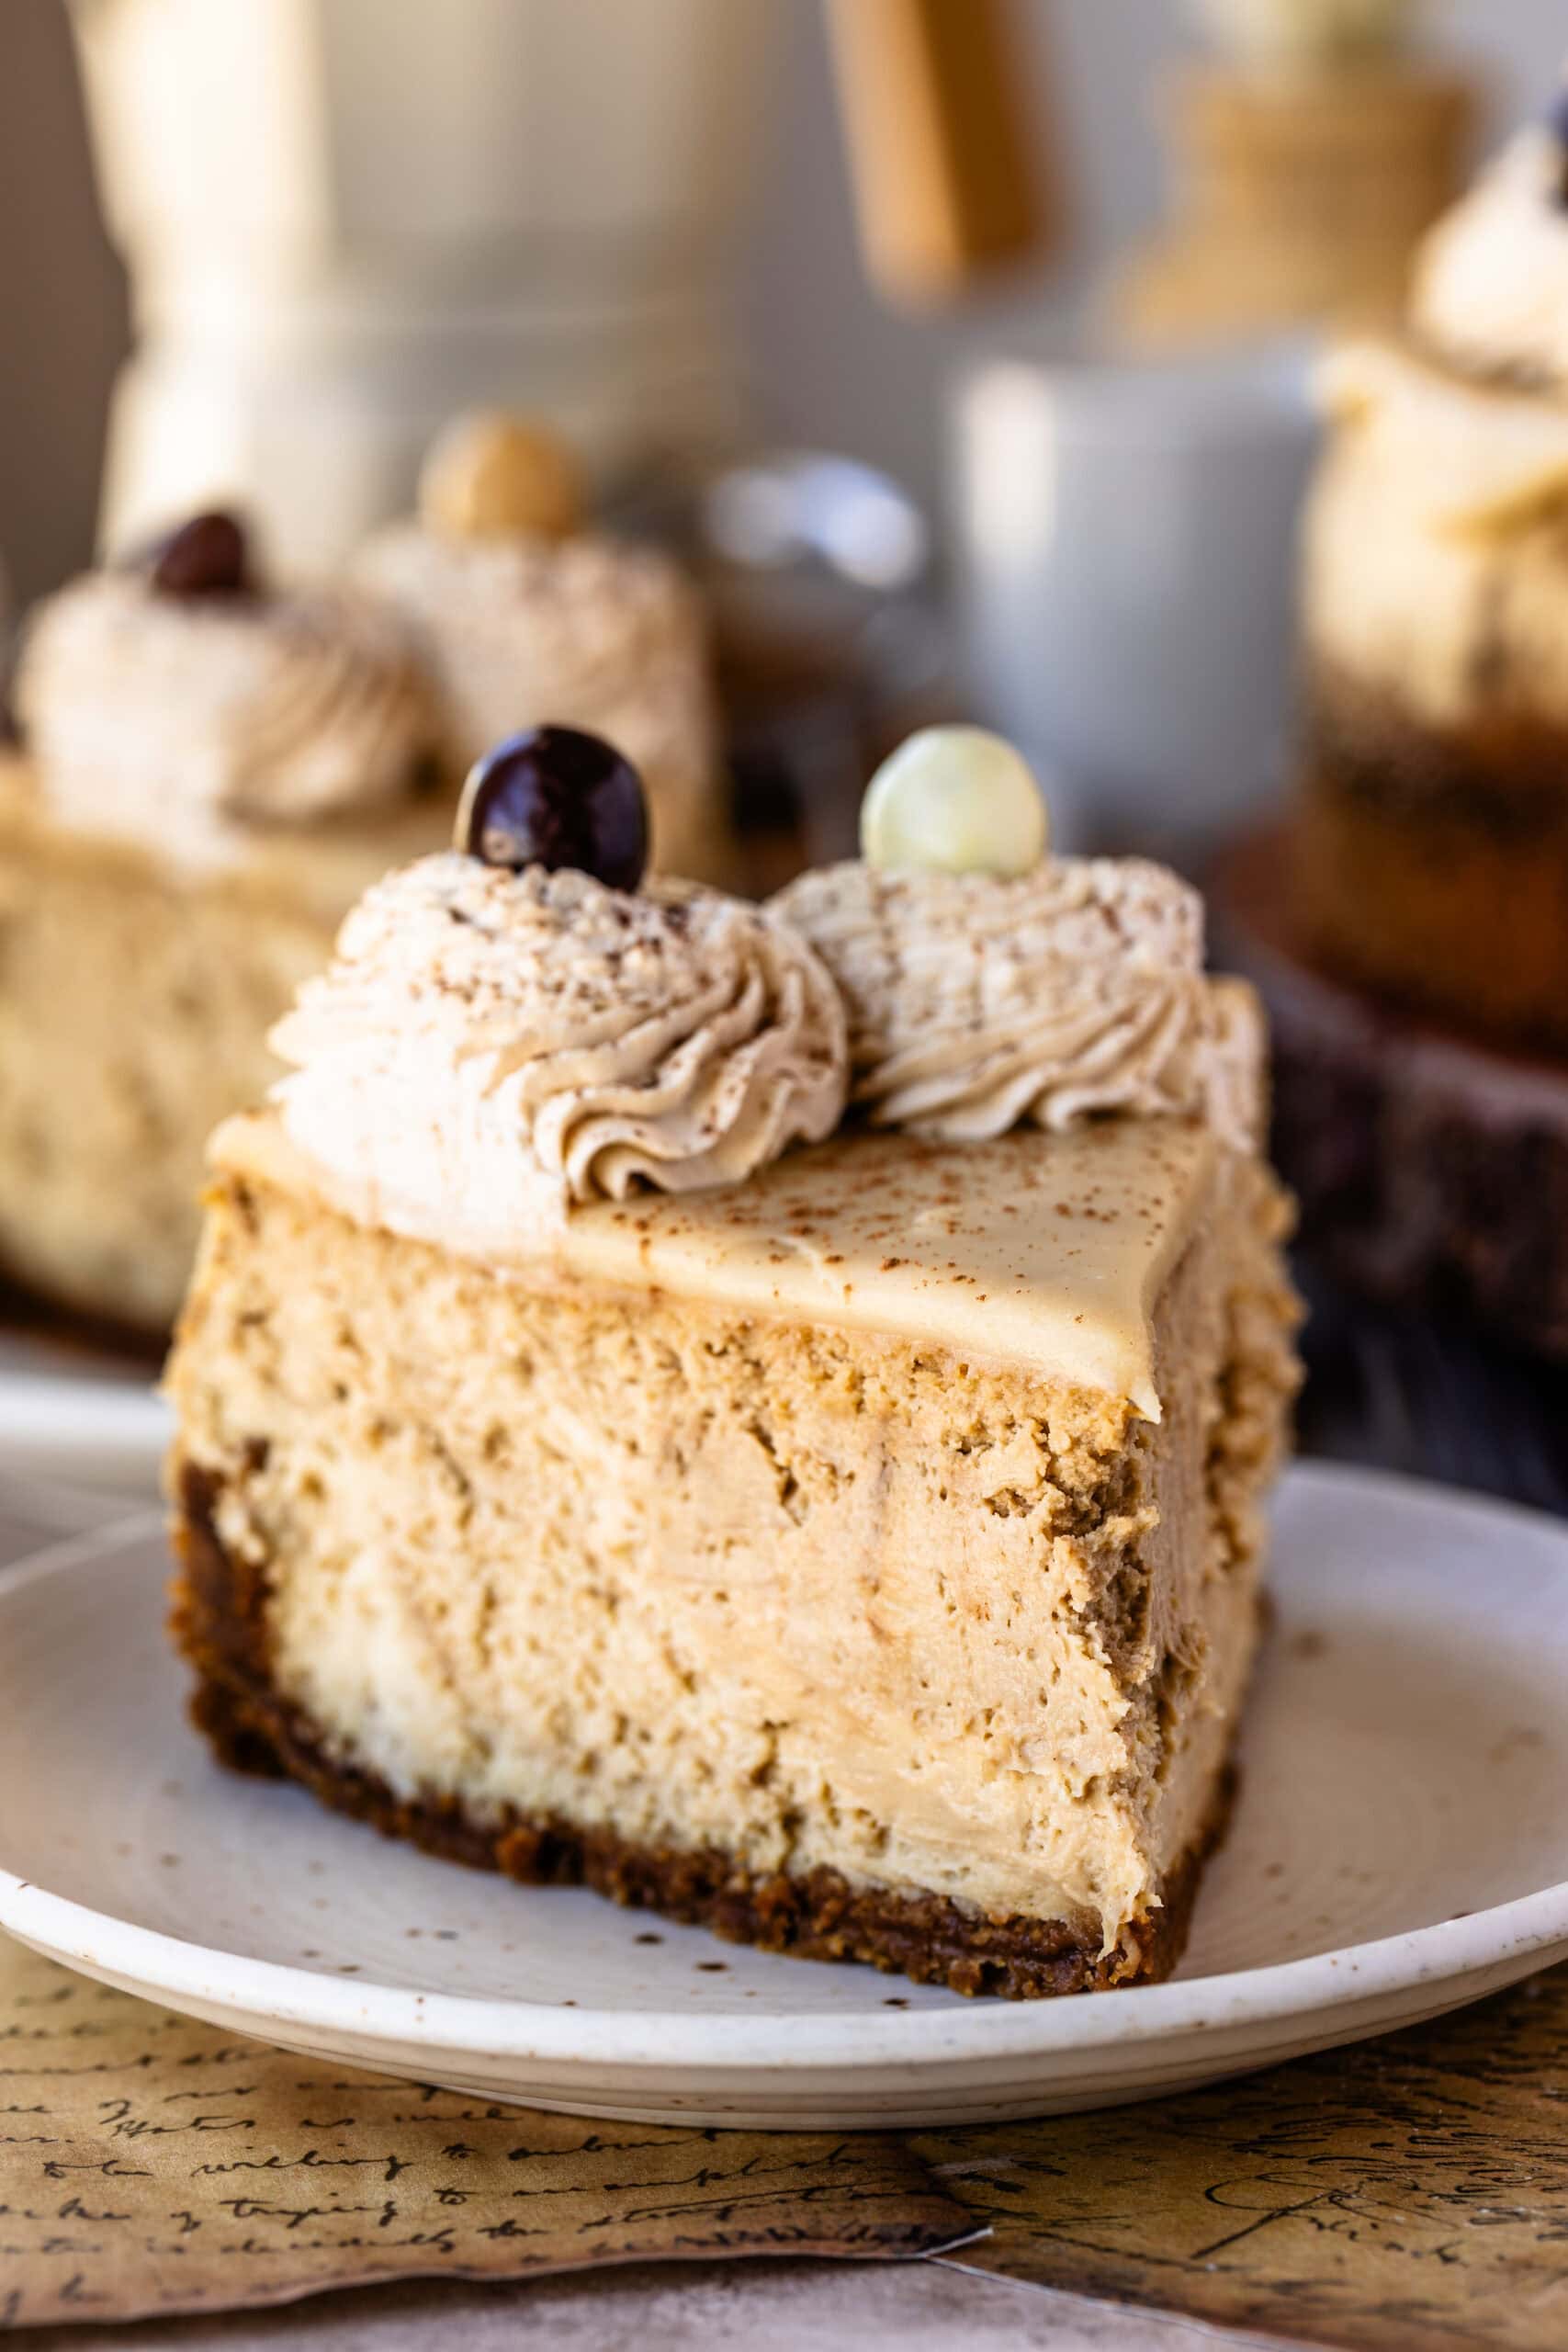
This Espresso Cheesecake is one of my favorite ways to turn a cup of coffee into dessert. It has a creamy, coffee-flavored cheesecake filling baked over a buttery Biscoff cookie crust, finished with a smooth Bailey’s white chocolate ganache and espresso whipped cream. I love how the warm, caramelized flavor of the cookies balances the espresso, while the ganache adds just enough sweetness.
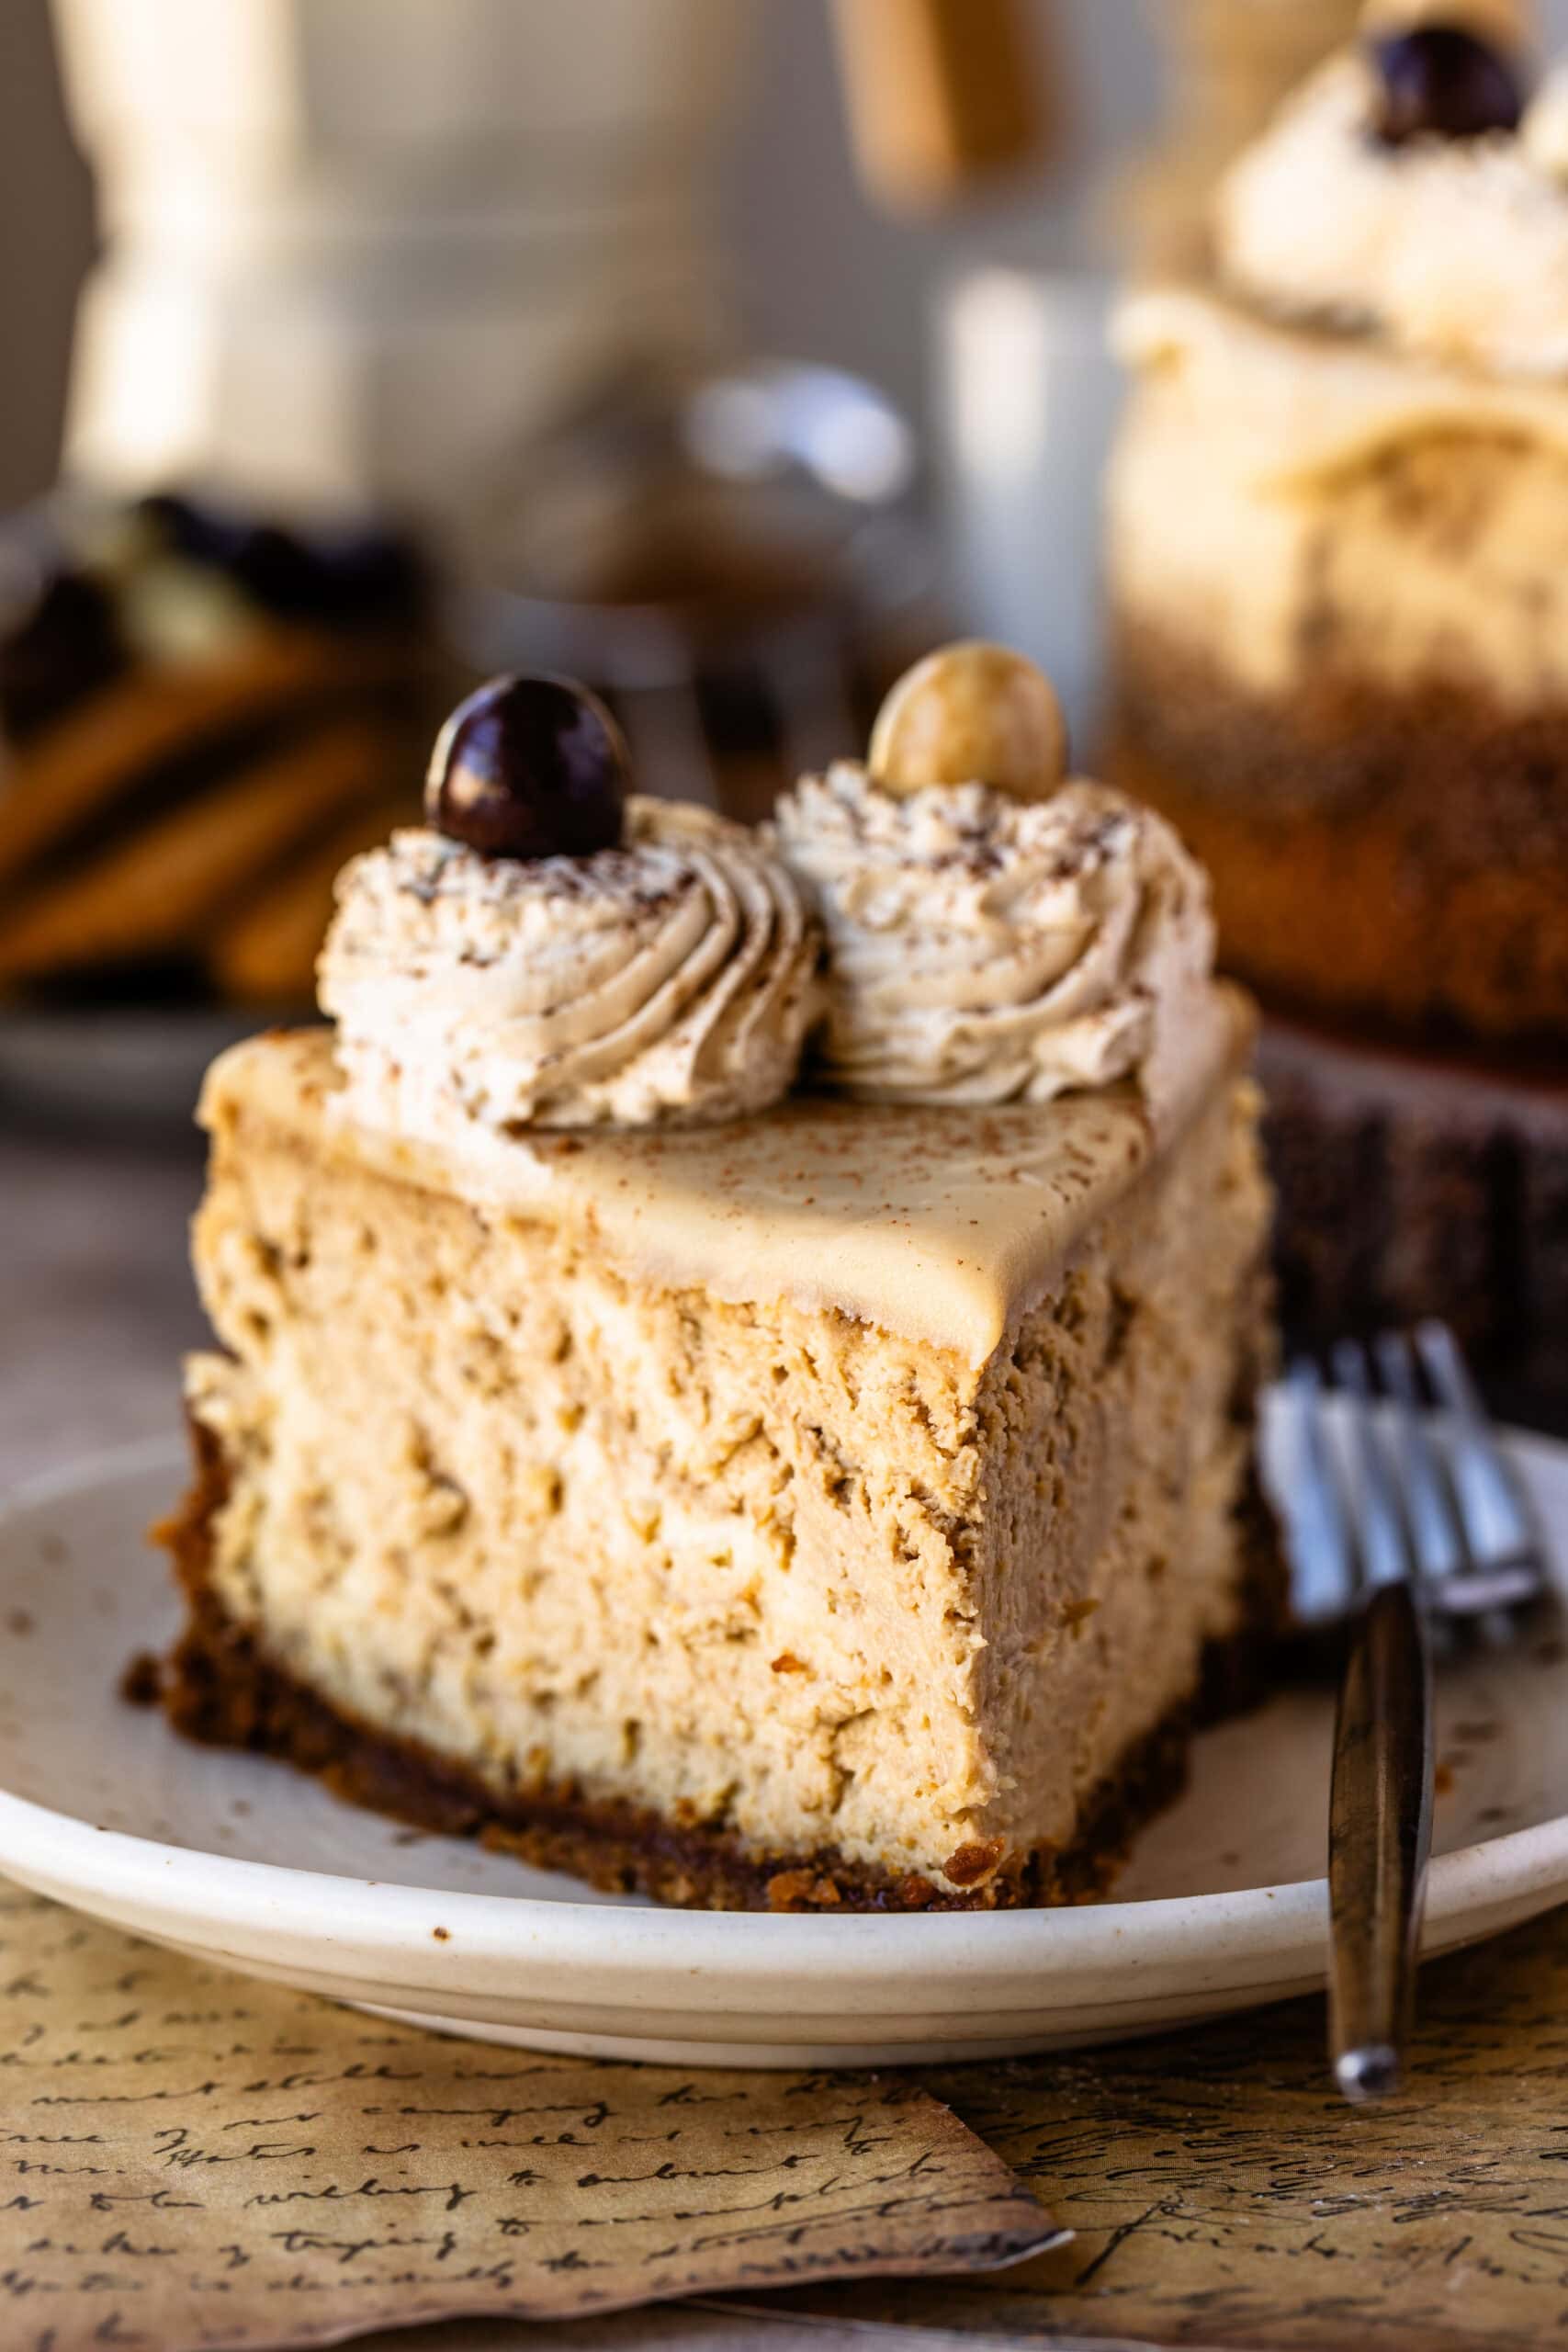
Why You’ll Love This Espresso Cheesecake
If you love coffee desserts, this cheesecake has plenty of espresso flavor without being overwhelmingly bitter. The different layers complement each other, and each one brings something a little different to the finished cheesecake.
- Rich espresso flavor: Instant espresso powder gives the cheesecake a distinct coffee flavor without adding extra liquid to the batter.
- Creamy cheesecake filling: Sour cream and a gentle water bath help create a smooth, rich texture.
- Buttery Biscoff crust: The caramelized cookies pair beautifully with the espresso and white chocolate. I borrowed the crust recipe from my Biscoff Cheesecake.
- Bailey’s white chocolate ganache: A smooth, sweet topping that balances the coffee flavor. You can also make it without alcohol.
- Perfect for making ahead: The cheesecake needs several hours to chill, making it a great dessert to prepare the day before serving.
If you’re a fan of desserts that combine chocolate and coffee, you should also try my Espresso Chocolate Scones. They’re another delicious way to enjoy that combination, especially with your morning coffee.
This post may contain affiliate links. I earn a commission from qualified purchases. Please read our Privacy policy here.
New to Making Cheesecake?
I highly recommend you check out my Best Cheesecake Tips post! It’s full of lots of tips and tricks, as well as help with troubleshooting. Cheesecakes can be hard to get right, so here I make sure you have support every step of the way!
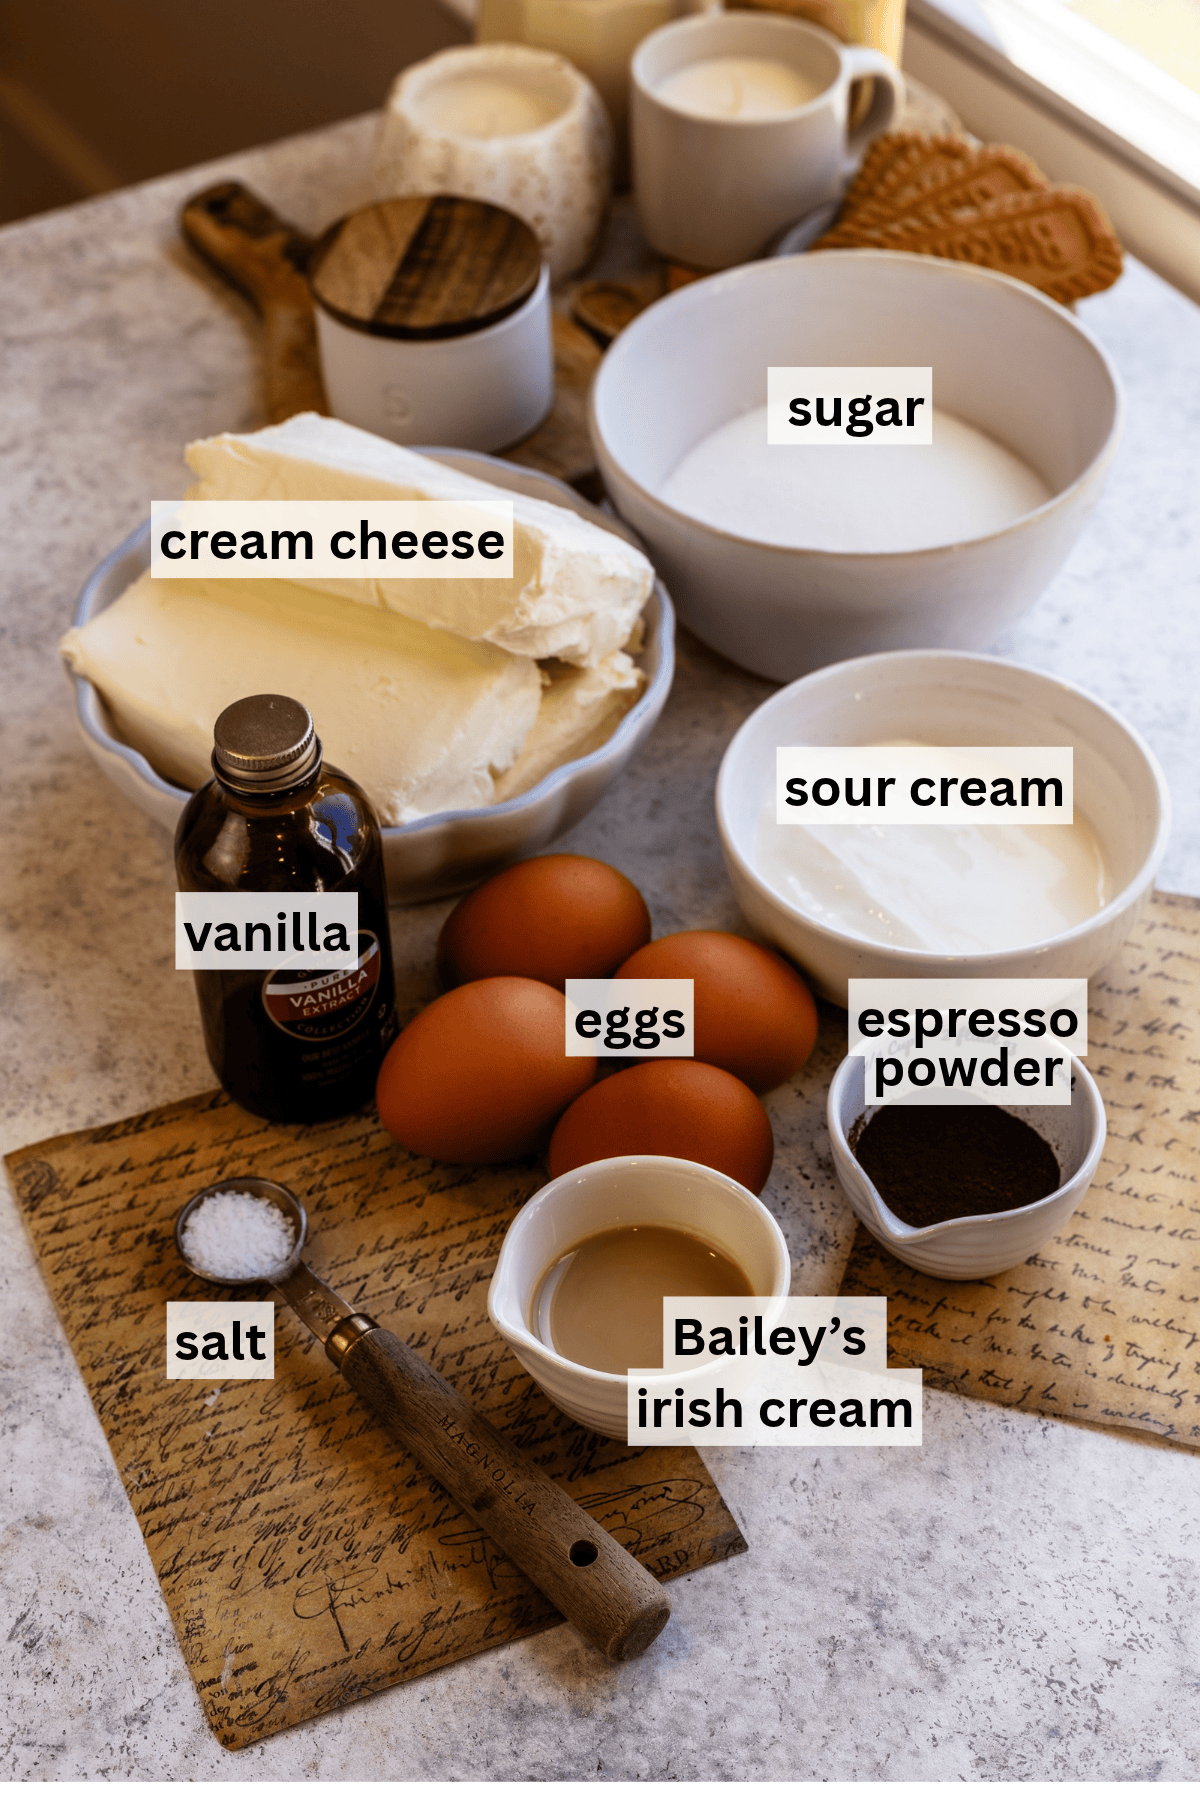
Key Ingredients and Why I Use Them
Cream cheese: Full-fat, brick-style cream cheese is the foundation of this cheesecake. Make sure it’s softened to room temperature before mixing so the batter becomes completely smooth without needing excessive beating.
Instant espresso powder: This is what gives the cheesecake its coffee flavor. I use instant espresso powder because it dissolves into the batter without adding moisture or leaving behind coffee grounds.
Sour cream: Sour cream adds a little tanginess and helps keep the cheesecake filling creamy. You can substitute plain full-fat Greek yogurt if needed.
Biscoff cookies: The caramelized, lightly spiced flavor of Biscoff cookies works especially well with espresso. I use my homemade Biscoff Crust recipe for the base.
Bailey’s Irish Cream: Bailey’s adds a subtle Irish cream flavor to the cheesecake and ganache. The tablespoon in the cheesecake batter is optional, and the ganache can also be made without alcohol.
White chocolate: I use real white chocolate containing cocoa butter for the ganache. I prefer chopped Lindt white chocolate bars because they melt smoothly and produce a creamy ganache.
Heavy whipping cream: Cold heavy cream creates the fluffy espresso whipped cream topping, while a smaller amount is used to melt the white chocolate for the ganache.
How to Make Espresso Cheesecake
This cheesecake has four components: the Biscoff crust, espresso cheesecake filling, Bailey’s ganache, and espresso whipped cream. I recommend making the crust and cheesecake the day before you plan to serve it, then adding the toppings once the cheesecake has chilled completely.
The Biscoff Crust
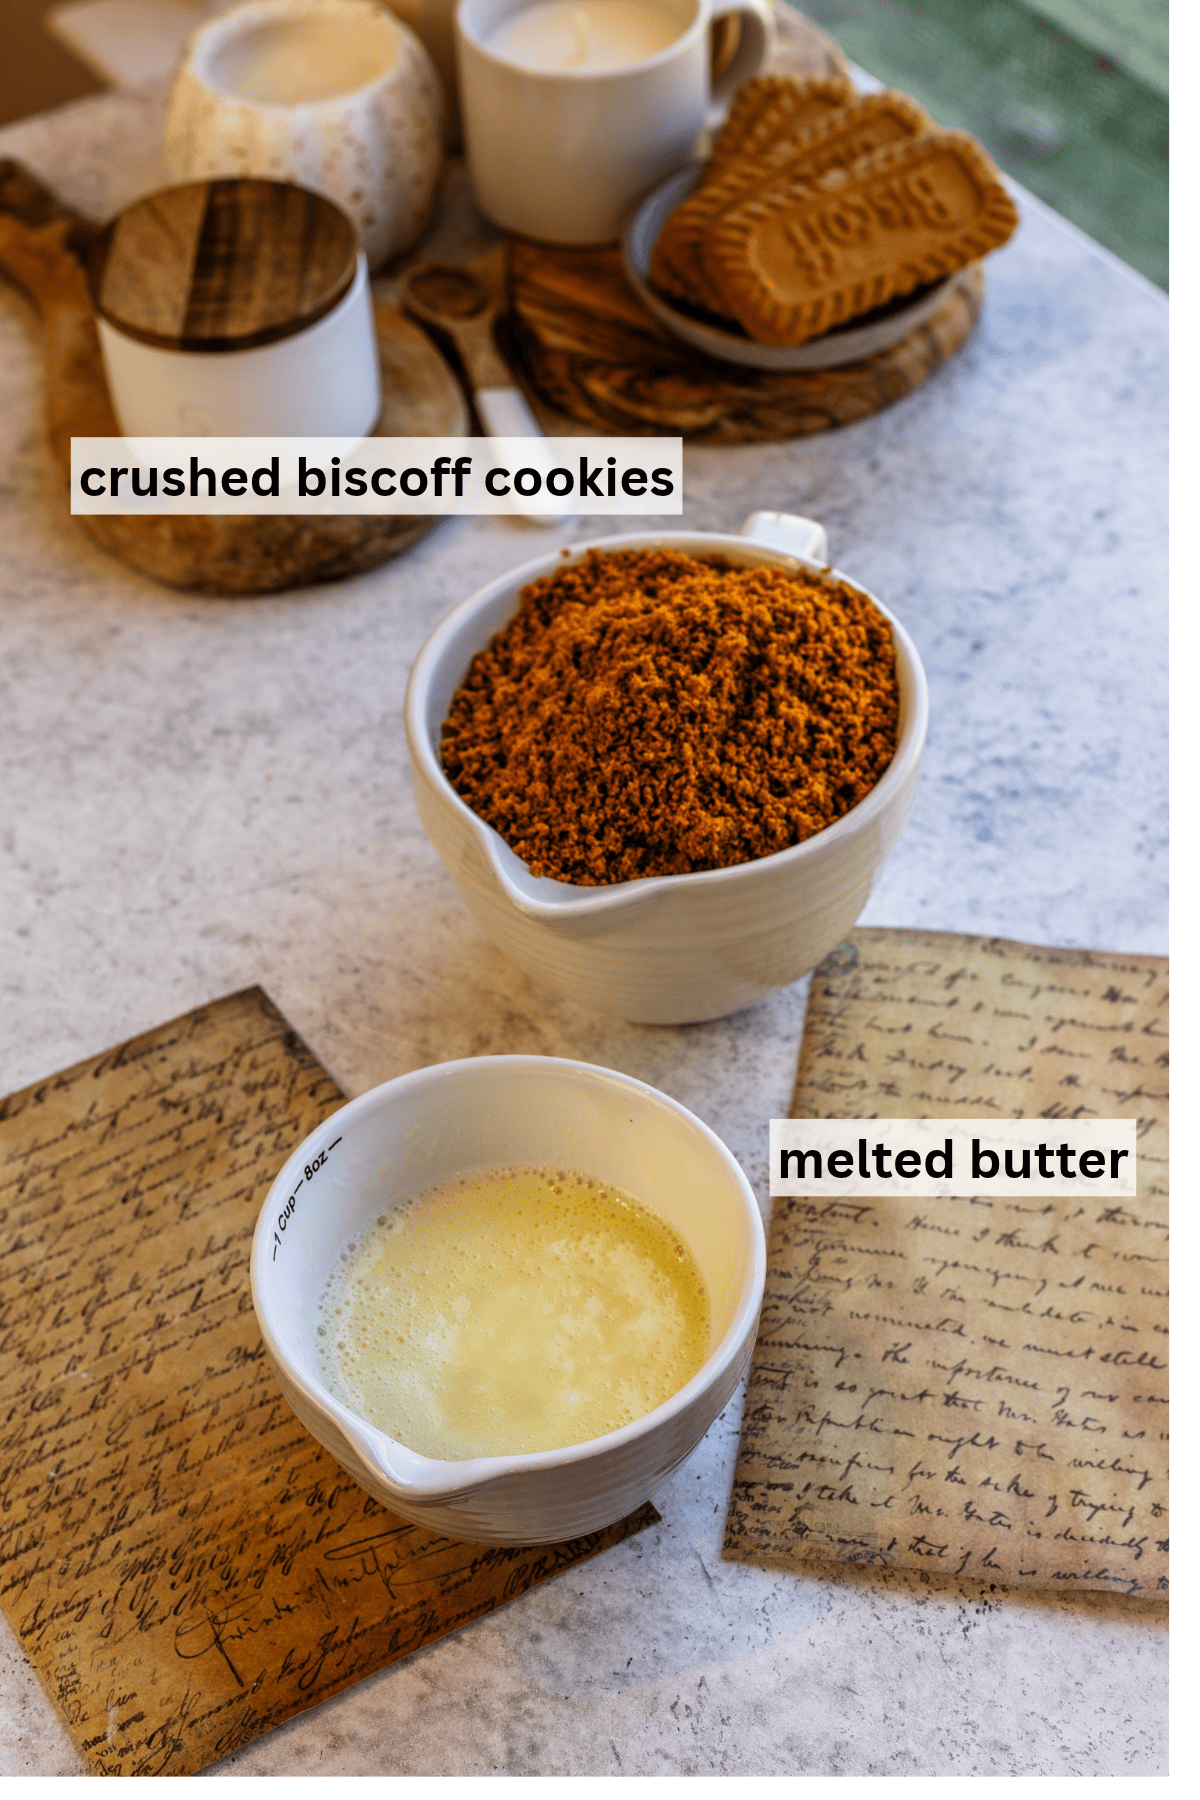
For this recipe, I’m using my Biscoff Cookie Crust recipe. It’s very simple and easy to make because it’s literally just Biscoff cookie crumbles and melted butter. It will give this espresso cheesecake a little bit of sweetness and spice!
Make the Biscoff Crust
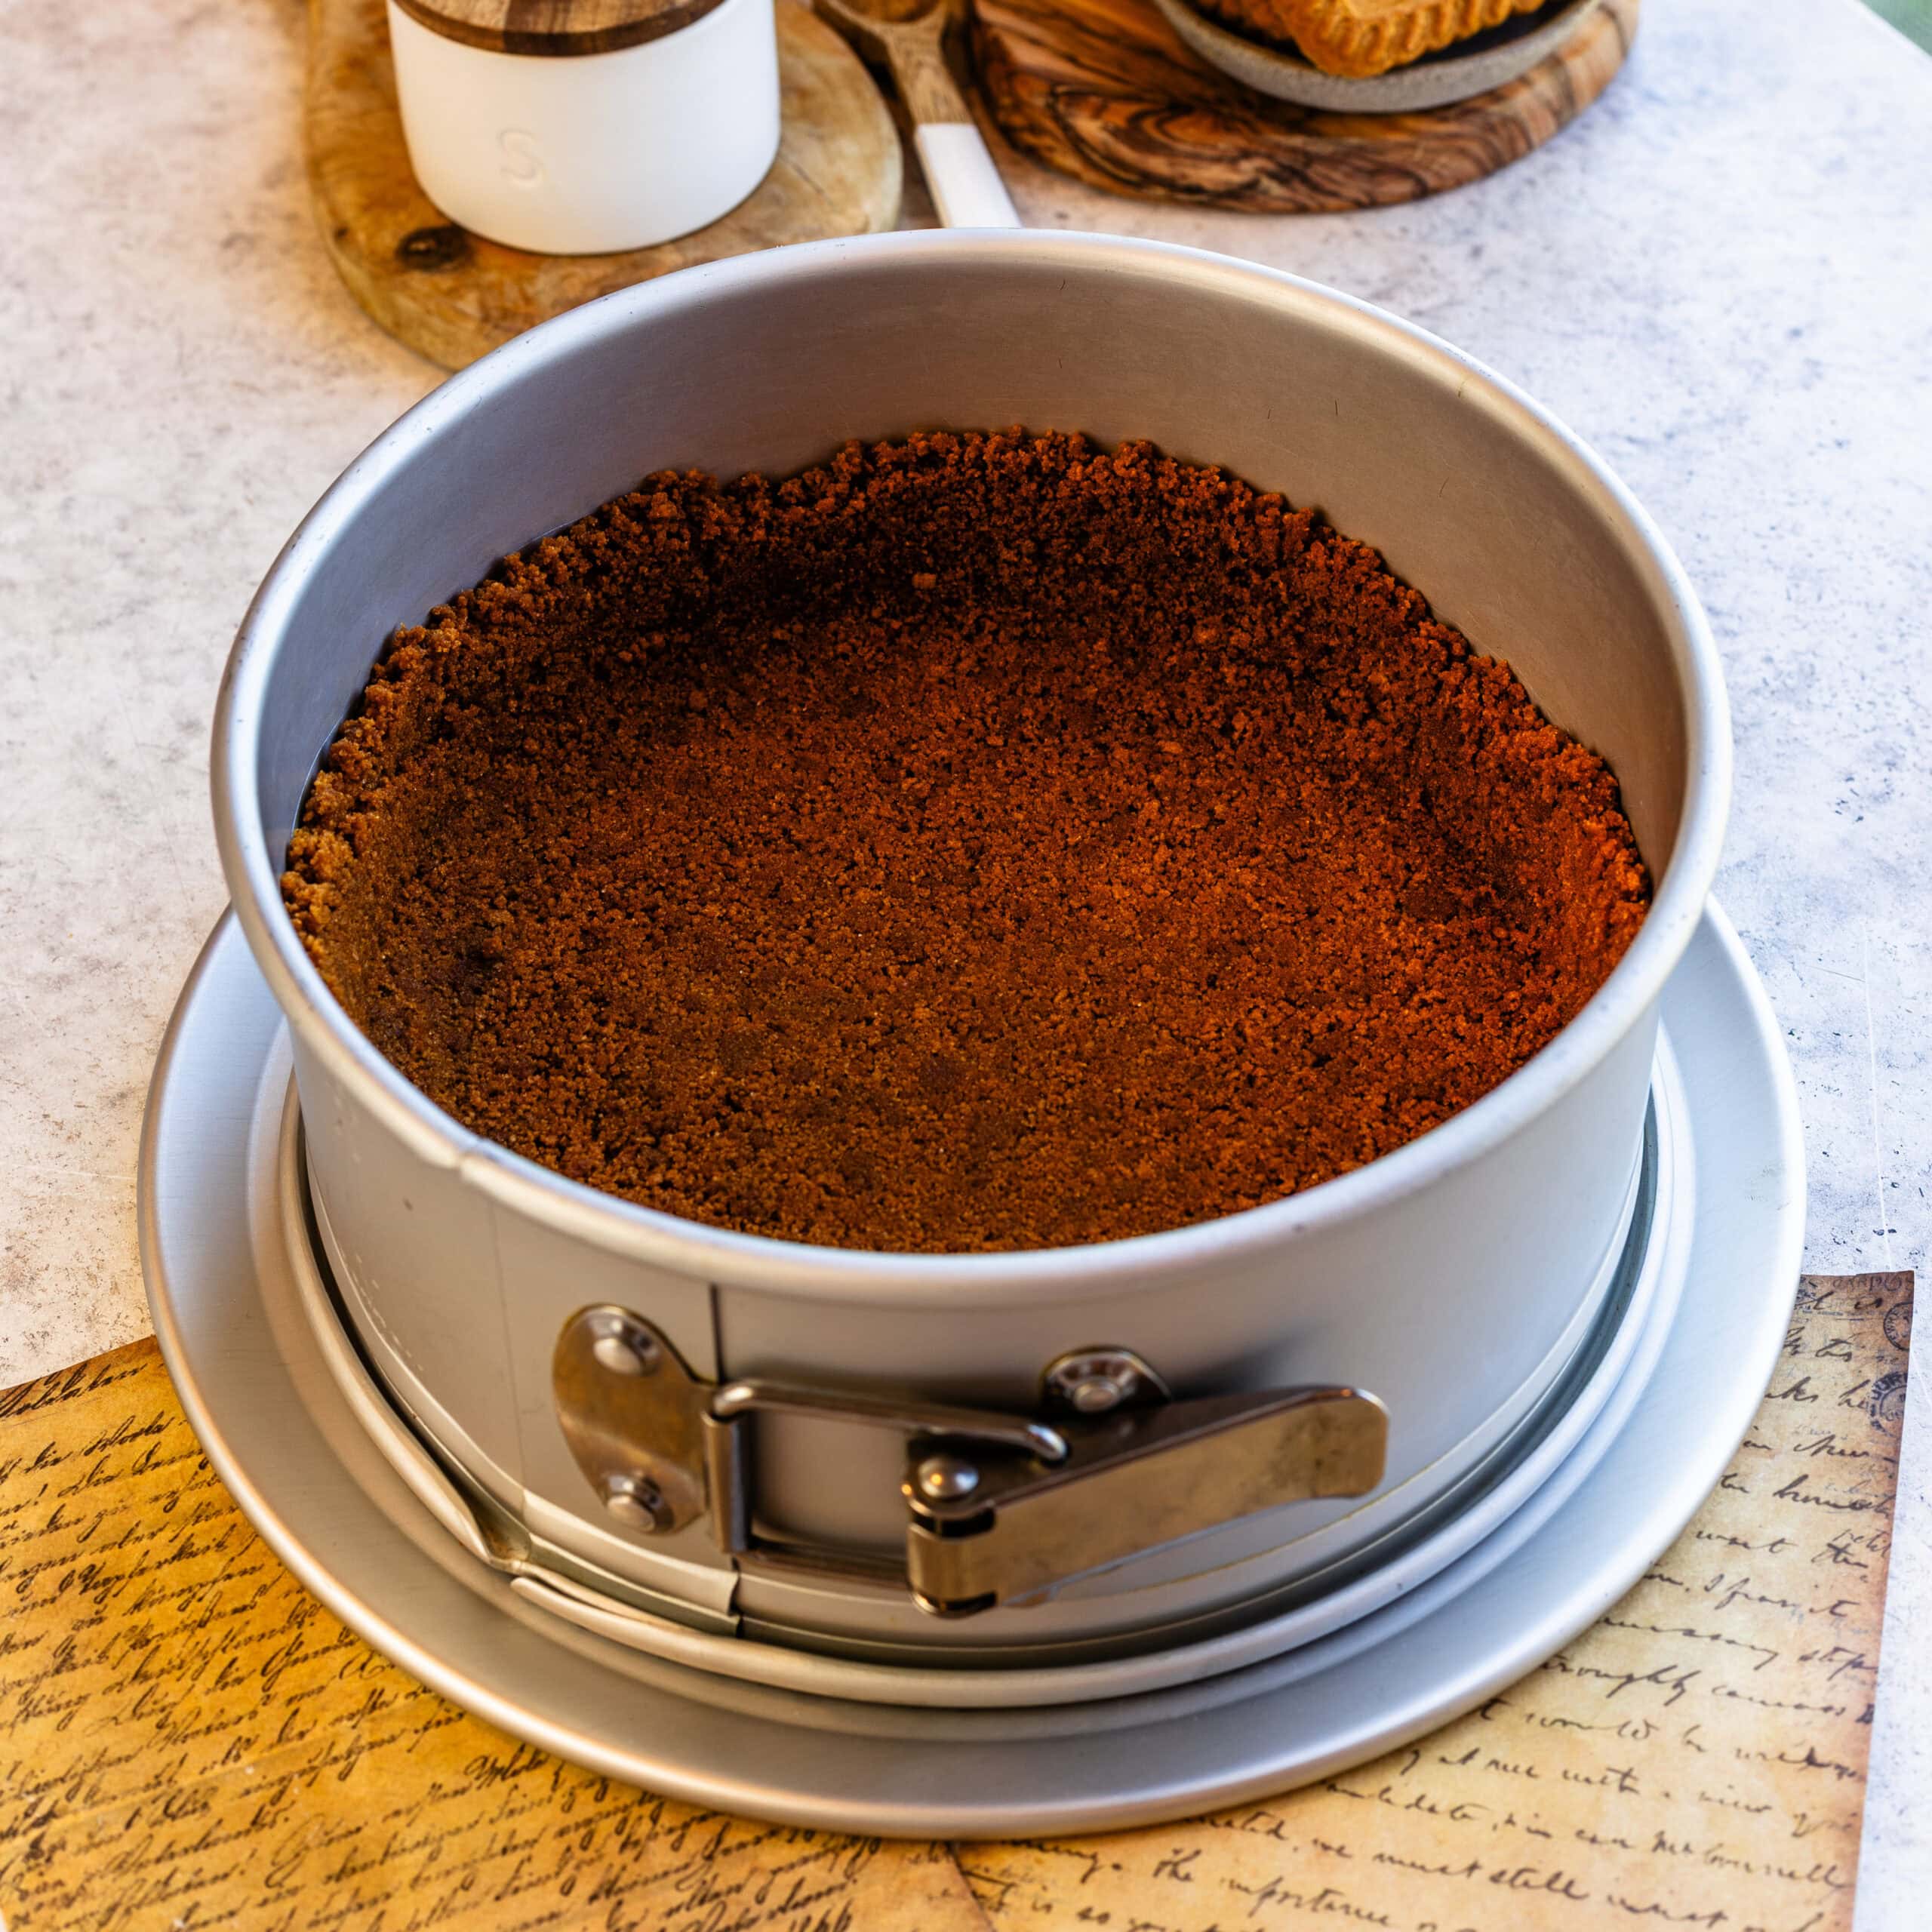
Start by preparing my Biscoff Crust according to the recipe instructions. Crush the Biscoff cookies into crumbs. Mix with melted butter, and press the crumbs onto the bottom of your springform pan.
Bake in the oven for about 10 minutes – your crust should come out slightly golden. While the crust is baking and cooling, it’s time to prepare the cheesecake filling. Bake the crust and allow it to cool before adding the cheesecake filling.
I like to grease the exposed sides of the cheesecake pan after baking the crust rather than before. This helps the crust stay in place while allowing the cheesecake to release more easily from the sides of the pan.
The Biscoff crust adds a buttery, caramelized flavor that complements the espresso beautifully. If you enjoy baking with these cookies, my Biscoff Chocolate Cheesecake is another recipe worth trying. You can also use a regular Graham Cracker Crust if you prefer a more neutral base.
Make the Espresso Cheesecake Batter
Place the softened cream cheese in a large mixing bowl. Using an electric mixer, beat on medium speed for about 3 minutes, until completely creamy and smooth. Add the granulated sugar and continue beating for another 2 minutes.
Stop the mixer and scrape the sides and bottom of the bowl thoroughly with a spatula. Beat for another 30 seconds to make sure there are no lumps of cream cheese remaining.
Add the sour cream and mix until combined. Scrape the sides and bottom of the bowl again.
Next, add the eggs one at a time, mixing on low speed just until each egg is incorporated before adding the next. It’s important not to overmix the cheesecake batter once the eggs have been added because incorporating too much air can cause the cheesecake to rise excessively and crack as it cools.
With the final egg, add the vanilla extract, salt, and Bailey’s Irish Cream, if using. Mix just until combined.
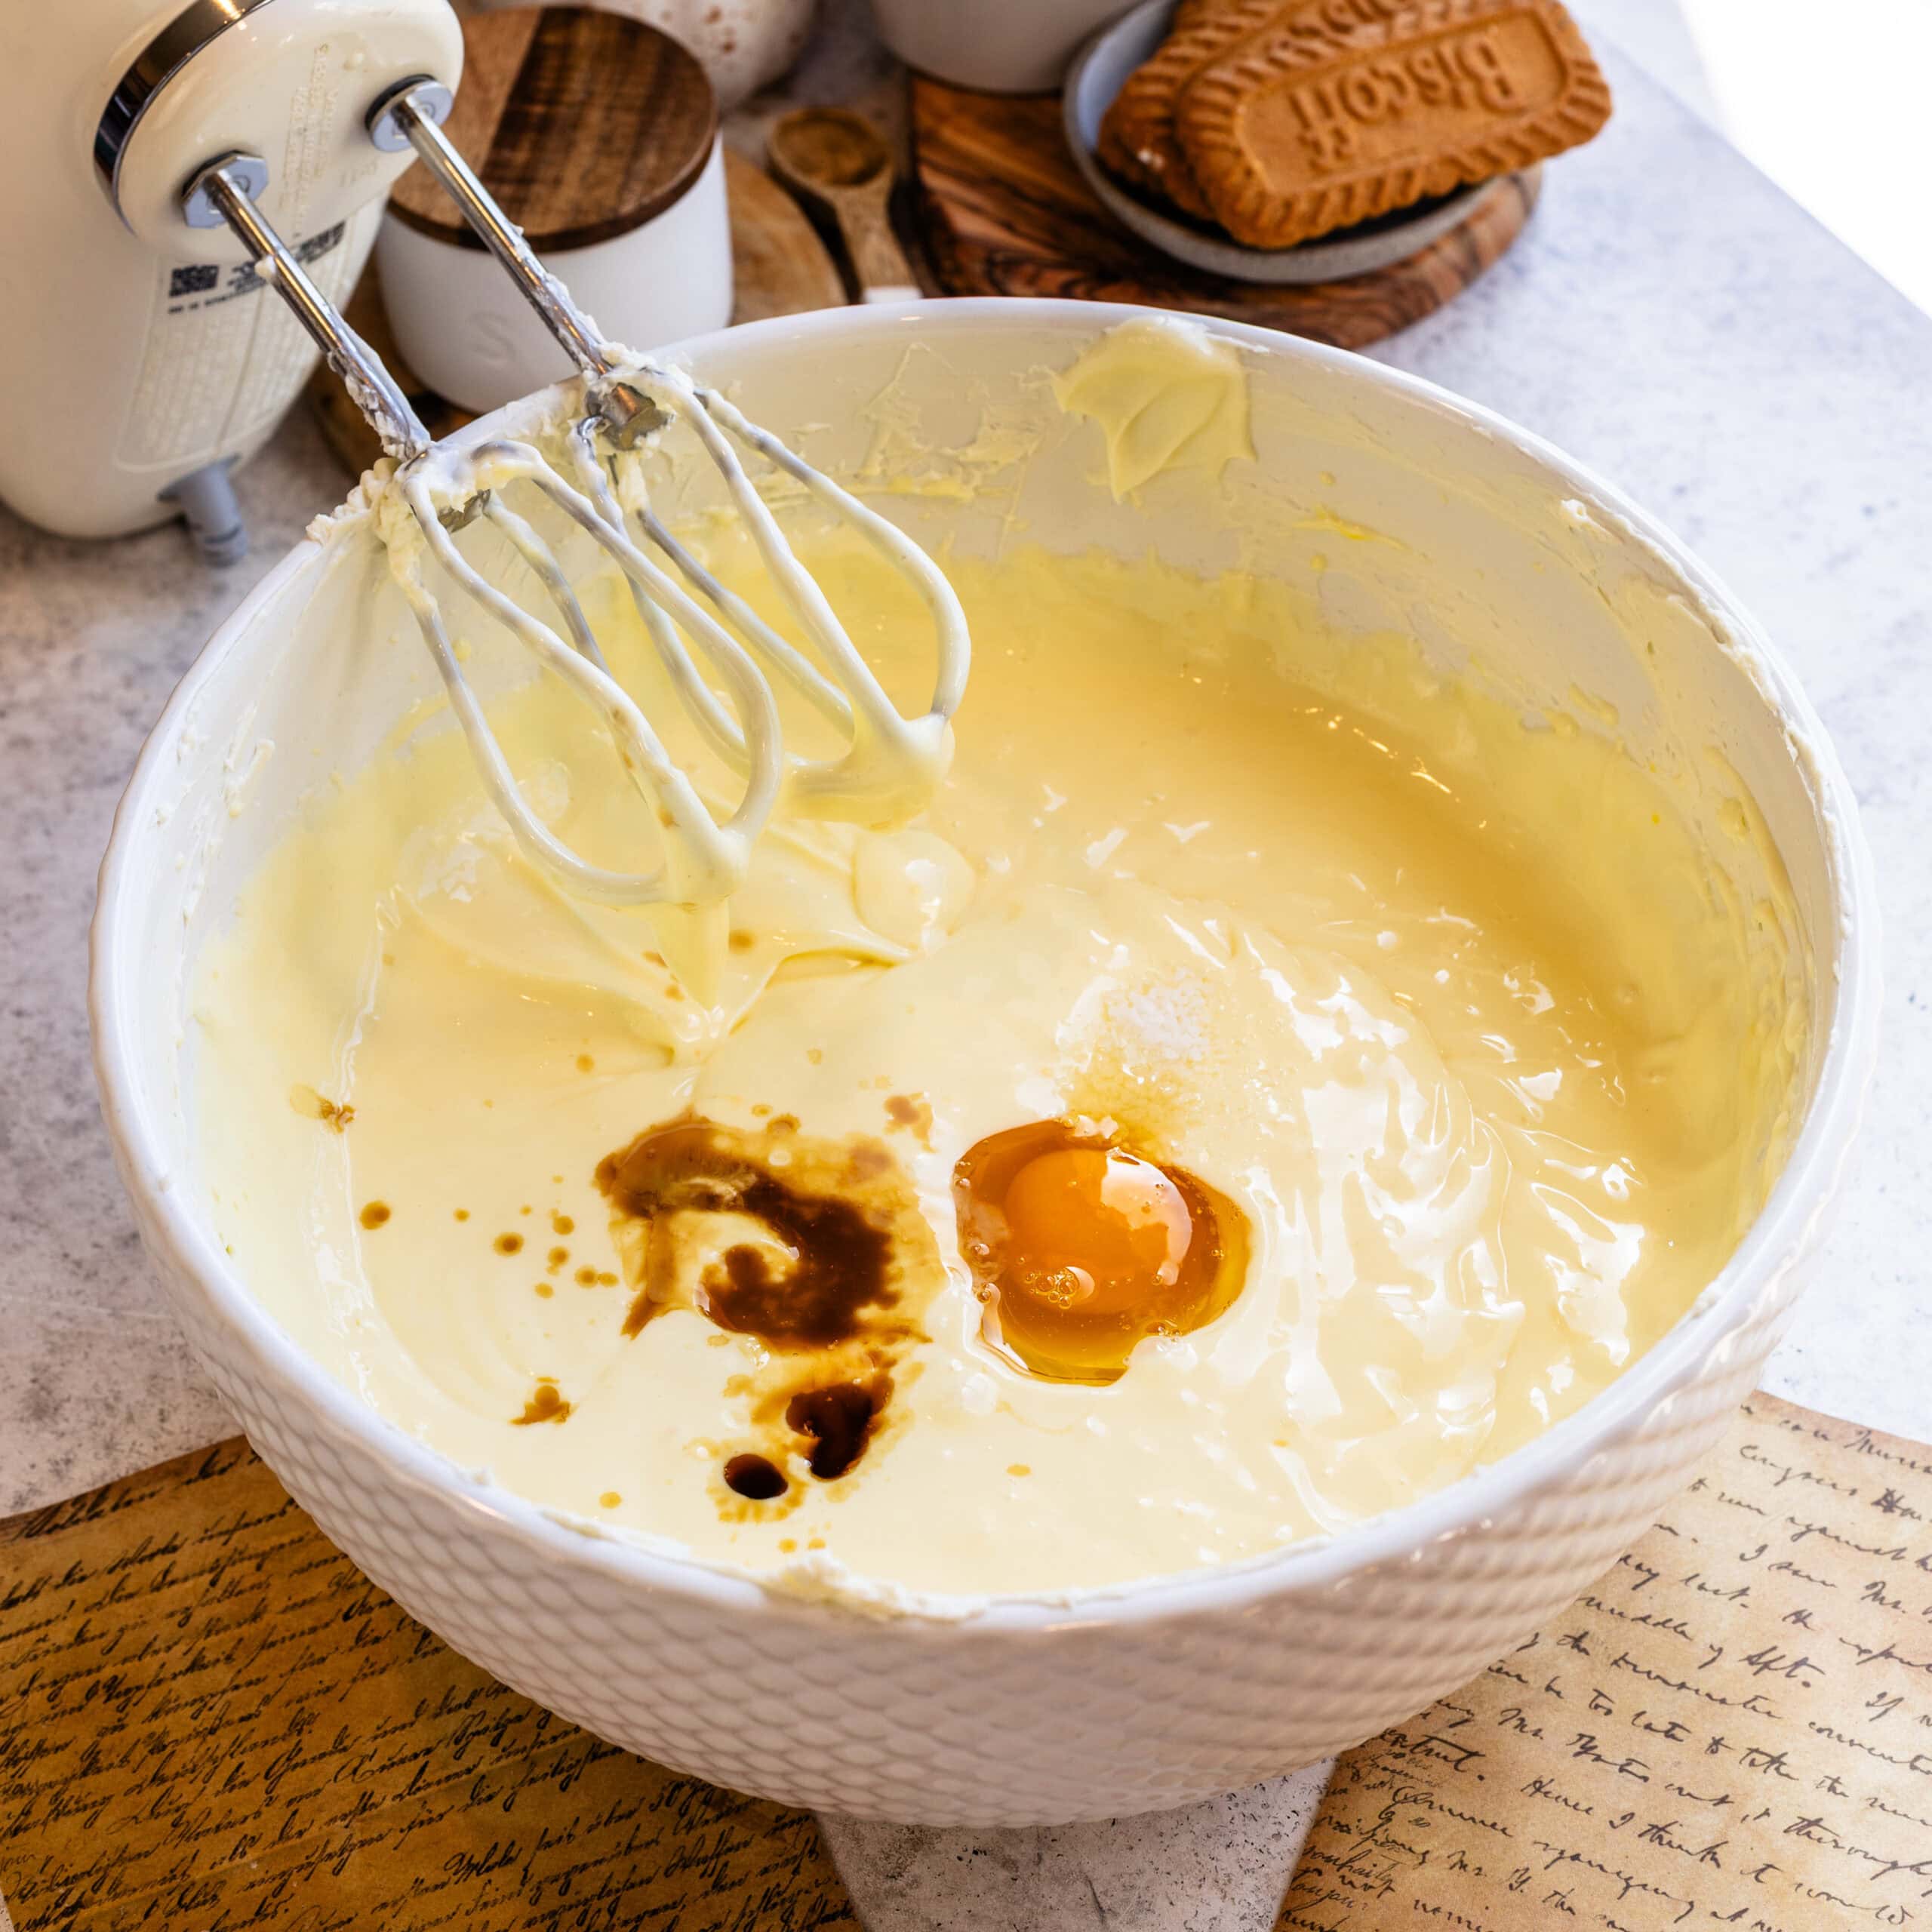
Add the Espresso Powder
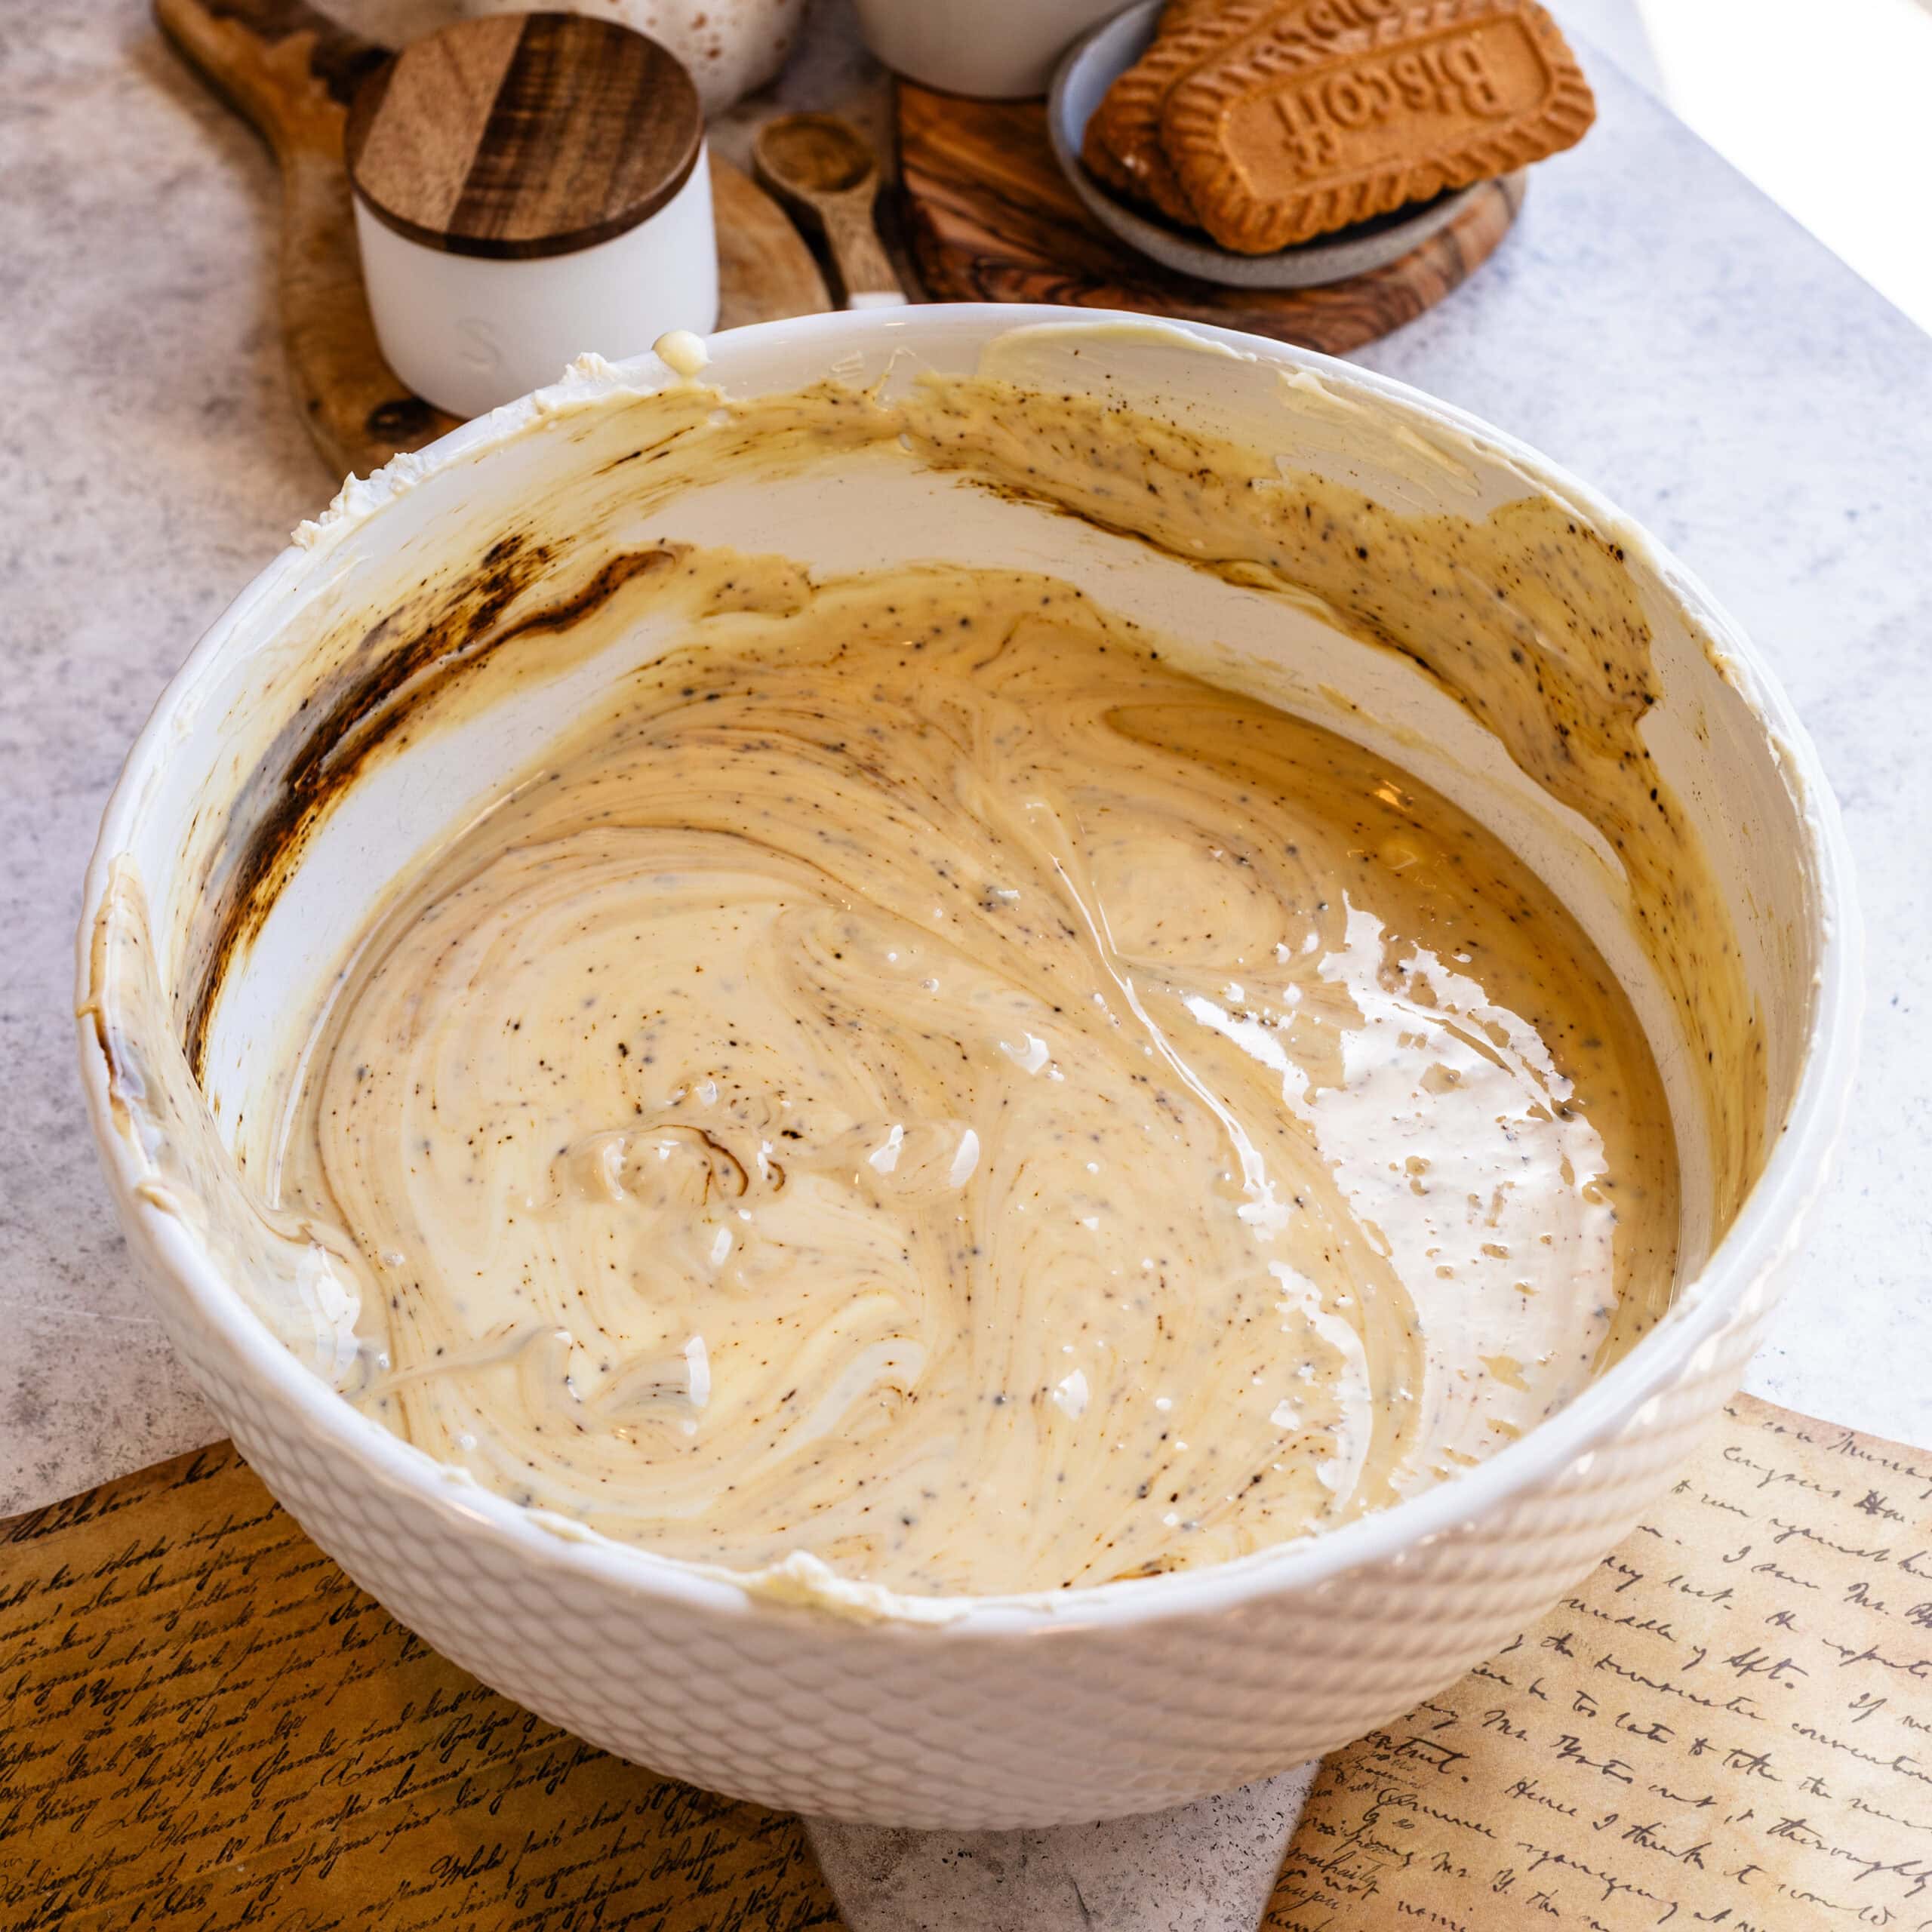
Finally, add the instant espresso powder and mix on low speed until it is evenly distributed throughout the batter. Scrape the bowl once more to make sure everything is incorporated.
The batter should be smooth, creamy, and lightly coffee-colored.
Prepare the Water Bath
Pour the espresso cheesecake batter over the baked and cooled Biscoff crust. Smooth the top with a spatula if necessary.
Now we’re going to use a water bath to bake this cheesecake. The moisture and gentle, even heat help the cheesecake bake more slowly, reducing the risk of cracks and keeping the texture creamy.
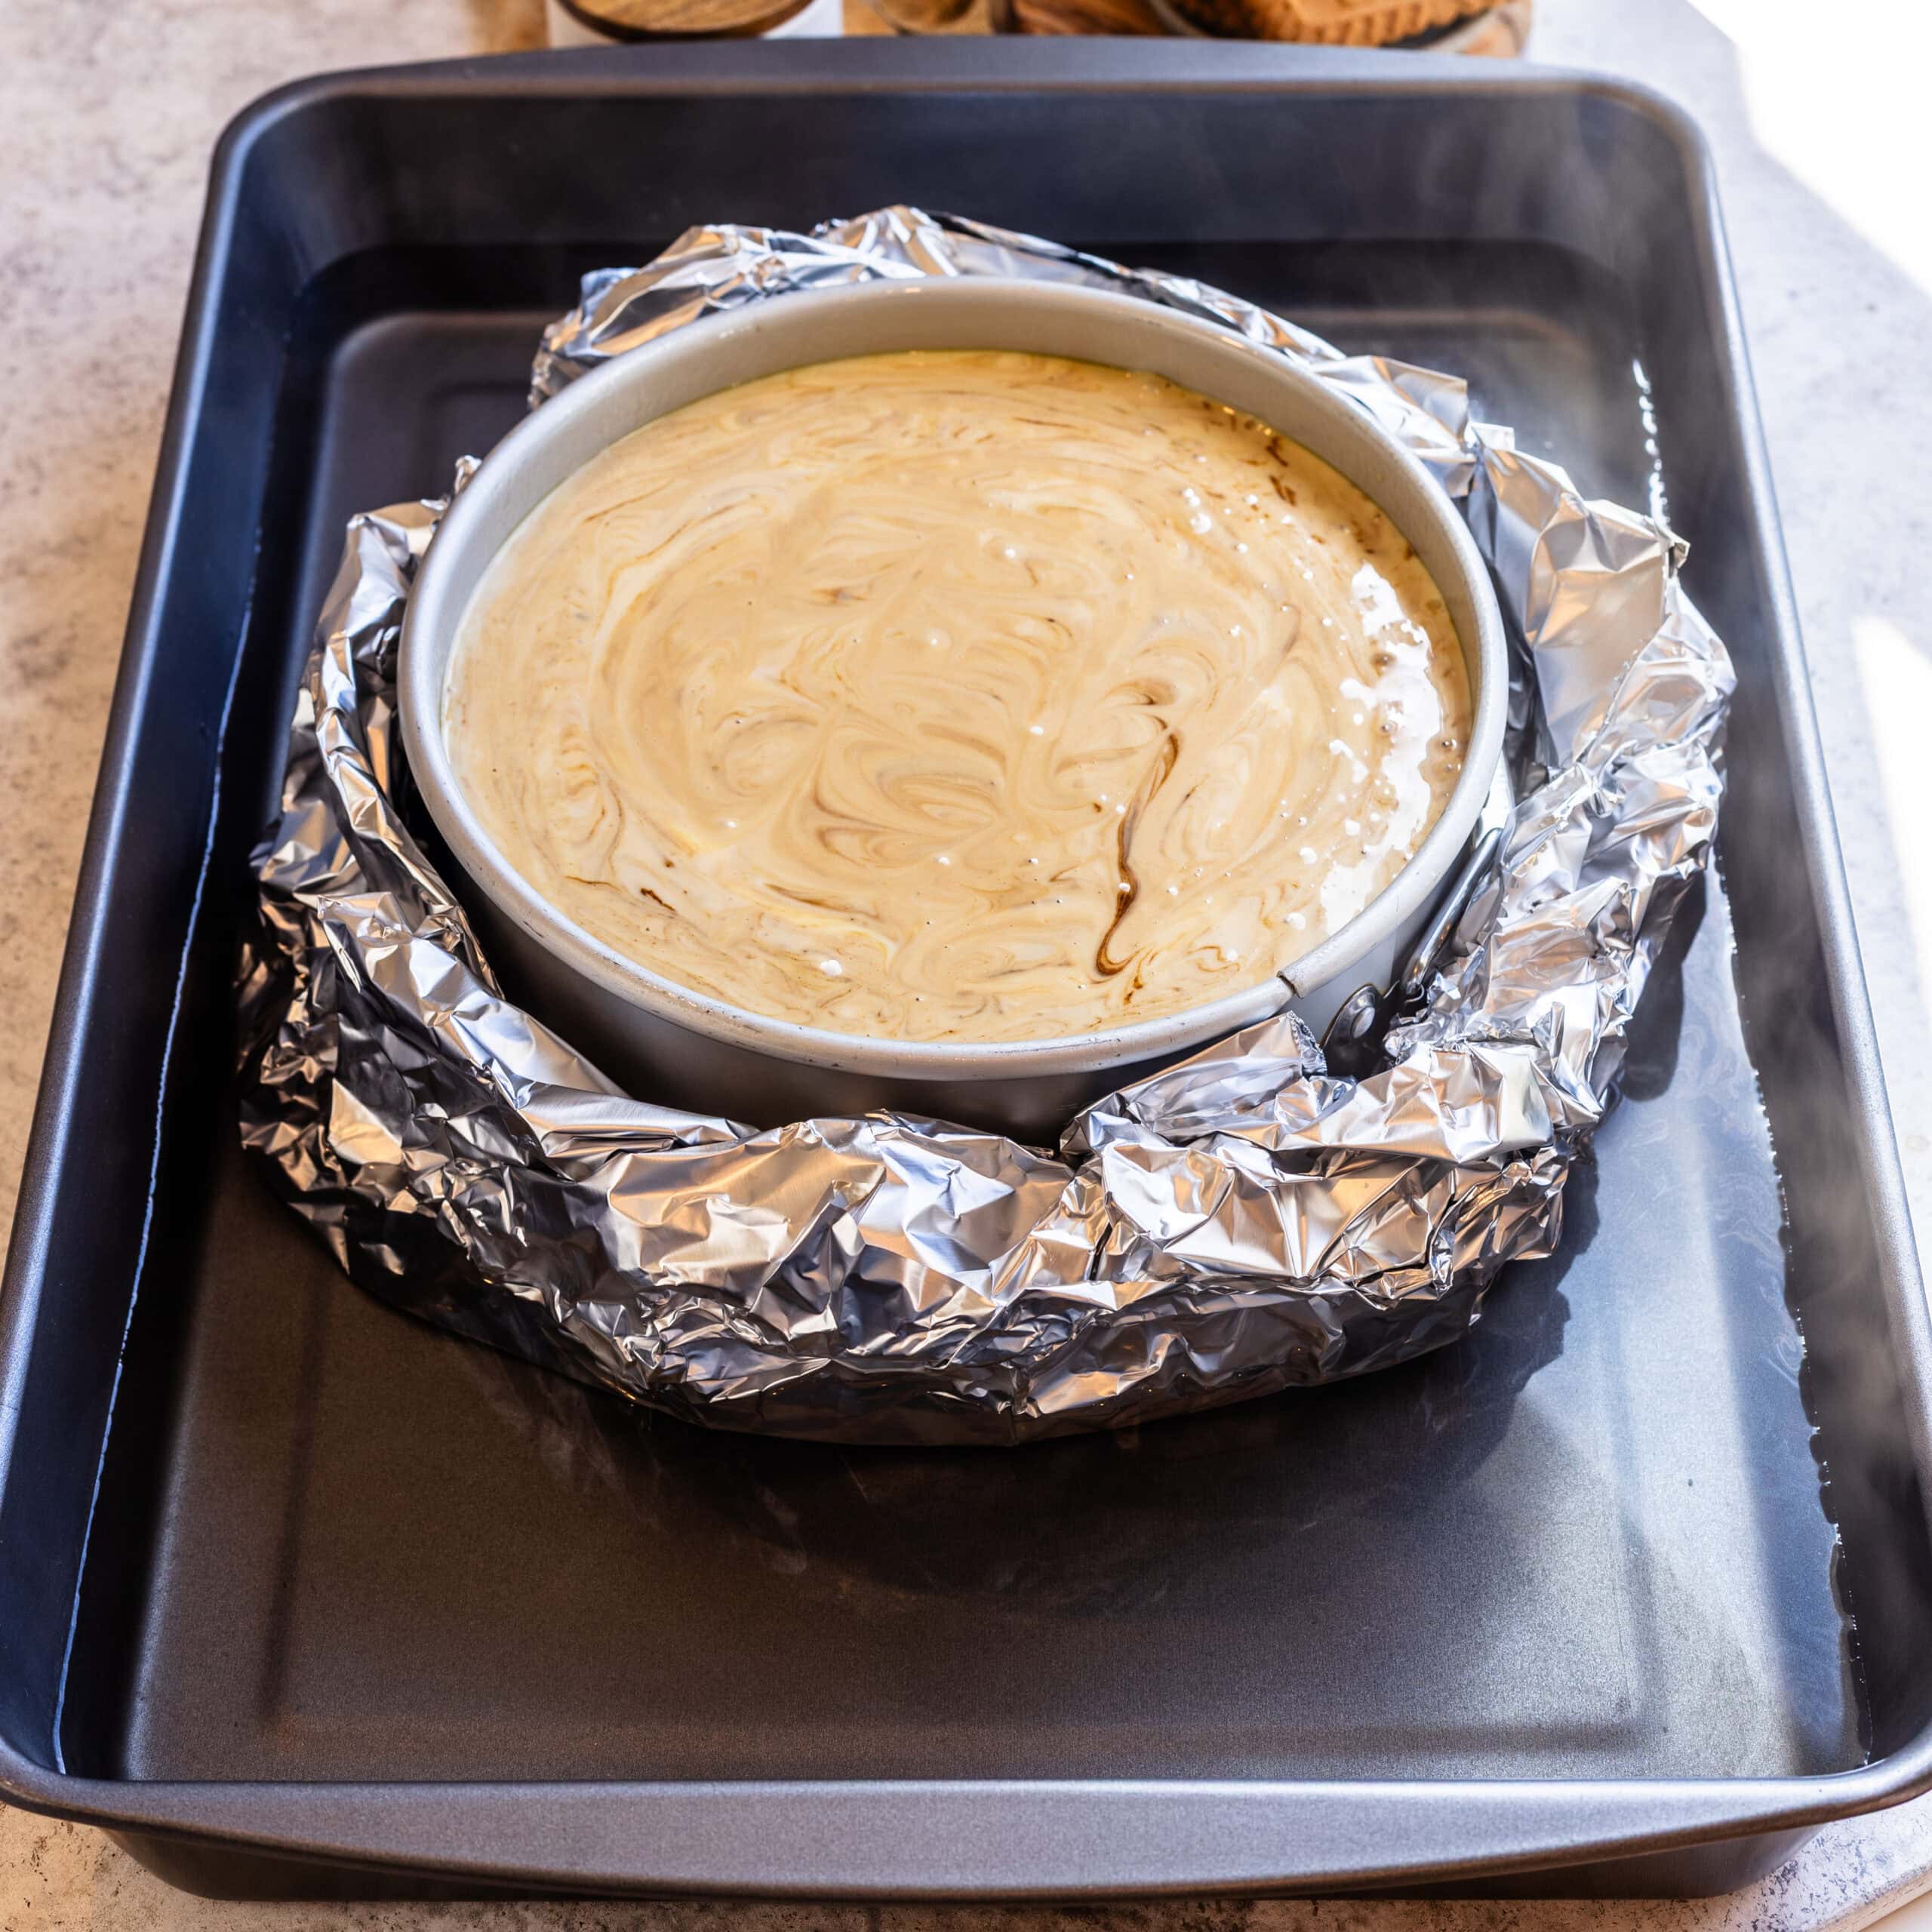
Before placing the cheesecake in the oven, wrap the bottom and sides of the springform pan with several layers of heavy-duty aluminum foil. I prefer using 18-inch-wide heavy-duty foil. Lay three large pieces of foil on the counter in different directions, place the cheesecake pan in the center, and bring the foil securely up around the sides of the pan.
Make sure there are no gaps where water could seep into the crust. Place the wrapped cheesecake pan inside a larger roasting pan.
Carefully pour hot water into the roasting pan until it reaches approximately halfway up the sides of the cheesecake pan. If you’re concerned about water leaking into the crust, you can also place the cheesecake pan inside a slightly larger solid cake pan before setting it in the roasting pan. This creates an additional barrier between the cheesecake and the water.
Bake the Cheesecake
Bake the cheesecake in a preheated 325ºF (163ºC) oven for 60 to 75 minutes.
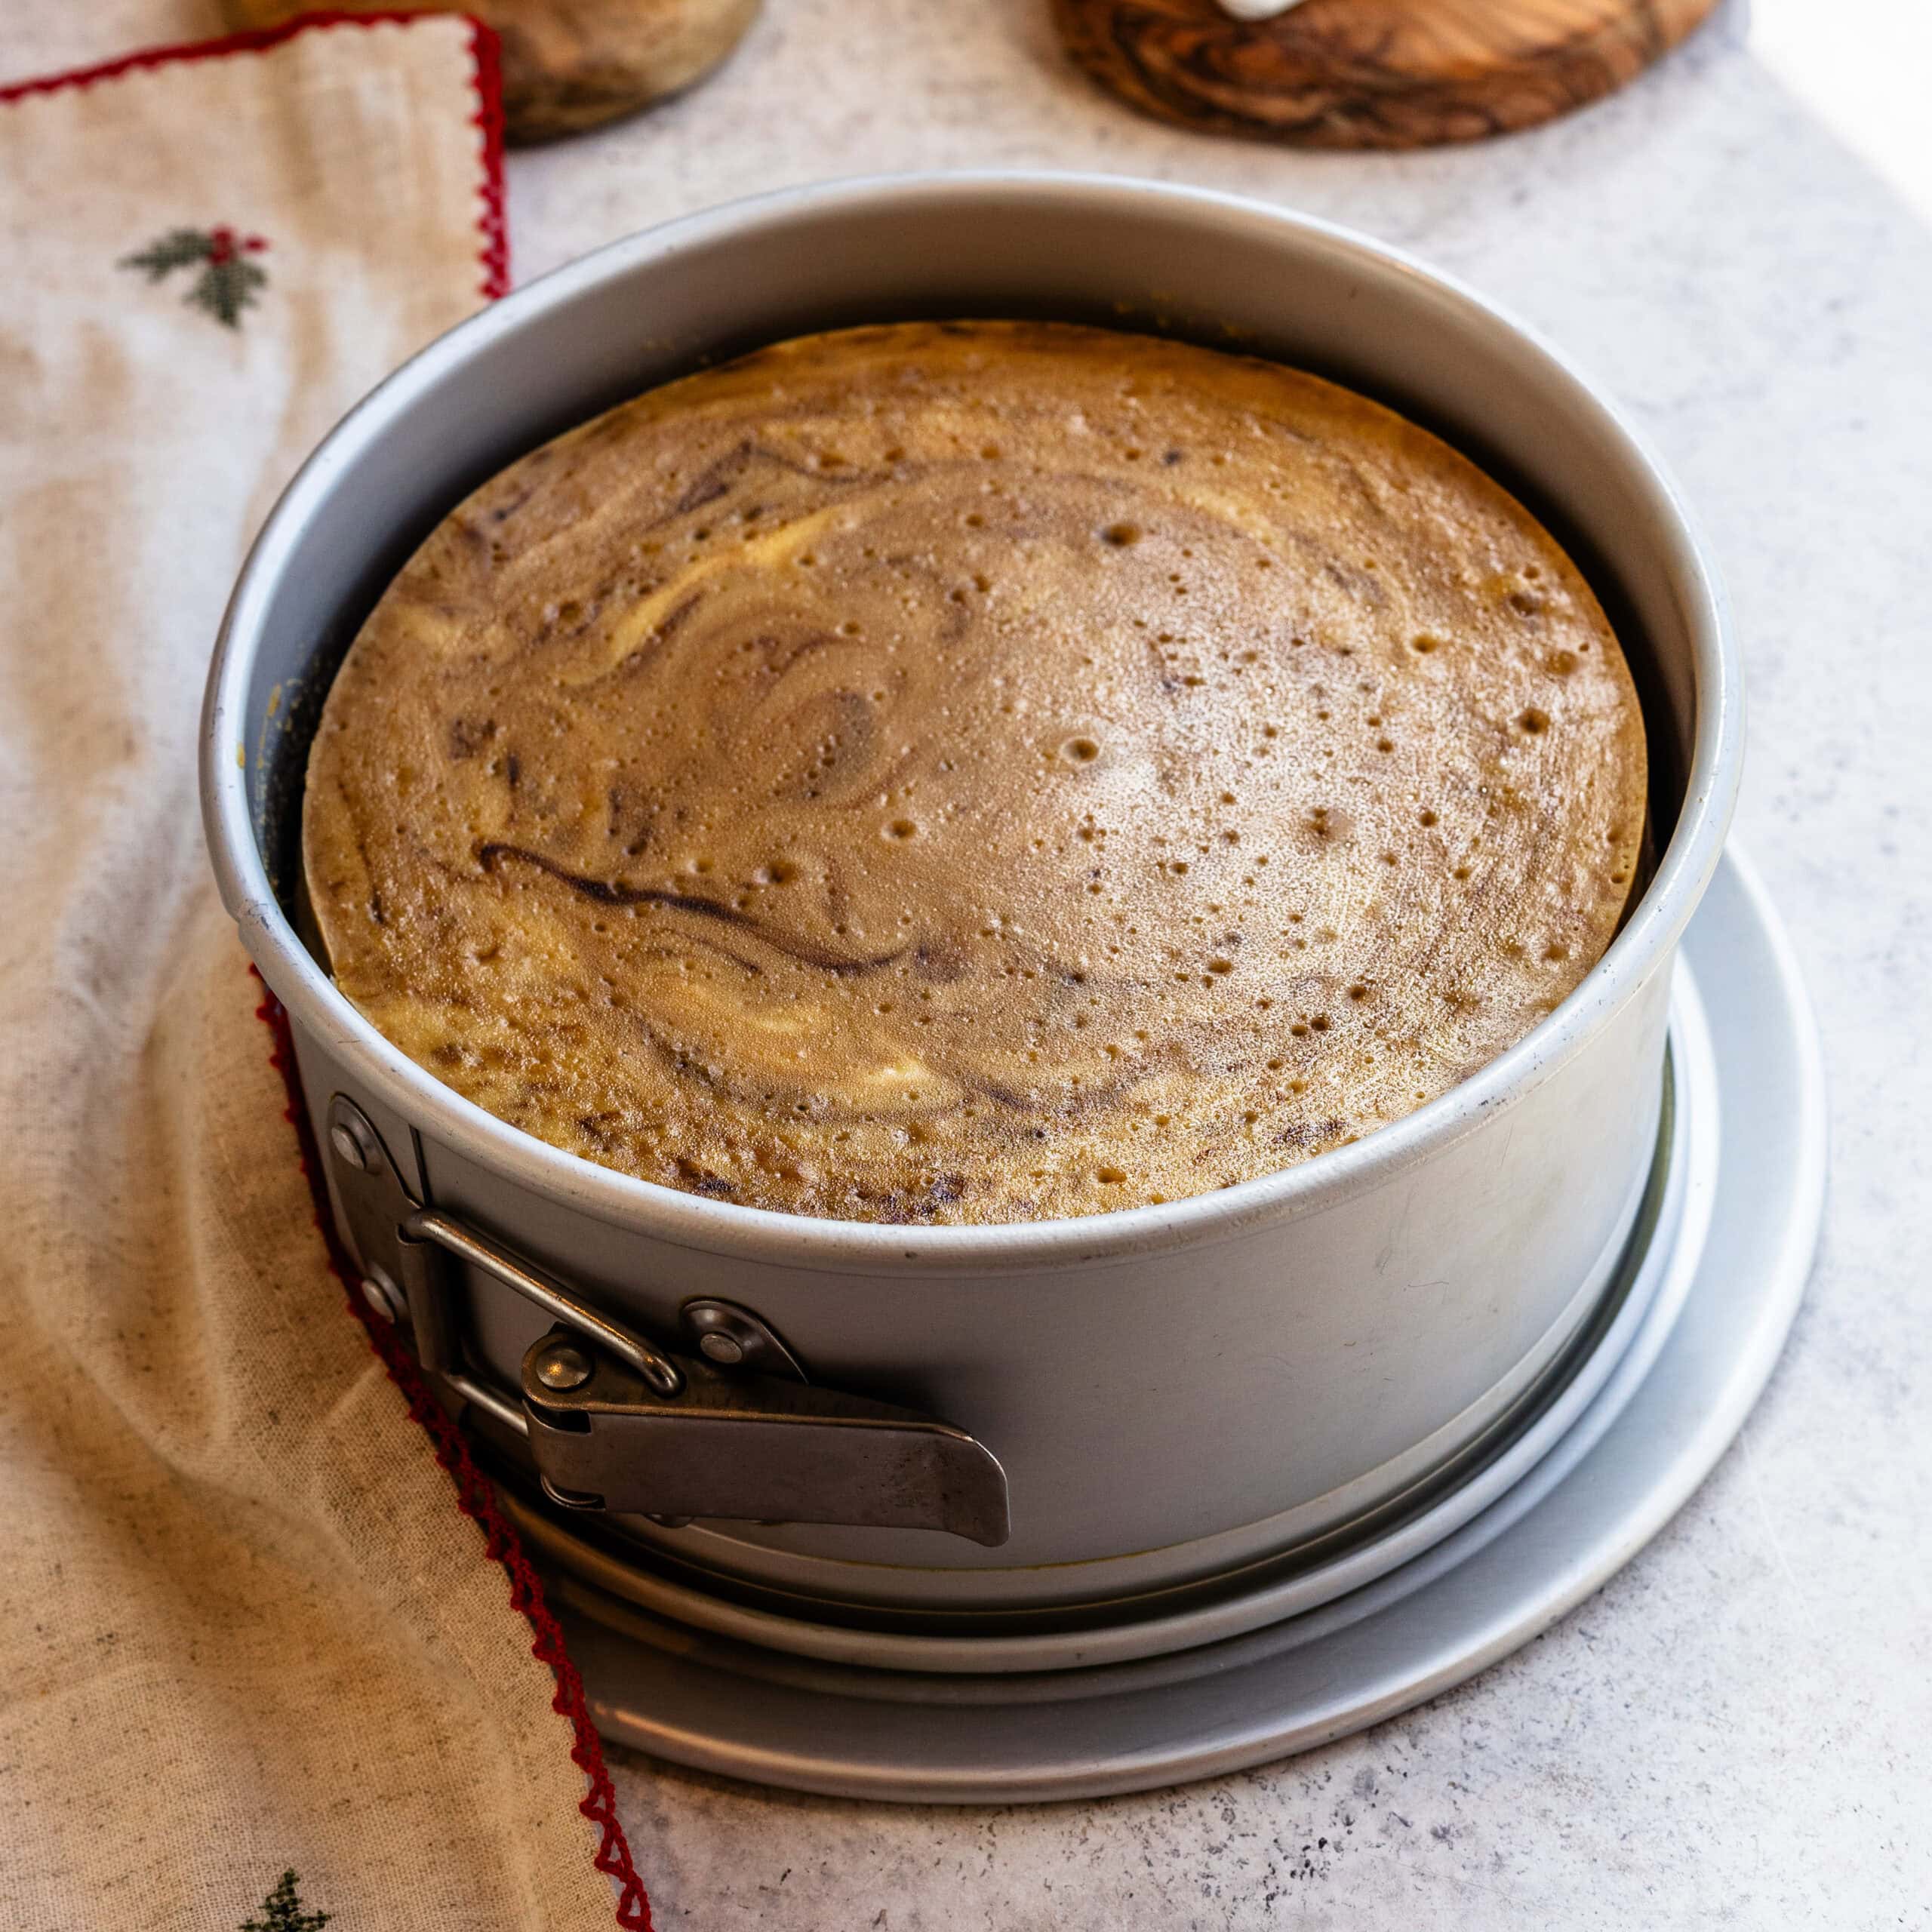
The cheesecake is ready when the edges are set but the center still has a slight jiggle when the pan is gently moved. The center shouldn’t look liquid, but it also shouldn’t be completely firm.
Avoid waiting until the entire cheesecake is solid because it will continue to set as it cools.
Once the cheesecake is done, turn off the oven and leave it inside for 1 hour. This gradual cooling period helps prevent sudden temperature changes that can cause cracks.
After 1 hour, remove the cheesecake from the oven and carefully lift it out of the water bath. Remove the foil and allow the cheesecake to cool completely at room temperature.
Refrigerate for at least 6 hours, preferably overnight, before removing it from the pan and decorating.
Chilling is an important part of making cheesecake. It allows the filling to finish setting and gives it that dense, creamy texture that makes clean slices possible.
Make the Bailey’s Ganache
The Bailey’s ganache is one of my favorite parts of this cheesecake. It’s made with white chocolate, heavy cream, and Irish cream, creating a smooth topping that balances the espresso flavor. If you enjoy the flavor of Irish cream in cheesecake, you should also check out my Bailey’s Cheesecake.
Place the finely chopped white chocolate in a heatproof bowl. Add the heavy cream to a small saucepan and heat over medium-low heat until steaming. Do not let it boil.
Pour the hot cream over the chopped white chocolate and let the mixture sit undisturbed for 2 minutes. This gives the chocolate time to soften before mixing.
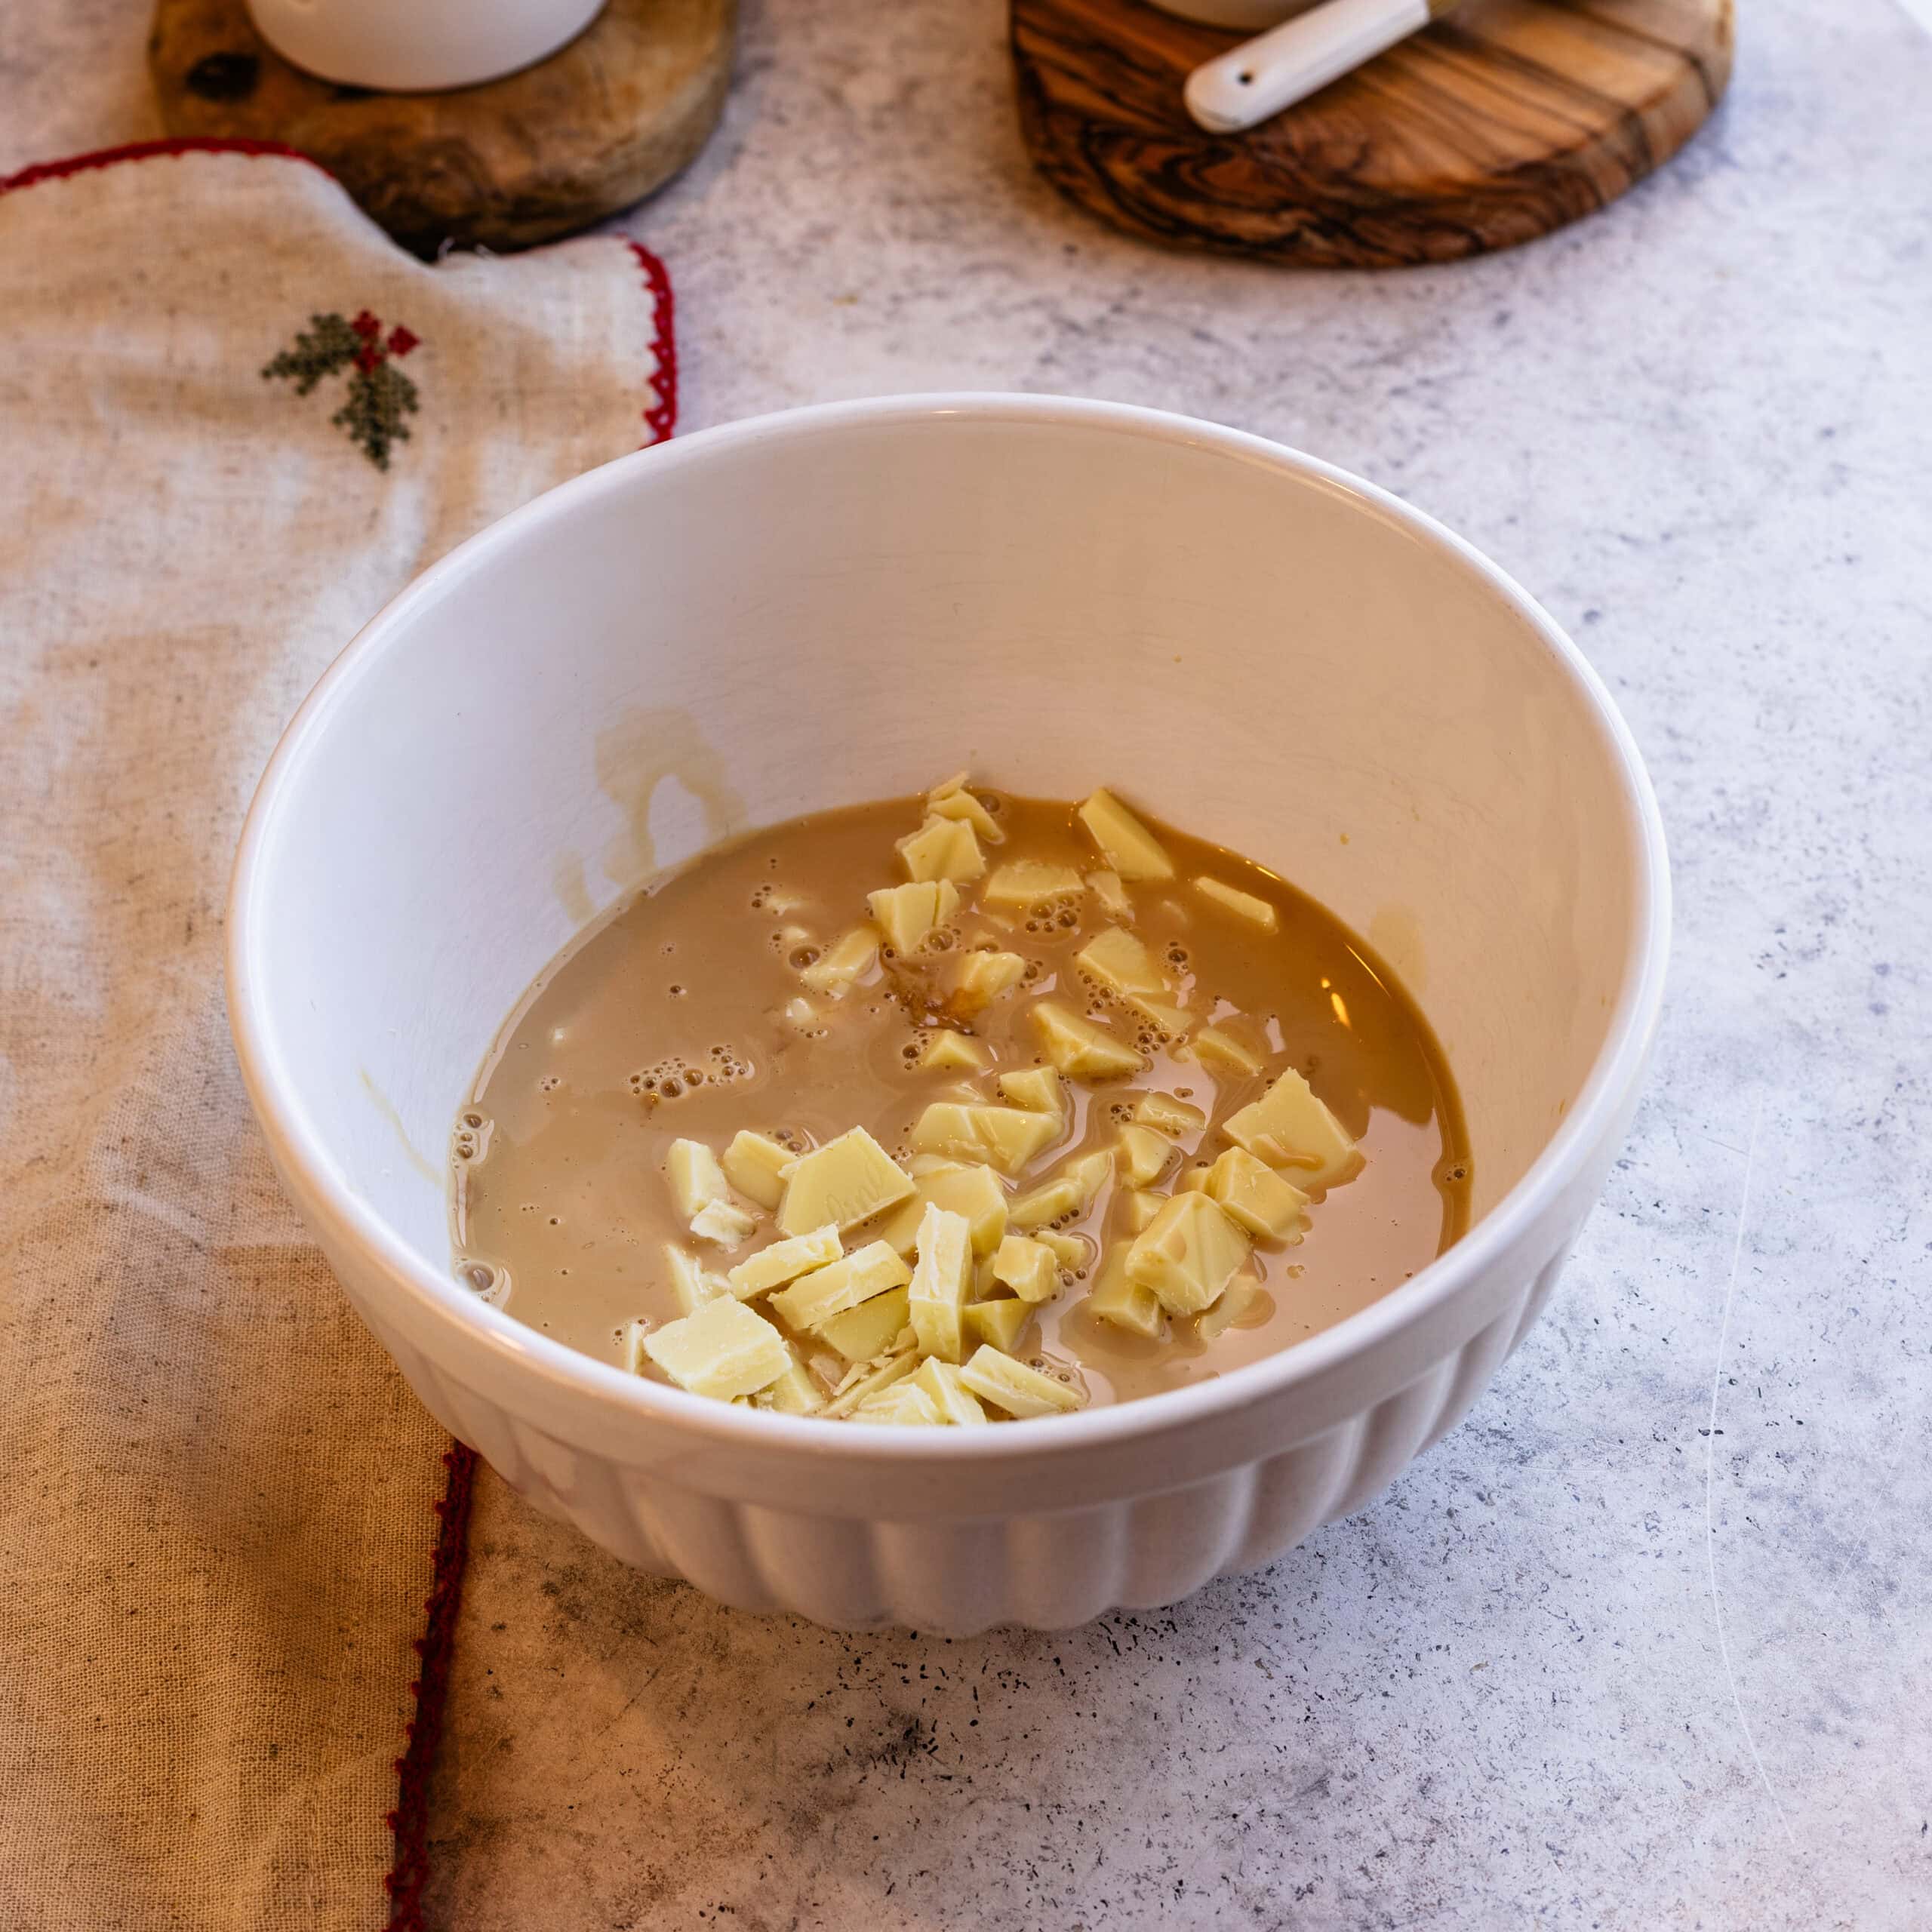
Stir!
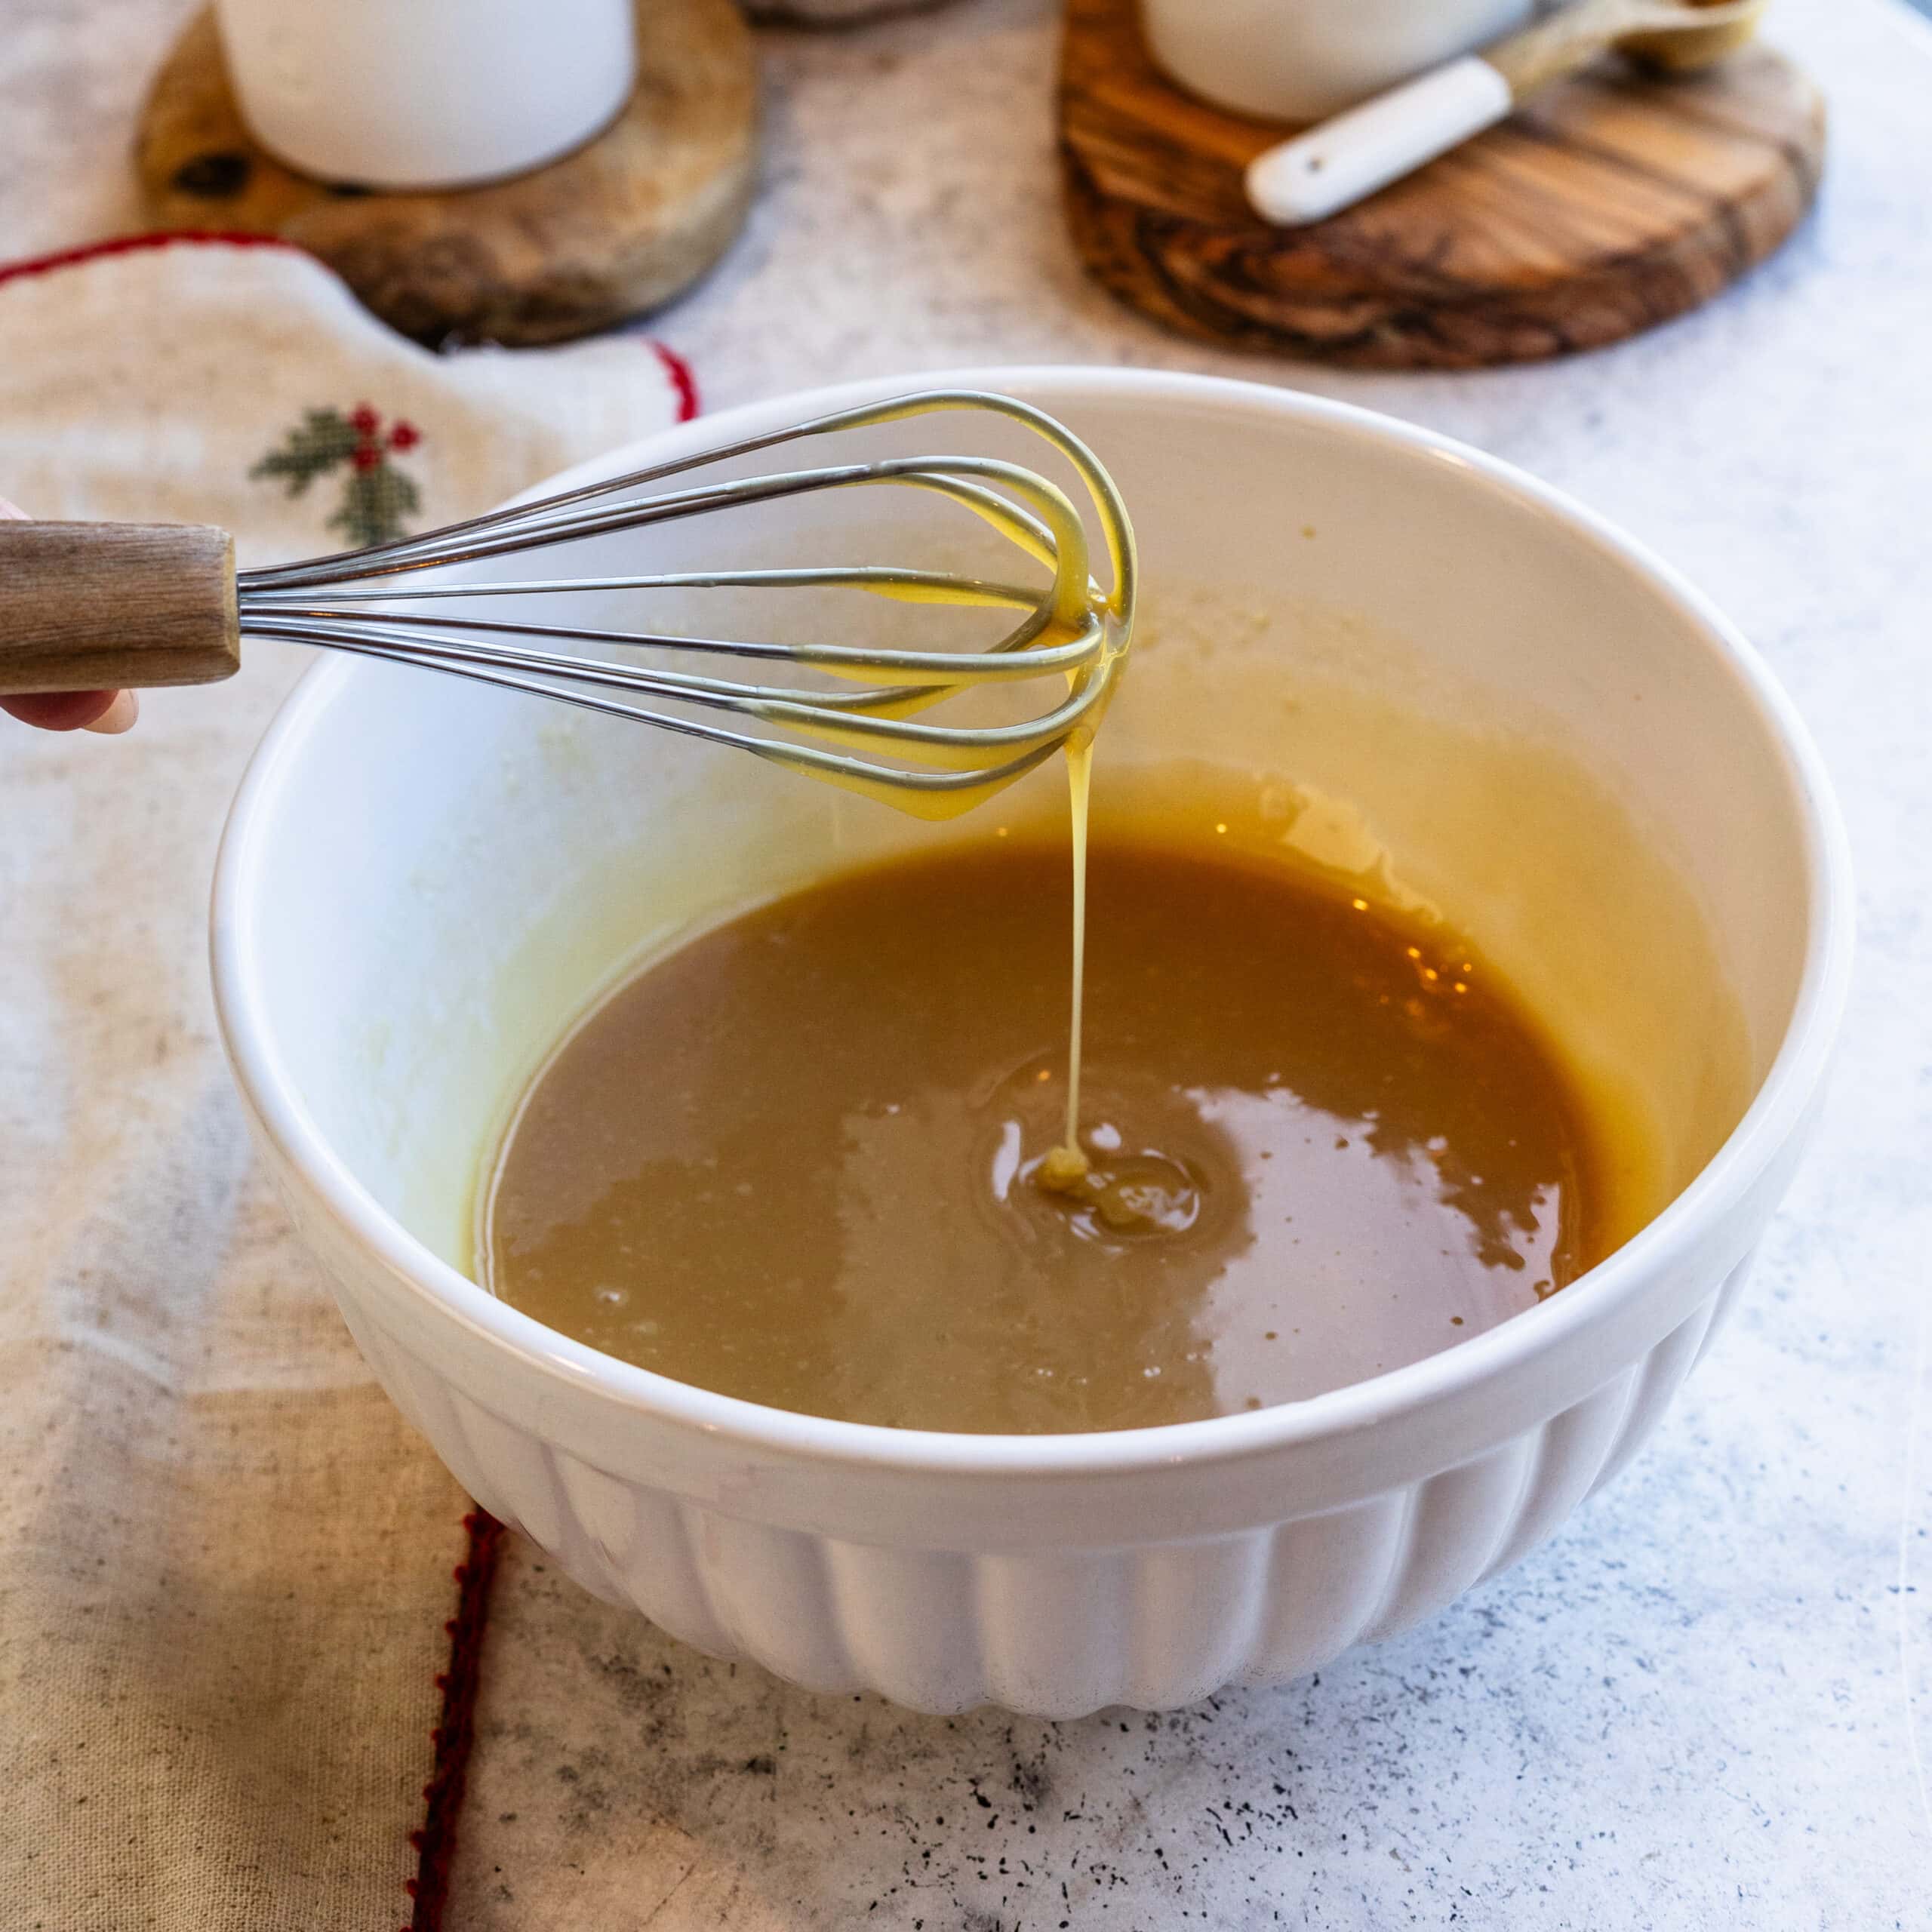
Starting in the center of the bowl, slowly whisk outward until the chocolate has melted completely and the ganache is smooth.
Slowly pour in the Bailey’s while whisking gently until fully incorporated. Add a pinch of salt if desired.
Allow the ganache to cool for a few minutes, until it has thickened slightly but is still pourable.
Drizzle over top the Cheesecake
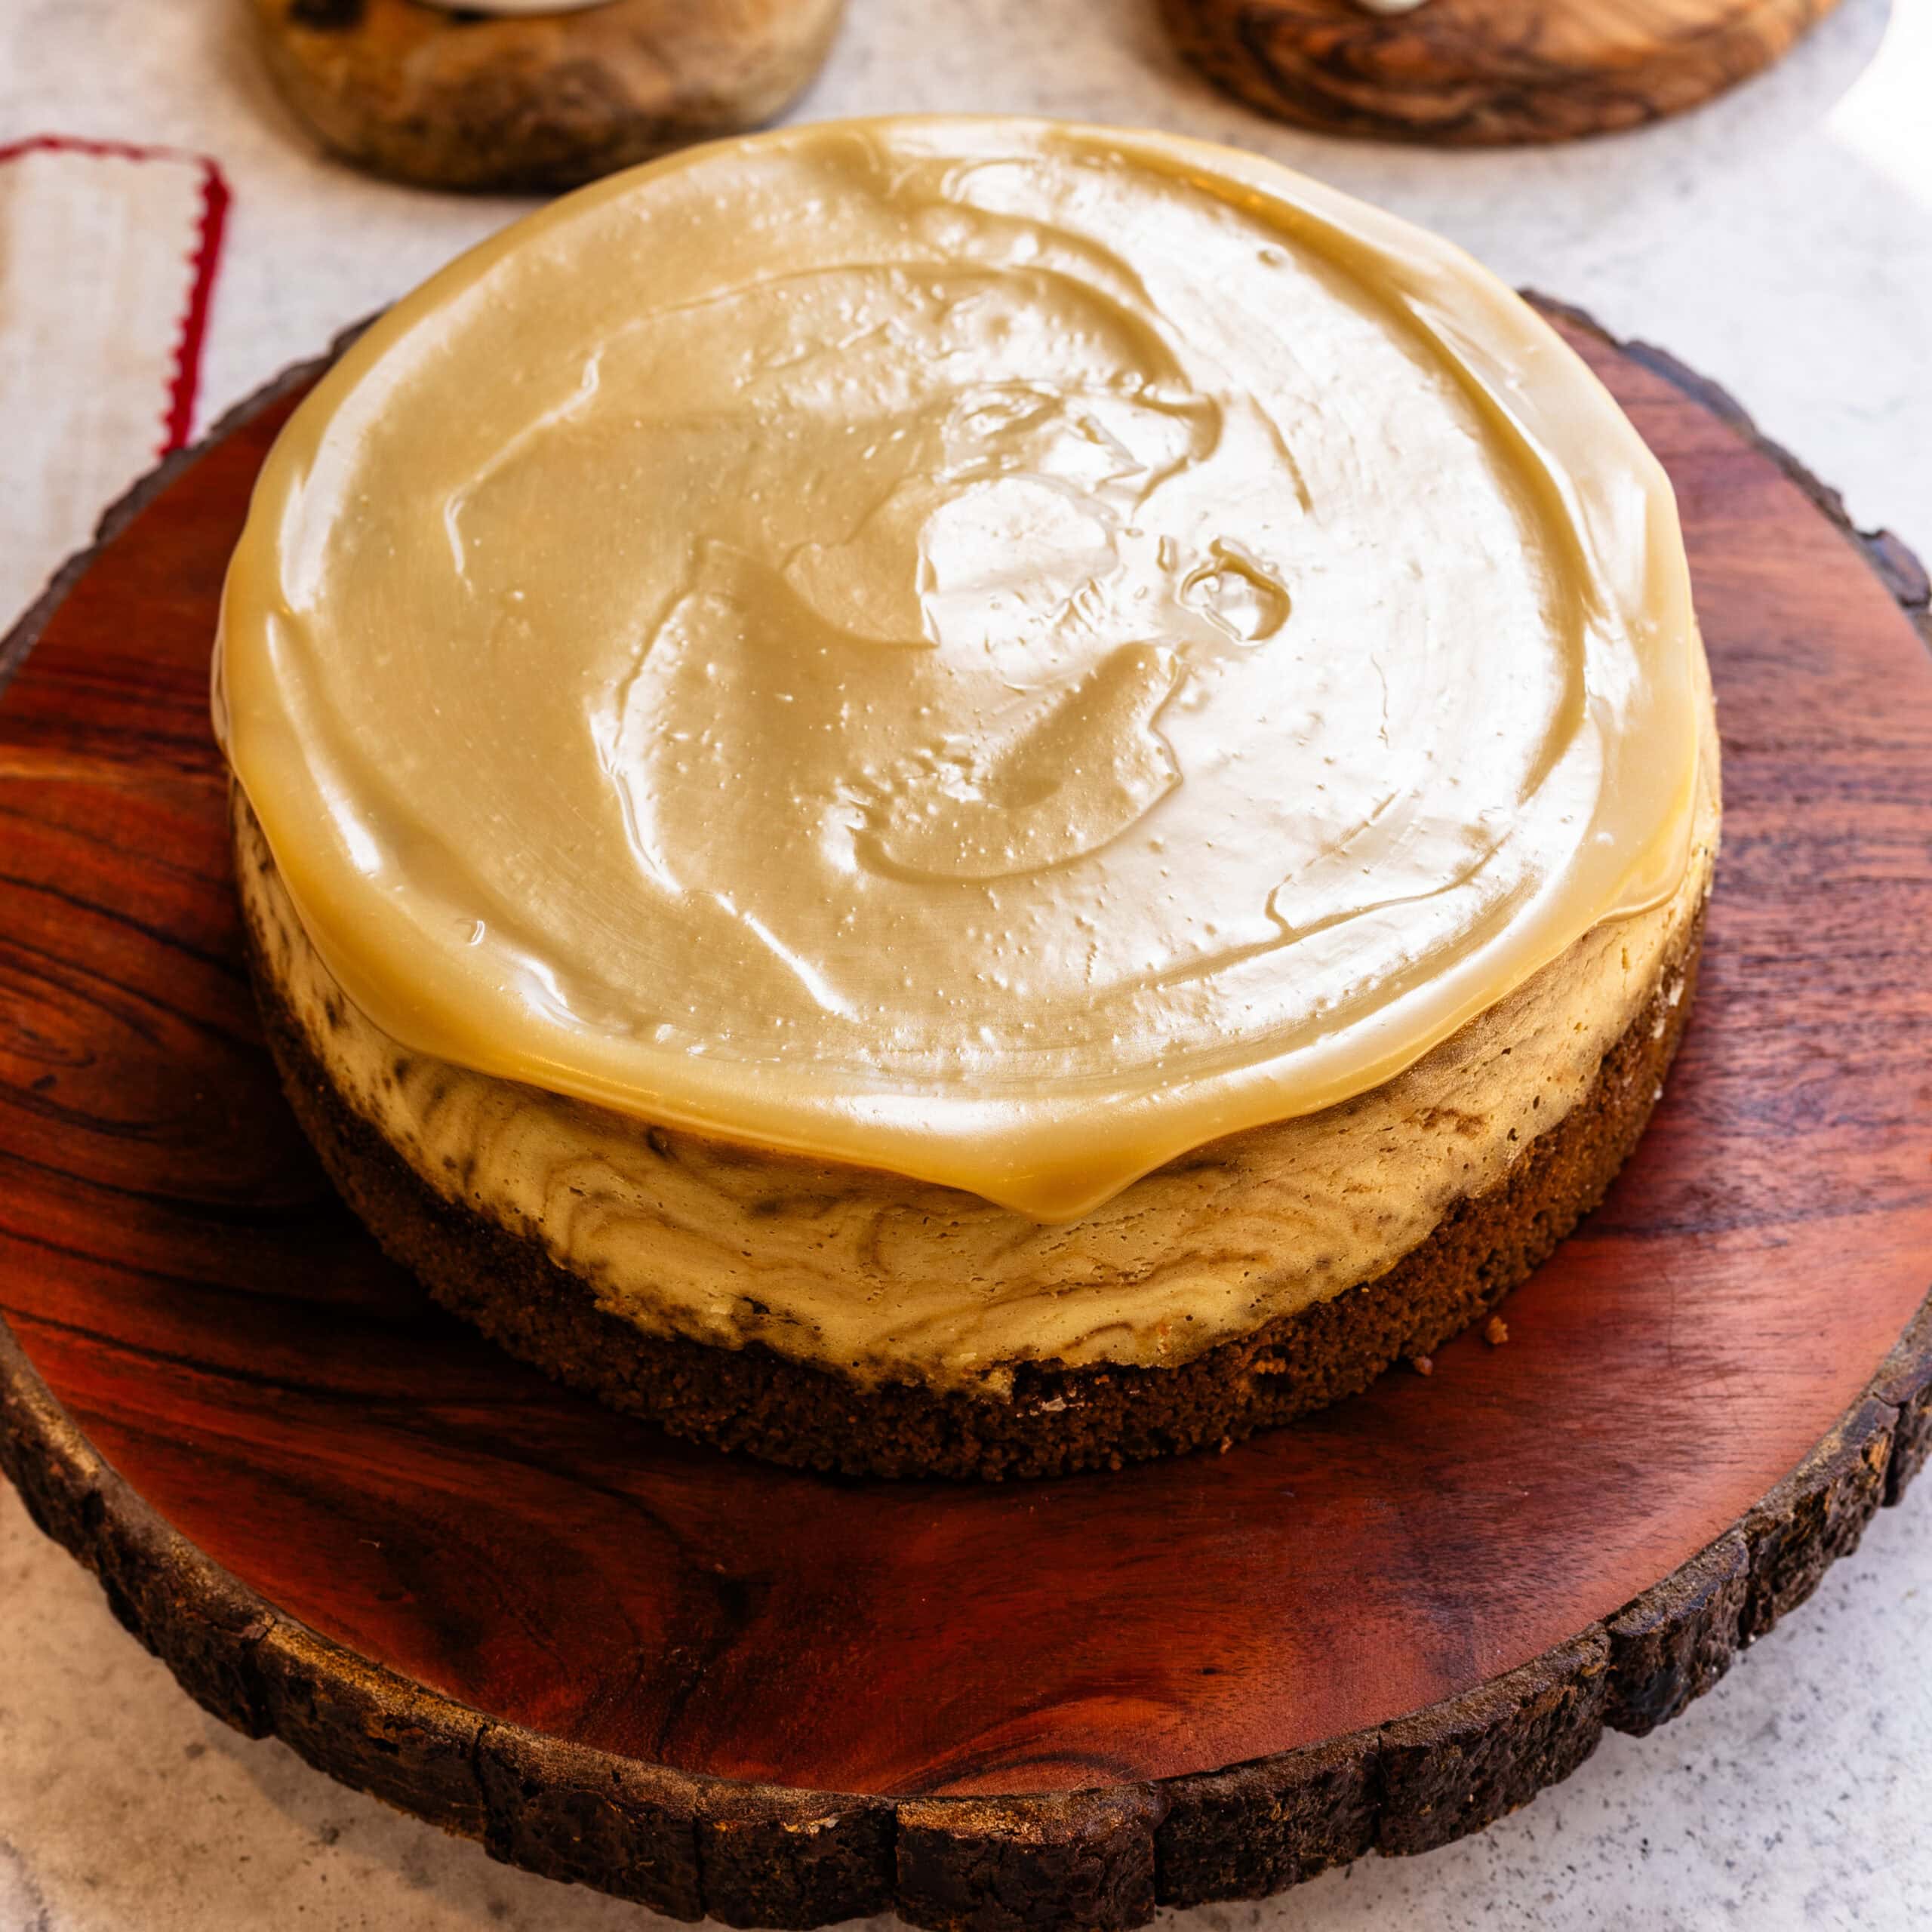
Remove the chilled cheesecake from the springform pan and transfer it to a serving plate.
Pour the Bailey’s ganache over the cheesecake and gently spread it toward the edges using an offset spatula.
Refrigerate for approximately 30 minutes, or until the ganache has set.
For an alcohol-free version: Replace the ¼ cup (60 ml) Bailey’s with an equal amount of heavy cream. You’ll need 7 tablespoons (105 ml) of heavy cream total for the ganache.
Espresso Whipped Cream
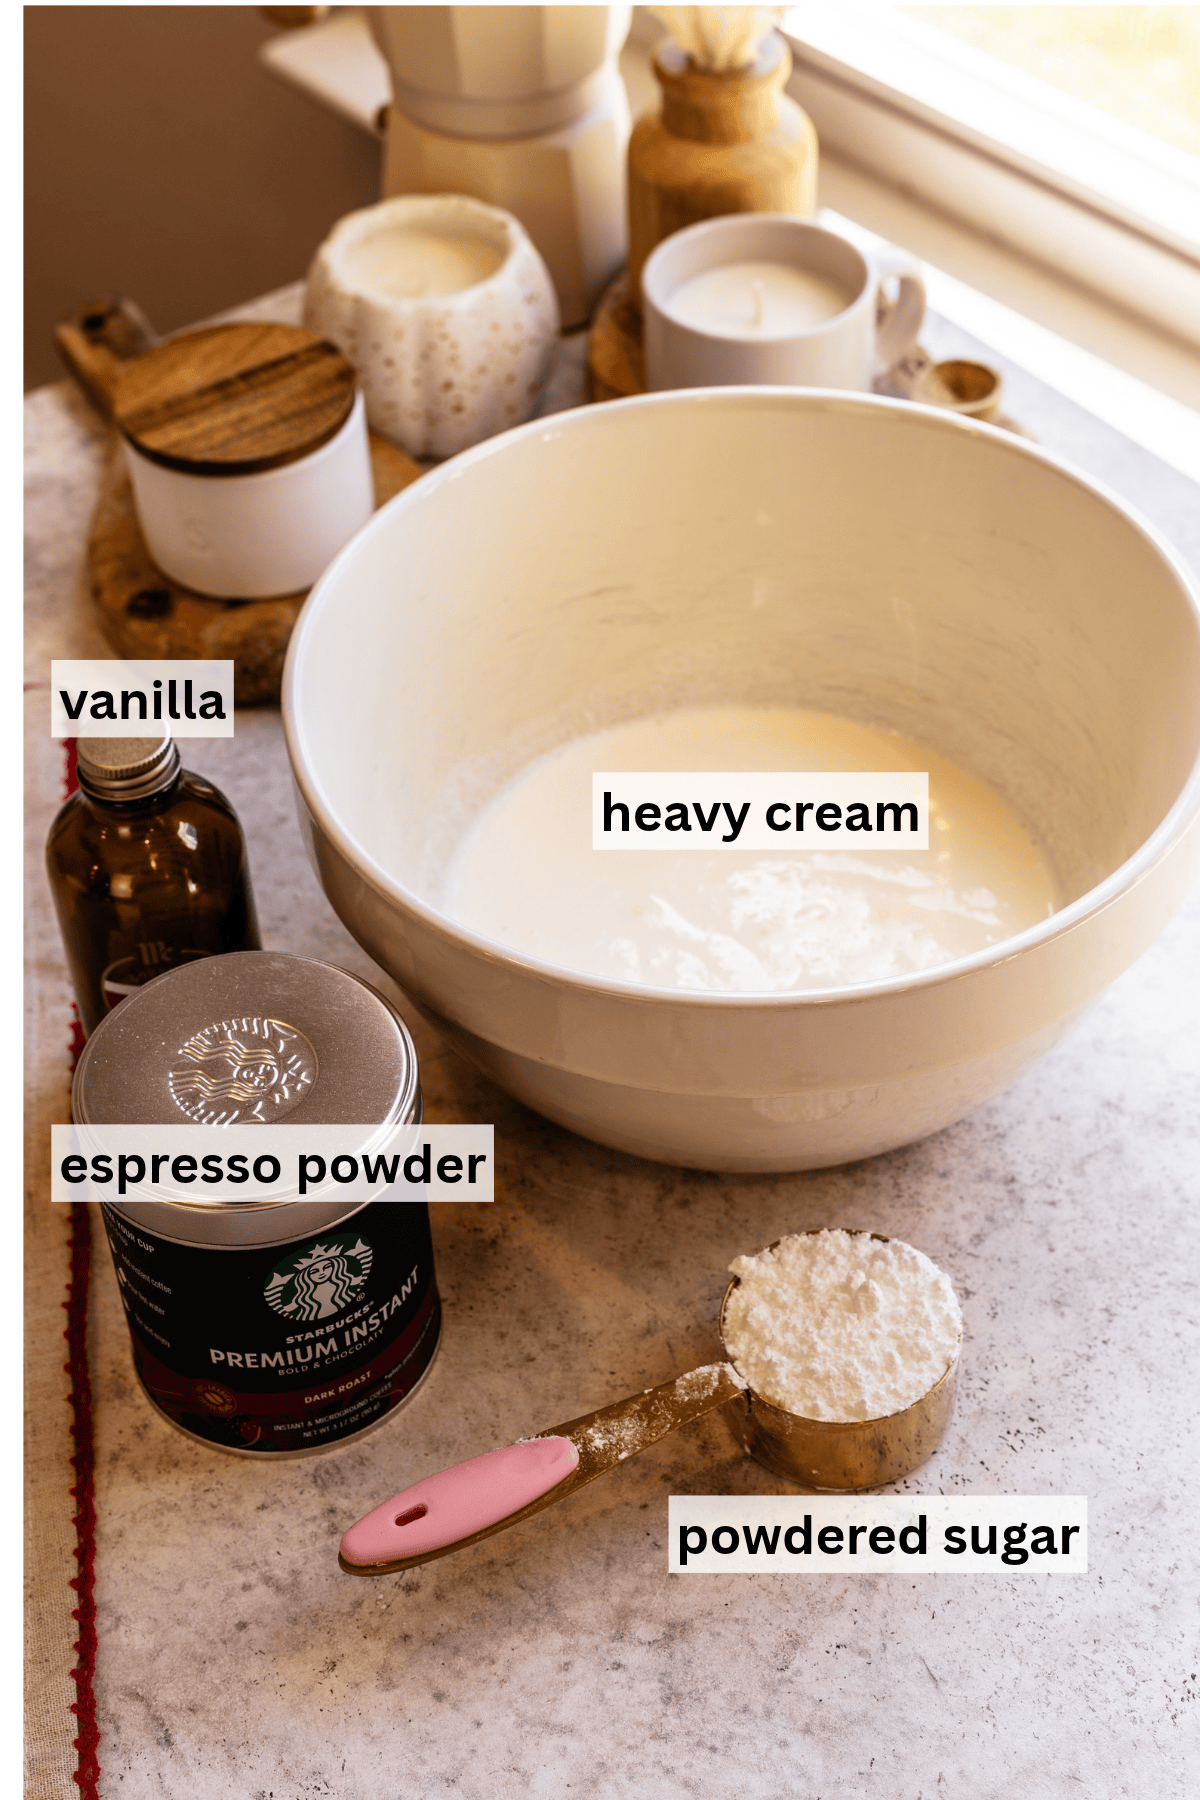
This espresso whipped cream is light, fluffy, and full of rich coffee flavor. It has just the right amount of sweetness to balance the bold espresso notes, making it the perfect finishing touch for cheesecakes, cakes, and other coffee-inspired desserts.
Make the Espresso Whipped Cream
Add the cold heavy whipping cream, powdered sugar, instant espresso powder, and vanilla extract to a mixing bowl.
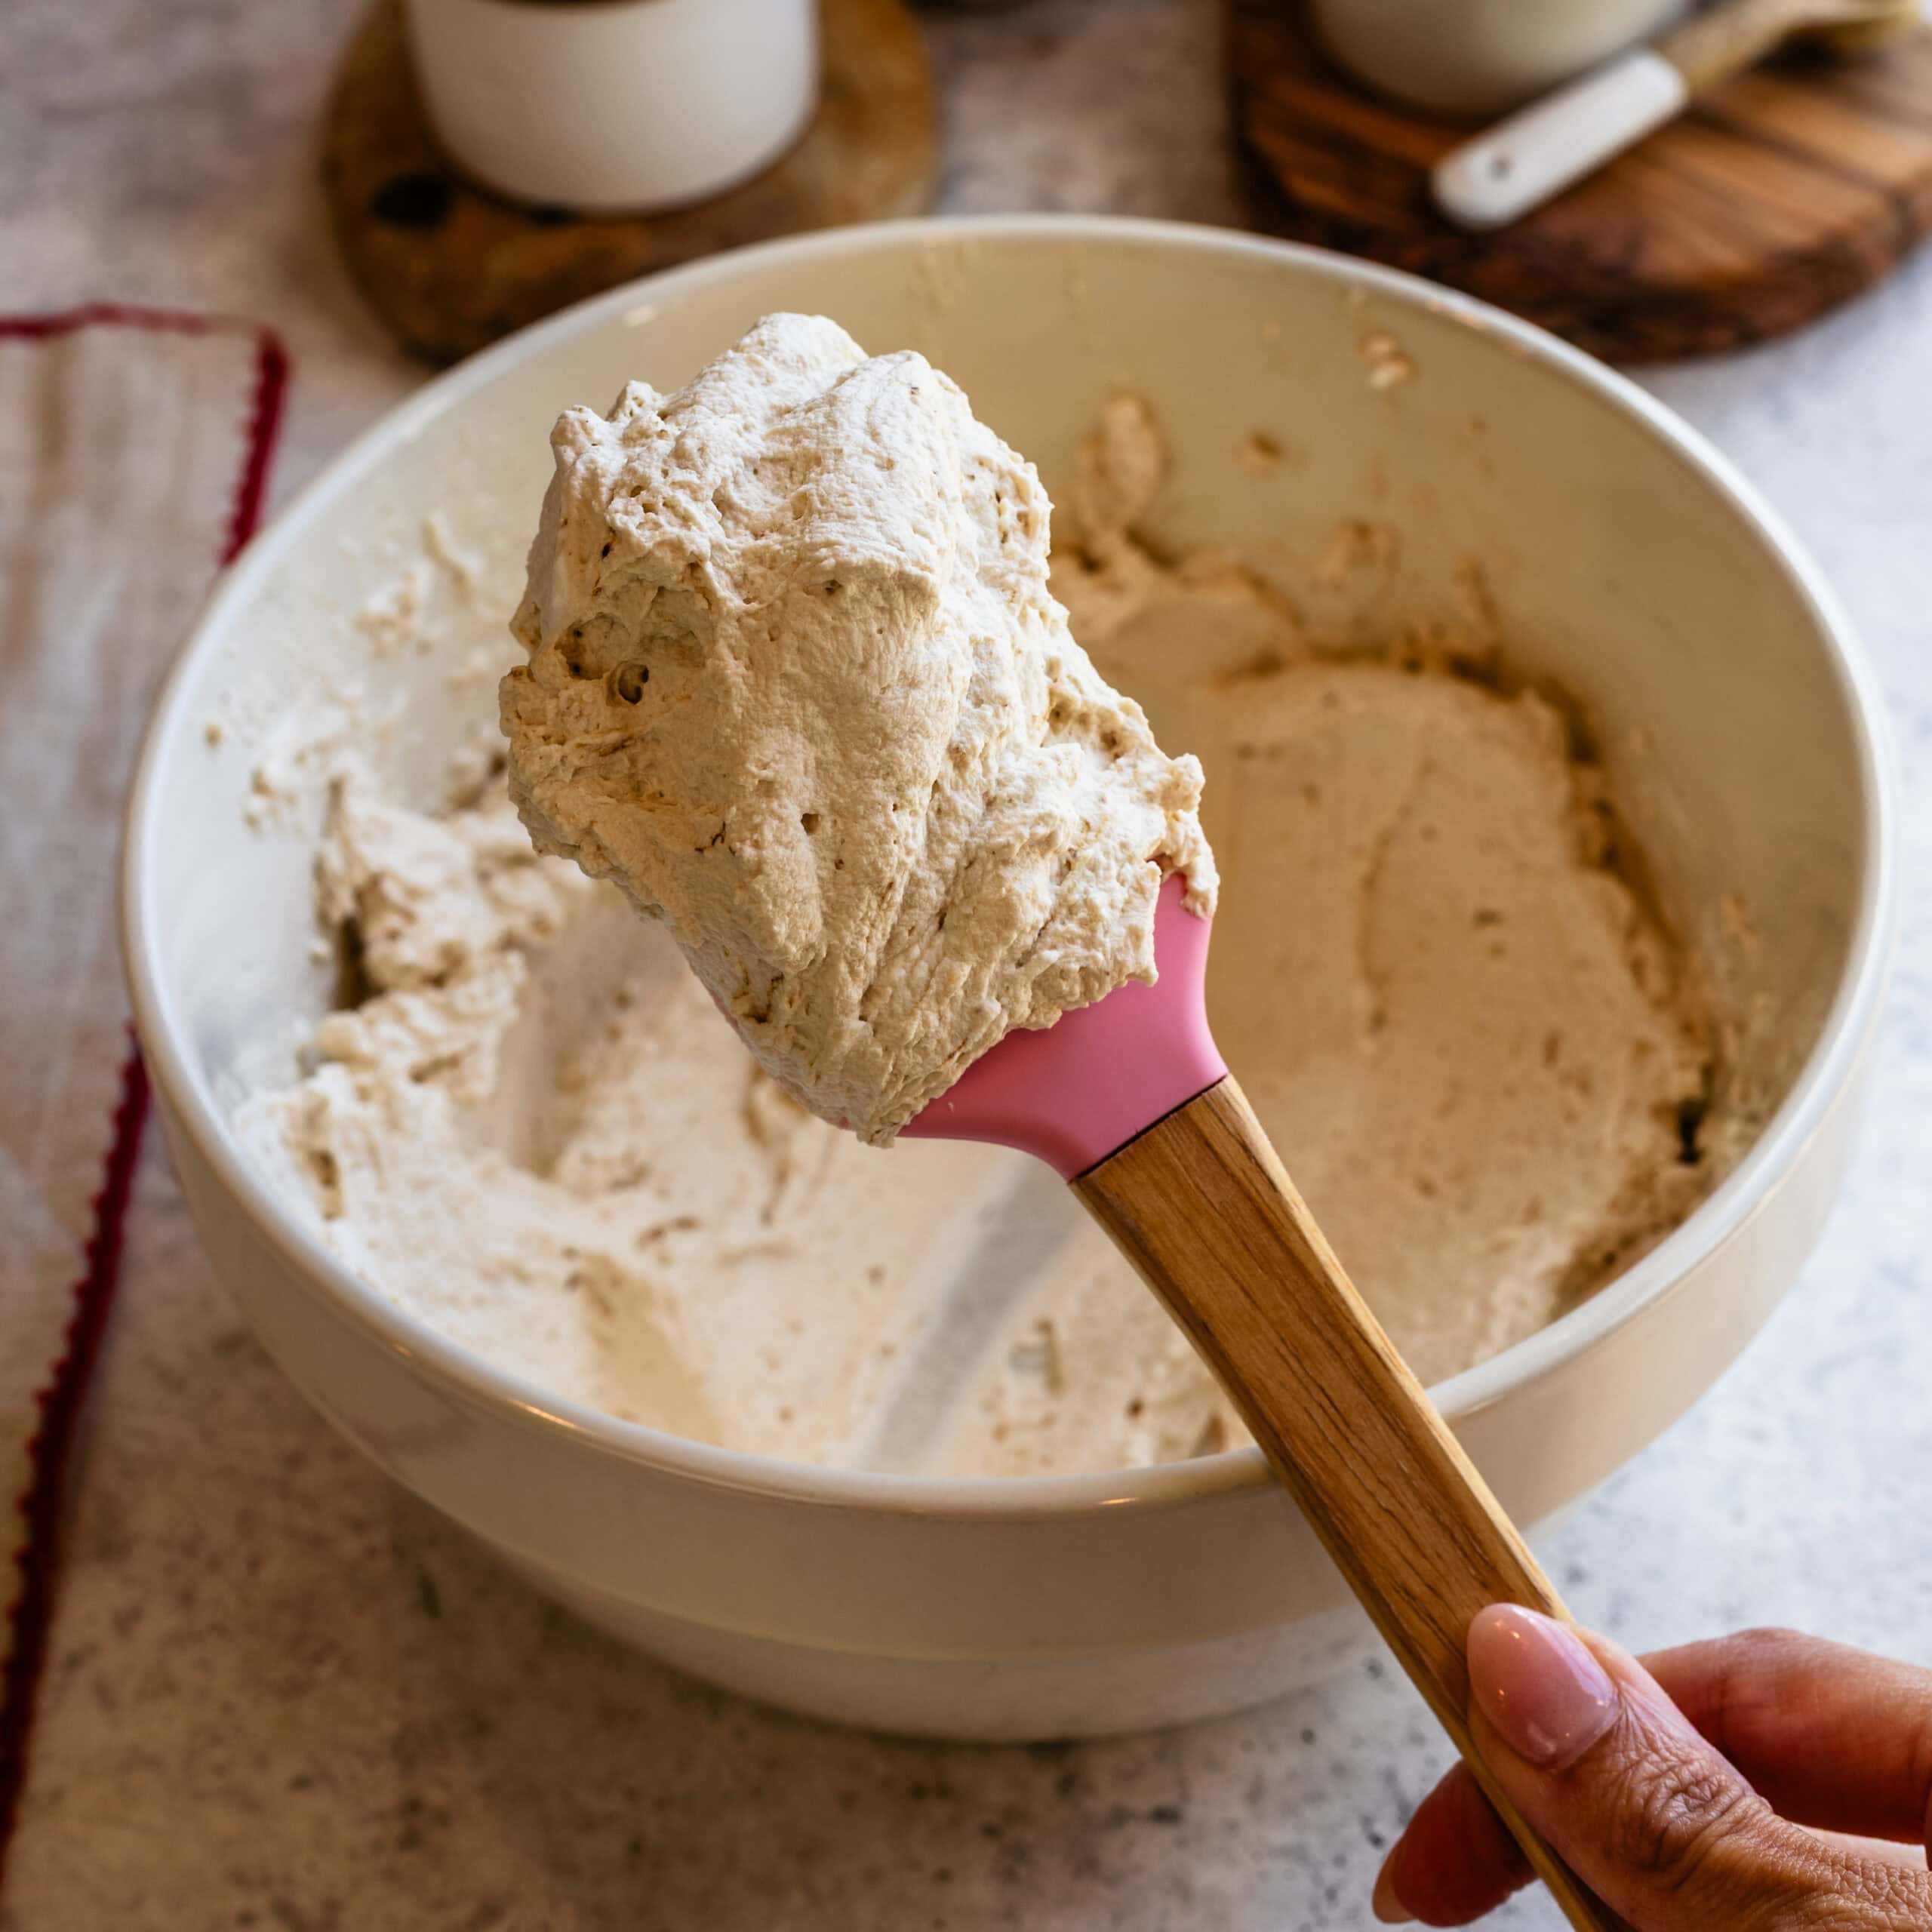
Using an electric mixer, whip on medium-high speed until medium to stiff peaks form.
The whipped cream should hold its shape when piped, but be careful not to overwhip it. If you continue mixing for too long, the cream can become grainy.
Decorate the Cheesecake!
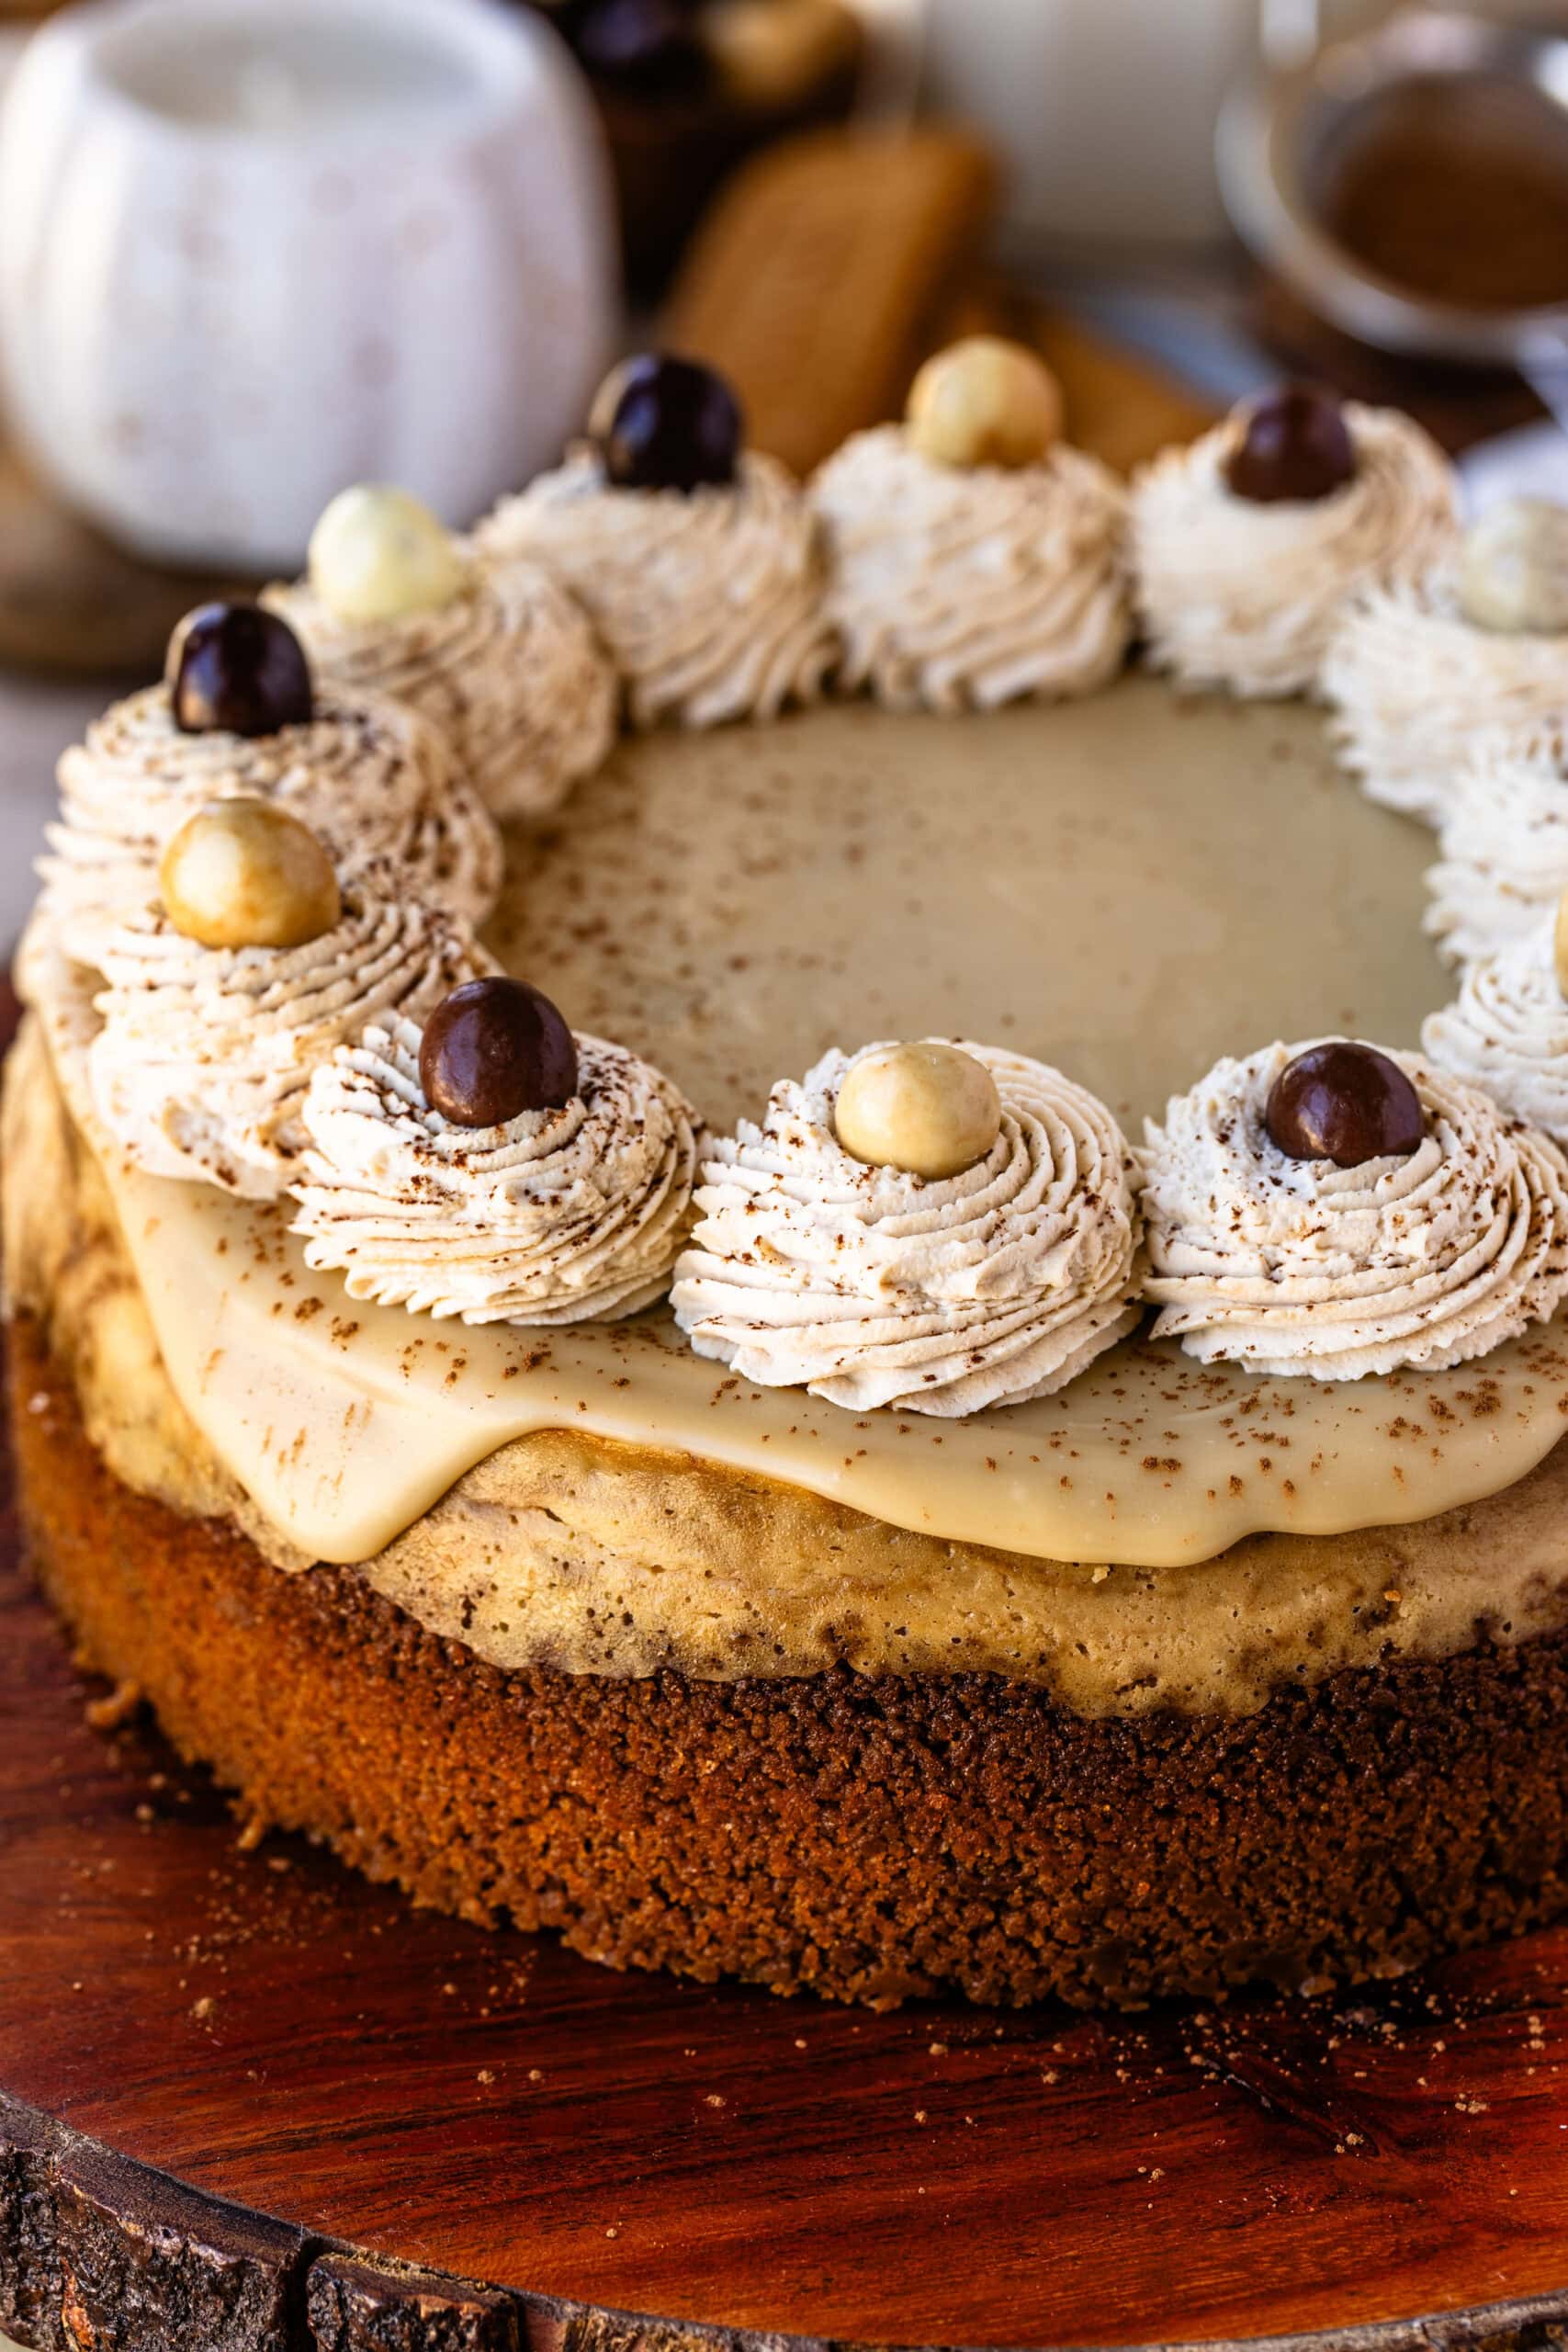
Transfer the espresso whipped cream to a piping bag fitted with your preferred piping tip.
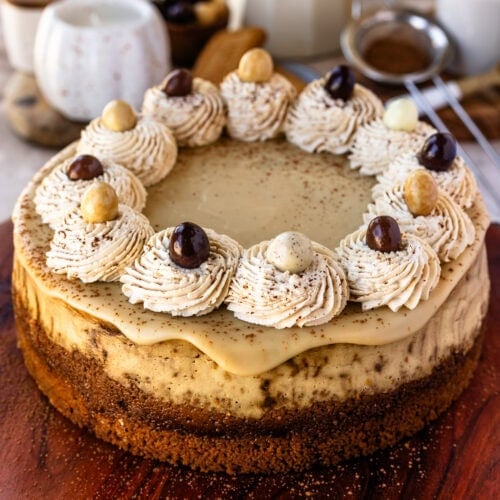
Pipe the whipped cream around the edges of the chilled cheesecake. Finish with chocolate-covered espresso beans and a light dusting of cocoa powder, if desired. Keep the cheesecake refrigerated until ready to serve.
How to Store Espresso Cheesecake
Store the Espresso Cheesecake covered in the refrigerator for up to 4 to 5 days.
Because the cheesecake is topped with whipped cream, I recommend keeping it refrigerated until shortly before serving.
For the neatest appearance, you can prepare the cheesecake and ganache ahead of time, then add the espresso whipped cream on the day you plan to serve it.
Freezing: The cheesecake can also be frozen for up to 2 months. For best results, freeze it without the whipped cream decoration.
Allow the cheesecake to chill and set completely, then freeze until firm. Wrap tightly in plastic wrap and place in an airtight container or freezer-safe bag.
Thaw overnight in the refrigerator before adding the whipped cream and decorations.
Expert Tips
- Use room-temperature ingredients. The cream cheese, eggs, and sour cream should be at room temperature before mixing. This helps everything combine smoothly and reduces the need for excessive beating.
- Scrape the mixing bowl frequently. Cream cheese tends to collect along the sides and bottom of the bowl. Scraping thoroughly between additions helps prevent lumps in the finished cheesecake.
- Use instant espresso powder, not ground coffee. Regular ground coffee doesn’t dissolve into the batter and can leave a gritty texture. Instant espresso powder distributes evenly and provides concentrated coffee flavor.
- Mix the eggs on low speed. Once the eggs have been added, avoid whipping extra air into the batter. Too much air can cause the cheesecake to puff up in the oven and crack as it cools.
- Don’t skip the water bath. A water bath helps regulate the temperature around the cheesecake, allowing it to bake gently and evenly.
- Check the center, not just the baking time. The edges of the cheesecake should be set while the center still jiggles slightly. Every oven bakes differently, so use the visual cues rather than relying only on the timer.
- Use an oven thermometer. An oven that runs too hot can cause cracks and overbaking, while an oven that runs too cool can significantly extend the baking time.
- Be gentle with the ganache. Overheating the cream or whisking too aggressively can cause white chocolate ganache to separate. Use real white chocolate containing cocoa butter whenever possible.
- Chill overnight if possible. Although 6 hours is the minimum, I prefer refrigerating cheesecake overnight. The texture becomes firmer, and the flavors have more time to develop.
Variations and Substitutions
Alcohol-Free Espresso Cheesecake: The Bailey’s in the cheesecake filling is optional and can simply be omitted. For the ganache, replace the ¼ cup (60 ml) Bailey’s with an equal amount of heavy cream. This gives you a smooth white chocolate ganache without Irish cream.
Espresso White Chocolate Ganache: If you want even more coffee flavor, add ½ to 1 teaspoon instant espresso powder to the heavy cream before heating it. Use ½ teaspoon for a subtle coffee flavor or 1 teaspoon for a stronger espresso ganache. Stir until the powder dissolves completely, then proceed with the recipe.
Graham Cracker Crust: If you don’t have Biscoff cookies, substitute a traditional graham cracker crust. The cheesecake will still have plenty of coffee flavor, but the crust will be slightly less caramelized and spiced.
Mini Espresso Cheesecakes You can make approximately 24 mini cheesecakes using this recipe. Divide the prepared crust and cheesecake batter between lined cupcake tins. Bake until the edges are set and the centers are just slightly jiggly. Mini cheesecakes don’t require a water bath, and they’ll bake much more quickly than a full-sized cheesecake. Begin checking them after about 18 minutes. Allow the mini cheesecakes to cool completely before refrigerating and decorating.
Chocolate Espresso Cheesecake Variation: For a different coffee-and-chocolate combination, you can replace the white chocolate ganache with a dark chocolate ganache. The bittersweet chocolate will make the dessert richer and less sweet, similar to the flavors in my Chocolate Sheet Cake, where chocolate and coffee work beautifully together.
Frequently Asked Questions
Yes! The Bailey’s in the cheesecake filling is completely optional. For the ganache, replace the Bailey’s with an equal amount of heavy cream. You’ll still have a creamy white chocolate topping that pairs beautifully with the espresso cheesecake.
I recommend using instant espresso powder for this recipe. Brewed espresso would introduce additional liquid into the cheesecake batter, which could affect the texture and consistency. Instant espresso powder provides a concentrated coffee flavor without changing the amount of moisture in the filling.
Yes. I baked this cheesecake in an 8-inch cheesecake pan, but a 9-inch pan will also work. The cheesecake will be slightly thinner and may bake more quickly, so begin checking for doneness earlier. Look for set edges and a slightly jiggly center.
Cheesecakes can crack if they’re overmixed, overbaked, or exposed to sudden temperature changes. To help prevent cracking, mix the eggs on low speed, bake the cheesecake in a water bath, and allow it to cool gradually in the turned-off oven. Even if your cheesecake cracks, the Bailey’s ganache will cover the top beautifully.
More Coffee and Cheesecake Recipes to Try
If you love this Espresso Cheesecake, there are plenty of other desserts to explore. My Espresso Chocolate Scones combine rich chocolate with coffee flavor and are perfect for breakfast or an afternoon treat. Or for an ever more coffee-forward dessert, try my classic Tiramisu. For another cheesecake with Irish cream, try my Bailey’s Cheesecake, or make my Biscoff Chocolate Cheesecake if you love the combination of caramelized cookies and chocolate. And for an easy chocolate dessert that serves a crowd, my Chocolate Sheet Cake is always a great choice.
I hope you enjoy making this Espresso Cheesecake! If you try the recipe, leave a comment below and let me know how it turned out. You can also share a picture on Instagram and tag me so I can see your beautiful cheesecakes!
Espresso Cheesecake

Ingredients
Biscoff Crust
- 1 batch of Biscoff Cookie Crust prepared and baked according to this recipe
Espresso Cheesecake Batter
- 907 g cream cheese softened (4 packages, 8oz each)
- 1⅓ cups granulated sugar 266g
- ½ cup sour cream 120g
- 4 large eggs room temperature
- ½ tsp vanilla extract
- ½ tsp fine salt
- 1 tbsp Bailey’s Irish Cream optional
- 1½ tbsp instant espresso powder
Bailey's Ganache
- 1 cup chopped white chocolate 170g
- ¼ cup Bailey’s Irish Cream 60ml
- 3 tbsp heavy cream 45ml
- pinch of salt optional
Espresso Whipped Cream
- 1 cup cold heavy whipping cream 240ml
- ¼ cup powdered sugar 30g
- 1 tsp instant espresso powder
- 1 tsp vanilla extract
To Decorate
- Chocolate-covered espresso beans for topping
- Cocoa powder for dusting
Instructions
Biscoff Crust
- Prepare the Biscoff Cookie Crust according to the recipe instructions. Allow the crust to cool before adding the cheesecake batter. Grease the exposed sides of the cheesecake pan after baking the crust.
Espresso Cheesecake Batter
- Preheat the oven to 325ºF (163ºC).
- Beat the cream cheese with an electric mixer on medium speed for about 3 minutes, until creamy and smooth.
- Add the granulated sugar and beat for another 2 minutes.
- Scrape down the sides and bottom of the bowl, then beat for another 30 seconds.
- Add the sour cream and mix until combined. Scrape down the sides and bottom of the bowl again.
- Add the eggs one at a time, mixing on low speed just until each egg is incorporated before adding the next. Avoid overmixing once the eggs have been added.
- With the final egg, add the vanilla extract, salt, and Baileys, if using. Mix just until combined.
- Add the instant espresso powder and mix on low speed just until evenly incorporated throughout the batter.
- Pour the cheesecake batter over the baked and cooled Biscoff crust.
- Wrap the bottom and sides of the cheesecake pan with several layers of heavy-duty aluminum foil to prevent water from leaking into the pan. I like to use 18-inch-wide heavy-duty foil. Lay three large pieces of foil in different directions, place the cheesecake pan in the center, and bring the foil securely up around the sides of the pan.
- Place the cheesecake pan inside a larger roasting pan.
- Carefully pour hot water into the roasting pan until the water reaches about halfway up the sides of the cheesecake pan.
- Bake at 325ºF for 60 to 75 minutes.
- The cheesecake is done when the edges are set but the center still has a slight jiggle when the pan is gently moved.
- Turn off the oven and leave the cheesecake inside for 1 hour.
- Remove the cheesecake from the oven and carefully lift it out of the water bath. Remove the foil and allow the cheesecake to cool completely.
- Refrigerate for at least 6 hours, preferably overnight, before removing it from the pan and decorating.
Bailey’s Ganache
- Place the chopped white chocolate in a heatproof bowl.
- Add the heavy cream to a small saucepan and heat over medium-low heat just until steaming. Do not let it boil.
- Pour the hot cream over the chopped white chocolate and let it sit undisturbed for 2 minutes.
- Slowly whisk from the center outward until the white chocolate is completely melted and the mixture is smooth.
- Slowly pour in the Bailey’s while whisking gently until the ganache is smooth and fully combined. Add a pinch of salt, if desired.
- Let the ganache cool for a few minutes, until slightly thickened but still pourable.
- Pour the Bailey’s ganache over the chilled cheesecake and gently spread it toward the edges with an offset spatula.
- Refrigerate the cheesecake for about 30 minutes, or until the ganache has set.
Espresso Whipped Cream
- Add the cold heavy cream, powdered sugar, espresso powder, and vanilla extract to a mixing bowl.
- Whip with an electric mixer on medium-high speed until medium to stiff peaks form.
- Be careful not to overwhip the cream.
- Transfer the whipped cream to a piping bag fitted with your desired piping tip.
- Pipe the espresso whipped cream around the edge of the cheesecake.
- Finish with chocolate-covered espresso beans and a light dusting of cocoa powder, if desired.
- Keep the cheesecake refrigerated until ready to serve.
Storage
- Store the Espresso Cheesecake covered in the refrigerator for up to 4 to 5 days.
- The cheesecake can also be frozen for up to 2 months. For best results, freeze the cheesecake without the whipped cream decoration. Once frozen, wrap it tightly with plastic wrap and place it in an airtight container.
