Chocolate Meringue Pie with Macadamia Crust
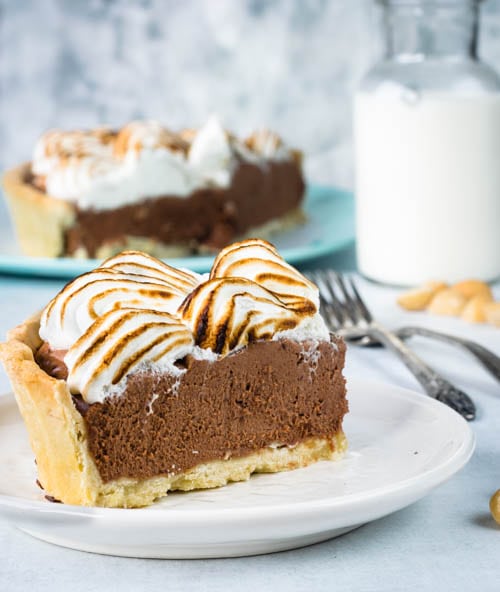
This Chocolate Meringue Pie is not something I make all the time. I probably make it once a year.
And it’s not because I don’t like it. I like it very much, I think it’s sublime.
This post may contain affiliate links. I earn a commission from qualified purchases. Please read our Privacy policy here.
Everyone in my house loves it, which is saying something because my husband Brian does not have a sweet tooth. Actually, to be fair he loves some of the desserts I make, such as Tres Leches cake, Strawberry Rhubarb Pie, Creme Brûlée, Apple Crisp, pretty much any ice creams, most cookies, some cheesecake flavors. But that list doesn’t get much longer than this. And if you know me at all, you know I make desserts about 2 or 3 times a week sometimes. So, the amount of desserts I make is too damn high for Brian to be able to keep up. I don’t blame him, that’s why he stays skinny. (go, Brian!)
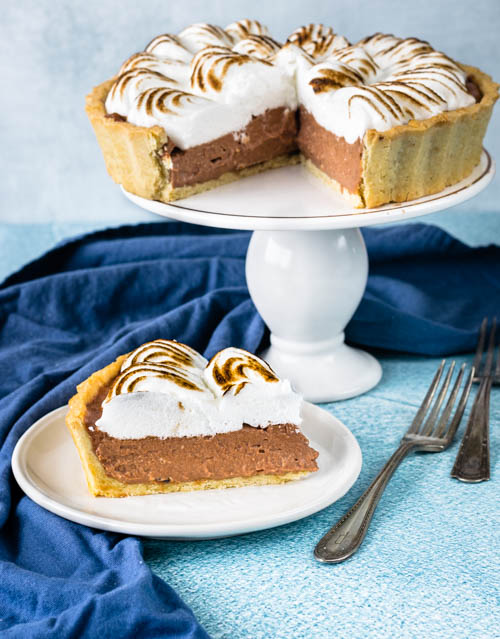
But this pie.
This pie right here. It can make any dessert-hater say: “Cut me another piece!” (No “please”, nothing! Don’t expect politeness from dessert-haters, after all they are… dessert-haters. Don’t trust them.)
But you happily give them another piece, because you are proud of your pie. And you start to like anyone who compliments your food.
Please tell me that’s not just me. If you compliment my food (or say my son is cute) I will immediately want to become your best friend and make you more food (or show you more pictures of my son)! The amount of food I make someone is equivalent to the amount of compliments I get from that person. I have no shame in saying this. As someone who’s been making food and sharing for quite a while, I have absolutely no patience to cook for people who don’t appreciate the time and love I put into what I make. And I’m not talking about embellished and exaggerated compliments, just a legitimate: “cut me another piece” will do.
Now you know.
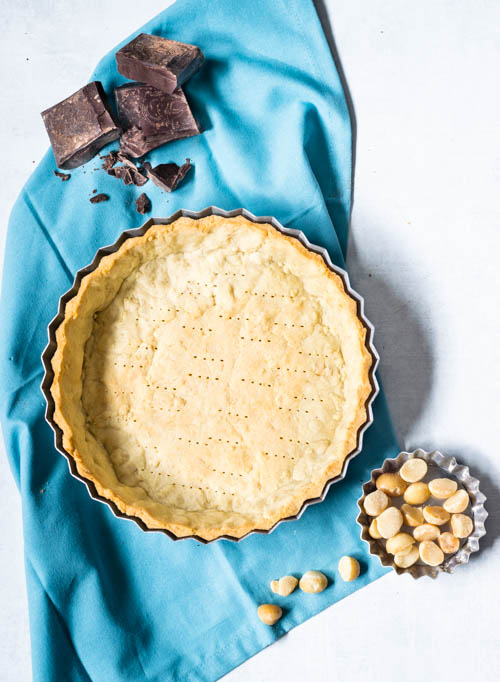
But about this pie. It comes with a macadamia crust. Say that slowly. Yes, sounds like music. Sounds like a ballad. In this pie, macadamia, chocolate and meringue slow dance together. It’s special and dreamy.
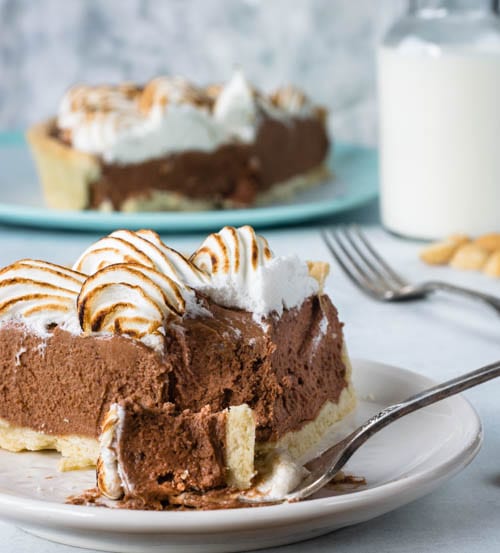
And that’s exactly why I only make it about once a year. Because of the expectation of experiencing such a delight. Just like my pumpkin cheesecake, that I solely make on Thanksgiving. It’s probably my favorite cheesecake of all. And, while I could make it all the time, I look forward to the day of finally eating it with my family at the Thanksgiving table, year after year (going on to its 4th year of the tradition).
This year, I looked forward to making this chocolate pie because it would be the first time my son would eat it. Next year, I will look forward to it because it will celebrate a year that I’ve written this.
And all of those things mean so much more than just making a pie in my kitchen.
They mark my life.
The first time I made this, was at my first apartment with my husband in Saratoga Springs. I still have pictures of the pie somewhere between the 8000 photos on my computer, it was taken from an old iPhone. My baking obsession was just getting started. And here I am today, photographing the same pie, this time with a Nikon, writing about it on my blog for other people to read (by the way, thank you if you did keep reading, I tend to ramble). I can’t imagine in another few years, where I will be when I make this again and look back at all of this.
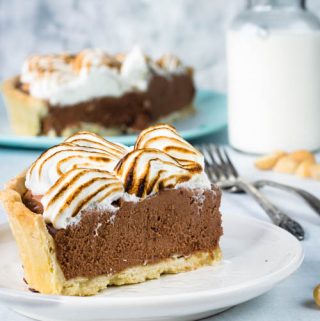
Chocolate Meringue Pie with Macadamia Crust
Ingredients
Macadamia Crust
- 8 tablespoons unsalted butter at room temperature (1 stick, 1/2 cup)
- 1/4 cup confectioner’s sugar sifted
- 1/2 cup ground roasted macadamias See Note 1
- 1 egg
- 1/2 teaspoon salt
- 1/2 teaspoon vanilla extract
- 1/8 teaspoon almond extract
- 2 cups all-purpose flour
Chocolate filling
- 10 ounces good quality chocolate chopped See Note 2
- 1 3/4 cup heavy cream divided
- 3 tablespoons powdered sugar
- 1 teaspoon vanilla extract
Meringue
- 3 large egg whites at room temperature
- 1/4 teaspoon cream of tartar
- Pinch of fine salt
- 1/3 cup granulated sugar
- 1/2 teaspoon vanilla extract
Instructions
Macadamia Crust
- You will need a 9 or 10” tart pan
- You can make the dough in a food processor or stand mixer.
- Food processor:
- Place butter in the bowl of a food processor. Pulse until butter is creamy.
- Add powdered sugar and process for about 30-60 seconds to incorporate.
- Add ground macadamias. Process until incorporated, about 30 seconds. Scrape the sides of the bowl and pulse once or twice.
- Add egg, salt, vanilla and almond extracts and pulse a few times until incorporated. Scrape sides down again and process a couple times to make sure egg is fully mixed in.
- Add flour at once and process 3 or 4 times. Don’t overmix. Just process until mixture is lumpy. You can finish incorporating dough by hand, so you don’t create a tough crust.
- Transfer mixture to your counter and very gently incorporate all the flour into the dough. A method that really works and it’s how I make scones and biscuits, you turn the dough into your counter, then you cut it in half and place one half on top of the other and press it down. Cut it in half again and place one half on top of the other and press it down. Do this a few times until you see no more streaks of flour. This mixing method ensures that you won’t overknead your dough.
- Once dough is smooth, wrap it in plastic and flatten it out a bit into a disk. Place it in the refrigerator for at least 3 hours and up to 2 days.
- To make this with a stand mixer, cream butter for a few minutes, add sugar and cream for one or two minutes. Add ground macadamias and mix at medium-low speed until incorporated. Add egg, salt and extracts and mix at medium speed for 30-60 seconds until egg is incorporated. Add flour and mix briefly on the lowest speed for a few seconds just until mixture comes together. Transfer to the counter and proceed with step 6 forward from instructions above.
- Regardless of which method you choose to use, once dough has chilled for at least 3 hours, take it out of the fridge and let it rest on the counter for a few minutes.
- Sprinkle flour on your counter and start rolling out the dough. It will be a very crumbly dough. Keep patching up where it breaks by pressing it back together with your hands.
- Once dough has been rolled out to about 1/4” thick, transfer it carefully to your tart pan.
- It really helped me in the beginning of working with this type of dough to roll it out between two floured sheets of wax paper. I’d lay a sheet of wax paper on my counter and sprinkle flour on it. Then, place the dough on top of it and flour the top of the dough and then place the other piece of wax paper over it and start rolling out. Just make sure you occasionally lift the papers to add some more flour if necessary so the dough doesn’t stick to the paper.
- Either way, once you transfer your dough to the tart pan, don’t worry if it’s all crumbly and breaking apart. Just start pressing it down with your fingers until you cover the entire pan. Make sure it isn’t too thick or too thin. You want it to be about 1/8-1/4” thick.
- Using a knife at a 90 degree angle to the top of the tart pan, run it all over the edges to trim the excess so the dough is the same height as the pan.
- Place it in the freezer or fridge to firm back up while you pre-heat your oven.
- Pre-heat oven to 350F.
- I like to place my tart pan on a baking sheet to make it easier to transfer in and out of the oven. Prickle the bottom of the crust with a fork all over so this way the bottom won’t puff up. Place it in the oven and bake for 20-25 minutes.
- Check at the 10 minute mark. If the edges are browning too fast, cover them with pieces of aluminum foil, leaving only the bottom of the crust exposed. Bake until golden for 10 or 15 more minutes.
- Remove from the oven and let it cool.
Chocolate Filling
- Place chocolate in a glass bowl or a non-reactive bowl. Heat up 3/4 cup of heavy cream until it almost reaches a boil. Don’t let it actually come to a boil. When you see the first bubble rising, turn the heat off.
- Pour hot cream over chopped chocolate and let it stand for one minute.
- Mix with a spatula until chocolate is all melted. Now, you want to make sure ALL the chocolate is melted. Sometimes when doing this, you will think that the chocolate is all melted, but there will be little chunks of chocolate remaining, so make sure to check.
- If this happens and the mixture isn’t hot anymore, place it in the microwave for a few seconds and mix again. Do this until there are no bits of chocolate. Be careful when placing this mixture in the microwave because you also don’t want to overheat it. Chocolate is delicate and hates to be overheated. That’s why you only microwave it in 5-10 seconds intervals.
- Set this mixture aside to cool down completely.
- You can put it in the fridge to help speed up the process.
- Once mixture is hardened and completely cooled down, you can proceed.
- Place the rest of the heavy cream (1 cup) in the bowl of a mixer. Whip on high for about 1 minute, add sugar and vanilla and keep whipping for another minute or two until it forms stiff peaks.
- Fold whipped cream into chocolate ganache gently with a spatula until it’s all incorporated.
- Spoon filling into crust and spread around with a spatula to even out.
Meringue
- Start by placing egg whites in the bowl of a stand mixer. Whip whites and the pinch of salt for about 1 minute on medium speed, until they are frothy.
- Add cream of tartar and increase speed to medium-high.
- Slowly add sugar while whipping. Whip for about 3 or 4 minutes. Check to see if the peaks are stiff. To do this, simply lift your beater or whisk and if the meringue holds its shape like a peak, you are good to go. If the meringue is falling to the side, you may have to whip a little longer. Be careful not to overwhip. The meringue should be glossy and when you flip the bowl over it should stay firm and not move.
- Once you obtain that stage, transfer meringue to a piping bag fitted with the piping tip of your choice and pipe it over room temperature pie. You don’t want your pie to be cold when you do this. If you don’t want to use a piping bag, simply spoon meringue over your filled pie and spread it around with the back of a spoon to create a nice design.
- Now, you can either blow torch the top with circular motions until it’s toasted, or place pie under a broiler for a minute or so.
Notes
Nutrition


Tido o que você faz é com excepcional carinho. Sinto-me orgulhosa de você, Camila!!😍😍
Haha even more getting-to-know friends stuff. I don’t have a sweet tooth either. And I have to be hyper aware of my processed sugar intake. That said if I have room I will ALWAYS order dessert even for just a few bites. If a friend is with me even better because then she can help! All aside, the photos of your desserts and savory dishes are intoxicating!! My mouth DOES water….for real! Lastly, absolutely cut me another slice and of course Luke is adorably cute!! 🙂 🙂 🙂
haha Mike, thank you. You are the best! Always!!
You’re such a great writer! Love reading your blog!
Awe, Thank you Dewey!! You are so sweet!!
I want to try this recipe one day but you know I will be catching my breath on thread mill the day after. Your blog is awesome keep it up. I want to have my own blog too but just don’t have time at the moment 😊
It takes a lot of time, girl! But you can do this! Start and take it slow! You should because your food is truly wonderful!!
this sounds very decadent! I love the macadamia crust!
Thank you Patrick 🙂
Drool Pie would best describe this yummmness! Holiday worthy 🙂
I’m so glad you like it! I’m sure you would make this and it would come out delicious with your cooking skills!!!
Ca, nada do que vc faz me surpreende, eu conheço muito bem sua capacidade e habilidades, muito detalhista e profissional, parabéns!!!!!!!
Obrigada, pai 🙂