Chocolate Cannoli
Hello friends! Today let’s make this delicious Chocolate Cannoli recipe! The Chocolate Cannoli Shells are made from scratch, filled with a scrumptious Chocolate Ricotta filling!
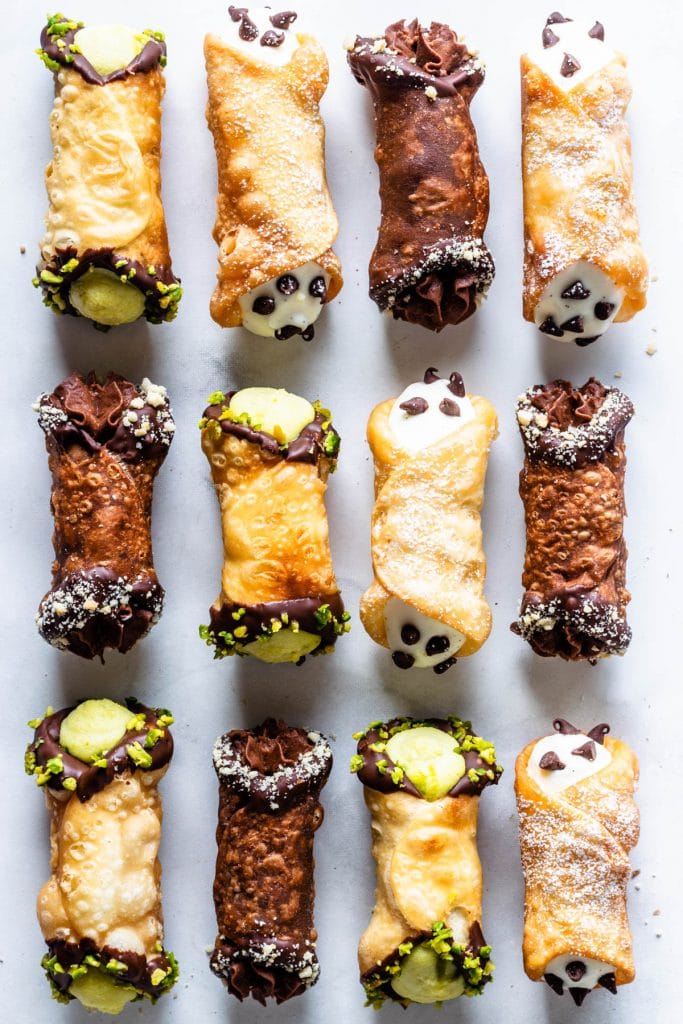
Earlier this week I updated my Cannoli post here on the blog with new pictures and a new video. And while doing that, I decided to make a couple more variations for my Cannoli recipe. So this is why you are getting this recipe for Chocolate Cannoli today, and later this week I will post a recipe for Pistachio Cannoli!
Stay tuned for that!
This post may contain affiliate links. I earn a commission from qualified purchases. Please read our Privacy policy here.
Make sure to watch the video on this page, or on my Youtube channel, showing you how to make the shells. The video is for the regular Cannoli recipe, but the Chocolate one is pretty much the same with the addition of cocoa powder to the shell, and to the filling.
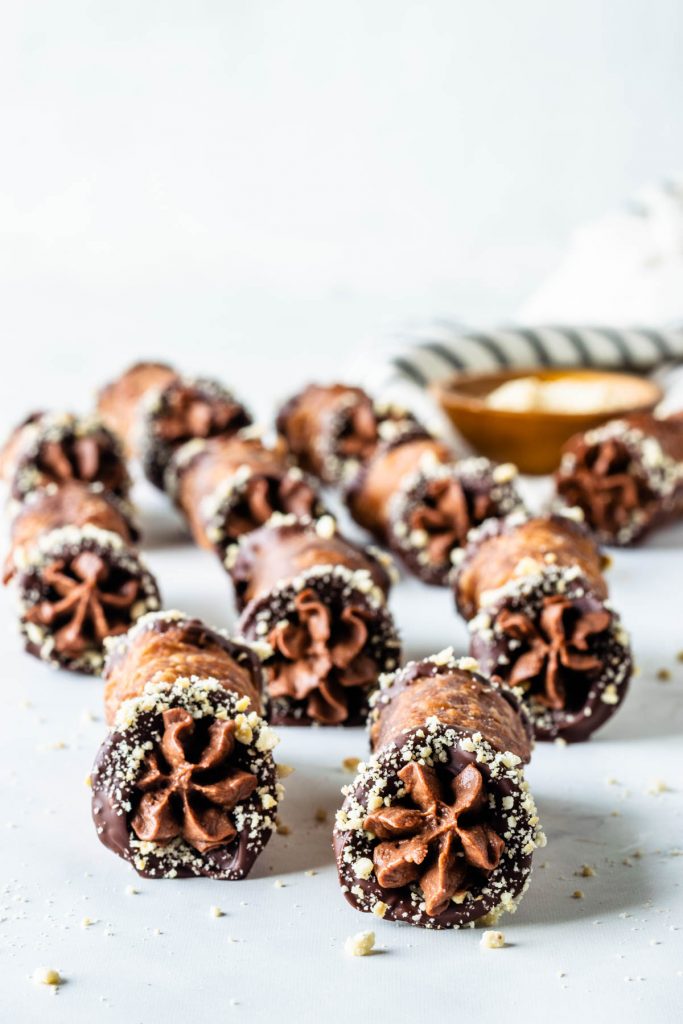
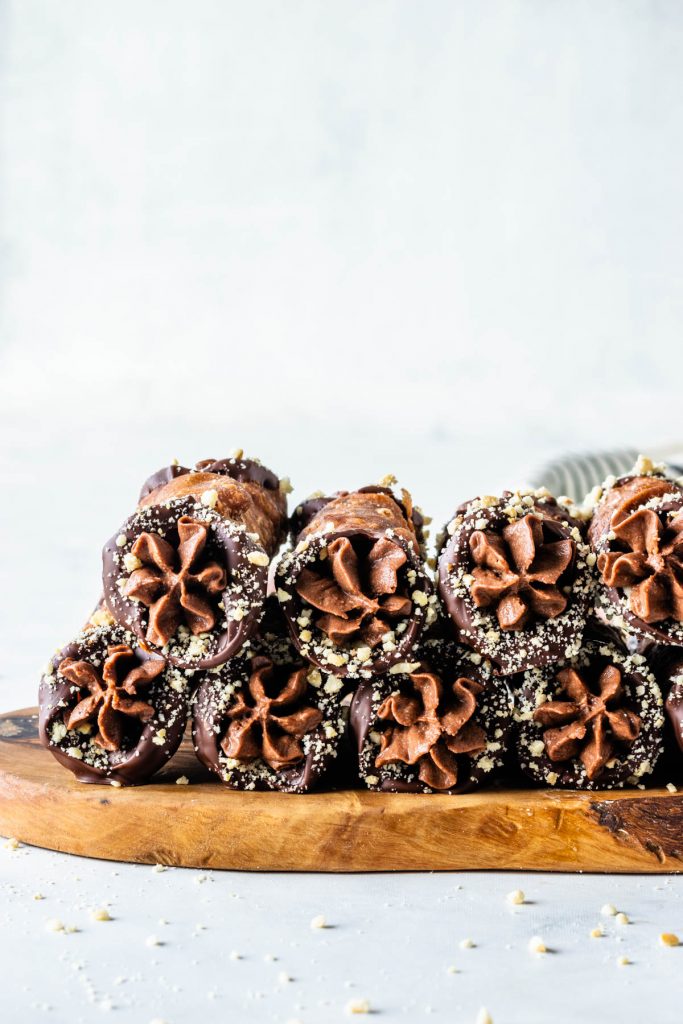
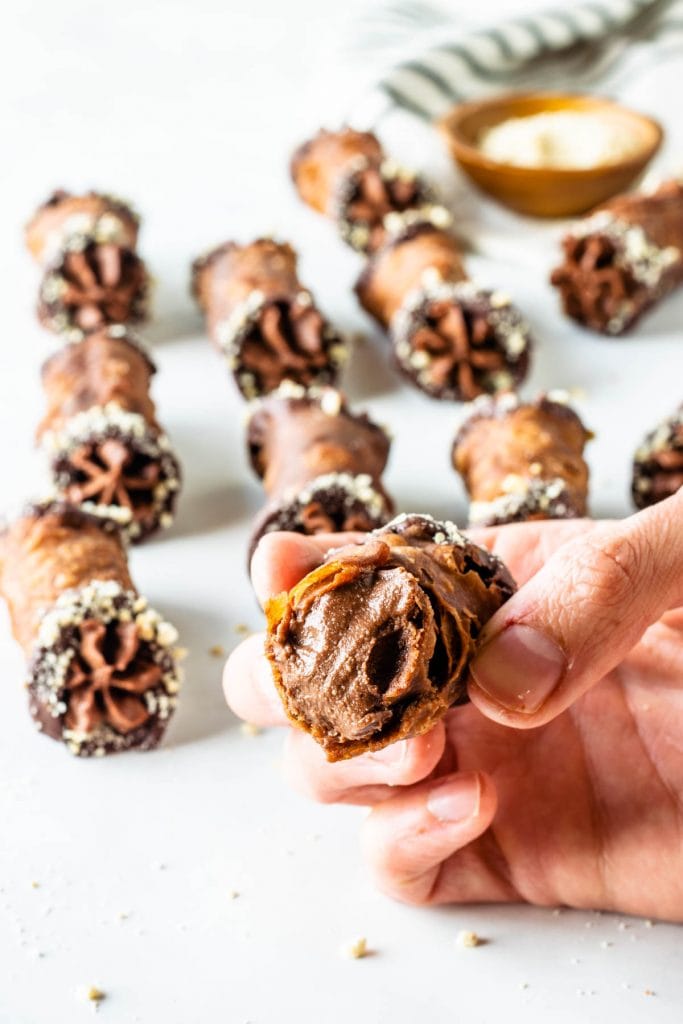
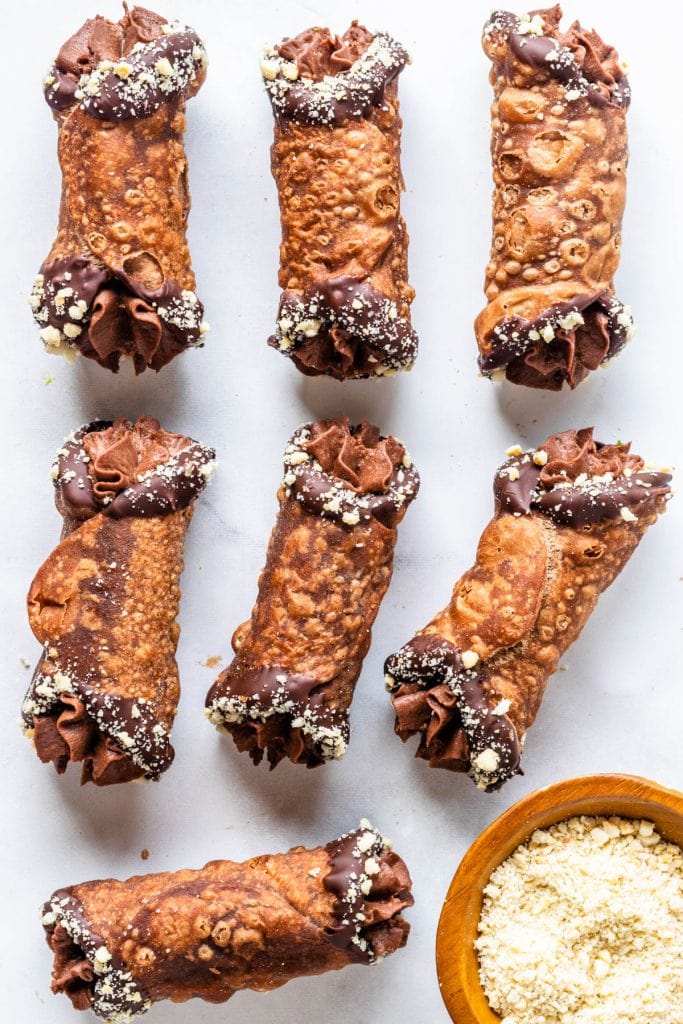
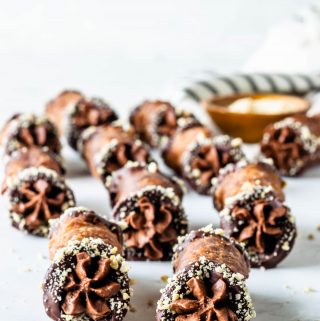
Also, I dipped the ends of the Chocolate Cannoli shells in melted chocolate, and coated in chopped nuts.
We start with the cannoli dough, which is very similar to pasta dough in texture. I use wine for the recipe, but feel free to substitute for water, or a combination of water and vinegar. Find the recommendations below on the recipe.
When I make my Vegan Cannoli, I like to use sparkling water.
The difference between using water and wine, is that the wine based recipe will be crispier in my experience.
After making the dough, make sure to let it rest in the fridge for at least 4 hours, or overnight. The resting time is important, because it will make sure that the liquid ingredients are fully absorbed by the flour, the gluten strands will have a chance to relax, and this will yield a strong and pliable dough, that will be smooth and won’t tear.

For rolling out the dough, I like to use my pasta machine, which makes the job much easier and faster. If you don’t have a pasta machine, you can use a rolling pin. I made pasta and cannoli for years before having one.
Make sure to roll out the dough very thin, this is important, so the cannoli shell isn’t soft. The thinner, the crispier. However, if you roll it too thin, it will tear.
On the pasta machine I like to roll it once in each setting until number 6.

To make my Cannoli shells, I work with a small portion of dough at a time, keeping the remaining dough covered.
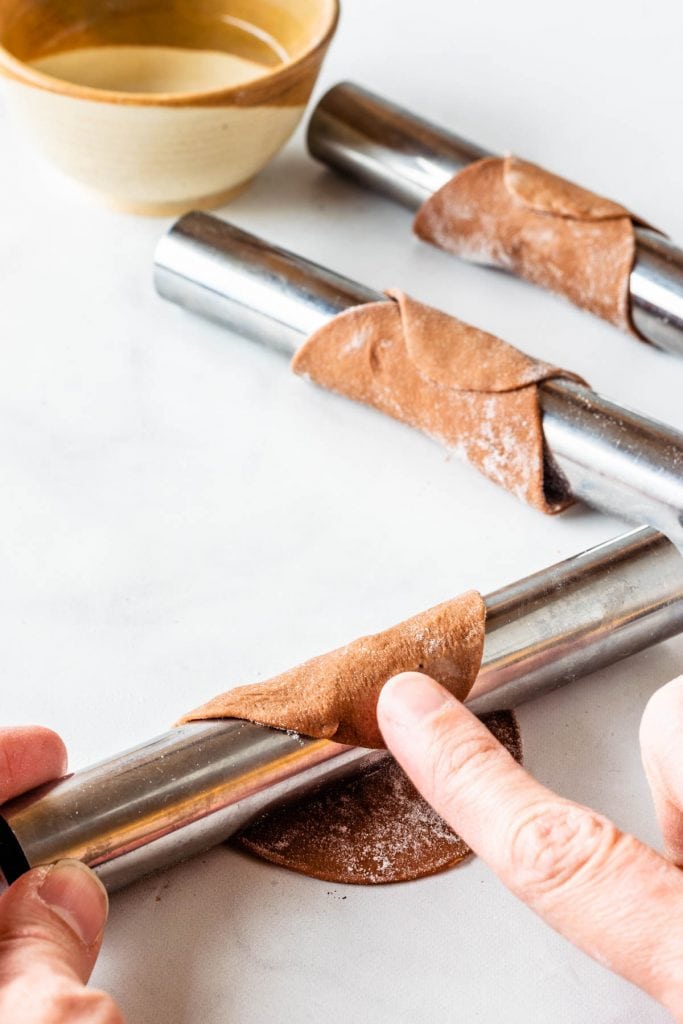
First, I roll out and cut about 16 circles.
Then I start wrapping my Cannoli Rings.
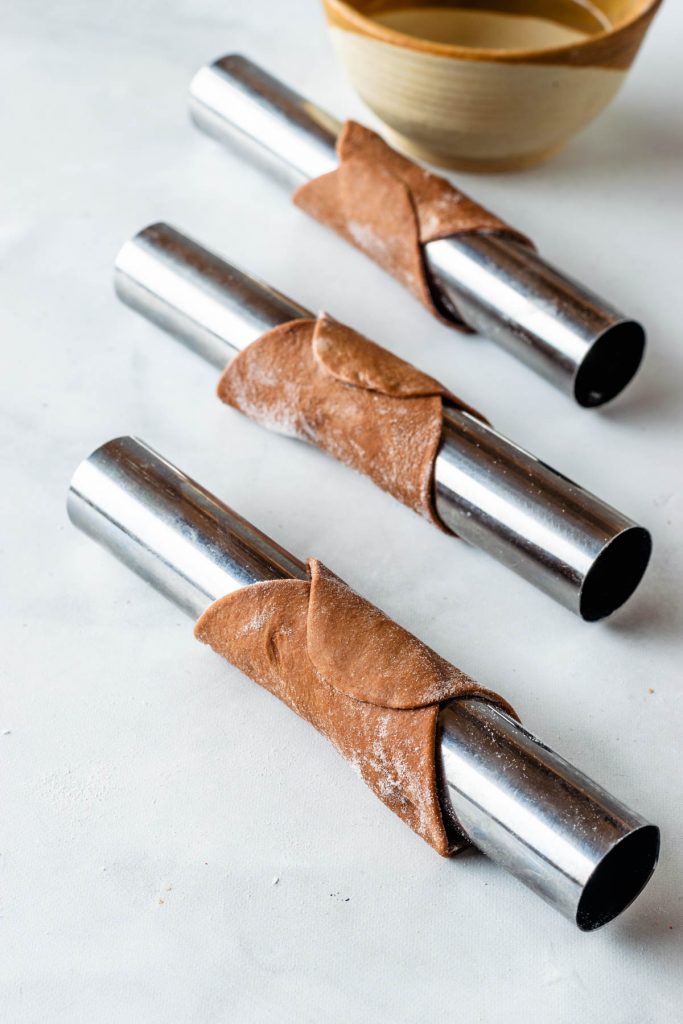
These are the Cannoli Forms use. And I use the 3.5″ cutter from this set.
The Cannoli set comes with 4 rings, and I have 2 sets, which means I have 8 cannoli forms.
Once I have 16 circles, I wrap the rings with a circle, and use just a dab of water to seal the edges together, and press it gently but make sure it’s sealed so the shells won’t open as they fry in the oil.
Then, I begin to fry the dough, and at the same time, I continue to roll out more dough, and cut out more circles. Always remembering to keep the circles and any dough covered at all times.
In my pan, I am able to fry 4 cannoli shells at a time. Fry them for about 1 minute on each side. And then remove the shells to a plate lined with paper towels. Use paper towels to remove the cannoli from the ring, and be careful when doing this because they will be piping hot!
Very Important tips on making Cannoli
- Make sure to let the dough rest, like I’ve mentioned above. This is very important. The dough will be more pliable, and won’t tear.
- Keep the dough covered at all times, if you are not using it.
- Make sure to have a thermometer clipped to the side of your frying pan, so you can control the temperature as you fry the cannoli.
- Work quickly, and turn the oil off, as you roll out more pieces of dough and cut out more circles.
- Don’t cut too many circles all at once, because even if they are covered, they will start to dry out. Which is why it’s important to work in steps.
- Keep the shells in an air tight container at room temperature.
- Make sure to strain the ricotta before making the filling!
- Only fill the shells up to a couple of hours before serving. If they sit with the filling for too long they will become soggy.
- You can freeze the dough for up to 2 months, but don’t freeze the fried shells.
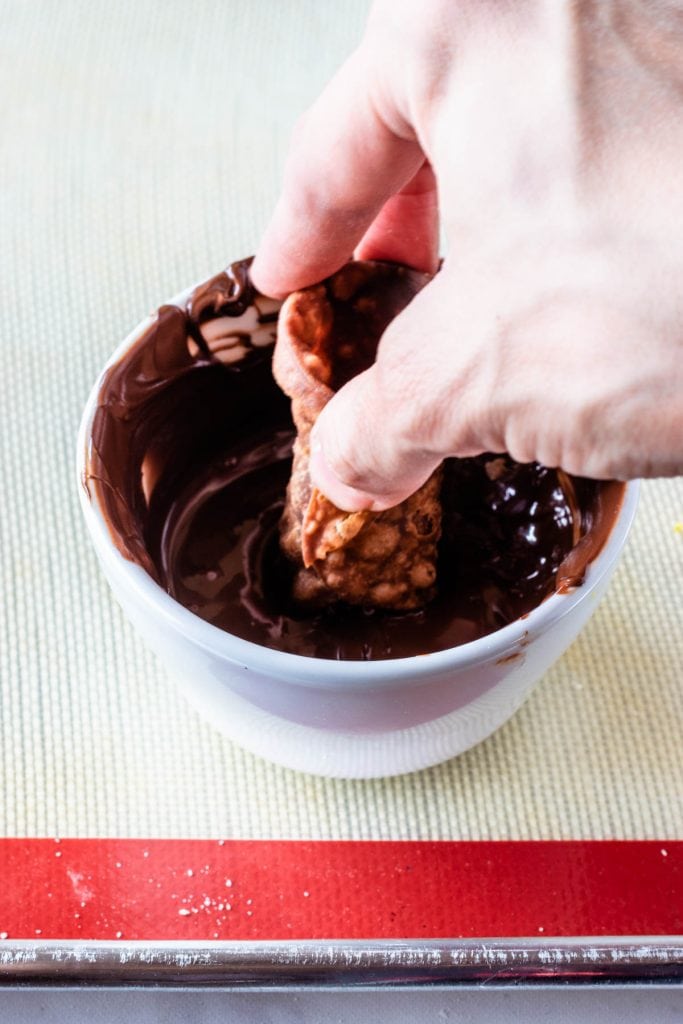
After the shells have cooled down, melt some chocolate, dip the end of each shell in and sprinkle some nuts on top if you wish.
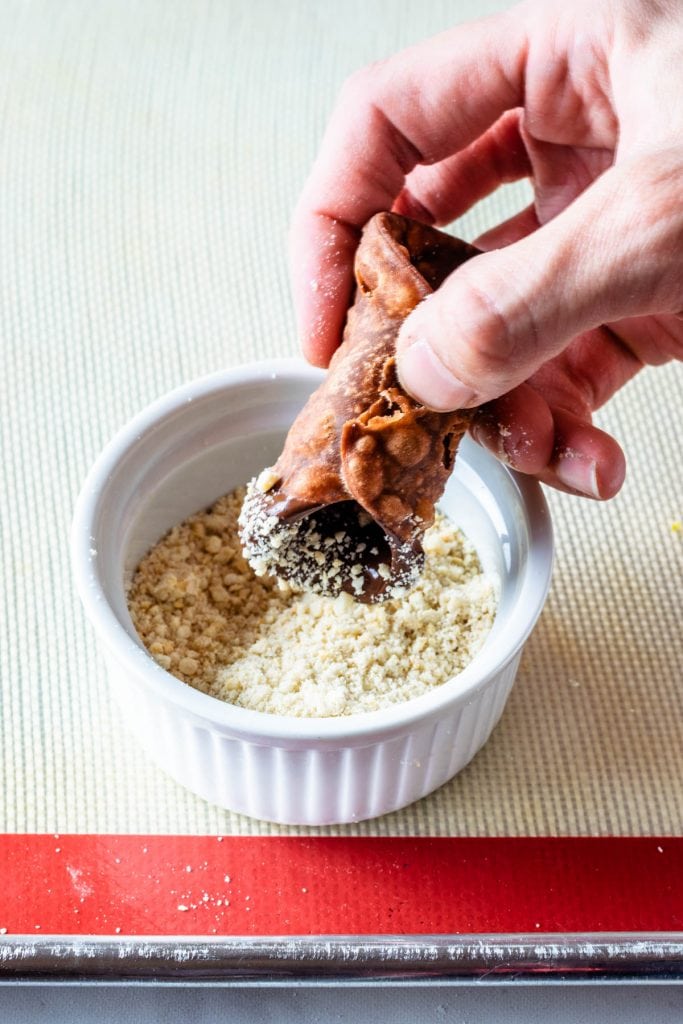
Make sure to let the chocolate dipped shells dry before filling.
To make the filling, you will need ricotta, powdered sugar, cocoa powder, and vanilla. I like to use my Homemade Ricotta when I make Cannoli.
Because I make my ricotta really thick, which makes the filling so rich, and there’s really nothing like homemade ricotta in my opinion.
But you can use store-bought and it will be scrumptious as well. My biggest tip about this, and I’ve mentioned this above is: make sure to strain the ricotta!
Please do not skip this step, or you will end up with a soupy filling that won’t hold up, and will make your shells super soggy!
To strain the ricotta, simply line a strainer with a double layer of cheese cloth, and place it on top of a bowl, and let the ricotta strain for a couple of hours, even overnight, in the fridge. Wrap the overhanging pieces of the cheesecloth over the ricotta, and give it a little squeeze to help drain some liquid.
Trust me on this one!
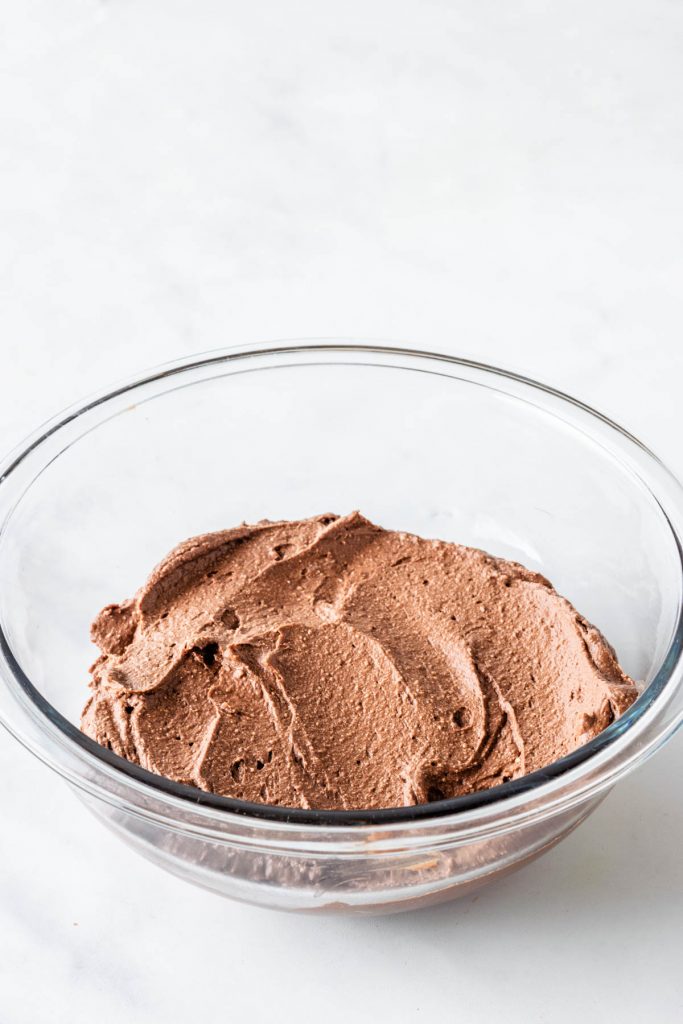
And you will end up with a Chocolate Cannoli Filling absolutely rich, creamy, and delicious, that will hold up its shape when piped!
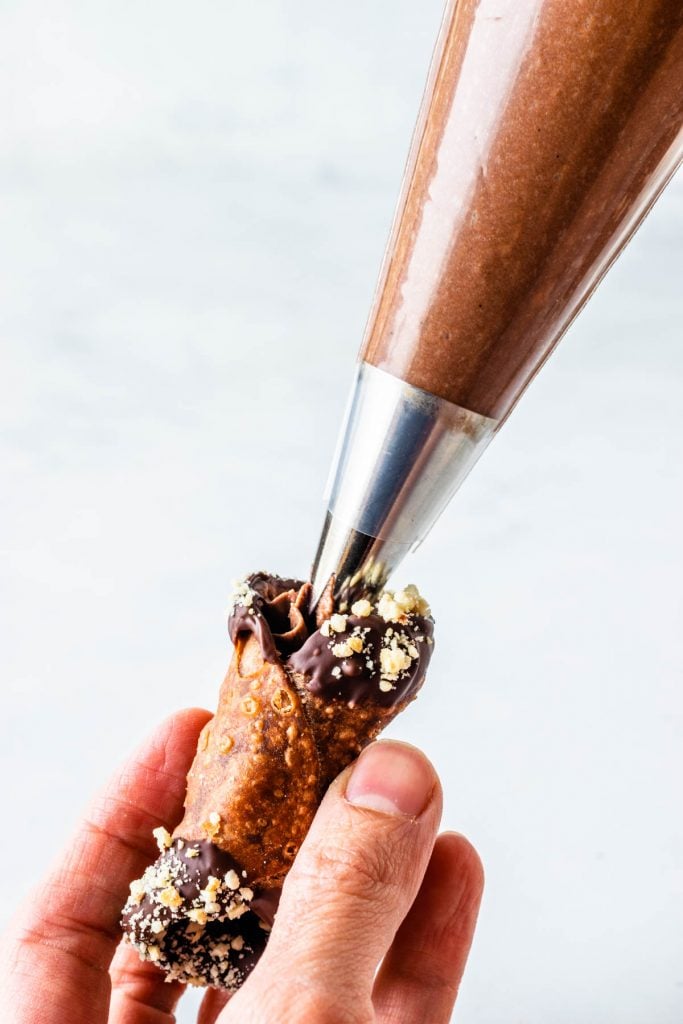
Use different piping tips to pipe the filling in the cannoli to give it texture and make it fun and pretty! I used a 1M Open Star Tip here.
I hope you enjoyed today’s recipe! Make sure to tag me on instagram if you make my recipes! These Chocolate Cannoli will make for an amazing project, my son helped me make them, and he absolutely loved playing with the dough, helping me roll it out and cut the circles!
Here is some of the equipment I used making this recipe:
And before I leave, here are some recipes you might enjoy!
- Traditional Cannoli Recipe
- Pistachio Cannoli
- Bavarian Cream Donuts
- Walnut Cardamom Pastries
- Strawberry Scones
- Dulce de Leche Donuts
- Pistachio Donuts
Thanks for reading my blog! Have a lovely day!
Chocolate Cannoli
Ingredients
Chocolate Cannoli Shells
- 2 1/3 cups all-purpose flour 10.5 oz, 297 grams
- 1/4 cup cocoa powder 1 oz, 30 grams
- 2 tbsp granulated sugar 0.88 oz, 25 grams
- 1/4 tsp salt
- 2 large egg yolks slightly beaten
- 2 tbsp butter softened 1 oz, 28 grams
- 2/3 cup dry white wine or Marsala wine 156 ml
Cannoli Filling
- 5 cups ricotta cheese store-bought or homemade
- 2 cups powdered sugar 8.8 oz, 250 grams
- 3/4 cup cocoa powder 3.1 oz, 88 grams
- 2 tsp vanilla extract
Chocolate
- 1 cup chopped chocolate, or chocolate chips (6 oz, 170 grams)
- 1/2 cup chopped nuts
Instructions
To make the dough
- Mix the flour, cocoa powder, sugar and salt in the bowl of a stand mixer, or any bowl if you plan on kneading by hand.
- Add the butter and yolks to the flour mixture.
- Slowly start to incorporate the wine, as you stir. And mix with the paddle attachment, or a spoon or fork, to form a ball.
- Switch to the dough hook, and begin to knead. Or continue to knead by hand.
- Using the dough hook, it should take about 4 minutes to knead the dough. By hand it will take a bit more, from 6 to 8 minutes.
- Only add more flour during the kneading process if necessary. After kneading for a while, the dough should become smooth, soft, and it shouldn’t be sticky.
- Flatten the dough into a disk, wrap it well in plastic, and refrigerate for at least 4 hours, preferably overnight.
- Once the dough rests, remove it from the fridge. It’s time to begin rolling.
- You can roll the dough out by hand, or with a pasta machine. Divide the dough into 8 pieces, and work with one piece at a time. If rolling out by hand, you can probably handle larger pieces, but most pasta machines won’t take a huge piece of dough in, which is why I divide mine into 8 pieces.
- The dough should be about 1/4″ thick, perhaps slightly thiner. Using the pasta machine, I roll it in each setting once until number 6.
- Don’t use too much flour in the rolling process, but use enough so the dough isn’t sticking.
- Too much flour will produce a dry and tough dough.
- You want to do this process in parts. Roll out about 1/4 of the dough and cut out circles using a 3.5″ inch cutter.
- Remember to keep the unused dough covered at all times.
- Re-roll the scrapes of dough out and cut more circles out of it.
- Once you have a few circles, start wrapping the cannoli tubes.
- To wrap the tubes, place each in the middle of a dough circle, roll out the bottom half and lightly dip your finger in water and brush where will be the seam so the other side will seal. Press it to make sure the tube won’t pop open in the fryer.
- Heat 4 cups of shortening or oil in a large pan with a heavy bottom, until it registers 350ºF. Start frying the cannoli in batches. Fry for 1 to 2 minutes on each side, and use tongs to flip the cannoli over. With the chocolate shells can be a bit tricky to tell when they are done because they are already dark, so keep an extra eye as you fry.
- Once the cannoli have a deep color, remove to a plate or tray lines with paper towel to drain the oil.
- Wait a little bit, and use paper towels to gently help remove the shells from the tube. And then proceed to wrap more shells and fry them.
- It helps to have more than a few tubes. I can manage doing this with 8 tubes, but often times, I have to turn the heat off the oil so I can have time to catch up with rolling out the dough and cutting out the circles.
- Rolling, cutting, wrapping, frying. Repeat until done.
- Also remember to have a thermometer clipped to the side of the pan so you can control the temperature of the oil, which should be kept constantly at 350ºF.
- Once the shells are cool, place them in an air-tight container, they will keep for up to 4 days, but might not be as fresh as the first 2 days.
To make the Cannoli filling
- A few hours or the day before making the filling, line a strainer with a double layer of cheesecloth, and place it over a bowl. Pour the ricotta on the strainer, and cover it with the overhanging cheesecloth. Insert it in the fridge and let it drain for a few hours, squeezing gently if you wish. This is very important because otherwise the filling will be way too wet to be piped in the cannoli.
- Sift the powdered sugar and cocoa powder together.
- Add the strained ricotta to the bowl of a mixer. Add the sifted powdered sugar to the bowl. Mix on low until combined.
- Add the vanilla extract.
- Raise the speed to medium-high and beat the mixture for a couple of minutes, until light, fluffy and creamy.
Chocolate Dipped Shells
- Melt the chocolate in the microwave at 15 second intervals, stirring in between, until completely melted.
- Dip the ends of the shells in the chocolate and then sprinkle nuts on top.
- Let the shells dry completely before filling.
To assemble
- Don’t assemble until you are ready to serve or serve within the next couple hours because if you let the filled cannoli sit, the shell gets soggy. I like to keep the filling in a piping bag inside my fridge and the shells stored in a airtight container on my counter. When ready to serve to my lucky guests, I simply pipe the filling in. Fresh, crispy and delicious! Perfection!
- I like to use a large round piping tip (around 1/2” inch) fitted in a large piping bag. Scoop the filling in and pipe from the middle to the outside from both sides.
- You can coat the tips in crushed pistachios, or any other nuts or in mini chocolate chips.
- Another option is to dip the ends of the shells into melted chocolate and let them dry for a while and once the chocolate is dry, fill with the ricotta.
- Sprinkle powdered sugar over the shells for the final touch.
Notes
Amount: This recipe yields about 45 small cannoli, cut with the 3.5” round cutter. If you use a different size cutter, you might end up with more or less shells.
Ricotta: Do not skip the ricotta straining process, or you will end up with a soupy ricotta filling that will make the shells soggy, or won’t even be able to hold up enough to be piped in the cannoli.
Please read the post above, my traditional Cannoli post, and watch the video from the Cannoli recipe to see more details on how to make the shells. The recipe and procedure are pretty much the same with just the addition of cocoa powder, and a little less flour instead.
This sounds absolutely delicious! Can I make the filling in advance and freeze it? And then letting it thaw over Night and maybe whip it up before piping?
I have never had any experience freezing it. You can certainly try but I really can’t guarantee it won’t lose any quality, Im not sure it will remain like the freshly made filling.
Will the unfilled shells freeze well?
I don’t believe so because they are fried.
Can the filling be made in advance and kept in the fridge? If so, any suggestions for how long it will keep?
Thanks 🙂
For sure, probably up to 2-3 days.
Que delícia de cannoli!!😋😋😋😋😋🌷
Cannoli é a melhor coisa e esses estão incríveis!!!!! Parabéns pela receita!!!
Aeee obrigada pai!!!