Sun-dried Tomato and Fontina Sourdough Bread
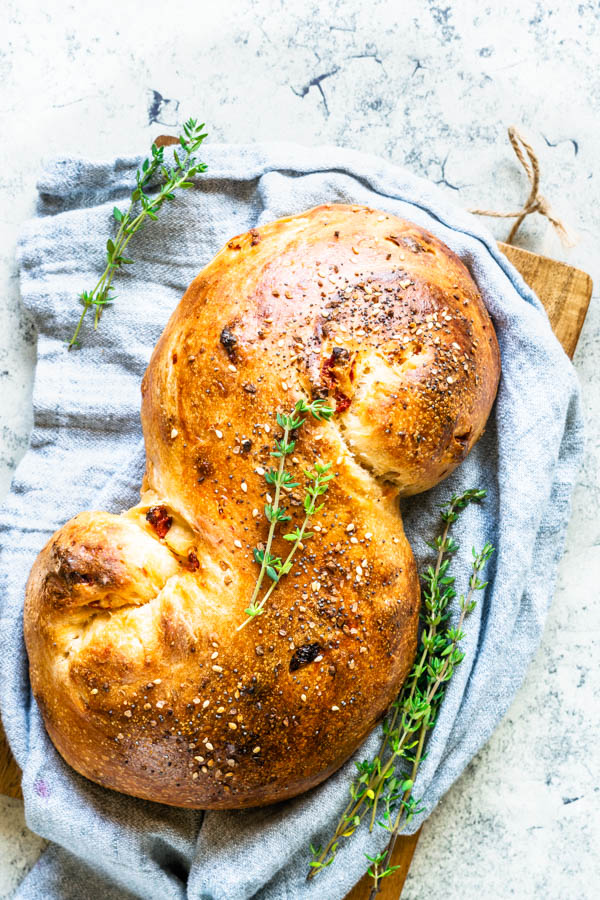
Sun-dried Tomato and Fontina Sourdough Bread.
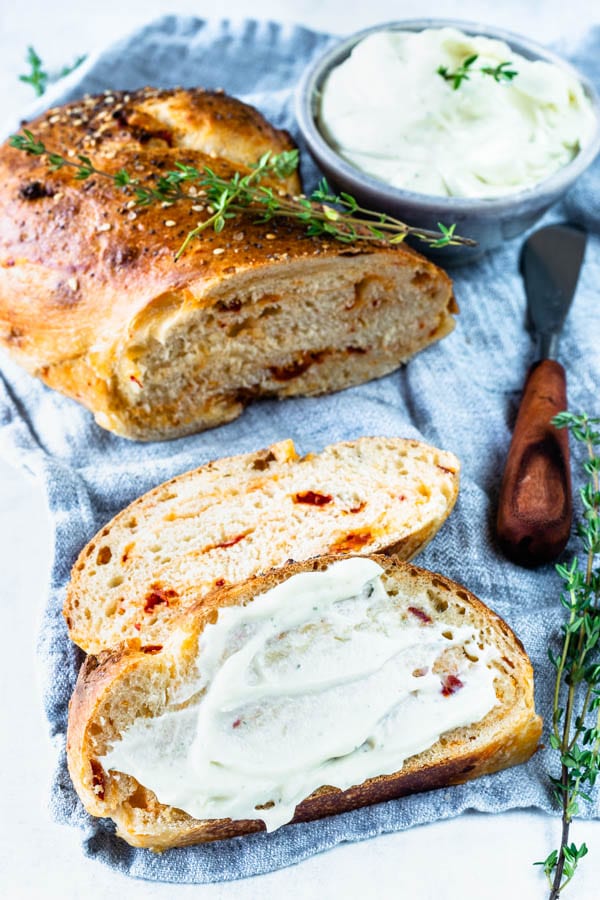
I served this delicious bread with a Thyme Mascarpone Cheese Spread that was to die for.
This post may contain affiliate links. I earn a commission from qualified purchases. Please read our Privacy policy here.
If you follow my blog, you know I have a starter named Phoebe, and if you don’t you can read about it here, in my other sourdough bread posts.
So Phoebe and I decided to go on a little adventure together, and bake this delicious Sun-dried Tomato and Fontina Sourdough Bread.
This Sourdough Bread was amazing!!
Make sure your starter is active before you make this bread. I keep my Phoebe on top of my fridge, so I feed her constantly. I simply feed her a few hours before I desire to make bread, and she is good to go.
However, if you keep your starter in the fridge, you might want to take it out of the fridge and start feeding it until it gets active, maybe 1 or 2 days.
I get often questions about my sourdough starter, how to make one, how to care for it. I hope to make a post about it soon! Meanwhile you can take a look at many resources online that can teach you that, or the best book I can recommend is the Artisan Sourdough Made Simple, by Emilie Raffa. About the online resources, you can take a look at this post by King Arthur Flour, but there are so many other blogs out there you can find some useful information to help you. I recommend diving in and just finding tips that work best for you.
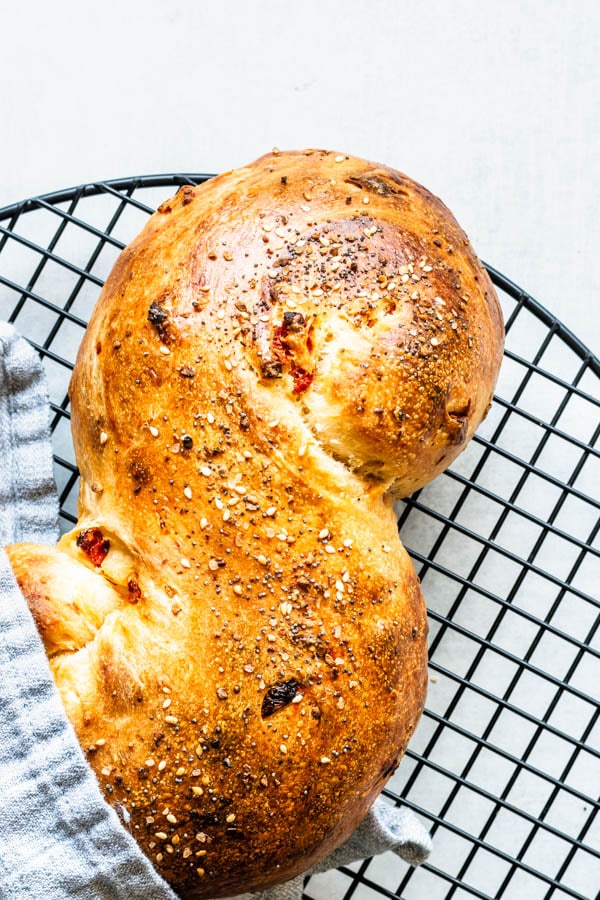
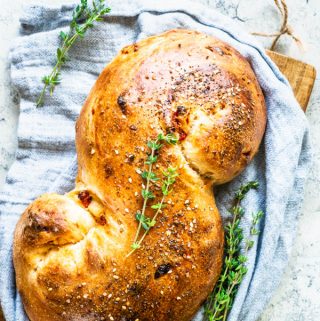
I really love this shape. And it’s not hard to make it.

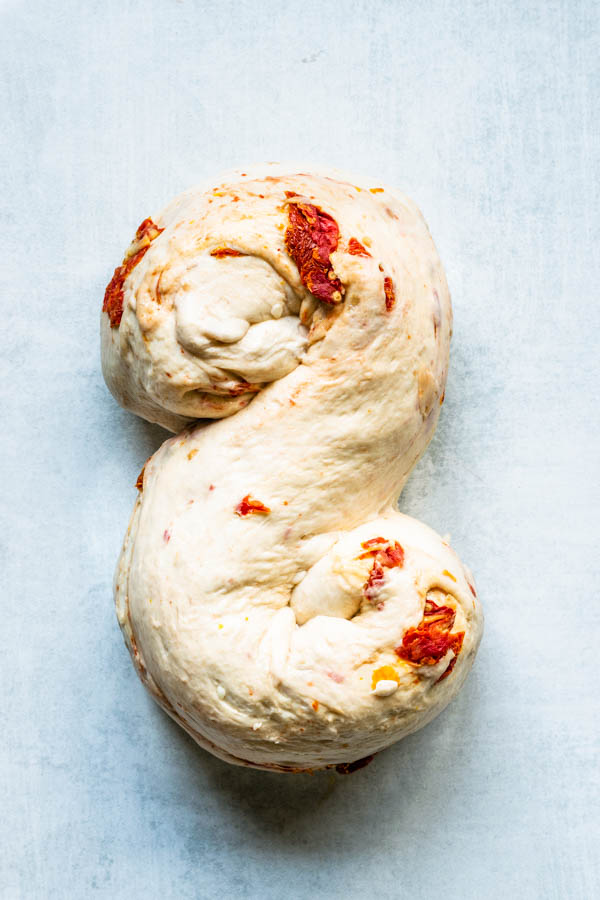
Divide the dough into 2 pieces, then form each dough piece into a thin log, then working from each end, simultaneously, simply coil the dough toward the center, to form an S shape.
After letting the dough do the last proof, I brushed it with some egg wash, and sprinkled some Everything Bagel Seasoning on top.
Let’s just say that if I saw this Sourdough Bread at the bakery I would not hesitate to buy it. Actually I might, just so I could have the opportunity to make it myself.
As for the cheese, you may use other kinds of cheese, and add other spices and stuff to the dough, maybe some fresh thyme, roasted garlic, etc.
Let your creativity flow when baking bread!

I hope you liked my Sun-dried Tomato and Fontina Sourdough Bread! Have a fantastic day, sourdough bakers!!
Check out this other Sourdough Bread Recipe, it’s a Cheddar Jalapeño Sourdough Bread with a Roasted Garlic Spread. And I also have many others in the Sourdough Section.
Sun-dried Tomato and Fontina Sourdough Bread
Ingredients
Sponge
- 113 grams active sourdough starter 2/3 cup, 4 oz
- 127 grams bread flour or high-gluten (1 cup, 4.5 oz)
- 56 grams water 1/4 cup, 2 oz
Dough
- 637 grams bread flour or high-gluten (5 cups, 22.5 oz)
- 2 teaspoons fine sea salt
- 340 grams water lukewarm 90F-100F (1 1/2 cups, 12 oz)
- 95 grams sun-dried tomatoes chopped (3/4 cup, 3.3 oz)
- 110 grams shredded fontina cheese 1 cup, 3.8 oz
Thyme Mascarpone Cheese Spread
- 226 grams mascarpone cheese 1 cup, 8 oz
- 2 teaspoons lemon juice
- 2 teaspoons thyme leaves
- 1/2 teaspoons garlic powder
- 1/2 teaspoon kosher salt
Instructions
Sponge
- To make the sponge for this dough, make sure your sourdough starter is active. I keep mine on top of my counter, so I just have to feed it a few hours before I want to bake my bread. If you keep yours in the fridge, you might want to start feeding the starter a couple days before making the dough, and leaving it at room temperature until it bubbles up and gets active again.
- Once your sourdough starter is active, simply mix all ingredients together in a bowl. Make sure the flour is entirely hydrated and incorporated into the starter and water.
- Transfer starter to a lightly oiled bowl.
- Cover bowl with a plastic wrap or kitchen towel. Let it rest on the counter for 4-8 hours, until it has risen a little. I let mine rest for about 8 hours. Whenever your dough has puffed up, you’re ready to move on to the next step, it doesn’t have to double up or anything like that.
- Also, if you want to, after the dough has risen, you may put it in the fridge overnight and keep going on the next morning. If you refrigerate your sponge, don’t forget to let it come to room temperature before making the final dough.
Dough
- In the bowl where the sponge is, add bread flour, salt, and water. Mix with a spatula until incorporated. You can either knead by machine, or by hand.
- If kneading by hand, you are going to have to work the dough for about 10 minutes. And if you are using the KitchenAid, you might need around 6-8 minutes.
- Dough should feel smooth and with a nicely developed gluten formation.
- At the final 2 minutes of kneading, add sun dried tomatoes and fontina cheese to the dough. Add a bit at a time, so this way the sun-dried tomatoes and cheese will be uniformly distributed through the dough.
- Place dough in a lightly oiled bowl.
- At this point, I put my dough in the fridge and let it rest overnight (actually I let it rest in there for 2 days).
- After kneading this dough, your options are:
- You may let this dough rise at room temperature for about 4 hours, then shape it and bake it.
- You may also let this dough slow rise in the fridge overnight, remember to take it out of the fridge about 1 hour before the final shaping.
- The final Shaping. Divide dough into 2 equal pieces. Very gently roll each piece into a long and thin log. Refer to pics above in the post for reference.
- Then working from each end, simultaneously, simply coil the dough toward the center, to form an S shape.
- You may also shape the dough pieces as boules, baguettes, or whatever shape you love the most.
- Let shaped loaves rest at room temperature, covered with a clean kitchen towel, for about 2 hours, until almost doubled in size.
- Pre-heat oven to 400F.
- Before baking the loaves, you may brush an egg wash on top of the loaves. I brushed each loaf with a light egg wash (1 yolk+1 tablespoon water) and then sprinkled them with my Everything Bagel Seasoning, which you can find a recipe for here.
- Insert loaves in the oven. Let them bake for 5 minutes, lower oven temperature to 350F.
- Bake these loaves slowly, or they might be undercooked in the center. Cook loaves for about 25 minutes total, but be careful not to burn the outside of the loaves, specially if there are sun-dried tomato pieces sticking out, those will burn very quickly.
- Loaves should register a temperature of 200F, and when you tap on the bottom of the loaves, it should sound hollow. Their color should be a deep golden brown.
Thyme Mascarpone Cheese Spread
- Blend all ingredients in a small blender, or cream them in the stand mixer.
- Taste for salt and add more if necessary.
- If you find that your spread has curdled it’s probably because you added too much lemon juice, so to stabilize it again, just add more mascarpone cheese to it.
Storage
- Store Thyme Mascarpone Cheese Spread in the fridge for up to 2 days. Store bread in a zip loc bag, or air tight container on the counter for the first day, then transfer it to the fridge and keep it for another 2-3 days, but be aware that the bread will lose its freshness.
Nutrition
SaveSave
Hi there, i love your website and this recipe/bread looks amazing! I have active starter ( named Peter Pane) and wanted to know if you there is a video showing you knead and fold this dough into that “S’ shape? Thanks so much!
I’ve made this several times. I feel like each time I make it the bread is very tough. It takes me quite a bit of time to get all of the flour incorporated before I begin kneading, then, when kneading, the bread is already so tough. Any advice? Or should I increase the hydration of the dough so that getting everything incorporated happens faster?
yes you should increase the hydration a bit.