Matcha Macarons
Hello friends! Today I am going to show you how to make Matcha Macarons!
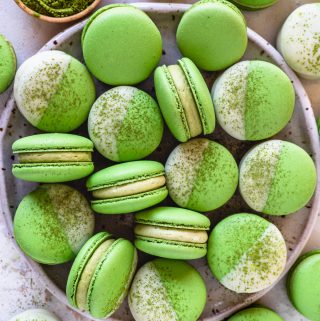
For these Matcha Macarons, I made two different fillings: Matcha Buttercream and Matcha Ganache. Check the recipe down below, and also check the video on YouTube or on this page, showing you exactly how to make these Matcha Macarons.

I initially wrote this Matcha Macarons recipe almost 3 years ago, and today I am updating it, with the recipe for the Matcha Ganache, and also with new pictures and a video.
This post may contain affiliate links. I earn a commission from qualified purchases. Please read our Privacy policy here.
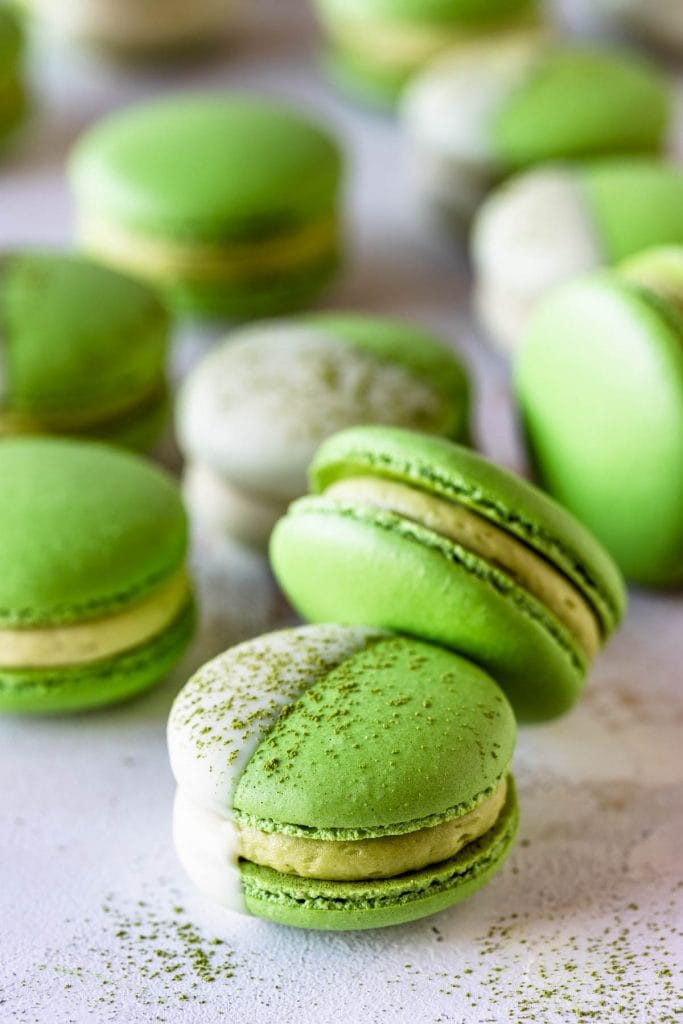
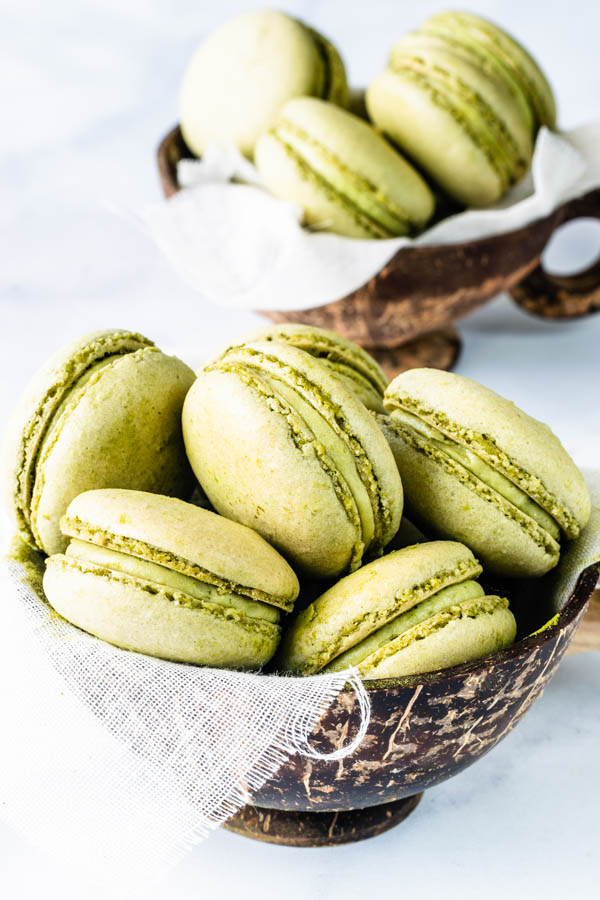
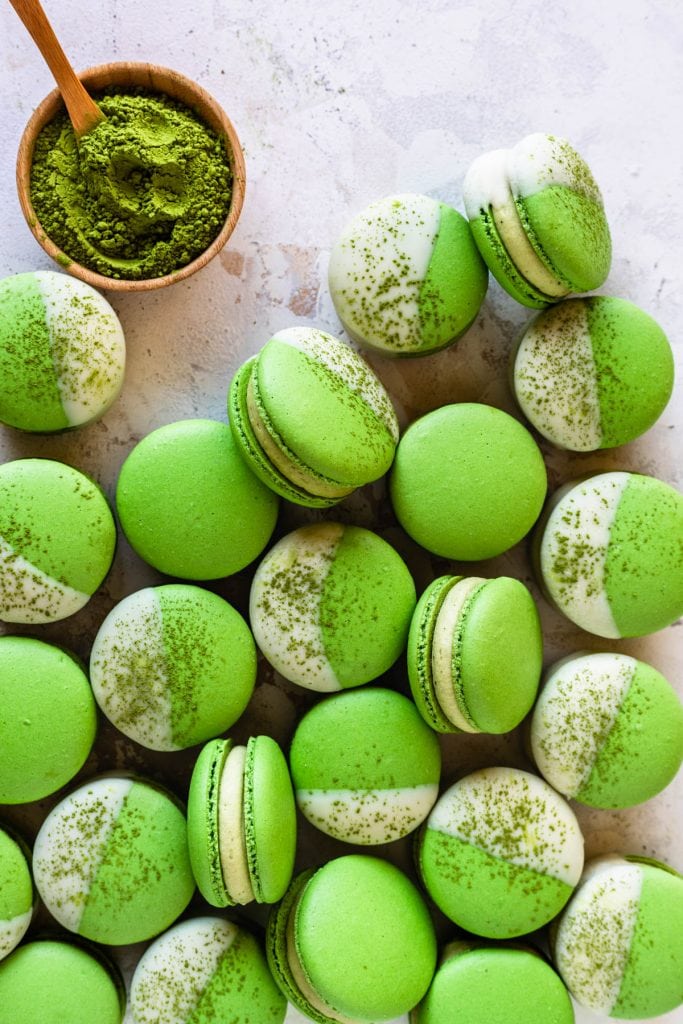
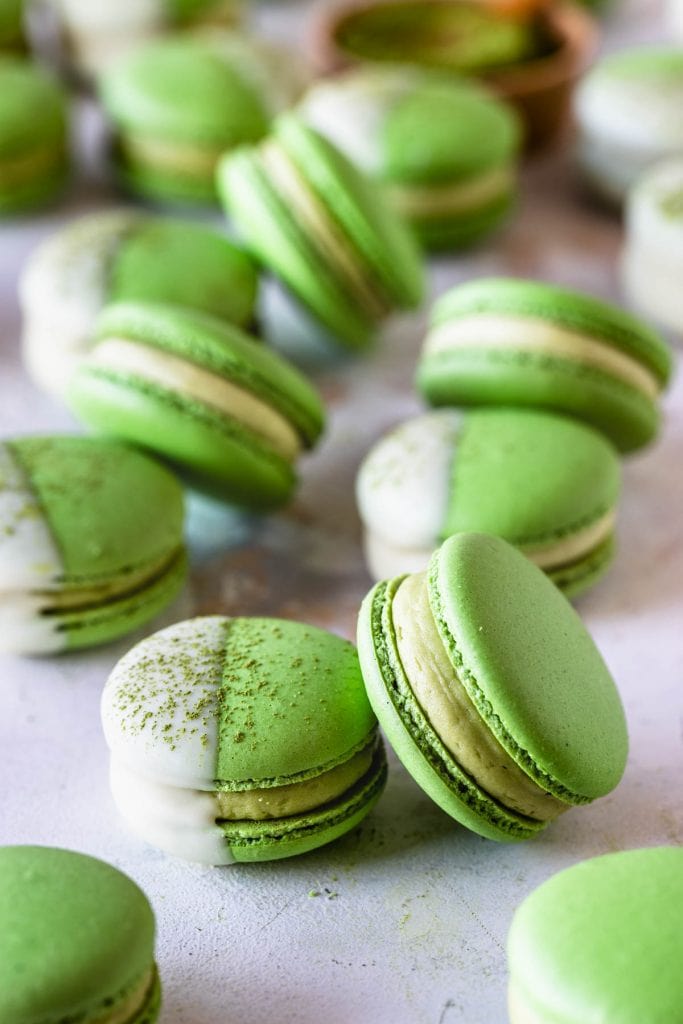
And that’s also why you will see two completely different styles of pictures here.
On the updated Matcha macarons recipe, I actually added green food coloring to make the green a bit more vibrant. This is a total optional step, and you can just let the matcha color the shells instead of adding food coloring, it’s up to you.
And another thing I’ve changed, is that I dipped the macarons in white chocolate for an extra beautiful decoration.
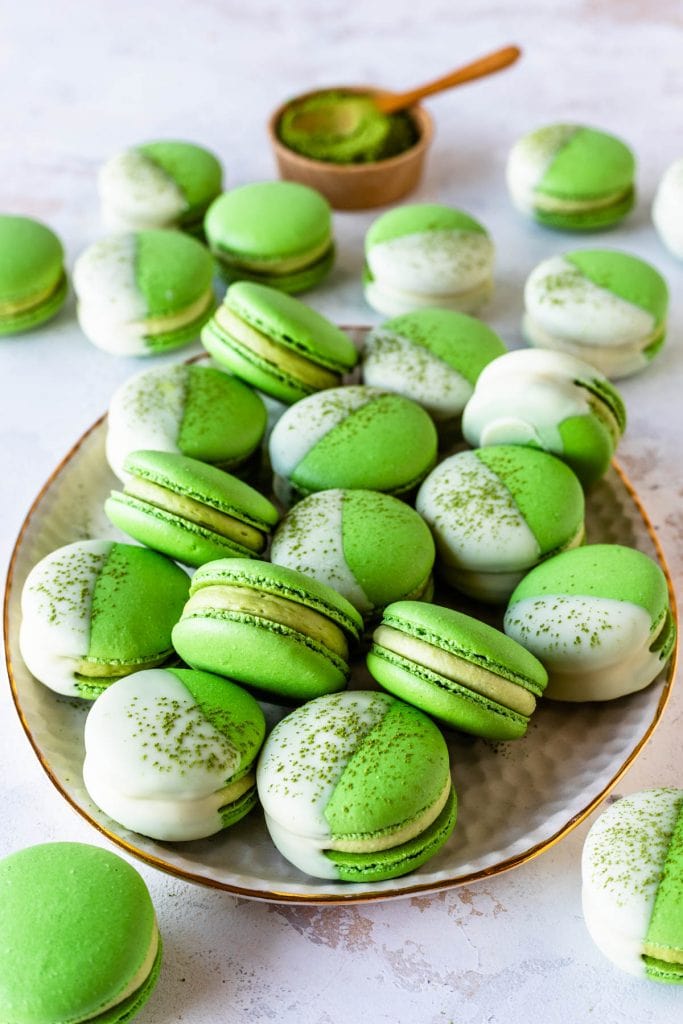
Which do you prefer? The more rustic macarons you see below, or the more colorful ones dipped in chocolate? Let me know down below!
And I will also say that I think the matcha ganache filling is incredibly delicious and if you like white chocolate ganache, then this will be right up your alley! The matcha is so smooth and compliments the velvety texture of the white chocolate ganache so well. It’s a treat!
Another thing that has changed since I first made this recipe, is that now I use egg white powder in my macarons. I add it along with the granulated sugar and egg whites when making the syrup.
Egg white powder isn’t the same as meringue powder.
It acts as a strengthener for the meringue, since it consists of dried egg whites only, so it provides extra protein to the structure of the meringue.
This is the brand I use Judees Gluten Free. You should only need a few grams per 100 grams of egg whites that you use in your recipe. I use 3 grams for the matcha macaron shells, 2 grams for chocolate shells, and 4 grams for regular shells.
I’ve experimented with different amounts for the matcha shells, and landed on 3 grams for my best results as far as feet and fullness of the shells go.
The egg white powder is totally optional but I love the results since I started using it. So now it became part of my recipes. However, I went by 5 years without using it, so you can totally get away without using egg white powder.
If you like experimenting with macaron recipes, I recommend trying it, because it does improve the quality of the shells.
To see more macaron tips, beginner’s guides, troubleshooting information, please visit Macaron School. Macaron School is a page I am building up with the best macaron resources and knowledge to help you bake better macarons!
Here are some recipes that may interest you if you like these Matcha Macarons:
- Earl Grey Macarons
- Coffee Macarons
- Tiramisu Macarons
- Chai Macarons
- Mint Chocolate Macarons
- Fig Macarons
- Honey Macarons
- Vanilla Bean Macarons
- Gingerbread Macarons
- Pistachio Macarons
- Hazelnut Macarons
And these Matcha Macarons were also featured in my 2020 Holiday Macaron Box which you can find here.

If you make this recipe tag me on instagram or leave a comment below! Thank you so much for reading!
Matcha Macarons
Ingredients
Matcha Macarons
- 3 grams egg white powder optional, read notes
- 100 grams egg whites
- 100 grams white granulated sugar
- 105 grams almond flour
- 105 grams powdered sugar
- 3 grams matcha powder
Matcha Buttercream
- 6 tbsp butter 85 grams
- 125 grams powdered sugar
- 1 tsp matcha powder (or more to taste)
- 2 tbsp milk (or water)
Matcha Ganache
- 170 grams white chocolate chopped
- 60 ml heavy cream (1/4 cup)
- 3/4 tsp matcha powder
Instructions
- Before you start, get all of the ingredients ready. Prepare a large piping bag, fitted with a large round tip, I use a 1/2” diameter tip. Set aside.
- Line two baking sheets with parchment paper or silicone mat.
- Measure out all of the ingredients.
- Sift the powdered sugar, almond flour, and matcha powder together. Set it aside.
- Whisk the sugar and the egg white powder (if using) in a bowl, and place it over a pan with barely simmering water. Add the egg whites to the sugar and whisk the mixture until frothy and the sugar is completely melted. It will take a couple of minutes. You can test by touching the mixture between your fingers, and if you feel any sugar granules just keep whisking the mixture over the water bath.
- Make sure the bottom of the bowl isn’t touching the simmering water because you don’t want the whites to cook.
- Also, don’t overheat the sugar syrup, this may cause issues down the line, such as wrinkly macarons.
- Transfer the syrup to the bowl of a stand mixer.With the whisk attachment, start whisking mixture on low for about 30 seconds, then gradually start increasing speed to medium. Whisk on medium for one to two minutes, until the mixture is white and starting to become fluffy. Raise the speed to high, or medium-high and whisk for a few minutes until stiff peaks are formed. Best way to check this is to keep your eye on the whites. Once they get glossy and you start seeing streaks formed by the whisk, it might be time to stop.
- Whisk until stiff peaks have formed. When you pull your whip up, the peak should be stiff and shooting straight up, with possibly a slight bend at the top, but not bending down to the side.
- Pour the sifted powdered sugar, almond flour, and matcha powder into the stiff meringue.
- Start folding gently forming a letter J with a spatula. Add the food coloring at this point, if using. I have added a bit of green food coloring to deepen the color.
- How to know when to stop folding the batter: It’s time to stop folding when the batter is glossy and has a thick and flowing consistency. There are several ways to test this.First, pick up some batter with the spatula and try to draw a figure 8 with the batter that is dripping off the spatula. If you can form several 8 figures without the batter breaking up, that’s one indication that it might be ready.
- There’s another test you can do. I call it the Teaspoon test.
- Grab a teaspoon of batter and spoon onto the parchment paper or silicon mat. Wait a minute to see how it behaves.If the batter stays stiff, forming a point and doesn’t spread out, fold a little bit more, about 3 folds. Test again.
- Once the batter spreads out a bit and starts to look glossy and smooth on top, on the parchment paper, it’s ready.
- You don’t want your batter to be too runny either. So be careful not to overmix. It’s always best to undermix and test several times until the proper consistency has been achieved.
- When you hold the spatula with batter on top of the bowl and the batter falls off the spatula slowly but effortlessly the batter is ready. The batter will keep flowing off the spatula non-stop, but not too quickly.
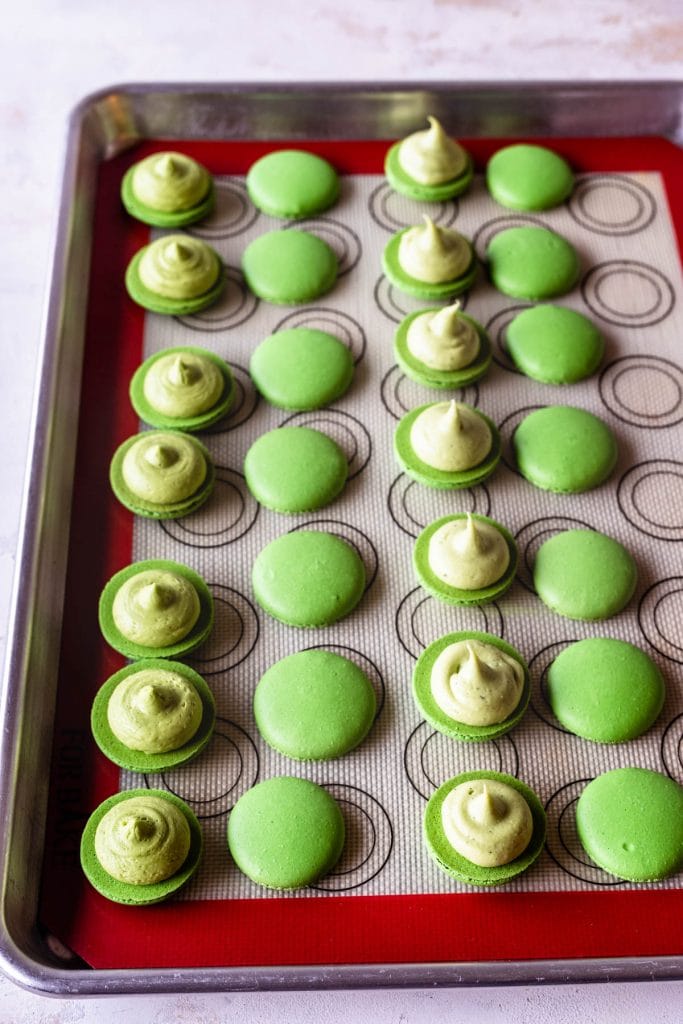
- Transfer the batter to the piping bag.
- Place the piping bag directly 90 degrees over the center of each macaron template. Apply gentle pressure and carefully pipe for about 3 seconds, and then quickly pull the bag up twisting slightly.
- Once you’ve piped as many circles as you could, bang the trays against the counter a few times each. This will release air bubbles that are in the batter and prevent your macaron shells from cracking.
- Use a toothpick to pop any air bubbles in the surface of the shells.Let the trays sit for a while so the shells will dry out a little bit. I usually leave about 20-40 minutes, depending on how humid the day is. You’ll know they’re ready when you gently touch the surface of a macaron and it seems dry.
- Pre-heat the oven to 300ºF.
- Bake one tray at a time.
- Bake for 5 minutes, rotate tray.
- Bake for 5 more minutes. Rotate again.
- I bake each tray for about 15 to 20 minutes.
- When baked, the macarons will have a deeper color and formed feet. If you try to move a macaron, it shouldn’t feel jiggly. If the macaron is still jiggly, keep baking.Remove from the oven and bake the other tray.
- Let the macarons cool down before proceeding with the filling.
Matcha Buttercream
- While macarons cool down, you can make the filling.
- Cream the butter on medium speed, until creamy, for about 1 minute. Add the powdered sugar and matcha and beat until mixture is fluffy and incorporated, another minute. If mixture seems too stiff, add the milk, or water. Mix to combine and add more milk as necessary.
- If the buttercream is too runny, add more powdered sugar to make it thicker.
Matcha Ganache
- Place the white chocolate in a glass or stainless steel bowl.
- Add one tablespoon of heavy cream to the matcha and mix with a spoon or fork until a paste is formed.
- Slowly add the rest of the heavy cream while stirring to combine. This will prevent any lumps from forming.
- Heat the heavy cream and matcha together in a small saucepan until it almost comes to a boil.
- Remove from the heat and pour over the white chocolate. If you notice the heavy cream and matcha mixture is lumpy, you can pour it through a sieve.
- After pouring the heavy cream over the chocolate cover the bowl with a plate or a towel and let it sit for 1 minute.
- Next, stir the white chocolate and hot heavy cream together until the chocolate has melted entirely.
- Set it aside until it cools to room temperature. It will thicken as it cools down. If making ahead you can place it in the fridge and then re-heat it gently in the microwave before using, for about 5 second intervals, and stirring in between, until the ganache isn't super hard anymore. Careful not to over heat it, because if the ganache gets too runny, it needs to go back in the fridge or sit for a while at room temperature to get thicker. And also, if you re-heat the chocolate too much, it will separate and become grainy.
To assemble
- Put the filling in a piping bag. Pipe a dollop in each macaron and close the sandwich.
Storage
- These Matcha Macarons will last in the fridge for up to 5 days or in the freezer for up to 2 months.
Notes
Nutrition
I love these photos and these are such helpful tips!
Question about the figure 8 on the spatula: Are you coating the spatula with the meringue and drawing the figure 8 with your finger? Or are you using the spatula to draw a figure 8 in the bowl of ingredients? These look amazing!
Ok, I should probably specify that in the post. That’s a great question. You’re going to grab a spatula full of batter and pull it up at a 90 degree angle on top of the bowl, then you start drawing a figure 8 in the air with the dripping batter. And if you can draw a few number 8s with the flowing batter, without having it break apart, that means your batter is probably ready, or close to being ready. Have a great day, Lisa!! 🙂
What an awesome colour macaron. I have always wanted to try making them and this might have given me the nudge I needed to actually do it.
I’ve not made or eaten macarons for such a long time. Yours look perfect and make me realise what I am missing.
These little cookies are beautiful. You really made making macarons looks less intimidating.
these are not only delicious I cant wait to put them on my Christmas cookie tray they are the perfect color! thanks
Ohh these matcha macarons look soo good! I need to try and make some using squafaba.
These came out gorgeous, and I know that is not an easy task! Matcha just makes everything prettier doesn’t it? Now to keep myself from eating a plate full of them!
Matcha really makes everything prettier!! For sure! 🙂 I’m a fan!
Making macaroons always intimidates me but this post is so super informative that I will give it a try, And I may try the Swiss method. These matcha macaroons look gorgeous and I wish I had one now 🙂
The Swiss method is the one I use the most now! Thank you!
Wow! I never knew they were so tricky to make! I guess I have a newfound respect for anyone making them! Yours look perfect! So armed with all of your tips, maybe I will venture to try them!
Thank you, Beth!
Wow, baking really is a science, isn’t it? It’s crazy how precise you need to be to make these cute little dandies – to then devour them in no time haha. They look perfect and I’m sure they taste amazing!
Haha, thanks Marie! baking is all about science, for sure!!
Matcha-rons! Brilliant. I’ve yet to attempt macarons because I’m not much of a baker and I’ve heard they can be tricky, but you’ve clearly mastered them! Love that they’re matcha-flavored, too. Gorgeous color!
They can be tricky, I should know lol. But they’re worth it! Thank you, Dana!
Receita deliciosa e detalhada, assim o regime vai pro espaço kkkkkk
que regime? hahaha
I have never made macarons before.. I find them too technical..This is actually the first time I have read the process of making them in so much detail!! Thanks for testing all the methods, failing and still trying to make them. This guide is gonna come handy for so many of us! And I love your pretty matcha macarons!!
Aweee!! Thank you, Dee!!
You always amaze me and I had no idea there was an Italian and Swiss way to make these! Have a great day, Camila! 🙂
Thanks, Mike, you’re always so sweet!