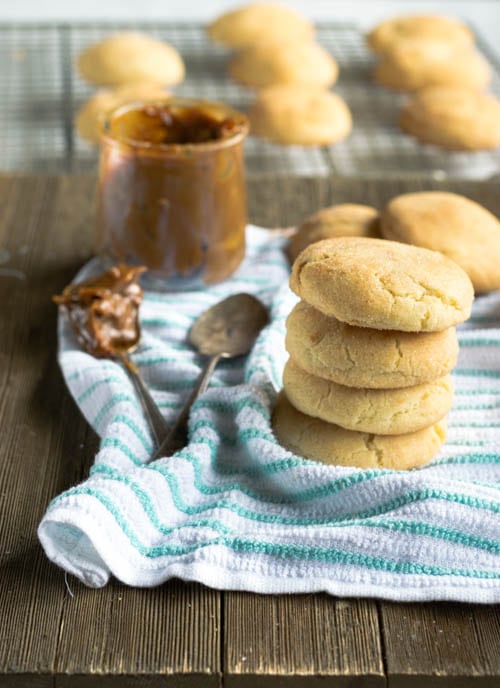
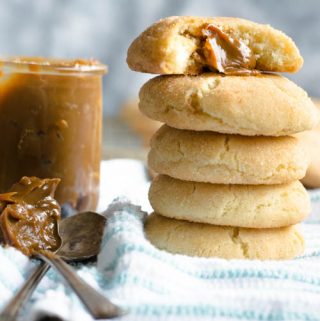
Dulce de Leche filled Snickerdoodles
Hey ho! This is my first blog post! It should probably be a pie or a taco recipe, right?!
But I’m just trying to make a statement. The statement is: this is not just a pies and tacos blog.
I cook it all! I like to bake a lot. I like dough. Pie dough, cookie dough, bread dough, pasta dough, pastry dough. Though that’s not all I like. I like savory big cheesy dishes. I like batters. Pancakes, cakes, muffins, fried fish batter! I like spicy! Soups! Salads! I like it all! French, Italian, Brazilian, American, Asian. You name it. I’ll cook it!
This post may contain affiliate links. I earn a commission from qualified purchases. Please read our Privacy policy here.
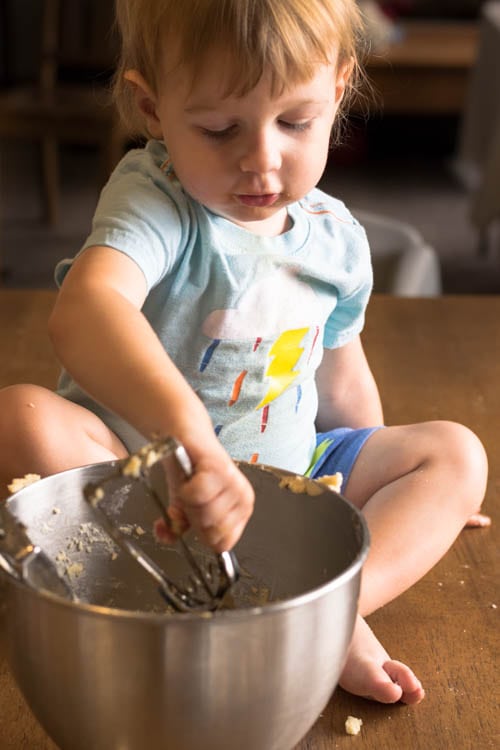
I am in the kitchen a LOT, cooking all those things I’ve listed! Like, all day! And who’s always with me? My assistant, my partner in crime and in the mess making department: Mr. Luke. He is only 18 months old and we literally get our hands dirty! I let him “assist” me in making some things in the kitchen.
He is there when I’m cooking…
When I’m photographing…
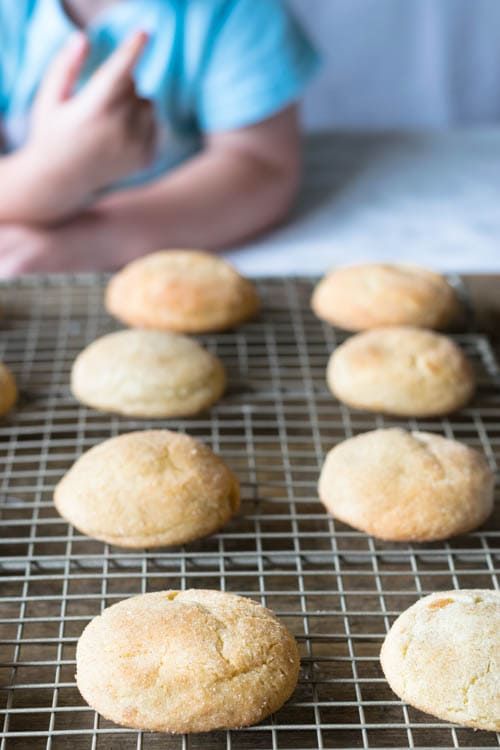
Just waiting patiently for his turn to eat some cookies.
No, just kidding, he doesn’t wait. He steals them and runs! He is always reaching his little hands up on the counters and stealing donuts, bread loaves, muffins, or whatever I’ve baked. I love it.
He is also here right now as I am writing this post. He is actually trying to feed me raisins. (awe!)
Either way…

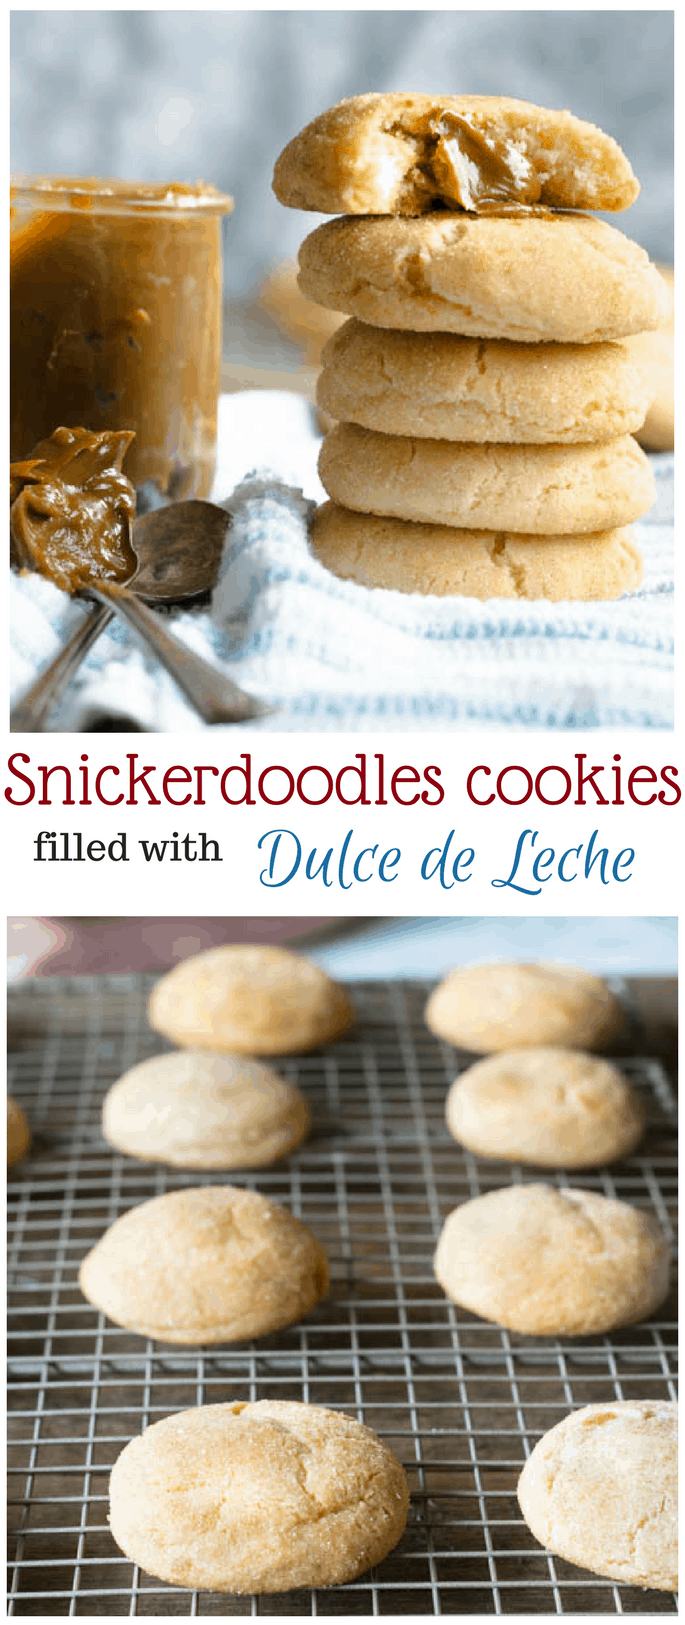
The cookie recipe I bring to you today is the epitome of deliciousness! It combines two of my favorite things: snickerdoodle cookies and dulce de leche! I hope you have had dulce de leche before. Because if you haven’t, you have to drop what you’re doing and go get some right now! Life as you know will change forever.
Dulce de leche is a thick, decadent, unbelievably delicious caramel! And you can make it at home if you can’t find it at the store.
There are a couple ways I like to approach making dulce de leche. If I am in a hurry, I remove the label of a condensed milk can and stick the sealed can in a pressure cooker, cover it with water until the pan is 2/3 of the way full and the can completely covered. Bring it to the stove over medium high heat until it catches pressure, then turn the heat down to medium low and let it cook for about 25 minutes. Turn the heat off and let the pot release all the pressure and wait a couple of hours until it cools down to open the can. I like to put some cold water in the pan to help the condensed milk can cool down faster. When you open the can, you will find the contents have thickened and darkened and turned into this beautiful luscious sinful dulce de leche!
The second method is fairly similar, but uses a regular pot instead of a pressure cooker and takes about 6 times longer. Remove the label of the condensed milk can and put sealed can inside a large stock pot. Fill the pot with water ensuring the condensed milk can is completely covered. Bring the pot to a boil over medium high heat, turn the heat down and let the can simmer in the water for anywhere from 3 to 4 hours, depending on how thick you want your dulce de leche to be. If you are going to use it to fill a cake, you might want the dulce de leche to be less hardened, so therefore, cook it for about 3 hours. For the purpose of these cookies, I want the dulce de leche to be firm and thick, so I cook it for about 3 1/2 to 4 hours. Always make sure there’s enough water to cover the can of condensed milk. Check regularly to see if you need to add more water.
Whatever you do, be very careful when making this. Don’t ever let the water level go down below the level of the can. This will cause the can to explode because of the pressure inside! And only remove the can from the water and open it once it’s cooled down. Stick it in a bowl of cold water if necessary or if in a hurry.
This was my first post and a milestone for me because it means I finally got off my butt and decided to start a blog! I have so much to share! Thank you for being here! Want a cookie?

Dulce de Leche filled Snickerdoodles
Ingredients
Snickerdoodle cookie dough
- 3 1/3 cups all-purpose flour 14.8 oz
- 2 teaspoons cream of tartar
- 1 teaspoon baking soda
- 1/4 teaspoon sea salt
- 1 cup unsalted butter softened (16 tablespoons, 2 sticks)
- 1 1/2 cups granulated sugar 10.5 oz
- 2 eggs room temperature
- 1 teaspoon vanilla extract
Filling
- About 1/2 cup of dulce de leche homemade or store-bought (read post above for instructions on how to make your own dulce de leche)
To coat cookies
- 1/2 cups granulated sugar
- 2 1/2 tablespoons cinnamon
Instructions
- Start by making the dulce de leche if you are using homemade, instructions are up there on the post.
- For cookie dough: Mix flour, cream of tartar, baking soda and salt and sift.Place butter in the bowl of a stand mixer and cream until fluffy, for about 2 minutes with the paddle attachment on medium speed. Slowly pour sugar in with the mixer running on low. Increase speed to medium and cream butter and sugar for about 2-3 minutes until pale in color.Turn speed to medium-low and add eggs one at a time. Wait until one egg is incorporated to add the next one. Add vanilla extract and mix. Scrape the sides of the bowl to make sure everything is incorporated and mix on low for 30 seconds. With the mixer on Stir, add flour a little at a time until it’s all incorporated. Cover the dough with plastic wrap and refrigerate for 1 hour or overnight. This is great for making ahead. You can make the dulce de leche and dough ahead and then just assemble the cookies to bake.
- With a 1/2 teaspoon measuring spoon, scoop about 36 little dollops of dulce de leche and place on a baking sheet. Stick the baking sheet in the freezer for about 15 minutes to harden up the little dollops of dulce de leche.
- Pre-heat the oven to 400
- Take the cookie dough out of the fridge. Mix cinnamon and 1/2 cup sugar in a shallow bowl. I like to use a 50 cookie scoop or a tablespoon measuring spoon to scoop my cookies. Scoop some dough into your hands and slightly flatten it. Place a dollop of frozen dulce de leche in the center of the dough and wrap it around it, then roll it in your hands to form a ball. Coat it in the cinnamon and sugar mixture and place cookies in a baking sheet about 2 inches apart. You could bake straight away or stick the cookies in the freezer for 15 minutes before baking, The reason why I do this is because it solidifies all the butter in the recipe, and when the cookies bake, they have a better structure and are more plump instead of flattened out.Actually, anytime I make cookies, I always scoop them into a baking sheet and stick the baking sheet in the freezer until the cookie balls are frozen, then I bake some or whatever I feel like eating and place the rest into ziploc bags and keep them in my freezer. That is great for when you have unexpected company over or simply have a sudden urge to eat a cookie. Just pre-heat the oven and take a few cookies out of the freezer and bake them. Go from zero to cookies in just minutes!!
- Bake cookies for 8-10 minutes, until just set. You don't want to overbake them. Nothing sadder than an overbaked cookie.
- You want to bake the cookies just enough so they are set, slightly golden brown, but still look a tad underbaked. Rule of thumb: if it looks done in the oven, it's going to be overdone when it cools down.
Storage
- Store Cookies for up to 4 days in an air tight container at room temperature.
Nutrition
How long do we bake this for?
Safia, thank you for bringing to my attention that I left this super important part out!! You bake the cookies for 8-10 minutes. You want to remove them from the oven when they look slightly overbaked. Because they will keep cooking when they come out of the oven. So, when your cookies look slightly browned, and seem to be set, but not fully baked, you can remove them and let them cool. They will be soft and chewy! Thank you! Have a great day!
If the first post is any indication of how this blog is going to turn out, then it’s going to be EPIC!
Love your writing style and your recipes!
You are superwoman because I know this is a one woman show writing, editing, and styling this blog and cooking!!! All while being a mother (an awesome one too I may add).
So proud of you !
Love,
Monica
AWE thank you so much, Monica. For all your support, since before I’ve even started this. You’re awesome 🙂
Loved reading this Cam!!! I am so excited for more to come! Your food and pictures are some of the most delicious and gorgeous on all of instagram! I’m proud to call you a friend!
Dewey, thank you so much for all your support always!! You are the best!!
Love it!!! Congrats and well deserved. Insakuraskitchen
Sherry
Thank you so much, girl!! You are the best!!
I’m celebrating your wonderful new blog by popping open a bottle of expensive champagne and pretending to share it with you. Your post is beautifully written and I always enjoy reading what you have to say. I look forward to your next post! ❤️
You are the very best! ❤
Fantastic first post, Camila! I like how you shared about Luke helping you and with the photos. Anything that has a “caramel” type goodness oozing out of it is a must have for me! I will give you a shout out on Twitter with your post!
Thank you so much Mike 😊
Camila! This is awesome!!! Way to go!
💗, Kira (aka the foggy foodie)
Thank you so much, my friend ❤
Can’t wait to try the recipe. Love your new blog!!
Thank you so much Kate 😊
I have a helper too! My dog! 😁 Great work on your first blog post. 😊 /Johanna
Your dog is magical then bc you make killer desserts lol. Thanks Johanna 😊
Cam, thats so perfect. Love your very first post ❤❤ and looking forward all the others 😍
Awe thank you 😘
Receita muito gostosa, parabéns
Obrigada pai!! 😊