

Danish Pastry Recipe
I’ve wanted a reliable homemade Danish pastry recipe that gives me those flaky, buttery layers without making the process unnecessarily complicated. Laminated dough does take some time, but most of it is chilling and resting, and once you understand how the folds work, the process becomes much more approachable.
I make these with a lightly sweet cream cheese filling, then add berries or a spoonful of jam depending on what I have. The contrast between the crisp pastry, creamy center, fruit, and simple glaze is exactly what I want from a Danish. This is one of my favorite desserts in the world. I hope you love it too!

Why You’ll Love This Recipe
- Flaky, defined layers: The dough gets three simple letter folds to build all those buttery layers.
- Creamy filling that stays put: I add a little flour to the cream cheese filling so it stays creamy without becoming watery as it bakes.
- Easy to customize: Use fresh berries, raspberry jam, strawberry jam, apricot preserves, or another fruit filling you like. I also have a recipe for apple danishes coming soon.
- Great for making ahead: I actually prefer letting the laminated dough rest overnight before shaping the pastries.
- Shape them however you like: I use simple rounds here, but this dough works for all kinds of Danish shapes. You can use it for twists, pinwheels (like in my Pinwheel pastries), braids (like in this gorgeous Blueberry Puff Pastry), envelopes, or rectangular (like my Cream Cheese Puff Pastry).

Key Ingredients & How I Use Them
European-style butter: This is my preference for lamination because it has a higher fat content and less water than most American butter. It tends to stay more pliable as you roll the dough and gives me more distinct layers. Regular unsalted butter will still work.
This post may contain affiliate links. I earn a commission from qualified purchases. Please read our Privacy policy here.
Whole milk: I use cold milk in the dough to keep everything cool from the beginning. Temperature matters much more with laminated dough than it does with a typical yeast dough.
Instant yeast: There’s no need to activate it separately. I whisk it directly into the dry ingredients.
Cream cheese: Use full-fat brick-style cream cheese rather than cream cheese spread. The texture is much more stable for baking.
Flour in the filling: It may seem like an unusual addition, but I add just a tablespoon. It stabilizes the cream cheese filling so it doesn’t become overly loose or watery in the oven.
Fruit: Fresh berries work beautifully here, but jam is the easiest option and gives you a lot of flexibility. Raspberry, strawberry, and apricot are some of my favorites.
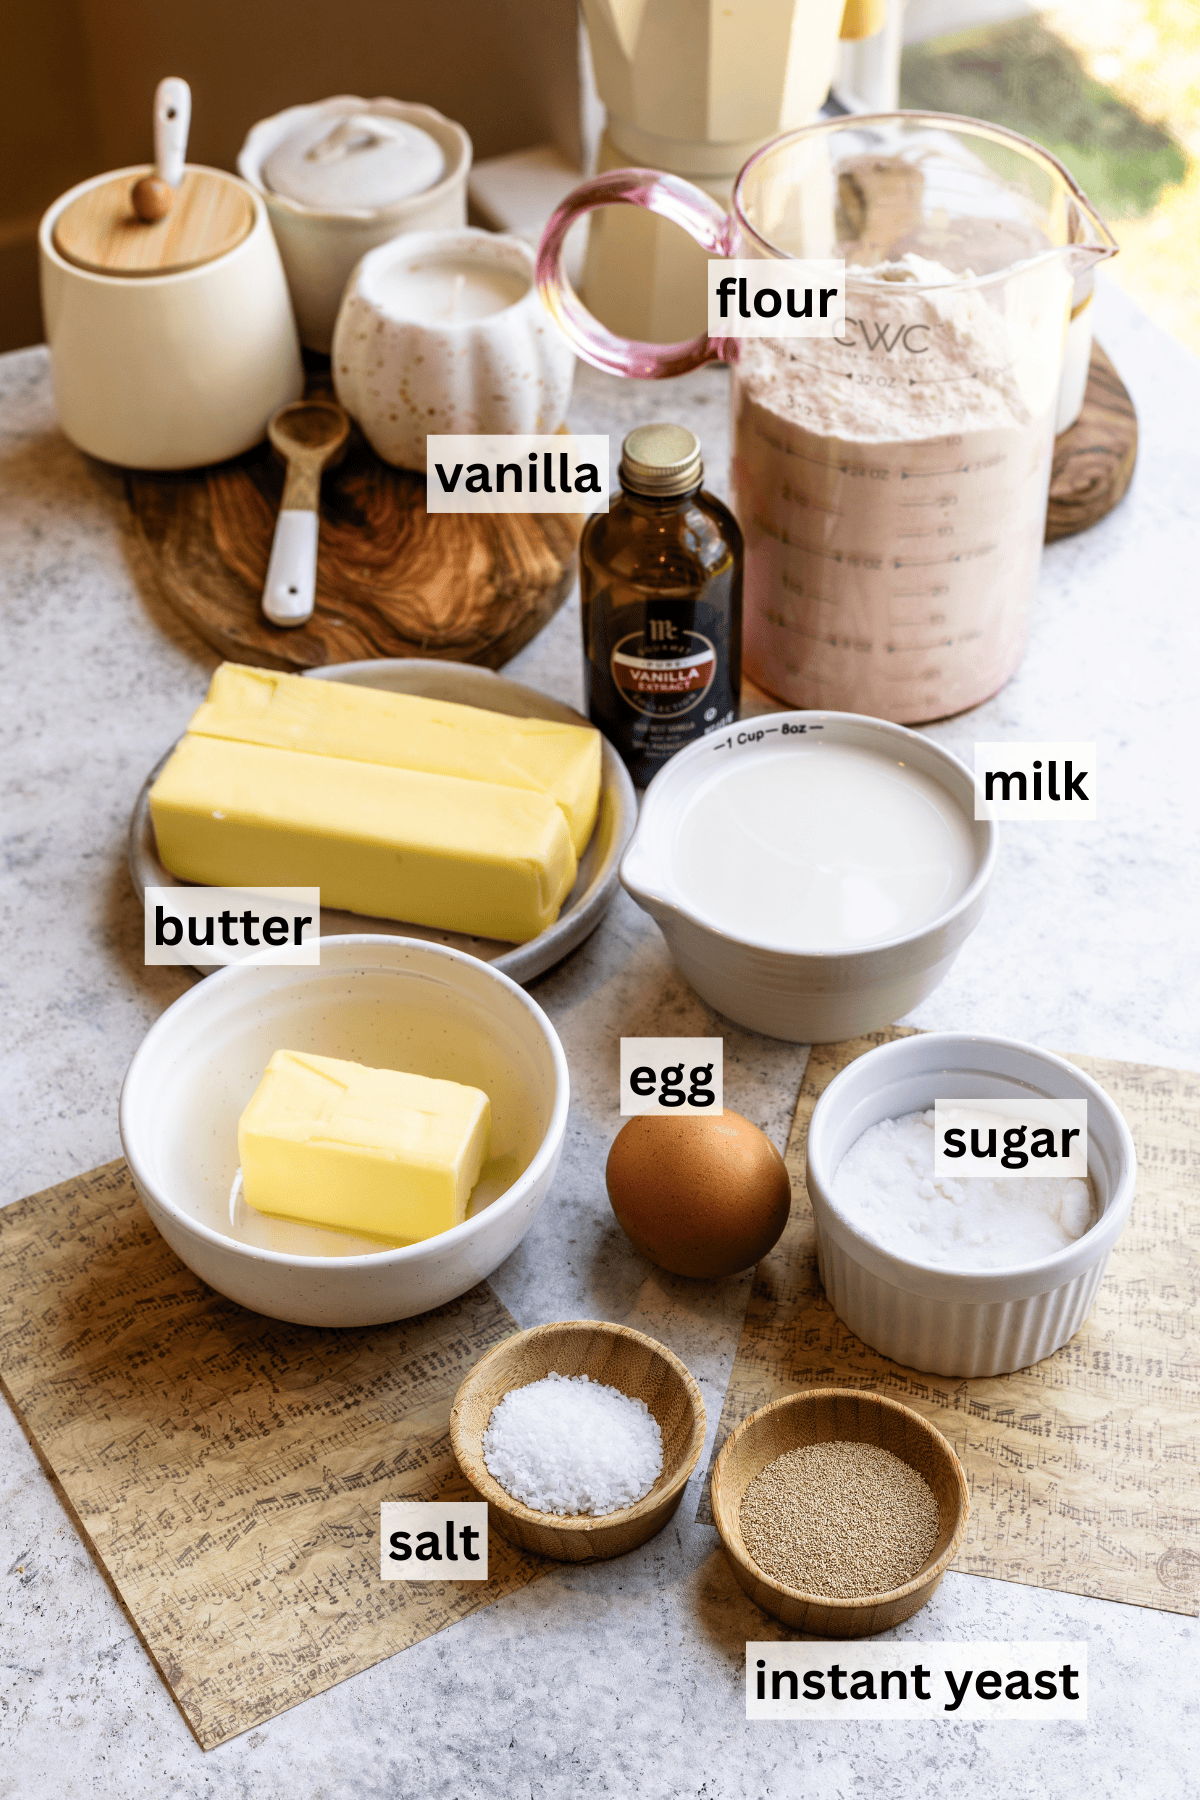
How to Make Danish Pastry
The full printable recipe is below, but here’s how I make the Danish step by step.
1. Make the dough
I start by combining the flour, sugar, yeast, and salt, then add the cold milk, egg, vanilla, and softened butter. I use instant yeast to make this dough. You can use active dry yeast instead. Warm the milk to about 100–110°F, stir in the yeast and a pinch of the sugar, and let it stand for 5–10 minutes until foamy before adding the remaining ingredients.
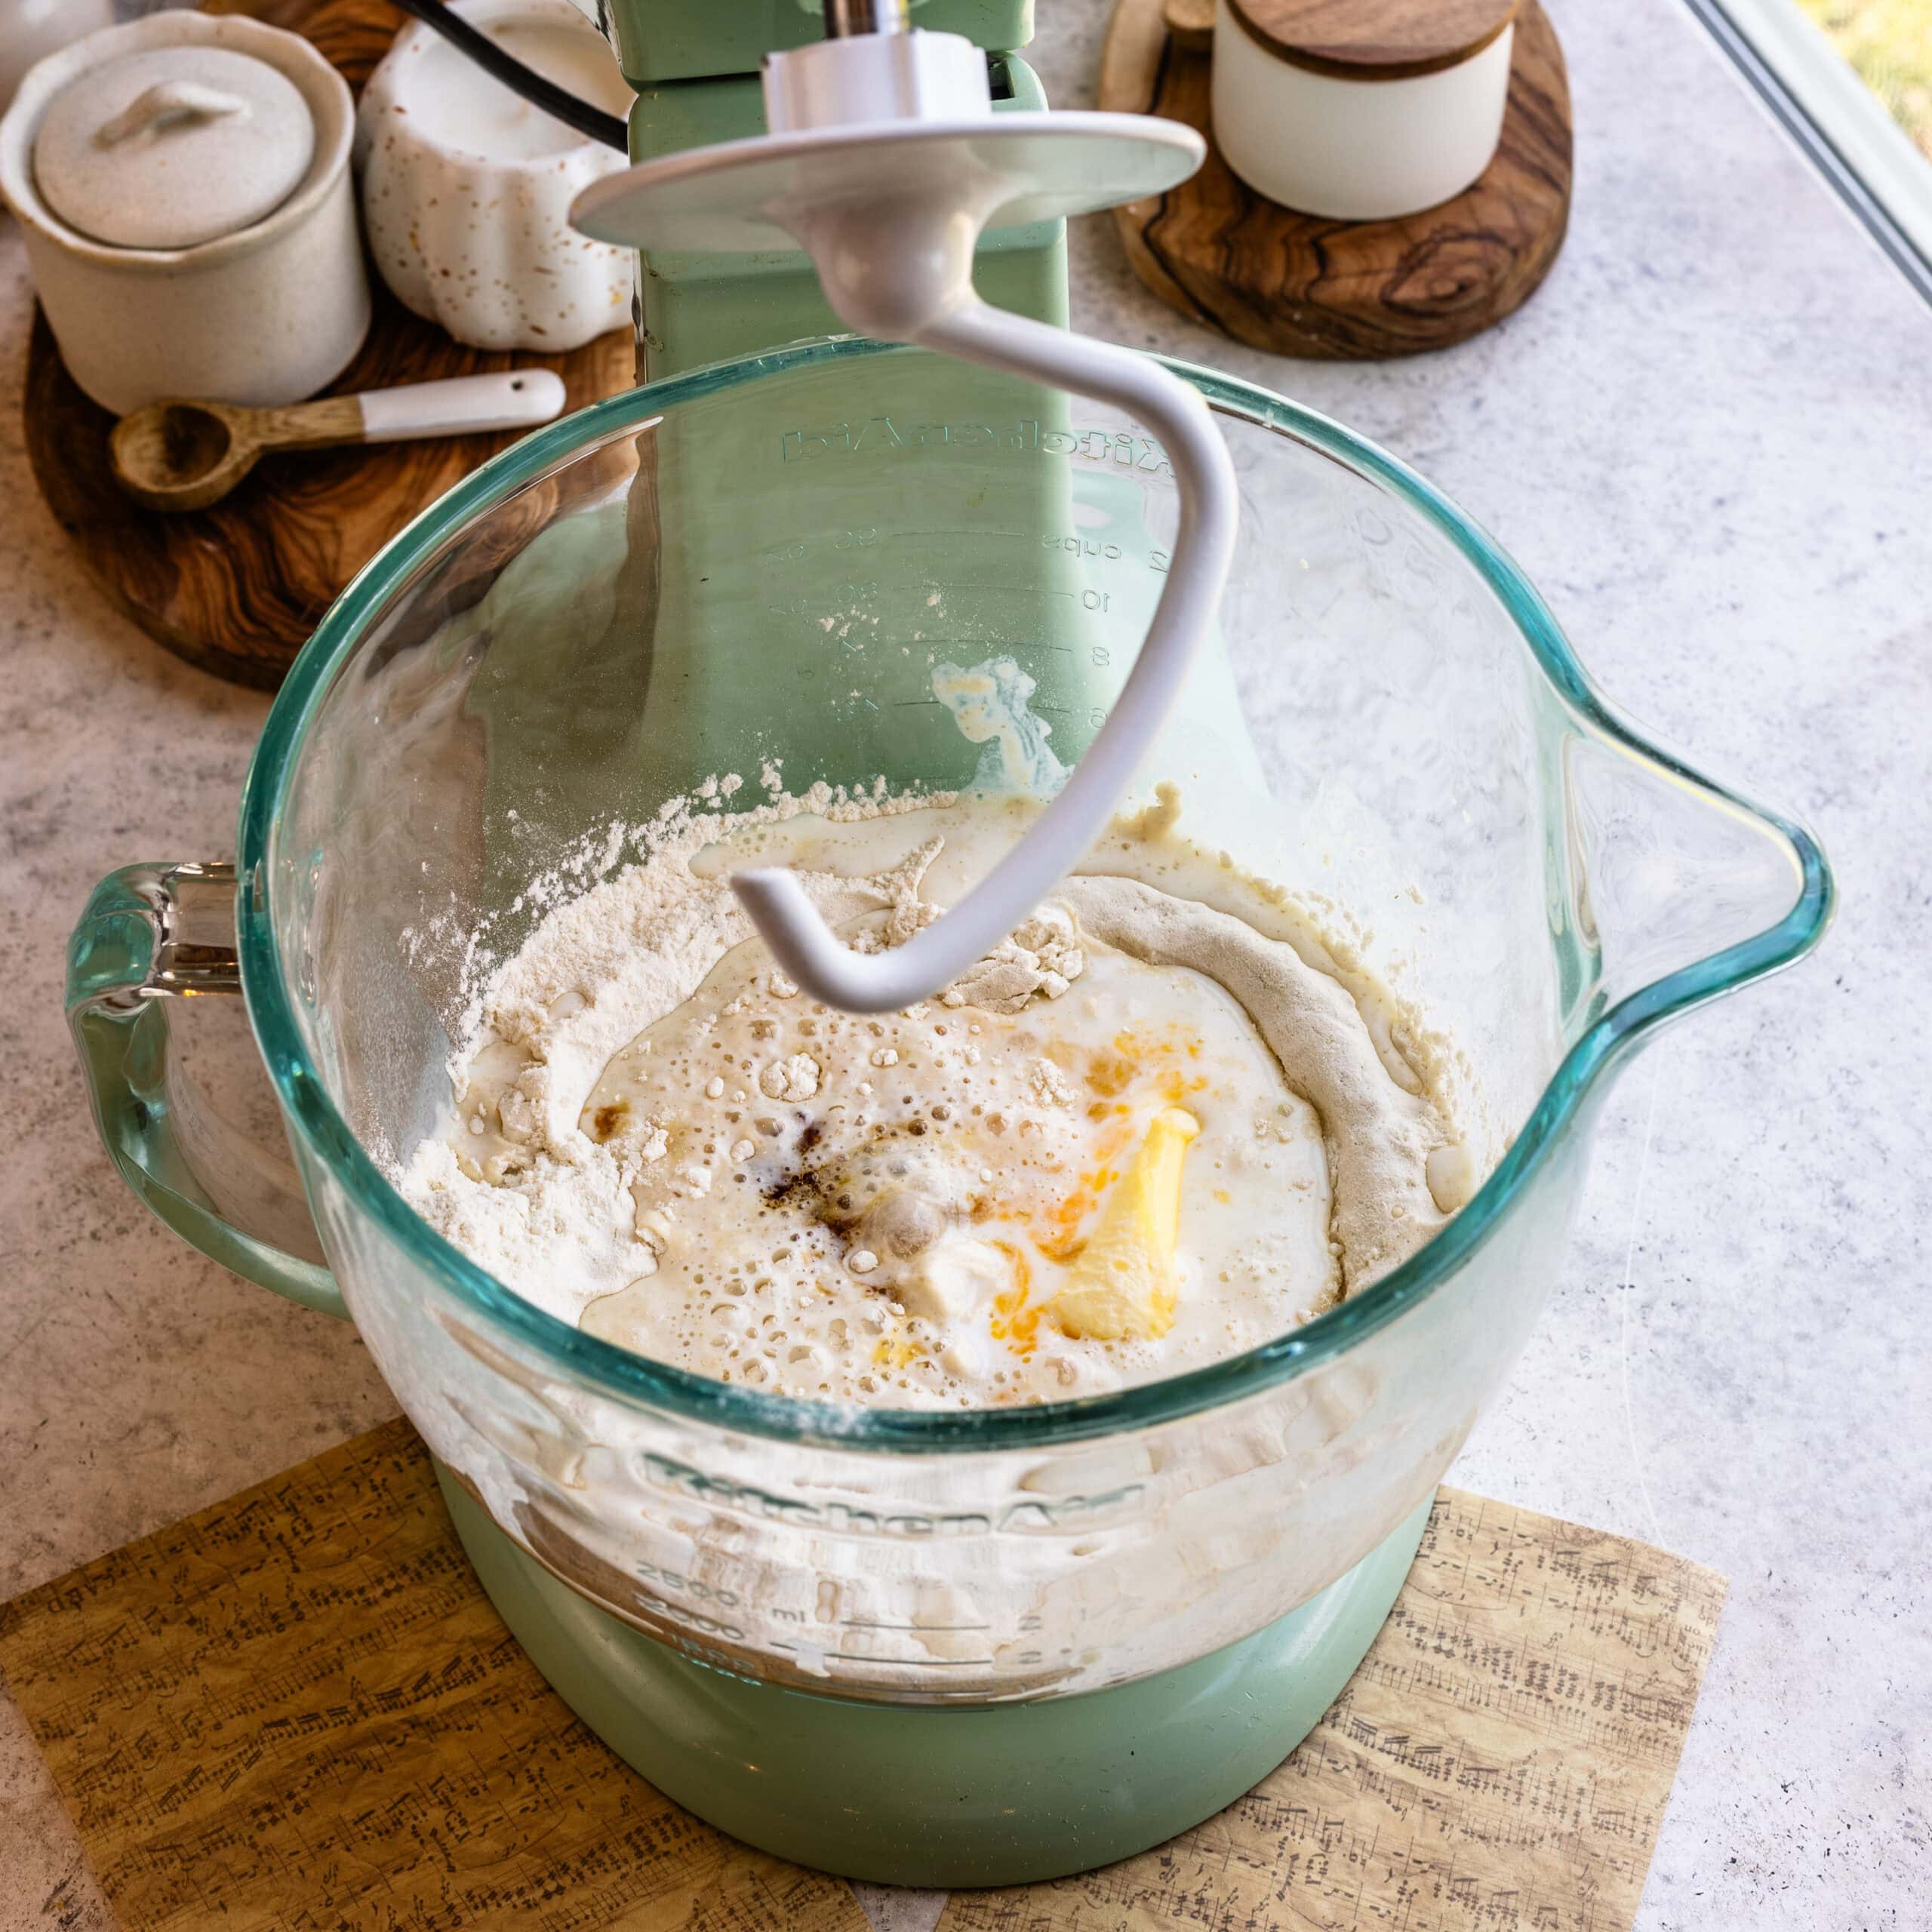
Knead the dough
Mix everything until the dough comes together, then knead it just until smooth, about 4 to 5 minutes. This dough doesn’t need the long kneading you would give bread dough.
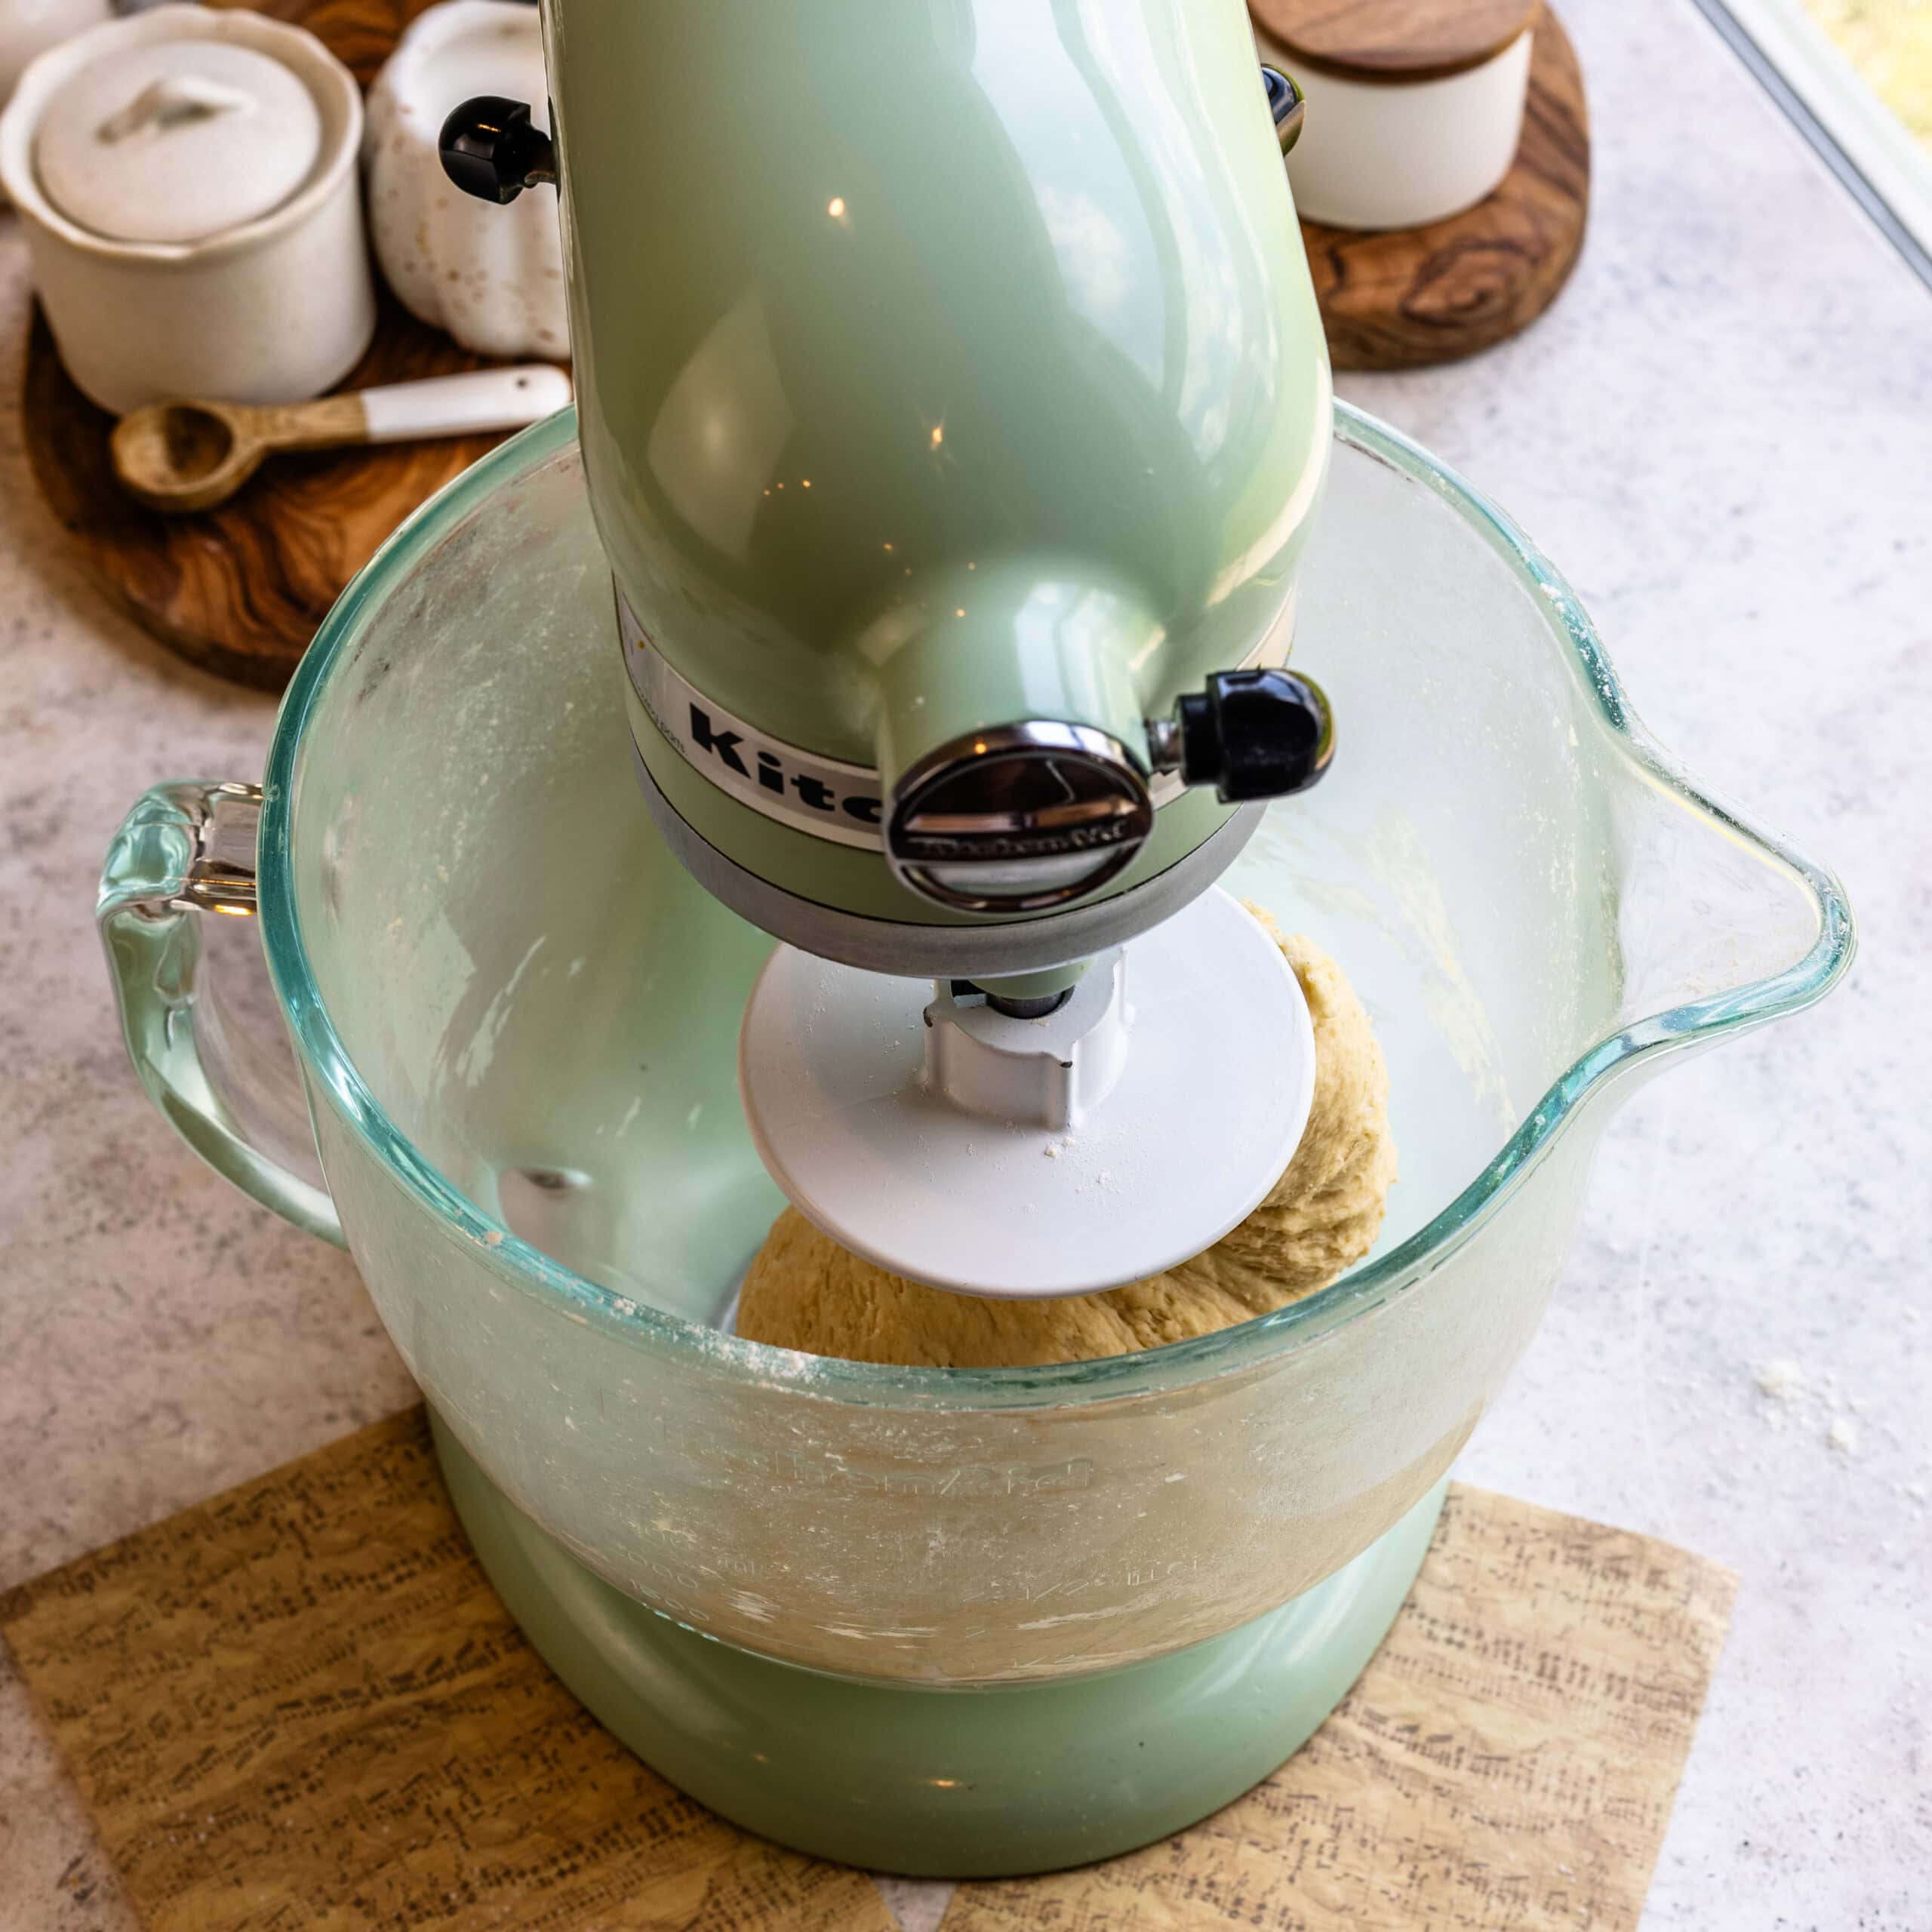
Shape and refrigerate
Shape the dough into a rectangle, wrap it, and refrigerate until completely cold. I set a timer for one hour when I do this.
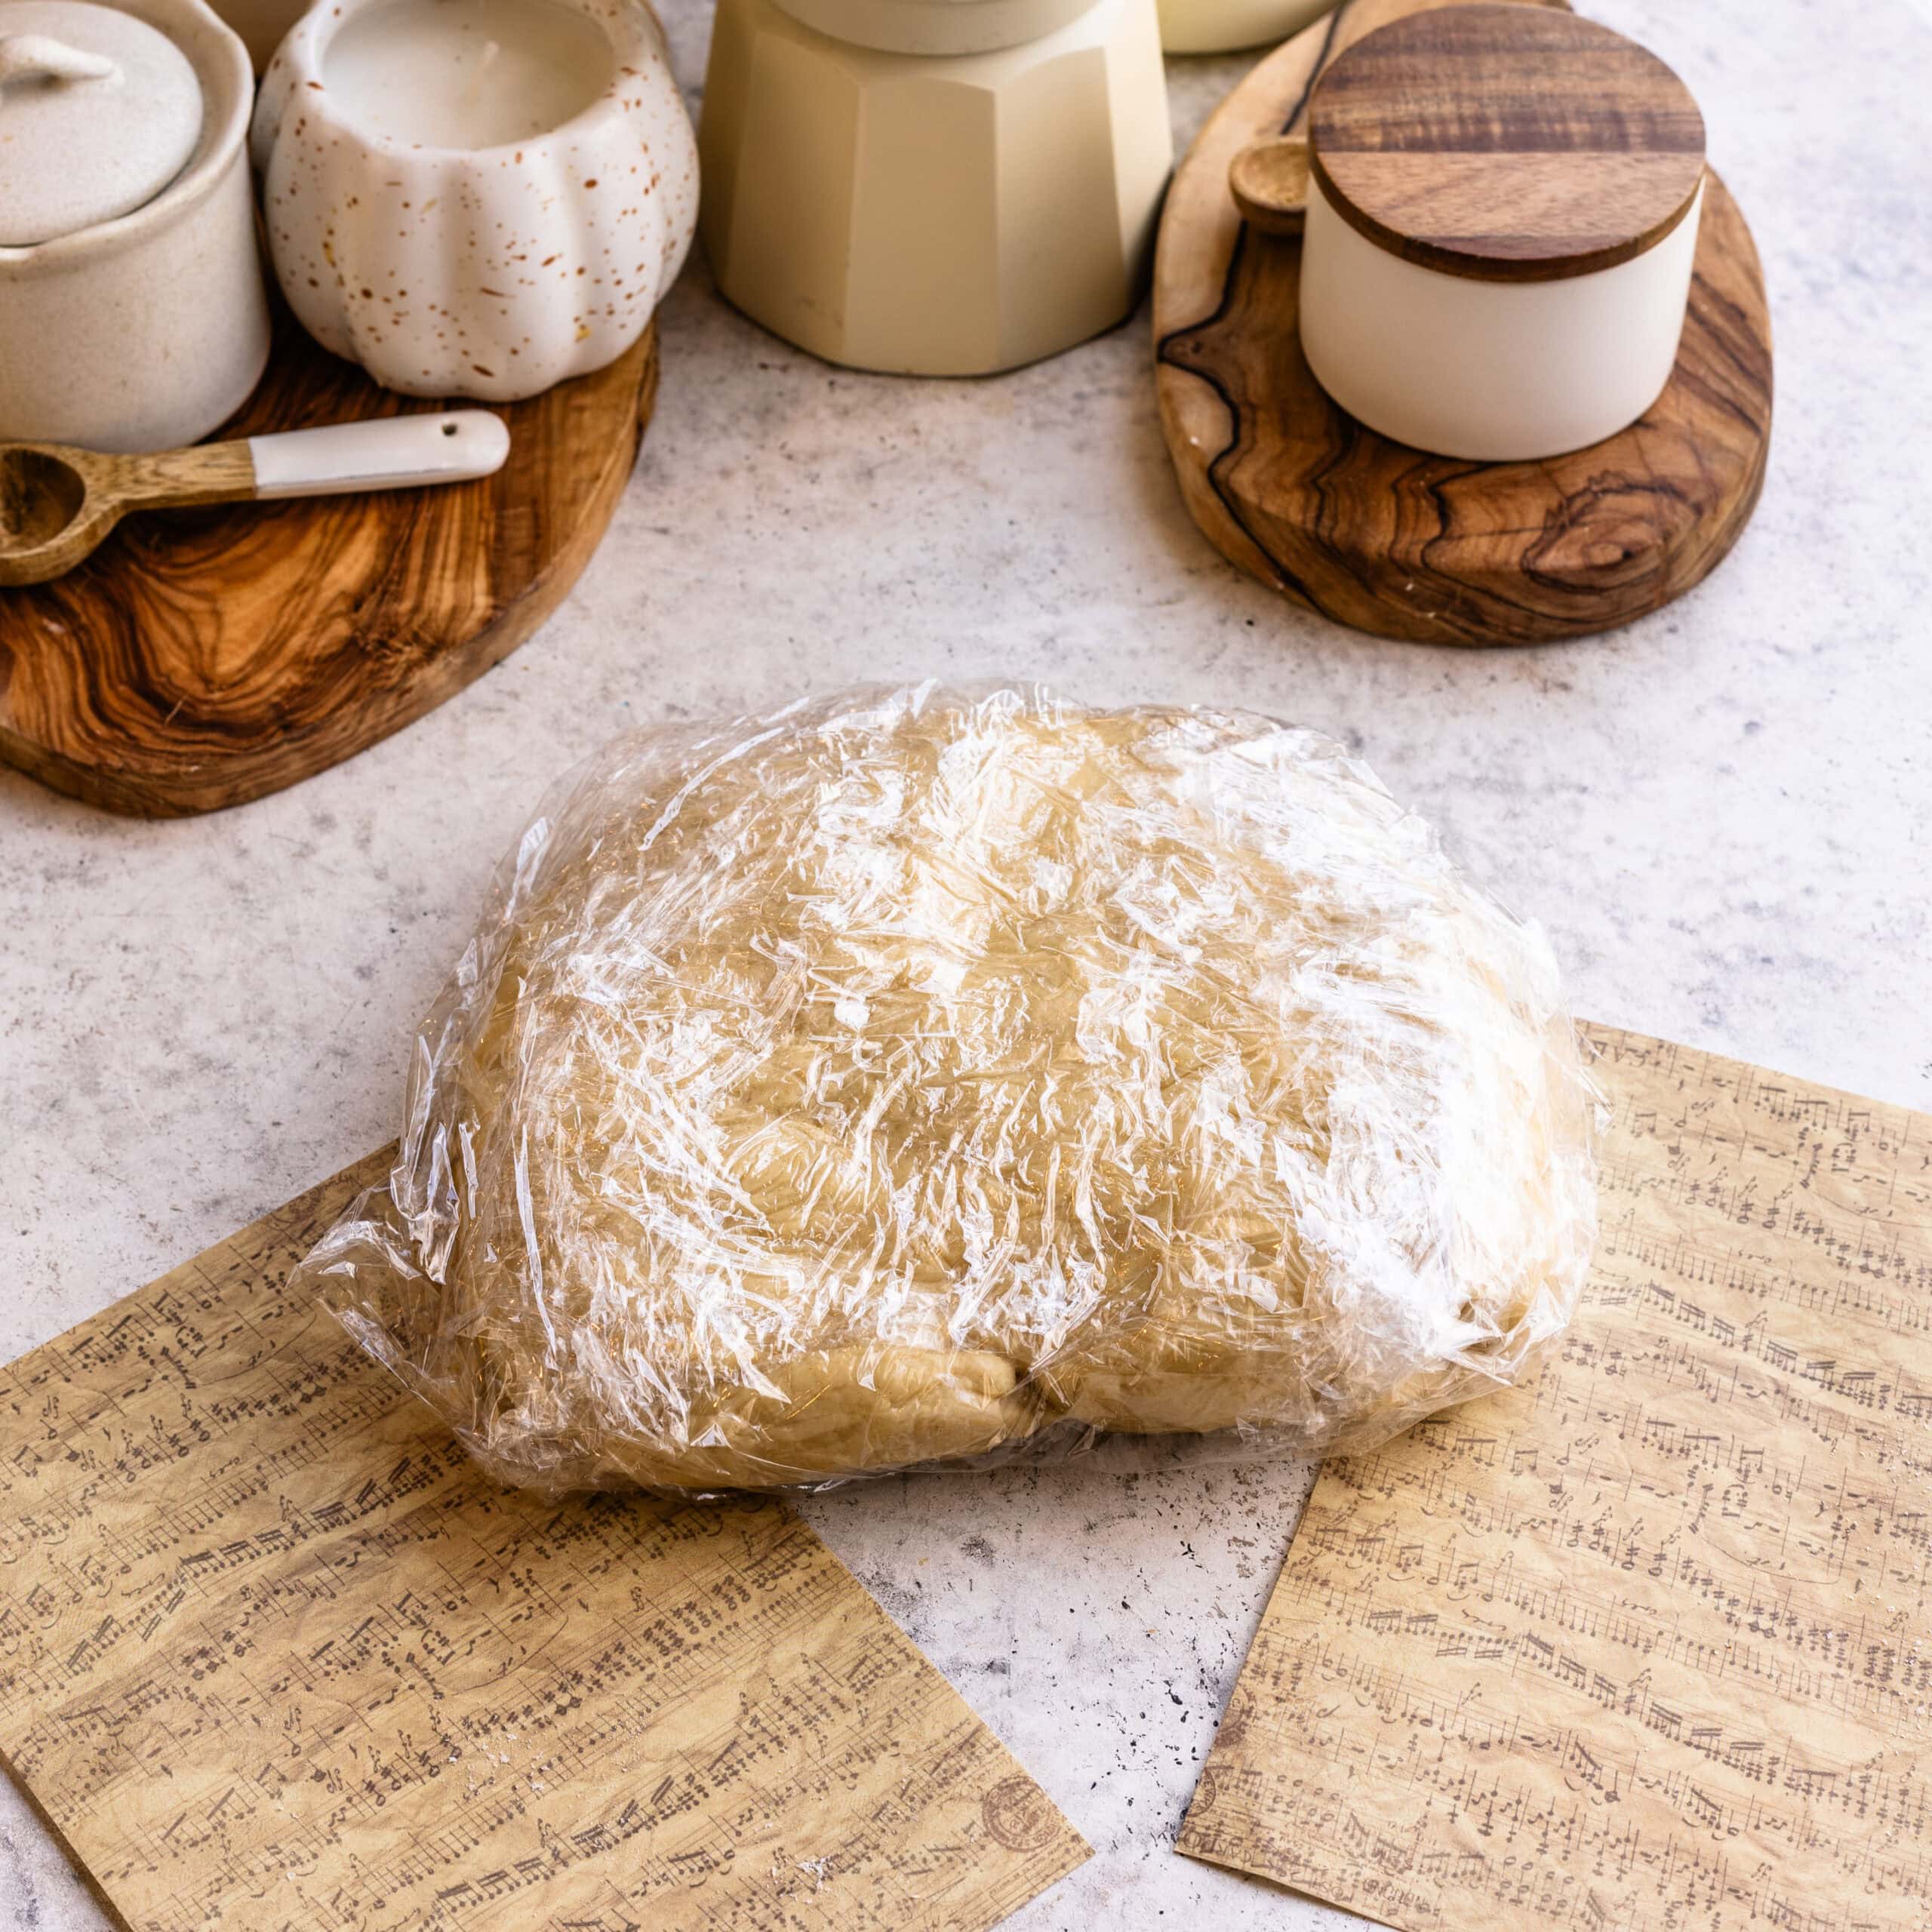
Make the butter block
While the dough chills, place the butter between two sheets of parchment paper and pound and roll it into roughly a 6 × 8-inch rectangle.
The consistency of the butter is more important than making the rectangle absolutely perfect. It should be cold but flexible enough to bend without cracking. If it starts getting shiny or very soft, put it back in the refrigerator for a few minutes.
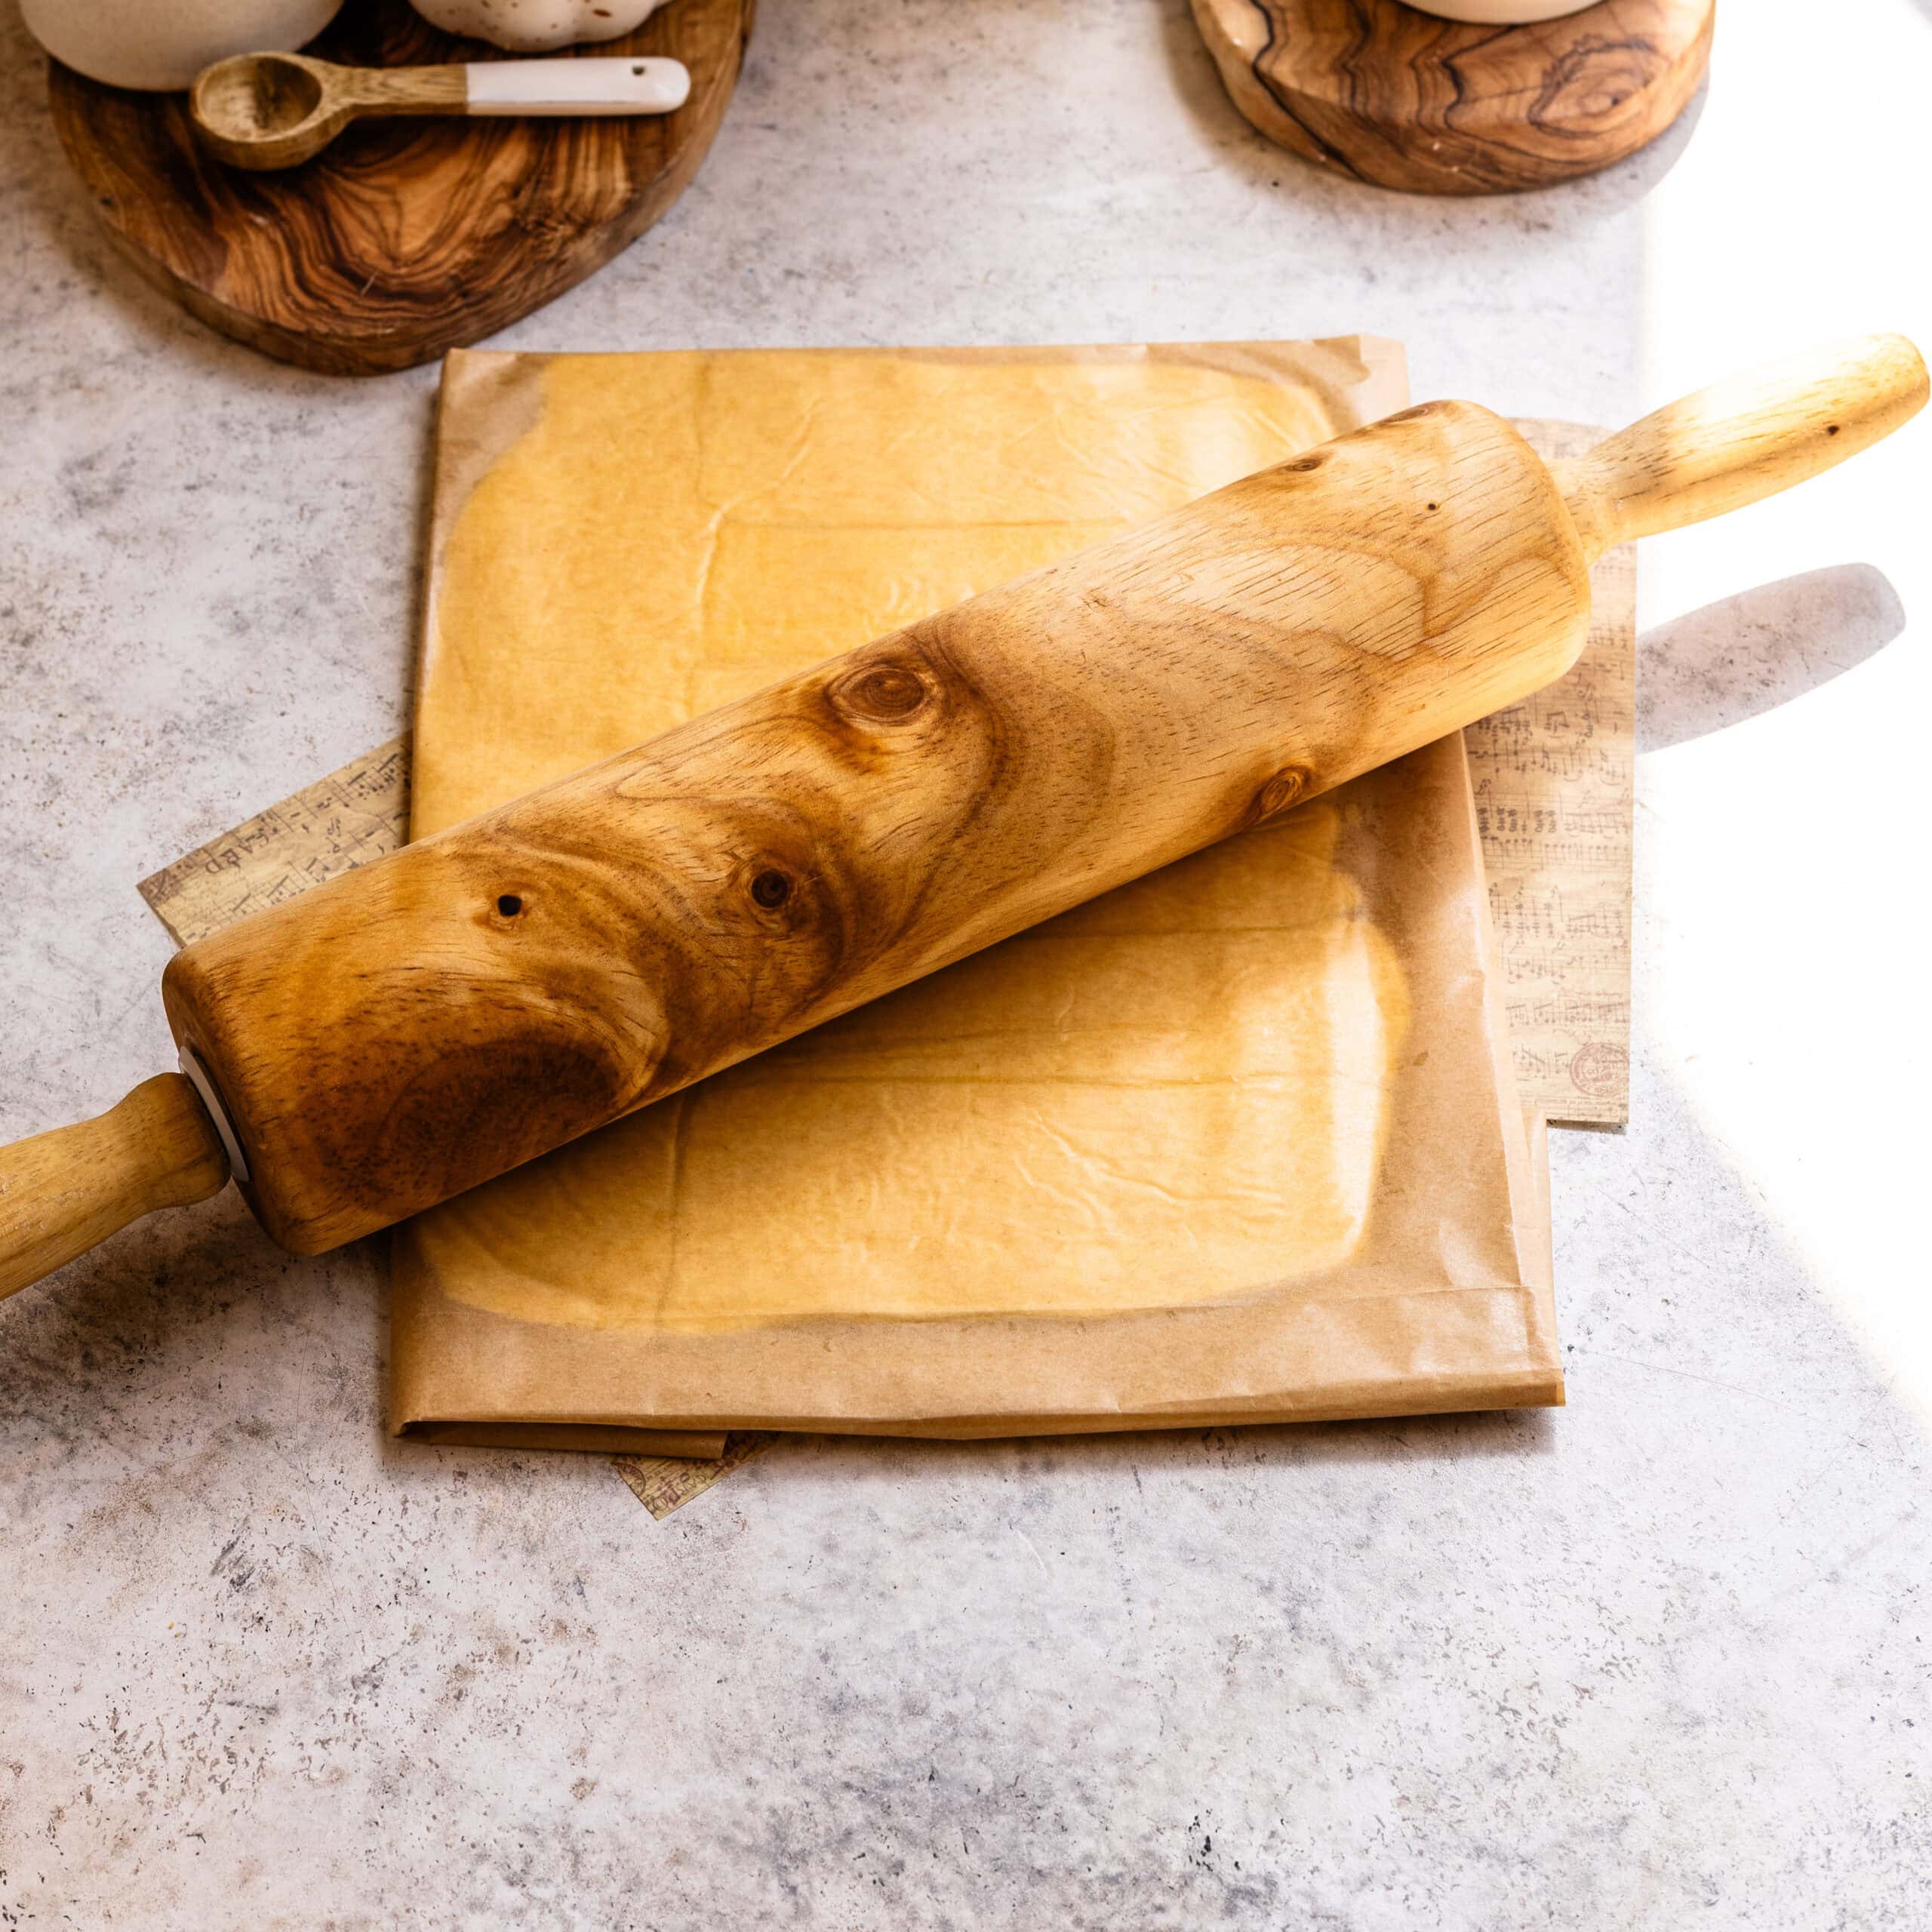
Roll out the dough
Roll the chilled dough into a rectangle large enough to completely enclose the butter block.
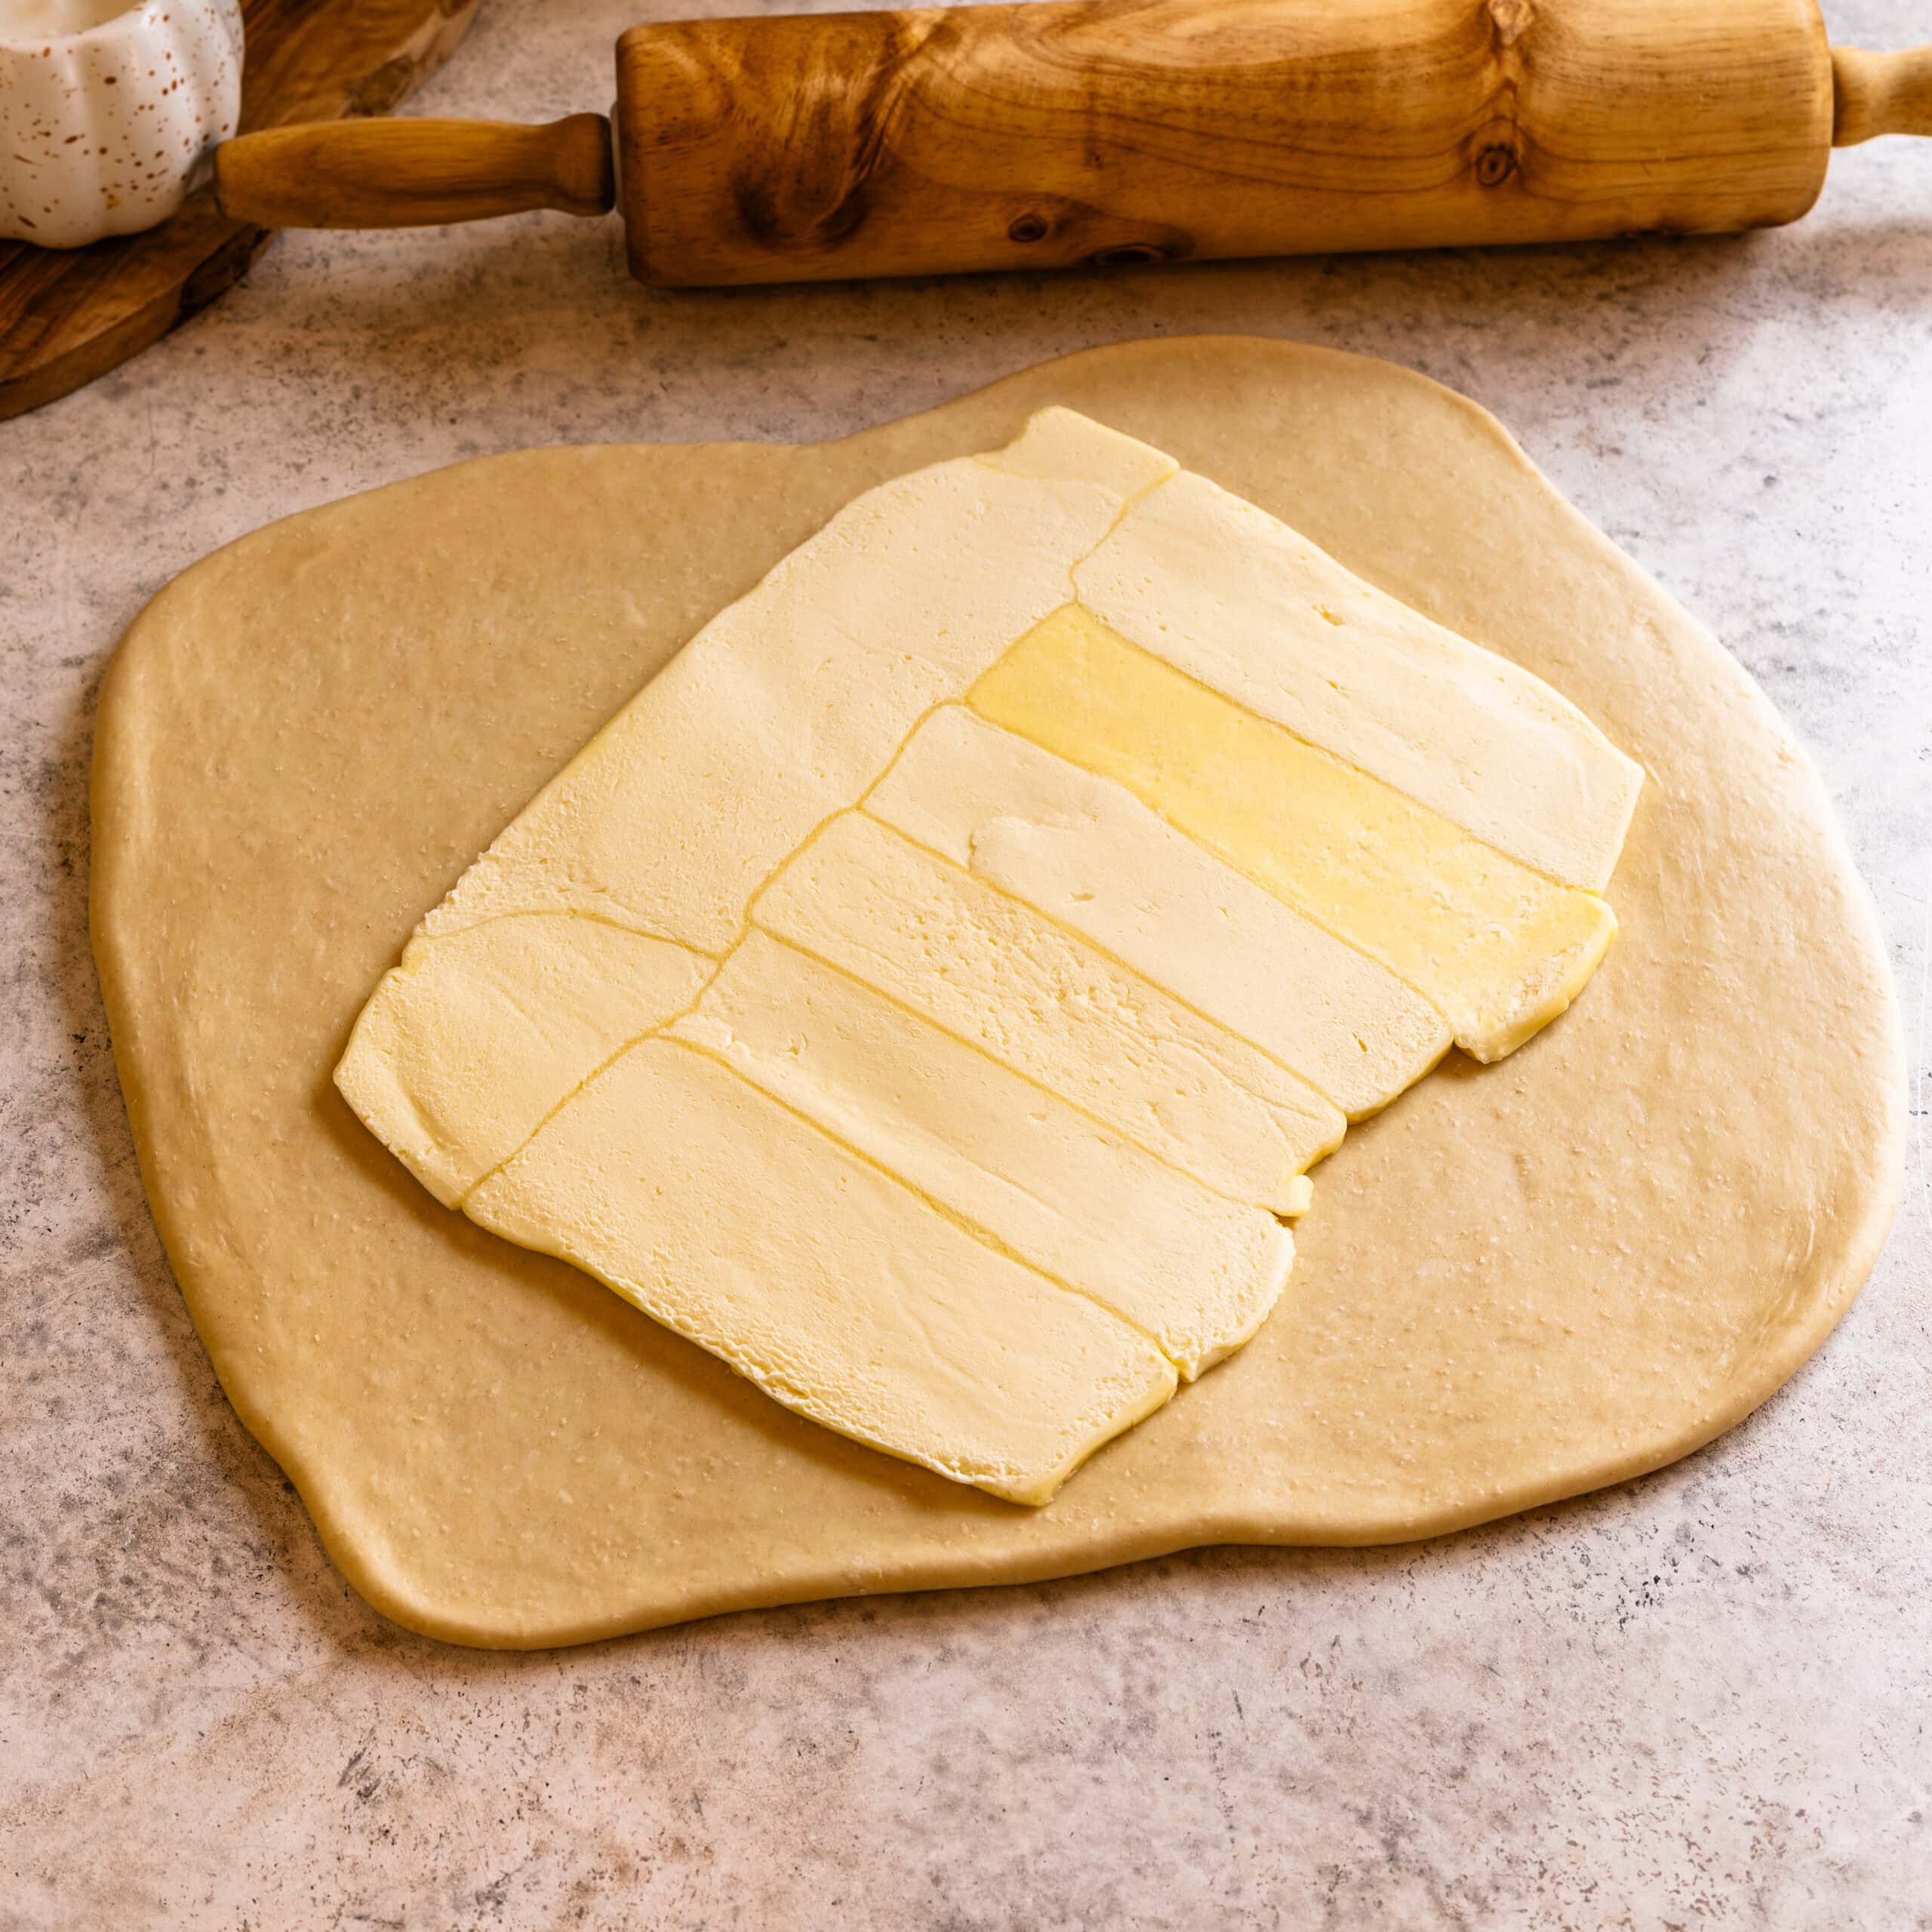
Enclose the butter
Place the butter over one half of the dough, fold the other half over it, and gently seal the edges. At this point, the butter should be completely enclosed inside the dough.
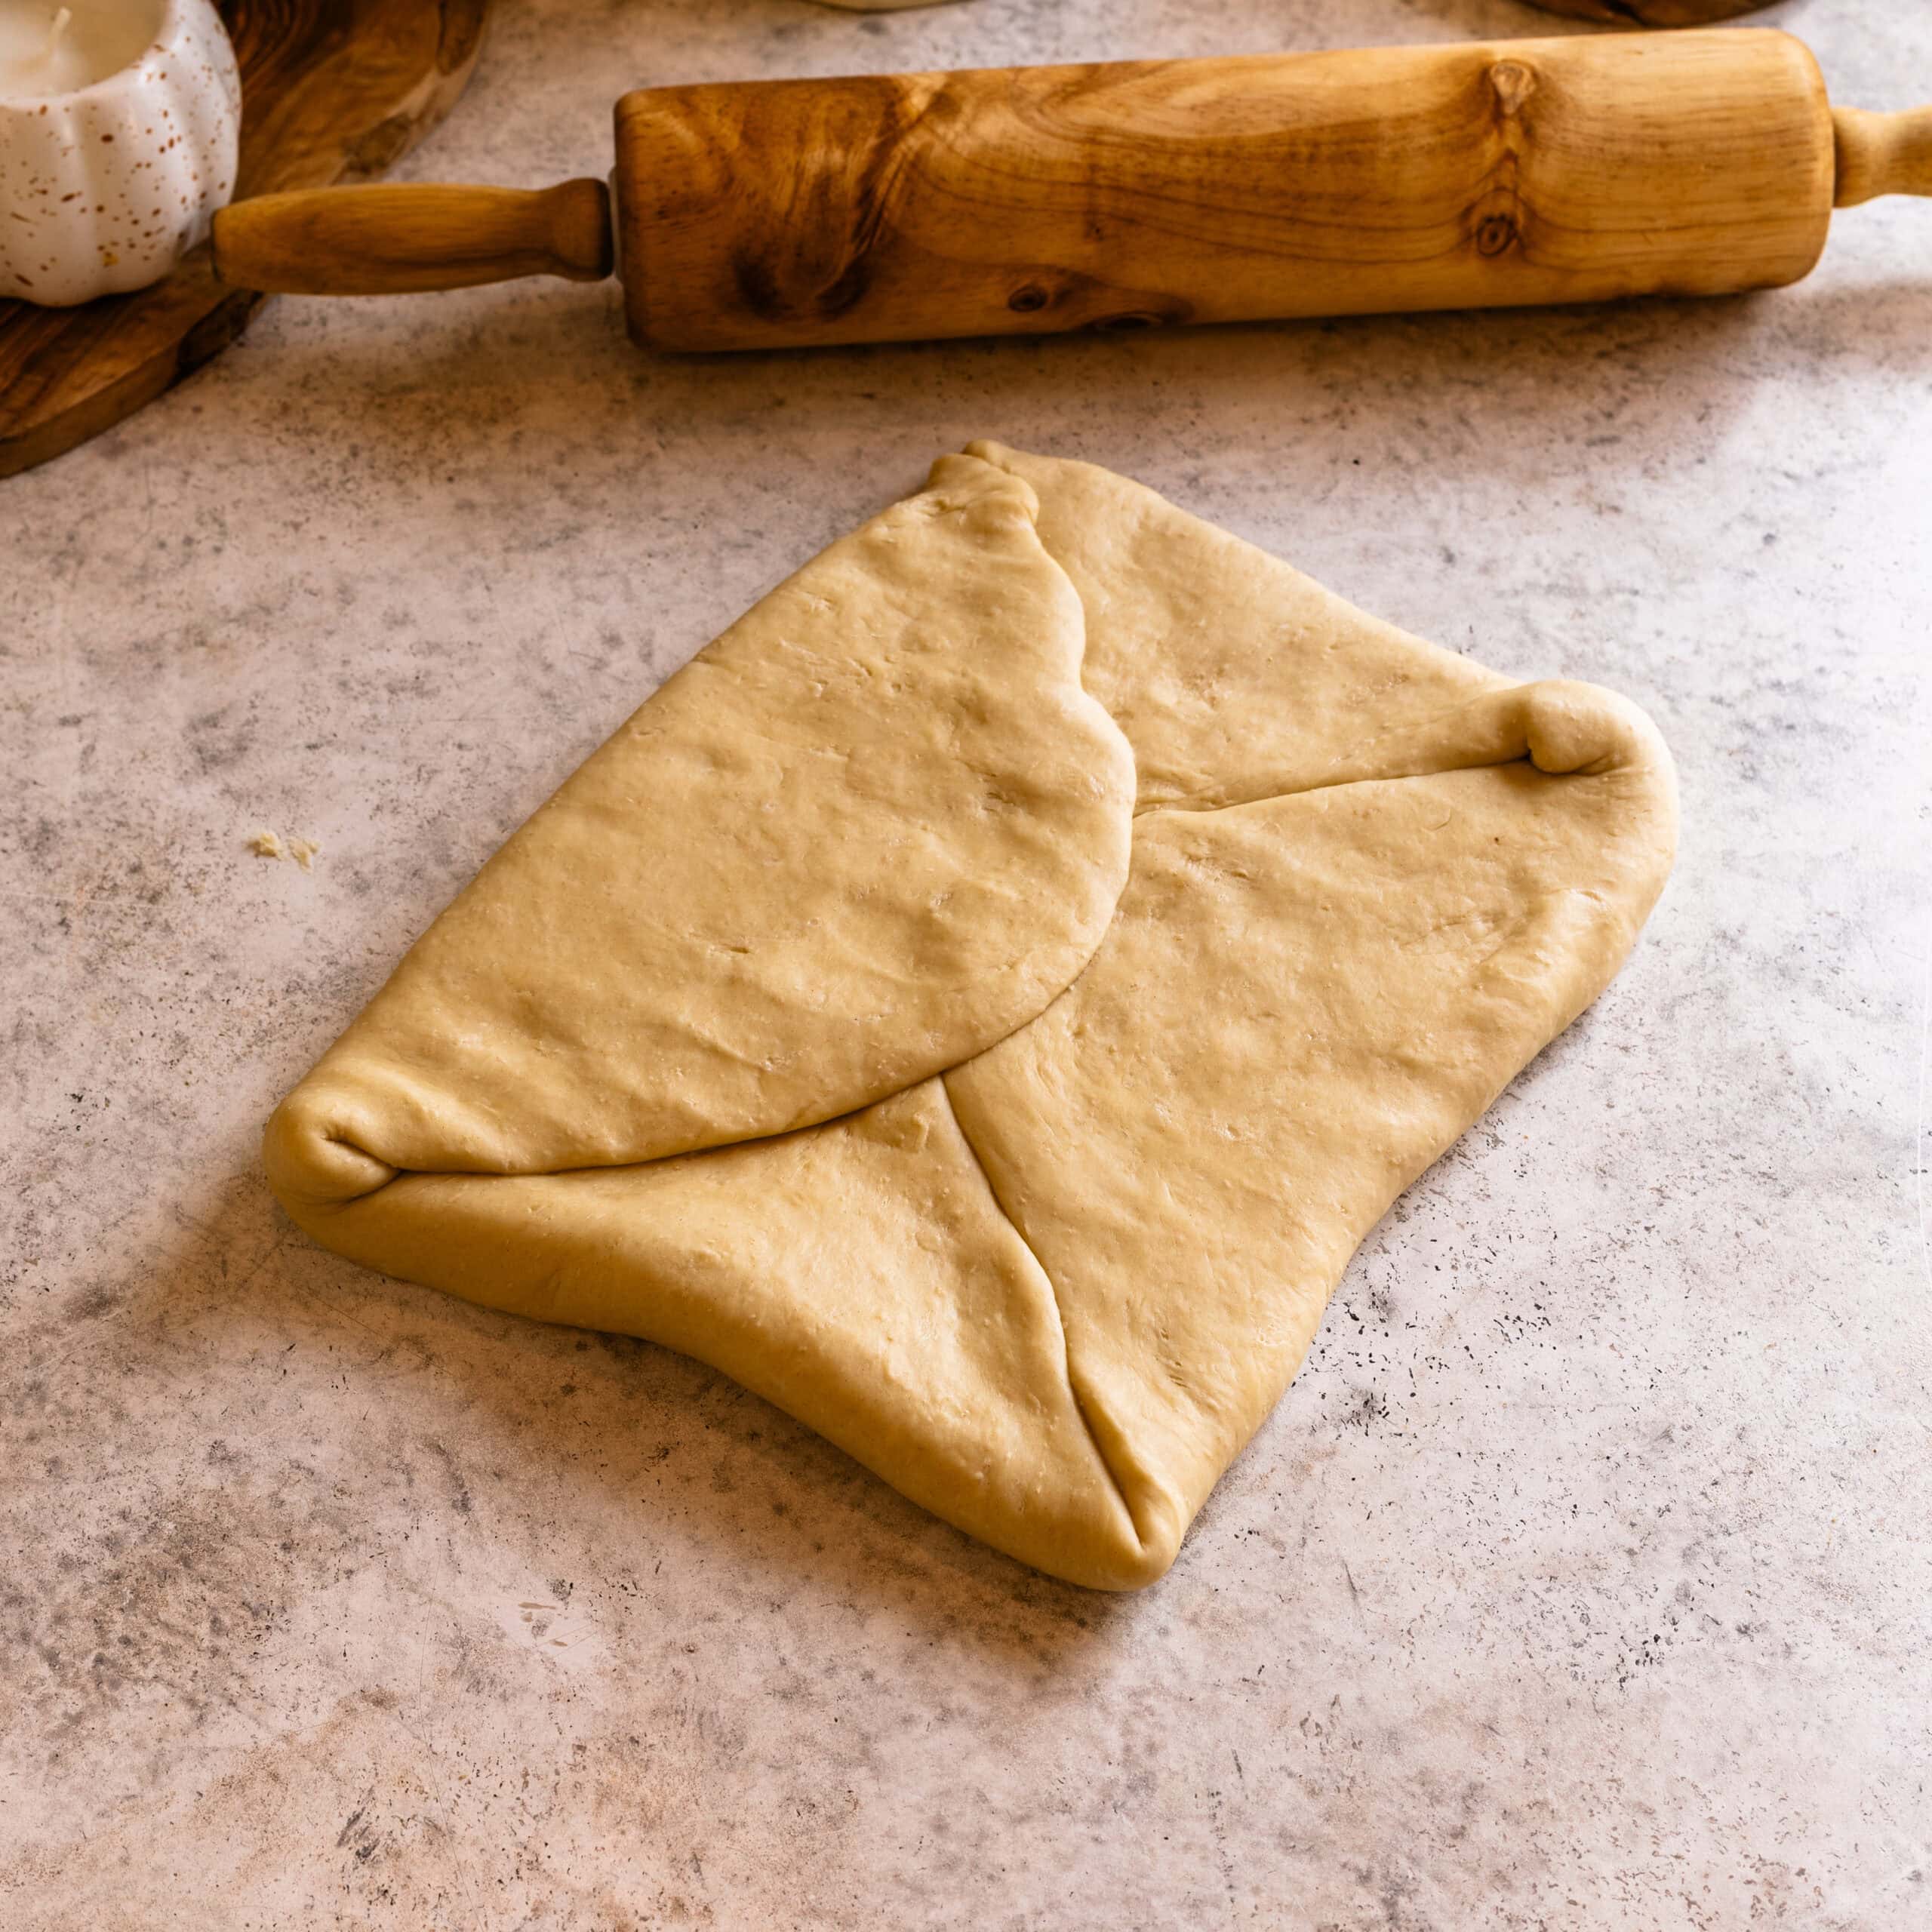
Roll and fold
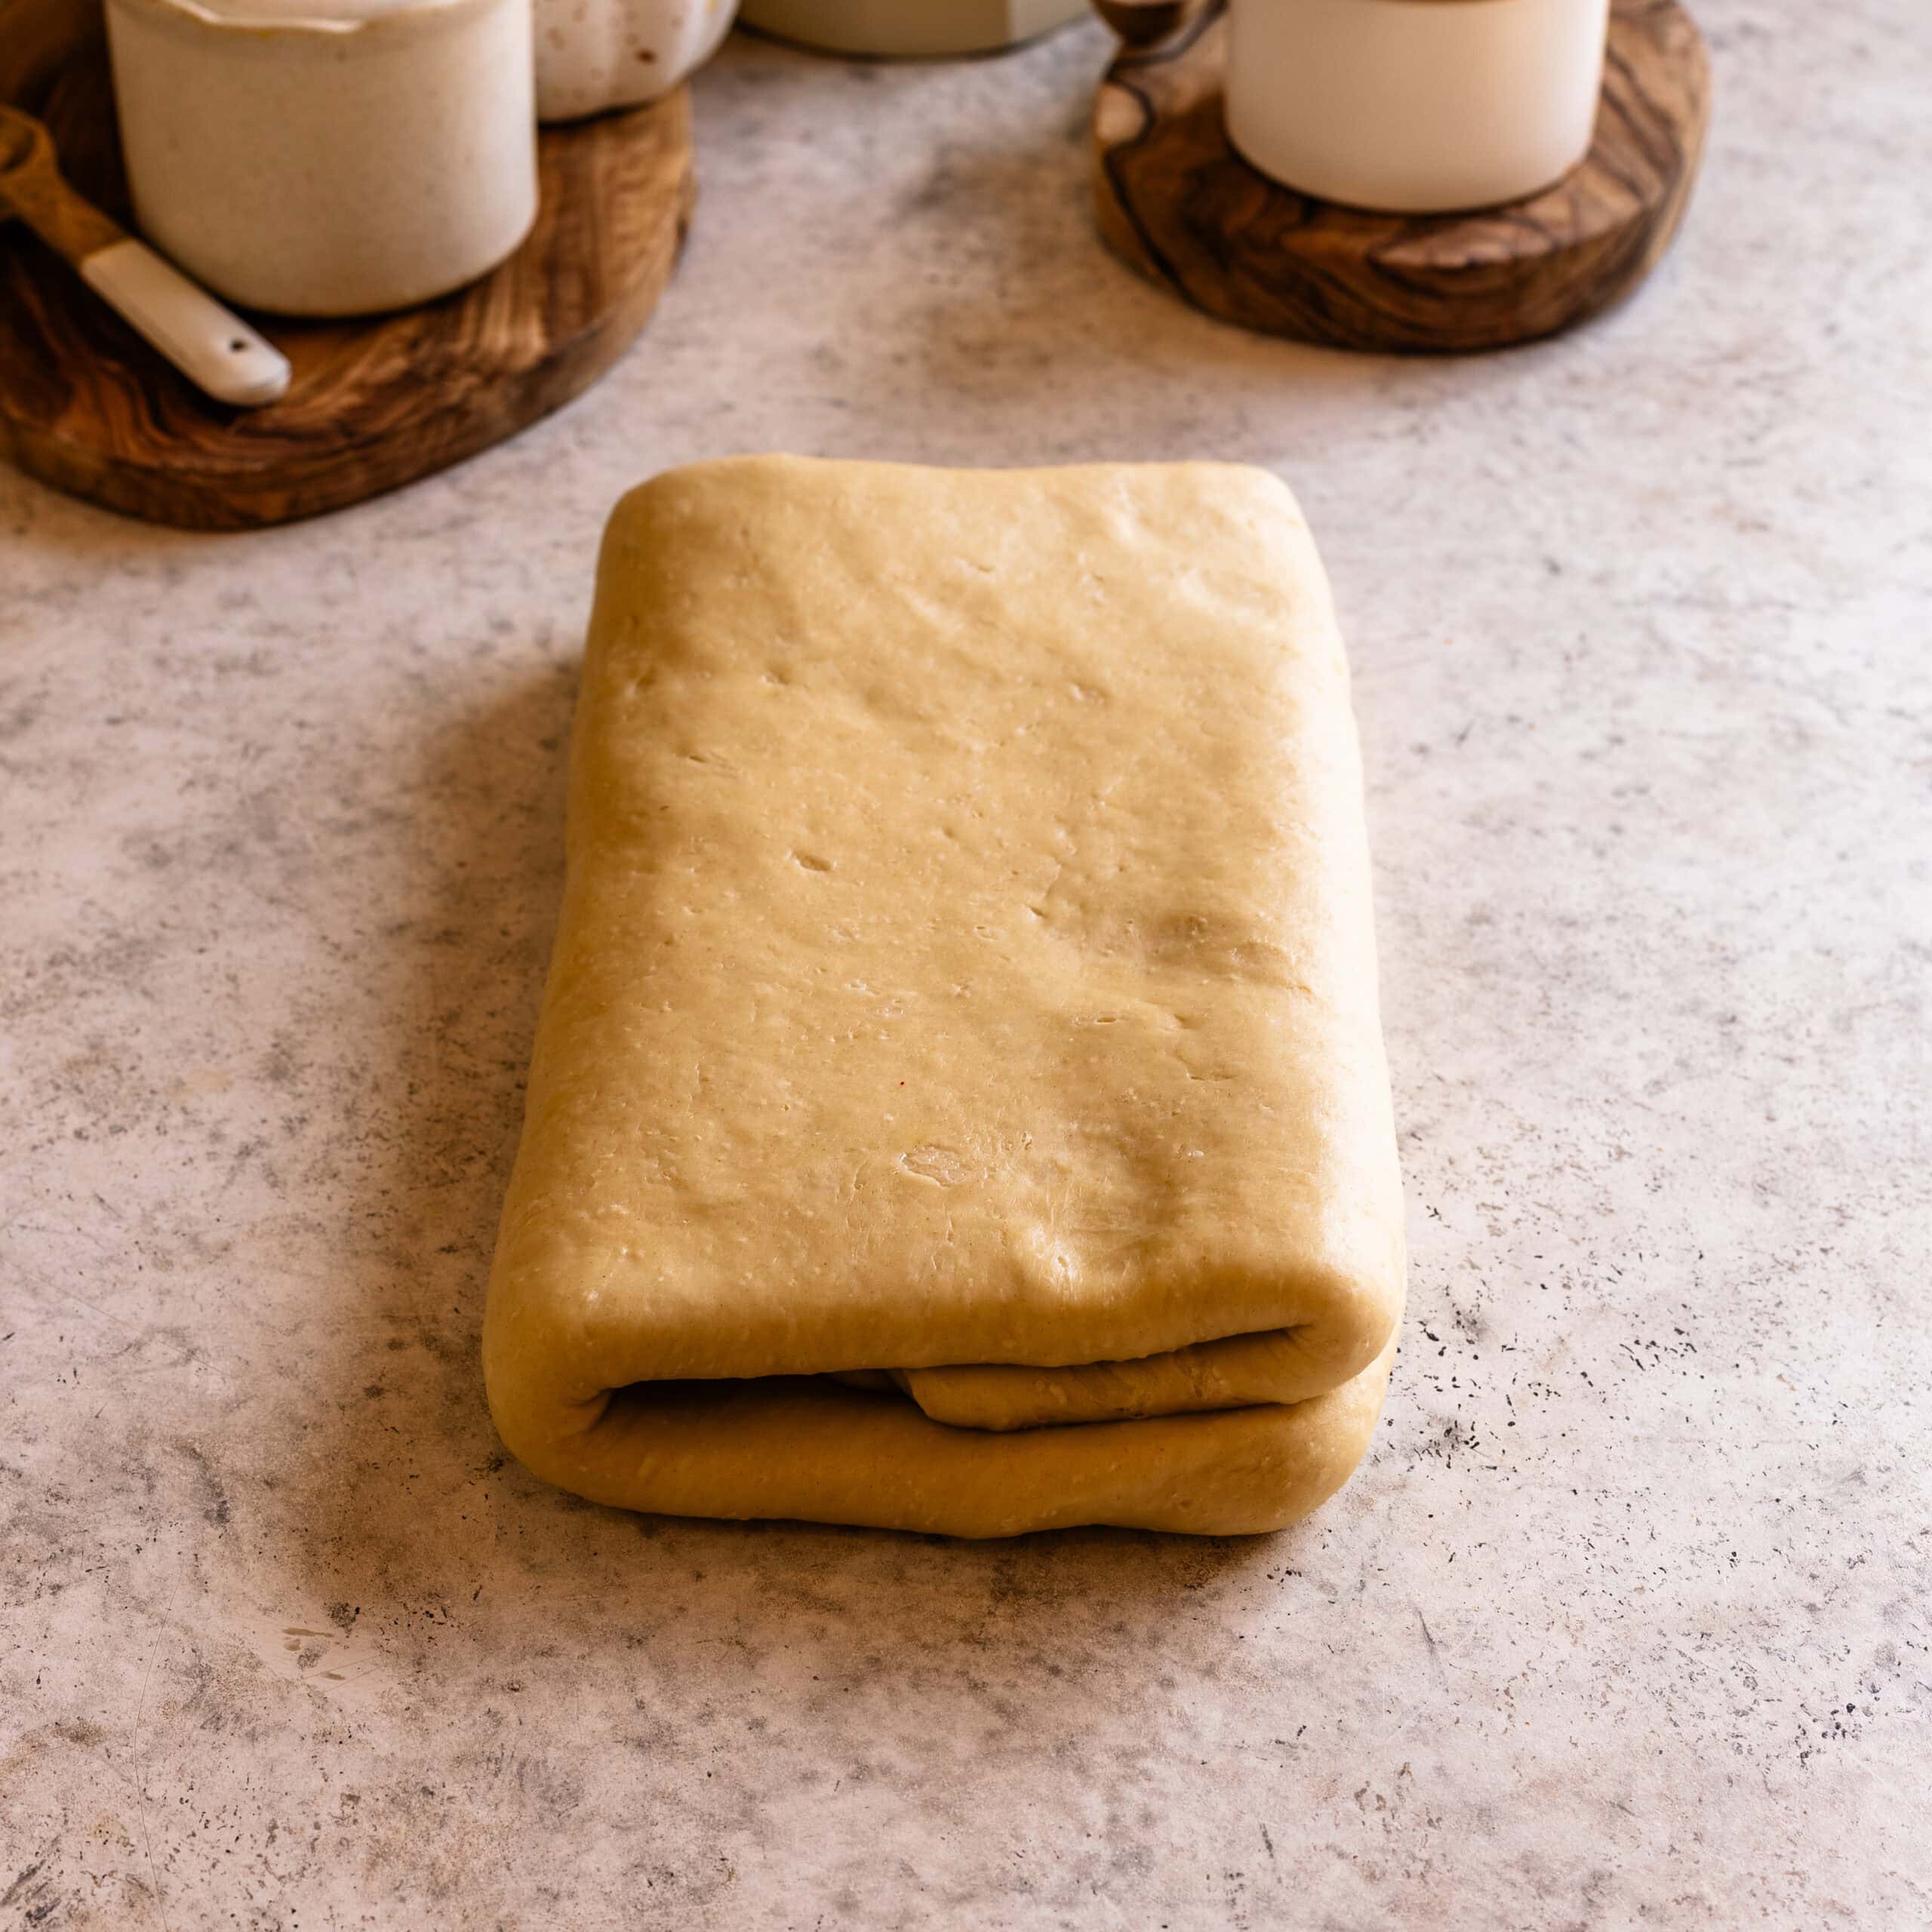
Now I start building the layers. Roll the dough into a long rectangle, then fold it into thirds like a letter.
Chill it for about 30 minutes, then repeat this process two more times for a total of three letter folds.
Try not to force the dough while you roll. If it keeps shrinking back or the butter starts feeling soft, refrigerate it and continue once everything has relaxed and cooled.
After the third fold, refrigerate the dough for at least an hour. I prefer leaving it overnight when I have the time.
Cream Cheese Filling
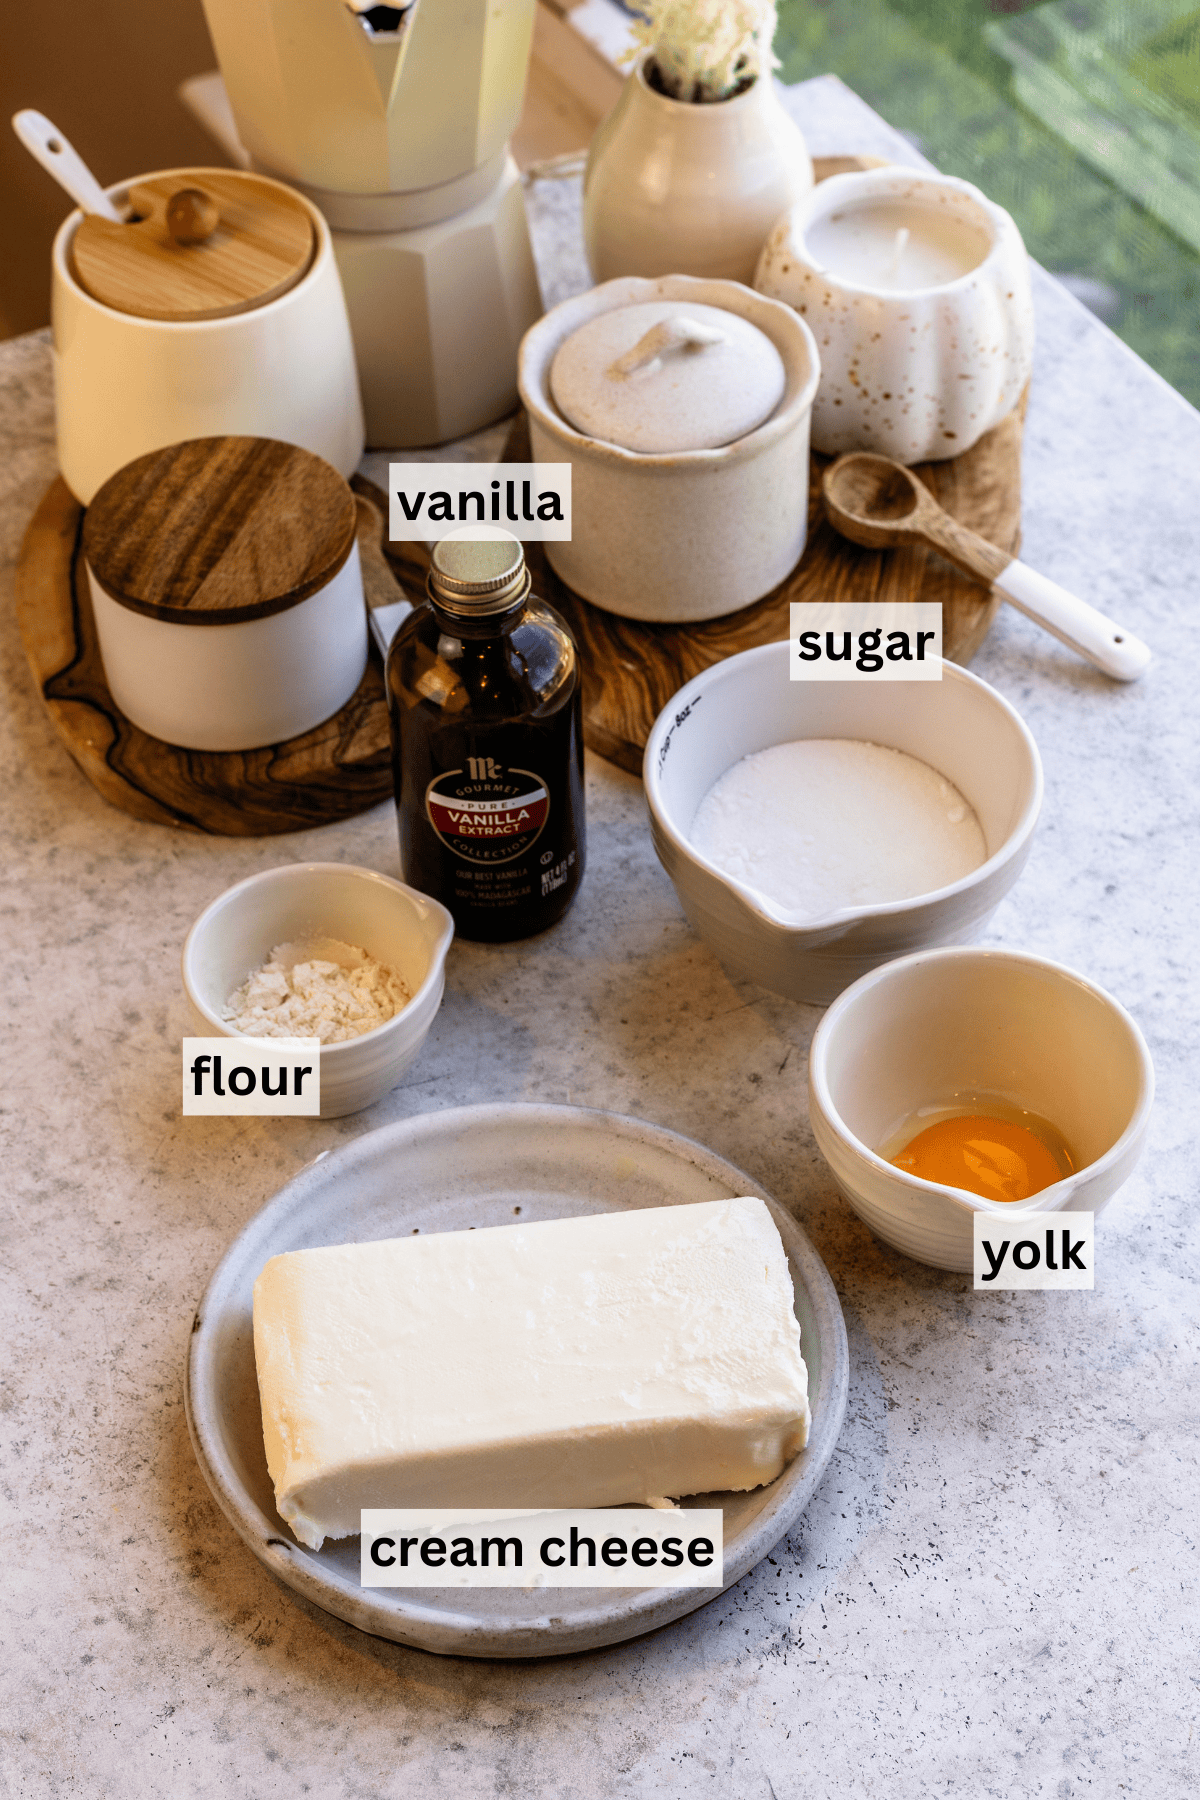
I use a simple cream cheese filling for these Danish pastries, but pastry cream works beautifully too. From there, you can add a spoonful of jam, fresh fruit, or even Nutella to the center before baking, so it’s easy to make several different flavors from the same batch of dough.
I add a little flour to help stabilize the cream cheese filling so it stays thick and creamy instead of becoming watery, and I use just the egg yolk for richness and structure without adding the extra moisture that comes from the egg white.
Make the filling
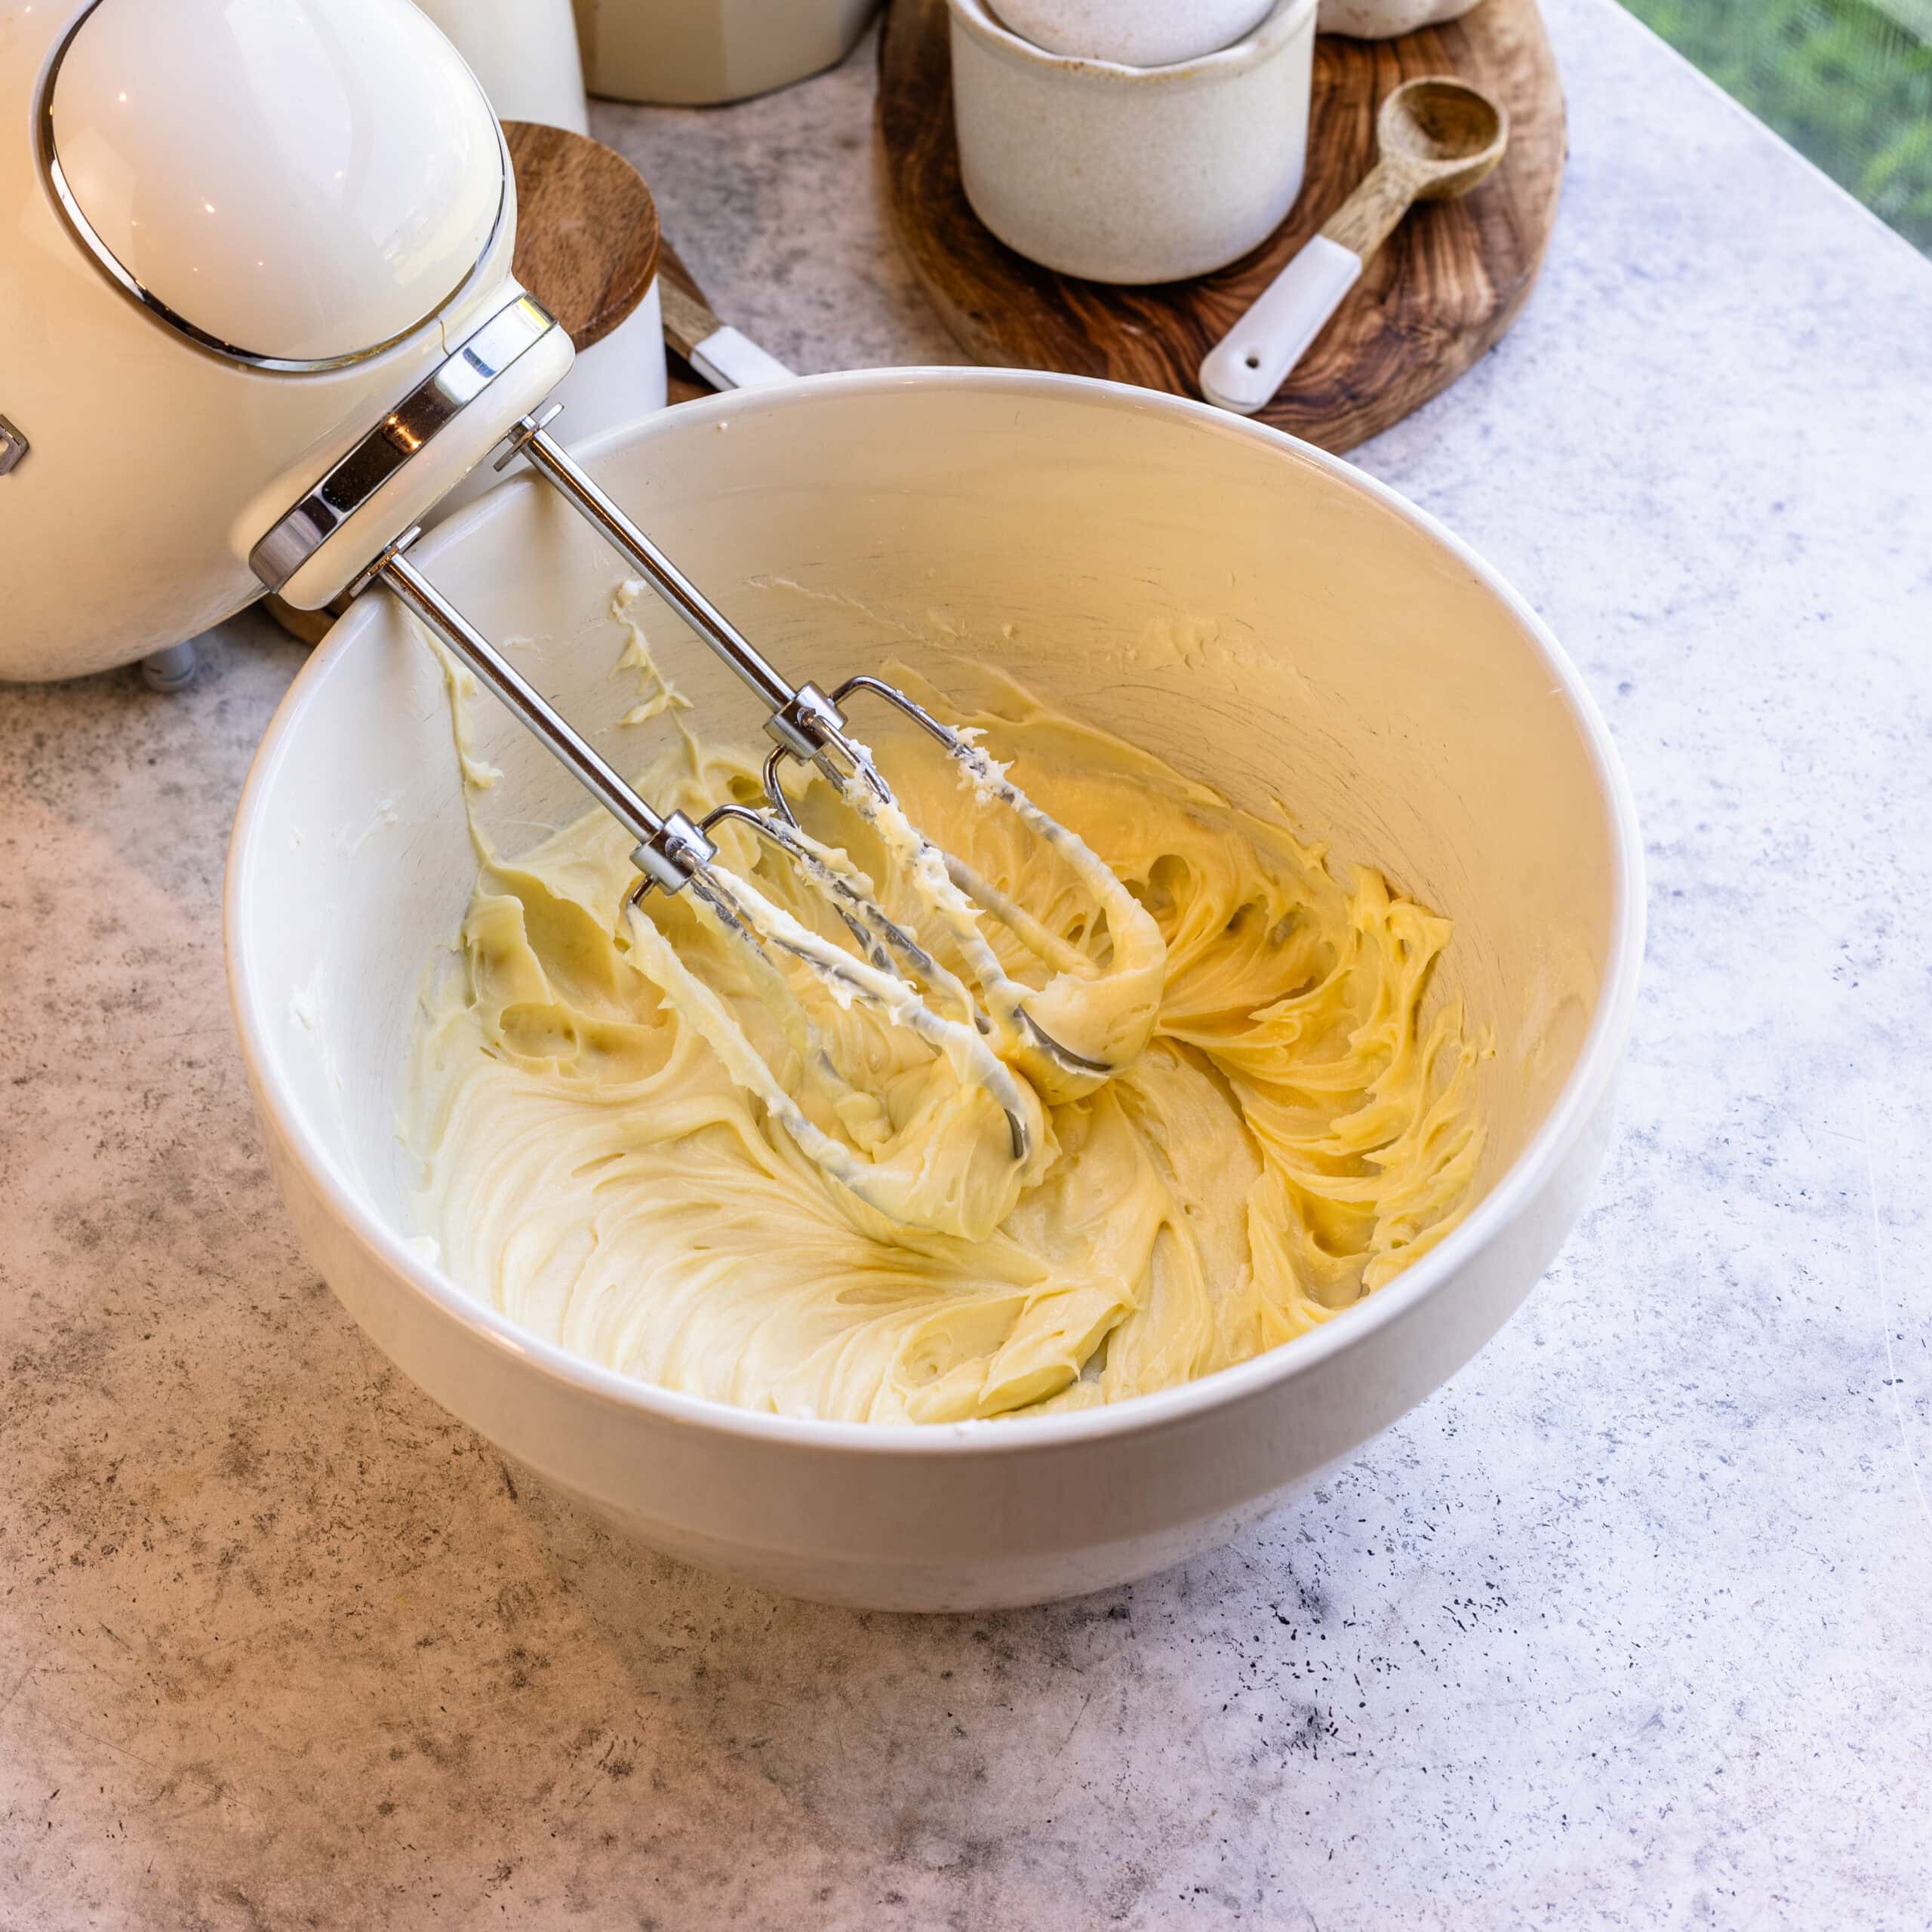
Beat the softened cream cheese with the sugar until smooth, then mix in the flour, egg yolk, vanilla, and a pinch of salt.
I keep the filling refrigerated until the pastries are shaped so it stays thick and easy to portion.
Roll and shape
After the dough has gone through all the folds and is thoroughly chilled, it’s time to roll and shape the pastries. I like to refrigerate the dough overnight before this step because it gives the gluten plenty of time to relax and makes the dough much easier to roll. A couple of hours in the refrigerator will work too, but you may find that the dough springs back a little more as you work with it.
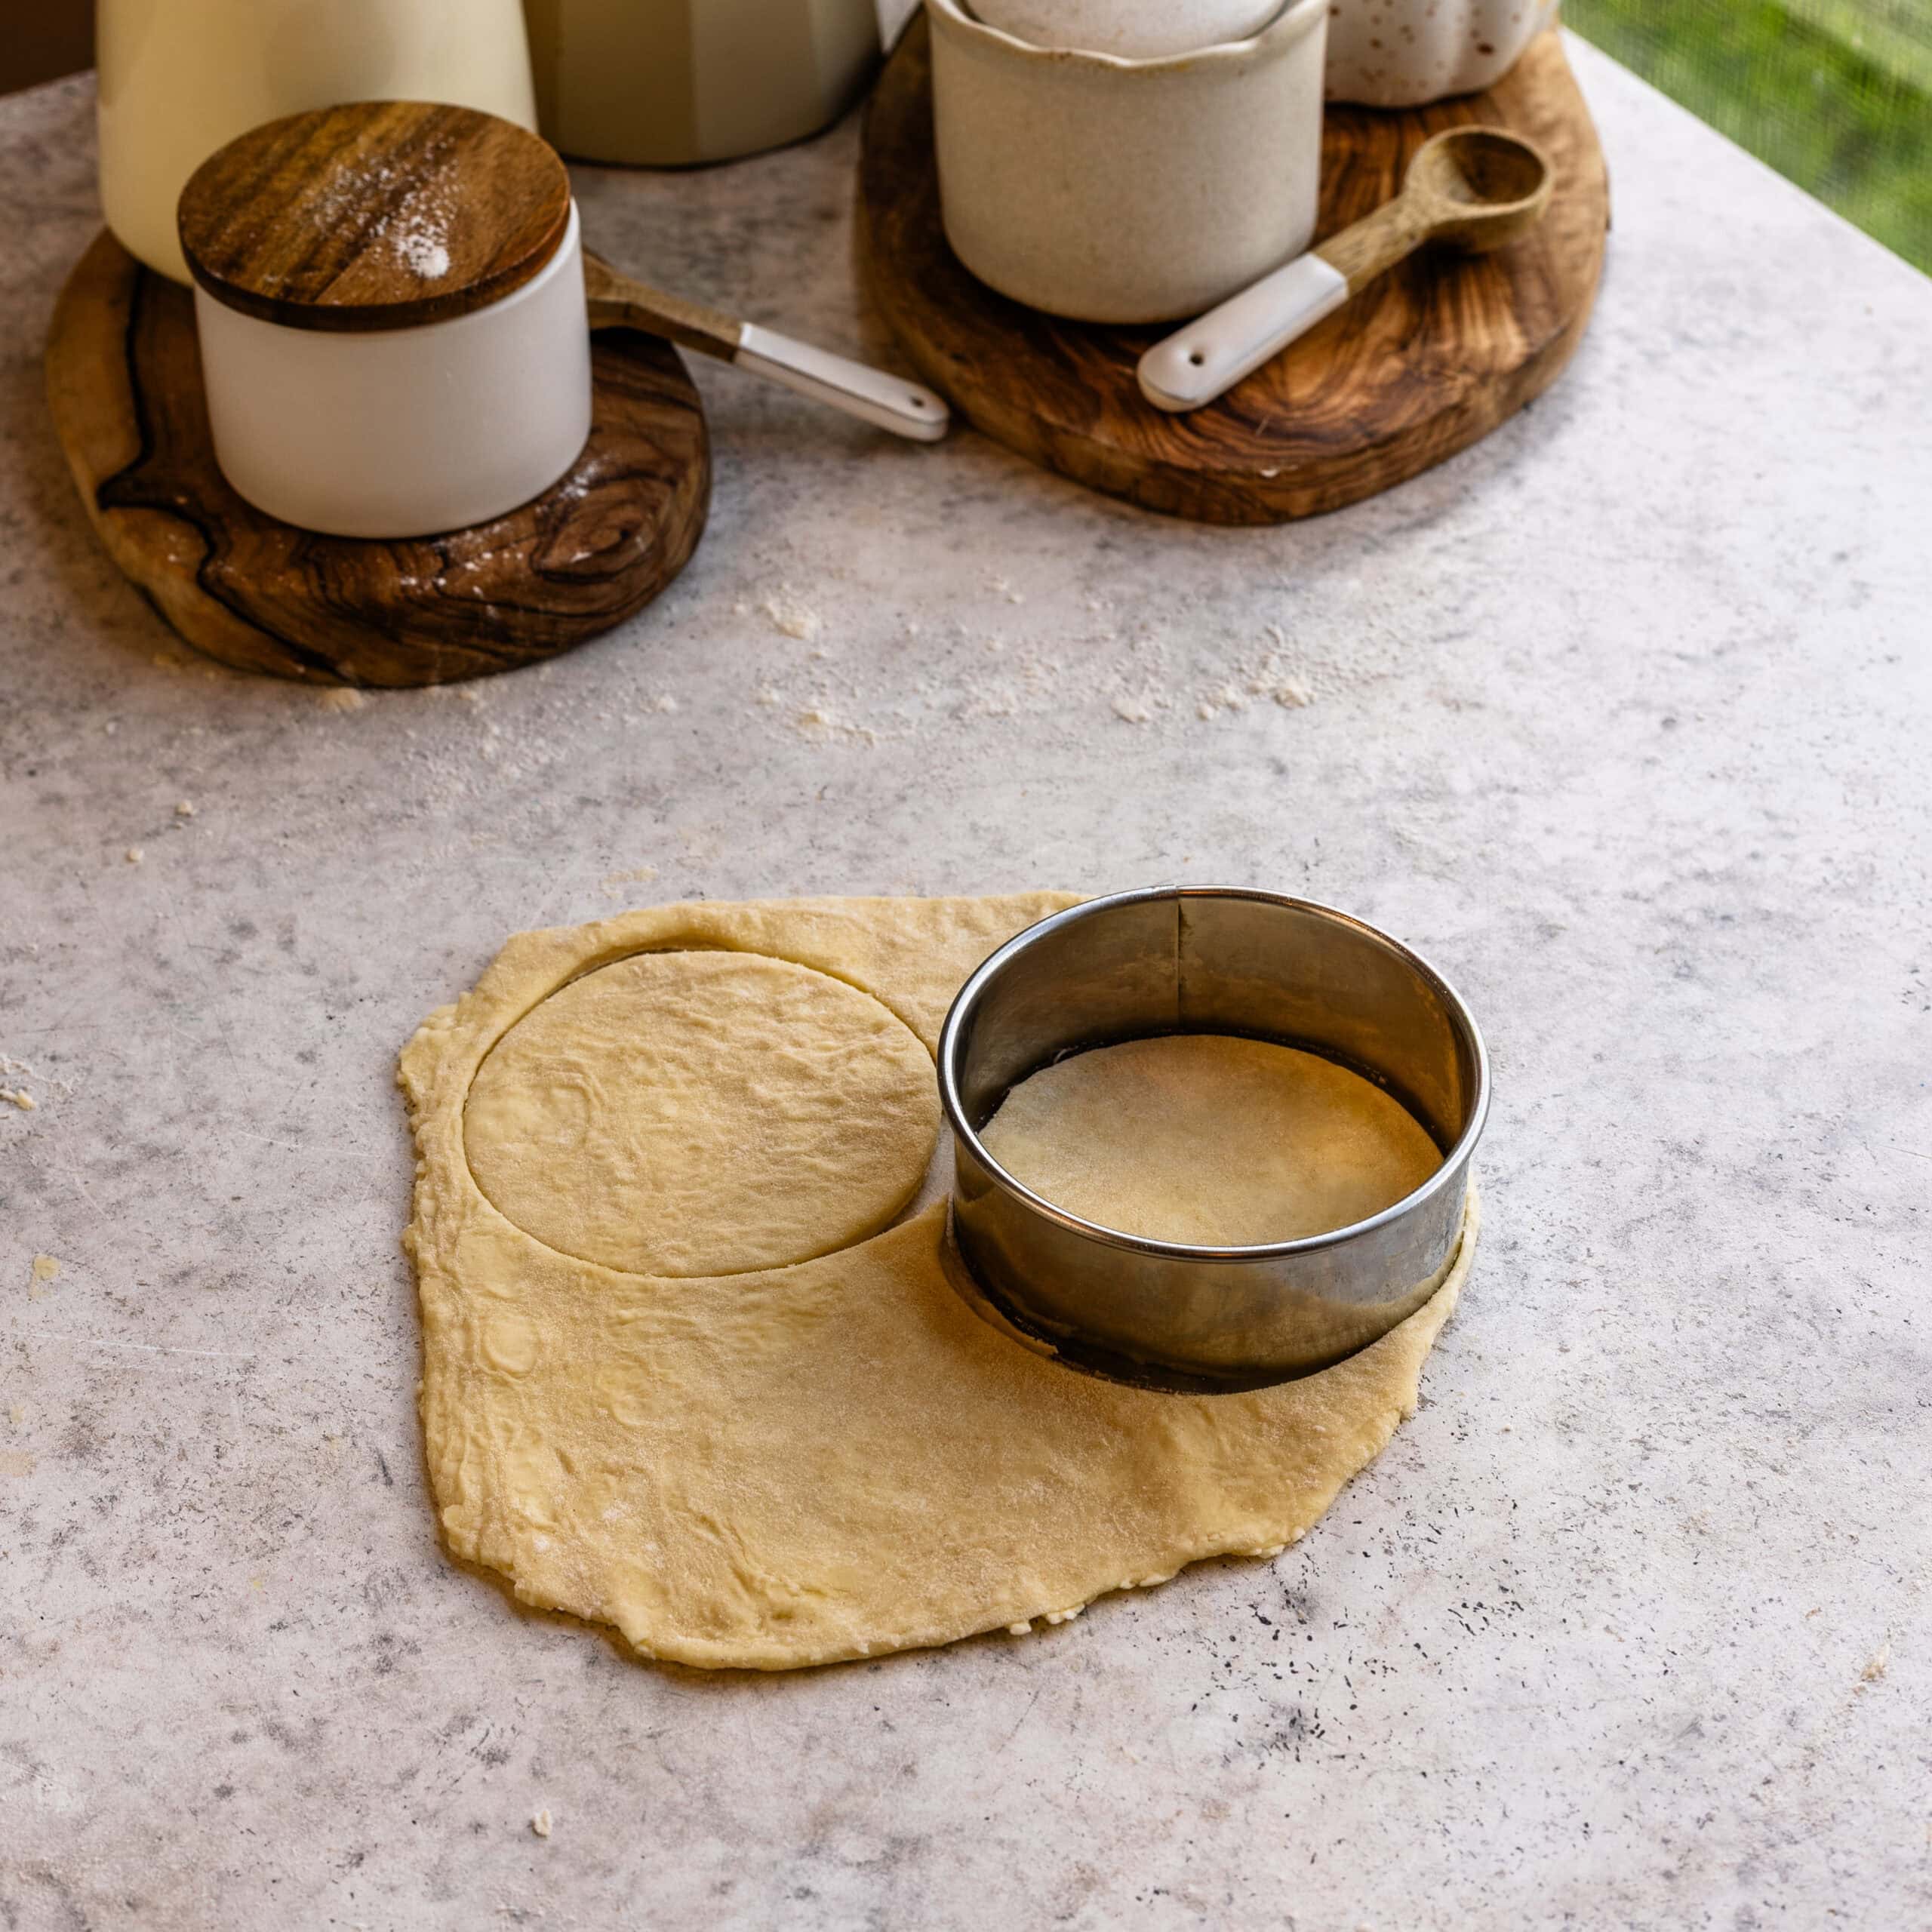
Divide the dough into 4-6 pieces, to make it easier to roll each piece. Roll the chilled dough to about ⅓ inch thick, or slightly thinner, then cut it into 4-inch rounds.
I like this thickness because the pastry has enough structure to puff without becoming so thick that the center struggles to bake through.
Make an indentation
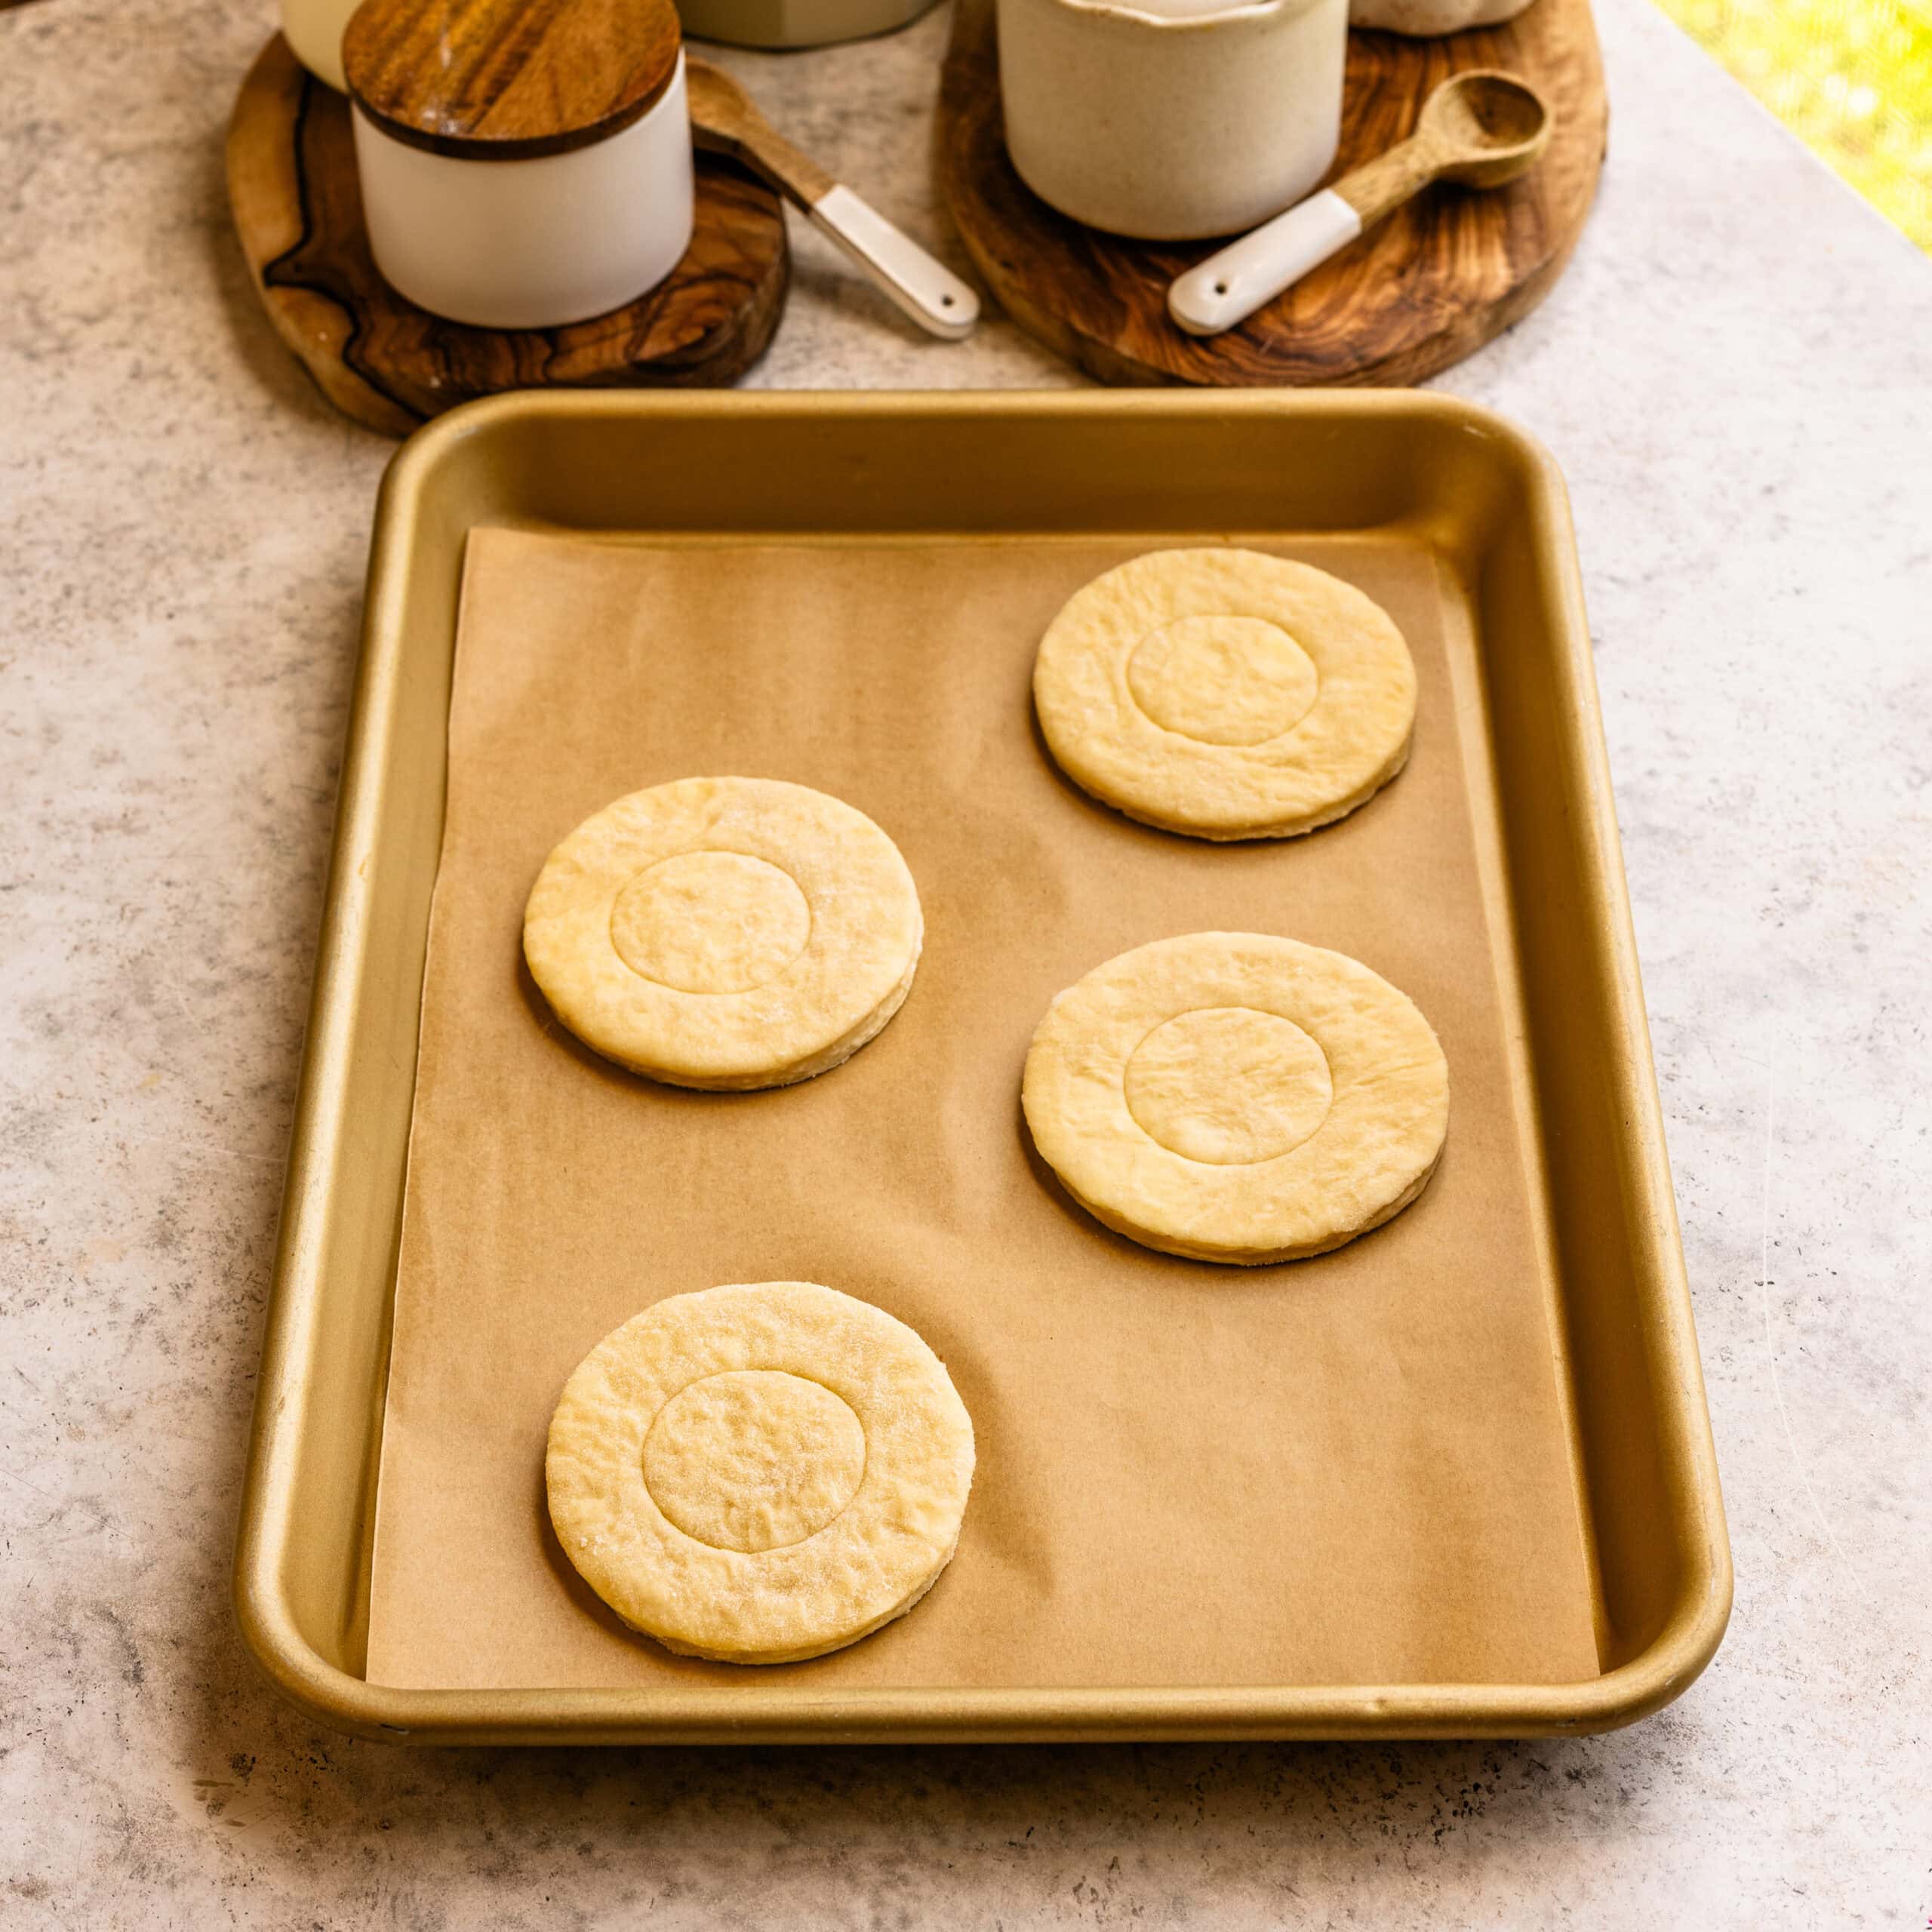
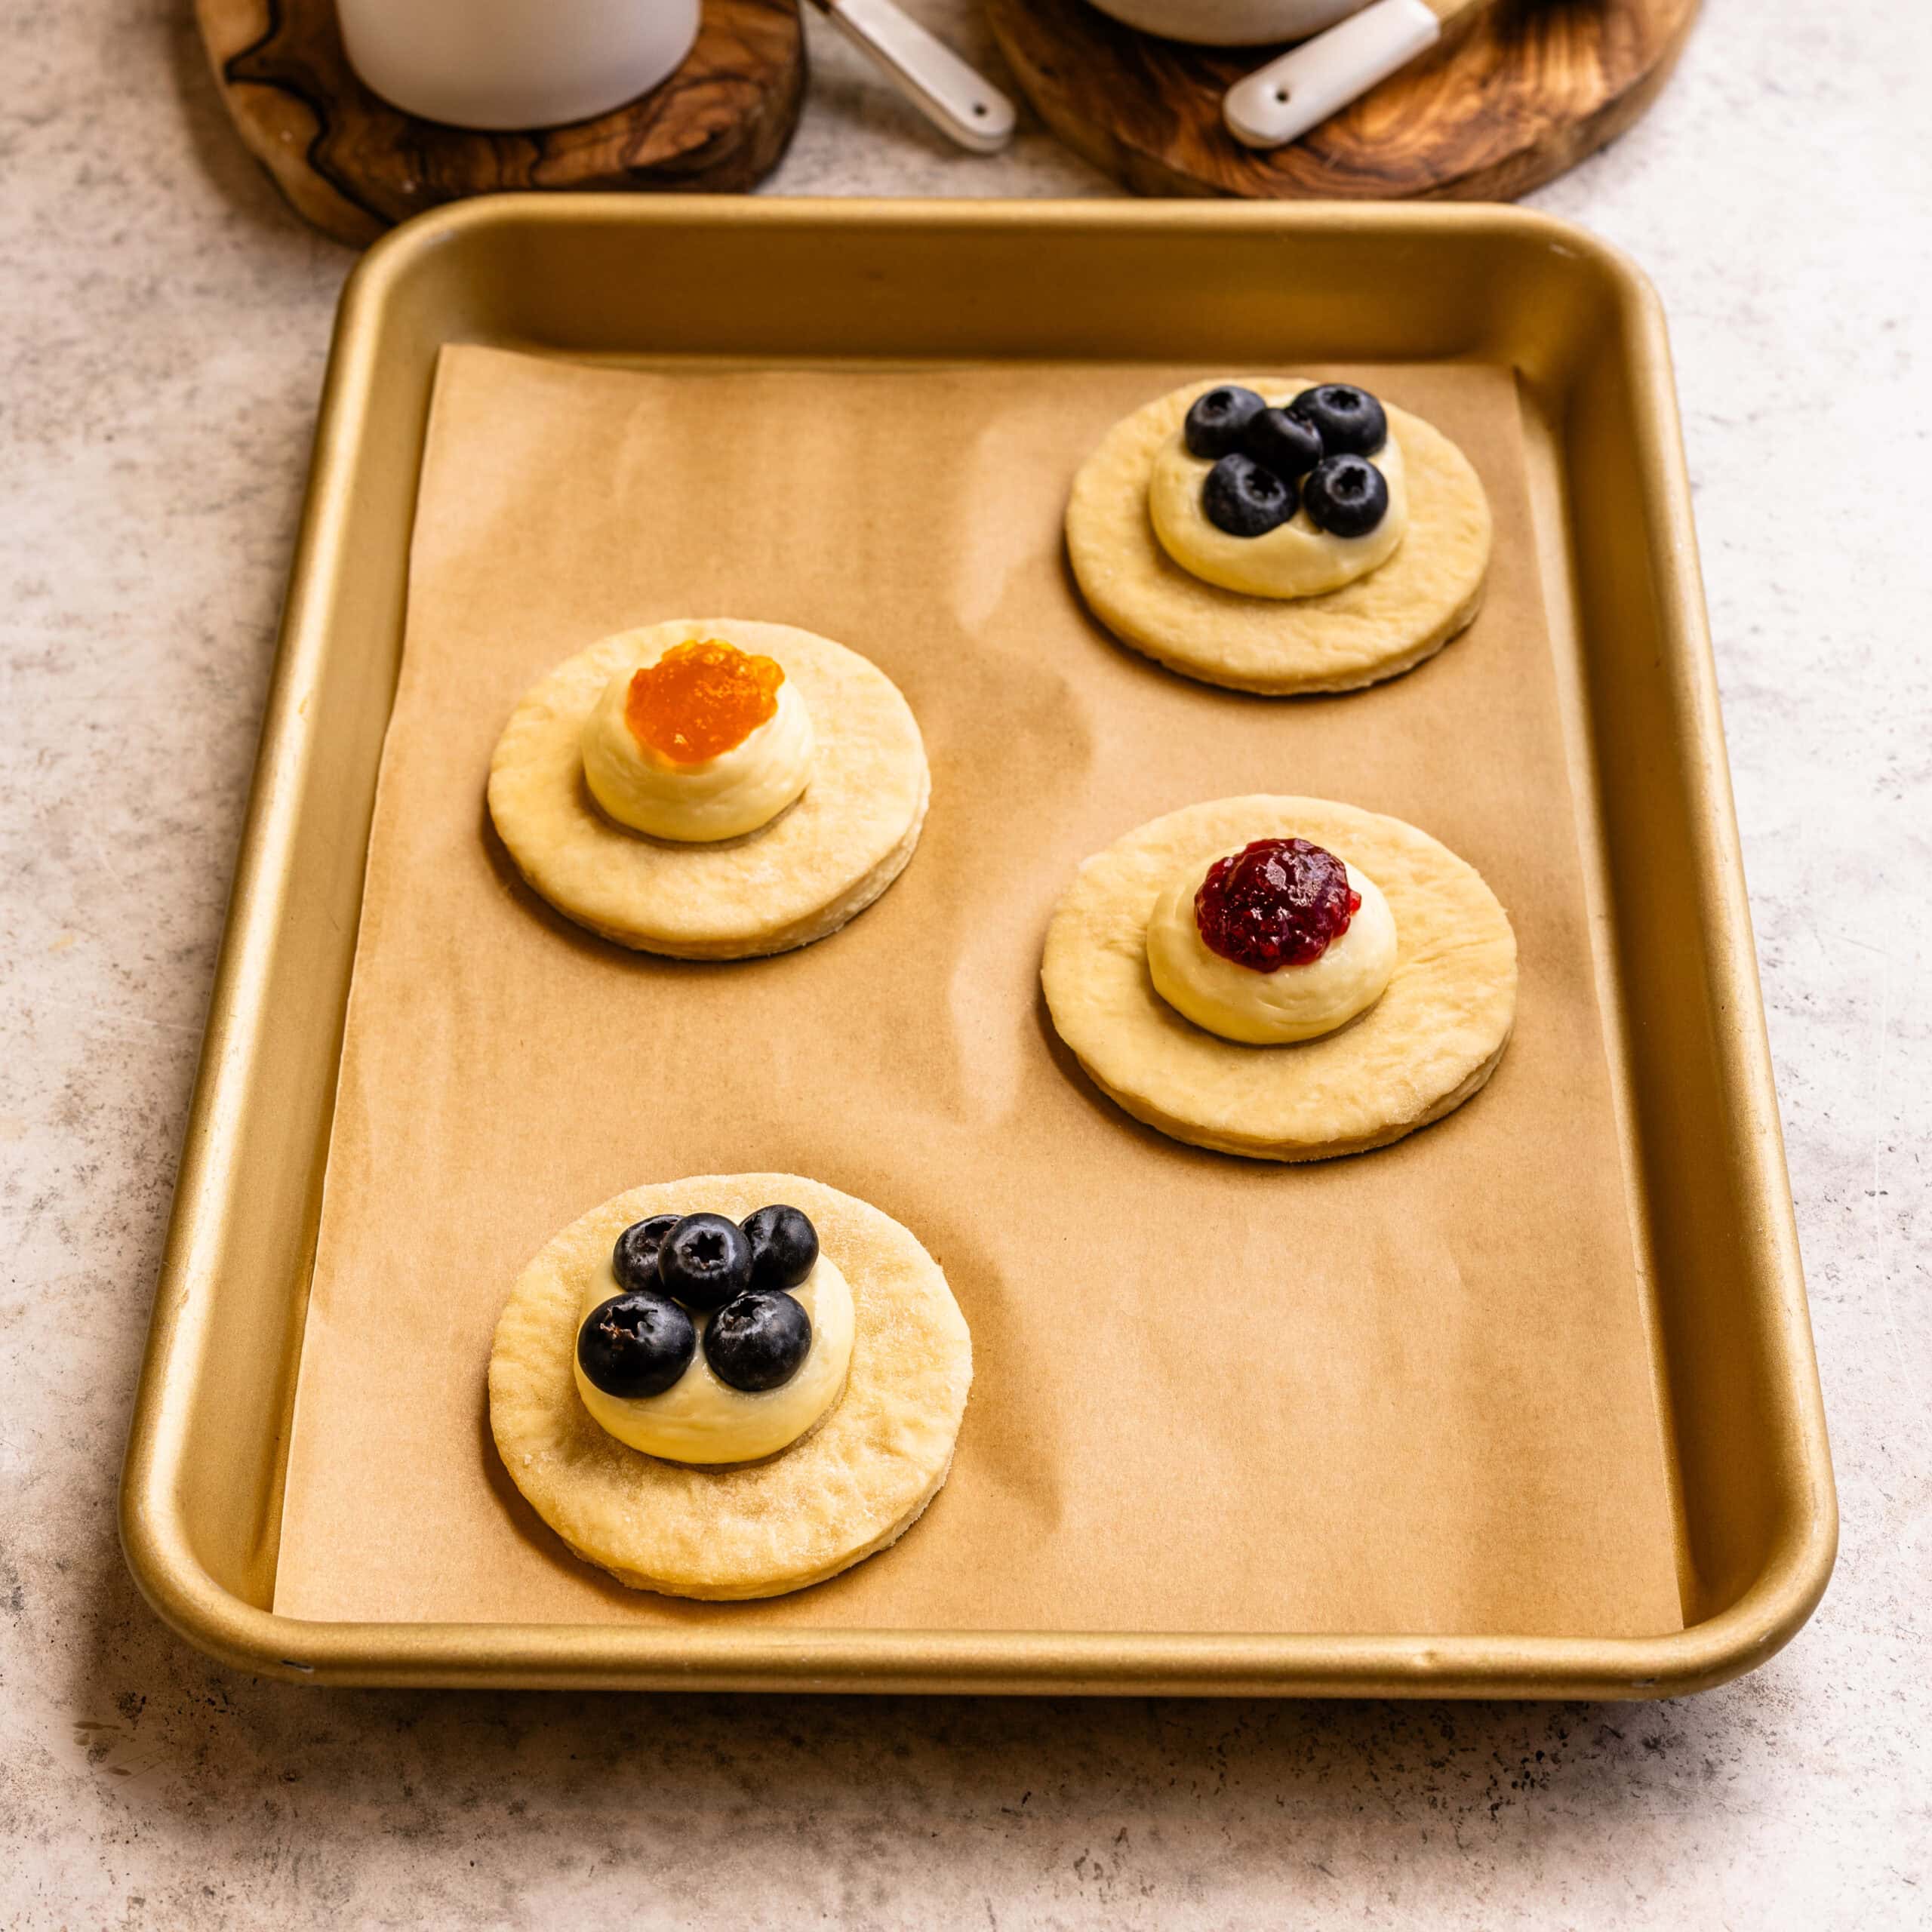
Use a smaller round cutter to gently mark an indentation in the center of each piece without cutting through the dough.
Fill the pastries
Add the cream cheese filling inside the indentation, followed by fresh berries or a small amount of jam.
Expert/Pro Tip
Let the dough relax as you roll. Laminated dough will naturally want to spring back, especially after chilling and when you reroll the scraps. As you work, lift the dough off the counter every so often to make sure it isn’t sticking or being stretched into place. If it keeps shrinking back, cover it and let it rest for 5 to 10 minutes before continuing. That short rest gives the gluten time to relax, which makes the dough easier to roll and helps the cut pastries hold their shape instead of shrinking once they’re on the baking sheet.
Proof and brush with the egg wash
Loosely cover the shaped pastries and leave them at room temperature until they look noticeably puffy. They don’t need to double in size. I look for dough that feels lighter and softer, with the laminated layers becoming easier to see.
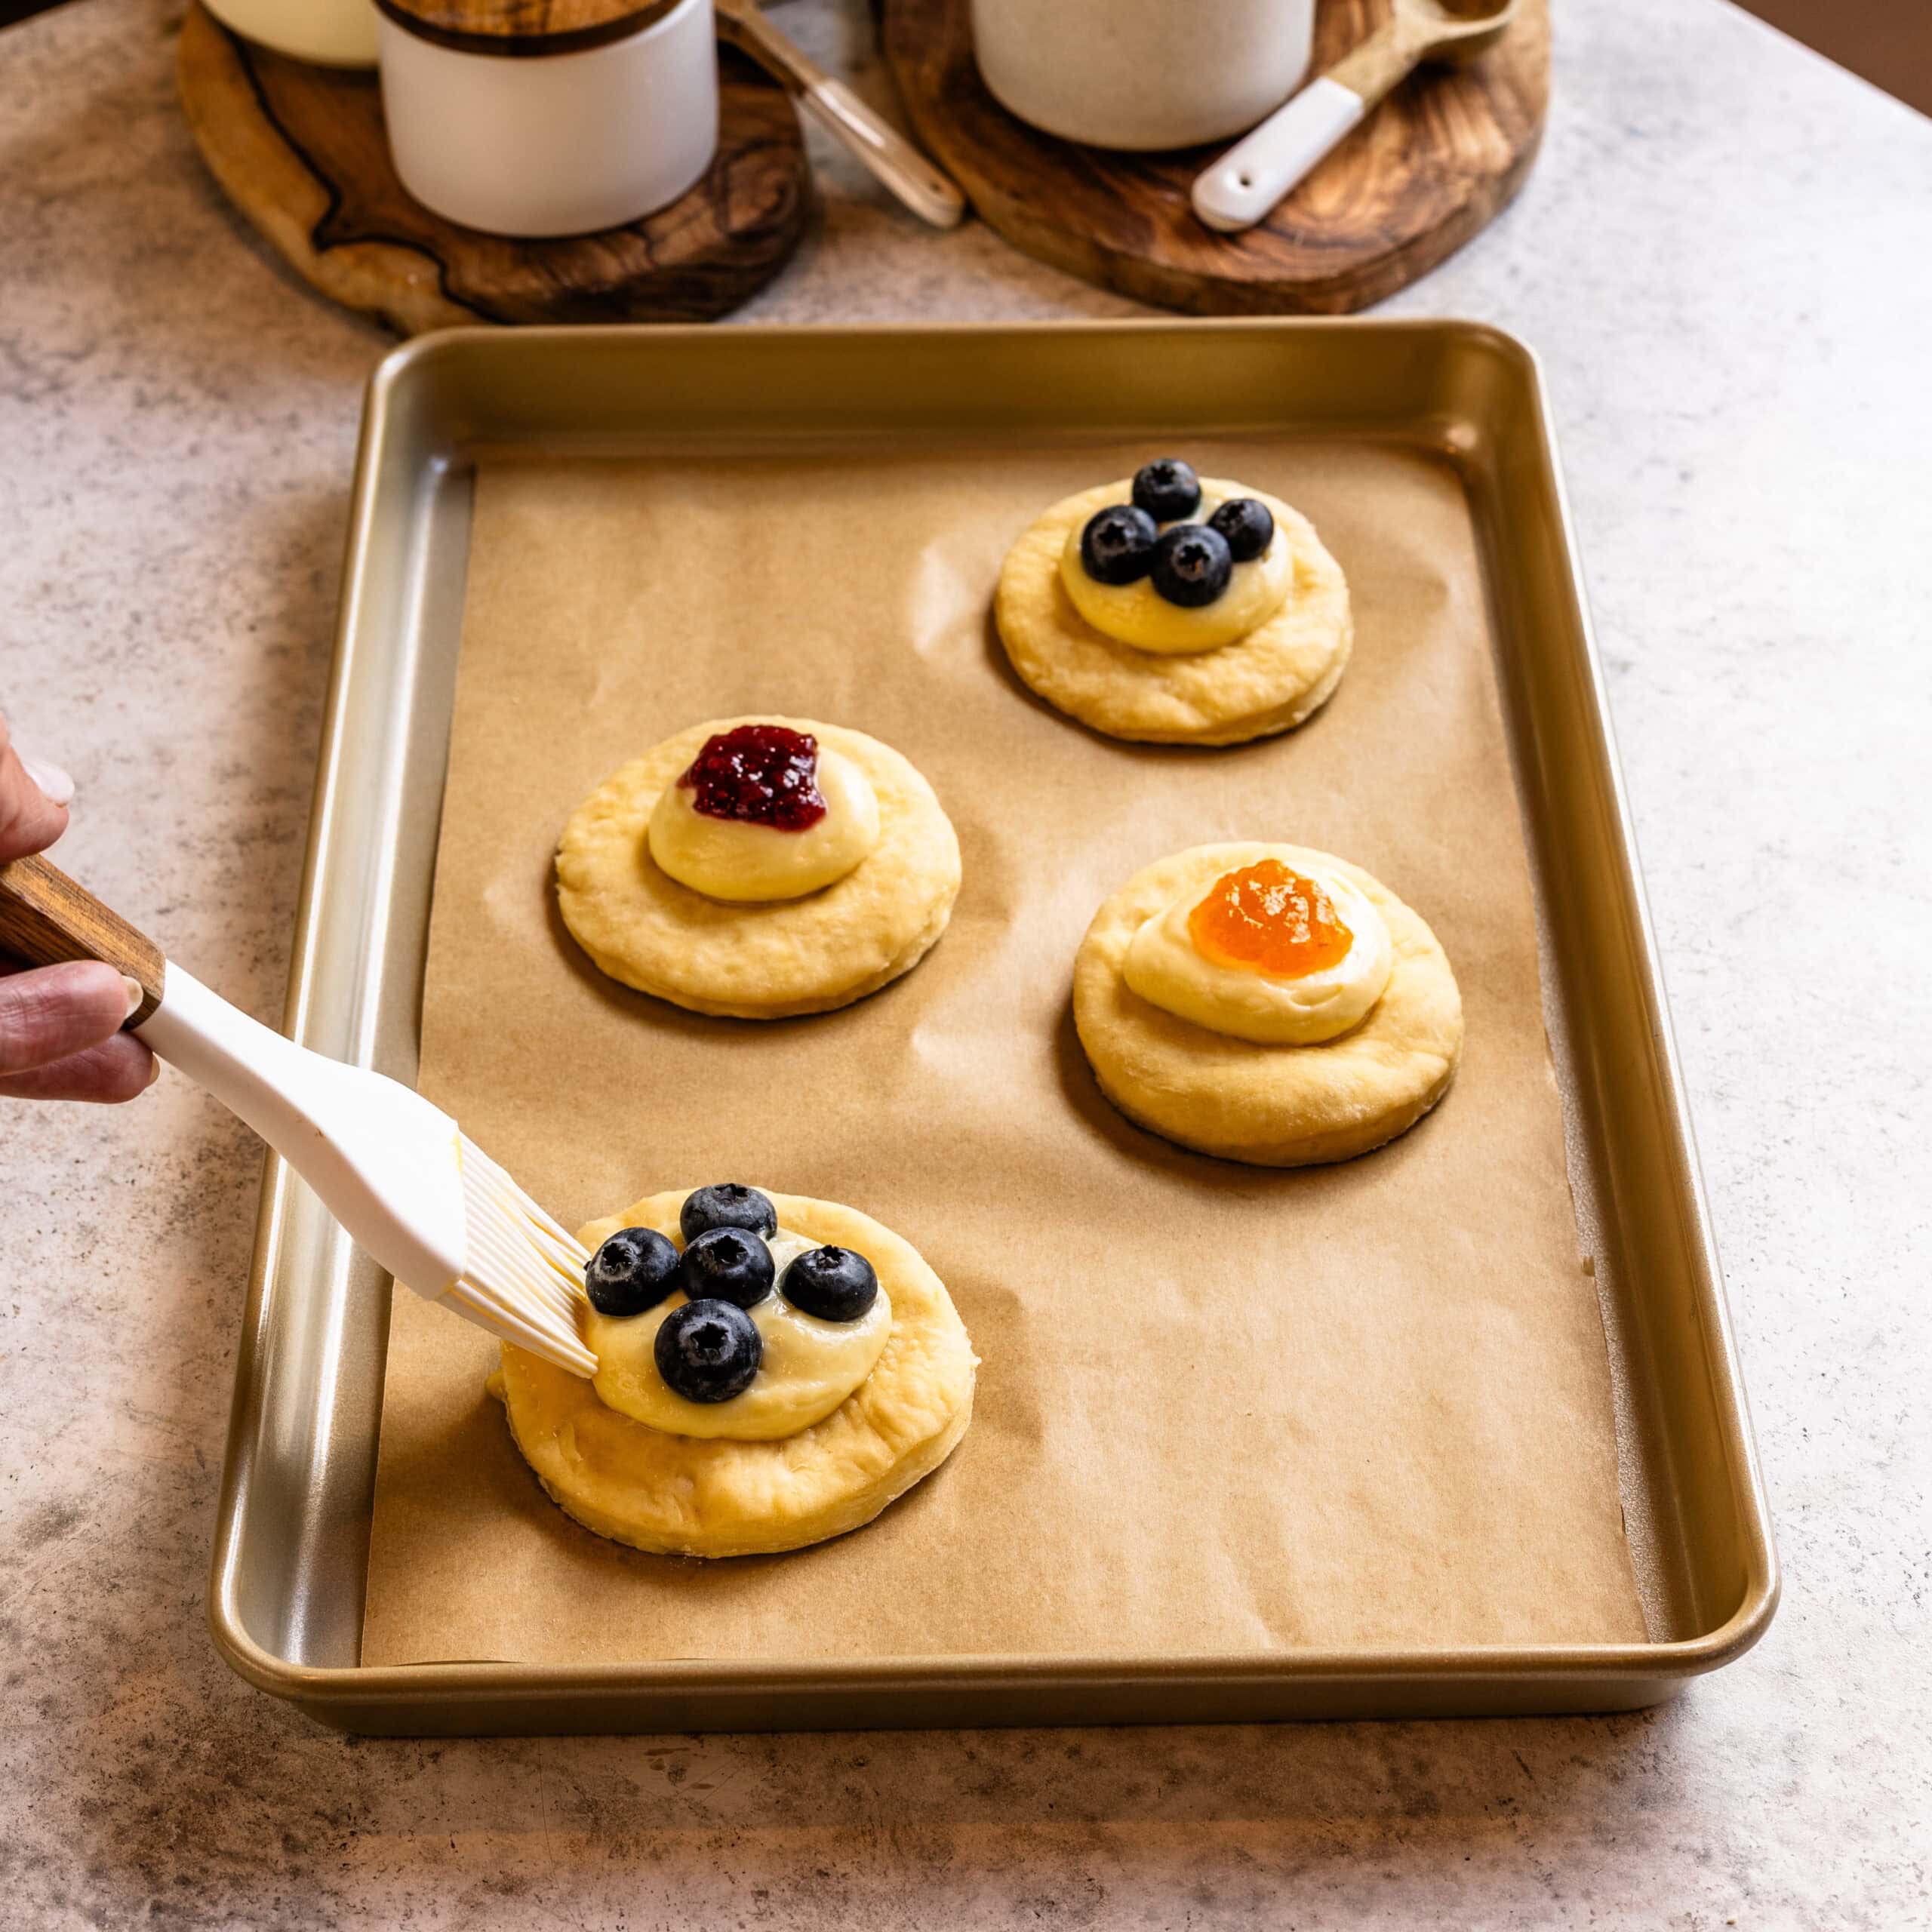
Brush the exposed dough lightly with egg wash right before baking. I like to add a bit of milk to my egg wash because it softens the egg slightly and helps the pastries bake up with a more even, glossy golden color instead of a darker, more intensely browned finish.
Bake the Danish
Bake the Danish at 400°F to give the layers a strong initial lift, then lower the oven temperature to 375°F so the centers can finish baking without the outside getting too dark.
I bake them until they are deeply golden rather than pale blonde. The bottoms should be crisp and nicely browned too. Let the pastries cool for about 15 minutes before glazing.

Make the glaze
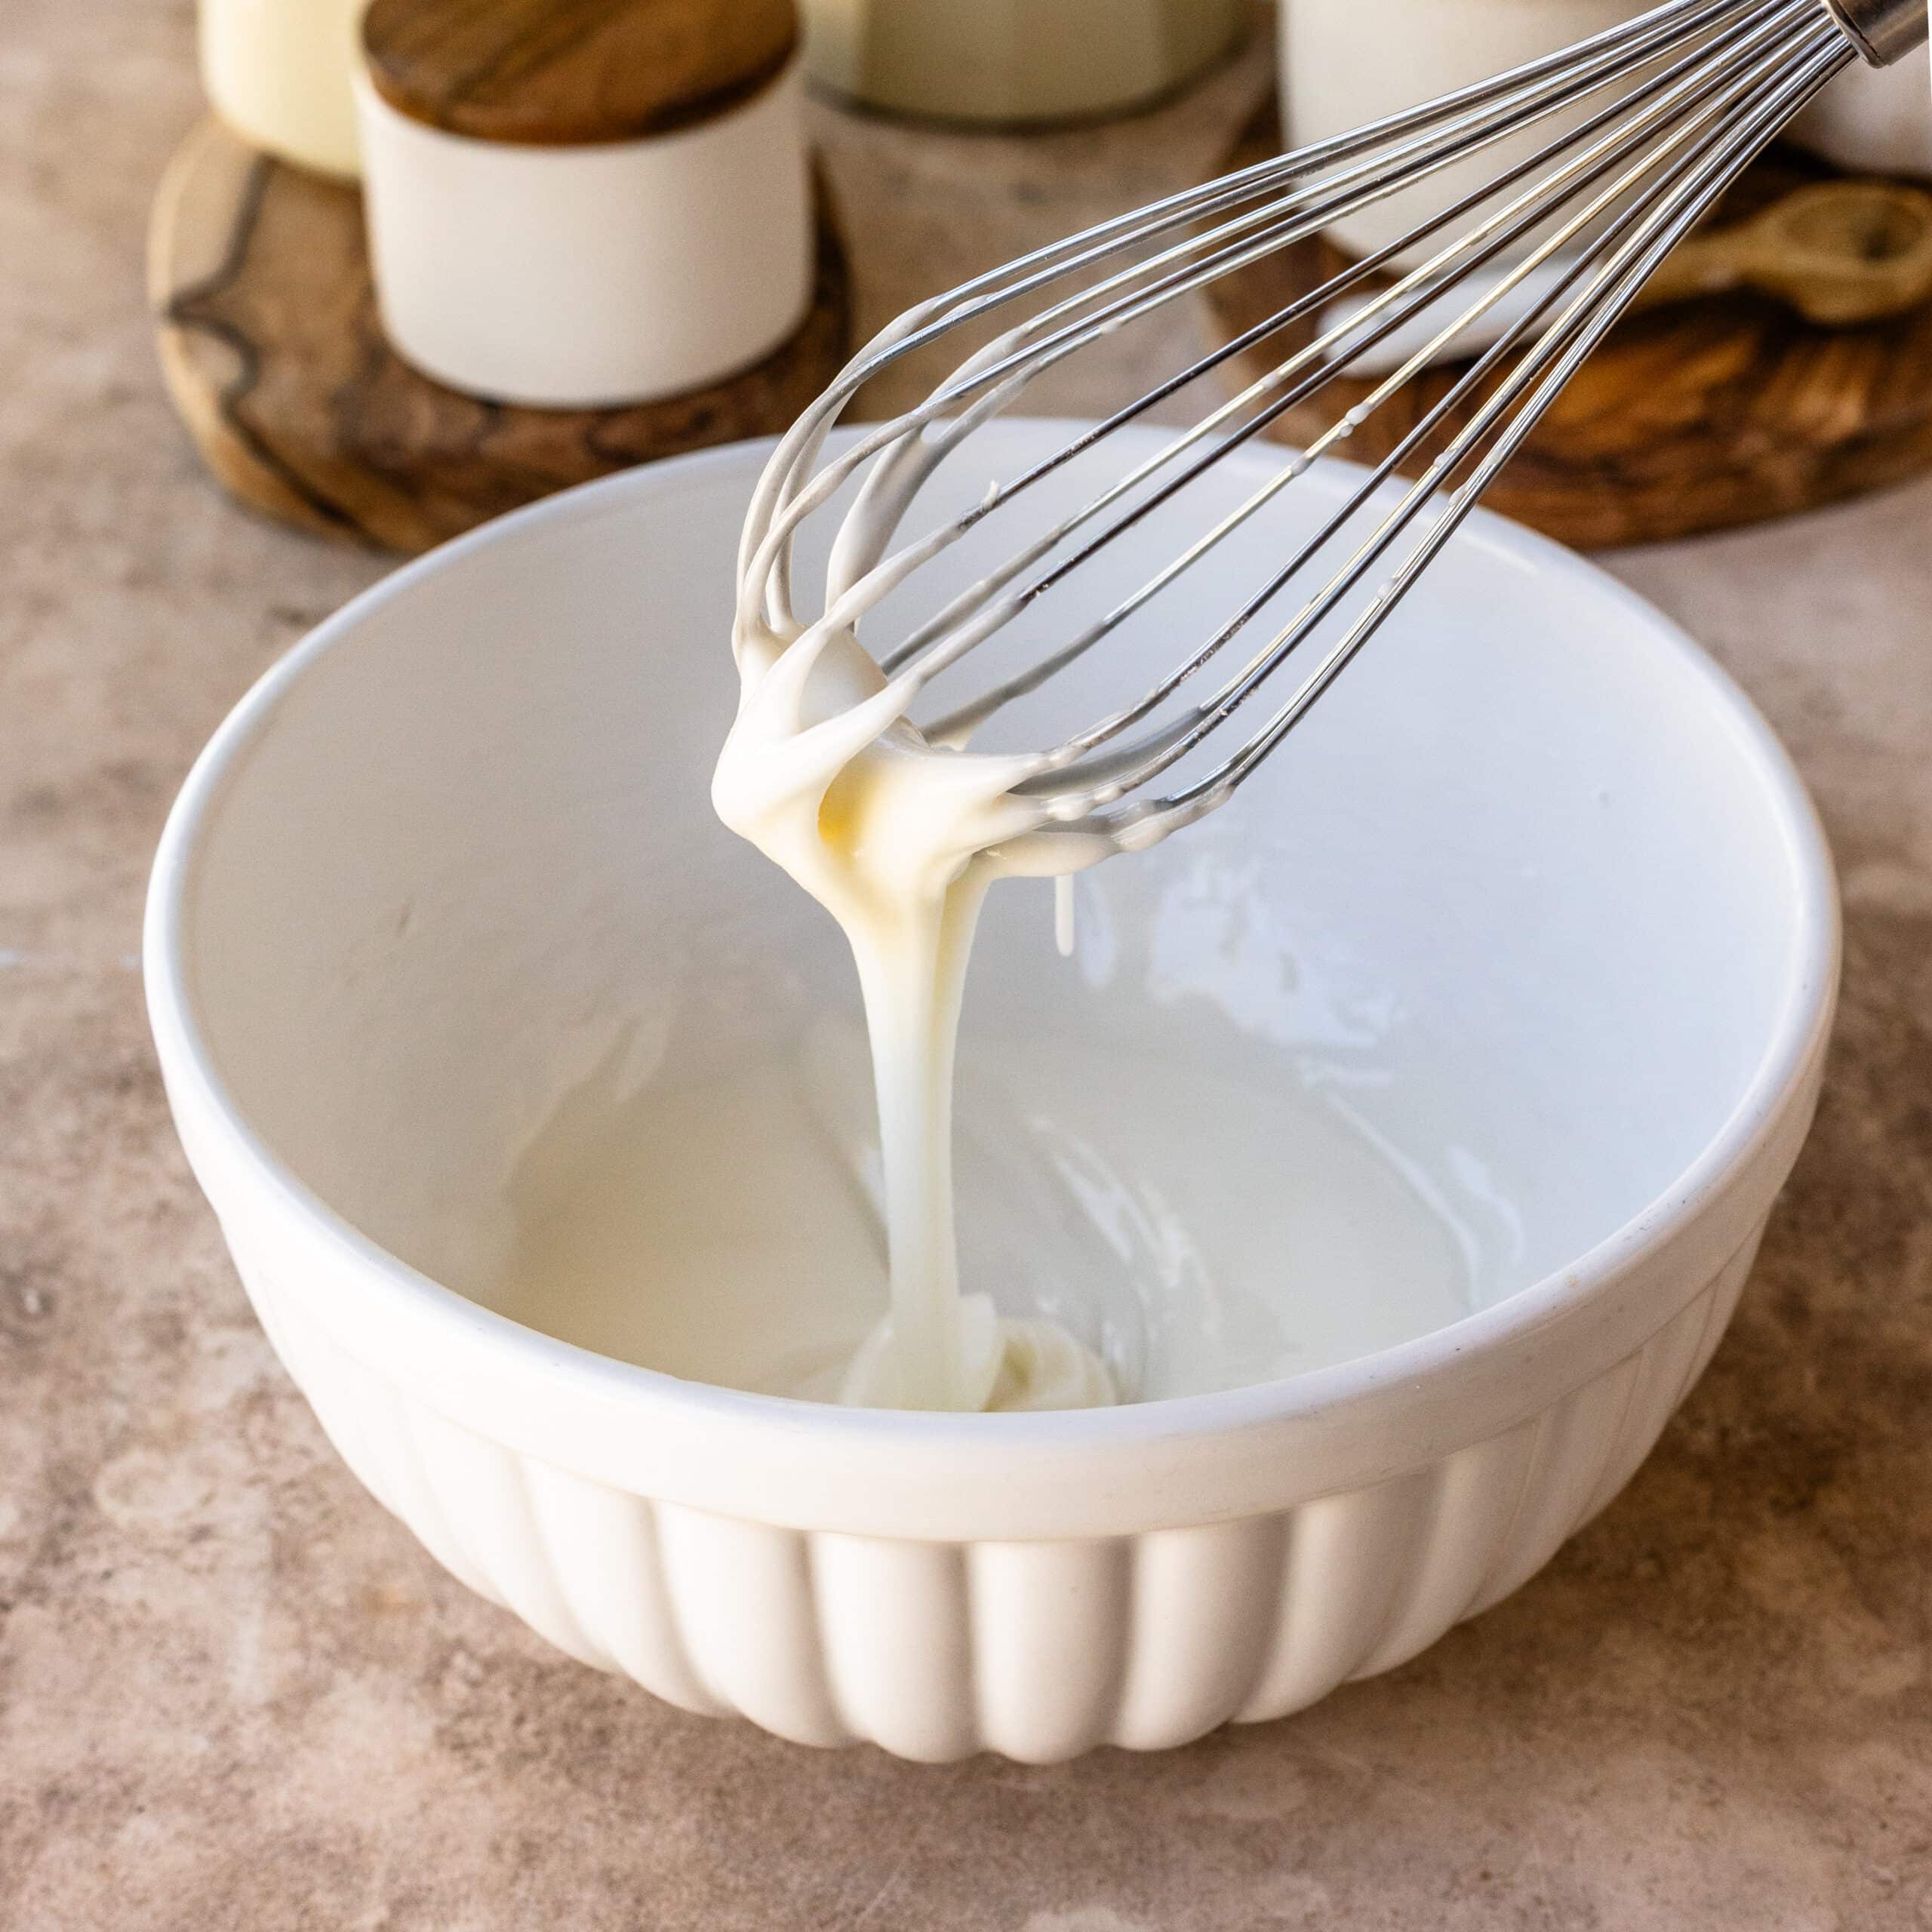
Whisk the powdered sugar with 1 tablespoon of milk until smooth. Add a little more milk as needed until the glaze is thick but pourable.
Glaze the pastries
Drizzle it over the cooled Danish right before serving.

Tips for Perfect Danish Pastry
- Keep the butter and dough at similar consistencies. If the butter is rock hard, it can crack into pieces as you roll. If it is too soft, it will smear into the dough instead of creating separate layers.
- Use the refrigerator whenever you need it. Lamination is not a race. If the dough becomes warm or difficult to handle, chilling it is usually the answer.
- Don’t aggressively stretch the dough. Let it rest for 5 to 10 minutes if it keeps pulling back while you roll.
- Don’t overfill the centers. Too much cream cheese or fruit can weigh down the middle of the Danish and make it harder for the dough underneath to bake.
- Use parchment paper instead of a silicone baking mat. I get noticeably crisper, more browned bottoms on parchment.
- Give the oven plenty of time to preheat. That initial blast of heat helps create steam between the butter and dough layers, which is what gives the pastry its lift.
- Don’t judge doneness by the top alone. Check the bottoms too. They should be golden and crisp.

Danish Filling Ideas
Once you have the dough and cream cheese base, you can make quite a few variations without changing the method.
Berry Danish: Spoon a little raspberry, strawberry, or blueberry jam over the cream cheese, or use a few pieces of fresh berries instead. You can also use my Strawberry Sauce for a softer, fruitier filling.
Apricot Danish: Spoon apricot preserves into the center. This is especially good if you prefer a filling that is slightly more tart.
Curd Danish: Citrus and tropical curds work beautifully here too. Try adding a small spoonful of my Lemon Curd, Mango Curd, or Passionfruit Curd over the cream cheese before baking. The curd adds a brighter, tangier contrast to the buttery pastry and creamy filling.
You can also leave the fruit off entirely and make a simple cream cheese Danish. Stay tuned for an Apple Danish recipe I’ll be sharing very soon!

Yes. My favorite way to break up the work is to make and laminate the dough one day, then leave it wrapped in the refrigerator overnight. The next day, make the filling, roll and shape the pastries, proof them, and bake. You can also prepare the cream cheese filling ahead and keep it refrigerated in an airtight container.
Because these Danish contain cream cheese filling, I store leftovers in the refrigerator in an airtight container.
For the best texture, let them come closer to room temperature before serving, or warm them briefly in the oven. Refrigeration naturally softens laminated pastry, so they will always be at their crispiest the day they are baked. You can even microwave them for a few seconds, they might not be as crispy as if you toasted or briefly warmed them in the oven, but will still be fluffy and delicious!
You can freeze the baked pastries. Let them cool completely first, then freeze them in an airtight container or freezer bag. Thaw them in the refrigerator or at room temperature, then warm them briefly in the oven to crisp the pastry again.
You can also freeze the dough. Keep it well wrapped in the freezer for up to 2 months. Thaw in the fridge overnight.
Yes. European-style butter is my preference because its higher fat and lower water content makes lamination easier, but regular unsalted butter can still produce a good Danish.
Pay especially close attention to temperature. If the butter starts becoming greasy or very soft while you’re working, refrigerate the dough before continuing.
Danish dough, puff pastry, and croissant dough are all laminated, which means layers of butter are folded into the dough to create that flaky texture, but they’re not quite the same. Puff pastry doesn’t contain yeast, so it gets its lift almost entirely from steam between the butter and dough layers. You can find my homemade puff pastry recipe here.
Croissant dough is yeasted and laminated like Danish dough, but it’s usually a little less sweet and is designed for that light, airy, honeycomb-style interior. Danish dough is also yeasted, but it’s typically richer and slightly sweeter, which makes it especially well suited for pastries filled with cream cheese, fruit, jam, or curd.
Why is my Danish deflated
If the pastries come out dense and flat instead of flaky, baking them longer usually won’t solve the problem. The most common issues happen earlier in the process:
- the butter may have become too warm and blended into the dough
- the butter may have cracked during lamination
- the dough may have been rolled too thin
- the shaped pastries may have been under-proofed before baking.
The goal throughout the process is to keep distinct layers of dough and butter intact and give the pastries enough time to proof before they hit the hot oven.
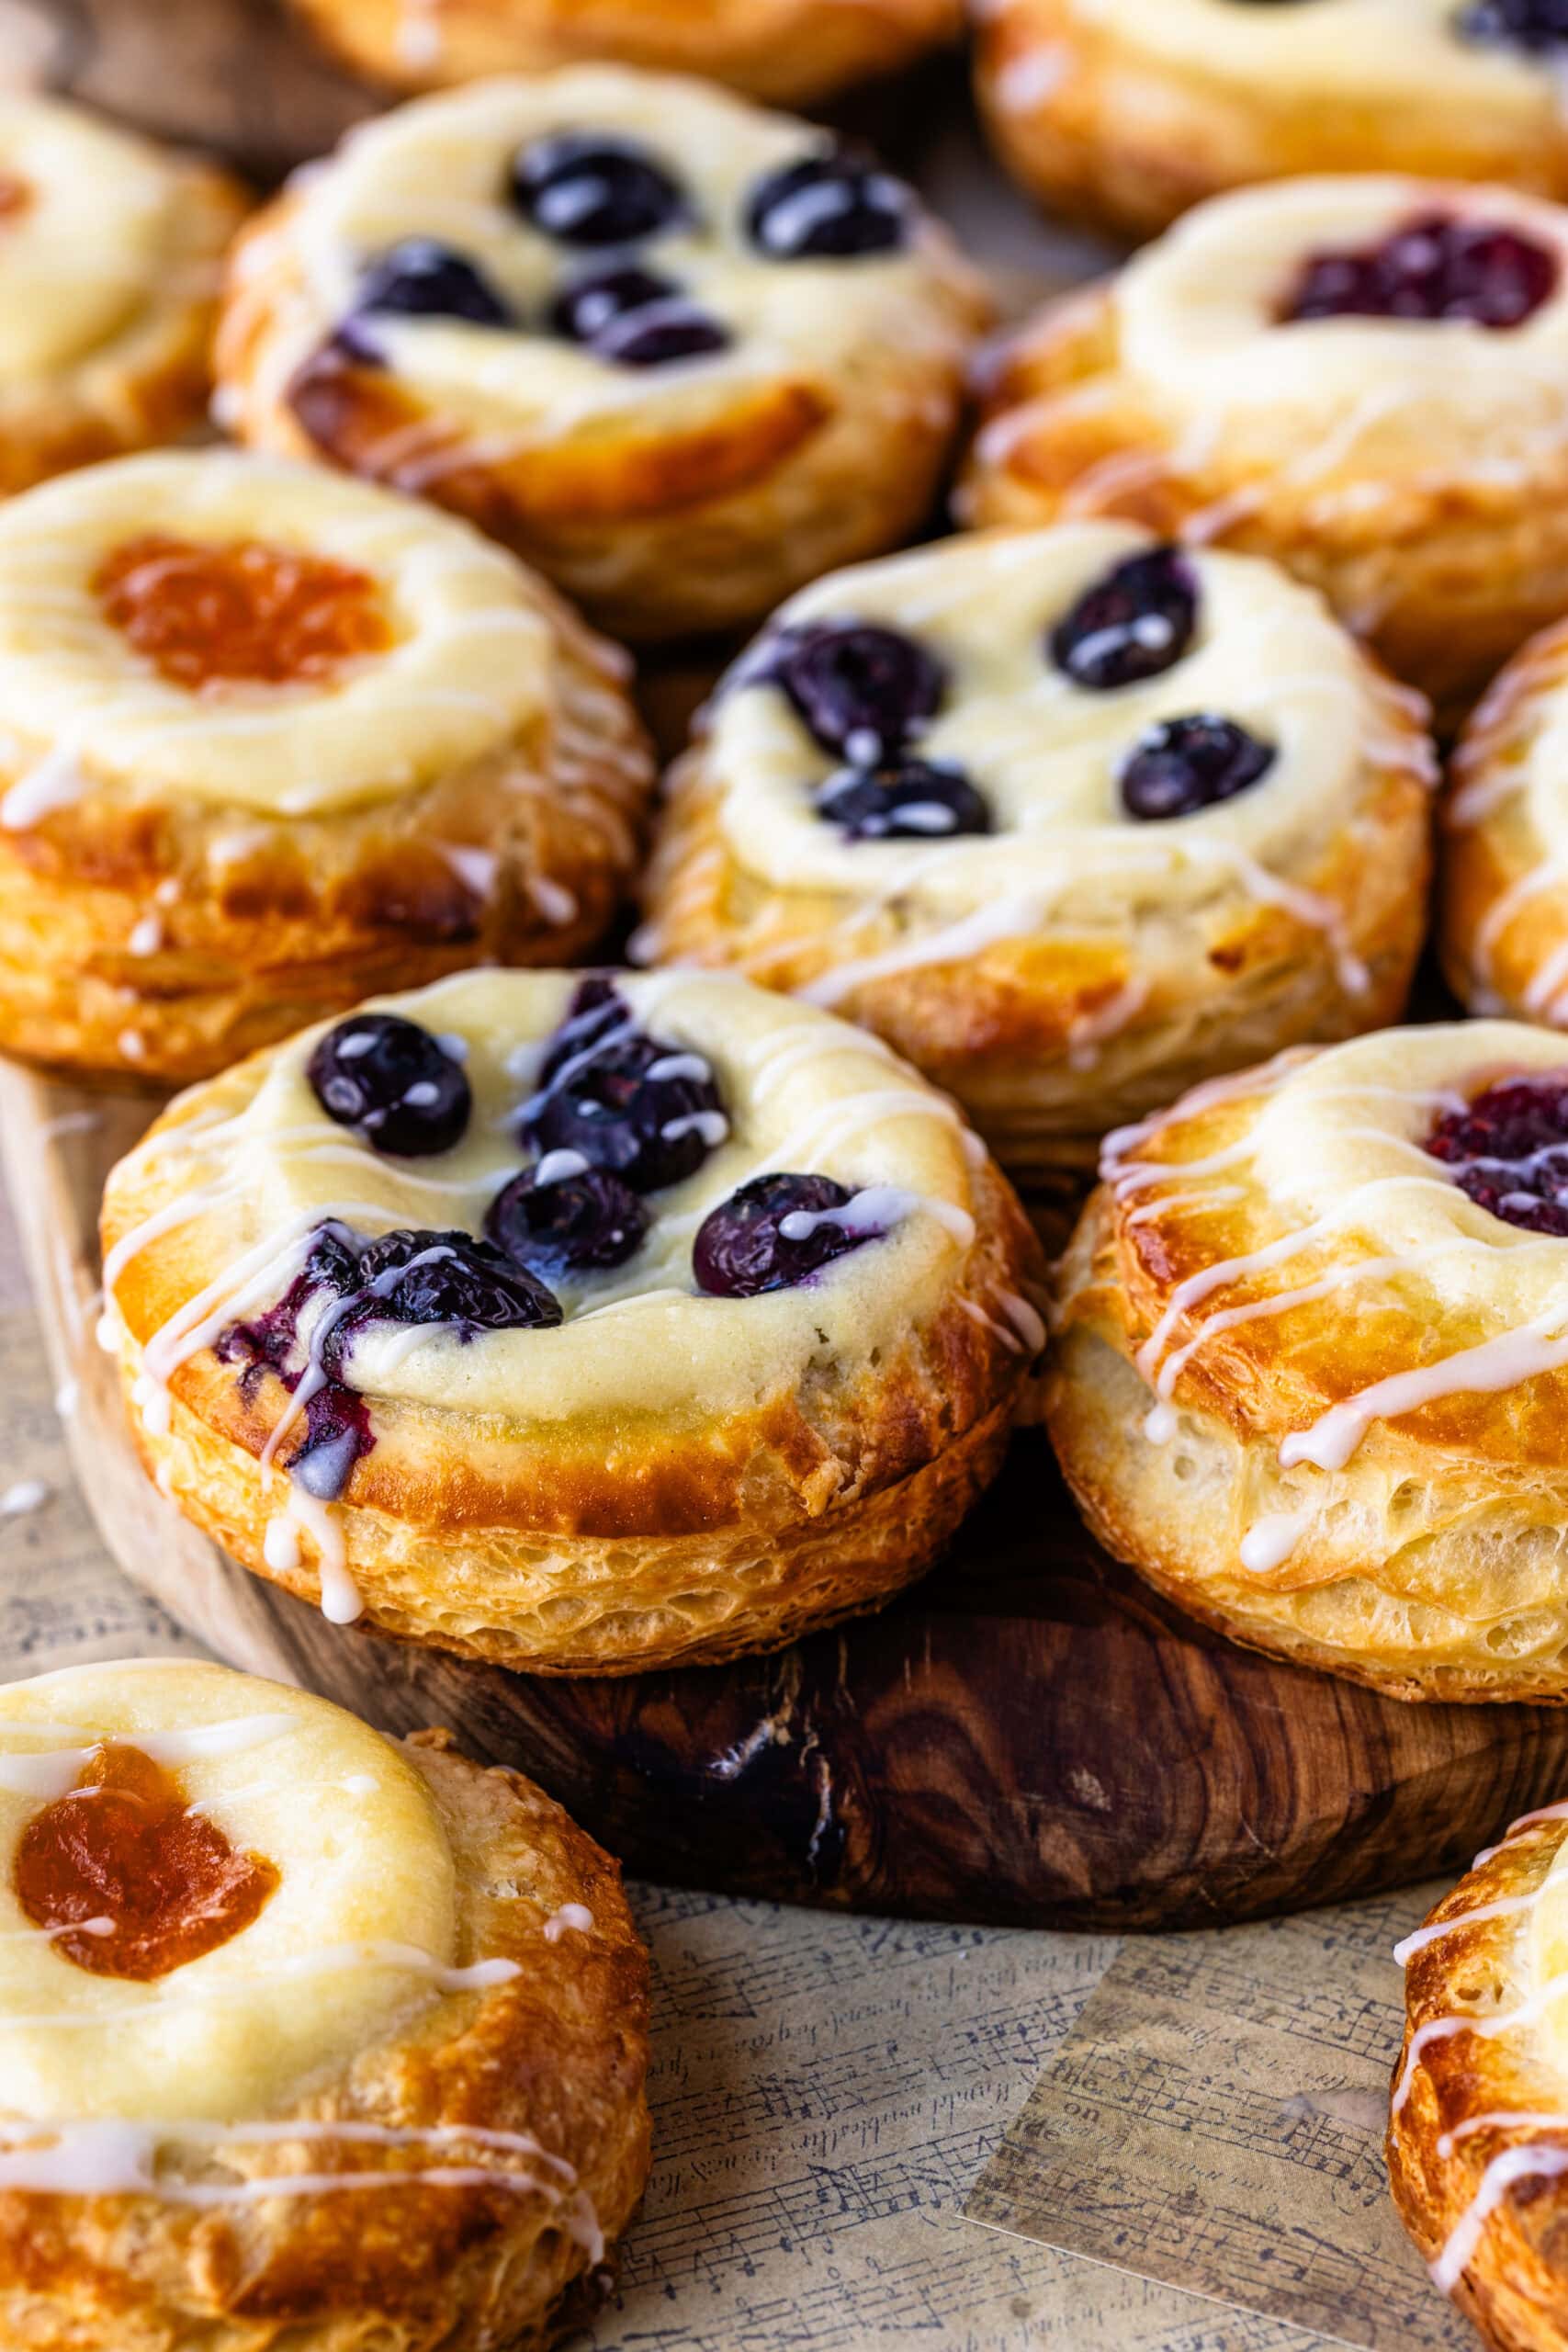
I hope you love making these Danish pastries! If you try the recipe, leave a comment below and let me know how they turned out, especially which filling or shape you used. And if you share them on social media, make sure to tag me so I can see your pastries!

Danish Pastry Dough

Ingredients
Danish Dough
- 3¾ cups all-purpose flour 450 g
- ¼ cup granulated sugar 50 g
- 2¼ tsp instant yeast 7 g
- 1½ tsp fine sea salt
- ¾ cup whole milk cold (180 ml)
- 1 large egg
- 1 tsp vanilla extract
- 4 tbsp unsalted butter very soft (56 g)
For Laminating
- 1 cup unsalted European-style butter cold but pliable (226 g) (read notes)
Cream Cheese Filling
- 8 oz full-fat brick cream cheese softened (226 g)
- ⅓ cup granulated sugar 67 g
- 1 tbsp all-purpose flour 8 g
- 1 large egg yolk
- 1 tsp vanilla extract
- Pinch of salt
Egg Wash
- 1 large egg
- 1 tbsp whole milk 15 ml
Glaze
- 1 cup powdered sugar 120 g
- 1 to 2 tbsp milk 15 to 30 ml
Instructions
Make the Danish Dough
- Whisk the flour, sugar, yeast, and salt together in a large bowl.
- Add the cold milk, egg, vanilla extract, and softened butter. Mix until a shaggy dough forms.
- Knead the dough for 4 to 5 minutes, until smooth. Avoid over-kneading; the dough does not need the extended kneading time you would use for a traditional bread dough.
- Shape the dough into a rectangle, wrap tightly, and refrigerate for at least 1 hour, or until thoroughly chilled.
Make the Butter Block
- Place the butter between two sheets of parchment paper.
- Pound and roll the butter into approximately a 6 × 8-inch rectangle.
- The butter should be cold but pliable. When you gently bend the parchment, the butter should bend with it rather than cracking or snapping.
- Refrigerate briefly if the butter becomes too soft.
Laminate the Dough
- Roll the chilled dough into approximately an 8 × 16-inch rectangle.
- Place the butter block over the bottom half of the dough. Fold the top half of the dough over the butter and gently seal the edges to enclose it.
- Rotate the dough 90 degrees.
- Carefully roll it into approximately an 8 × 18-inch rectangle.
- Fold the dough into thirds like a business letter. Wrap and refrigerate for 30 minutes.
- Repeat the rolling and letter-fold process two more times, refrigerating the dough for 30 minutes between each fold, for a total of three letter folds.
- After the final fold, wrap the dough and refrigerate for at least 1 hour. For best results, refrigerate overnight.
Make the Cream Cheese Filling
- Beat the cream cheese and sugar together just until smooth.
- Add the flour and mix until incorporated.
- Add the egg yolk, vanilla extract, and salt and mix just until combined.
- Refrigerate the filling while you roll and shape the dough.
Roll and Shape the Danish
- Line baking sheets with parchment paper.
- Roll the chilled Danish dough on a lightly floured surface to approximately ⅓ inch thick, or slightly thinner. If the pastries are too thin, they will be deflated, but if they are too thick, they won’t bake fully internally.
- As you roll, periodically lift the dough from the work surface to make sure it is not sticking or becoming overly stretched. If the dough begins shrinking back significantly, cover it and let it rest for 5 to 10 minutes before continuing.
- Using a 4-inch round cutter, cut rounds from the dough.
- Gather the scraps gently, allow them to rest for a few minutes, then reroll and cut additional rounds. At this point, the dough can be hard to roll, and it will continue to spring back. Give it small intervals in between rolling to ensure it’s not going to shrink once you cut the rounds.
- Arrange the rounds on the prepared baking sheets.
- Using a 2-inch round cutter, gently press an indentation into the center of each round without cutting all the way through the dough.
- Place about 1½ tablespoons of cream cheese filling inside each indentation. I like to use a piping bag to do this. You can use a spoon.
- Top the filling with fresh berries or 1 to 2 teaspoons of raspberry, strawberry, or apricot jam.
Proof the Danish
- Cover the shaped pastries loosely and let them rise at room temperature for 60 to 90 minutes, or until visibly puffy.
- The Danish will not necessarily double in size, but the dough should look noticeably swollen and the laminated layers should become more apparent. The surface of a danish should feel fluffy and spring back when touched.
- Avoid proofing the pastries in a very warm environment. A room temperature of about 72 to 75°F is ideal.
Bake
- Toward the end of the proofing time, preheat the oven to 400°F (205°C) for at least 30 minutes.
- Whisk the egg and milk together to make the egg wash.
- Brush the exposed dough lightly with the egg wash, avoiding the cut edges as much as possible.
- Bake the Danish at 400°F (205°C) for 8 minutes.
- Without opening the oven unnecessarily, reduce the oven temperature to 375°F (190°C) and continue baking for another 10 to 14 minutes, or until the pastries are deeply golden brown.
- The bottoms should also be golden and crisp.
- Transfer the pastries to a cooling rack and let cool for at least 15 minutes before serving.
Glaze
- Whisk the powdered sugar with 1 tablespoon of milk until smooth. Add more milk, a little at a time, until the glaze reaches a thick but pourable consistency.
- Drizzle over the Danish once they have cooled for at least 15 minutes.
