

Chocolate Macarons
Chocolate macarons are famous for being trickier than regular shells — the cocoa powder adds fat, the batter behaves differently, and even small changes can lead to cracking, wrinkling, or shells with no feet. After teaching macarons for years through my macaron course and developing over 150 macaron recipes here on the blog, I’ve learned exactly what makes chocolate shells succeed or fail.
In this guide, I’ll show you how to make perfect chocolate macarons using the Swiss method, with a step-by-step video, the best cocoa powders to use, and clear troubleshooting for every common issue. If your chocolate shells keep failing or you’ve never been able to get them quite right, this post will walk you through the science behind the recipe and everything you need to know to finally master them.

Why you will love this recipe
There are many chocolate macaron recipes out there, but this one stands out for a few key reasons:
This post may contain affiliate links. I earn a commission from qualified purchases. Please read our Privacy policy here.
- It uses the Swiss meringue method — the perfect balance of stability and simplicity.
Swiss meringue is far more stable than the French method and much less complicated than the Italian method, making it ideal for chocolate shells. Since cocoa powder adds weight and fat, a strong and reliable meringue is essential for preventing cracked, wrinkled, or hollow shells.
The Swiss method gives you consistent results, even if you’ve struggled with macarons before. - It includes two decadent filling options: A rich chocolate buttercream — smooth, dark, and ready in minutes. Or a chocolate ganache — perfect for those who prefer a less sweet, more balanced filling. Both fillings pair beautifully with chocolate shells and give you flexibility depending on the occasion.
- The post is packed with macaron knowledge and troubleshooting tips. This isn’t just a recipe, it’s a full guide. Whether you’re brand new to macarons or looking to perfect chocolate shells specifically, this recipe gives you the technique, science, and confidence to succeed.
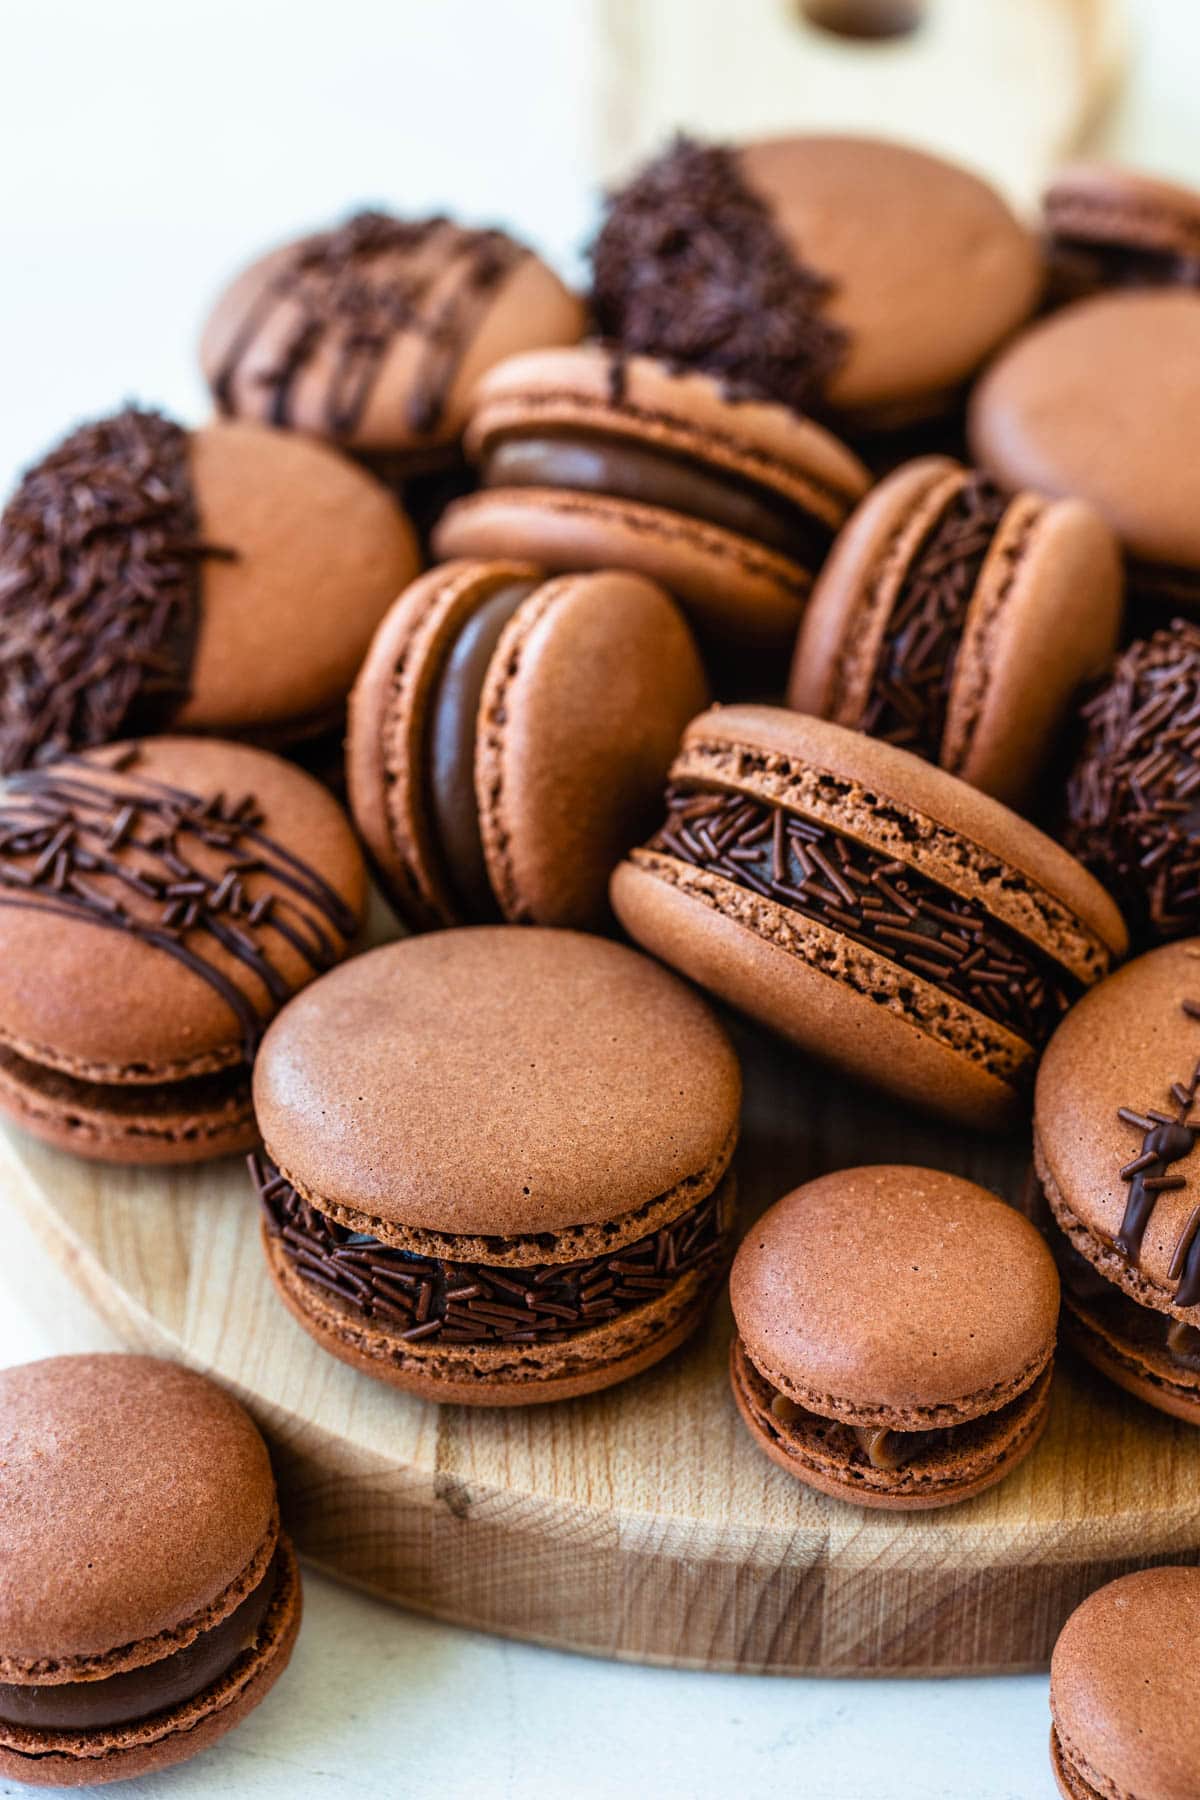
Quick Success Tips
Before we dive in, here are the key things to know:
- Choose a low-fat cocoa powder (around 0.5 g fat per tablespoon).
- Make sure your almond flour is fresh and not oily. If it’s clumping up too much, it’s time to get a new bag, or switch brands of flour.
- Macaronage usually takes less time for chocolate batter than for classic shells.
- The Swiss method produces a stronger, more stable meringue for chocolate shells.
- If your shells consistently wrinkle or crack, try reducing the cocoa powder slightly, or rest them longer. The issue could also be due to not having a strong enough meringue. Always make sure to whip the meringue to the perfect stiff consistency.
These quick cues alone solve most chocolate macaron issues.

How to make Chocolate Macarons
This recipe uses the Swiss meringue method, which creates a stronger, more stable base for chocolate shells. Follow the steps carefully and focus on visual cues rather than rushing through the process.
1. Prepare Your Tools and Ingredients
- Line two baking sheets with silicone mats or parchment paper.
- Fit a large piping bag with a round tip (Wilton 12 or a ¼-inch round tip).
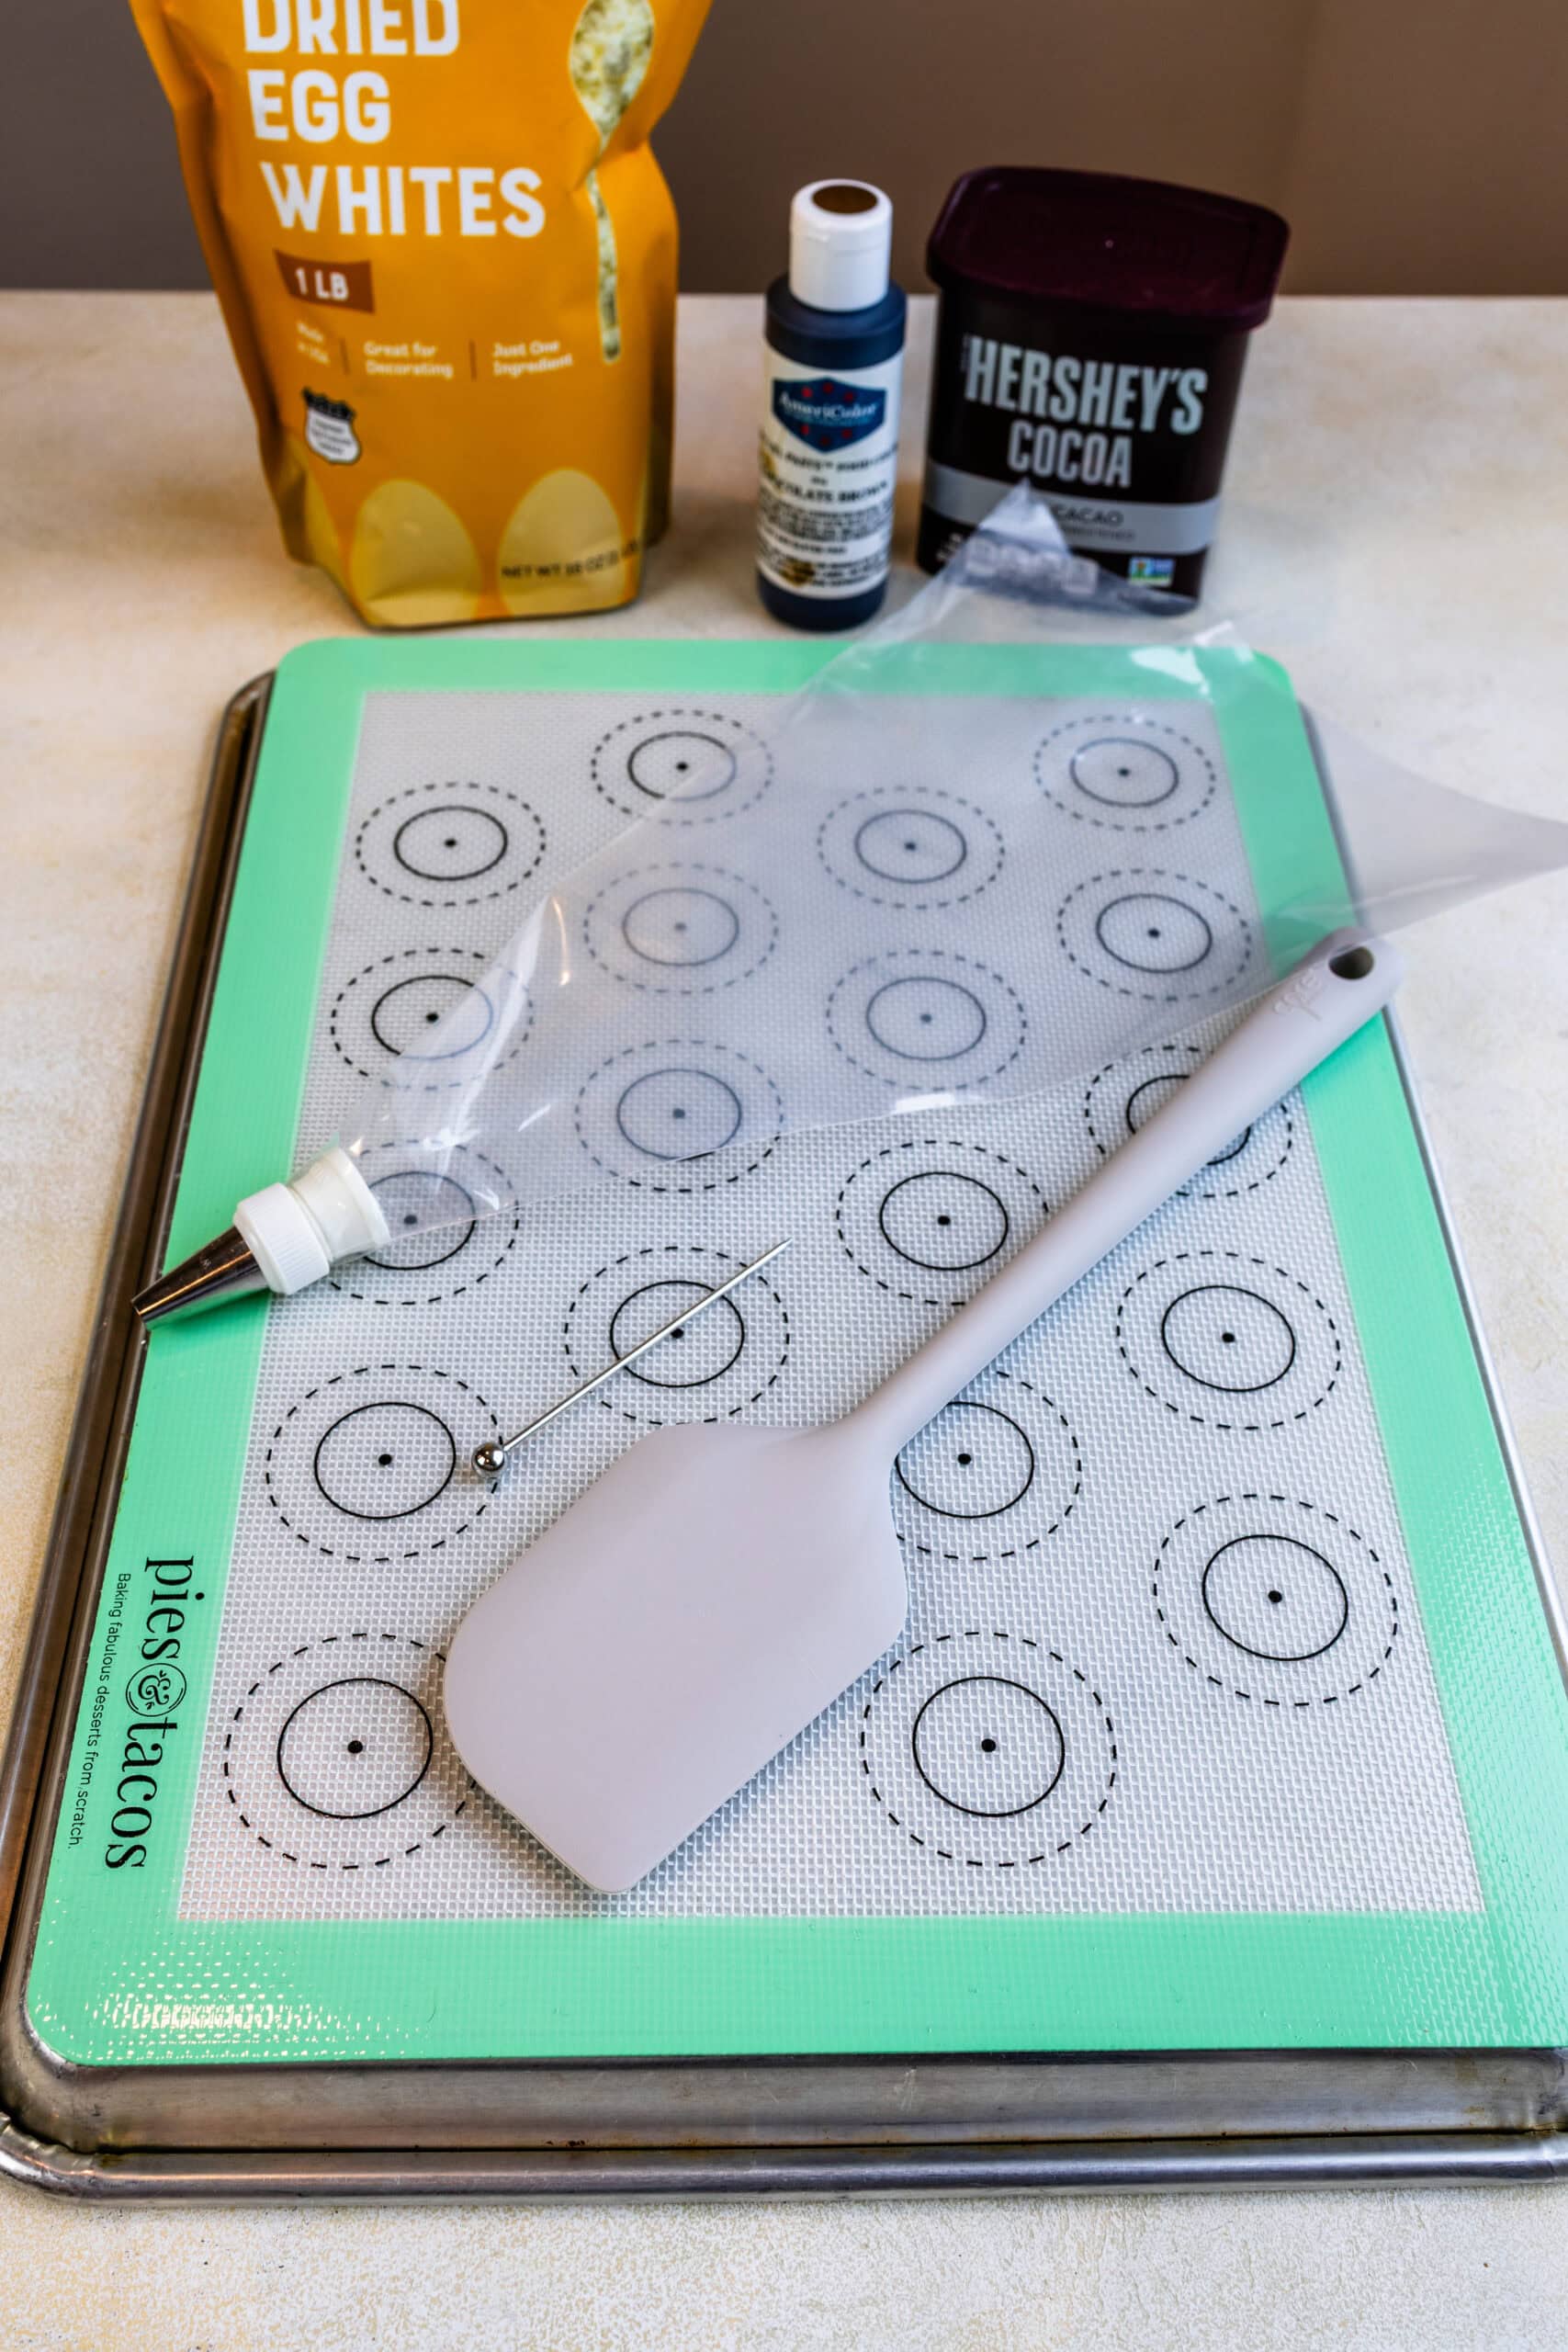
Gather all the tools and ingredients you will need for the recipe.
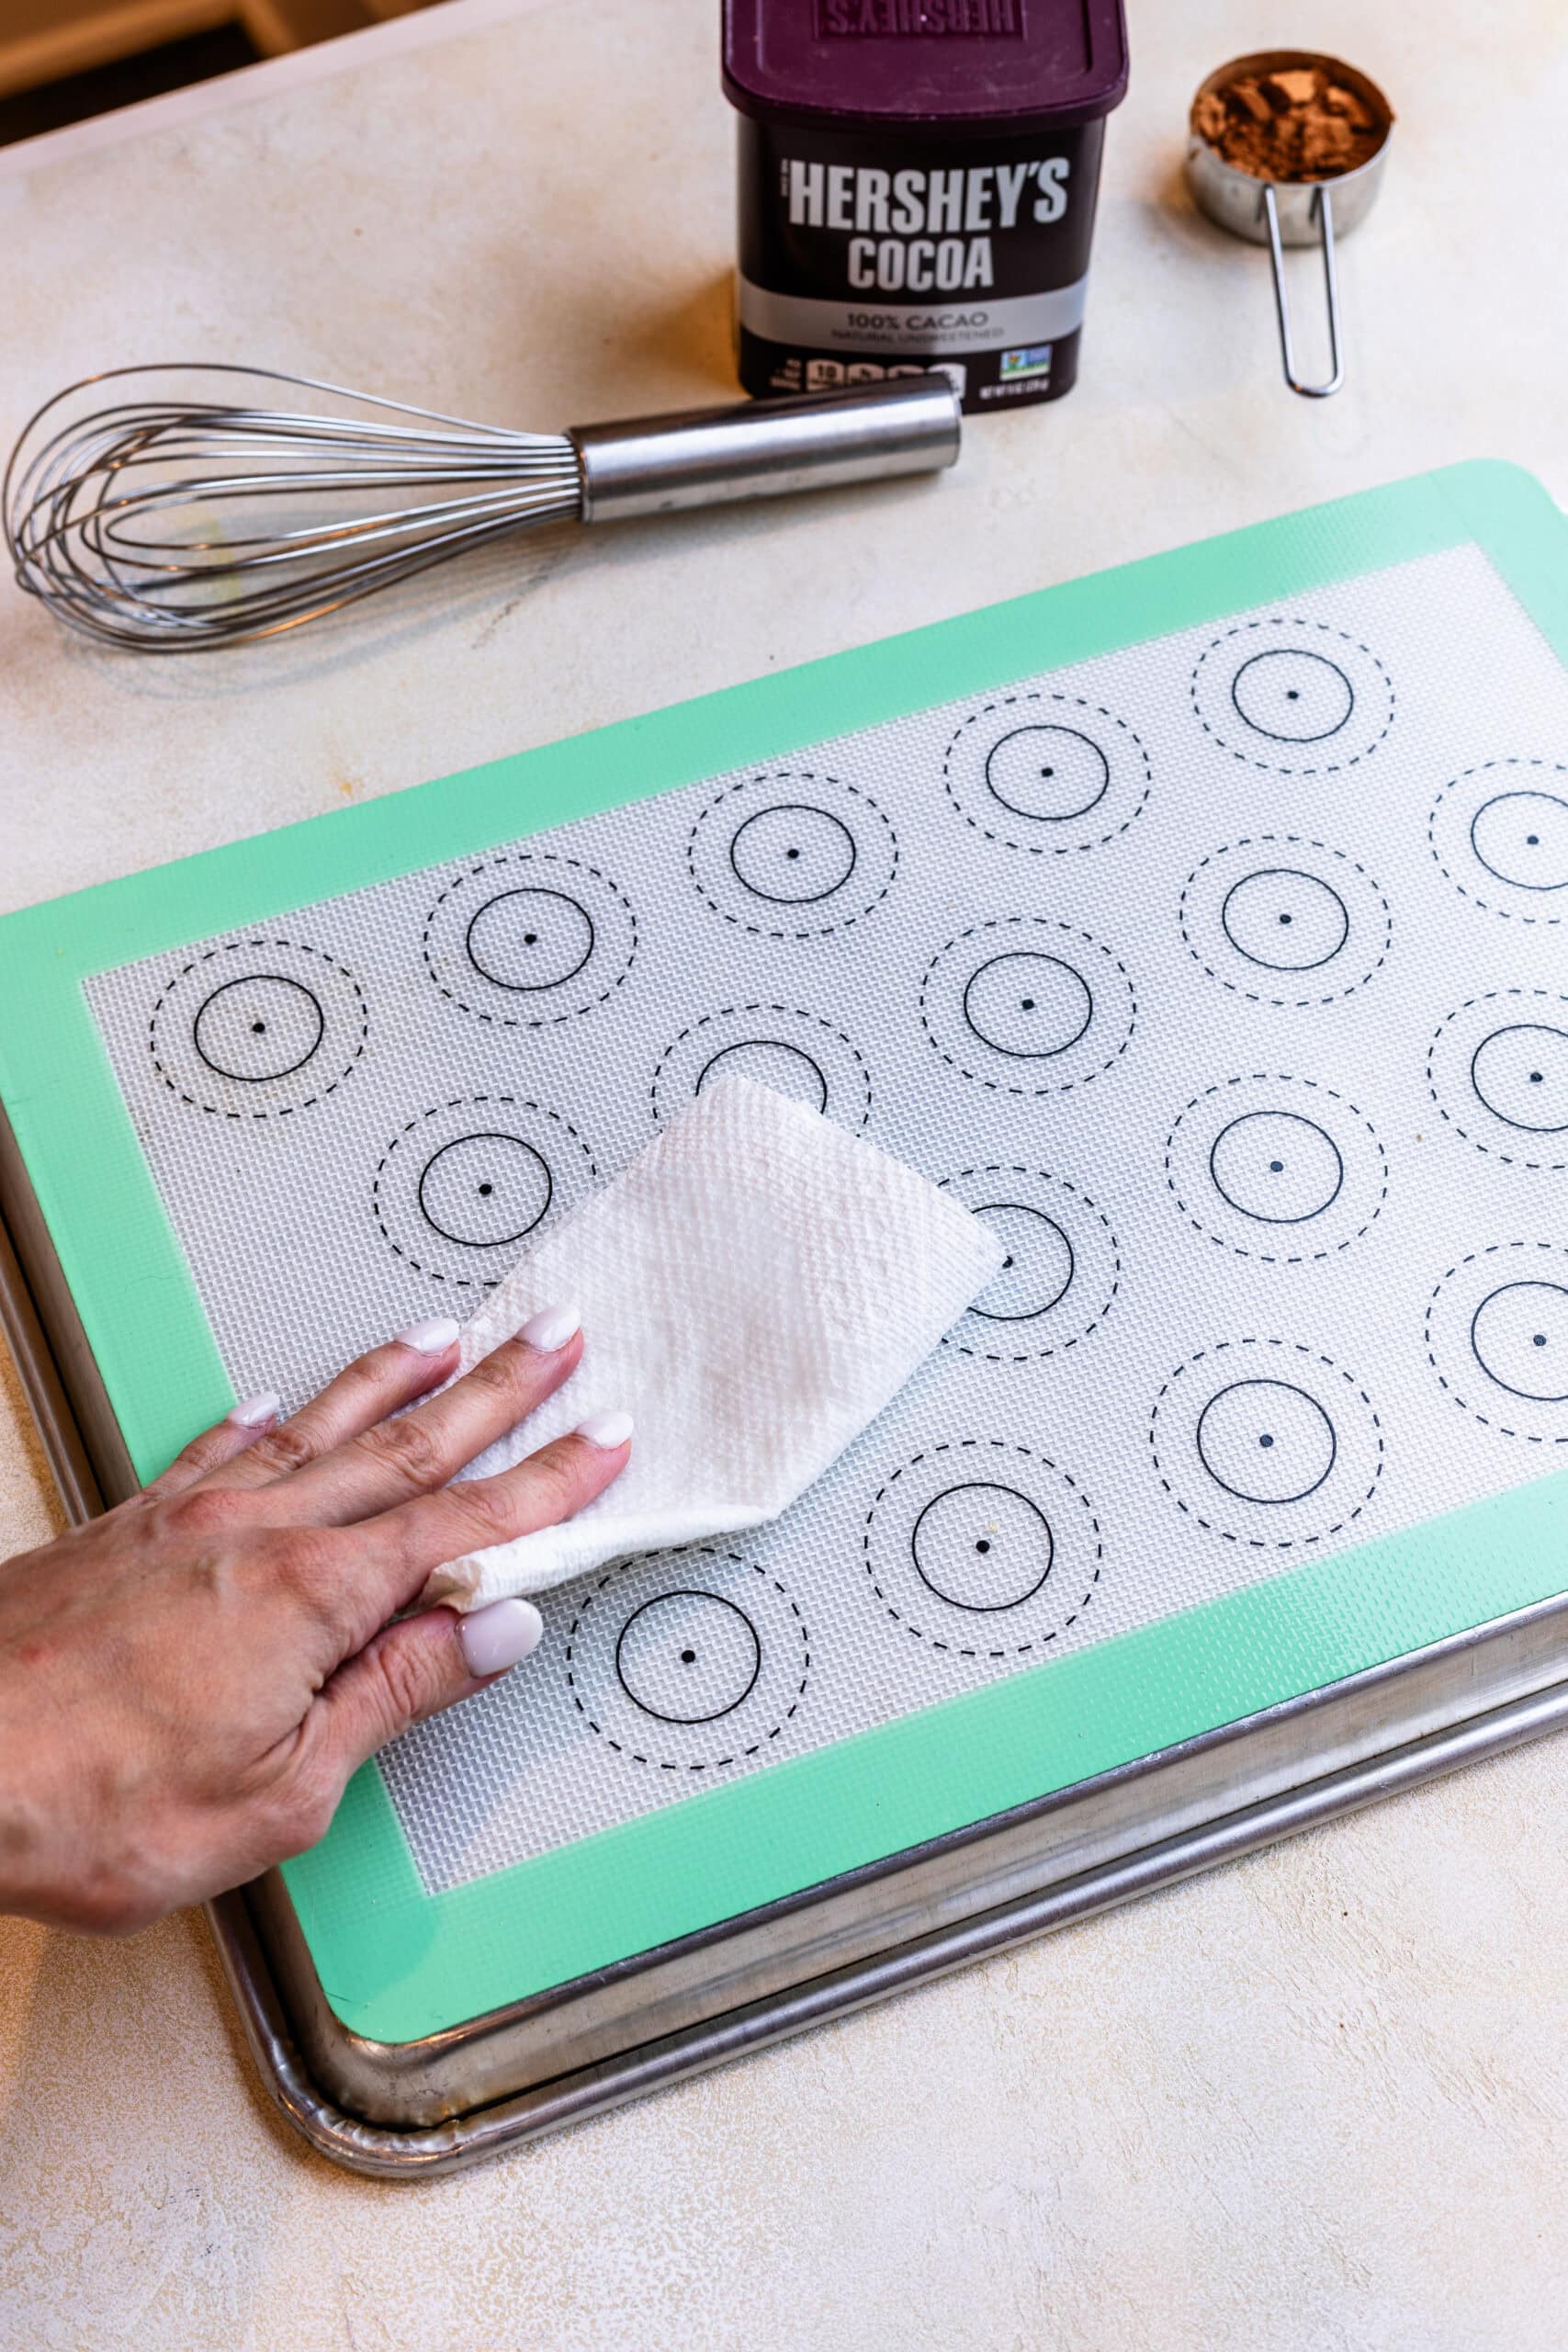
Wipe bowls, spatulas, and mats with vinegar to remove any grease.
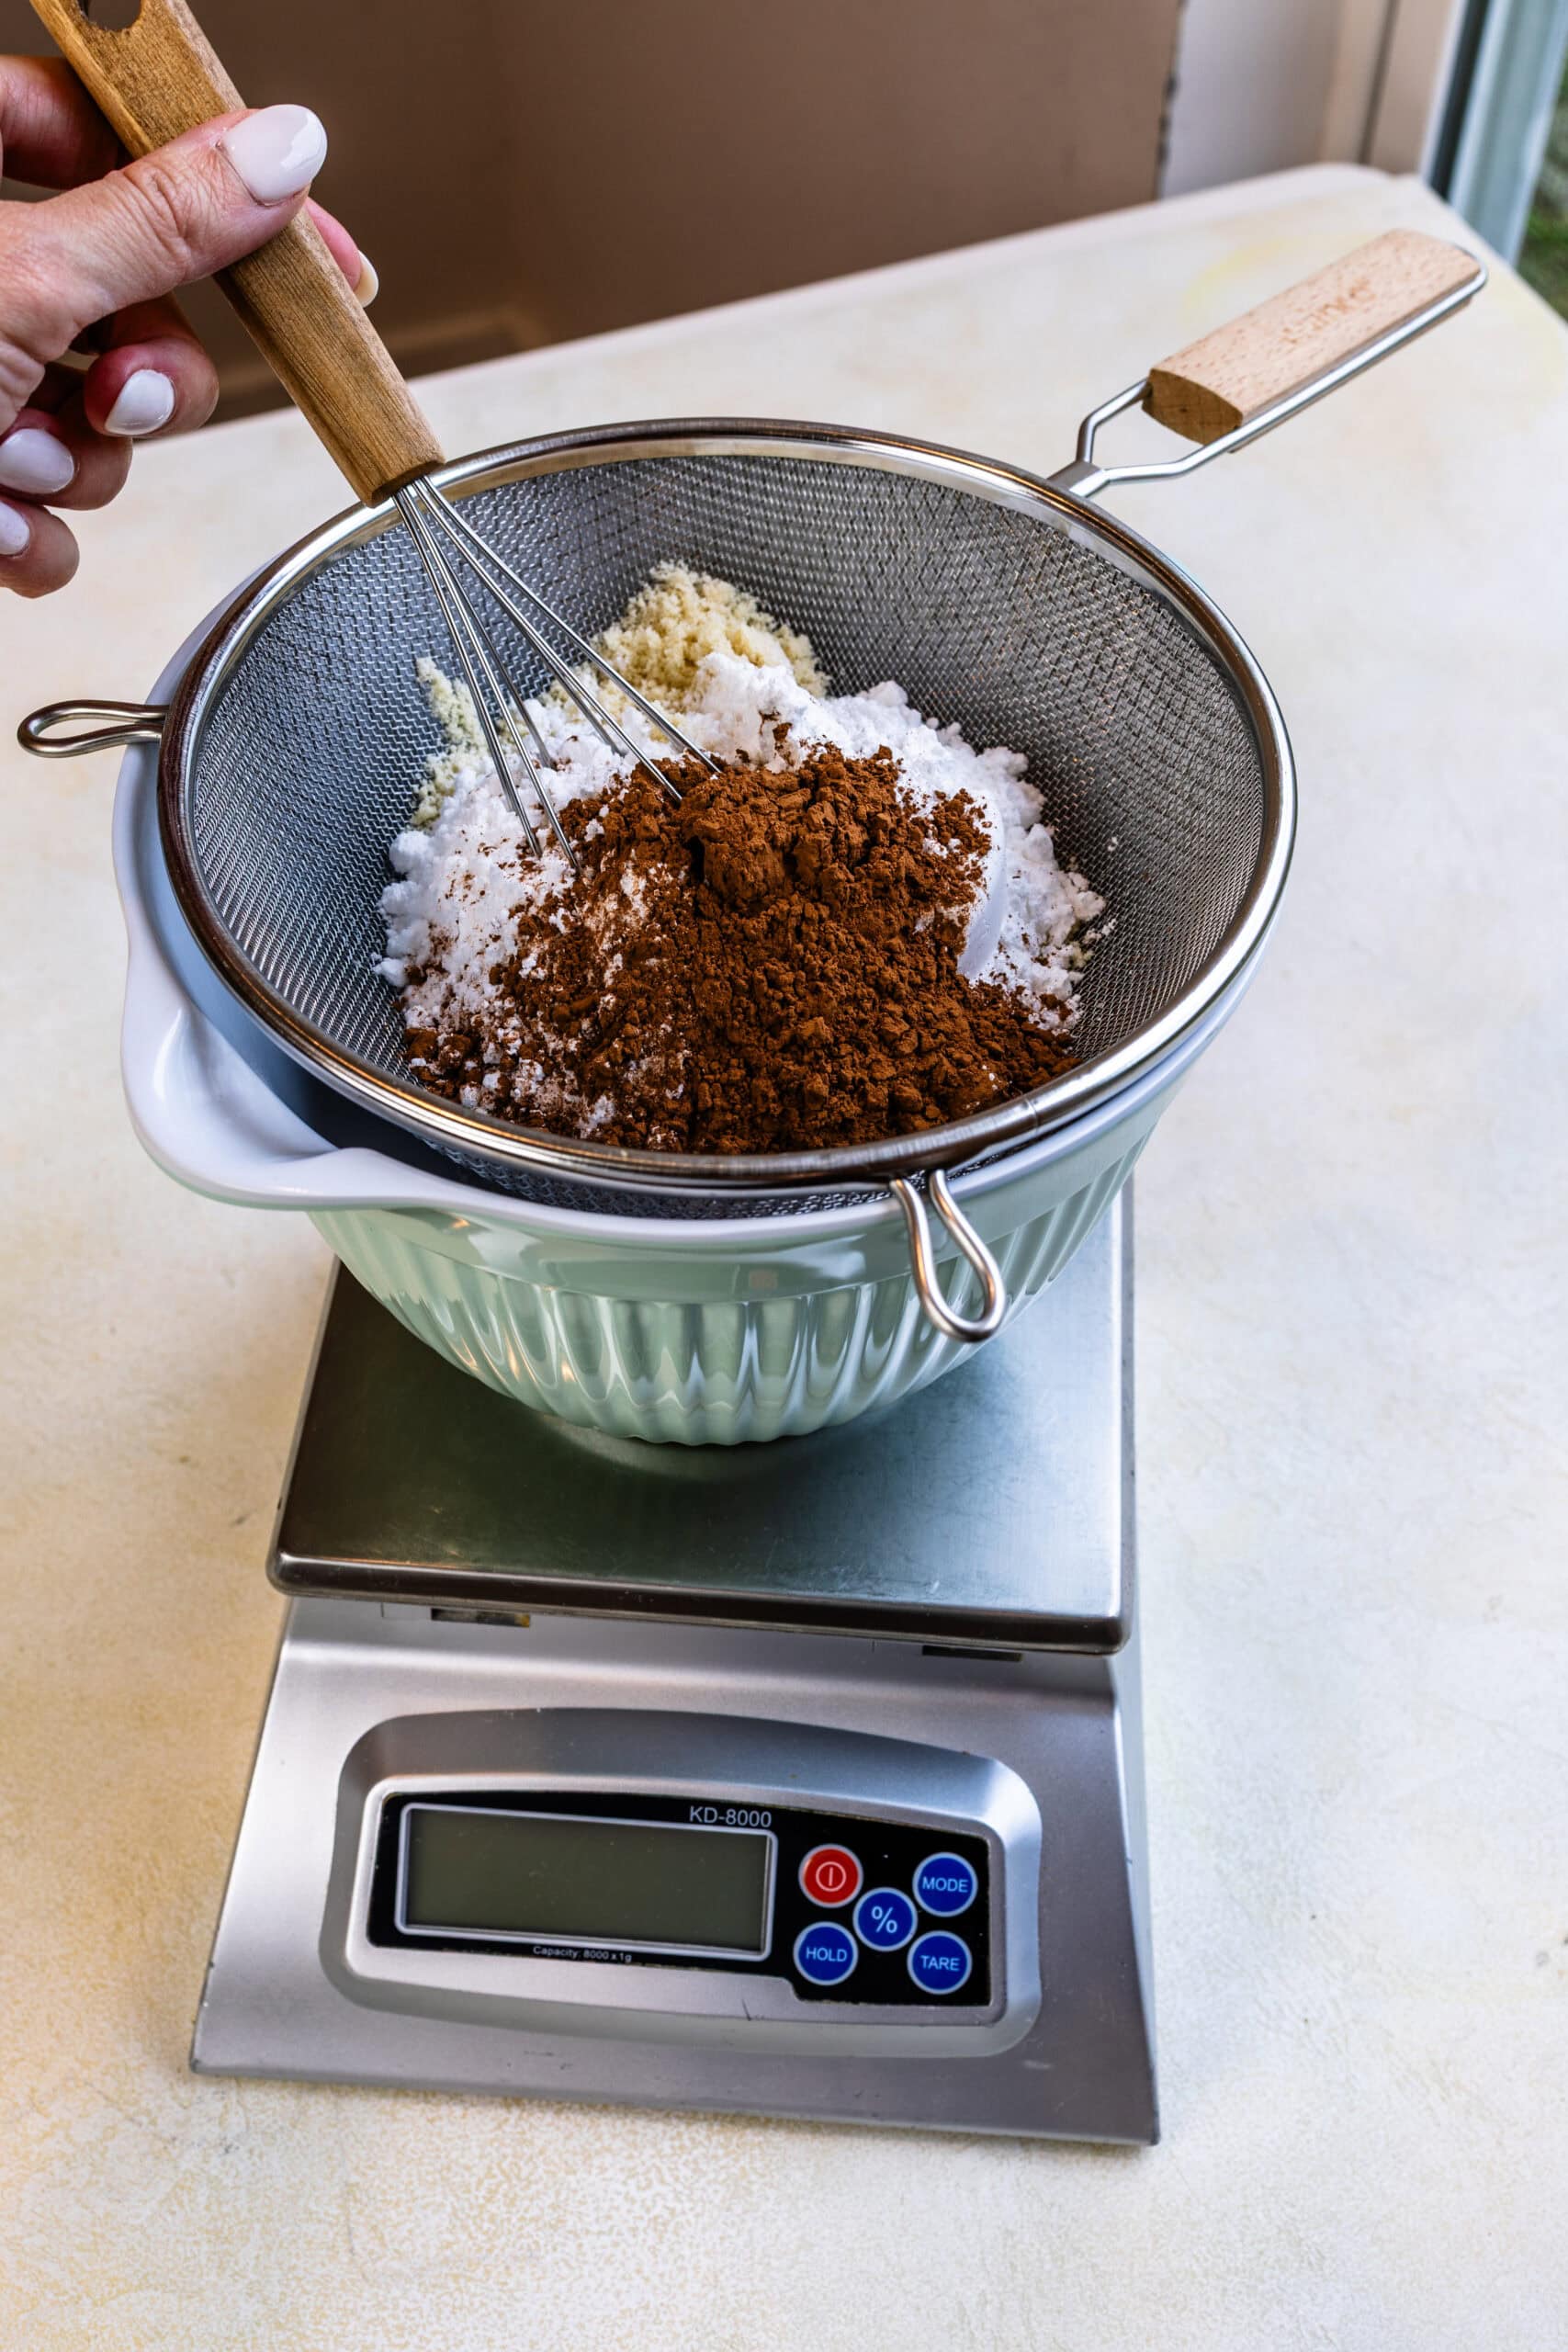
Sift the almond flour, powdered sugar, and cocoa powder together. Set aside.
2. Make the Meringue
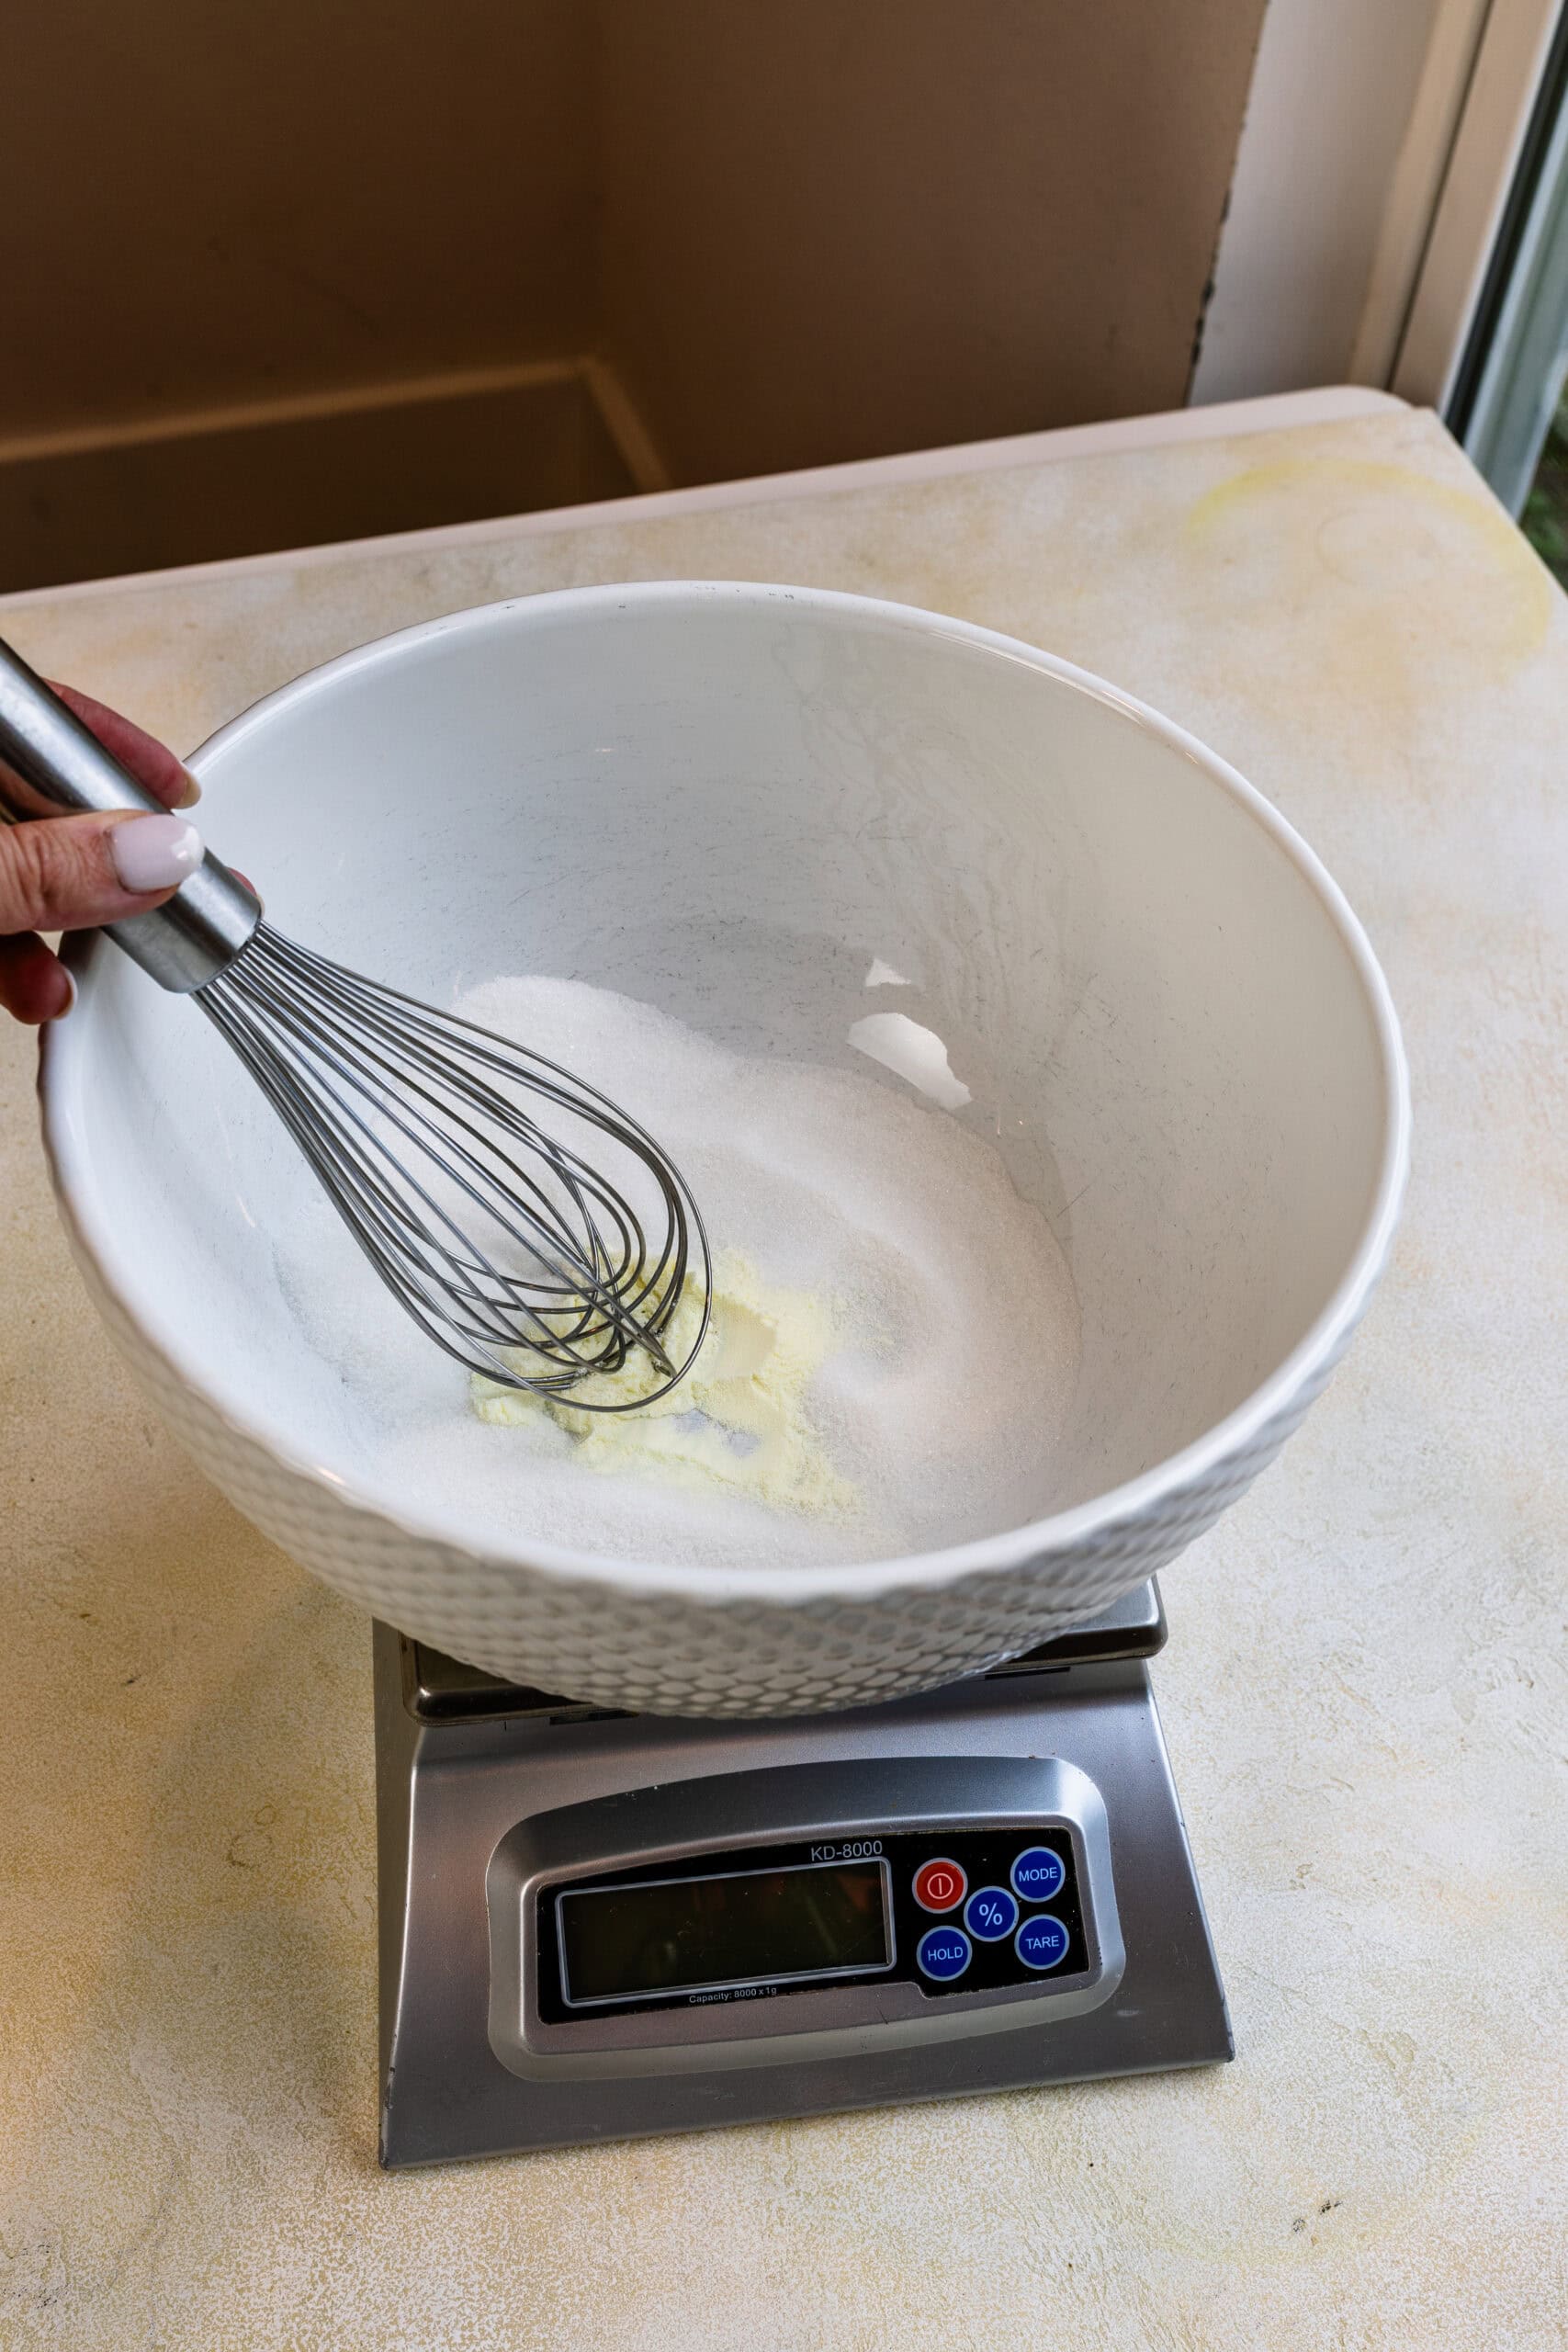
Whisk the sugar and egg white powder (if using) in a heatproof bowl.
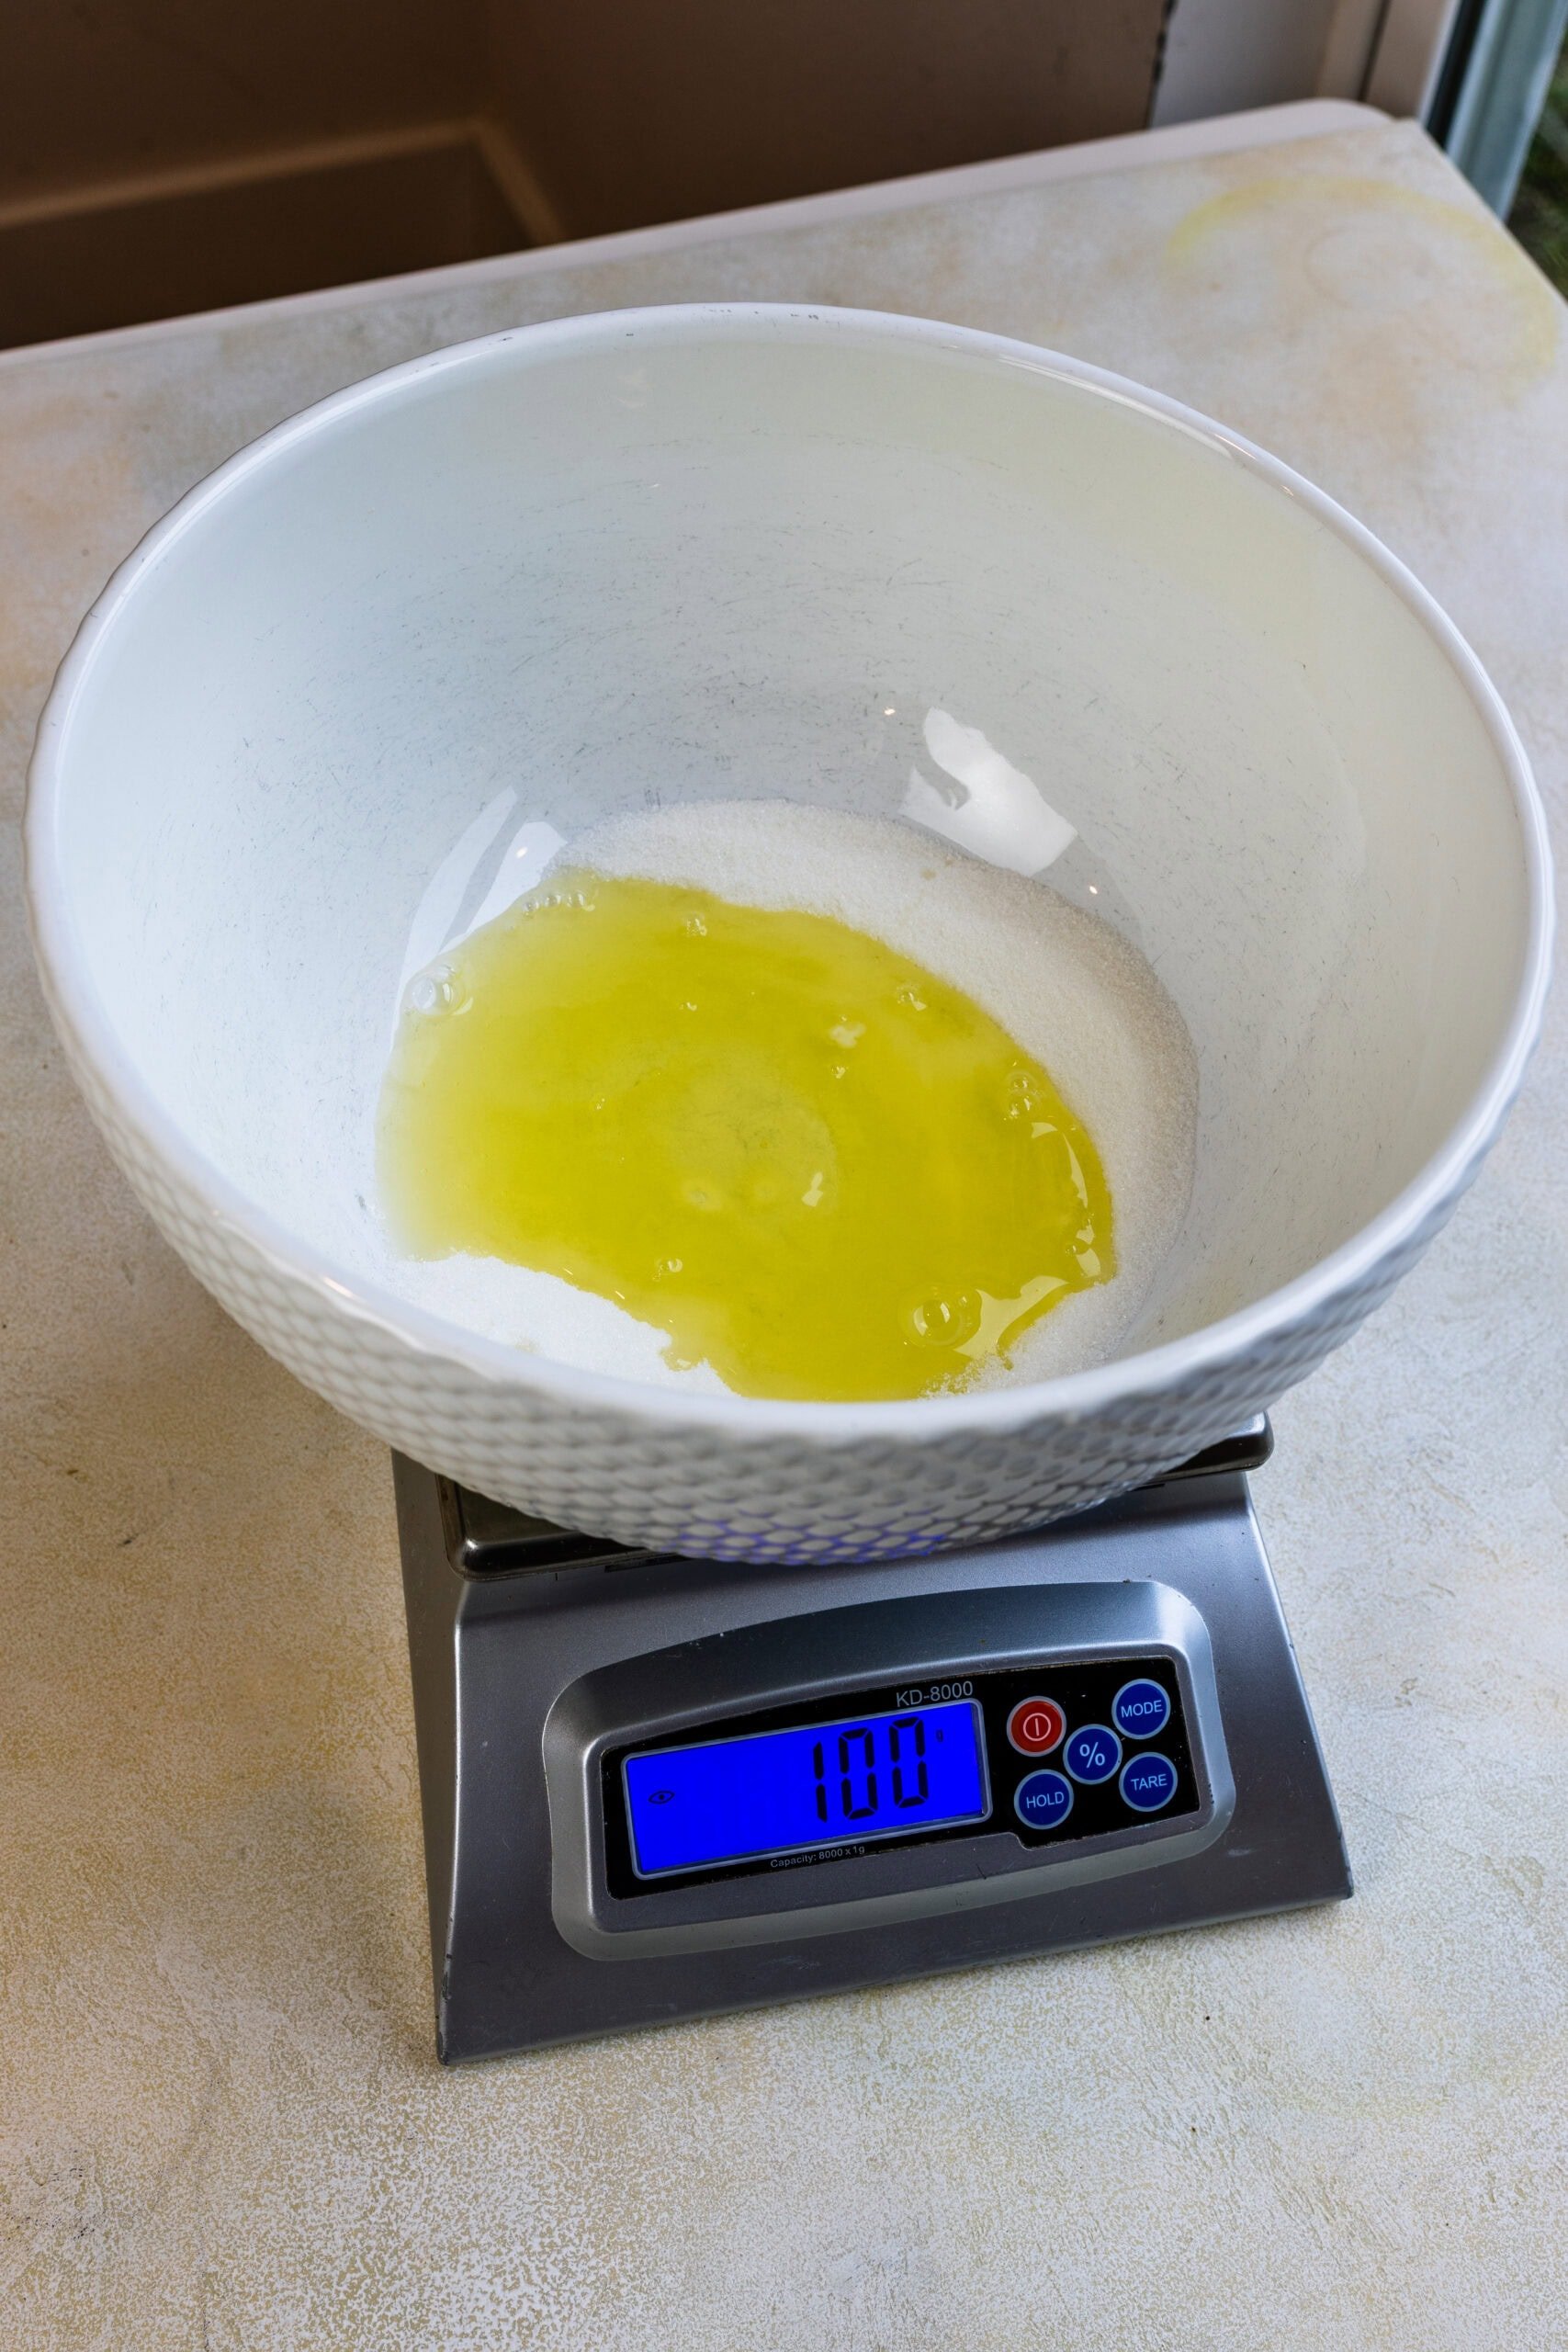
Add the egg whites to the bowl.
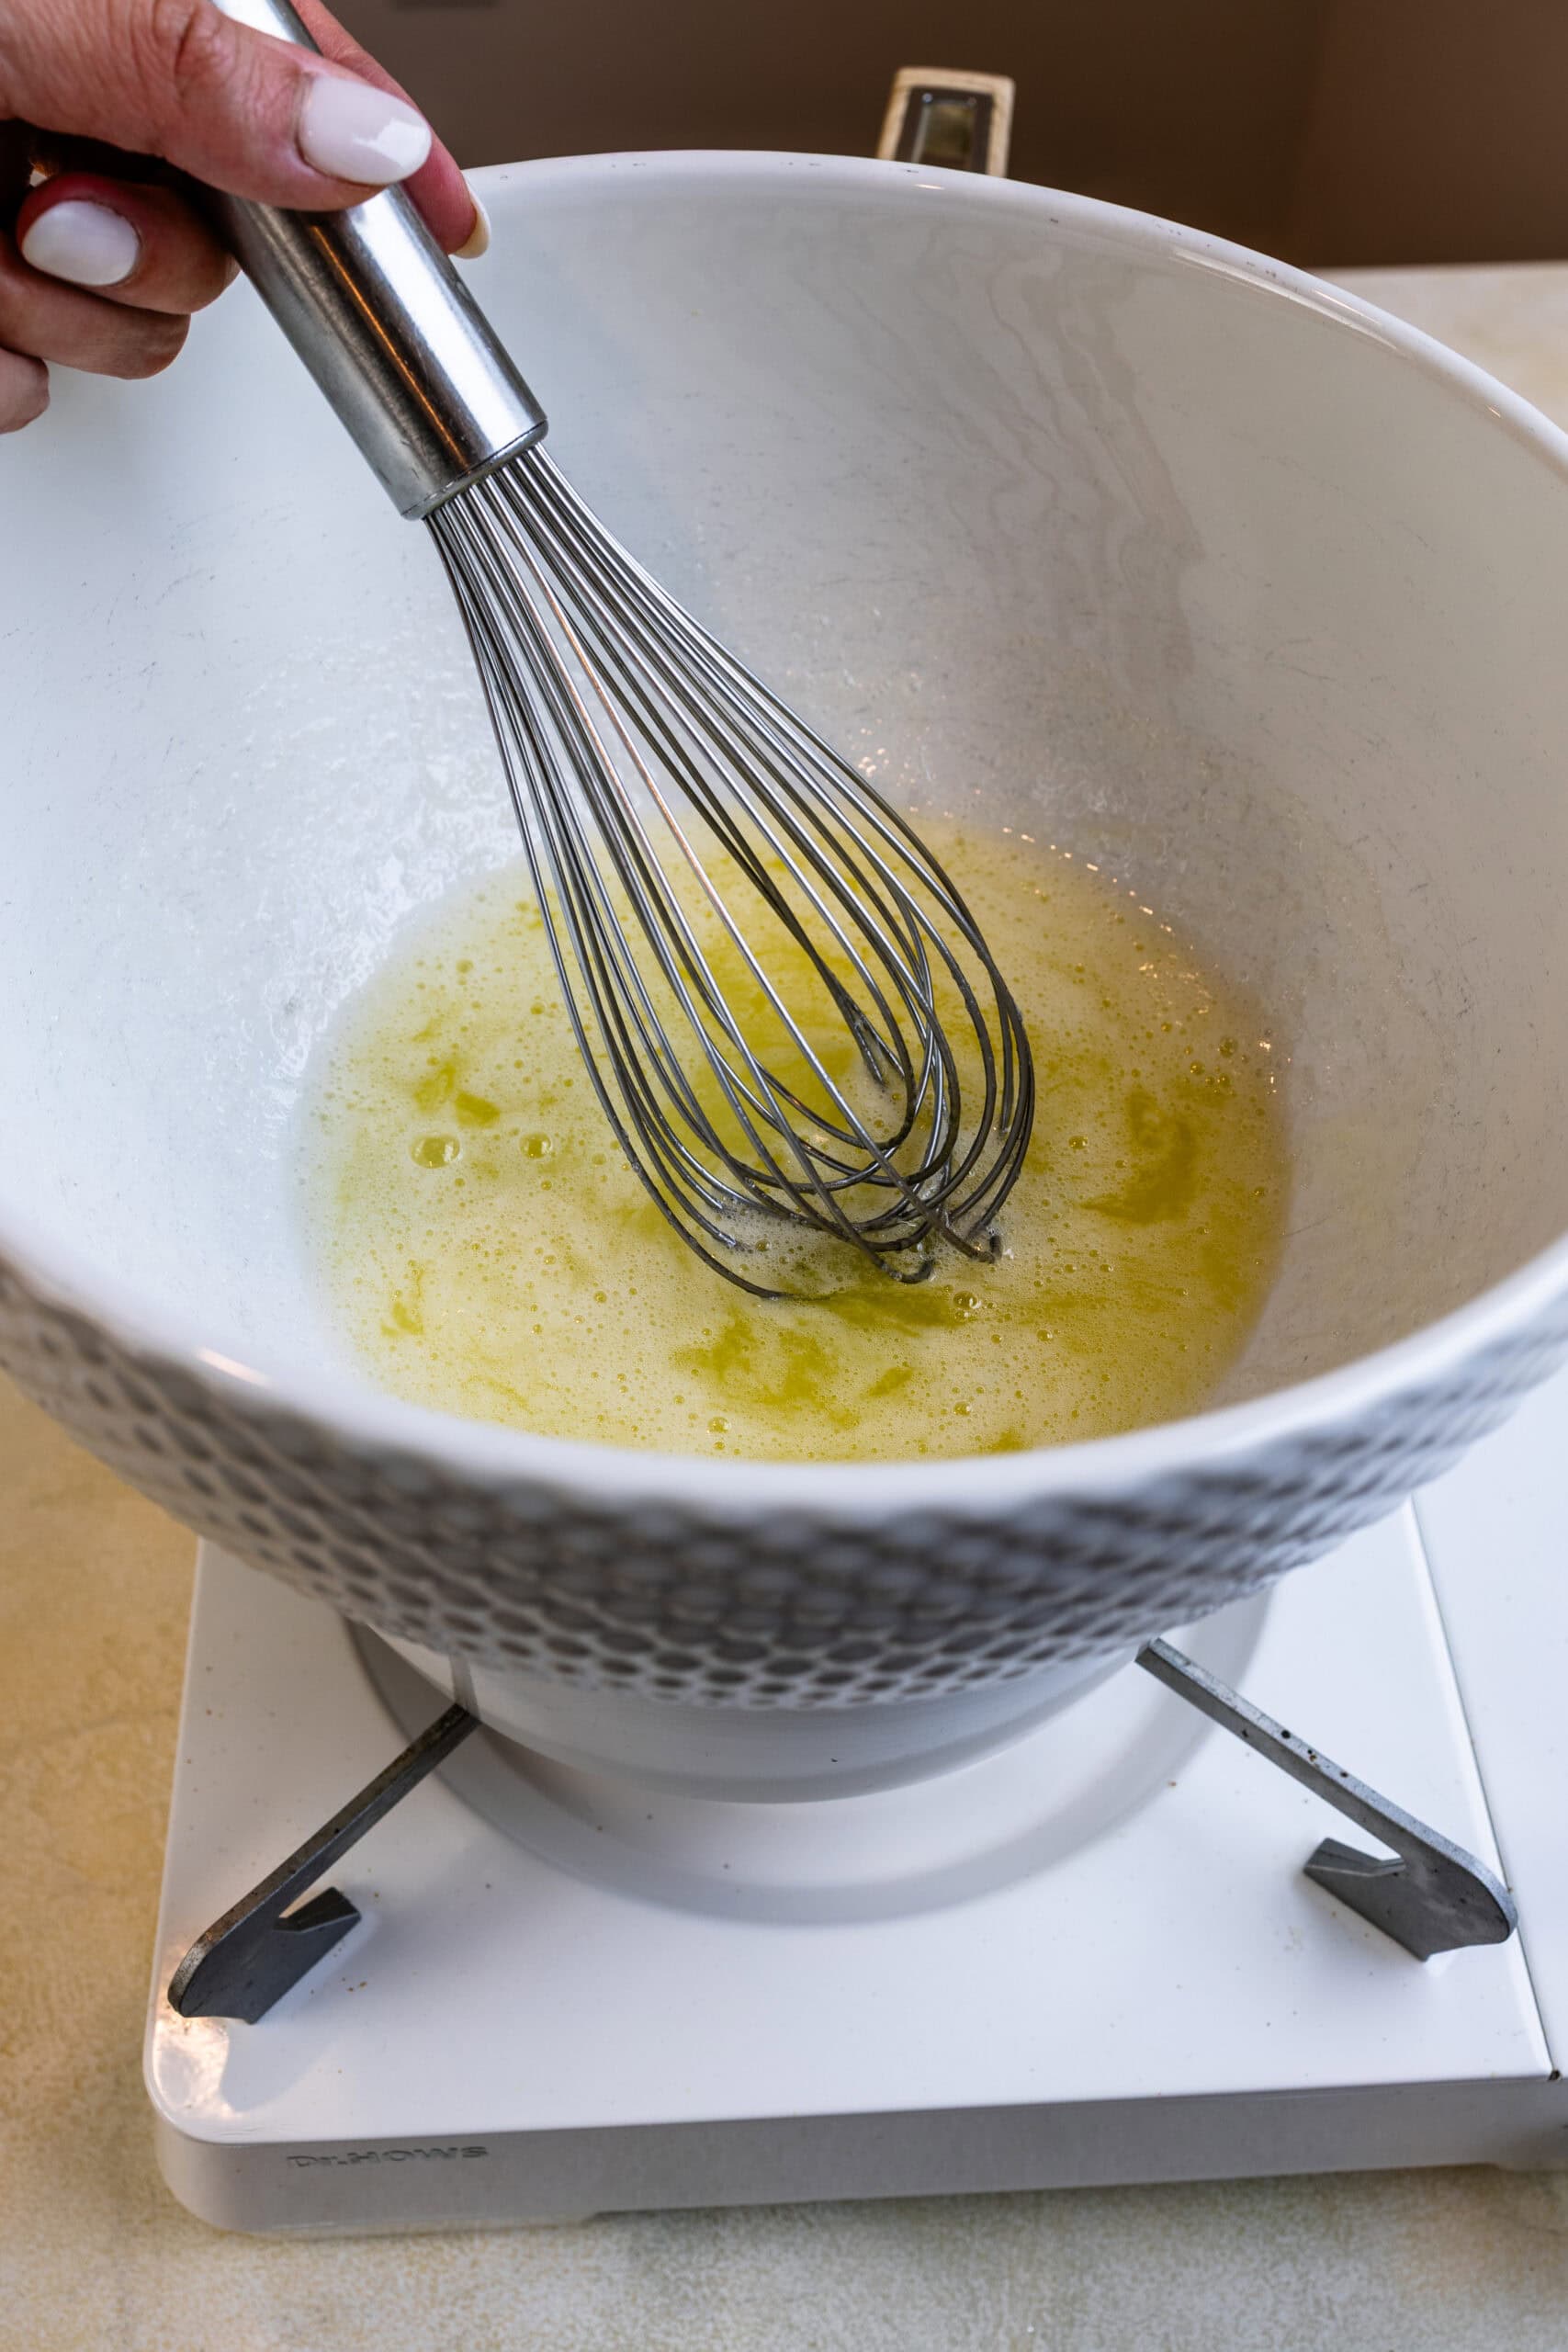
Whisk constantly over barely simmering water until the sugar is fully dissolved.
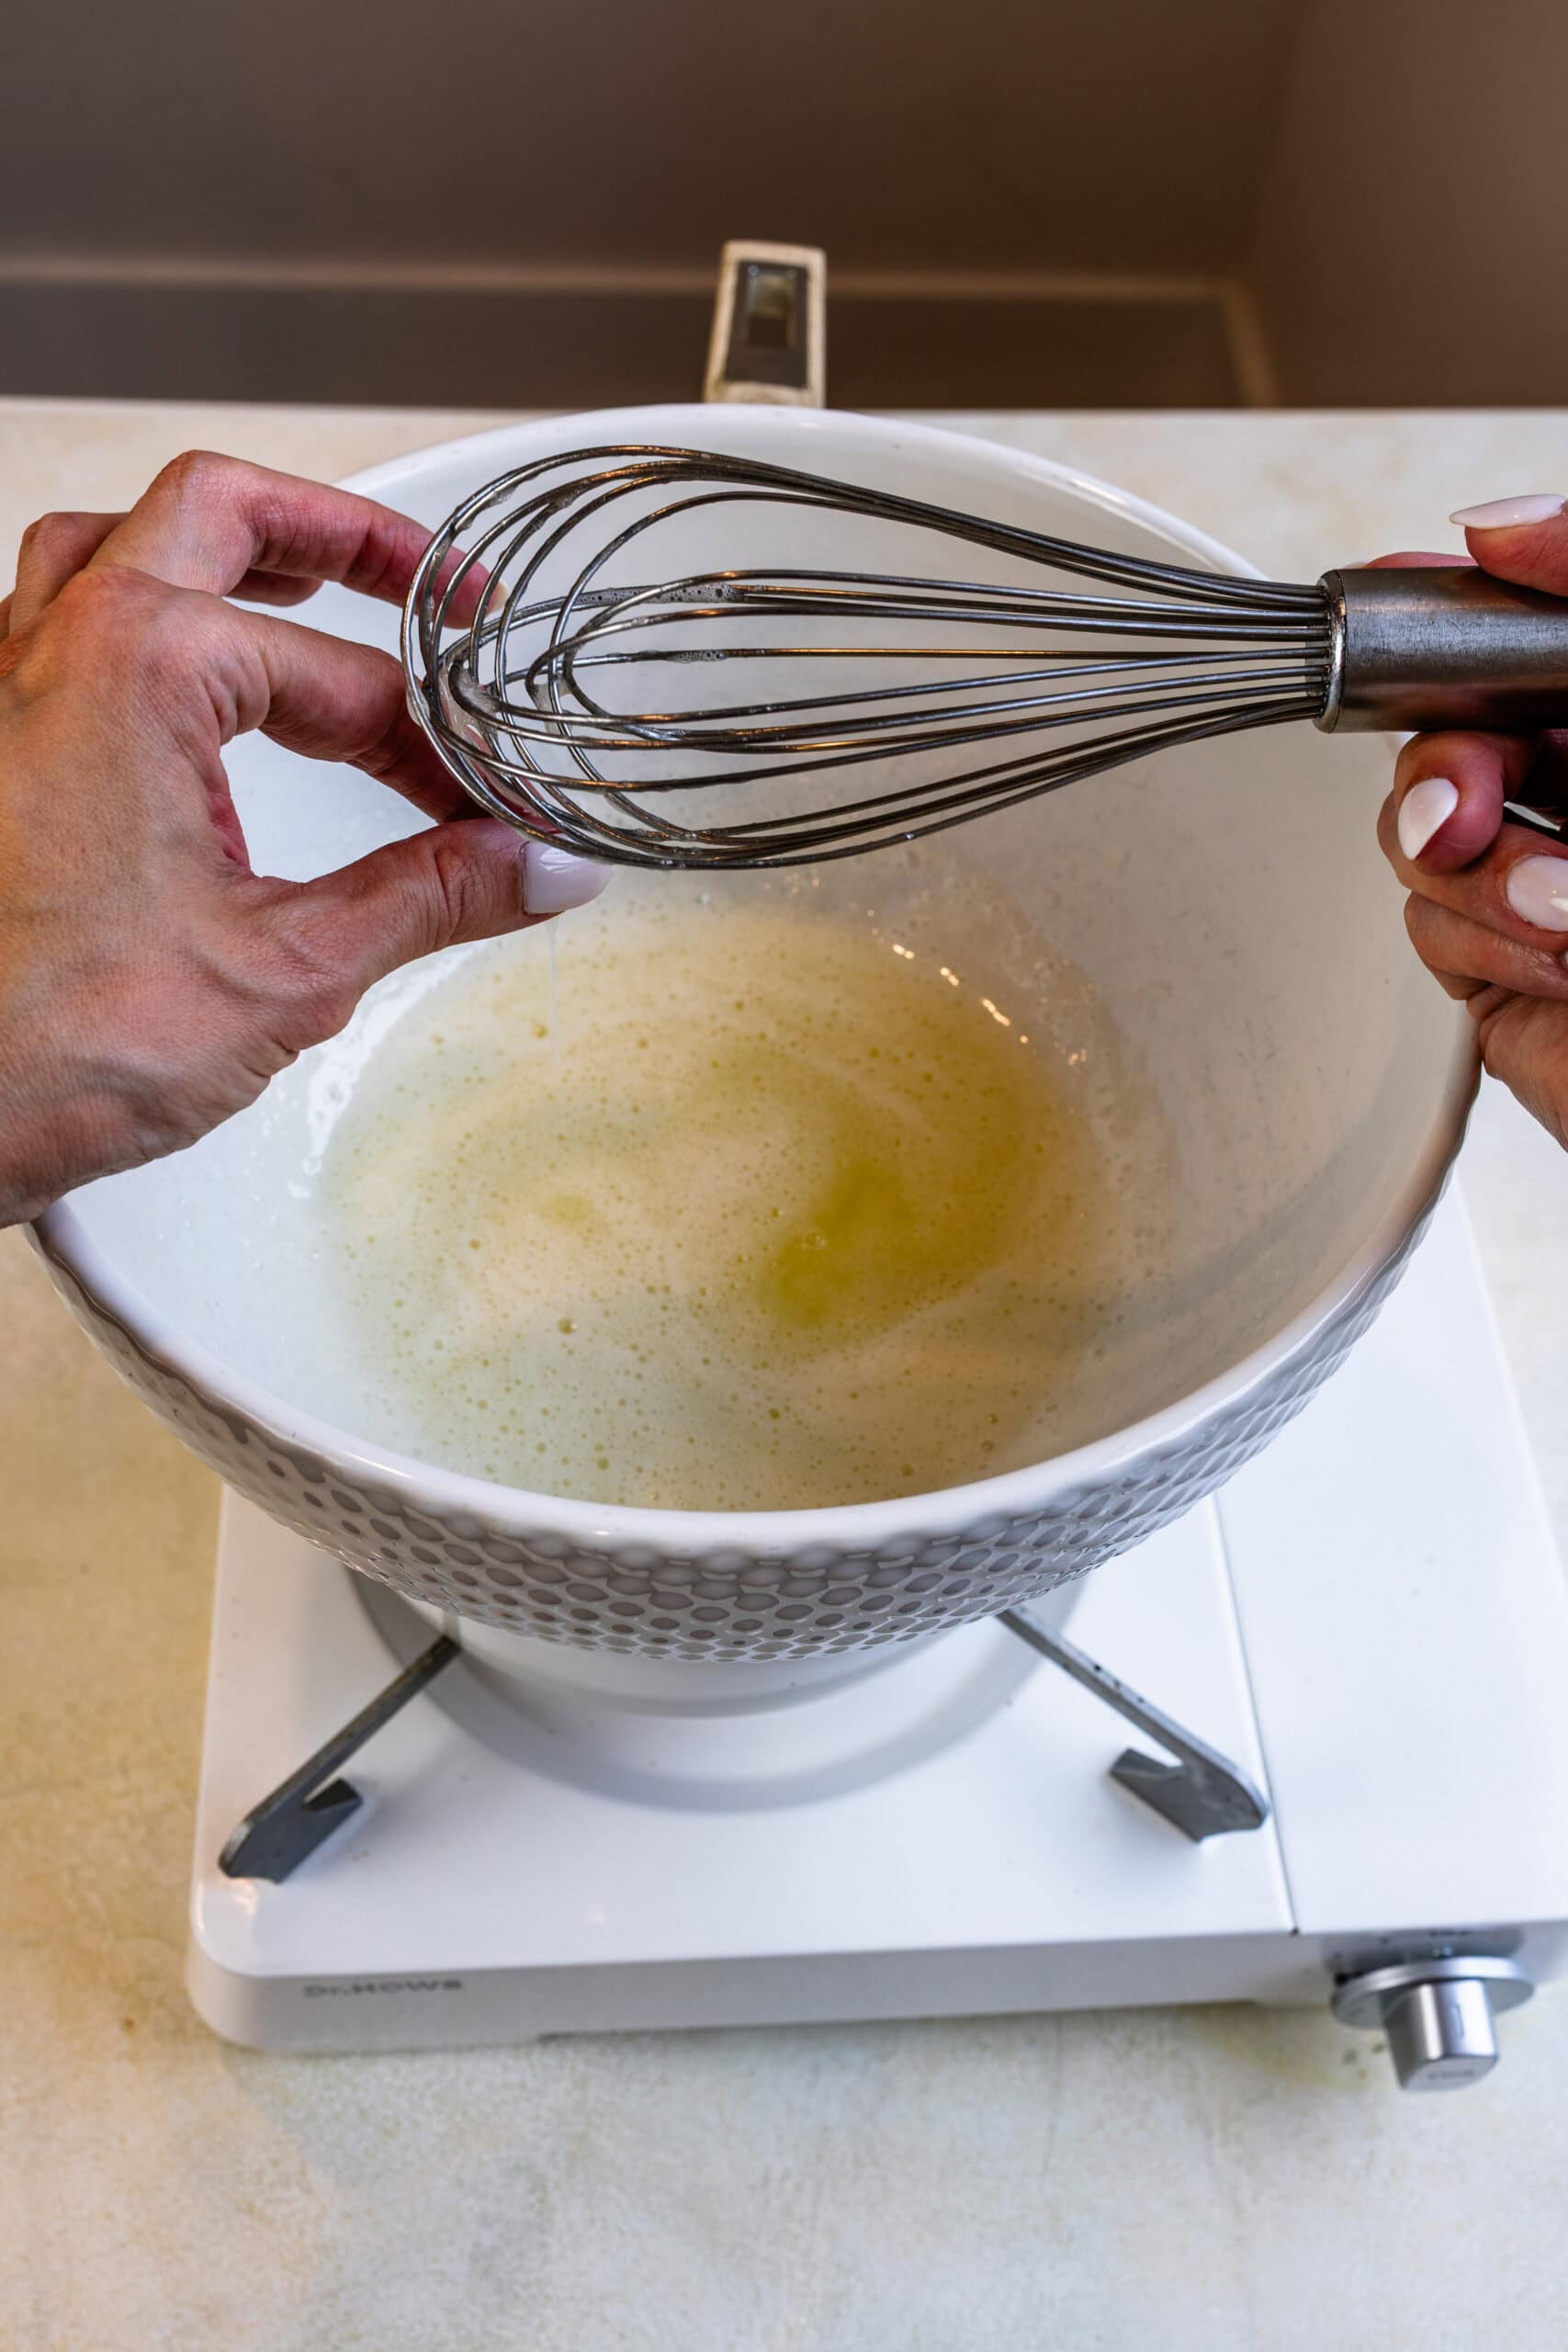
Rub a drop between your fingers—if you don’t feel granules, it’s ready.
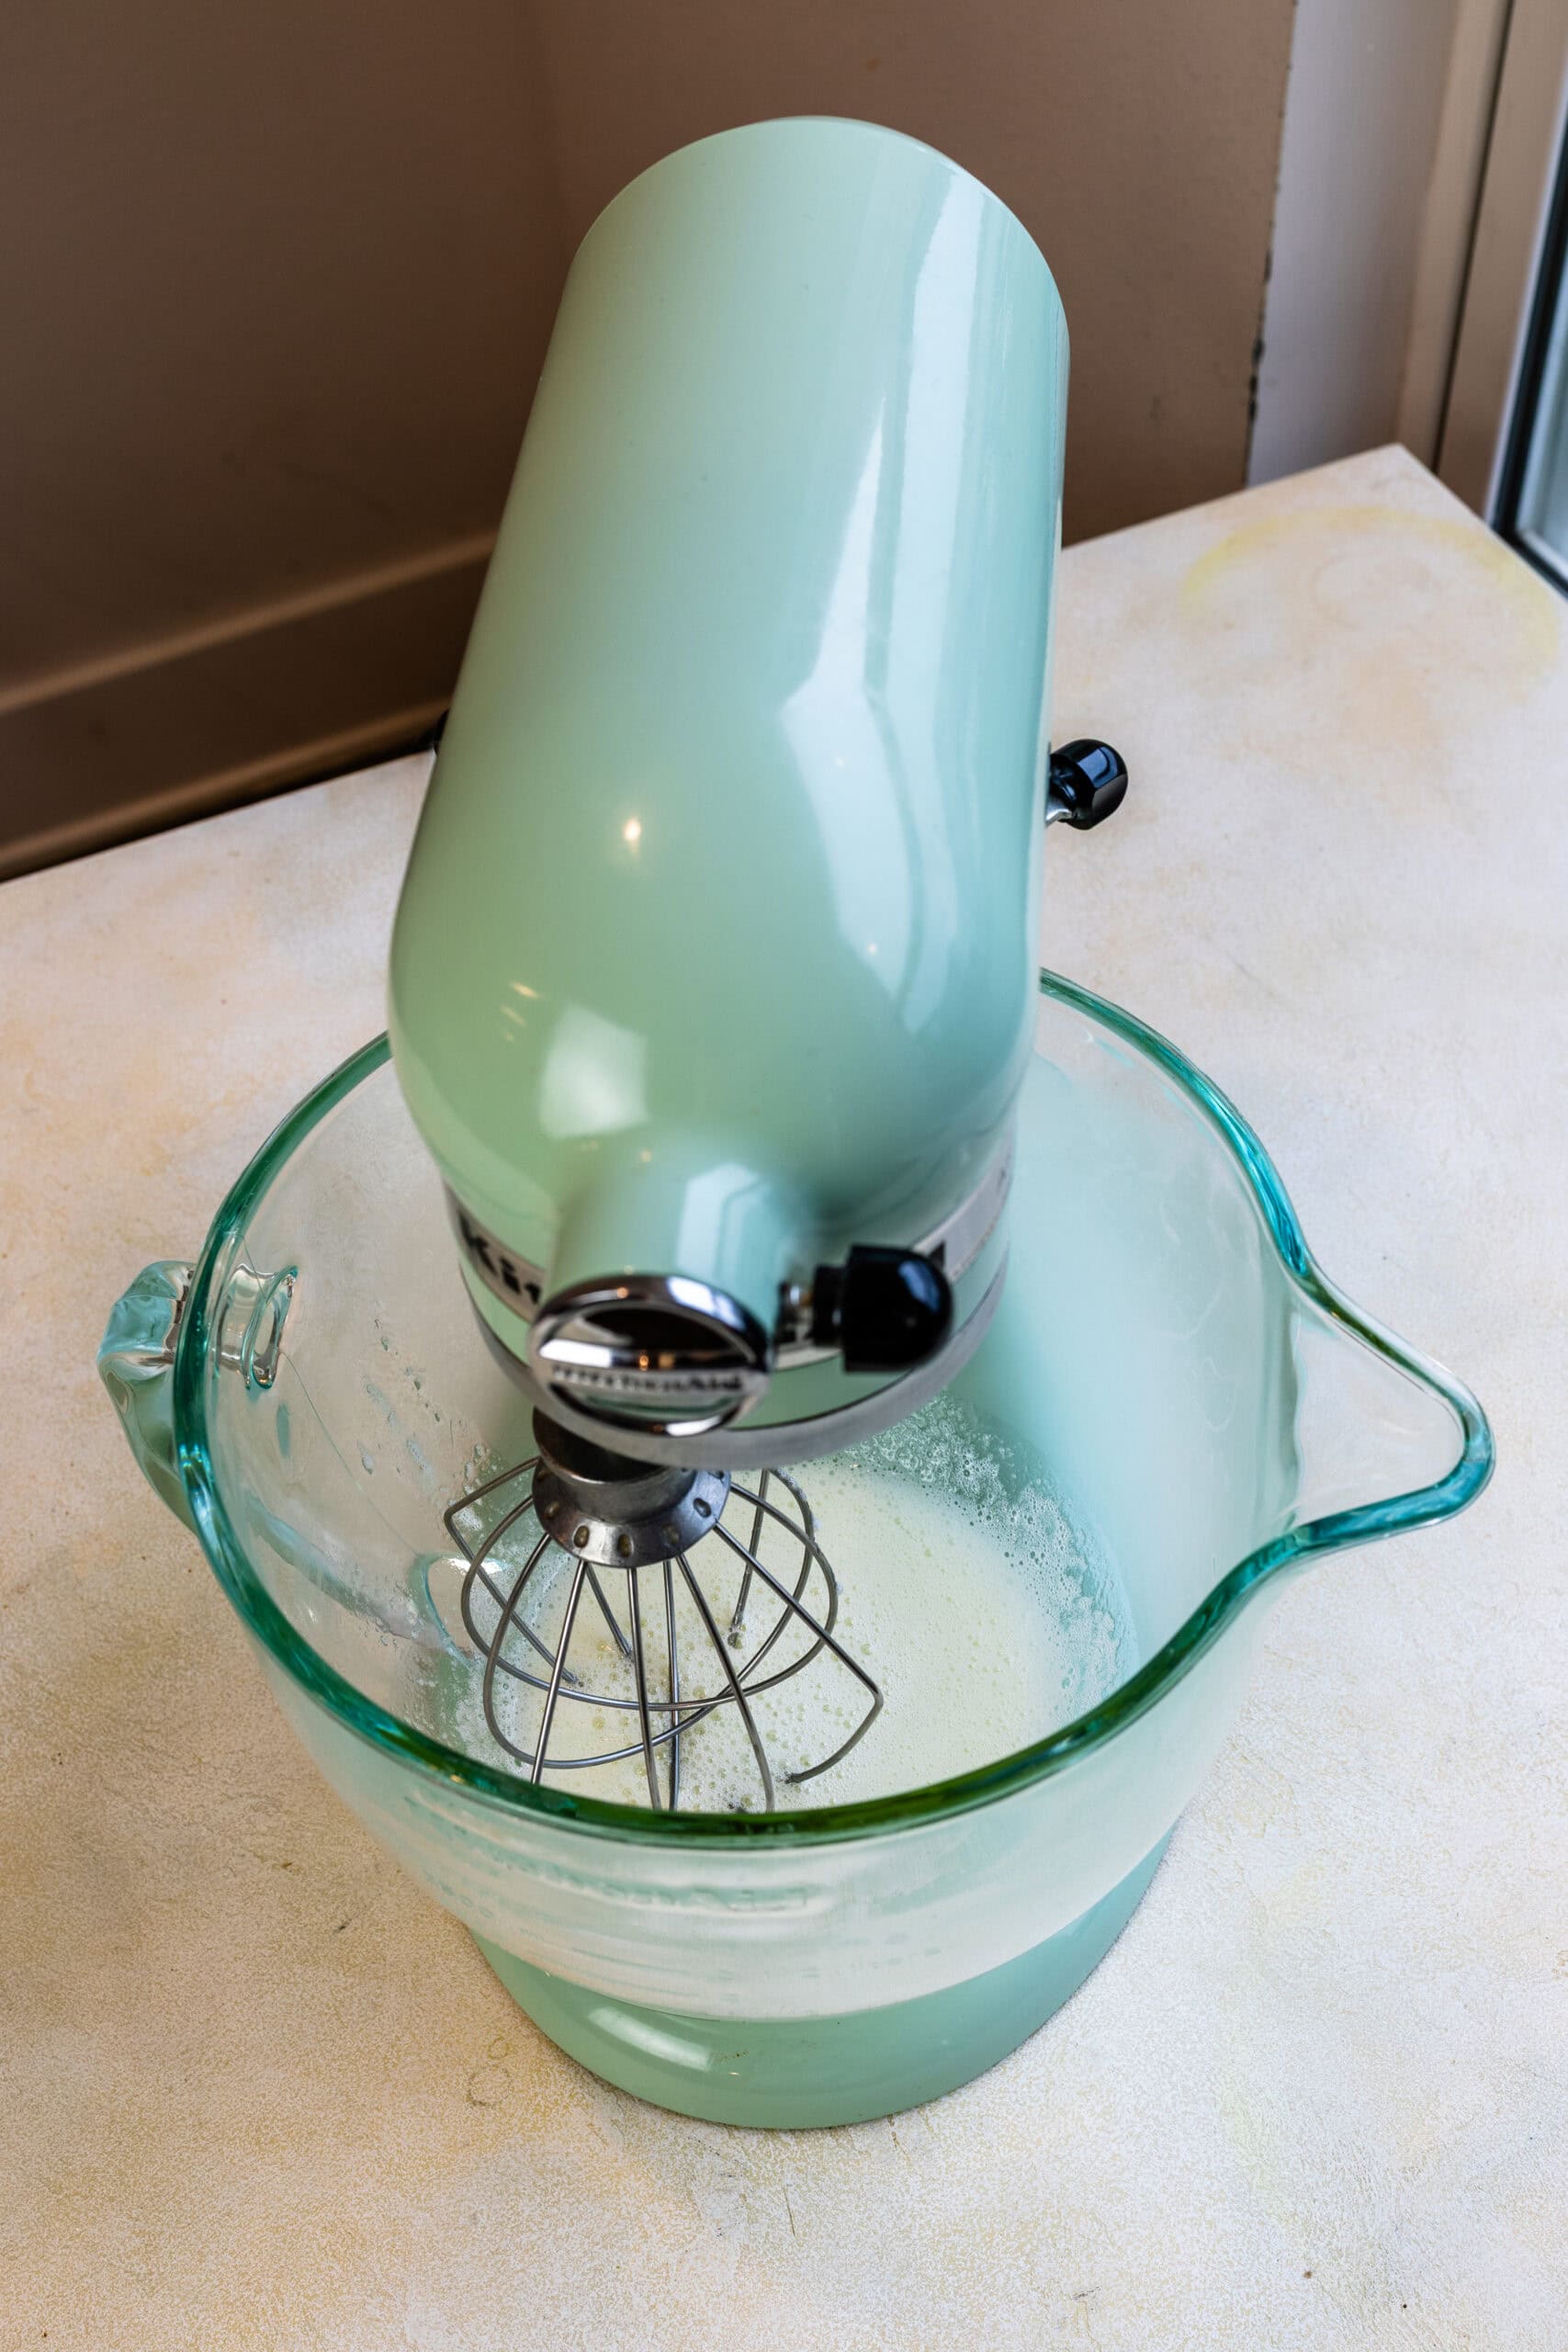
Transfer the mixture to a stand mixer fitted with the whisk attachment.
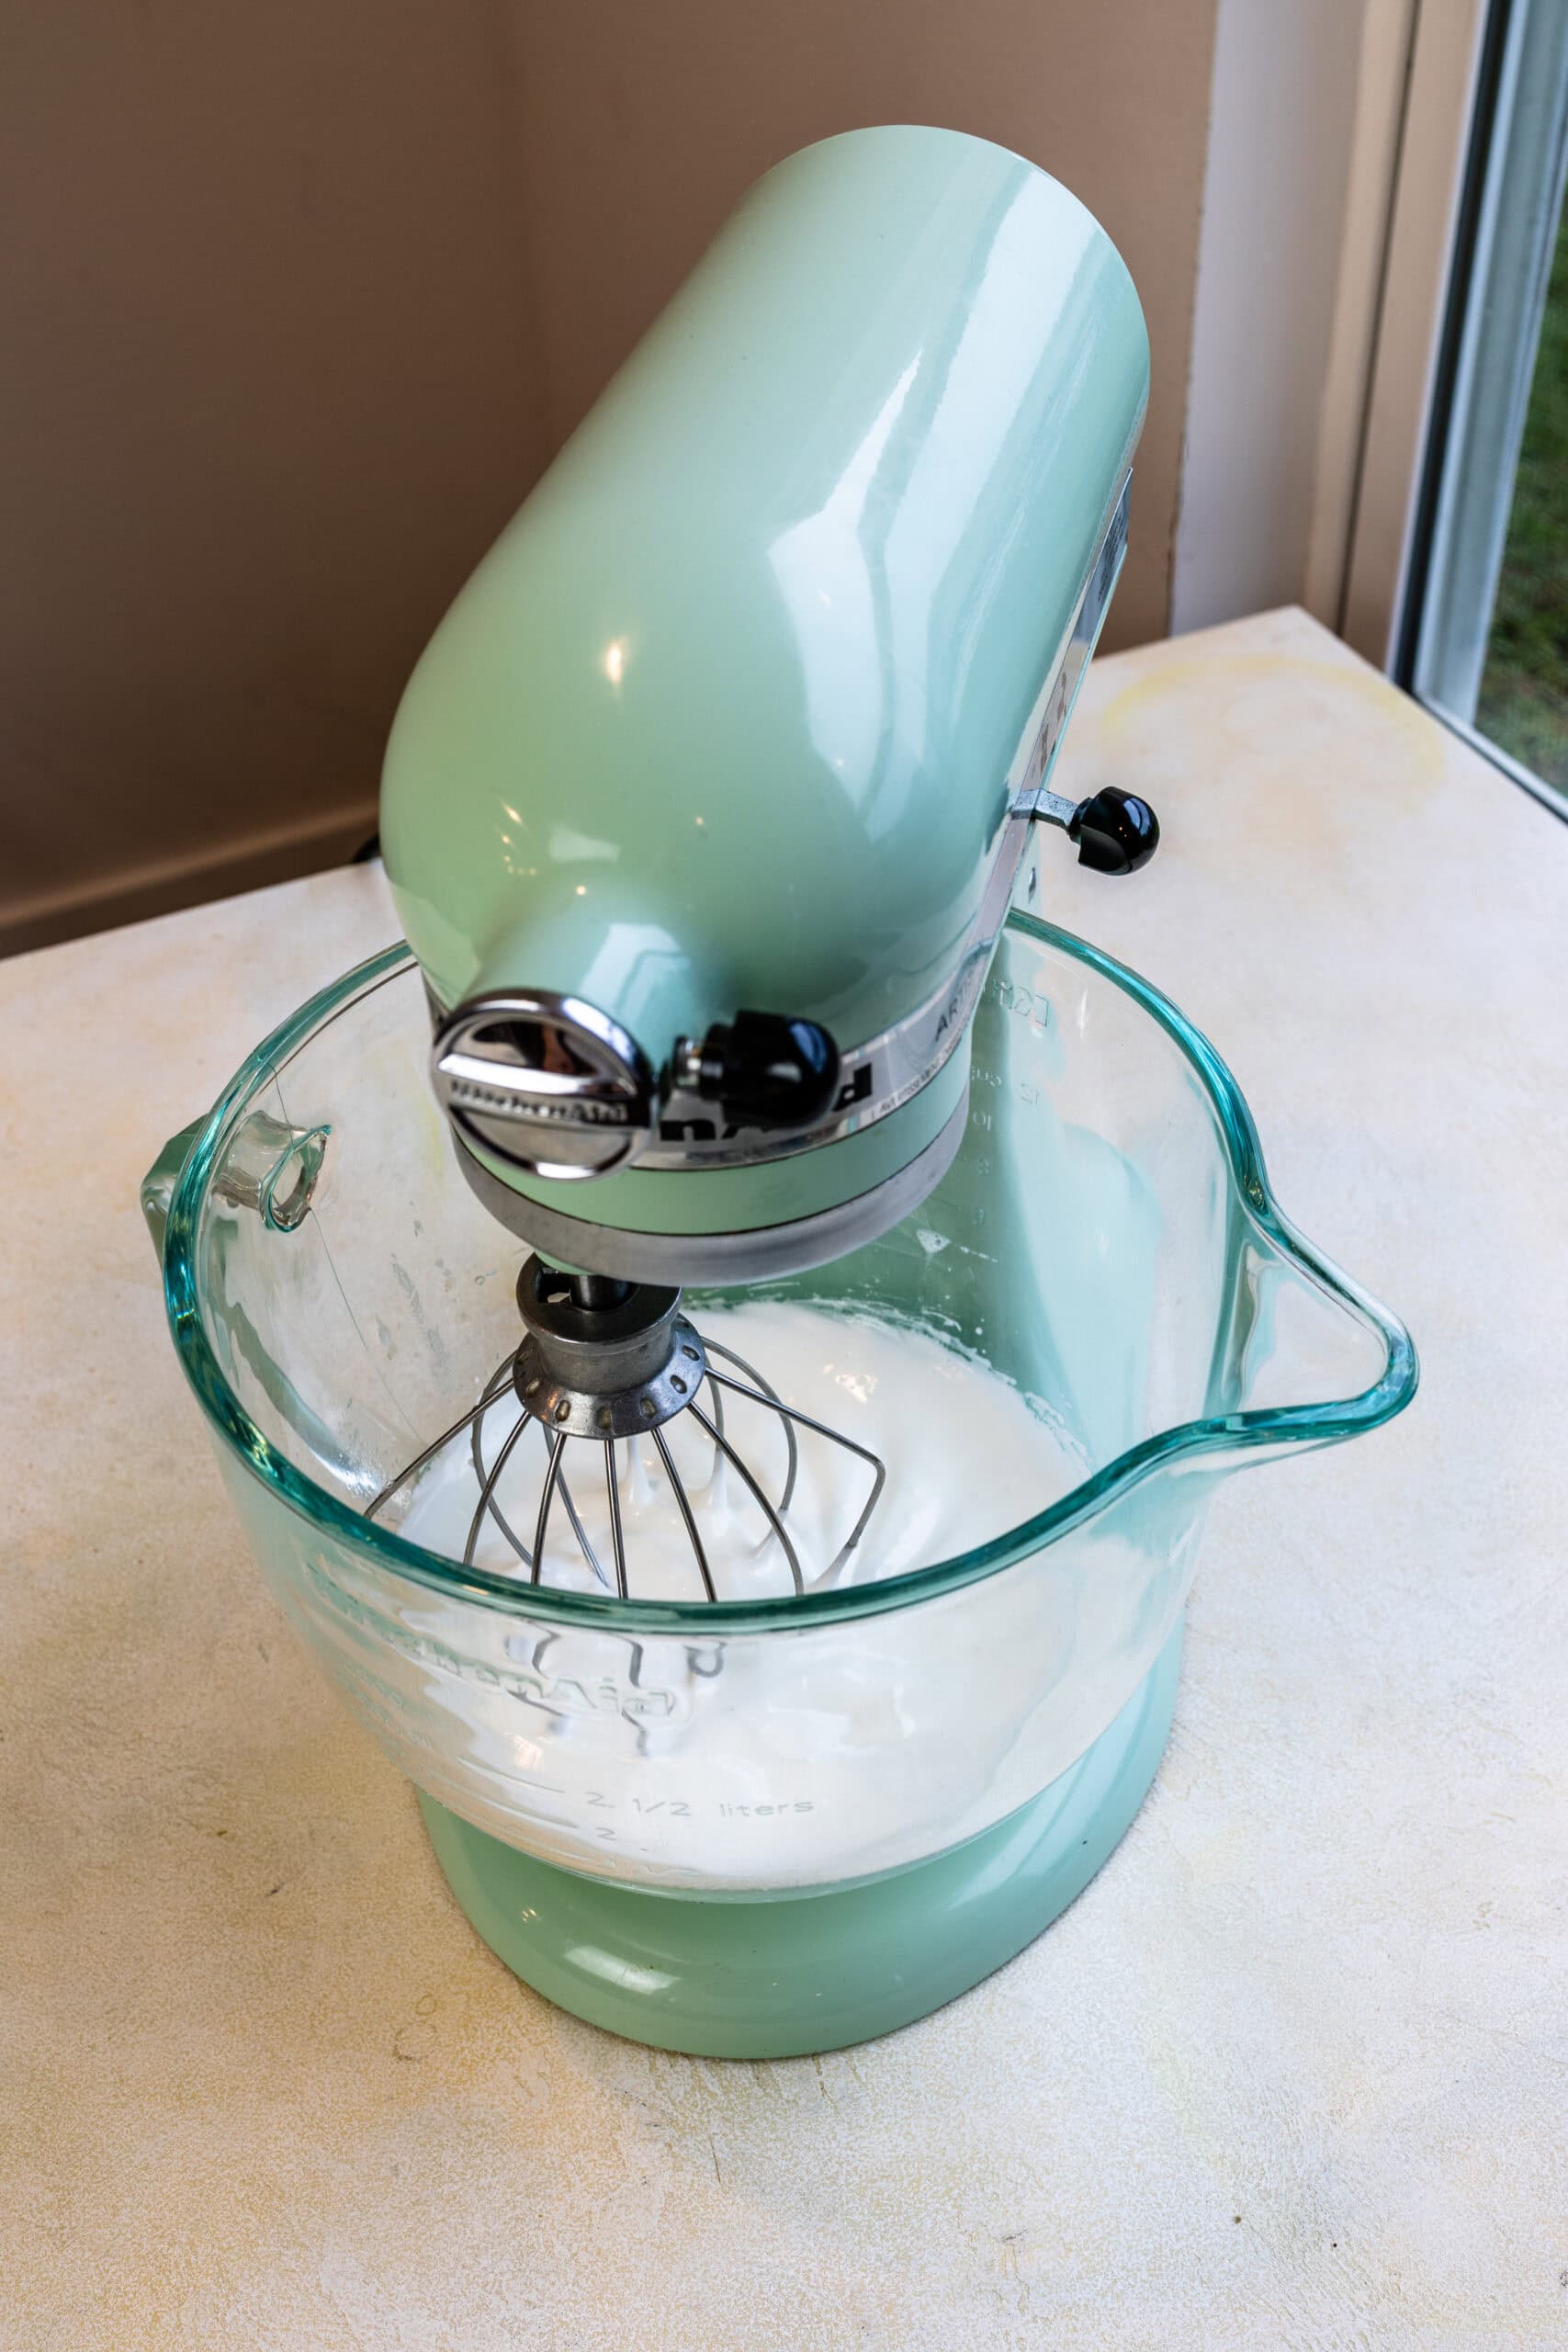
Whip on low speed for 30 seconds, then medium speed for a few minutes.
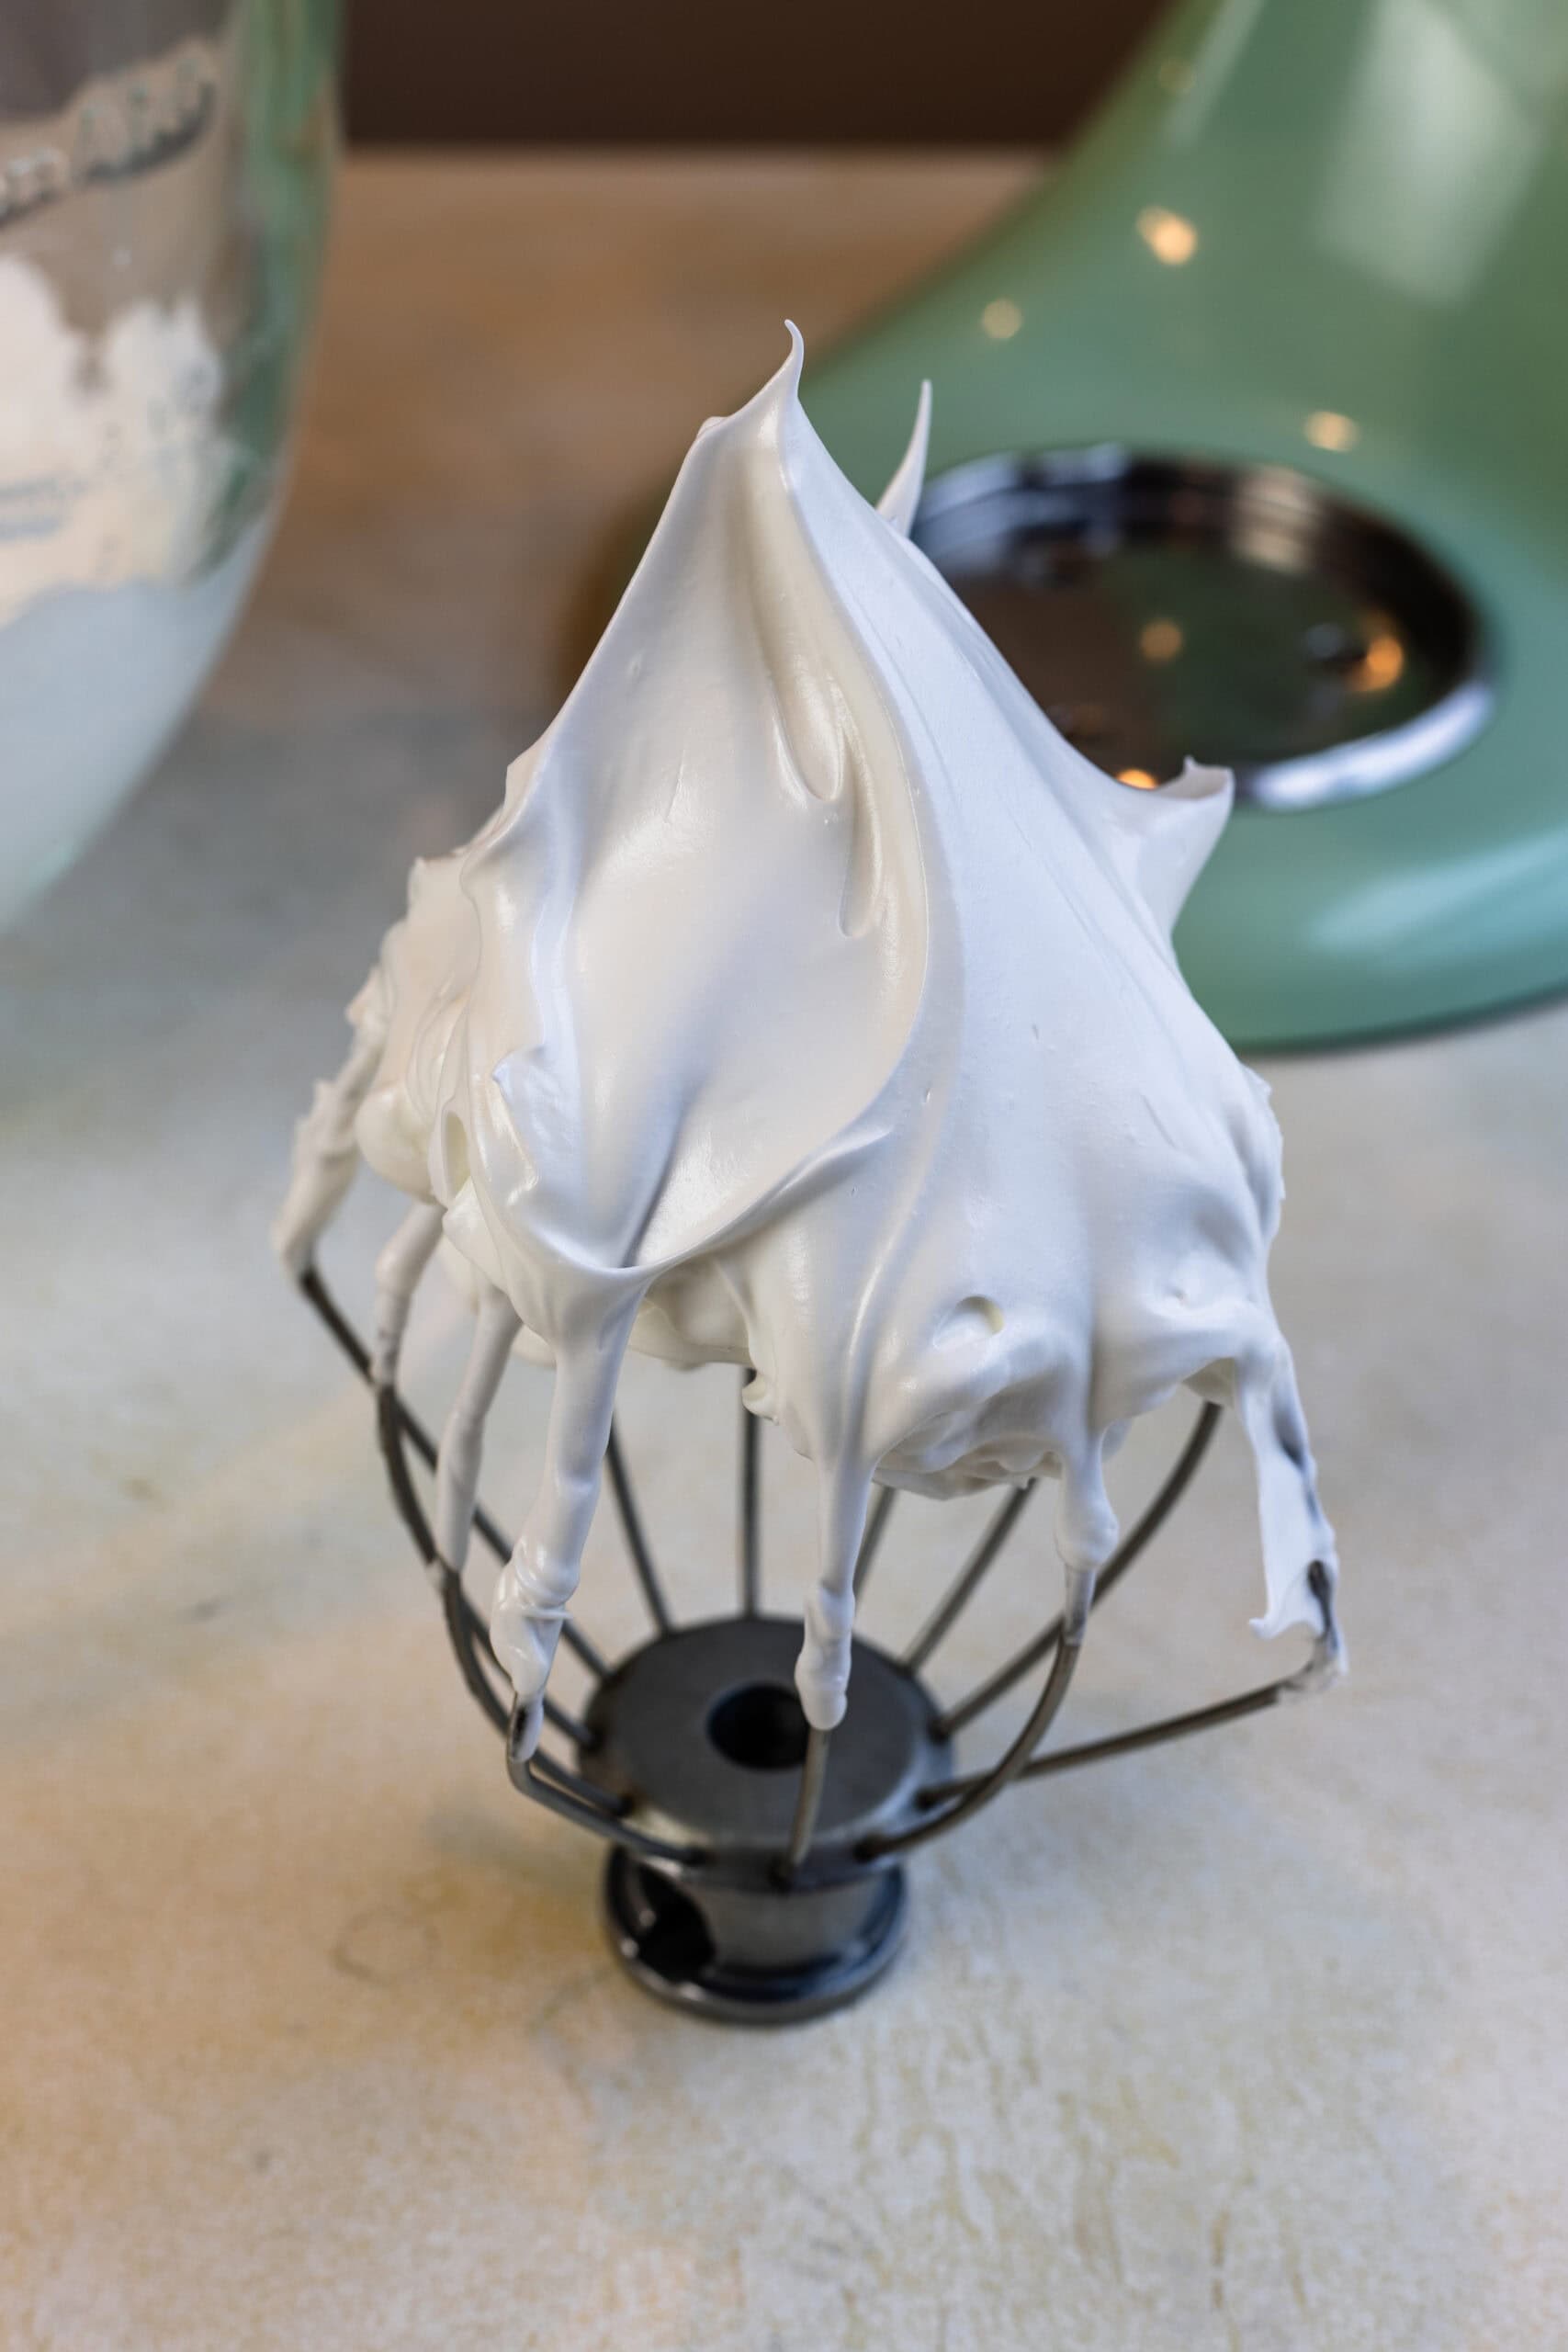
Increase to medium-high speed and whip until stiff peaks form.
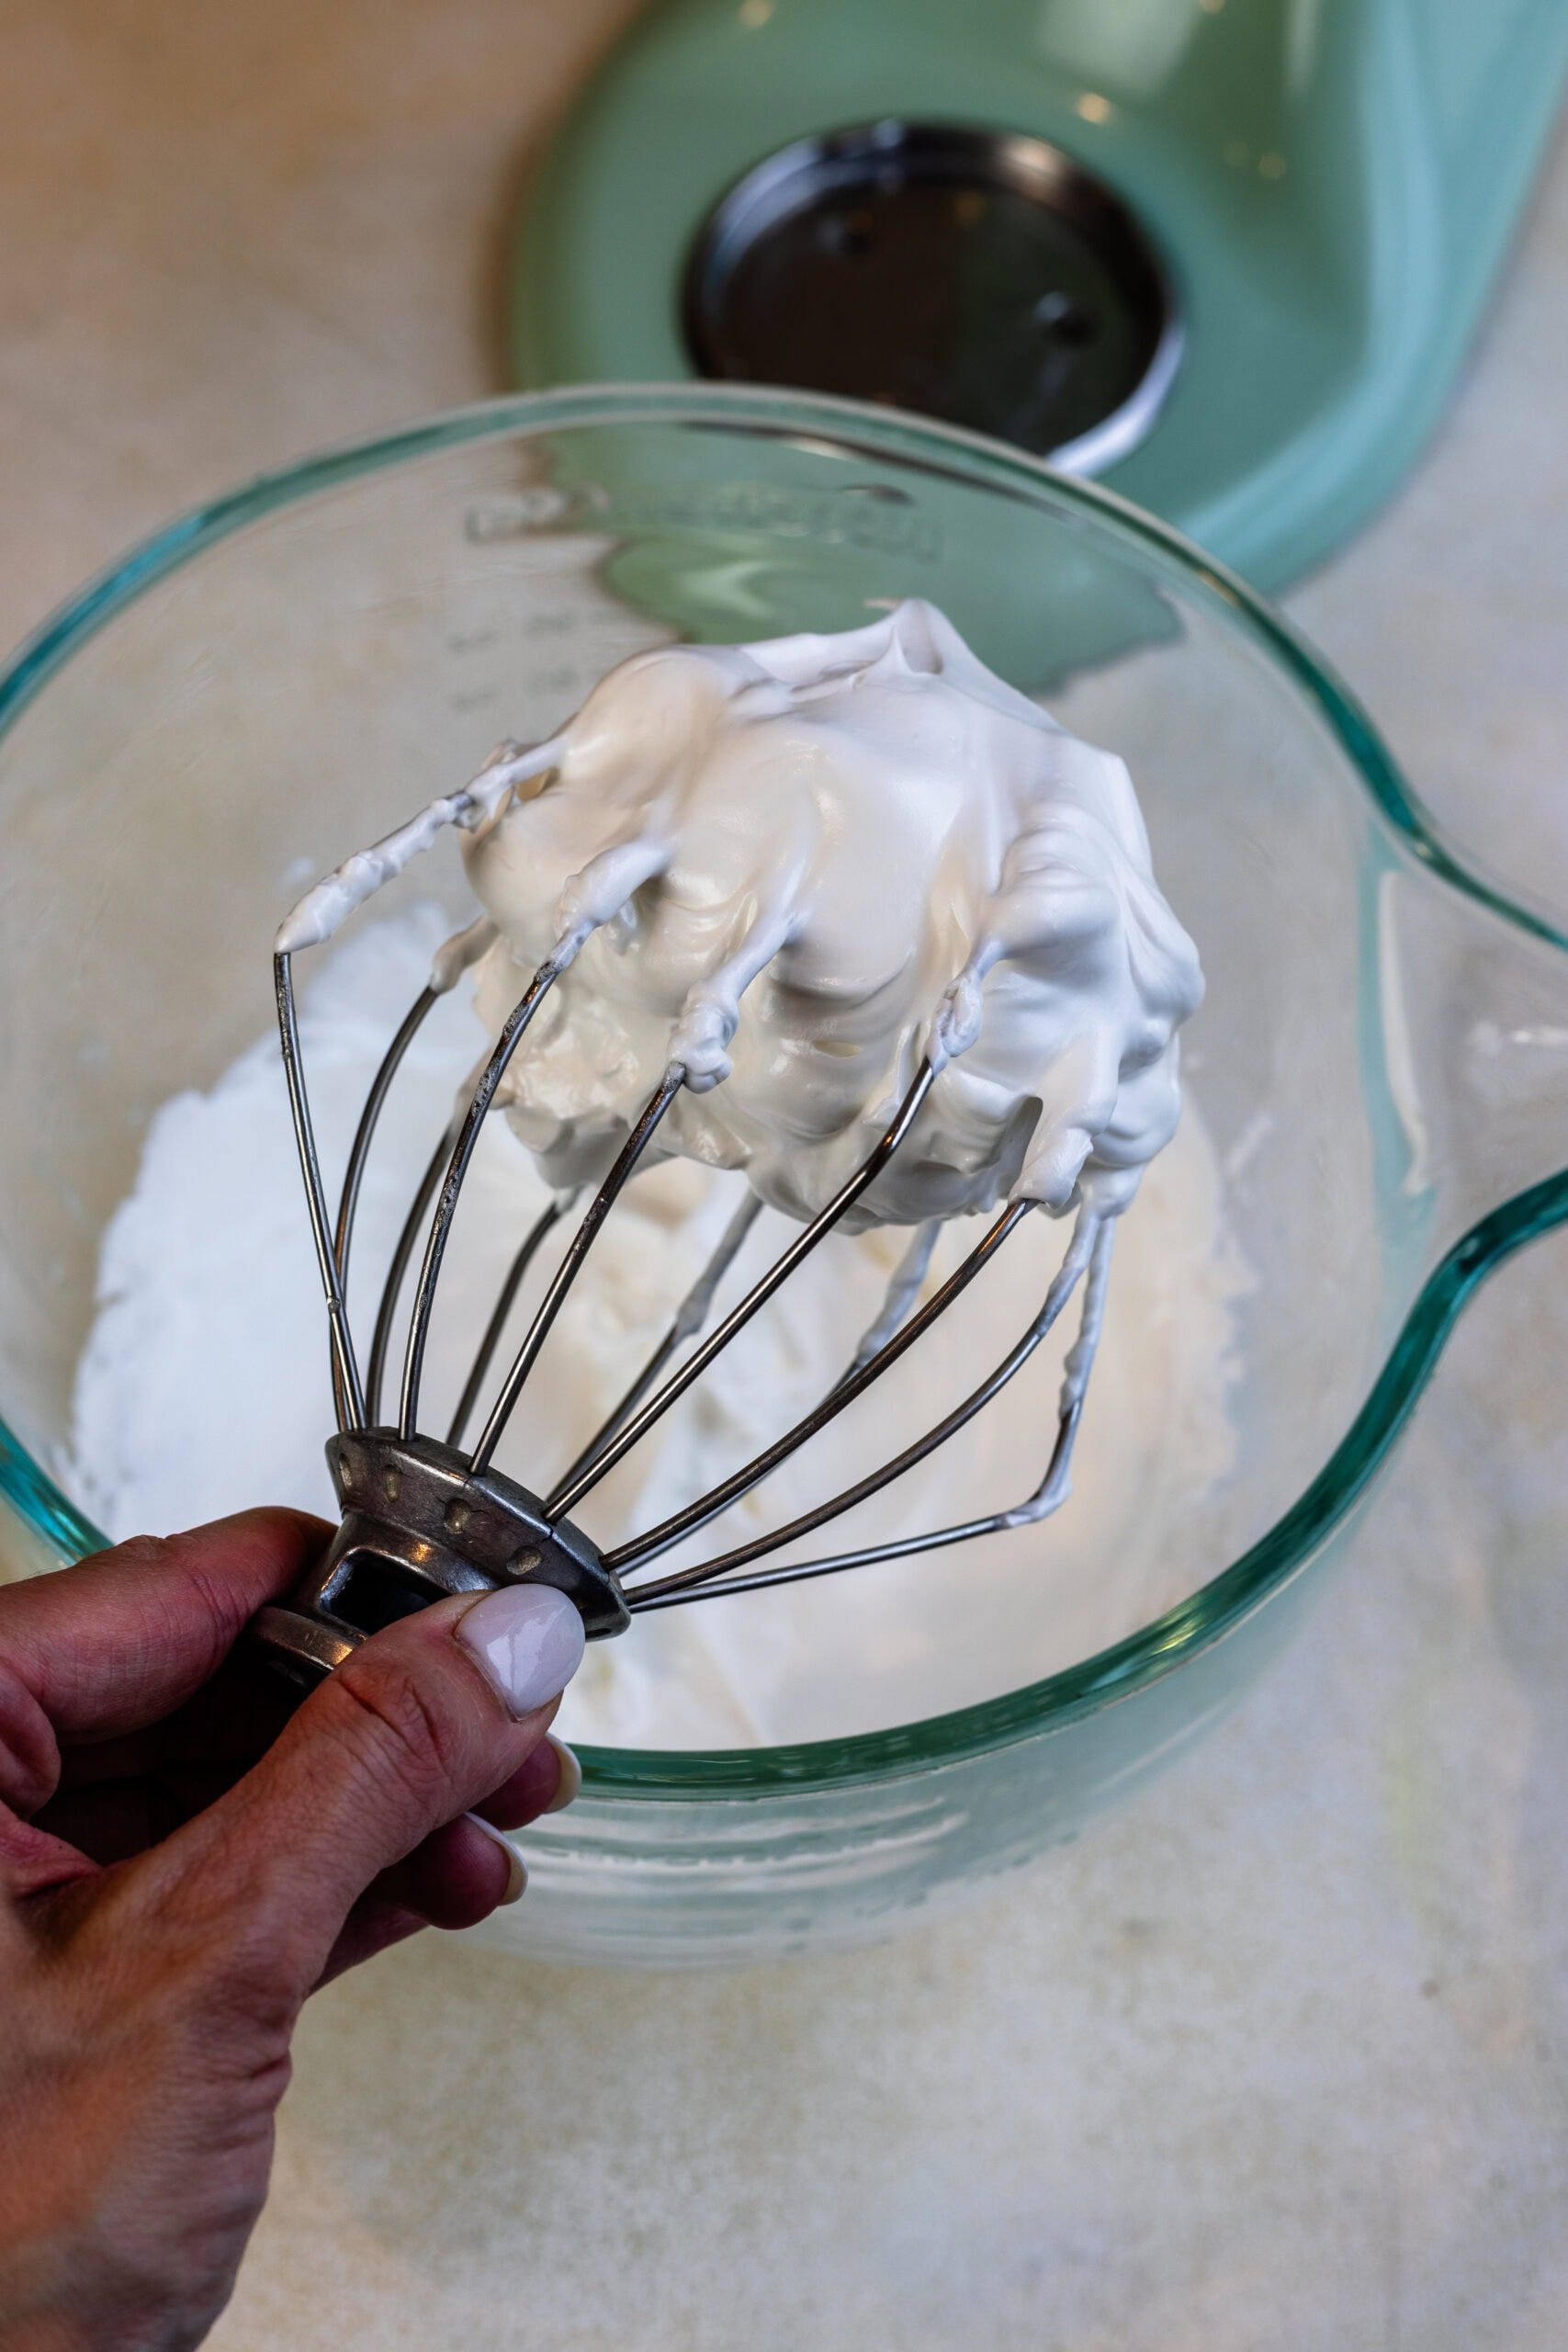
The meringue should be glossy, fluffy, and hold a peak that shoots straight up without drooping.
Read more about the meringue stage of making macarons in these two articles: How long to whip the meringue when making macarons, and The Meringue Stage.
3. Fold the Batter (Macaronage)
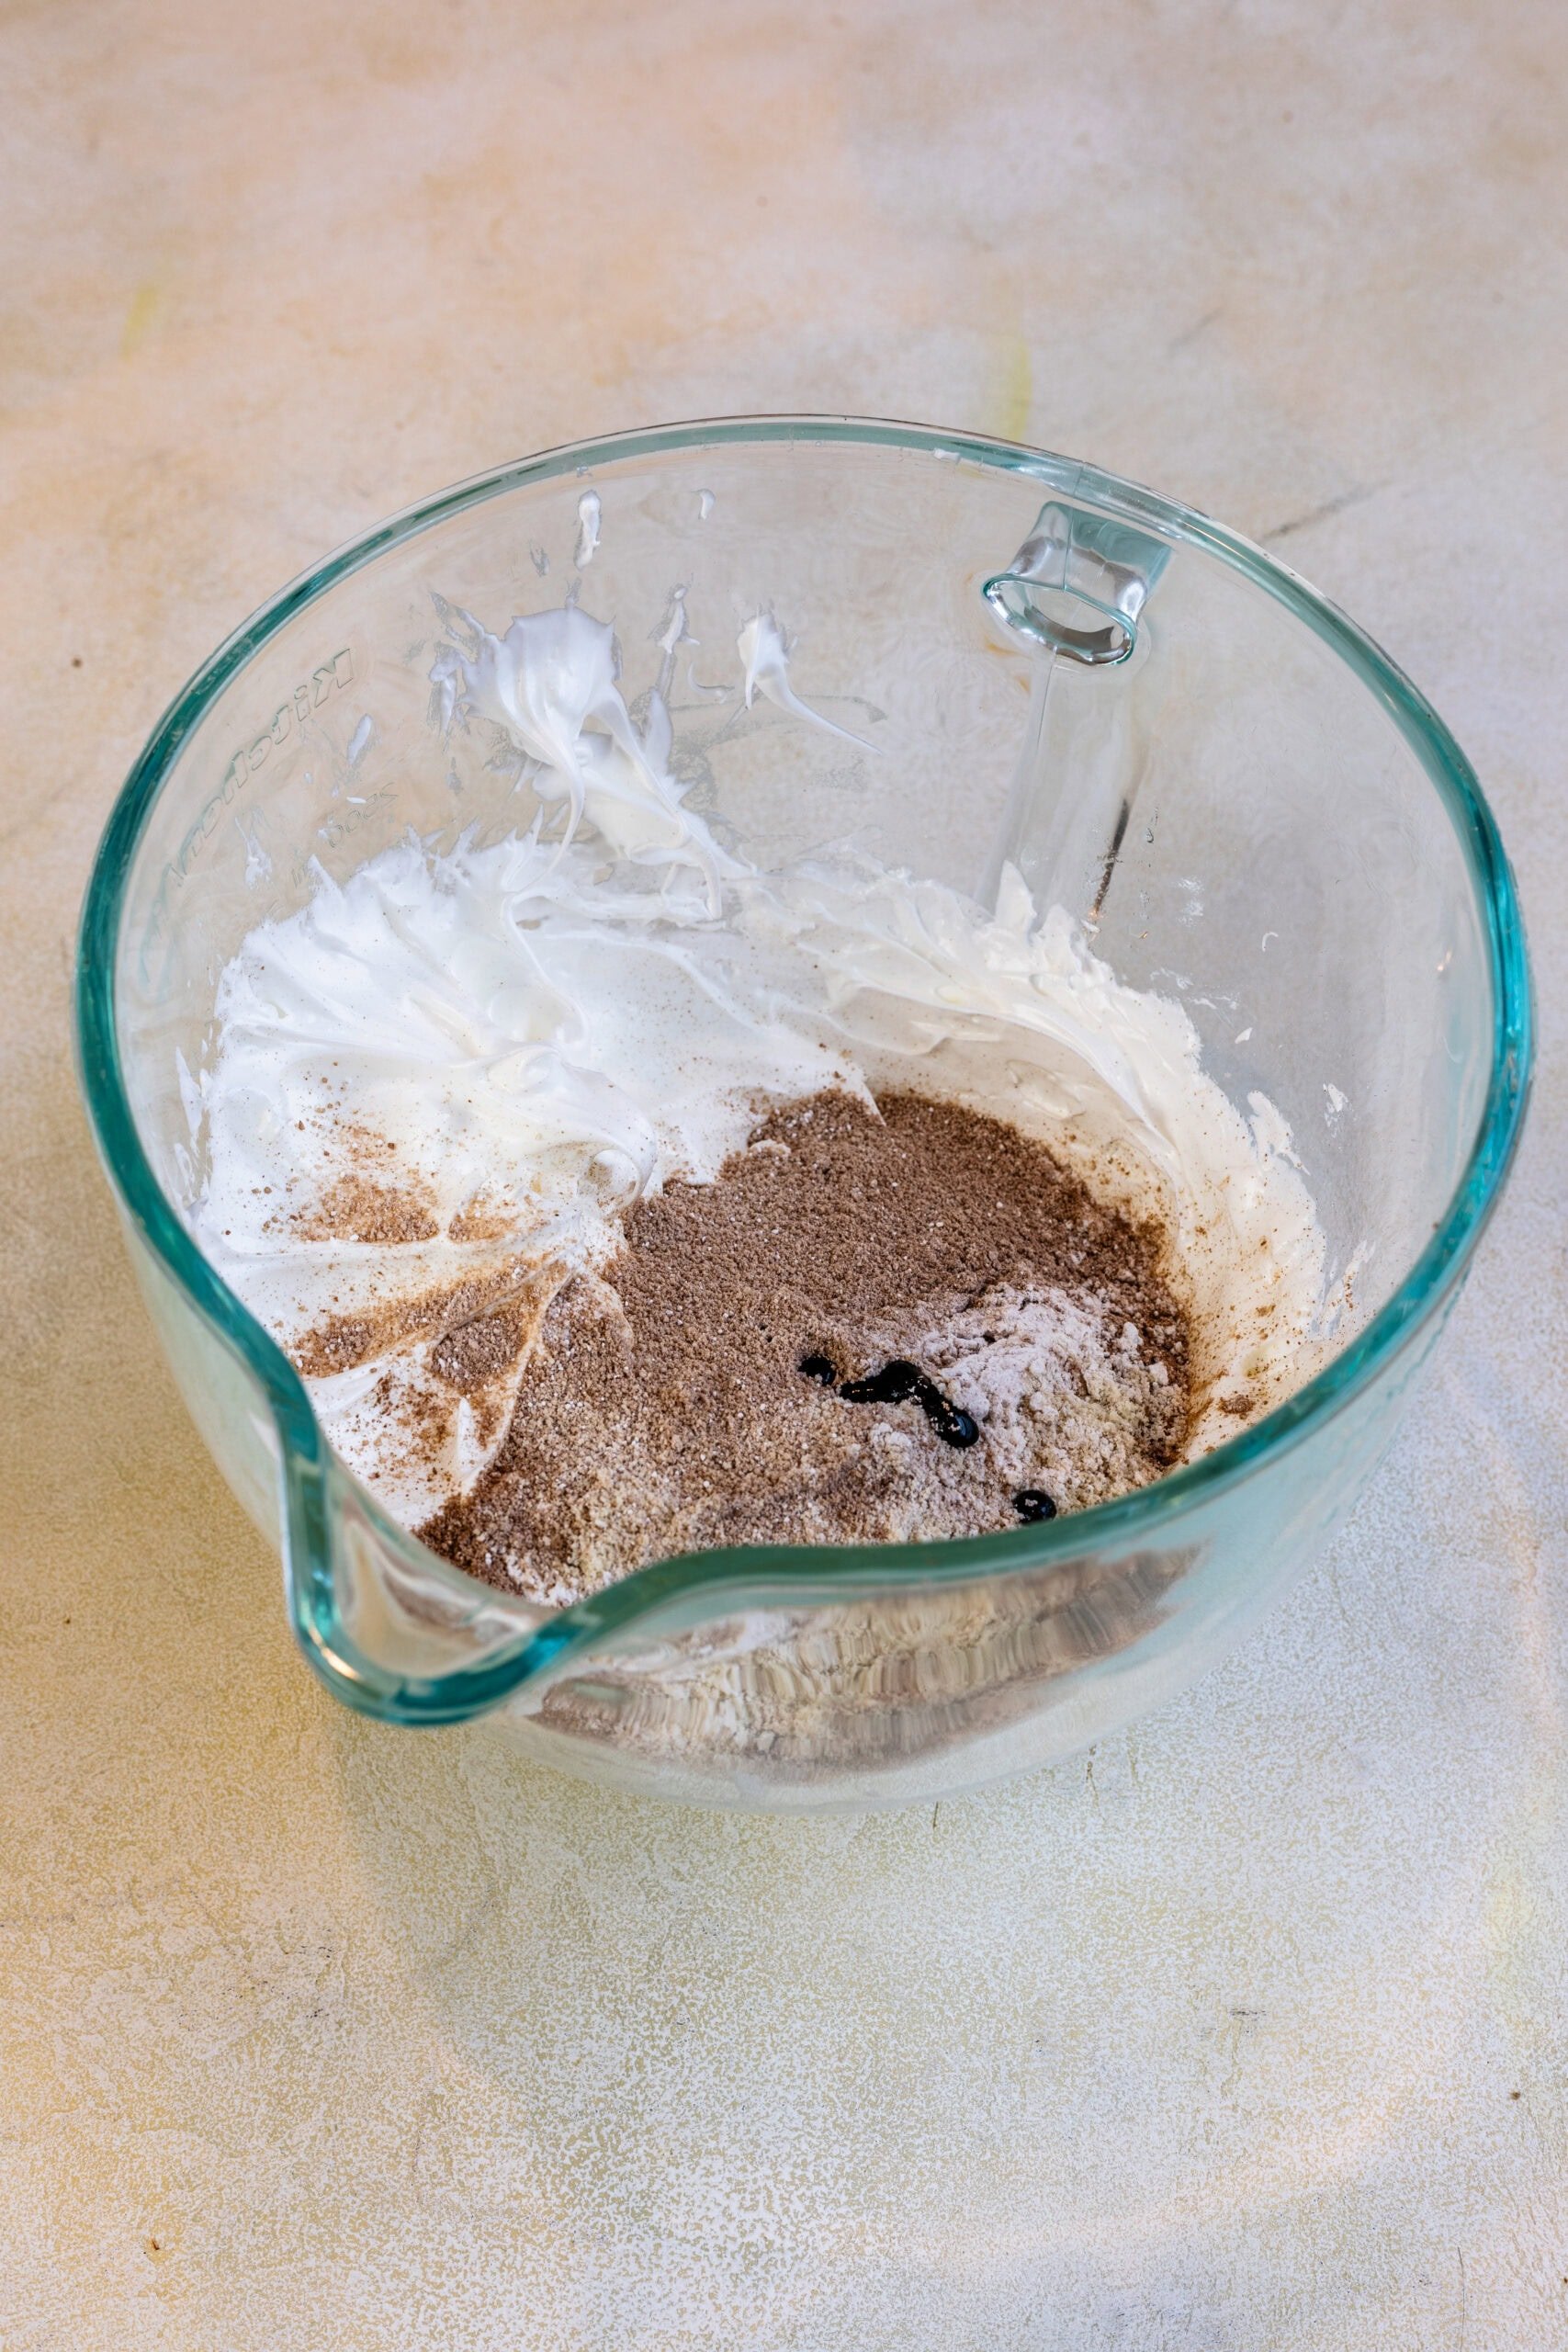
Add the sifted dry ingredients to the stiff meringue. Add brown food coloring if using.
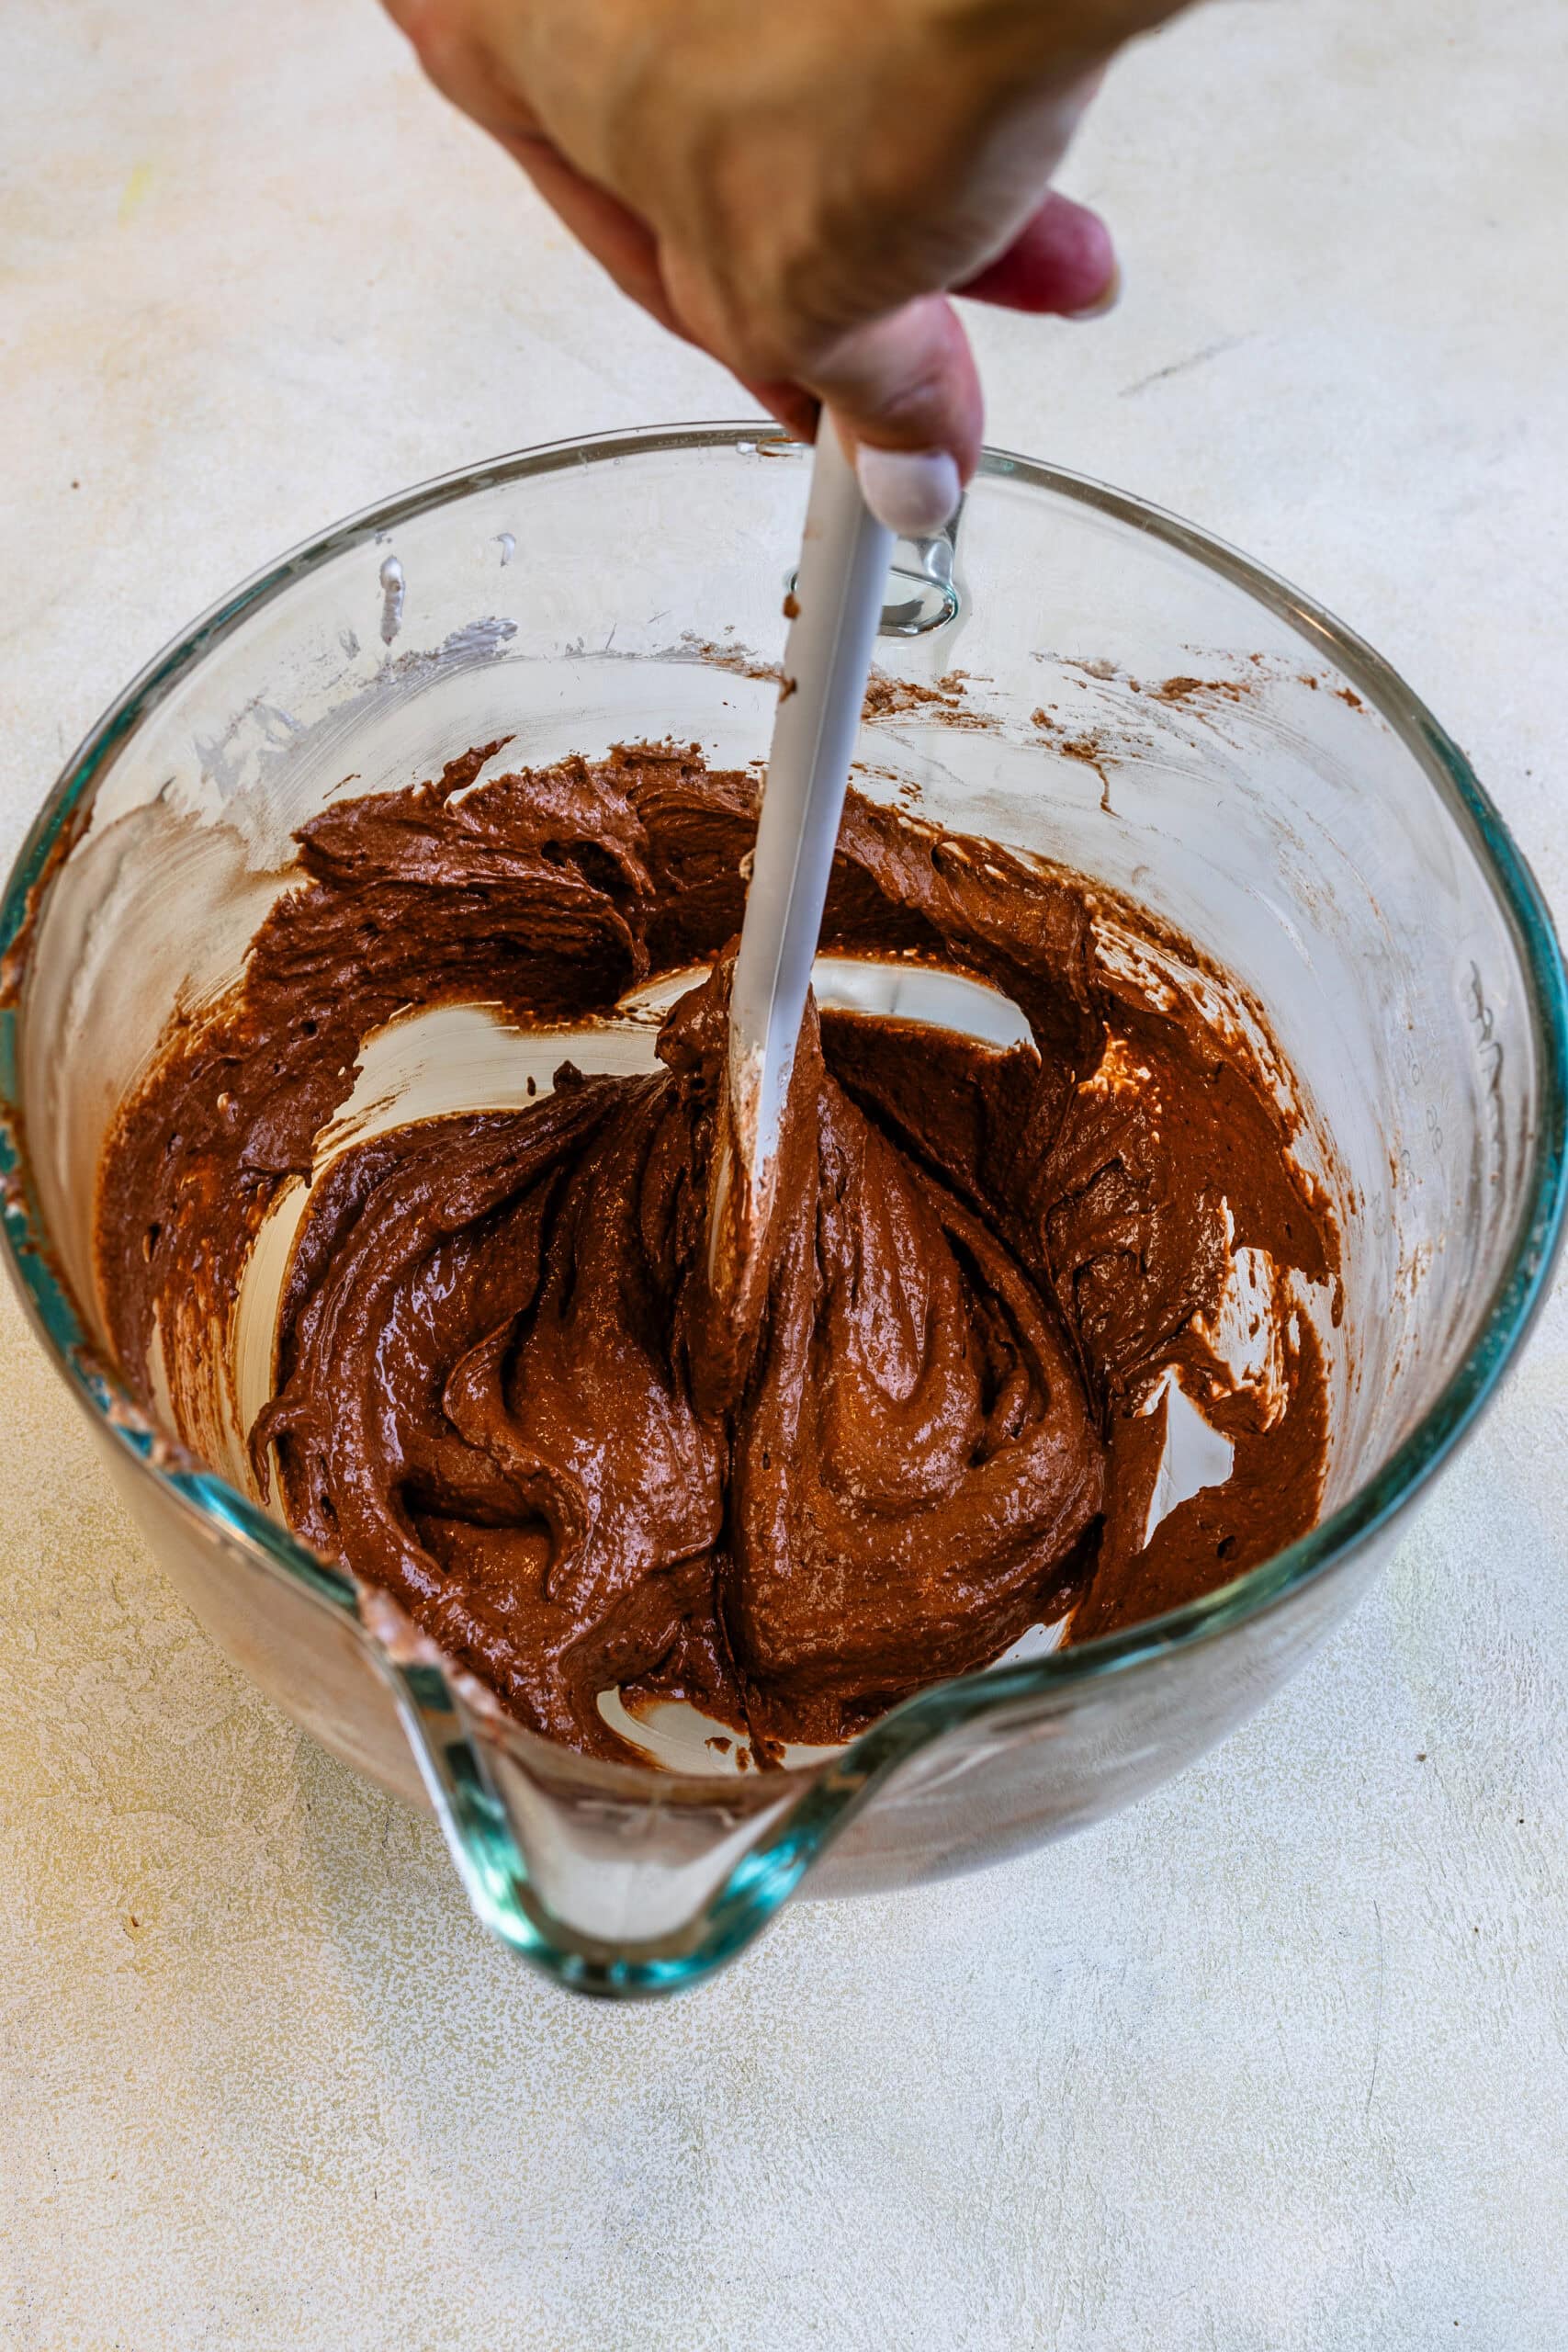
Fold gently with a spatula, forming a “J” motion, cutting through the middle with a spatula, then circling around the bowl.
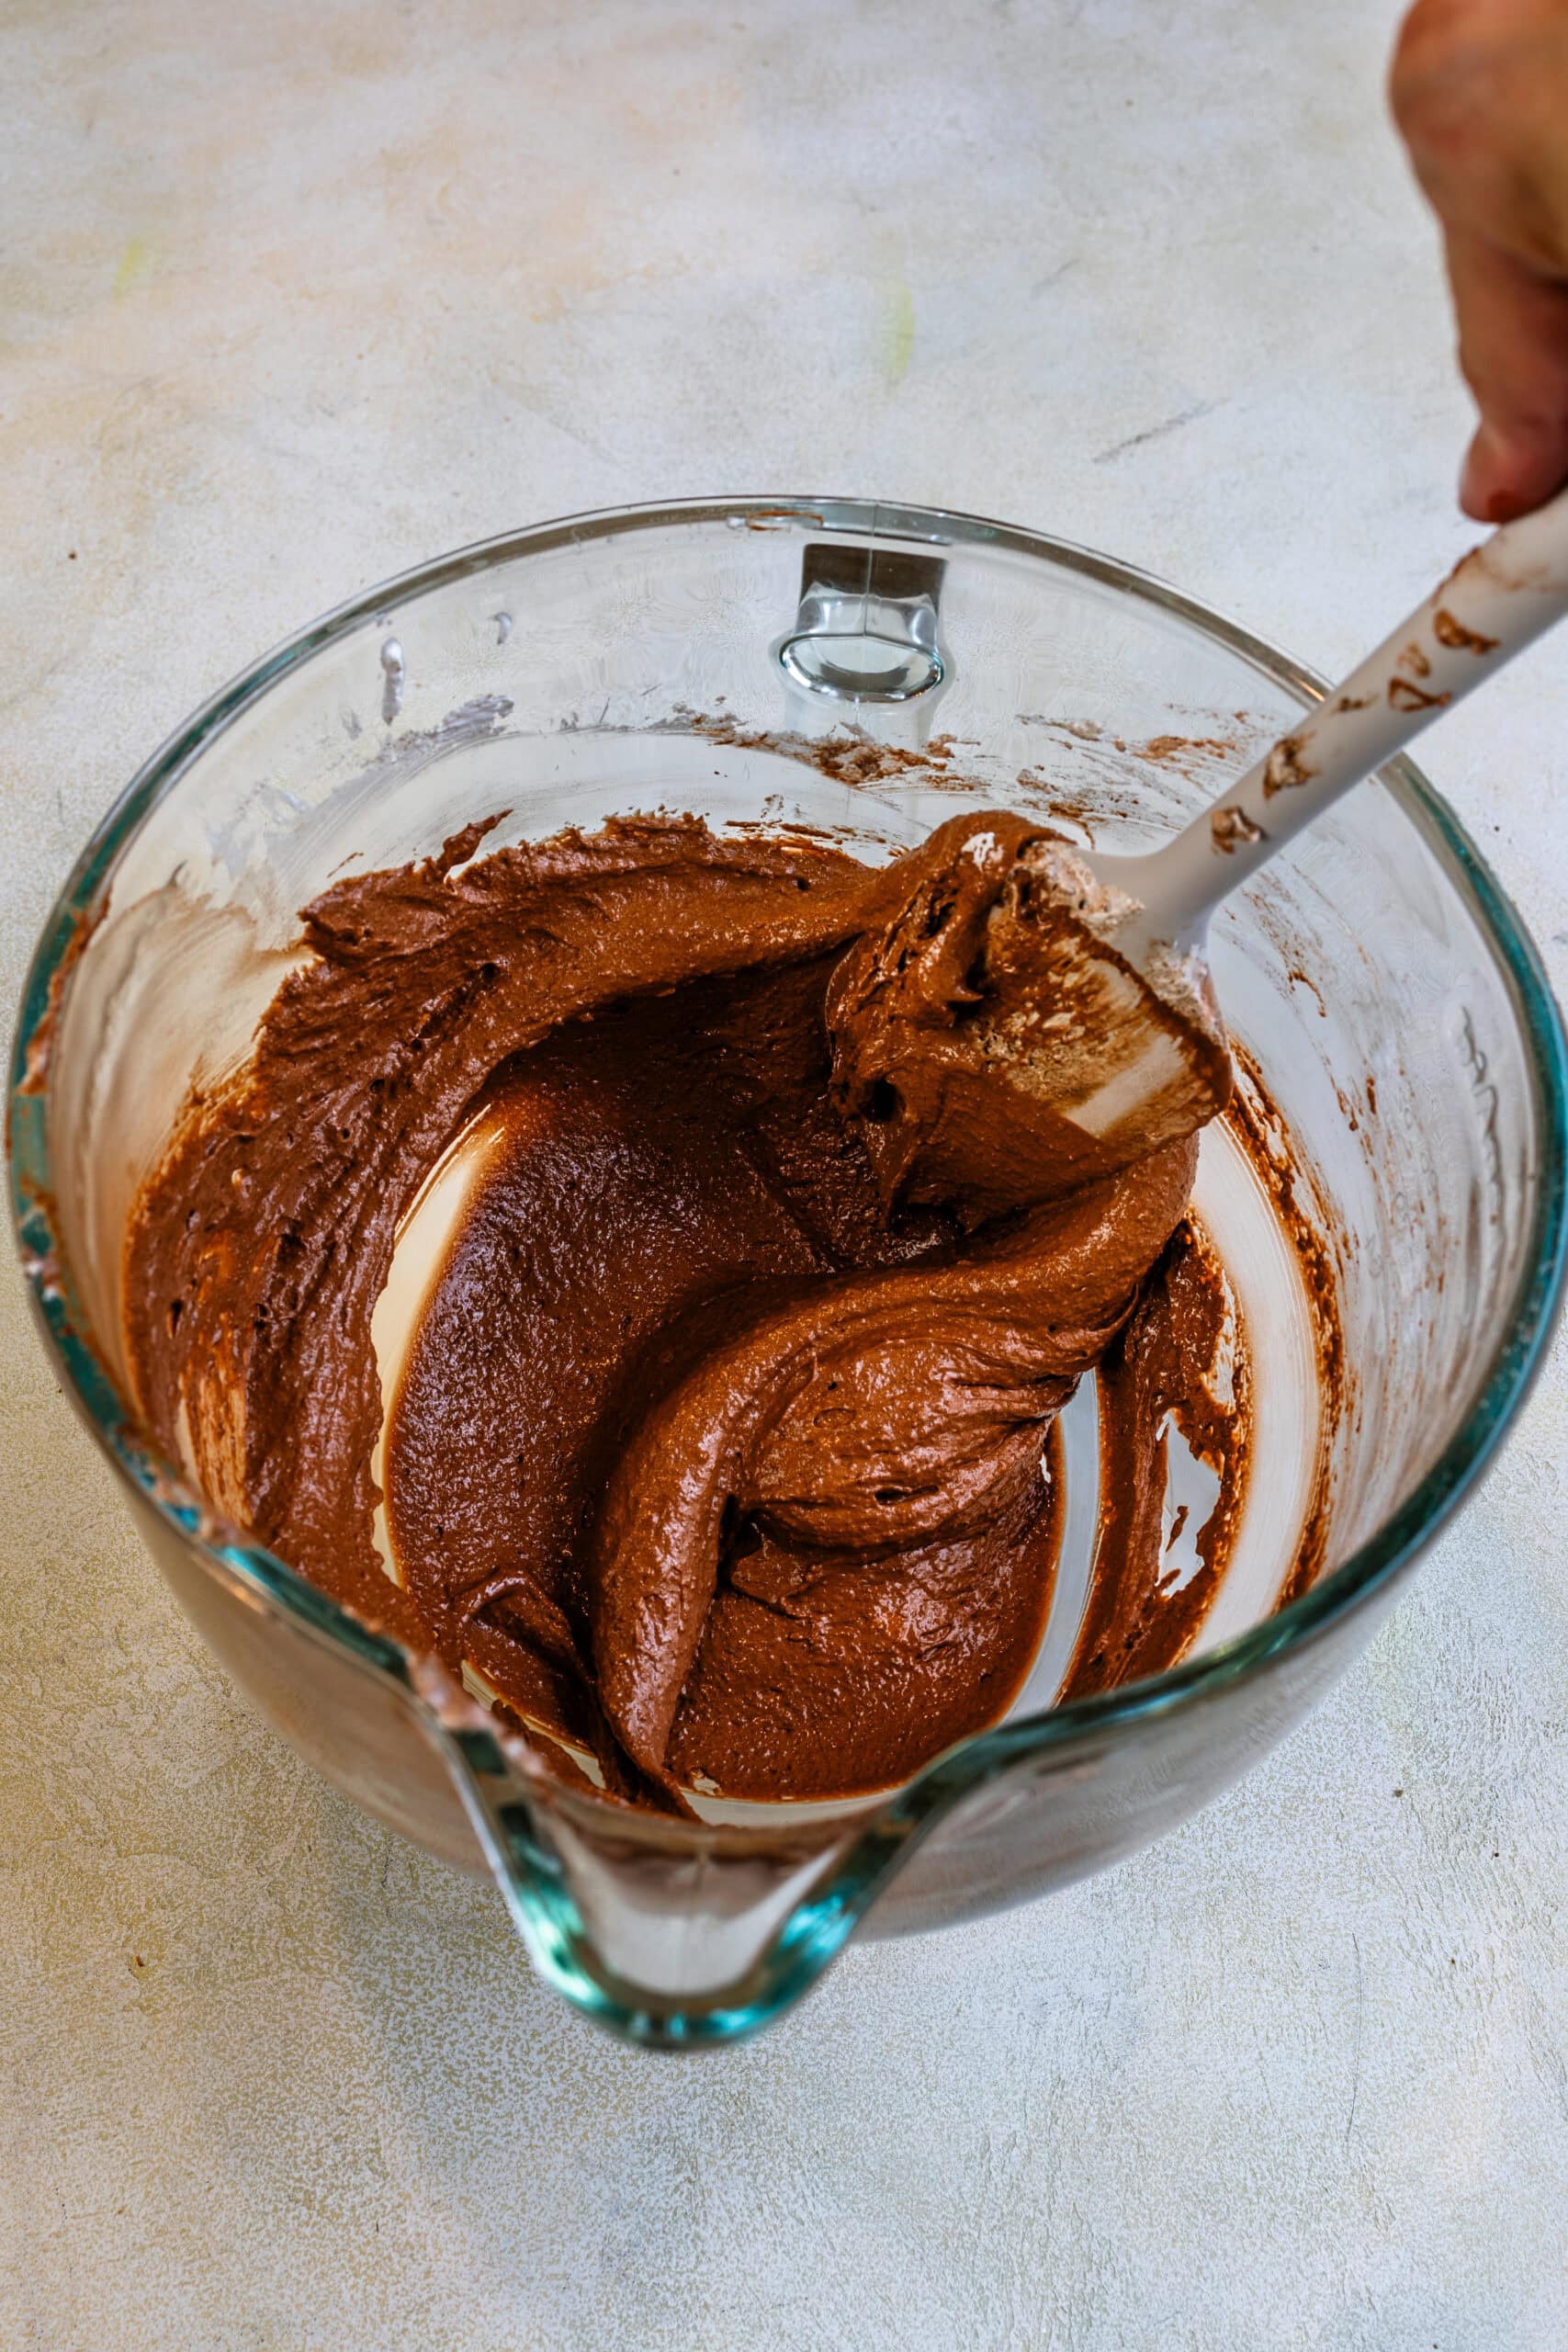
Press the batter against the sides of the bowl to deflate the batter.
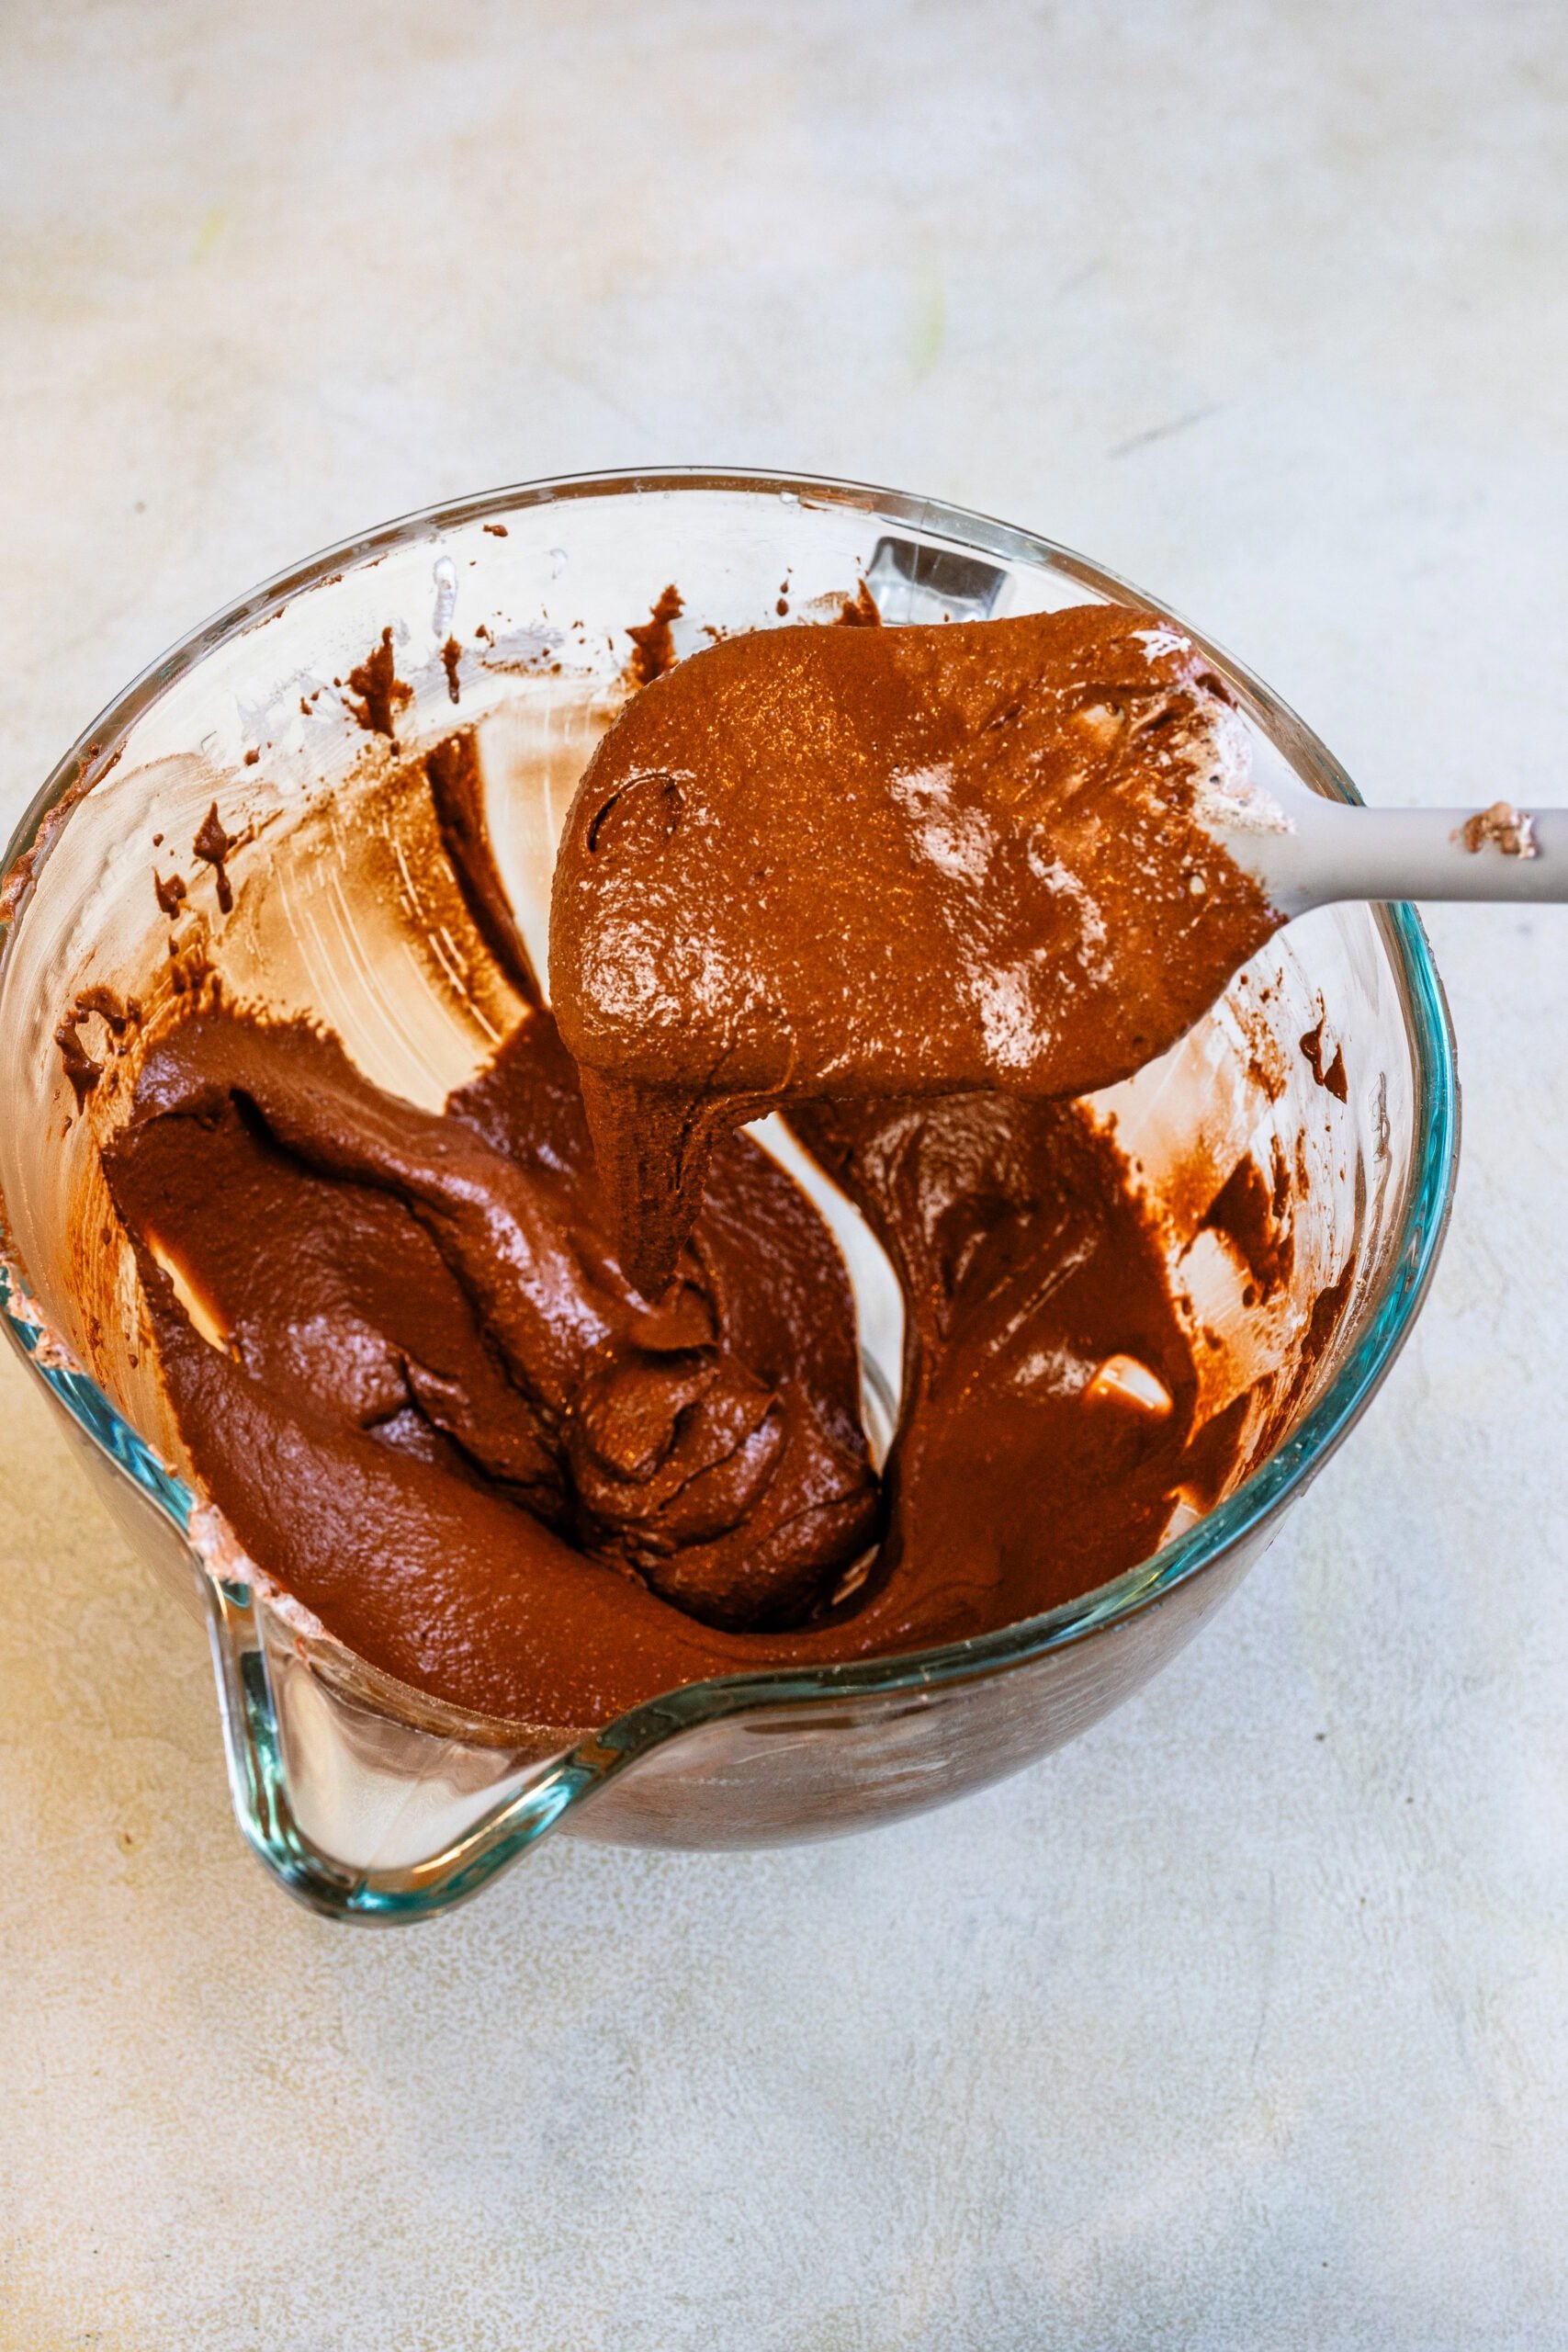
The batter is ready when it flows slowly off the spatula, forms figure-8s without breaking, and settles back into itself within 20–30 seconds.
The Teaspoon Test
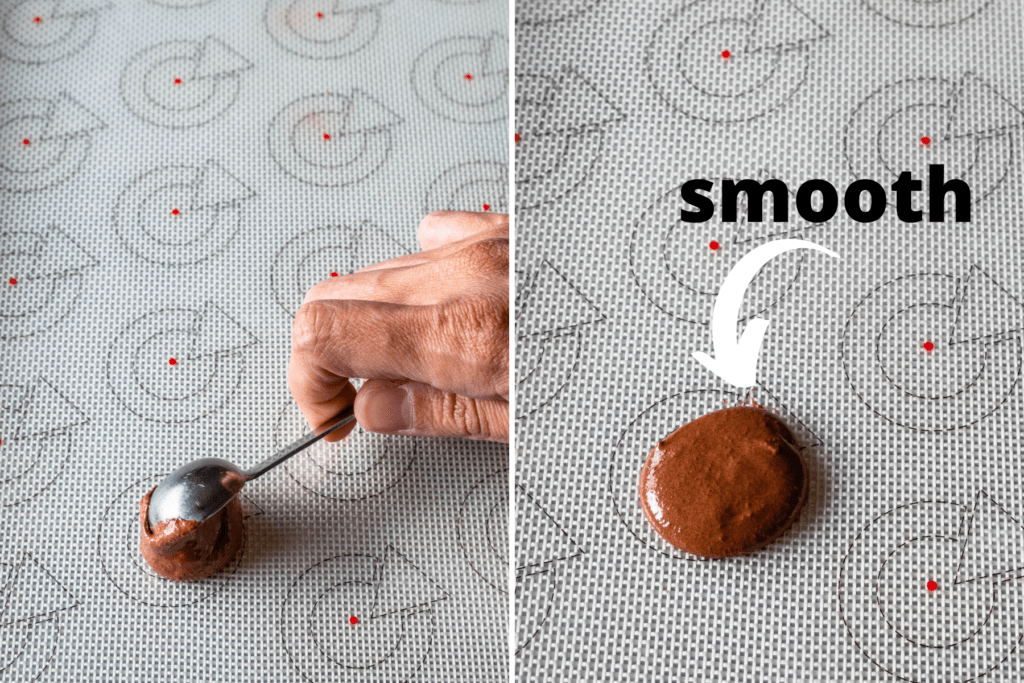
You can also perform the Teaspoon test, in which you spoon some batter on the tray, give it a few gentle taps, and watch how it behaves. The batter should spread out and lose the peak on top after a minute or so after being spooned onto the tray. This testing method works with all batters, not just chocolate. It’s the best way to tell if your batter is mixed enough if you are a beginner, or unsure of the proper consistency.
4. Pipe and Rest the Shells
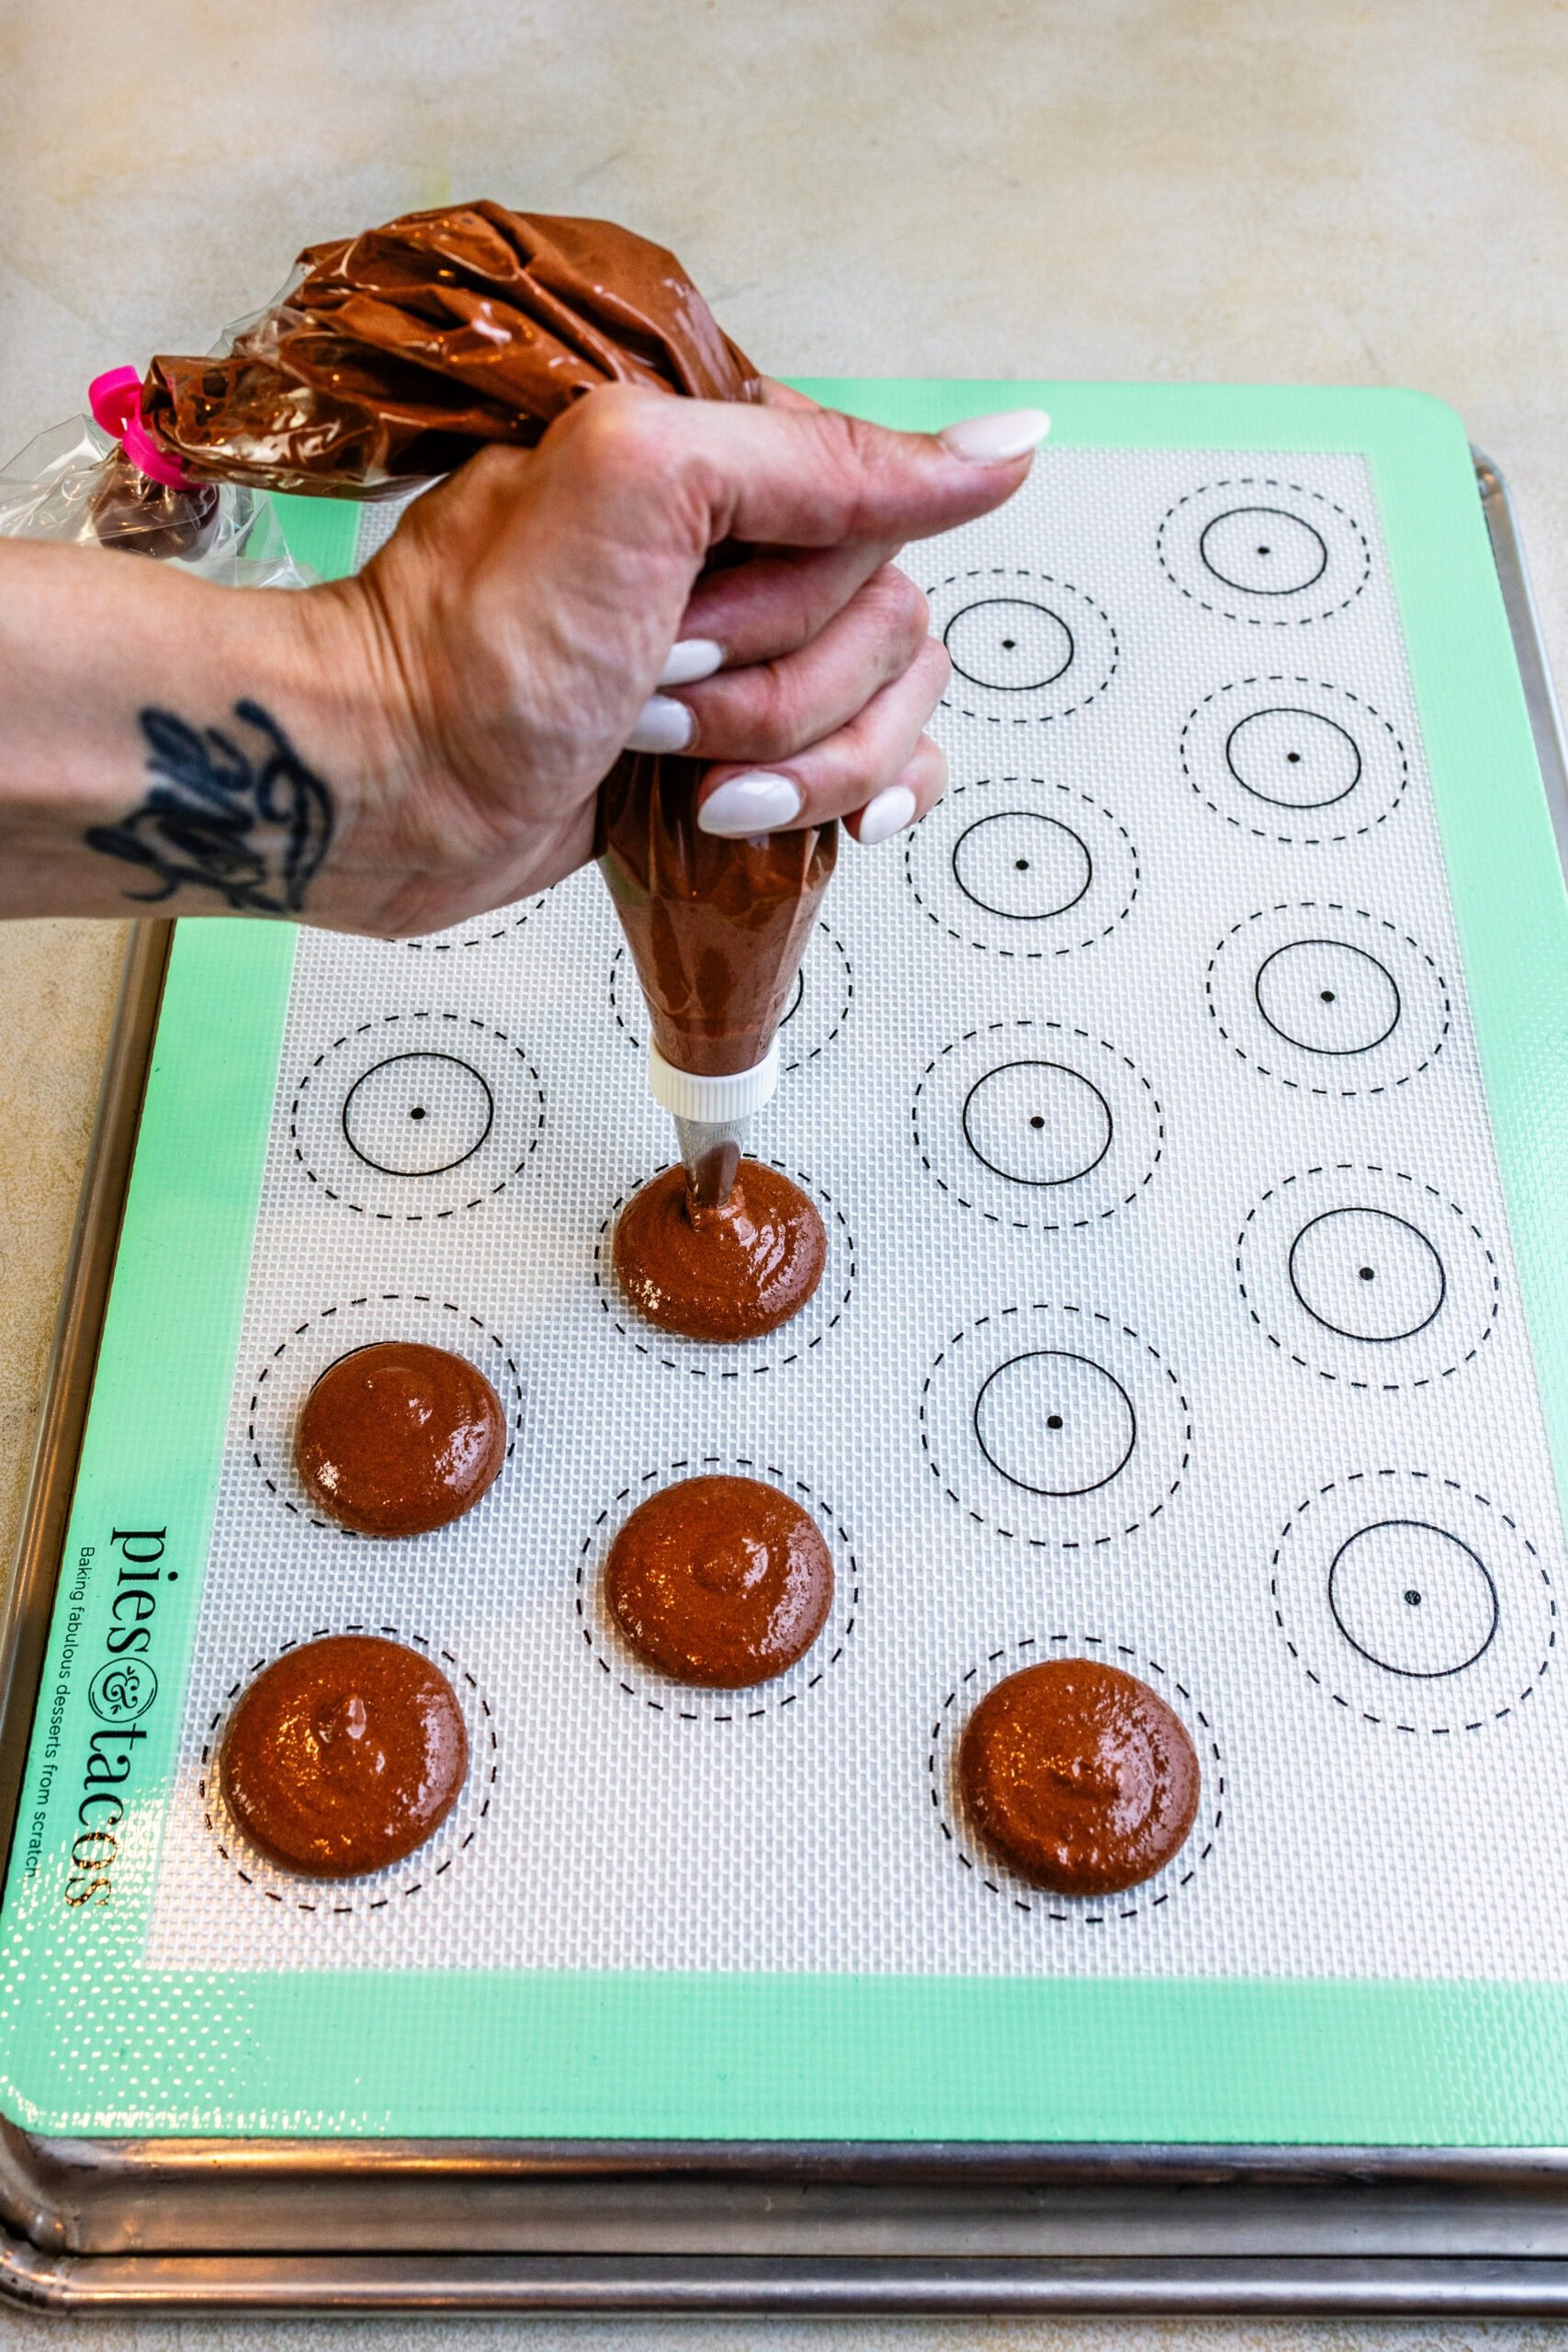
Transfer the batter to the piping bag and secure the top. Pipe straight down into the center of each template circle.
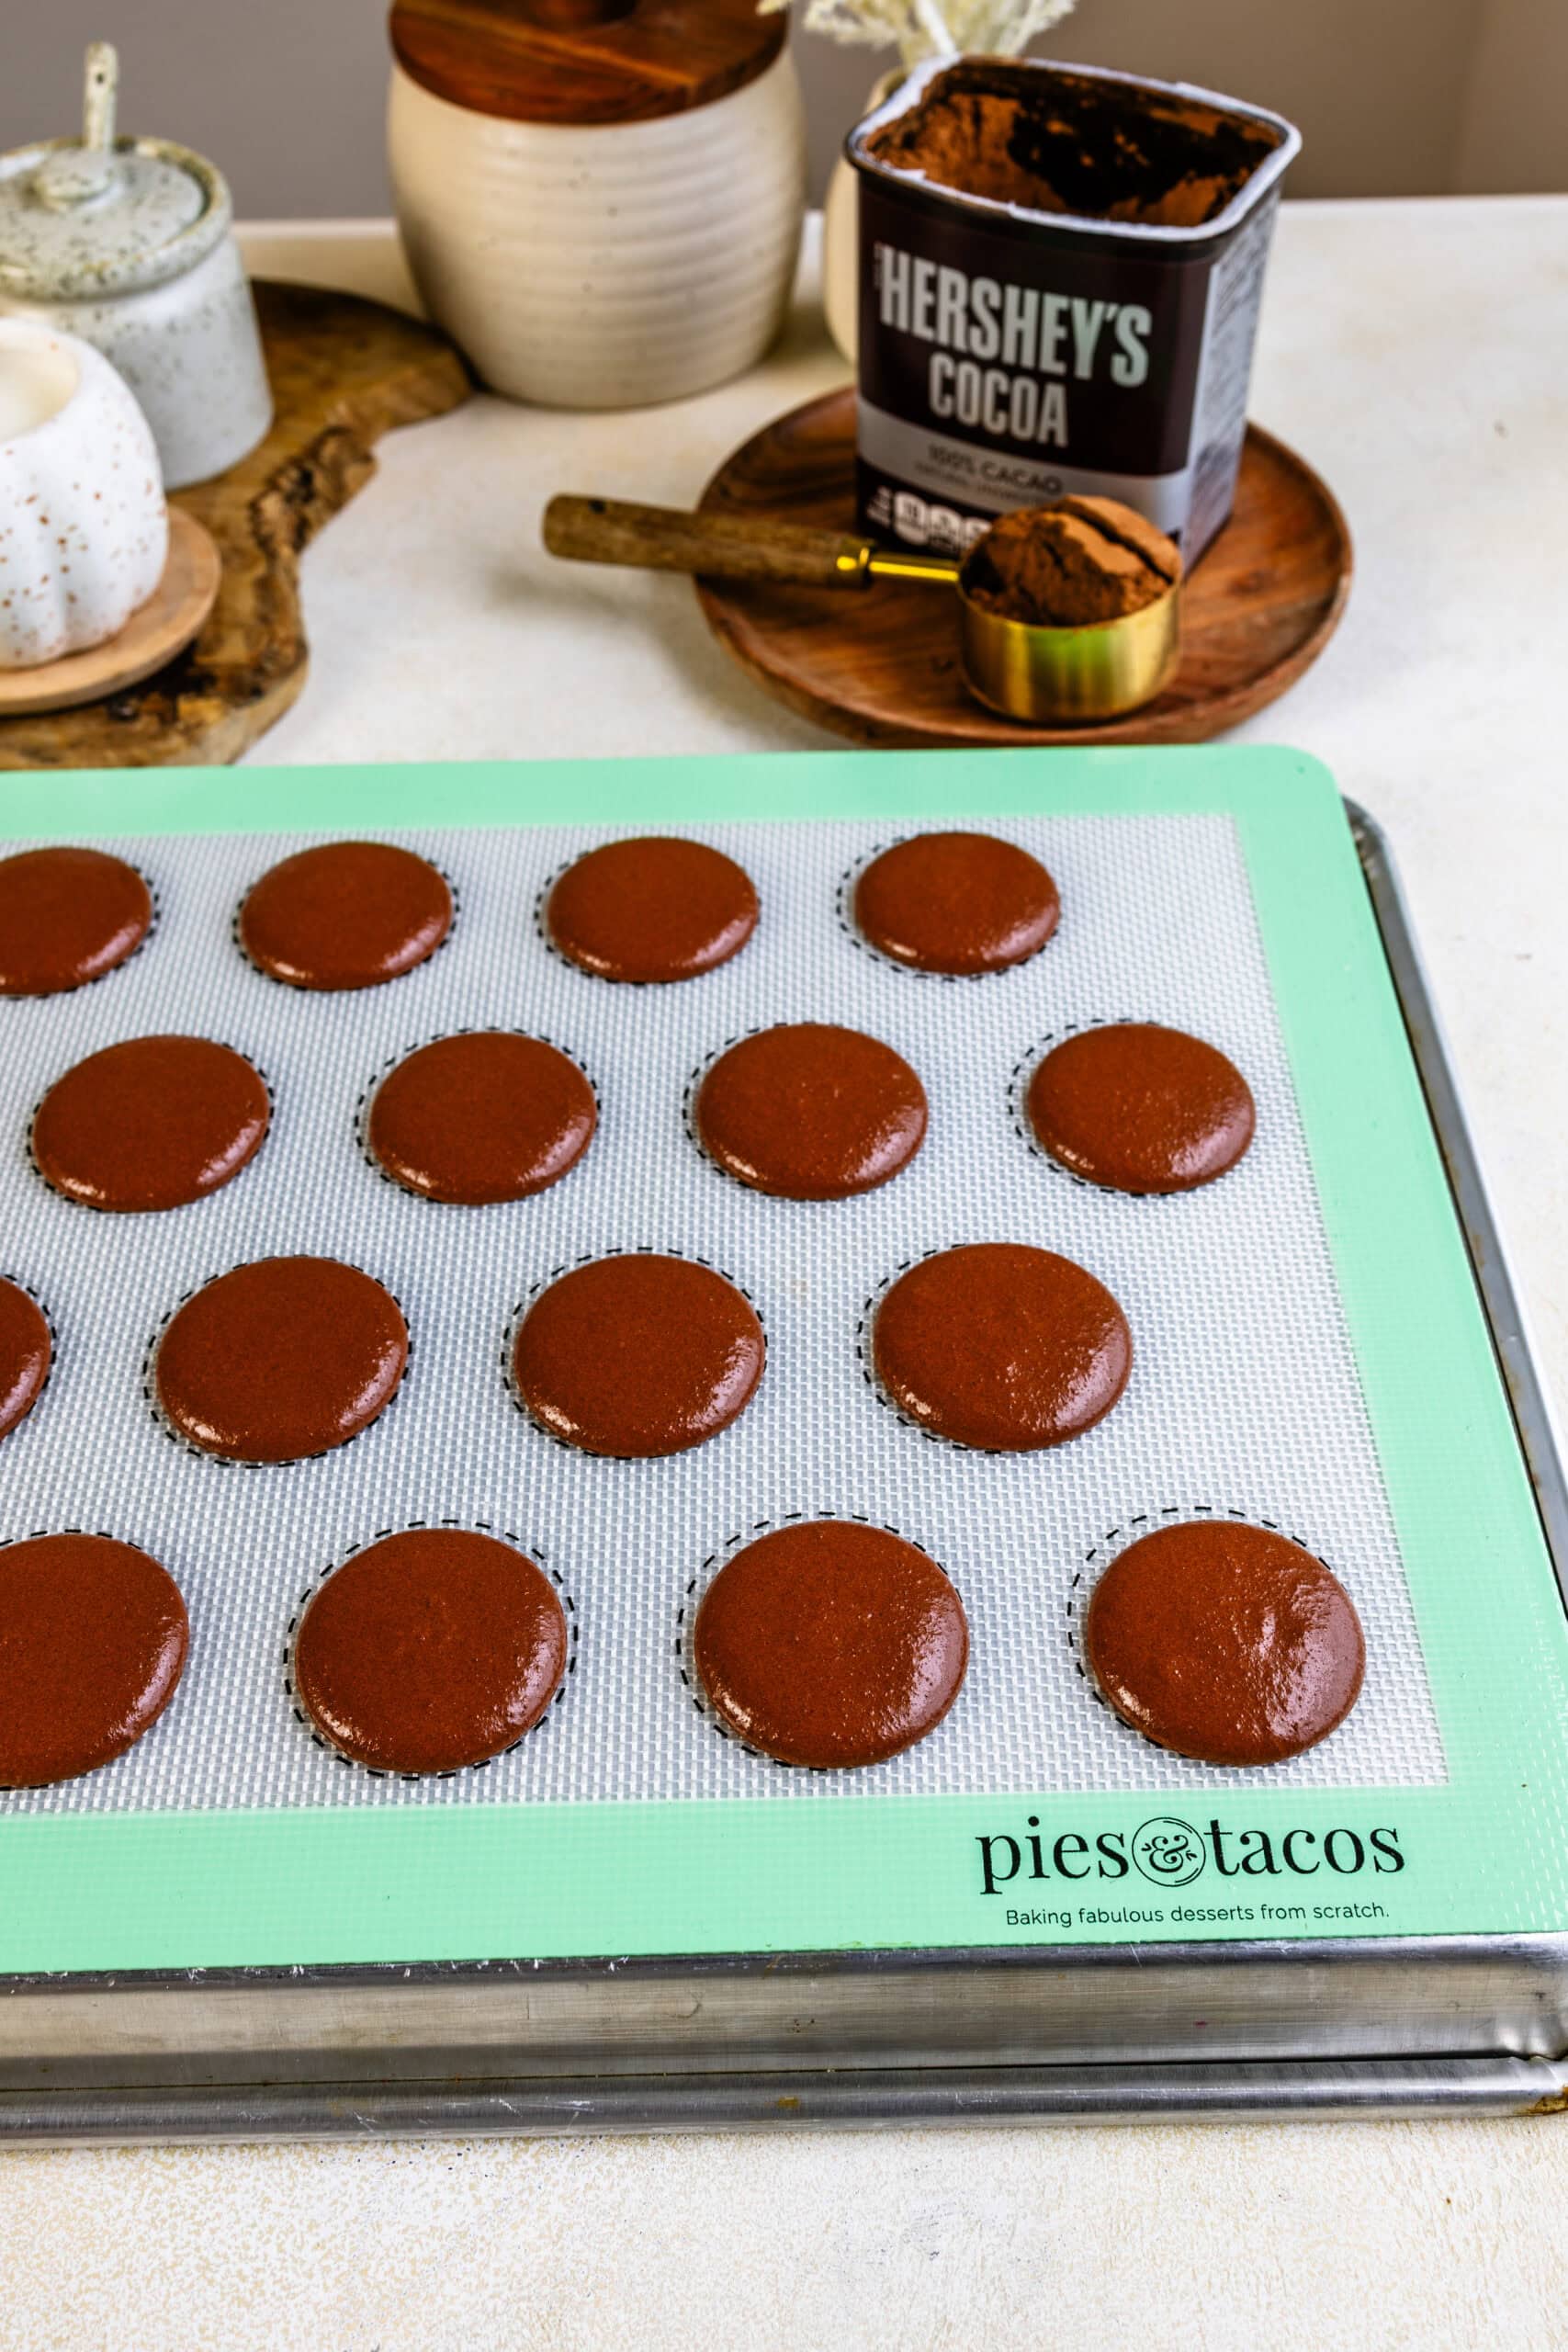
Tap the trays firmly against the counter to release air bubbles. Pop visible bubbles with a toothpick.
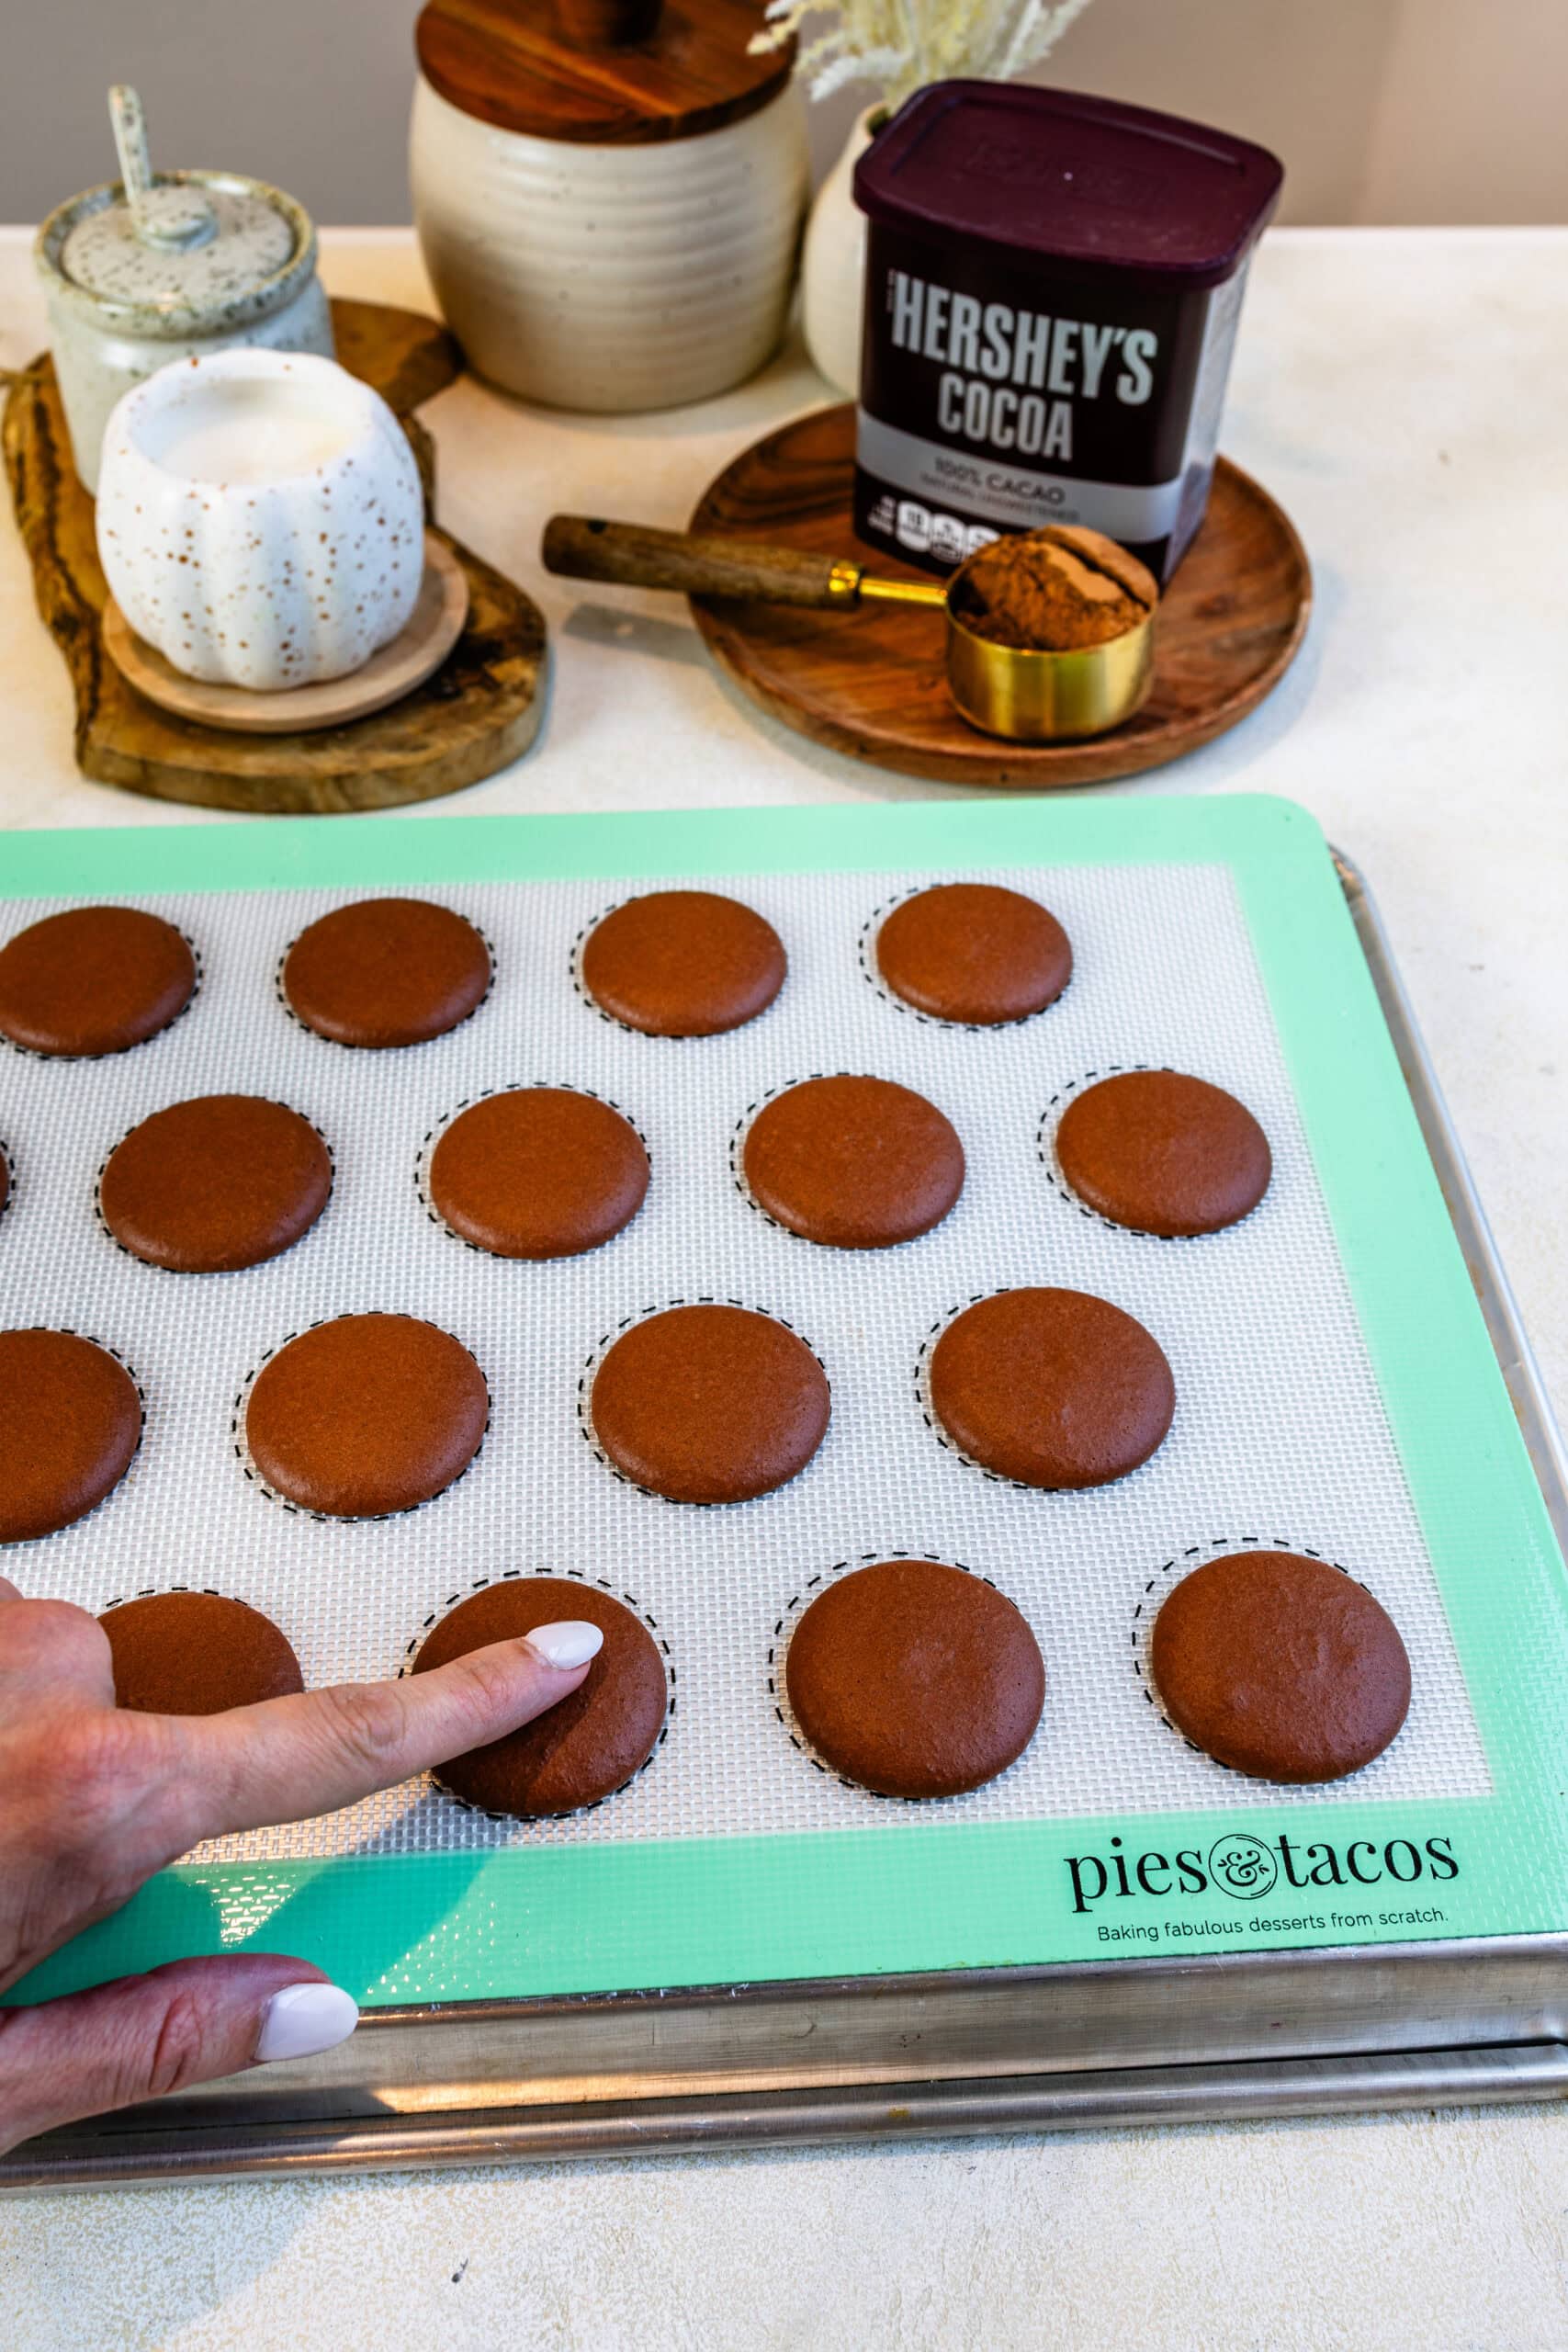
Let the shells rest at room temperature for 20–40 minutes, or until the tops feel dry and do not stick to your finger. Depending on the weather, or how much food coloring you’ve added, it can take much longer.
5. Bake
- Preheat the oven to 300°F. But have in mind oven temperatures vary depending on your oven. Read this article to understand more about your oven and how to determine the best temperature to bake your shells.
- Bake one tray at a time.
- Bake for 5 minutes, rotate the tray if needed, then continue baking for a total of 15–20 minutes.
- The shells are done when they no longer jiggle and release cleanly from the mat.
- Let cool completely before filling.
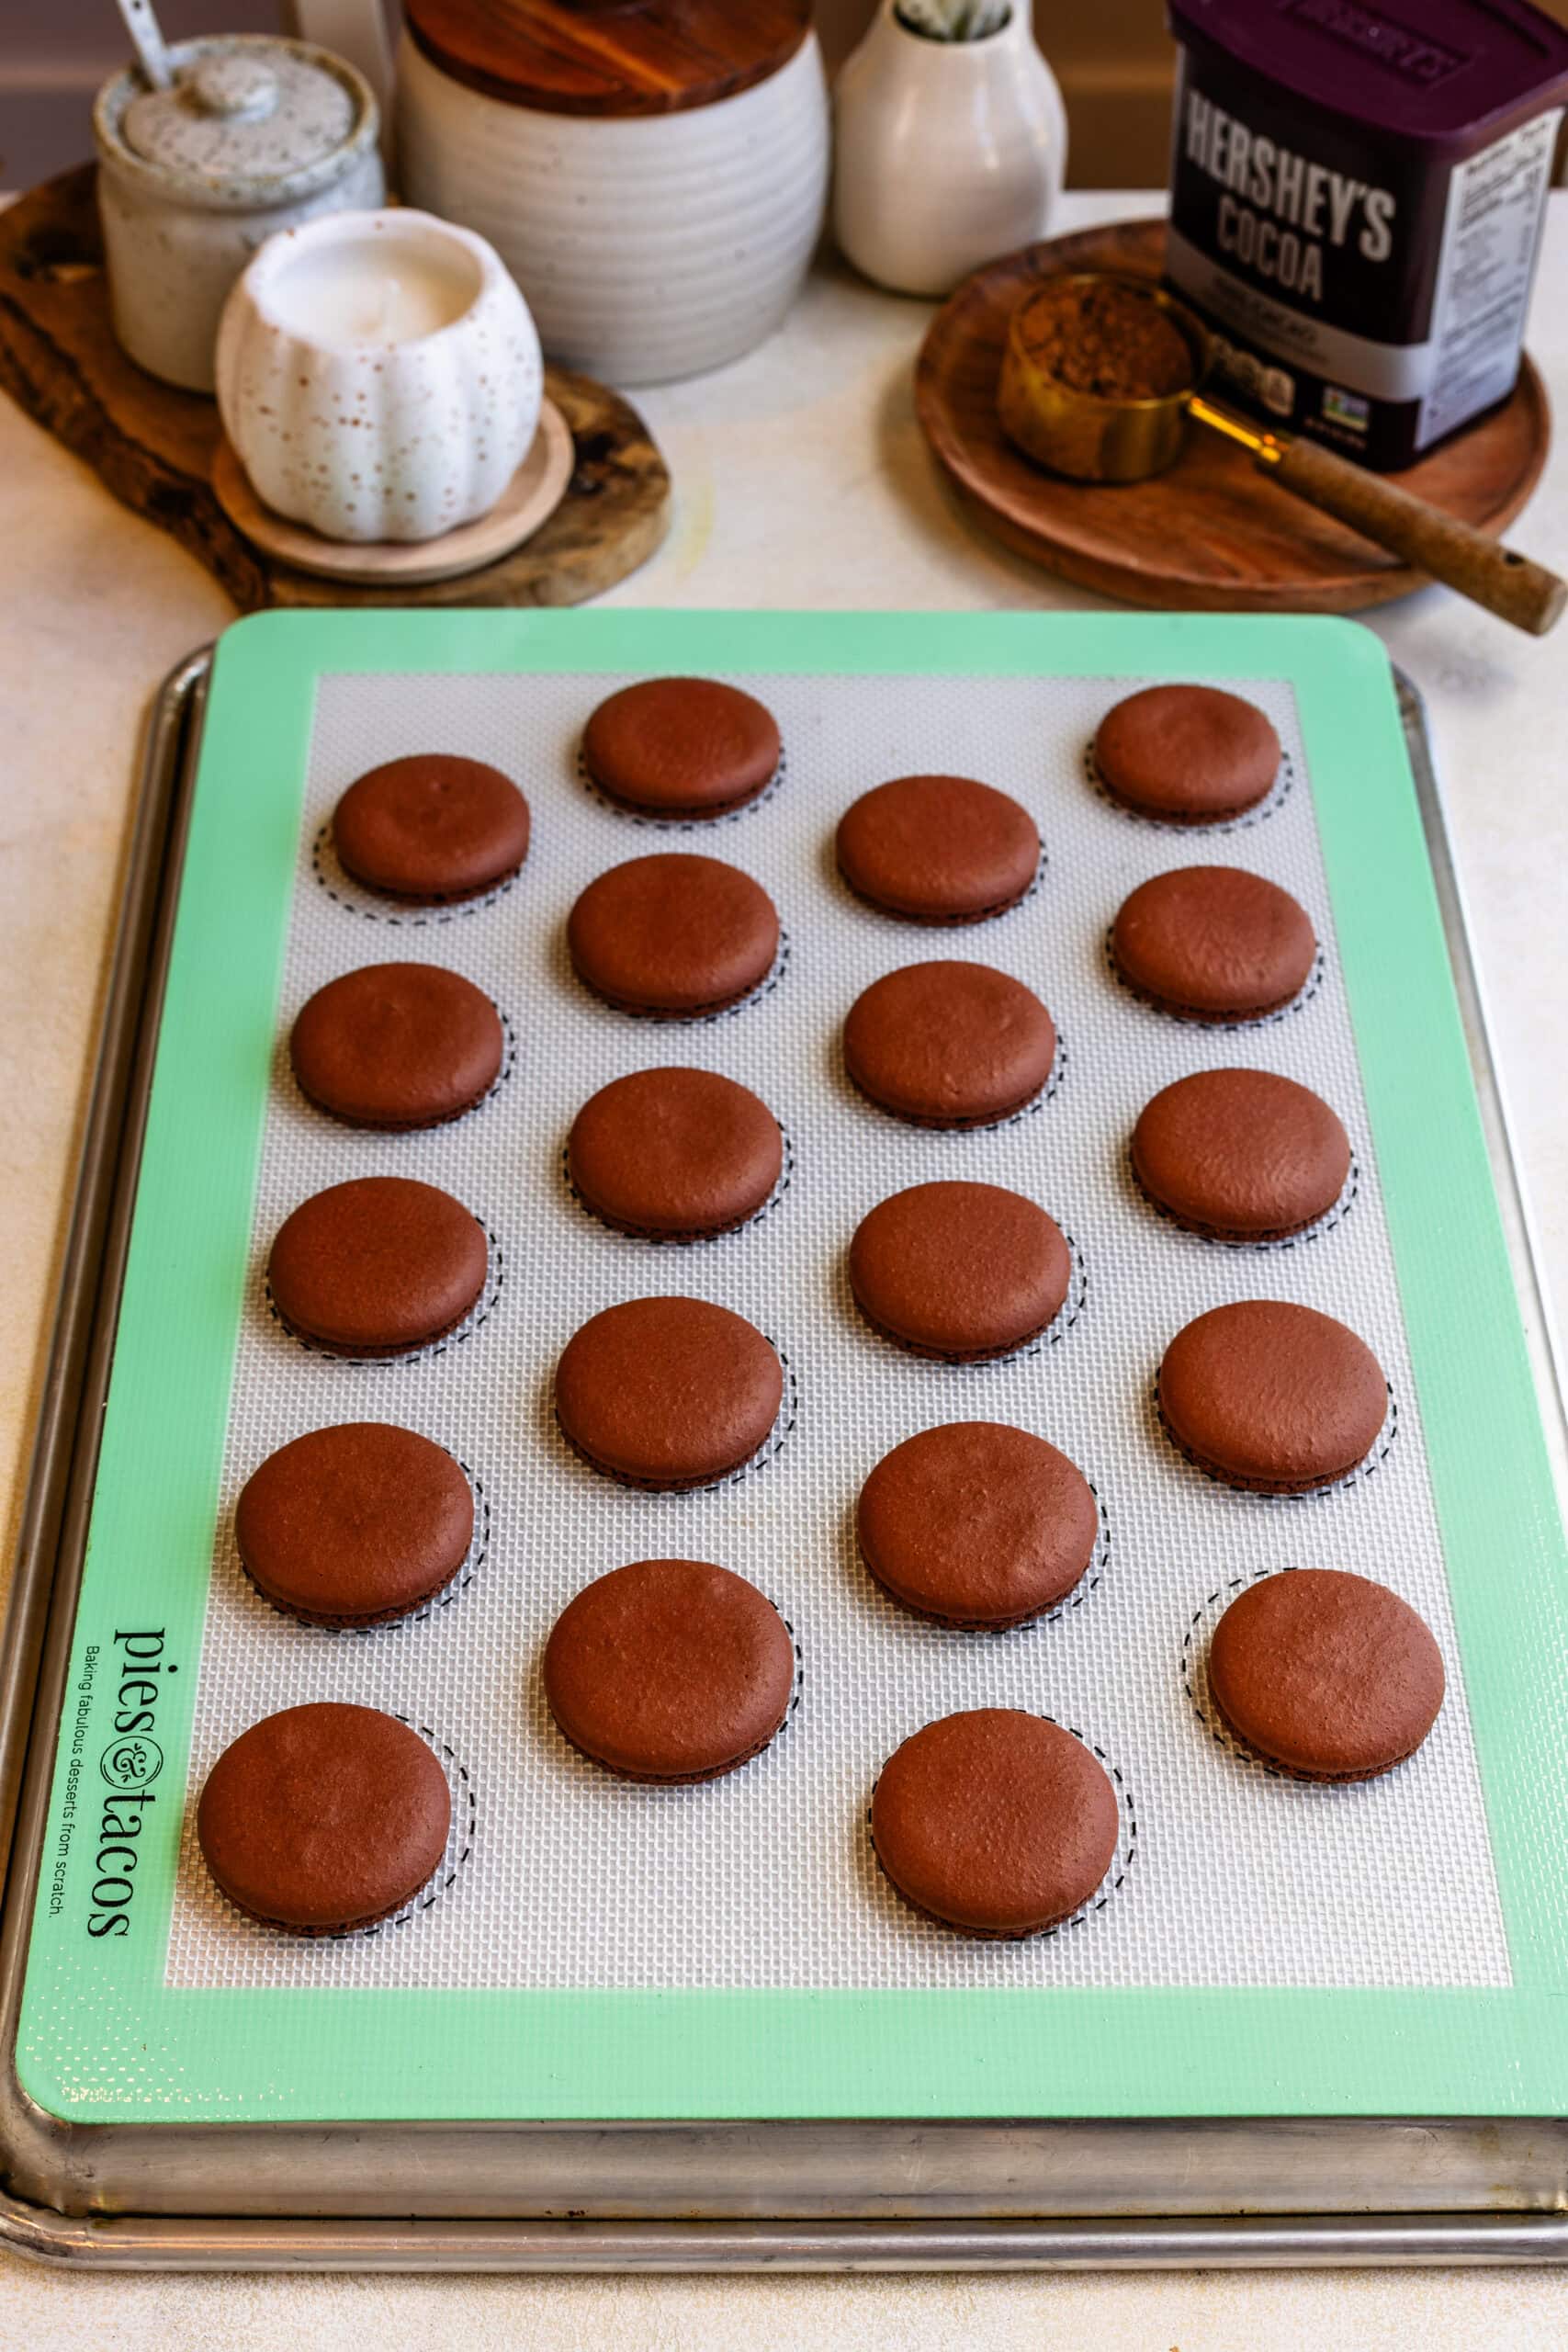
6. Fill the Macarons
I have an immense amount of fillings that would go amazing with chocolate macaron shells. Here are some of the suggested fillings from my blog. Such as these delicious Snickers Macarons, filled with Caramel Buttercream and nougat. These delightful Hot Chocolate Macarons, filled with hot chocolate buttercream. If you enjoy Nutella, then these Nutella Macarons, filled with Nutella buttercream will be perfect for you. And my all time favorite, Brownie Macarons, filled with a piece of brownie in the center.
Down below in the recipe I have posted two beautiful filling ideas: Rich Chocolate Buttercream, and Chocolate Ganache. Check both of them out, and let me know which one is your favorite!
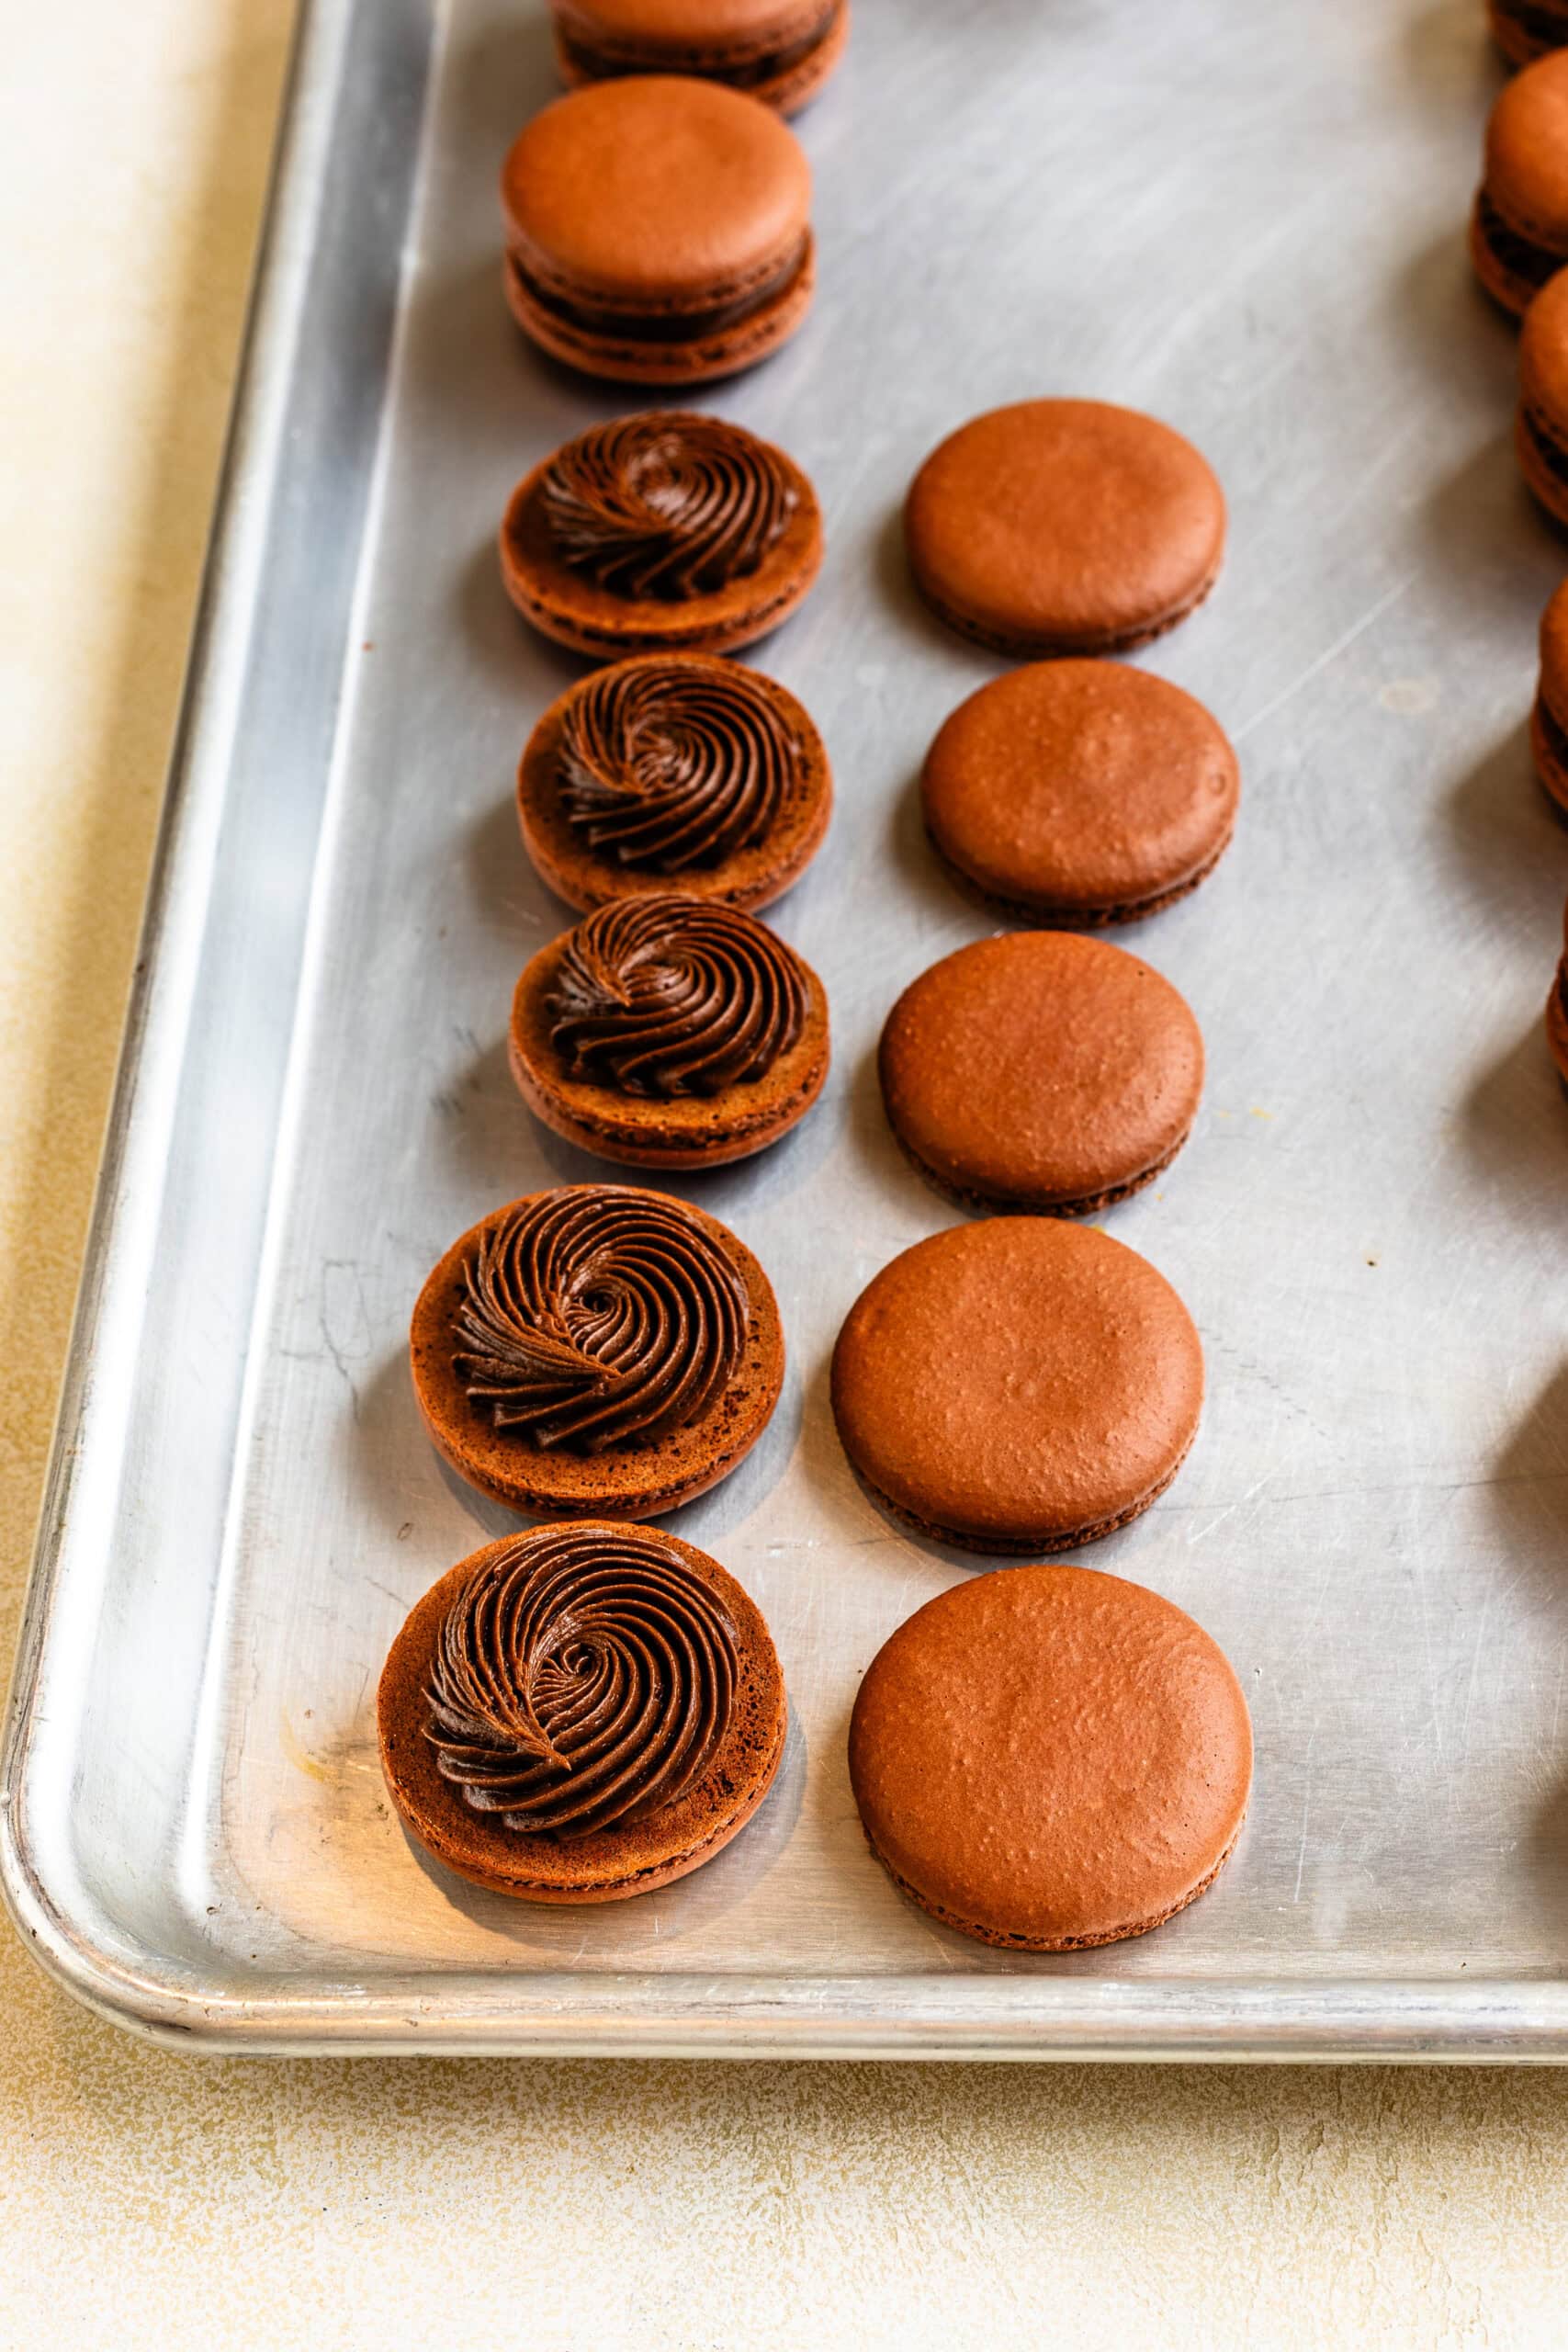
Fill the shells and place them in an airtight container in the fridge to mature overnight. Read more about Macaron Storage here.
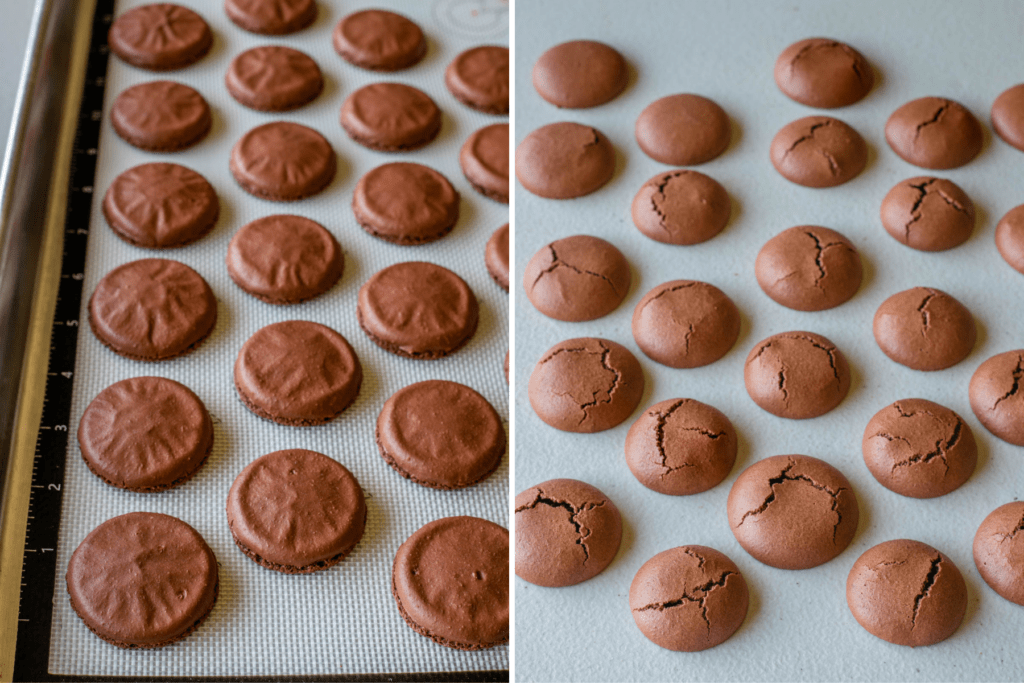
Why Do Chocolate Macaron Shells Fail?
Chocolate shells fail more often than classic shells because cocoa powder adds fat to the batter—and fat is the enemy of meringue. A stable meringue forms when proteins in the egg whites build a structured network that traps and protects air bubbles. When fat enters the mix—whether from oily almond flour or high-fat cocoa powder—it interferes with that structure, leading to weak or unstable shells. This is something I learned firsthand through a lot of trial and error.
This leads to:
- Cracked shells
- Wrinkled or porous tops
- Weak or tiny feet
- Hollow or collapsed shells
In short: too much fat prevents the meringue from supporting the macaron structure. This is why chocolate macarons require a more precise meringue and slightly different handling than classic shells.
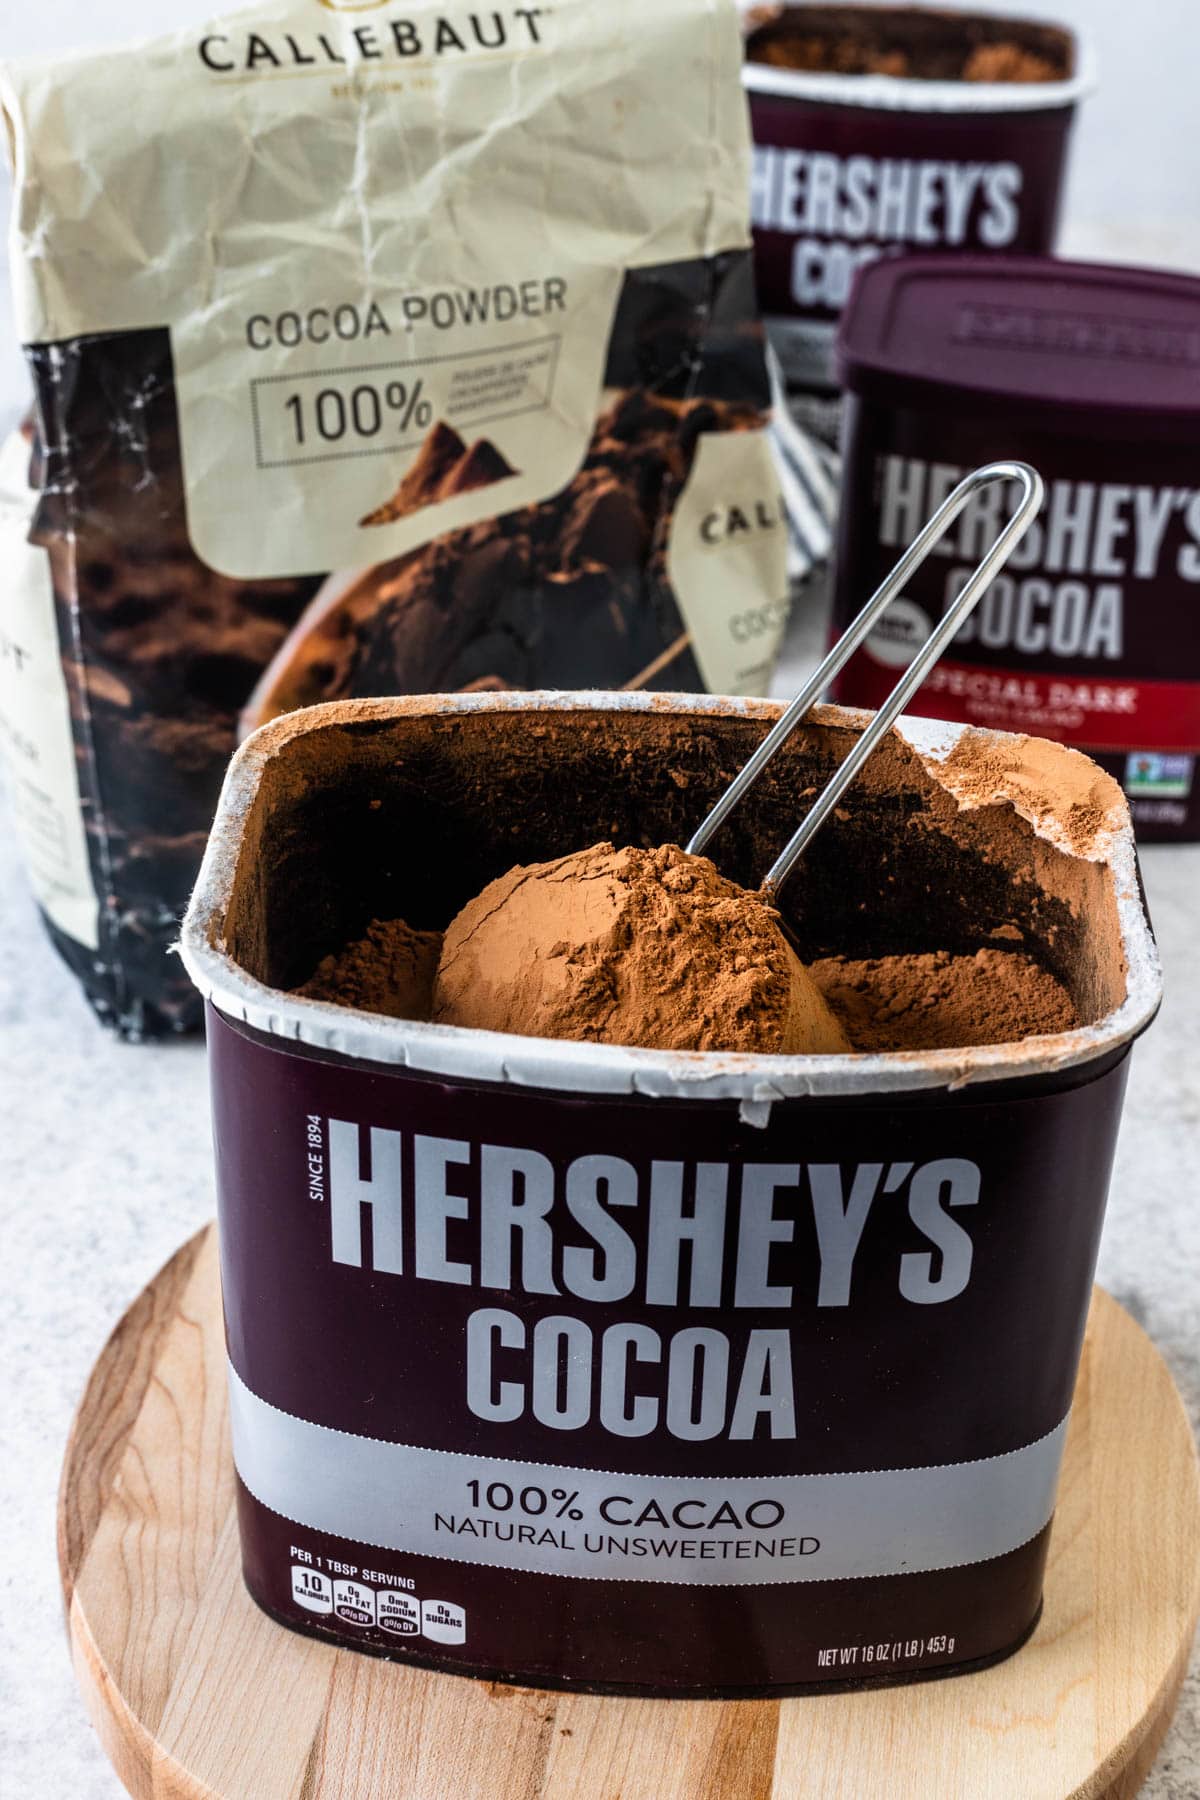
Best Cocoa Powder for Chocolate Macarons
Some cocoa powder brands have higher fat content than others. And depending on the fat content of the almond flour you use, the fat in the cocoa powder will also add into that, which will affect the shells greatly. The fat content matters.
Here’s why: Fresh, low-fat cocoa powder keeps the meringue stable. Older or high-fat cocoa powder releases fat into the batter and weakens the shells.
| Cocoa Powder | Fat per Tbsp | Notes |
| Hershey’s | ~0.5 g | Low fat, consistent results |
| Callebaut | ~1.5 g | Higher fat, can cause wrinkling |
| Valrhona | ~1.5 g | Amazing flavor, trickier shells |
A fat content around 0.5 g per tablespoon gives the best structure.
How much cocoa powder should you use?
My recipe uses 14 g cocoa powder. It works well for me, and I always use Hershey’s, but if you use a different brand, or have oily almond flour, or if your shells continue to come out wrinkled or cracked, you may want to reduce the cocoa powder to 5–10 grams.
If you do reduce it, replace the missing grams with powdered sugar to maintain the correct dry-to-wet ratio. Example: If using 7 g cocoa instead of 14 g, add 7 g extra powdered sugar.
Some bakers skip cocoa entirely and use brown food coloring, but you’ll miss the flavor. Even a small amount of cocoa adds richness, so I recommend adjusting — not removing it.
How to Know When to Stop Folding (Macaronage)
Macaronage is where most bakers go wrong — and chocolate batter behaves differently because cocoa powder absorbs moisture. Instead of focusing on mixing for a certain number of minutes, watch for the visual cues.
The perfect chocolate macaron batter should:
- Flow slowly and smoothly off the spatula on a V-shape
- Form two to three figure 8s without breaking
- Settle within 20–30 seconds when tapped
- Look glossy and thick, not runny
If the batter flows too quickly, it may be: overly affected by high-fat cocoa powder, overmixed, a sign the meringue was too soft.
Frequently Asked Questions
Usually because of too much fat (cocoa or almond flour), undermixed meringue, or oven heat hitting the shells too aggressively.
High-fat cocoa powder weakens the meringue and causes wrinkling as the shells collapse.
Egg white powder adds protein and strengthens the meringue. If you are used to adding it to your regular shells, you can still add it to the chocolate ones, but I recommend reducing the amount. I use 4g of egg white powder for my regular shells, for chocolate ones I reduce it to 2g. If living in a dry climate, consider skipping the egg white powder.
For the Swiss method (the one highlighted here), no. The whites warm up naturally when placed over the double boiler with the sugar. It might take longer to dissolve, but won’t affect the final structure. For the French method, it’s usually required that the eggs be at room temperature. Read more about egg white powder and how to use it here.
If you’ve followed me for a while, you know I’m team silicone mat for macarons. Silicone mat provides you with even bottoms, and if you use a mat with the circles in it, they will have uniform sizes. Also, silicone provides even heat distribution. Parchment paper can cause the shells to have uneven, wrinkly bottoms.
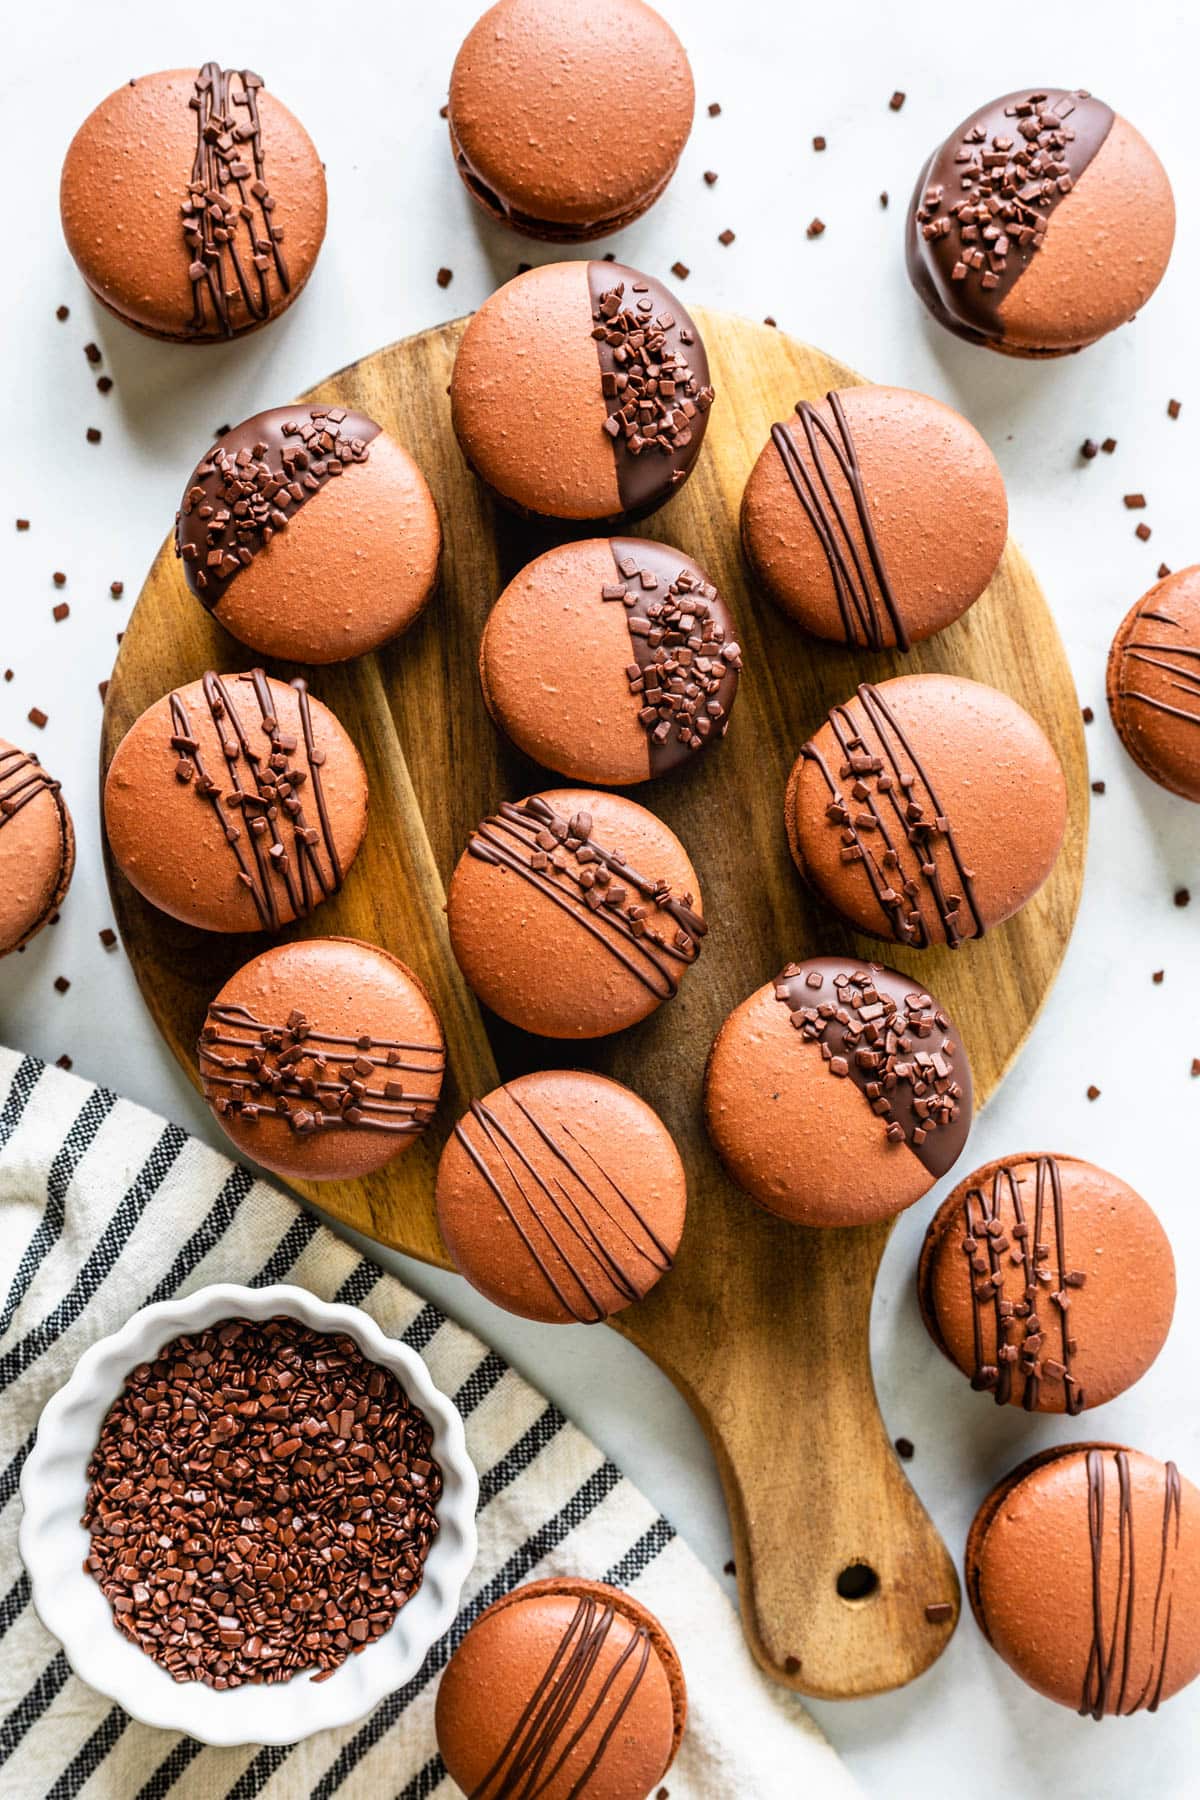
Thank you for being here and baking with me! I hope this guide helps you perfect your chocolate macarons and gives you the confidence to troubleshoot whenever something goes wrong. Once you understand the way cocoa powder affects the batter, chocolate shells become much easier — and so much fun to make.
Watch Video

Chocolate Macarons

Ingredients
Chocolate Macaron Shells
- 100 grams egg whites
- 100 grams white sugar
- 2 grams egg white powder optional (read notes)
- 96 grams almond flour
- 75 grams powdered sugar
- 14 grams cocoa powder
- brown food coloring (optional to deepen the color)
Rich Chocolate Frosting
- 5 tbsp unsalted butter (70 grams)
- 2½ tbsp cocoa powder (16 g)
- 1 cup powdered sugar (125 grams)
- 2-4 tsp milk (10–14 ml)
- ½ tsp vanilla extract
Ganache Filling option
- 200 grams chopped chocolate (or chocolate chips)
- ⅔ cup heavy cream (156 ml)
Instructions
Chocolate Macaron Shells
- Before you start, get all of the ingredients ready. Prepare a large piping bag, fitted with a round tip, I like to use a Wilton 12 or a tip measuring 1/4" in diameter.
- Line two baking sheets with parchment paper or silicone mat.
- I use a baking mat with the macaron template already in it. You can make your own or print it from the internet, and just place it under silicone mat, or parchment paper.
- Wipe the mats and bowls you will use down with vinegar, this gets rid of any grease particles that might be in the tools.
- Measure out the ingredients before starting out.
- Sift the powdered sugar, almond flour, and cocoa powder together. Set aside.
- Whisk the sugar and the egg white powder (if using) in a bowl, and place it over a pan with barely simmering water.
- Add the egg whites to the sugar and whisk the mixture until frothy and the sugar is completely melted. It will take a couple of minutes. You can test by touching the mixture between your fingers, and if you don't feel any sugar granules you can remove it from the heat.
- Make sure the bottom of the bowl isn’t touching the simmering water.
- Transfer the mixture to the bowl of a stand mixer.
- With the whisk attachment, start whisking the syrup on low (speed 2 KitchenAid) for about 30 seconds.
- After 30 seconds I’ll increase the speed to 4 and let the meringue whip for another couple of minutes here. Now I will finish whipping my meringue on speed 6 for about 10 minutes or so. Some people like to whip their meringue at a higher speed, and some people like it to be at a slower speed. I know of people who whip their meringue for a long time on speed 4, which can take a little while. And others like a faster speed. It all depends. Experiment with different speeds to find out how it affects your meringue. Generally, a faster speed will add lots of air bubbles to the meringue way too fast, which can create an unstable meringue, or hollow shells. Which is why I like to stay at a medium speed for the most part.
- Continue to watch the meringue whip to avoid over whipping.
- Once the whites get glossy and you start seeing streaks formed by the whisk, it might be time to start checking.
- Whip until stiff peaks have formed. When you pull your whisk up, the peak should be stiff and shooting straight up, with possibly a slight bend at the top, but not bending down to the side.
- Pour the sifted powdered sugar, almond flour, and cocoa powder into the stiff meringue. Add food coloring if using. Adding a little bit of brown food coloring can help deepen the color of the shells, specially if you've reduced the amount of cocoa powder.
- Start folding gently forming a letter J with a spatula. Fold the dry ingredients with the meringue until the perfect consistency has been achieved.
- The batter should be flowing slowly and effortlessly off the spatula, you should be able to pick up some batter with the spatula and draw several figure 8s with the batter that’s flowing, without having the batter break up. And even after the batter breaks up, it should still continue to flow off the spatula slowly.
- There’s another test you can do. I call it the Teaspoon test.
- Grab a teaspoon of batter and spoon onto the parchment paper or silicon mat. Wait a minute to see how it behaves.
- If the batter stays stiff, forming a point and doesn’t spread out, fold a little bit more, about 3 folds.
- Test again.
- Once the batter spreads out a bit and starts to look glossy and smooth on top, on the parchment paper, it’s ready.
- You don’t want your batter to be too runny either. So be careful not to over mix. It’s always best to under mix and test several times until the proper consistency has been achieved.
- Once the batter achieves the perfect consistency, transfer it to the piping bag. Secure the top with a tie, so the batter doesn’t scape while piping, and to keep the batter from drying out.
- Now position the piping bag over the center of the circle template, and start applying gentle pressure to release the batter. Then pull the bag up twisting slightly at the top.
- Once you’ve piped as many circles as you could, bang the trays against the counter. This will release air bubbles that are in the batter and prevent your macaron shells from cracking.
- Use a toothpick to pop any air bubbles on the surface of the shells.
- Let your trays sit for a while so the shells will dry out a little bit. I usually leave about 20-40 minutes, depending on how humid the day is. You’ll know they’re ready when you gently touch the surface of a macaron and it seems dry and doesn't stick to your finger.
- Pre-heat the oven to 300°F.
- Bake one tray at a time.
- Bake for 5 minutes, rotate tray. Not everybody has to rotate their trays, depending on your oven you may not have to do this. If I don't rotate my trays, the macarons come out lopsided.
- Bake the macarons for a total of 15 to 20 minutes, until you try to move a macaron and it doesn't feel jiggly. You can also gently touch the top of the shell and it shouldn't feel soft.
- When baked, the macarons will have a deeper color and formed feet. And they will peel off the tray easily.
- Remove from the oven and bake the other tray.
- Let the macarons cool down before proceeding with the filling.
Rich Chocolate Frosting
- Start by sifting the powdered sugar, and cocoa powder in a small bowl. Set aside.
- Add softened butter to the mixer bowl, and cream on medium-high speed for 1 minute.
- With the mixer off, add powdered sugar, cocoa powder, and milk.
- Mix on low until dry ingredients are incorporated with the butter.
- Raise the speed to medium-high, and cream from 30 -60 seconds, until smooth.
- Add the vanilla and mix.
- The frosting should be smooth, thick, not too stiff. Add more milk if the frosting is too stiff, and add more powdered sugar if the frosting is too runny and you went overboard with the milk.
- Always remember the a little bit of liquid here goes a long way, so you don’t want to be adding too much milk to the frosting.
For the Ganache filling option
- Chop dark chocolate very finely. Place it in a bowl.
- Heat the heavy cream in a small pan over medium heat, or in the microwave. No matter what method you choose, be very careful not to boil the heavy cream.
- Pour hot cream over chopped chocolate. Let it stand for a minute.
- Start stirring with a spatula until completely melted.
- Let it come to room temperature. Refrigerate for a bit before using, until it has piping consistency.
- To achieve the piping consistency for the ganache, you will have to rely a lot on the temperature of the ganache.
- If it has been in the fridge for a while, and it’s too thick and hard to pipe, insert it in the microwave for a few quick seconds, and stir it again. Test for consistency and keep going until you achieve the desired consistency.
- To be pipeable, the ganache should be thick, but easy to spread.
- If it happens that the ganache is too thin, you might want to put it in the fridge for a few minutes so it will harden up.
To assemble
- Place the frosting or ganache in a piping bag and pipe on top of half of the macarons. Top with another macaron.
Storage
- Keep it in the fridge for up to 4 days, and in the freezer for up to 1-2 months. Make sure to package macarons really well in an air tight container to place it in the fridge.

Hi! I’m a teen baker and i’m planning on making macarons for the first time after seeing them in Shari Franke’s Youtube Video. I was just wondering since my oven has conventional and convection bake, which one would have a better outcome? Super excited to make these!
Lots of people use convection bake. They recommend lowering the temperature by 20-30 degrees. I have never baked with convection but I know of a lot of bakers who do, and this is what they recommend. 🙂 best of luck!!!
Lovely recipe! Where did you get the silpat? I’ve searched online for the “For Bake” brand but can’t find it. Thanks!
I don’t think it’s available anymore. Which is a shame cause these mats are really good! They got a bit stained over the years, but they are seriously great!
I just tried this and it turned out so great! This is my second time at making macarons the first one i used a different recipe and it didn’t turn out so well, but this recipe I am keeping 😊. Thank you for sharing💕
I am so happy to hear that! Thank you so much!
I’ve been wanting to try my hand at making macarons for awhile now. I found your recipe and decided to give it a try. Thanks to your clear instructions I was able to do it right the first time! Thanks so much ❤️
That’s so sweet! I am so happy to hear! Thank you Jessica!!! 🙂
This icing y’all. It’s a situation. Honestly I don’t know if I already left a review because this is not my first time using the macaron recipes from this website but like FABULOUS.
Awe thank you SO much!!!!
I keep my almond flour in the freezer, should I make it room temperature before using? And other than the butter do any other ingredients have a preferred temp?
Some people say that keeping the almond flour in the fridge makes their almond flour humid, so they dry them in the oven for a few minutes at 200F, and then let it cool down before using in the recipe. But I’ve never had to do that, since I keep mine in my cupboard. But if you feel like the almond flour feels humid or wet, I would do that.
And the other ingredients such as egg whites don’t necessarily have to be at room temperature for the Swiss method, since you will have to whisk it with the sugar and melt it over the double boiler.
Let me know if you have any more questions.
Thank you 🙂
Do the egg whites need to be room temperature or will they work ok with cold eggs?
I make the Swiss method with whatever temperature egg whites, since the whites will be melted with the sugar over a double boiler, so it doesn’t really matter.
What kind of cocoa powder is best for this recipe?
I tried it with some but I just don’t know.
unsweetened and non dutch processed
Hi. I am reading through the comments to try and figure out where I went wrong with the chocolate macs. I have tried twice today and both times no feet and rounded cracked tops. I see that you specified non dutch process cocoa powder in the above response. I used Saco natural and dutched blend. Could that have an effect on my outcome as well?
You can use dutch cocoa, I personally don’t, but I highly doubt that that’s the reason why your macarons have no feet and cracked tops.
No feet and cracked tops can be due to several things.
First and foremost, make sure to have an oven thermometer, because one of the biggest reasons for cracked macarons is a heat issue. Home ovens arent accurate and the temperature you set the oven to won’t be the temperature that the oven is on the inside in the majority of the time.
Second, it could be due to under whipping the meringue. Under whipped meringue will cause cracked macarons with no feet.
Also, over mixing the batter will cause the same.
Not letting the macarons rest until they feel dry to the touch and baking them will also cause cracked macarons.
Thank you for your reply. I read this in the earlier comments and I will try again. I really thought I was being so careful with both the meringue and the macronage. They are not pretty but they are delicious! We will eat them !
All I’m going to say is I’ve tried about 10 different recipes with ALL of the tips for the past 6 months. I finally came across this recipe and it is the most successful recipe I’ve tried. Absolutely amazing! I will not look anywhere else for any other recipes.
Aweee that’s awesome!!! Thank you so much!!!! I’m so so happy!
Hey there! I went to culinary school 6 years ago and worked in a few restaurant kitchens (on line and doing pastry) but I’ve been a stay at home mom recently so have had more time to bake at home. This was my first time making macarons; I didn’t watch your videos until afterwards and saw that I could have mixed the batter more right before piping. I was definitely baby-ing the meringue haha. So between my batches I got some good ones but they were a tad stiff- now I know how to make them better! They were very delicious and the Swiss method was straightforward! thank you for this recipe and all of your helpful tidbits!
I am so happy!! Thank you for this wonderful feedback, specially from an experienced chef! 🙂
My macaron batter is always very thick and no matter how much I work it, it does not thin out. Any suggestions? We are at about 7k feet. TY!
Hello, I’ve never baked macarons at high altitude, but this recipe here indicated a much much lower amount of granulated sugar than what I use on my recipe, maybe you could give this one a go, since she is at high altitude. Best of luck!
Hey where you have said white sugar should I use castor or granulated
I use granulated usually but have used caster sugar before and works fine as well.
I think it was bad because my stuff was all very runny and nothing worked how it should have.
If it was runny it means you either over mixed the batter, or under whipped the meringue.
Hi. Do you cool your macarons on the tray? Looking forward to trying some of your delicious looking recipes!
Yes! Cool them on the tray and don’t remove them until they have cooled down all the way, or the bottoms may stick to the mat 🙂
I made these and used a dab of lemon curd in the middle to give it a nice tart filling and they came out perfectly. Well almost perfectly, everyone that tried them loved them but I think I may have over baked them a bit, it was hard for me to tell when they were finished. I ended up baking them for about 12-14 minutes per pan. I thought they were a little too crisp with not enough of the soft chew that I remember. The only thing I can say is that letting them sit for a day(in a container) definitely helped them out! I would post a photo if I could.
Omg! That sounds fantastic with the lemon curd!!! And yes letting the macarons sit for a day or two will definitely help! Thank you so much for reporting back!!! Wish I could see them you can email them to me camila @ piesandtacos. com or send them to me on instagram if you have an account there 🙂