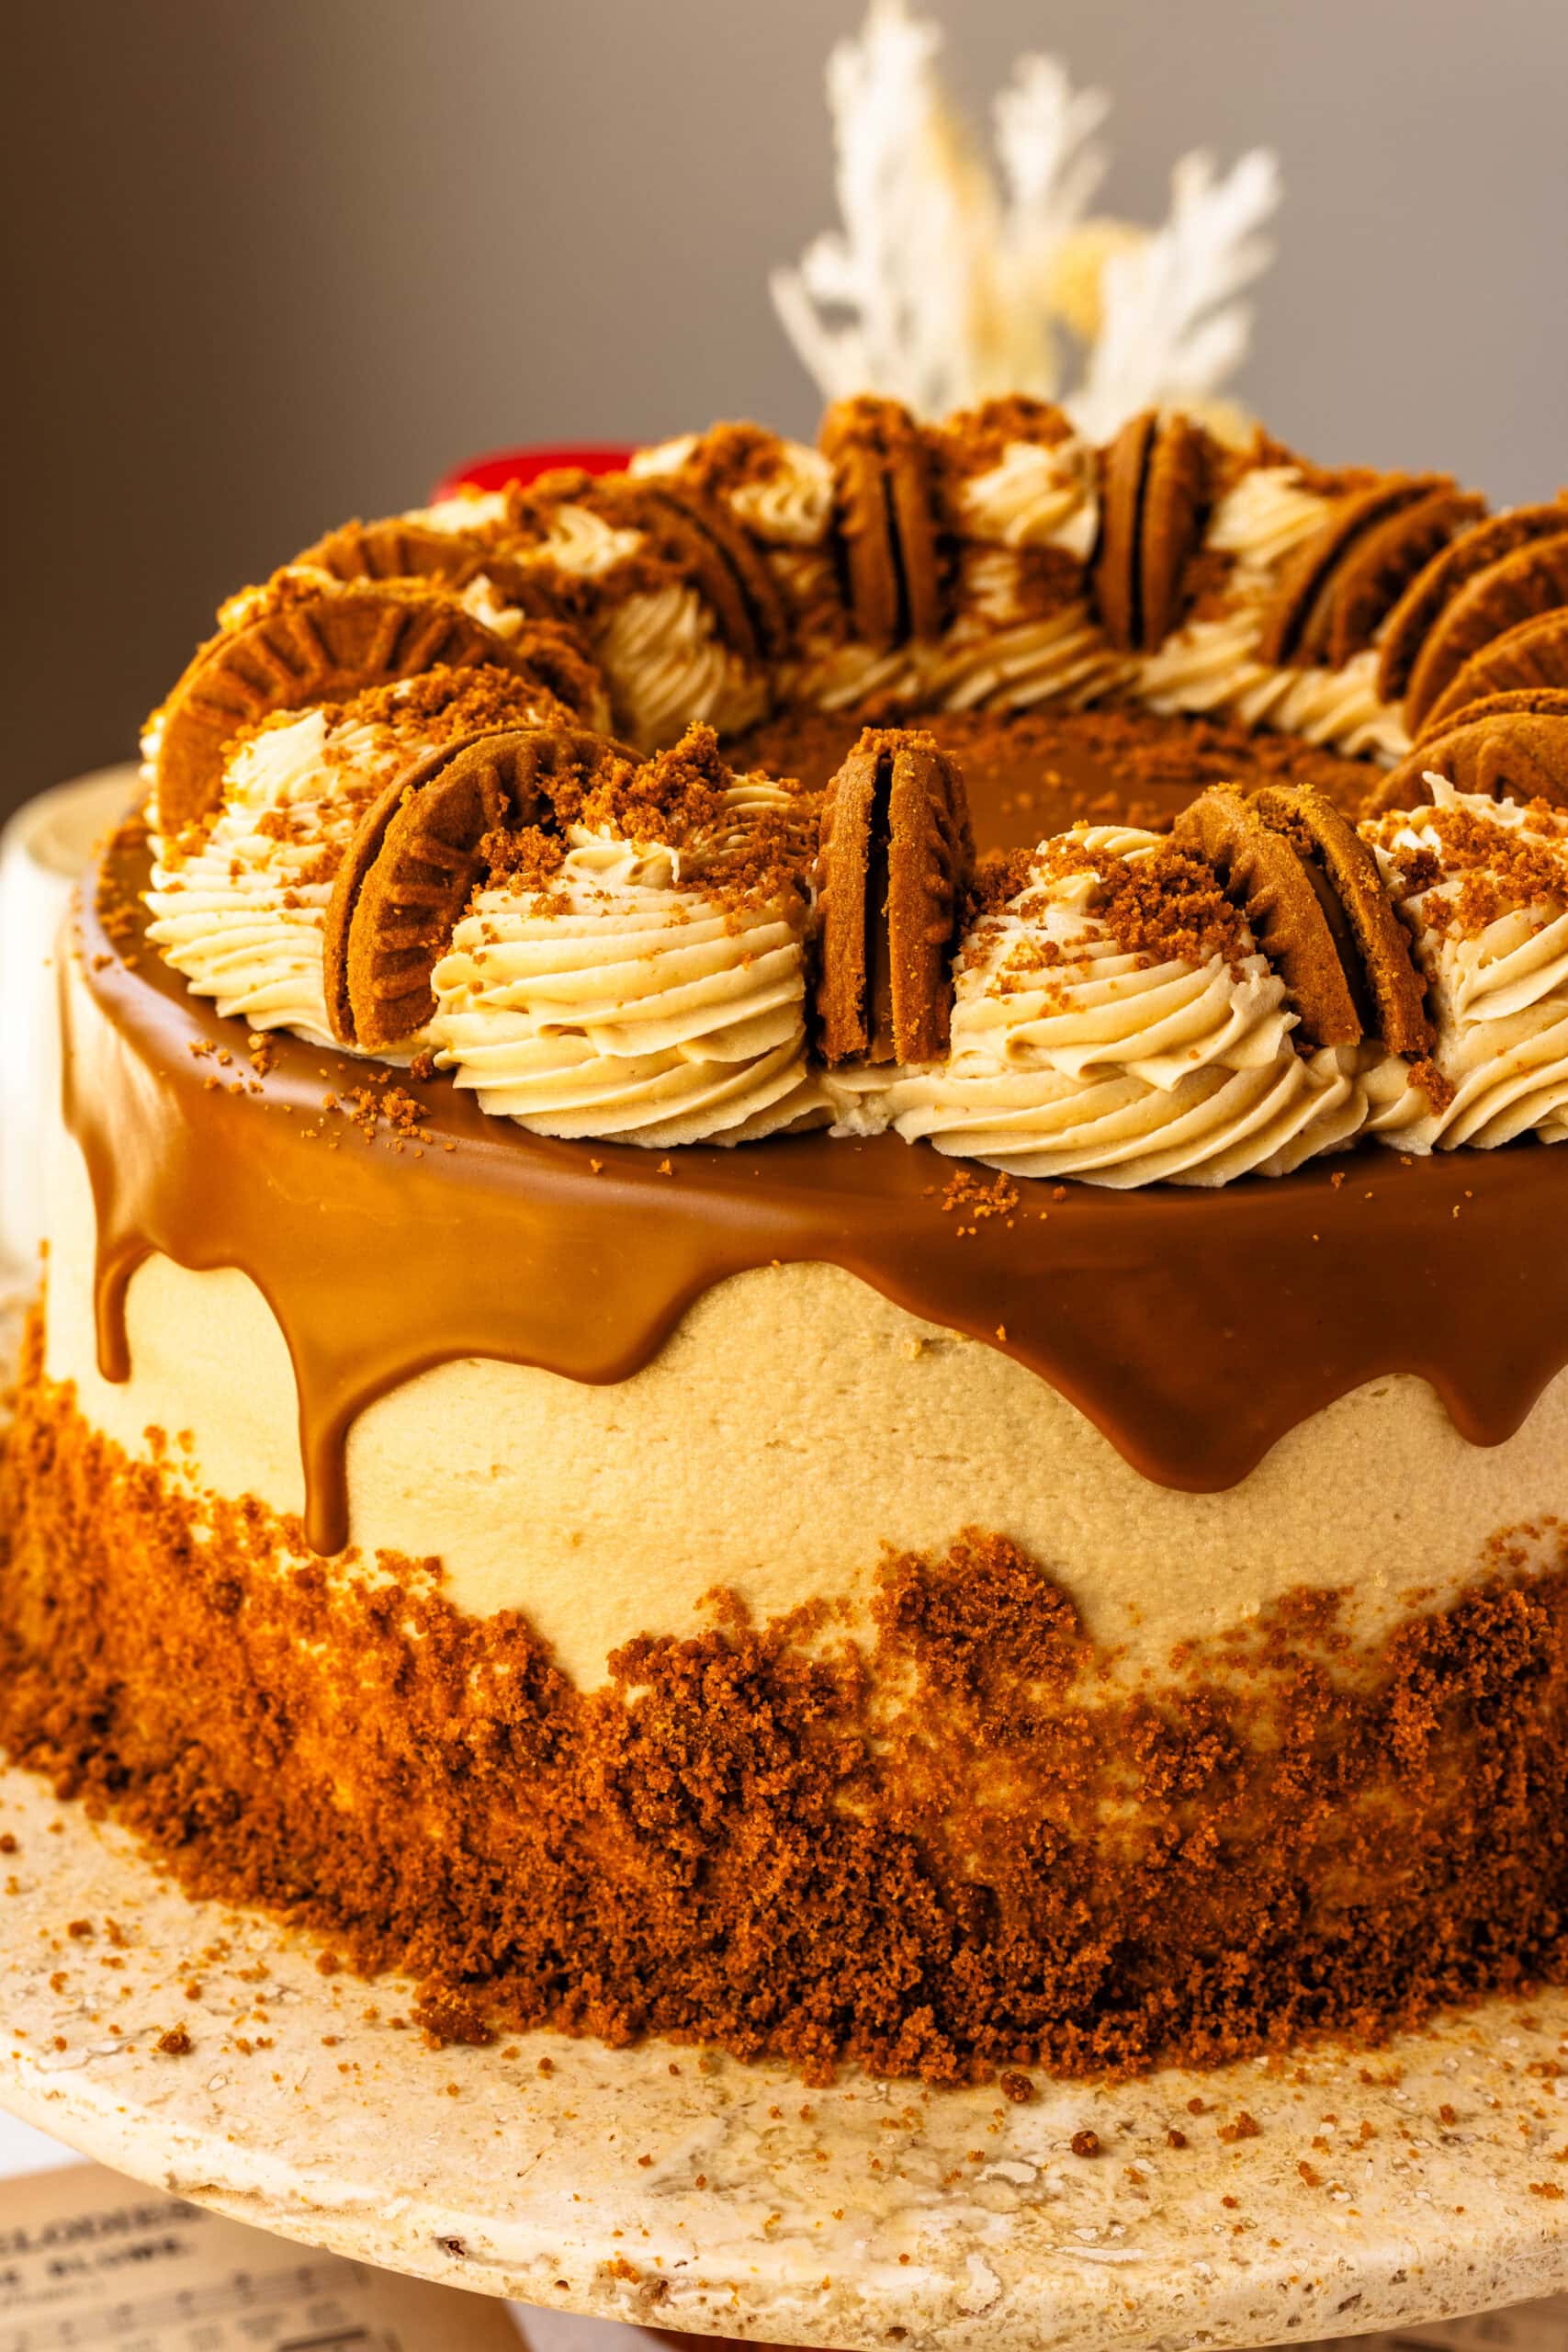
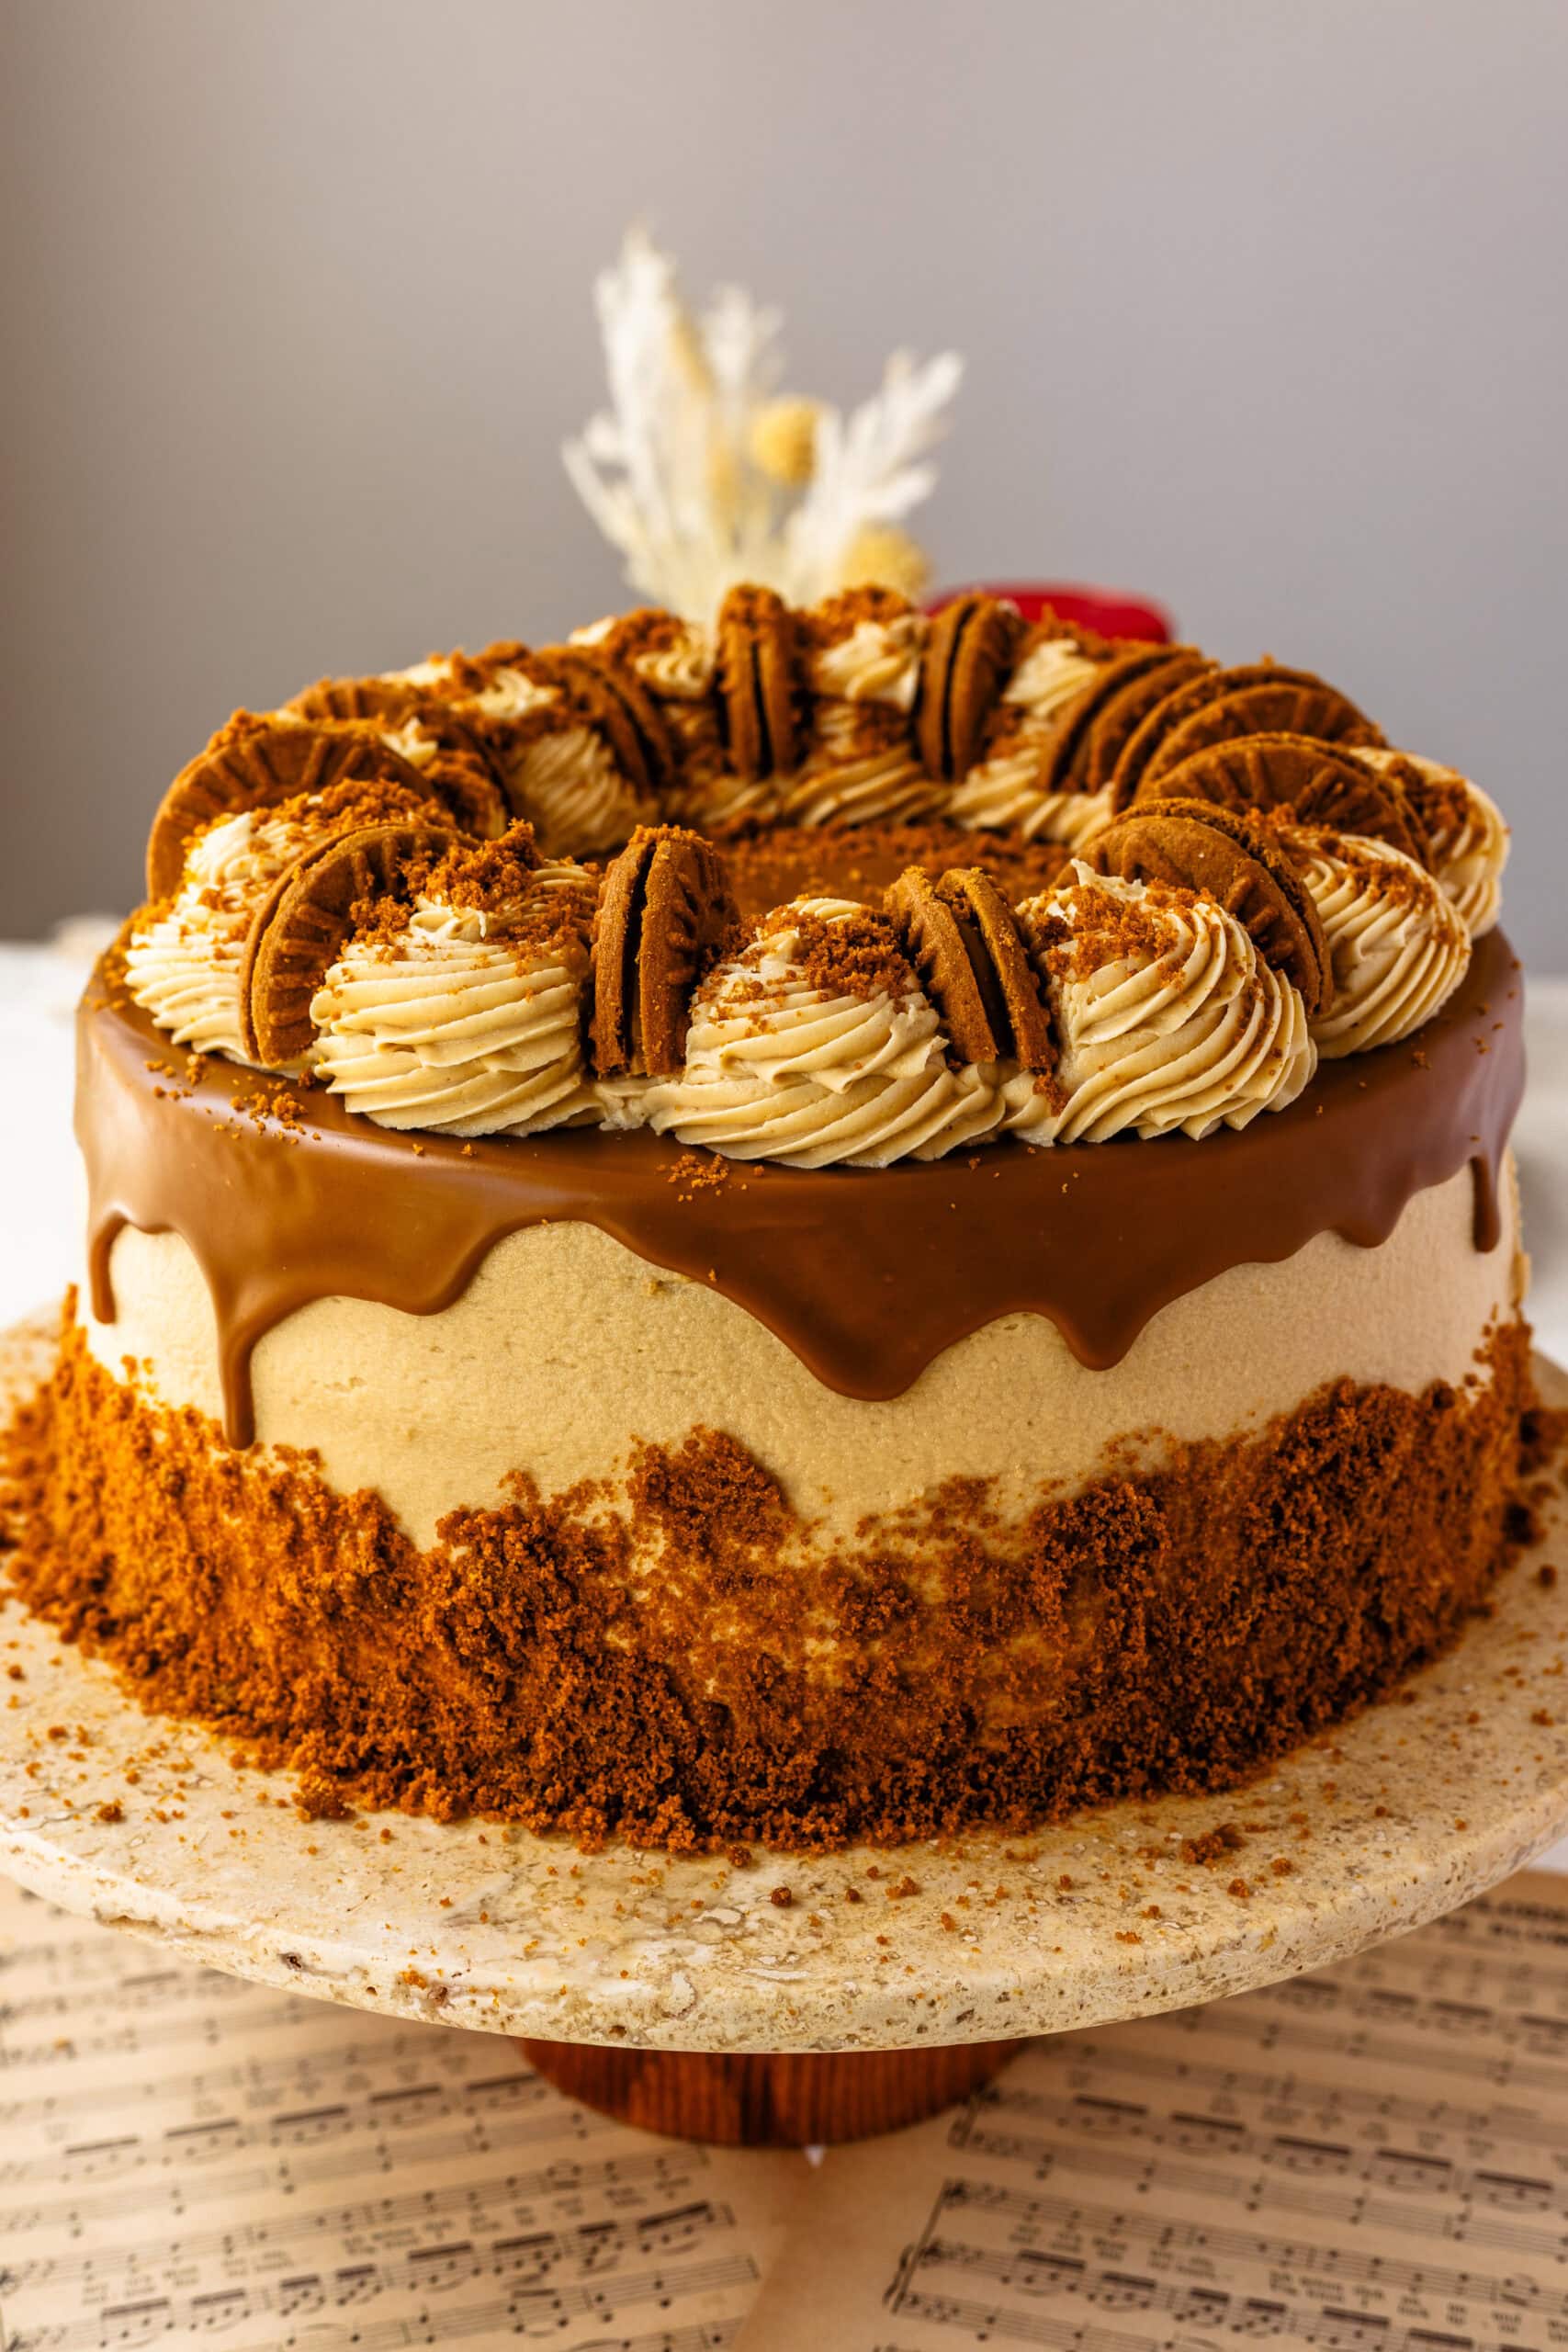
Biscoff Cake
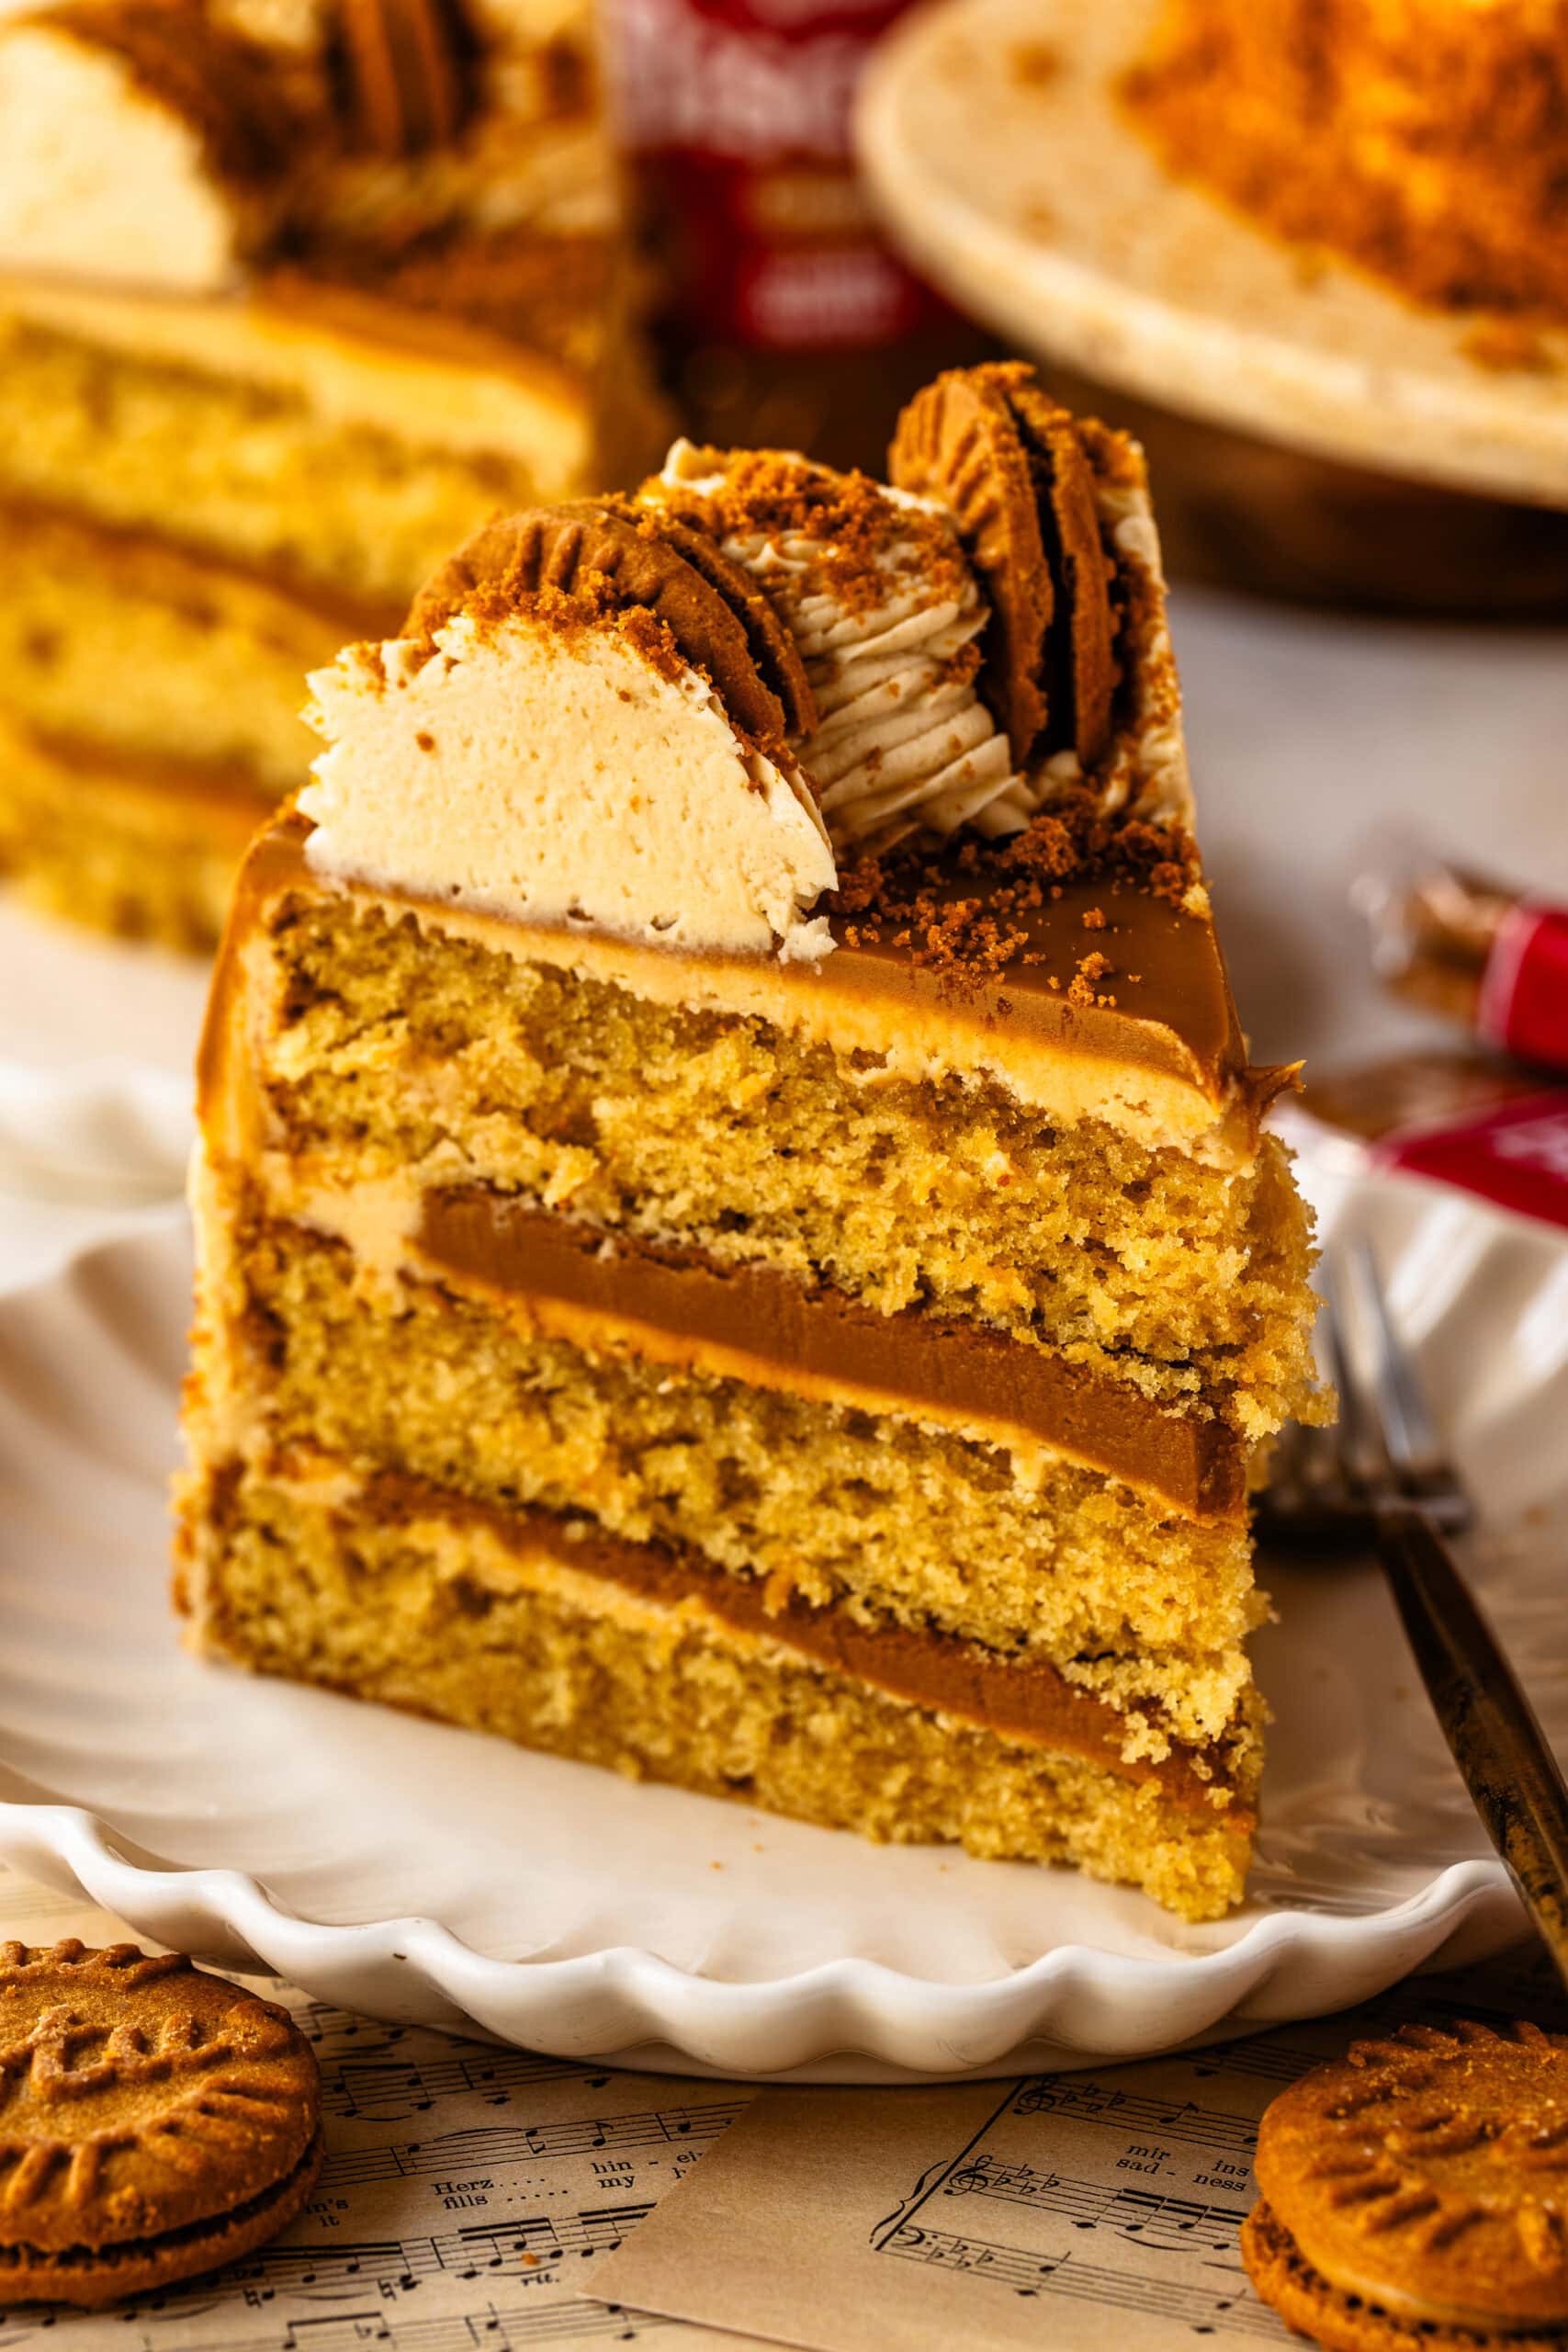
Biscoff is one of my favorite flavors, and I wanted to turn it into a cake that truly delivers. This Biscoff cake has soft, moist layers filled with cookie butter and finished with a rich cookie butter frosting. It’s decadent and perfect for anyone who loves Biscoff.
The original version of this cake included a Biscoff crumble baked into the layers and a Biscoff ganache filling, along with a drip and truffle topping. It was delicious, but more of a multi-step, two-day process.
This updated version keeps the same flavor profile but simplifies the process so you can make it more easily without losing what makes it special. If you want the original, please comment below and I’ll send it to you!
This post may contain affiliate links. I earn a commission from qualified purchases. Please read our Privacy policy here.
Why you’ll love this cake
This is one of those cakes that feels impressive but is actually very manageable.
- It slices cleanly and holds its shape really well
- The layers stay soft and moist for days
- The Biscoff flavor is built into every part of the cake
- The frosting is creamy and balanced, not overly sweet
- The filling adds richness without making it heavy
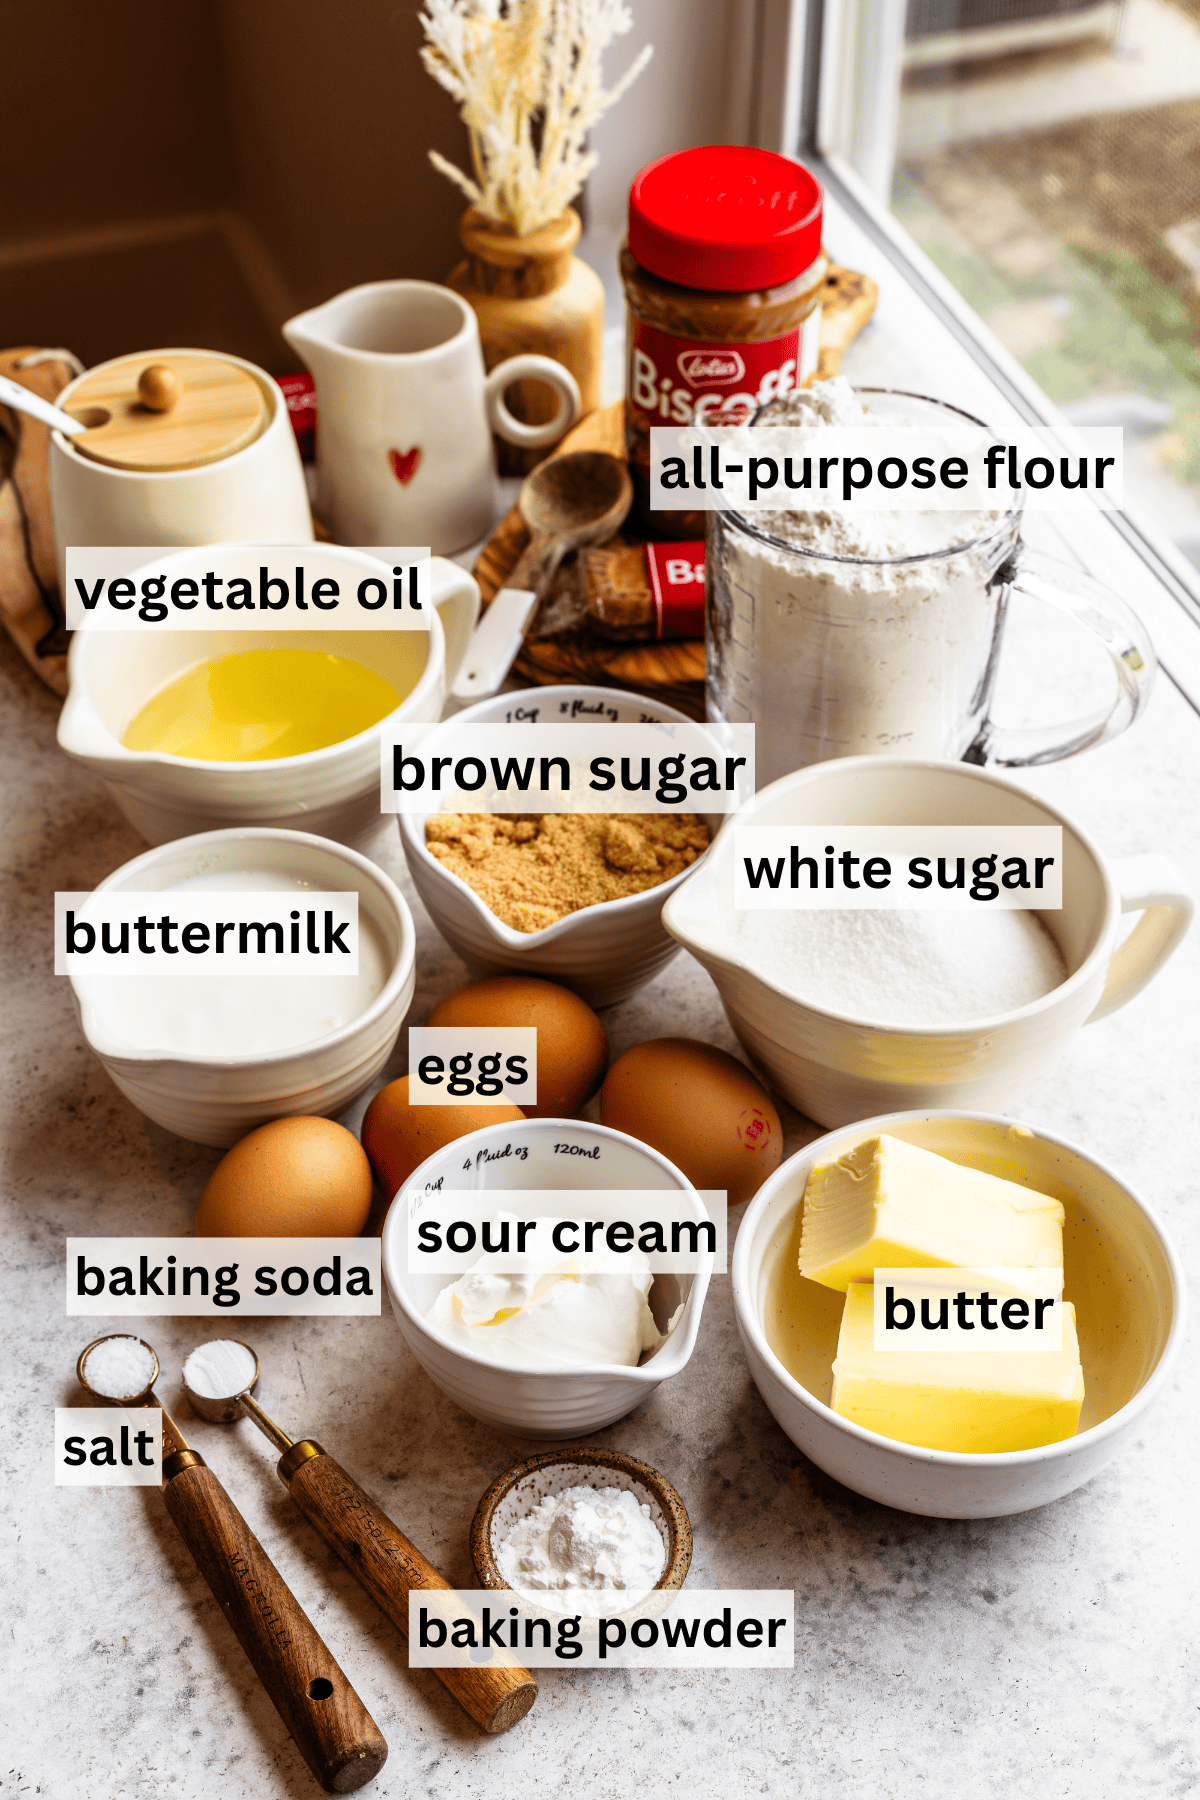
Key ingredients & why I use them
Biscoff cookie butter: I use it in the batter, filling, and frosting so the flavor actually comes through clearly. This is the key for any biscoff dessert. I use for recipes like my Biscoff Cheesecake and Biscoff Blondies.
Butter + oil: Butter adds flavor, oil keeps the cake soft. I’ve tested cakes both ways, and this combination consistently gives the best texture.
Sour cream: This is one of those ingredients I don’t skip. It keeps the crumb soft and slightly dense in a good way.
Buttermilk: Helps keep the cake tender and adds a slight tang that balances the sweetness.
Brown sugar + granulated sugar: The brown sugar adds moisture and depth, which pairs really well with Biscoff.
Cream cheese (in the frosting): Just enough to cut the sweetness and make the frosting smoother.
How to make Biscoff Cake
As always, I have the full recipe below, but here are detailed instructions for how I make it step by step!
Step 1: Prep and start the cake layers
Preheat your oven to 350°F. Grease three 8-inch cake pans and line the bottoms with parchment.
Whisk together the flour, baking powder, baking soda, and salt.
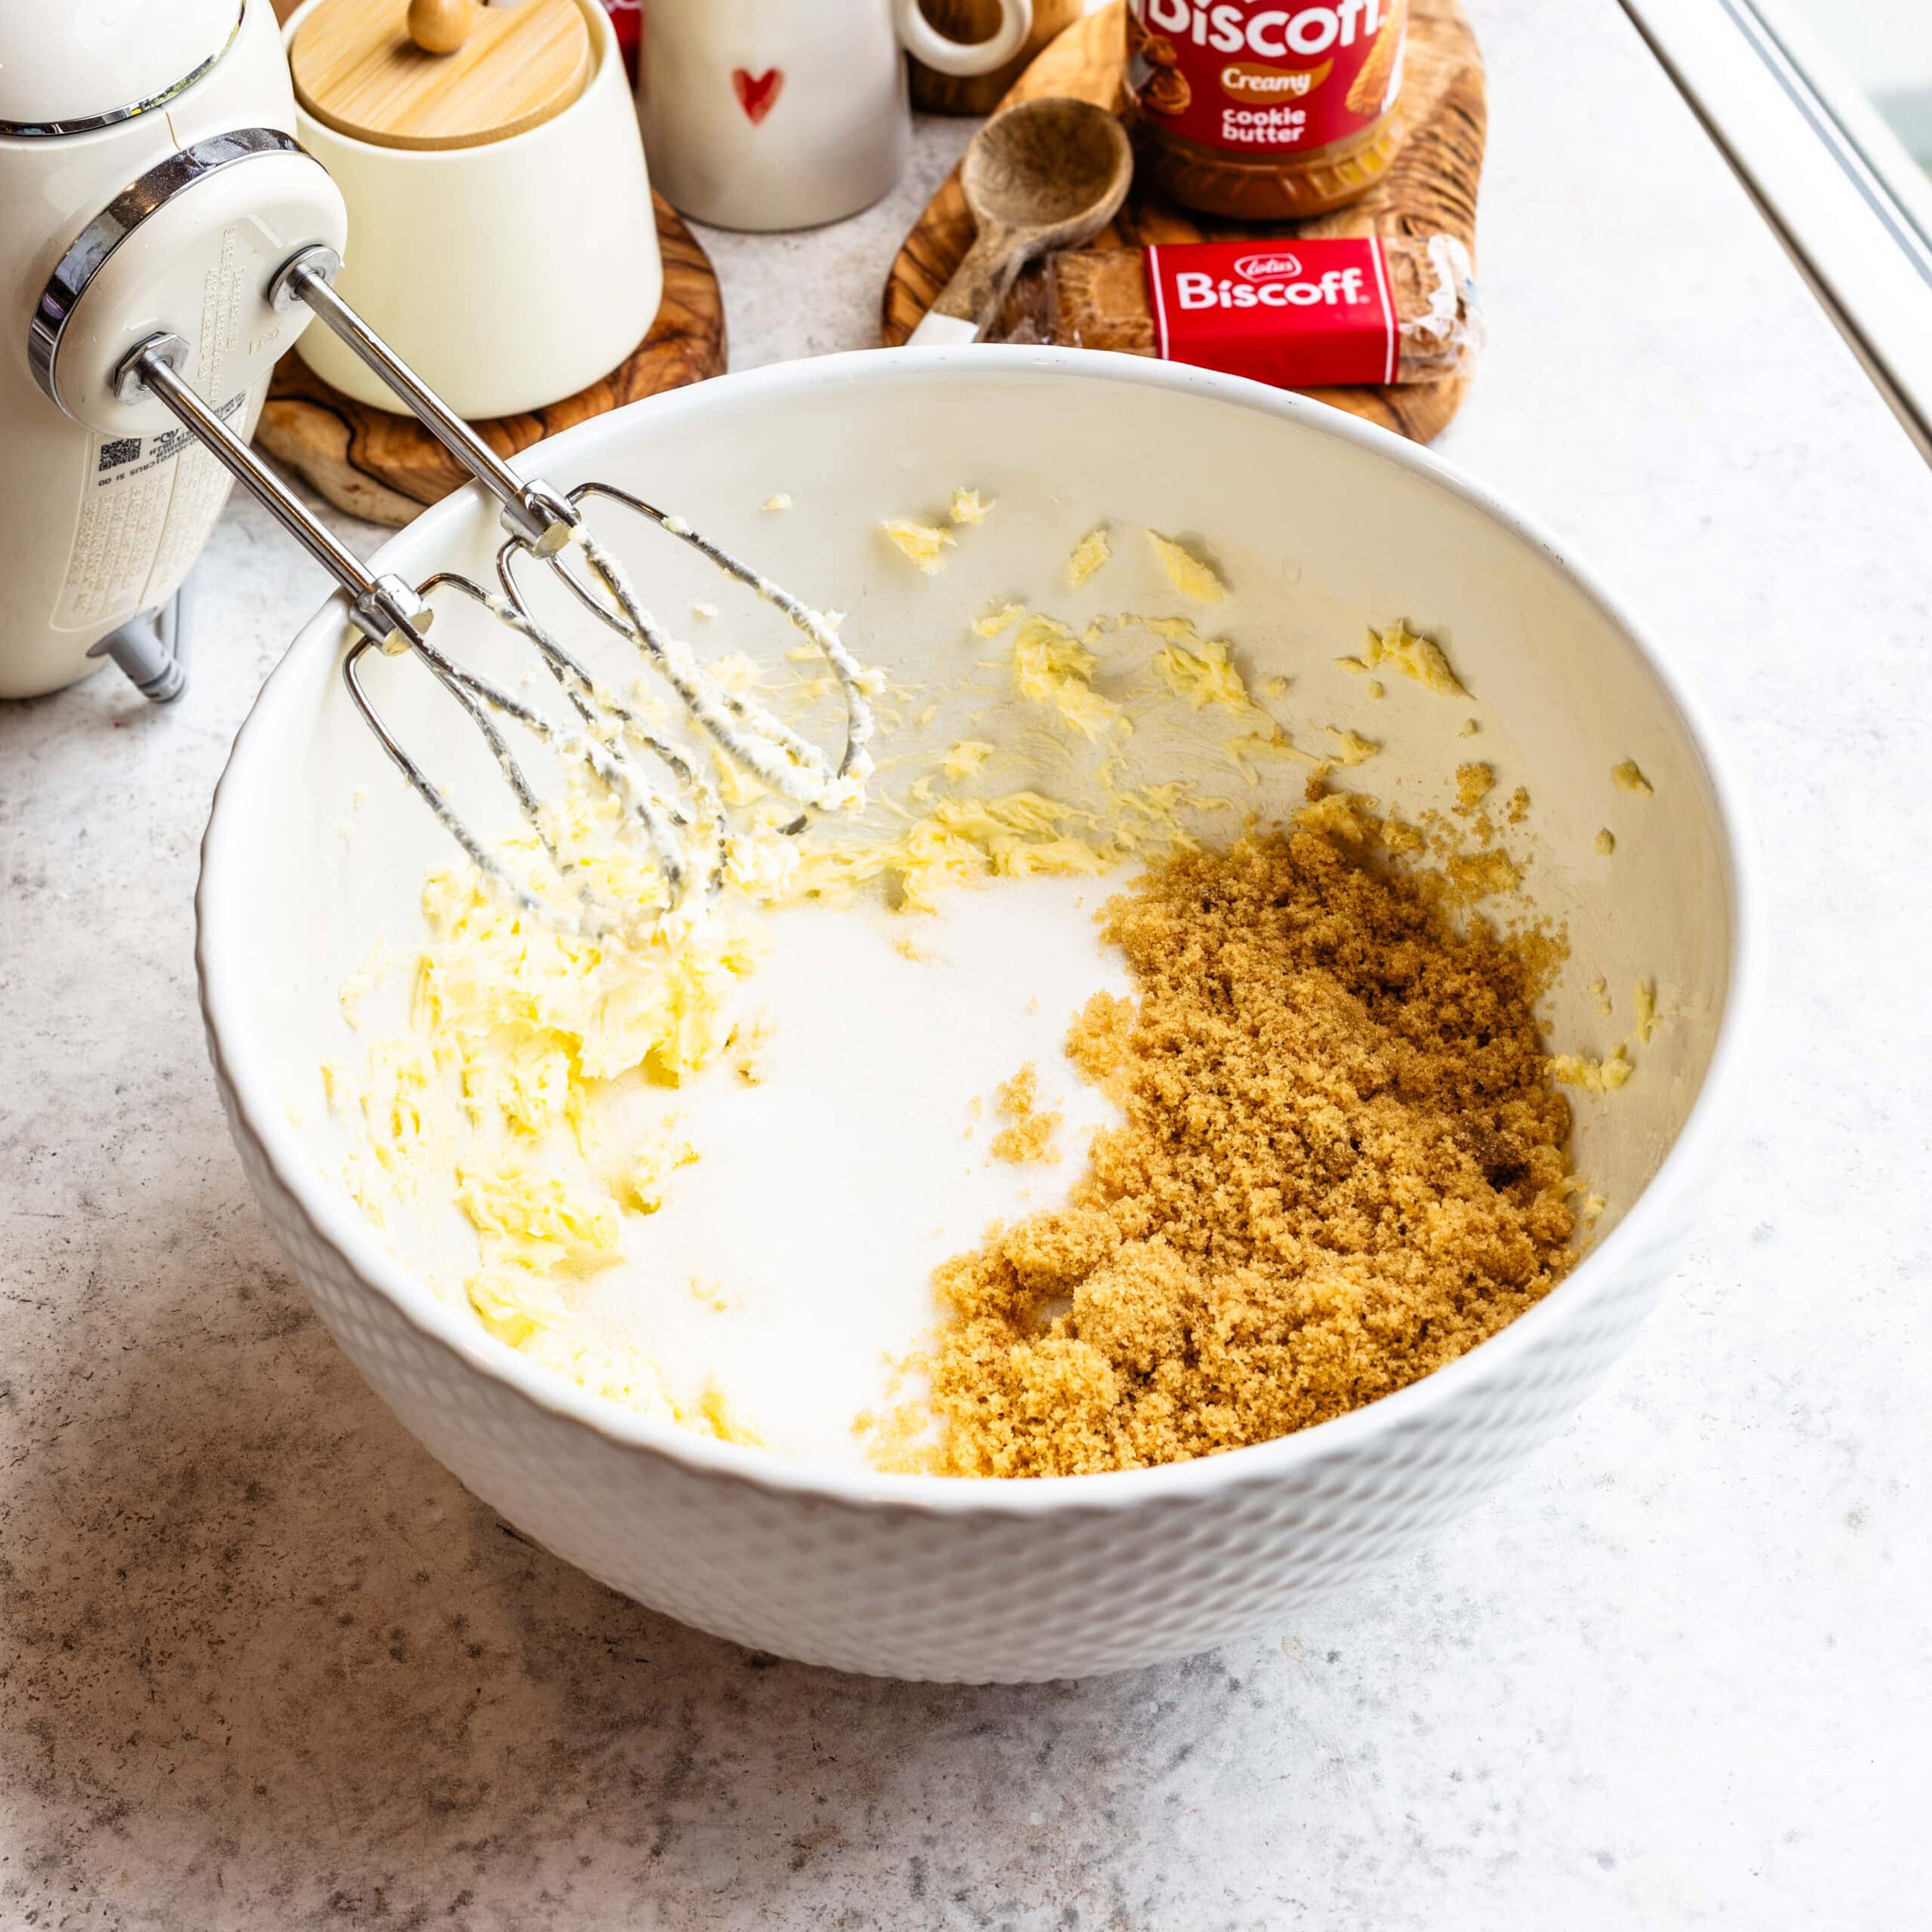
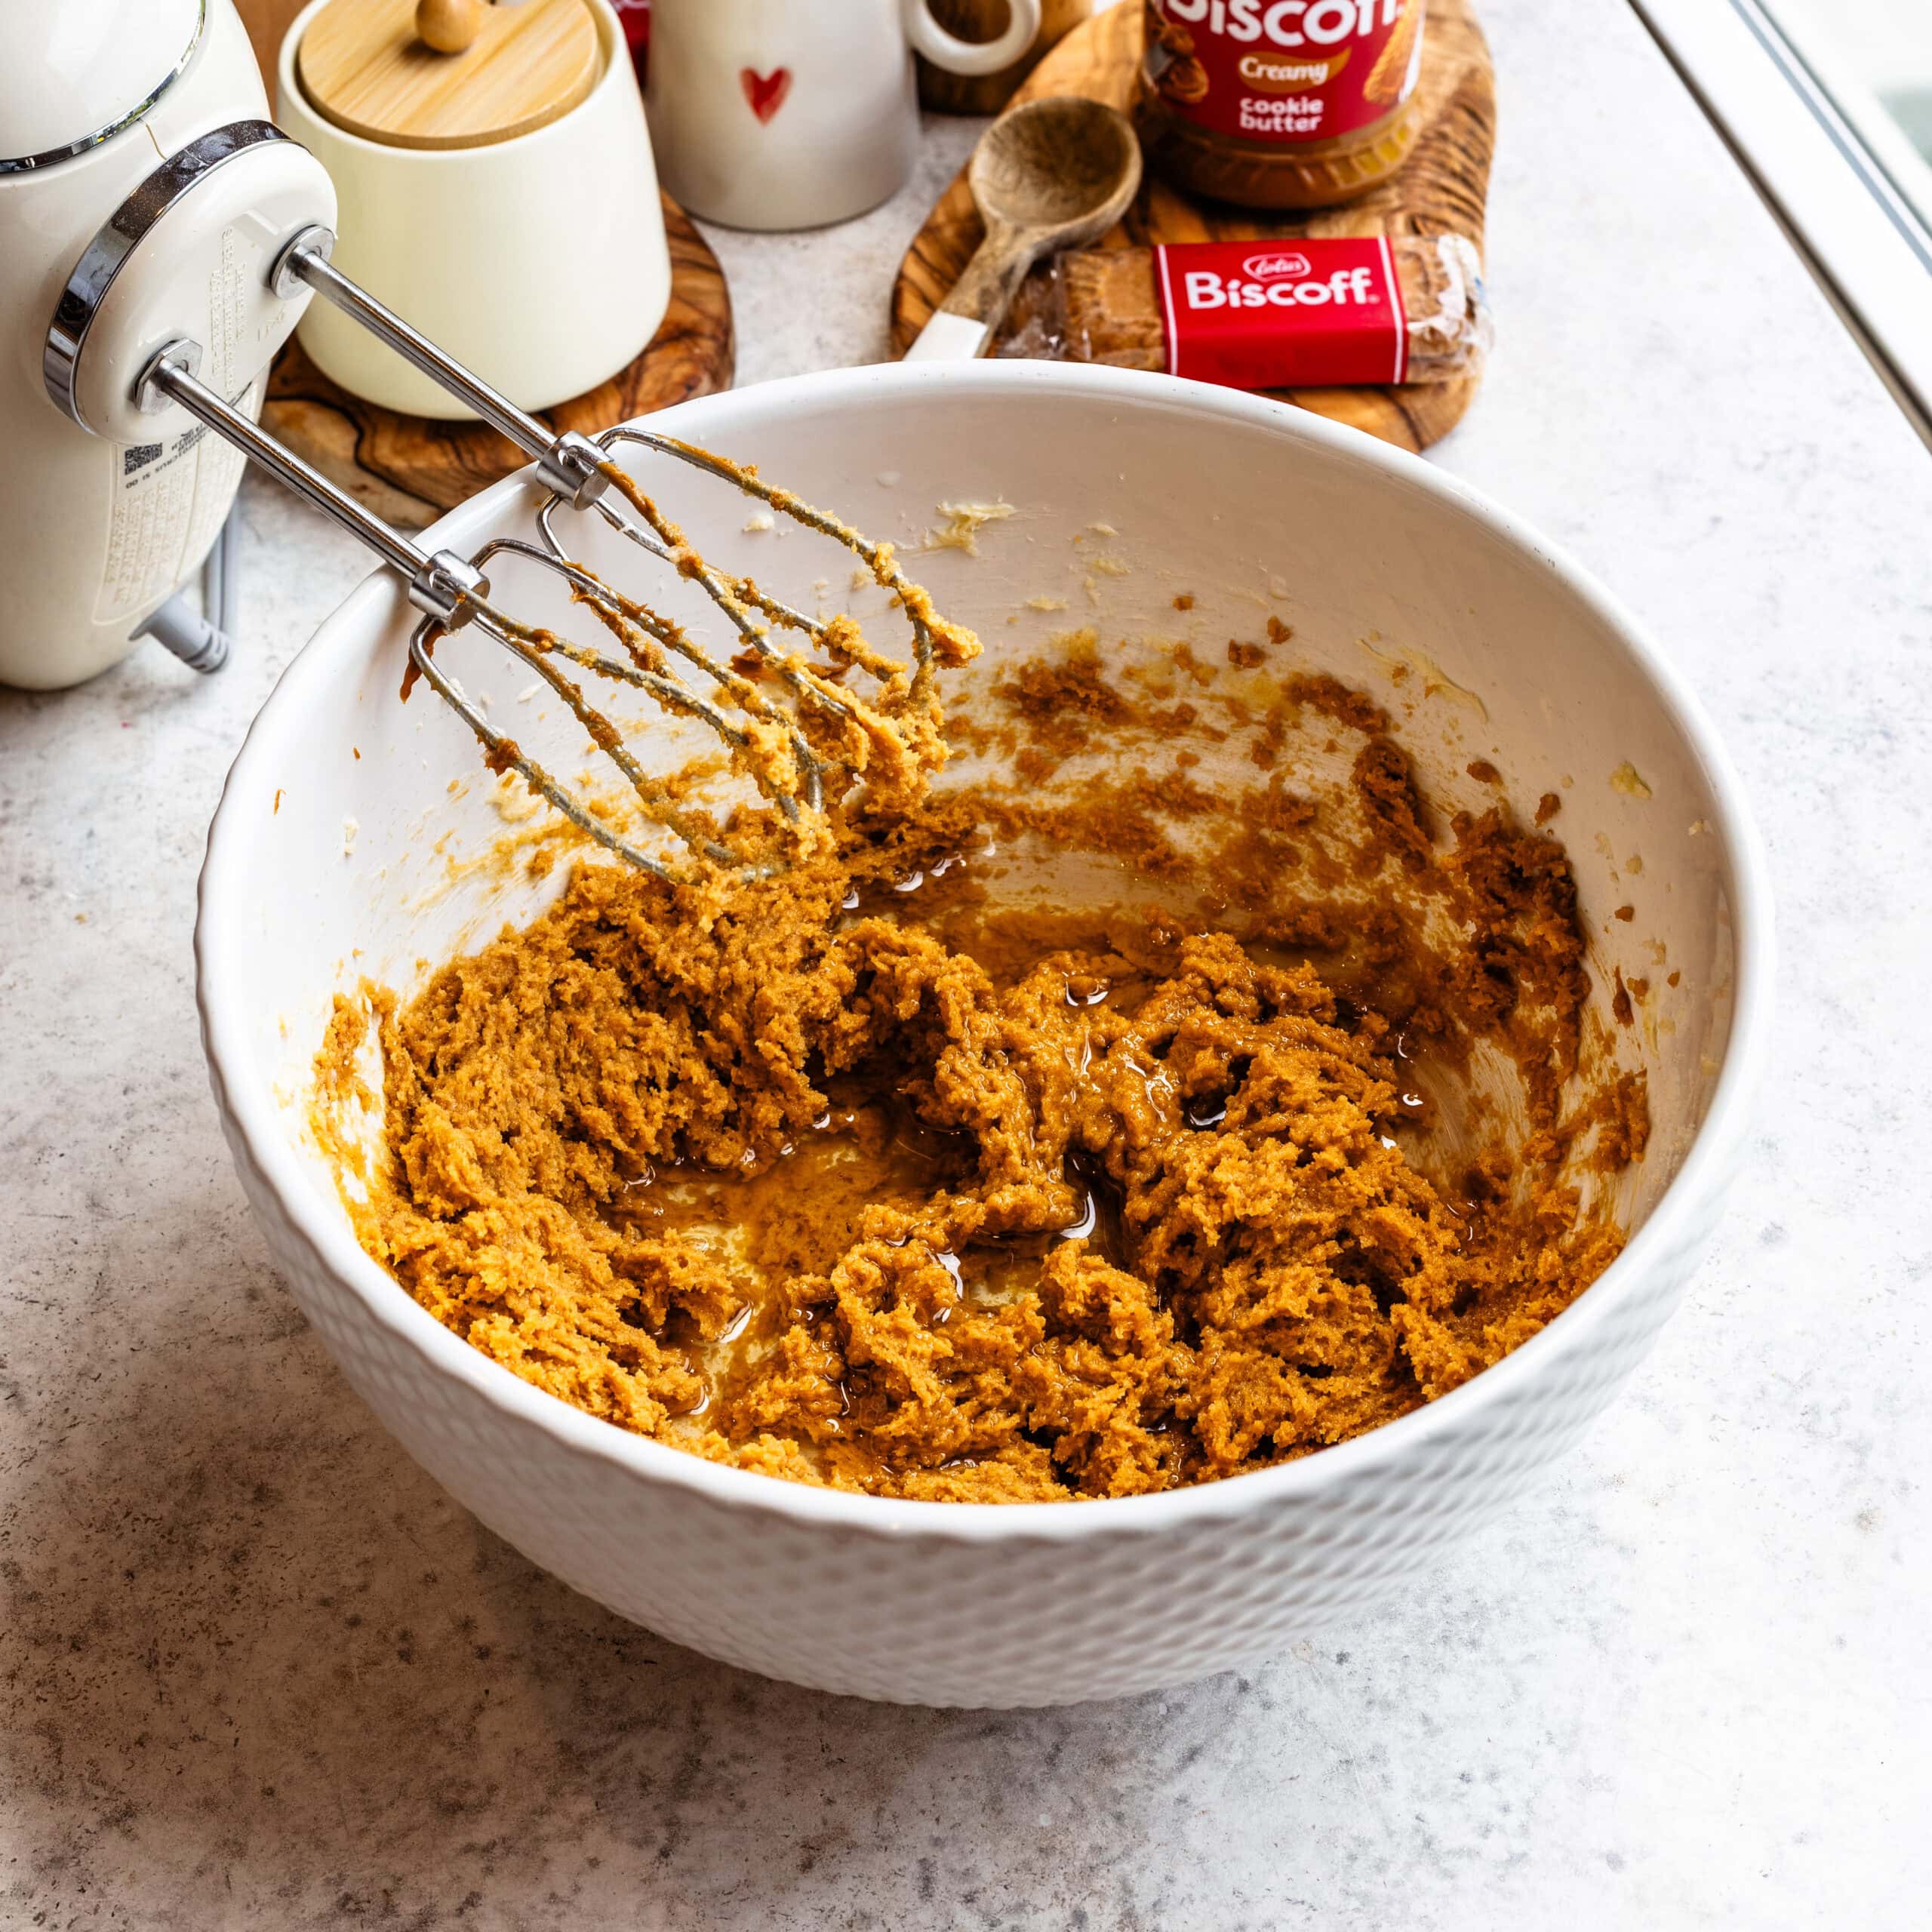
In your mixer, beat the butter for about 1 minute. Add the sugars and beat for 2 minutes until light and fluffy.
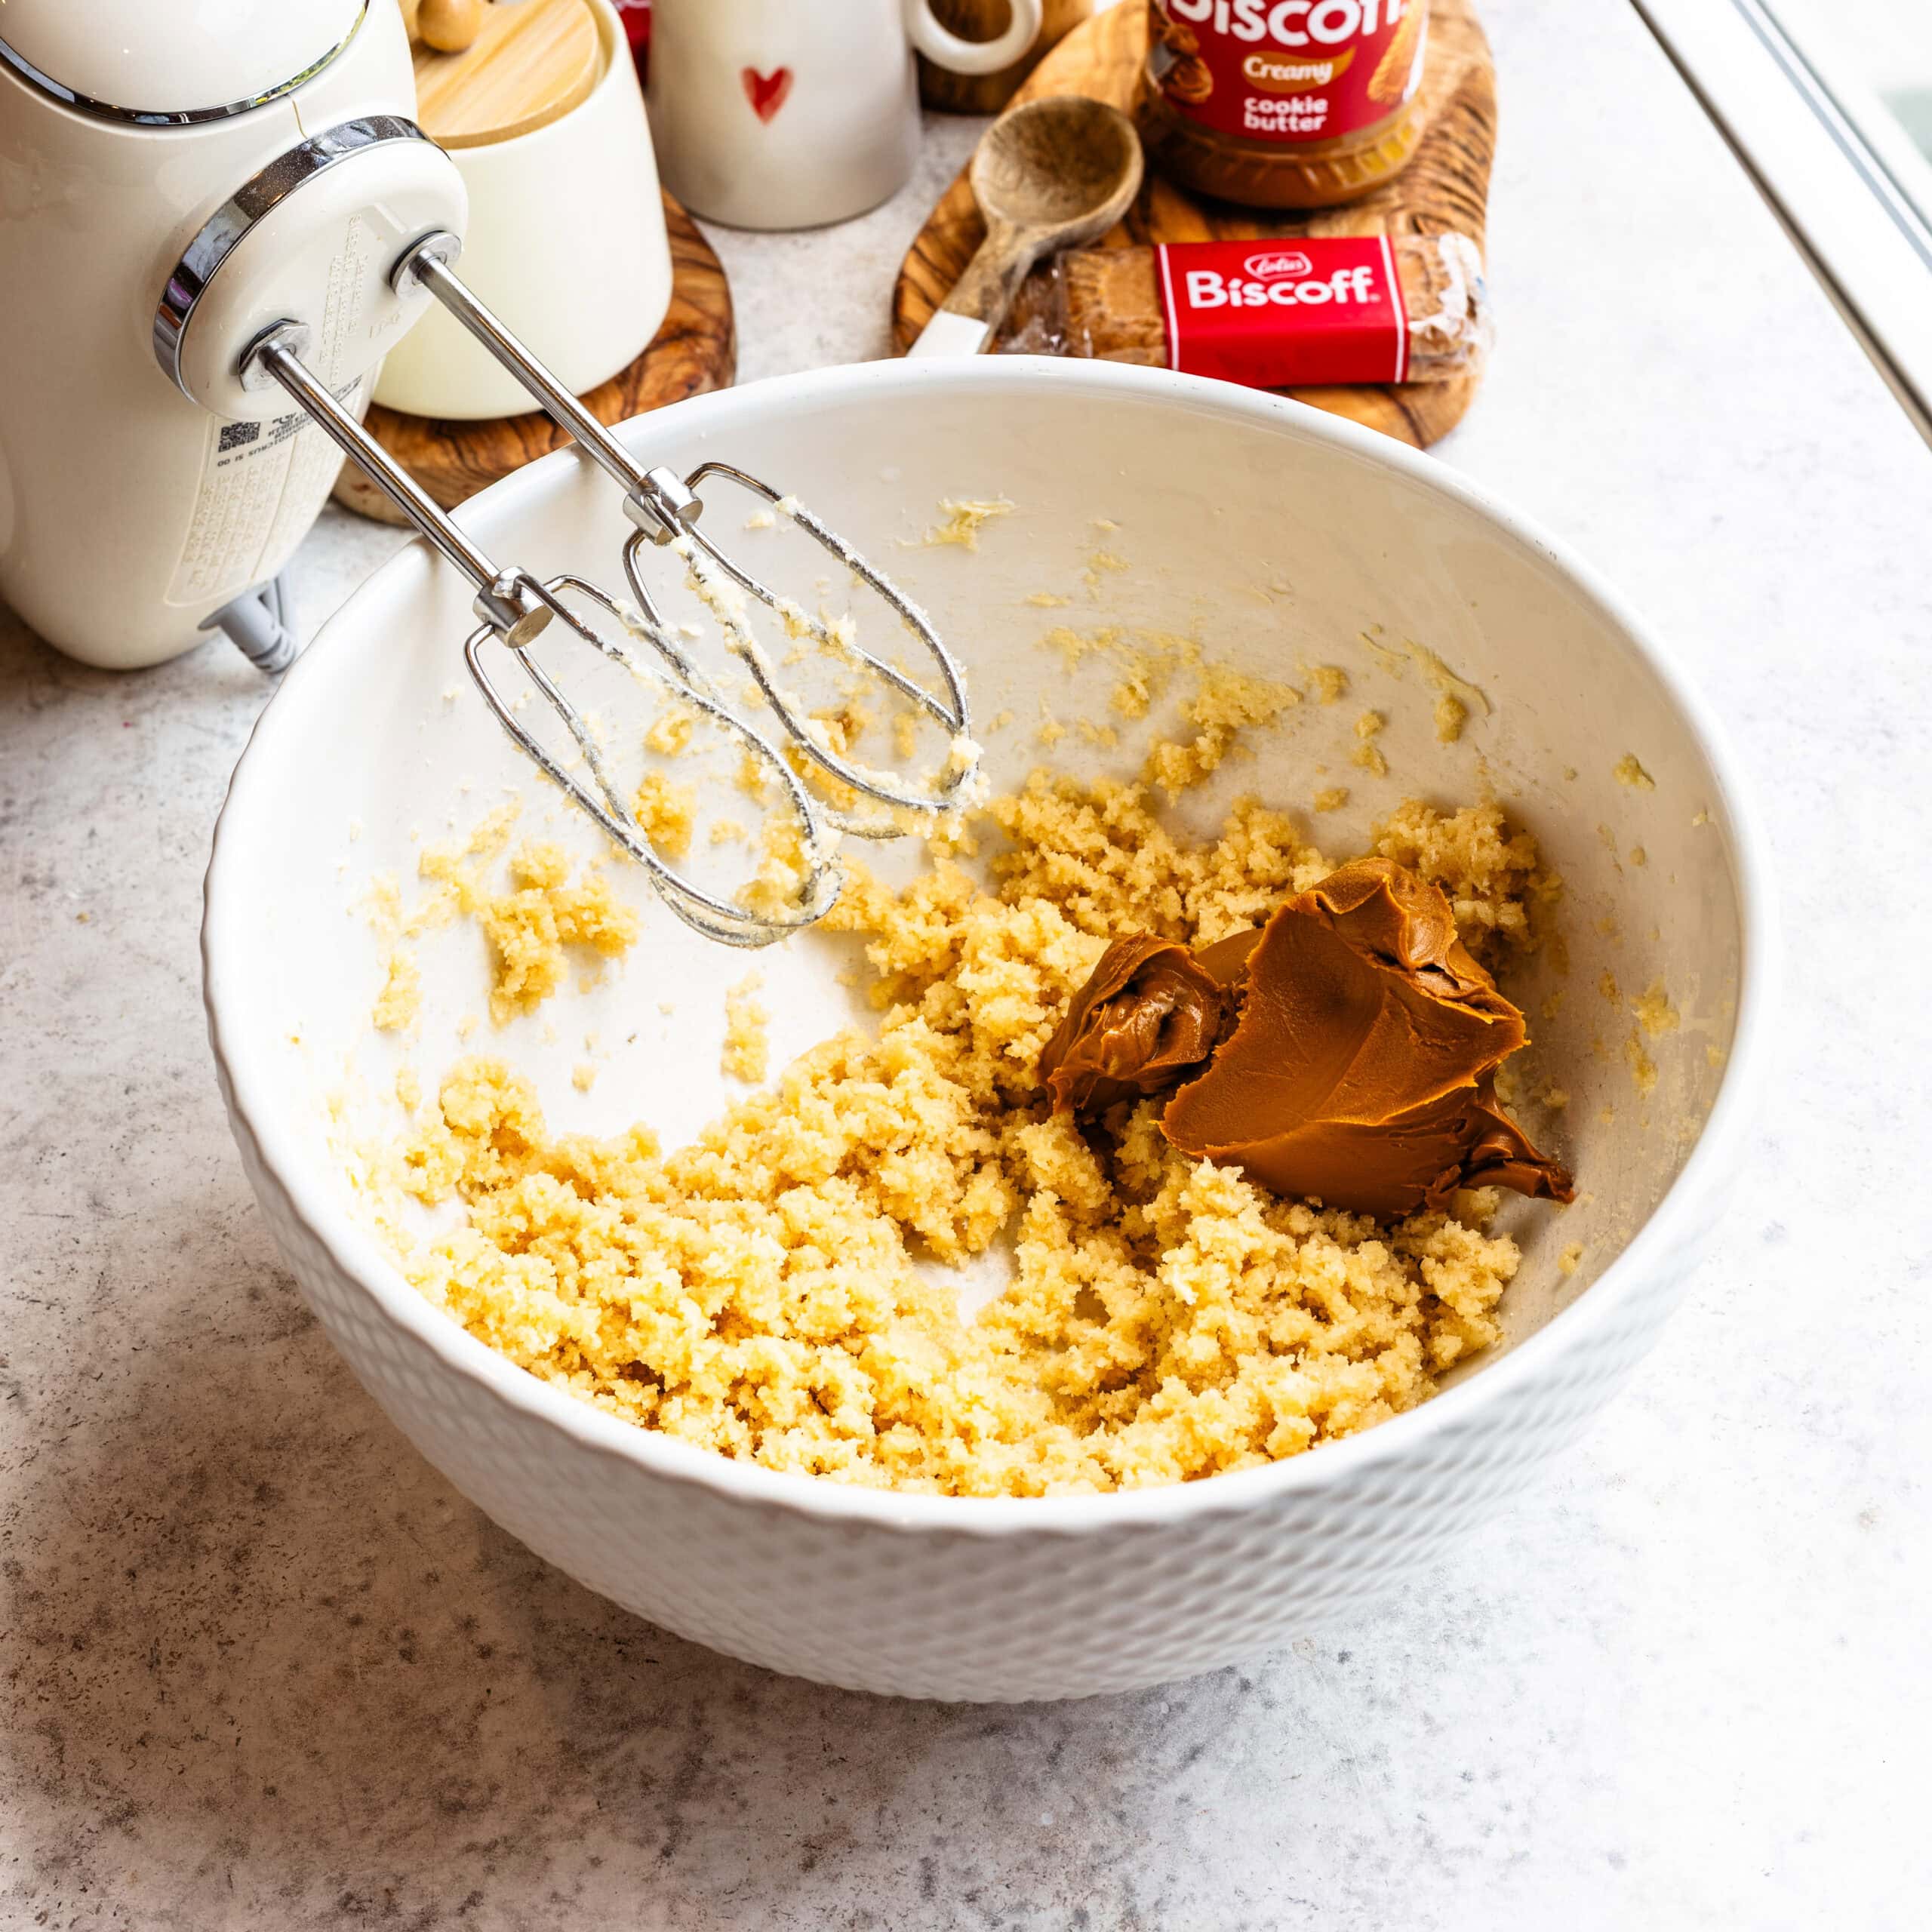
Step 2: Add the sour cream and Biscoff cookie butter
Mix in the sour cream and Biscoff cookie butter until well-combined.
Step 3: Add the oil
Add in the vegetable oil. It should be coming together now.
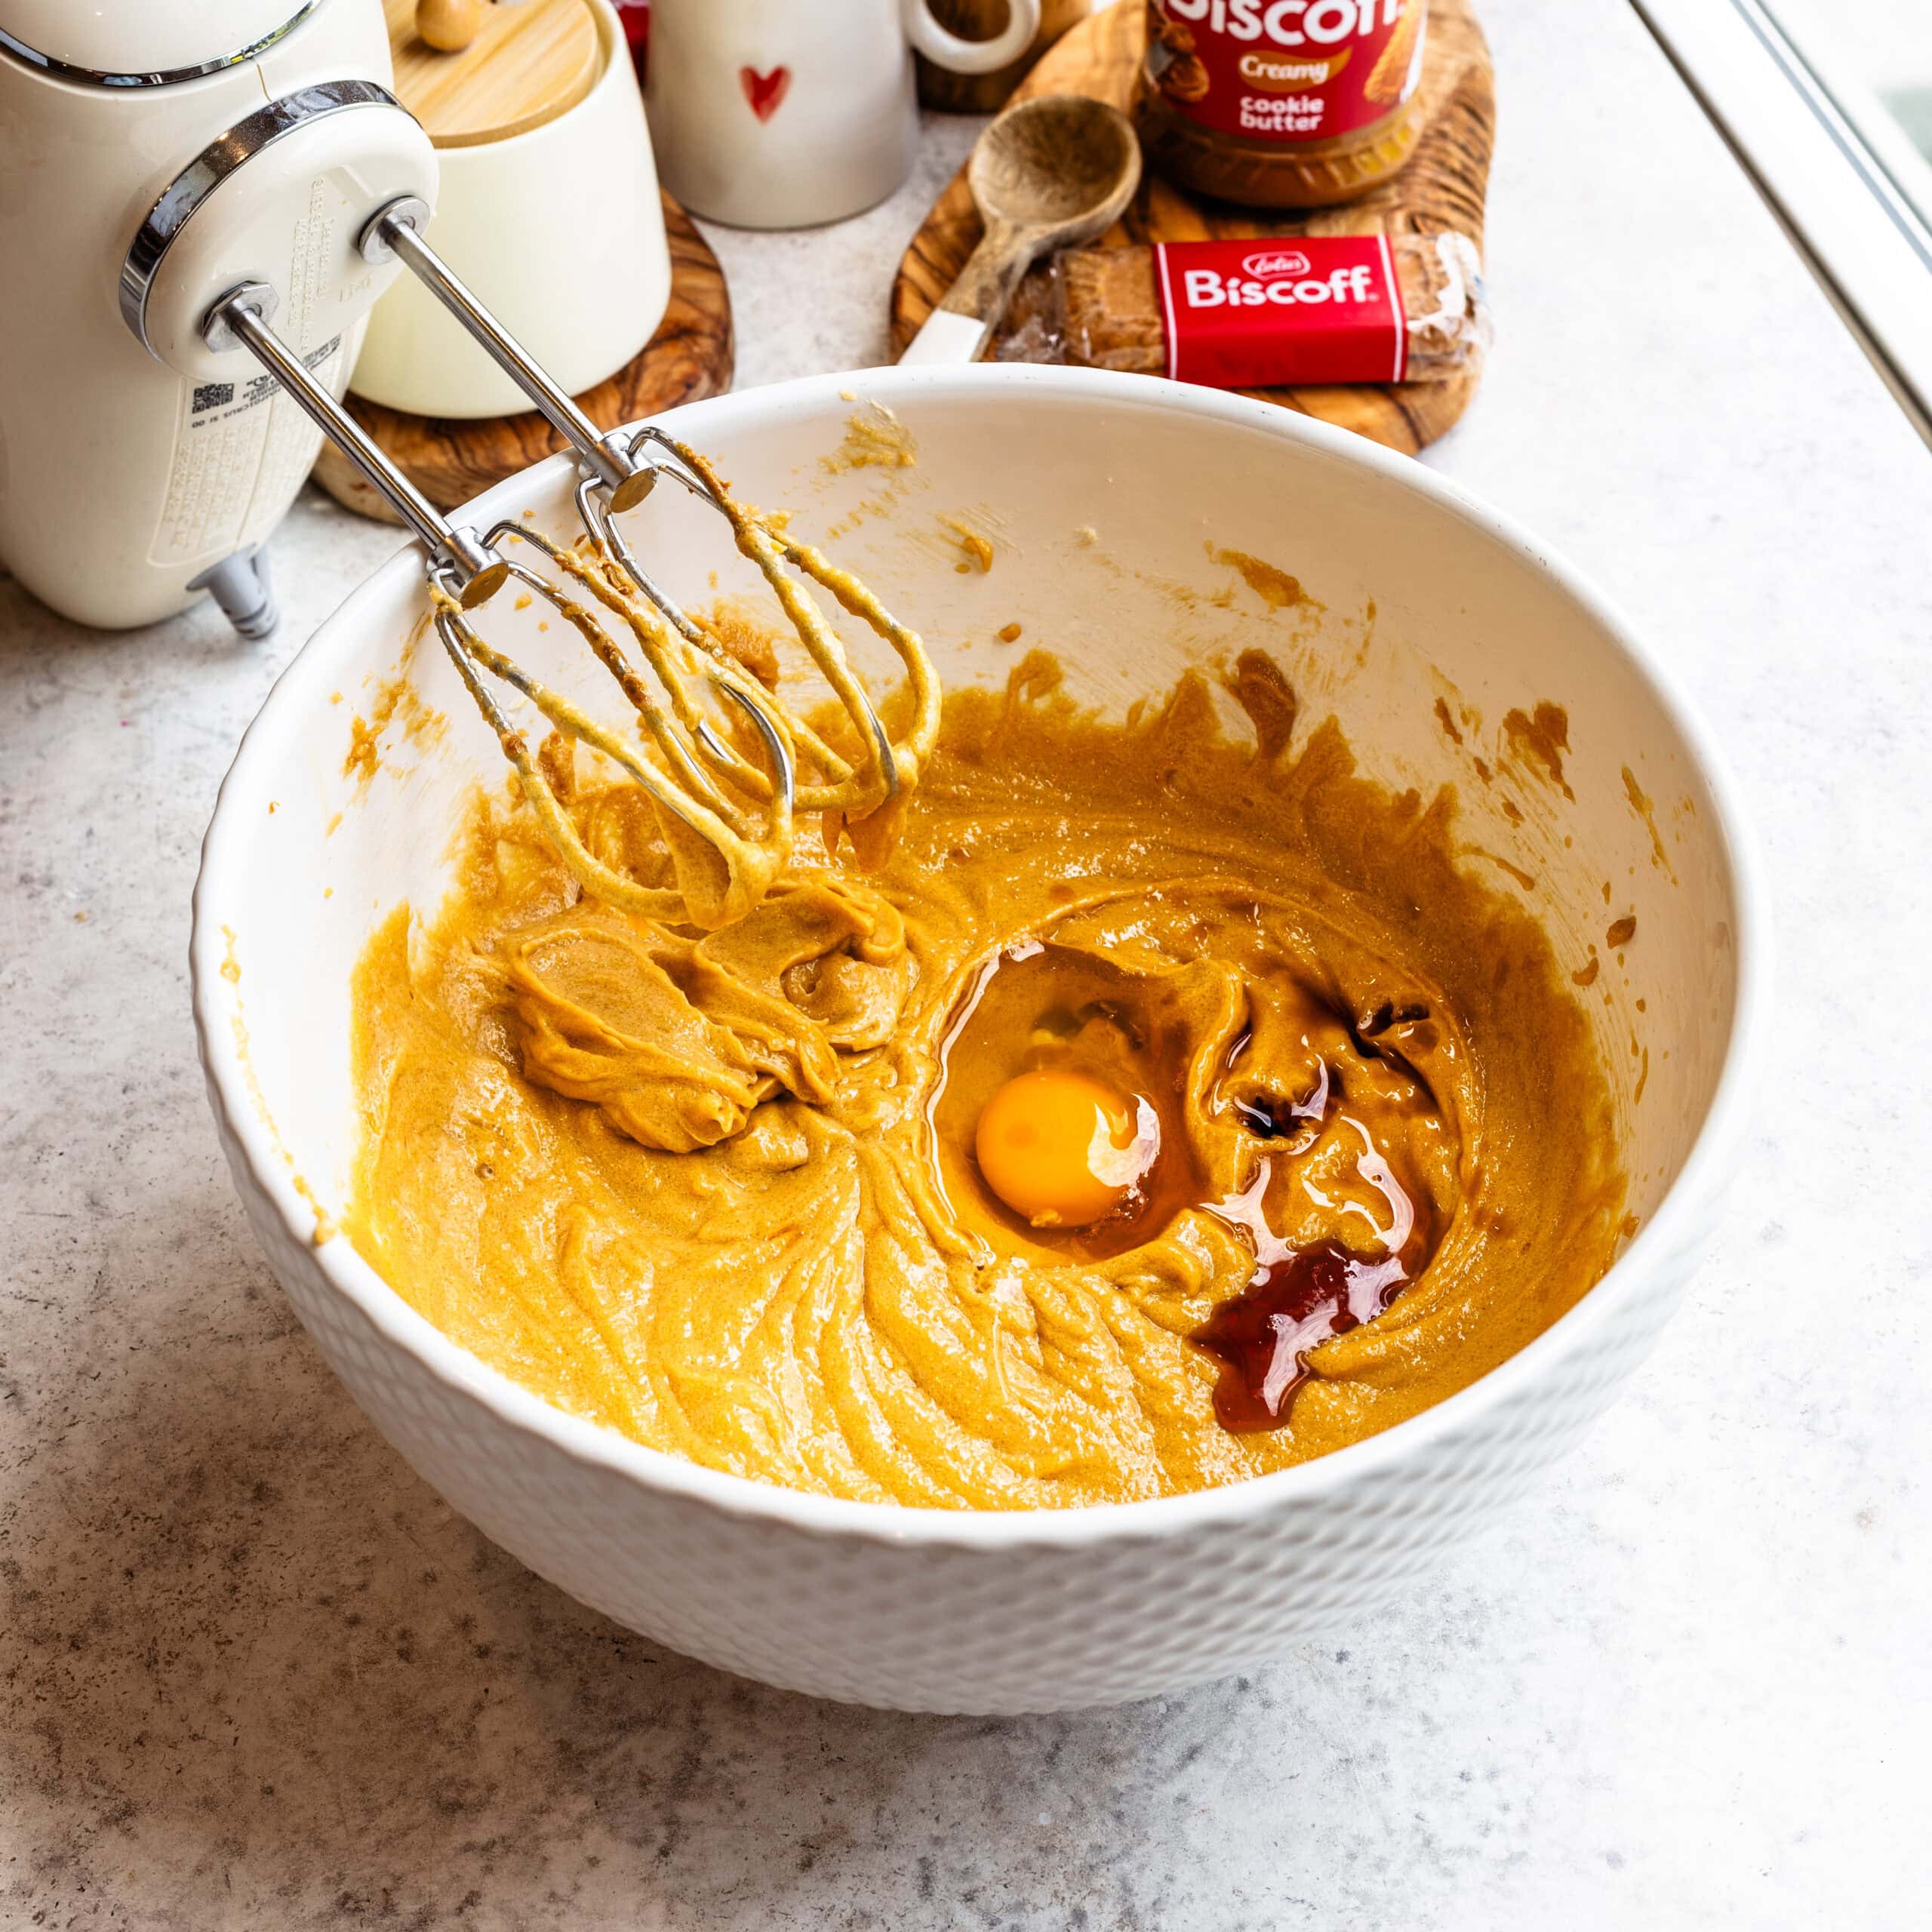
Step 4: Add the eggs
Add the eggs one at a time, mixing fully between each addition. Add the vanilla with the last egg.
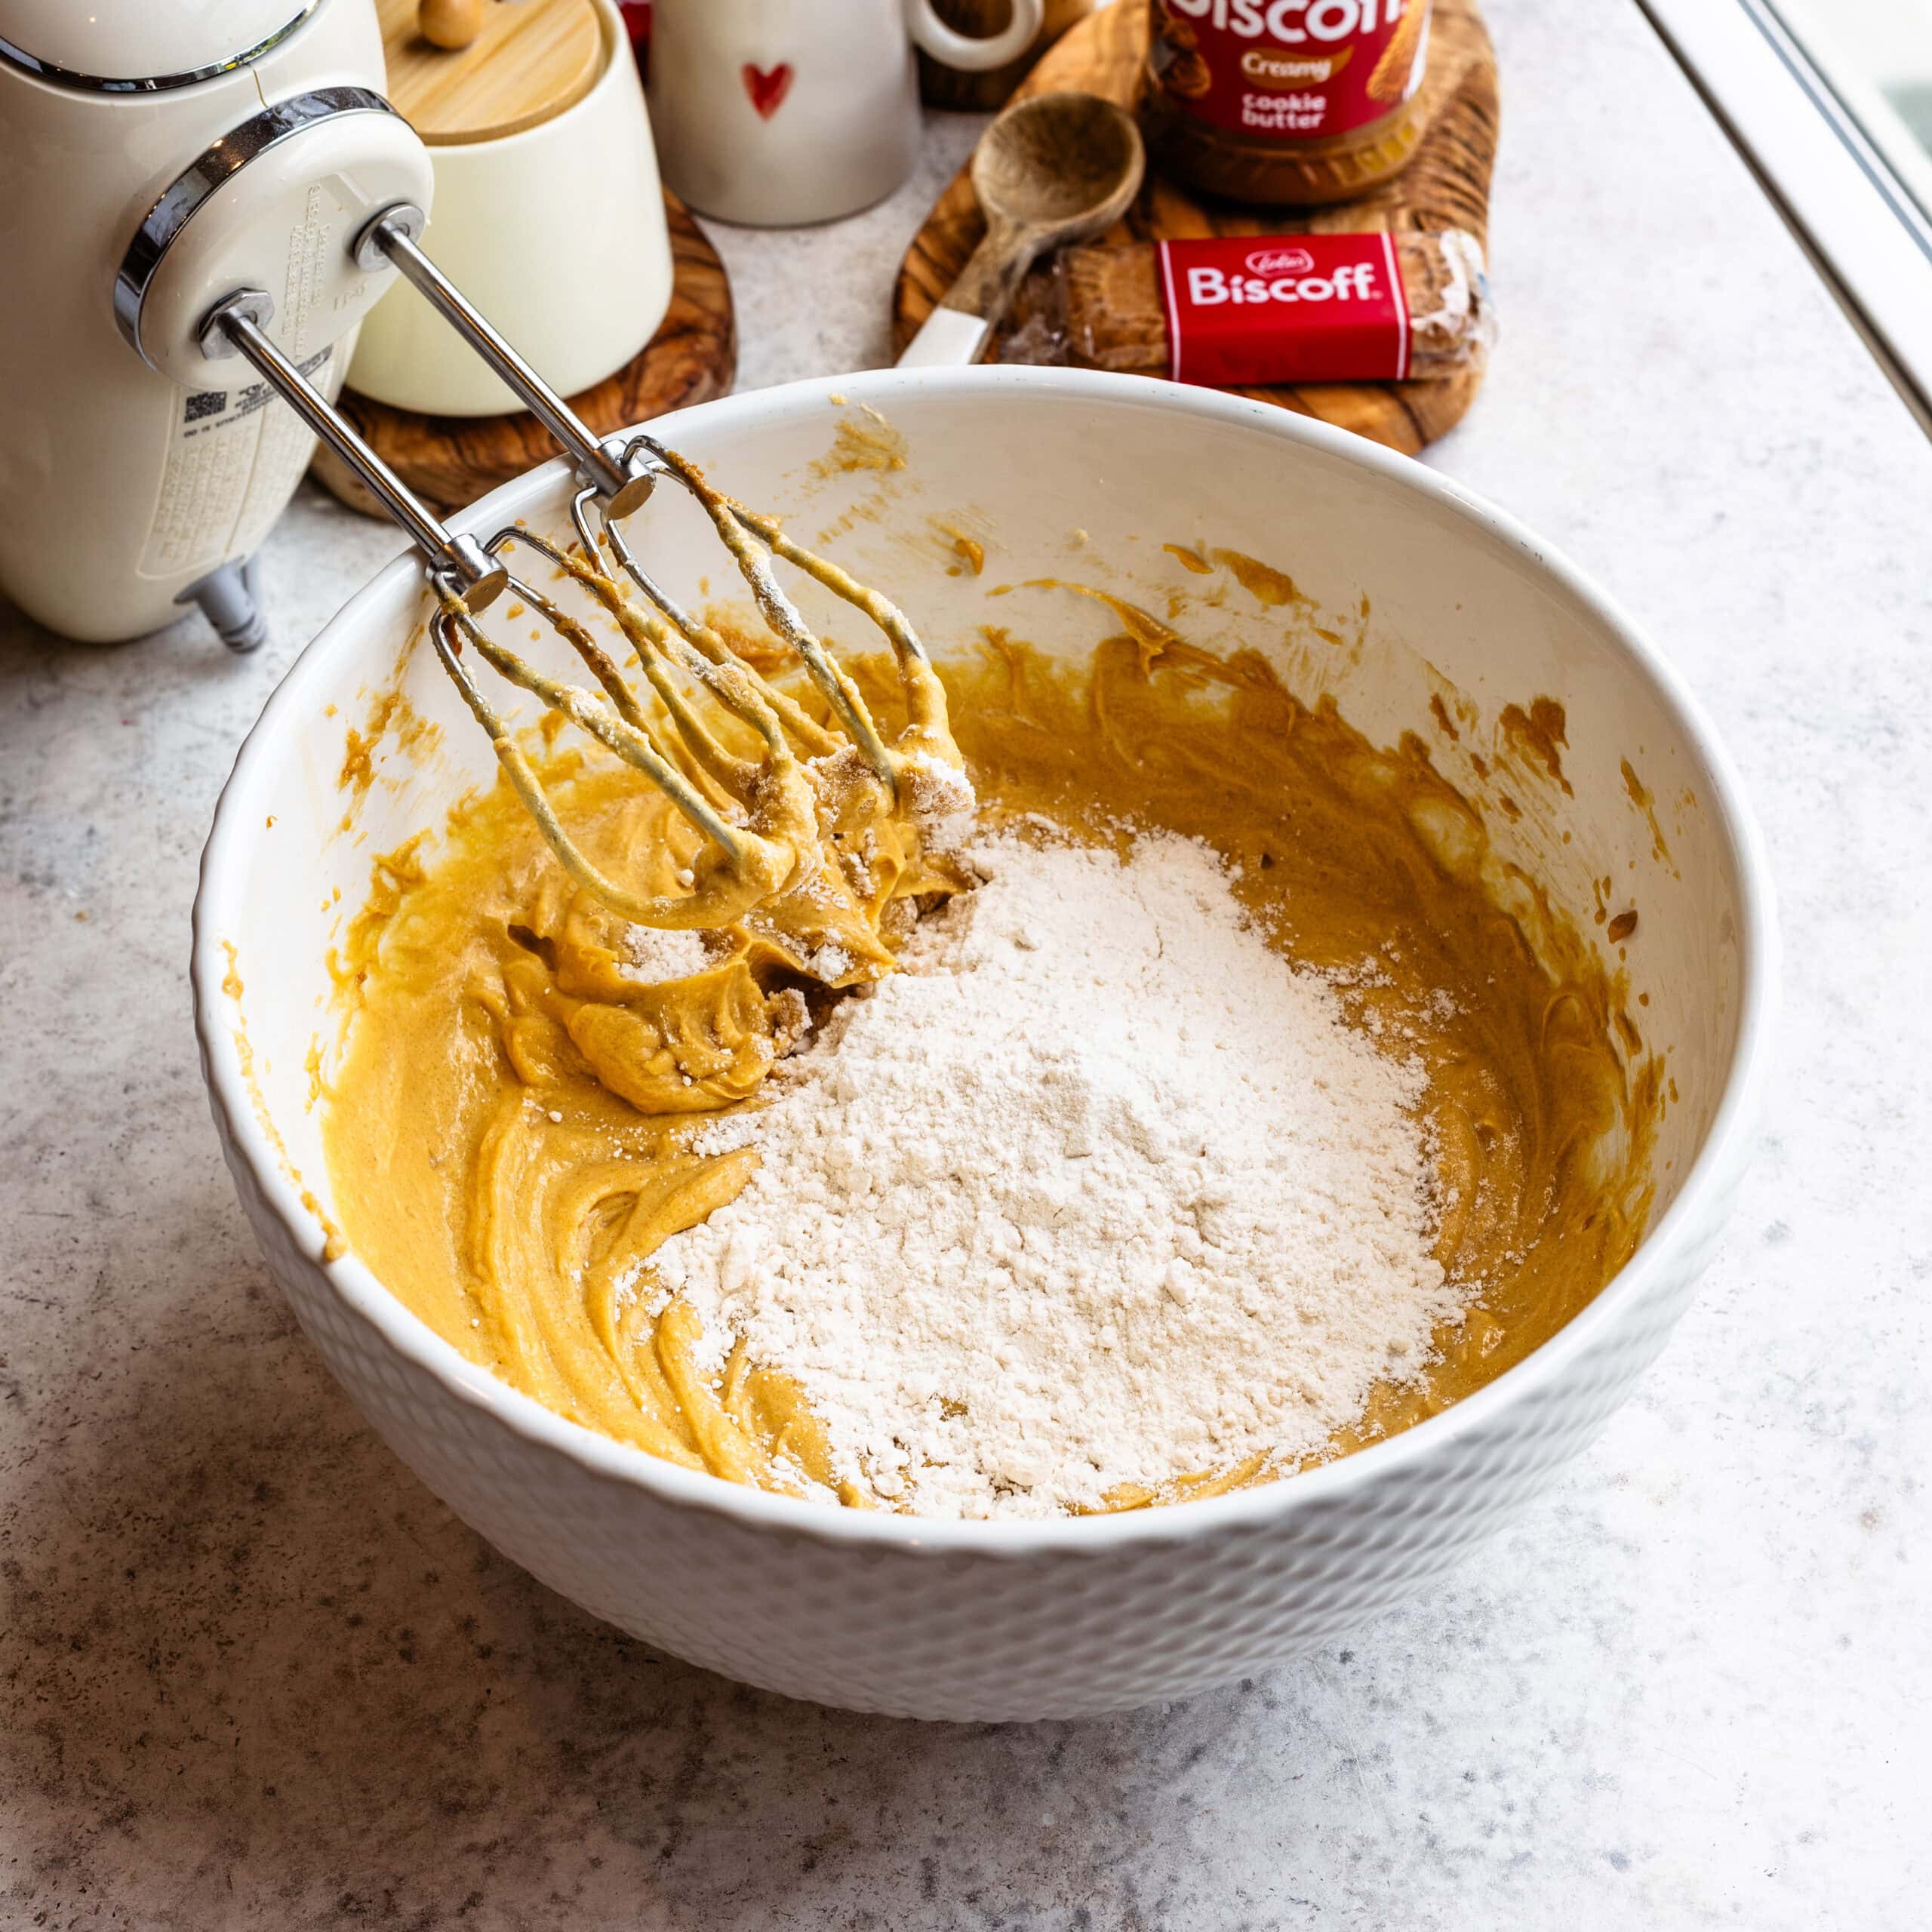
Step 5: Alternate the buttermilk and dry ingredients
Alternate adding the dry ingredients and buttermilk, starting and ending with the dry ingredients.
Once everything is combined, I stop mixing. This is where overmixing usually happens and can make the cake dense.
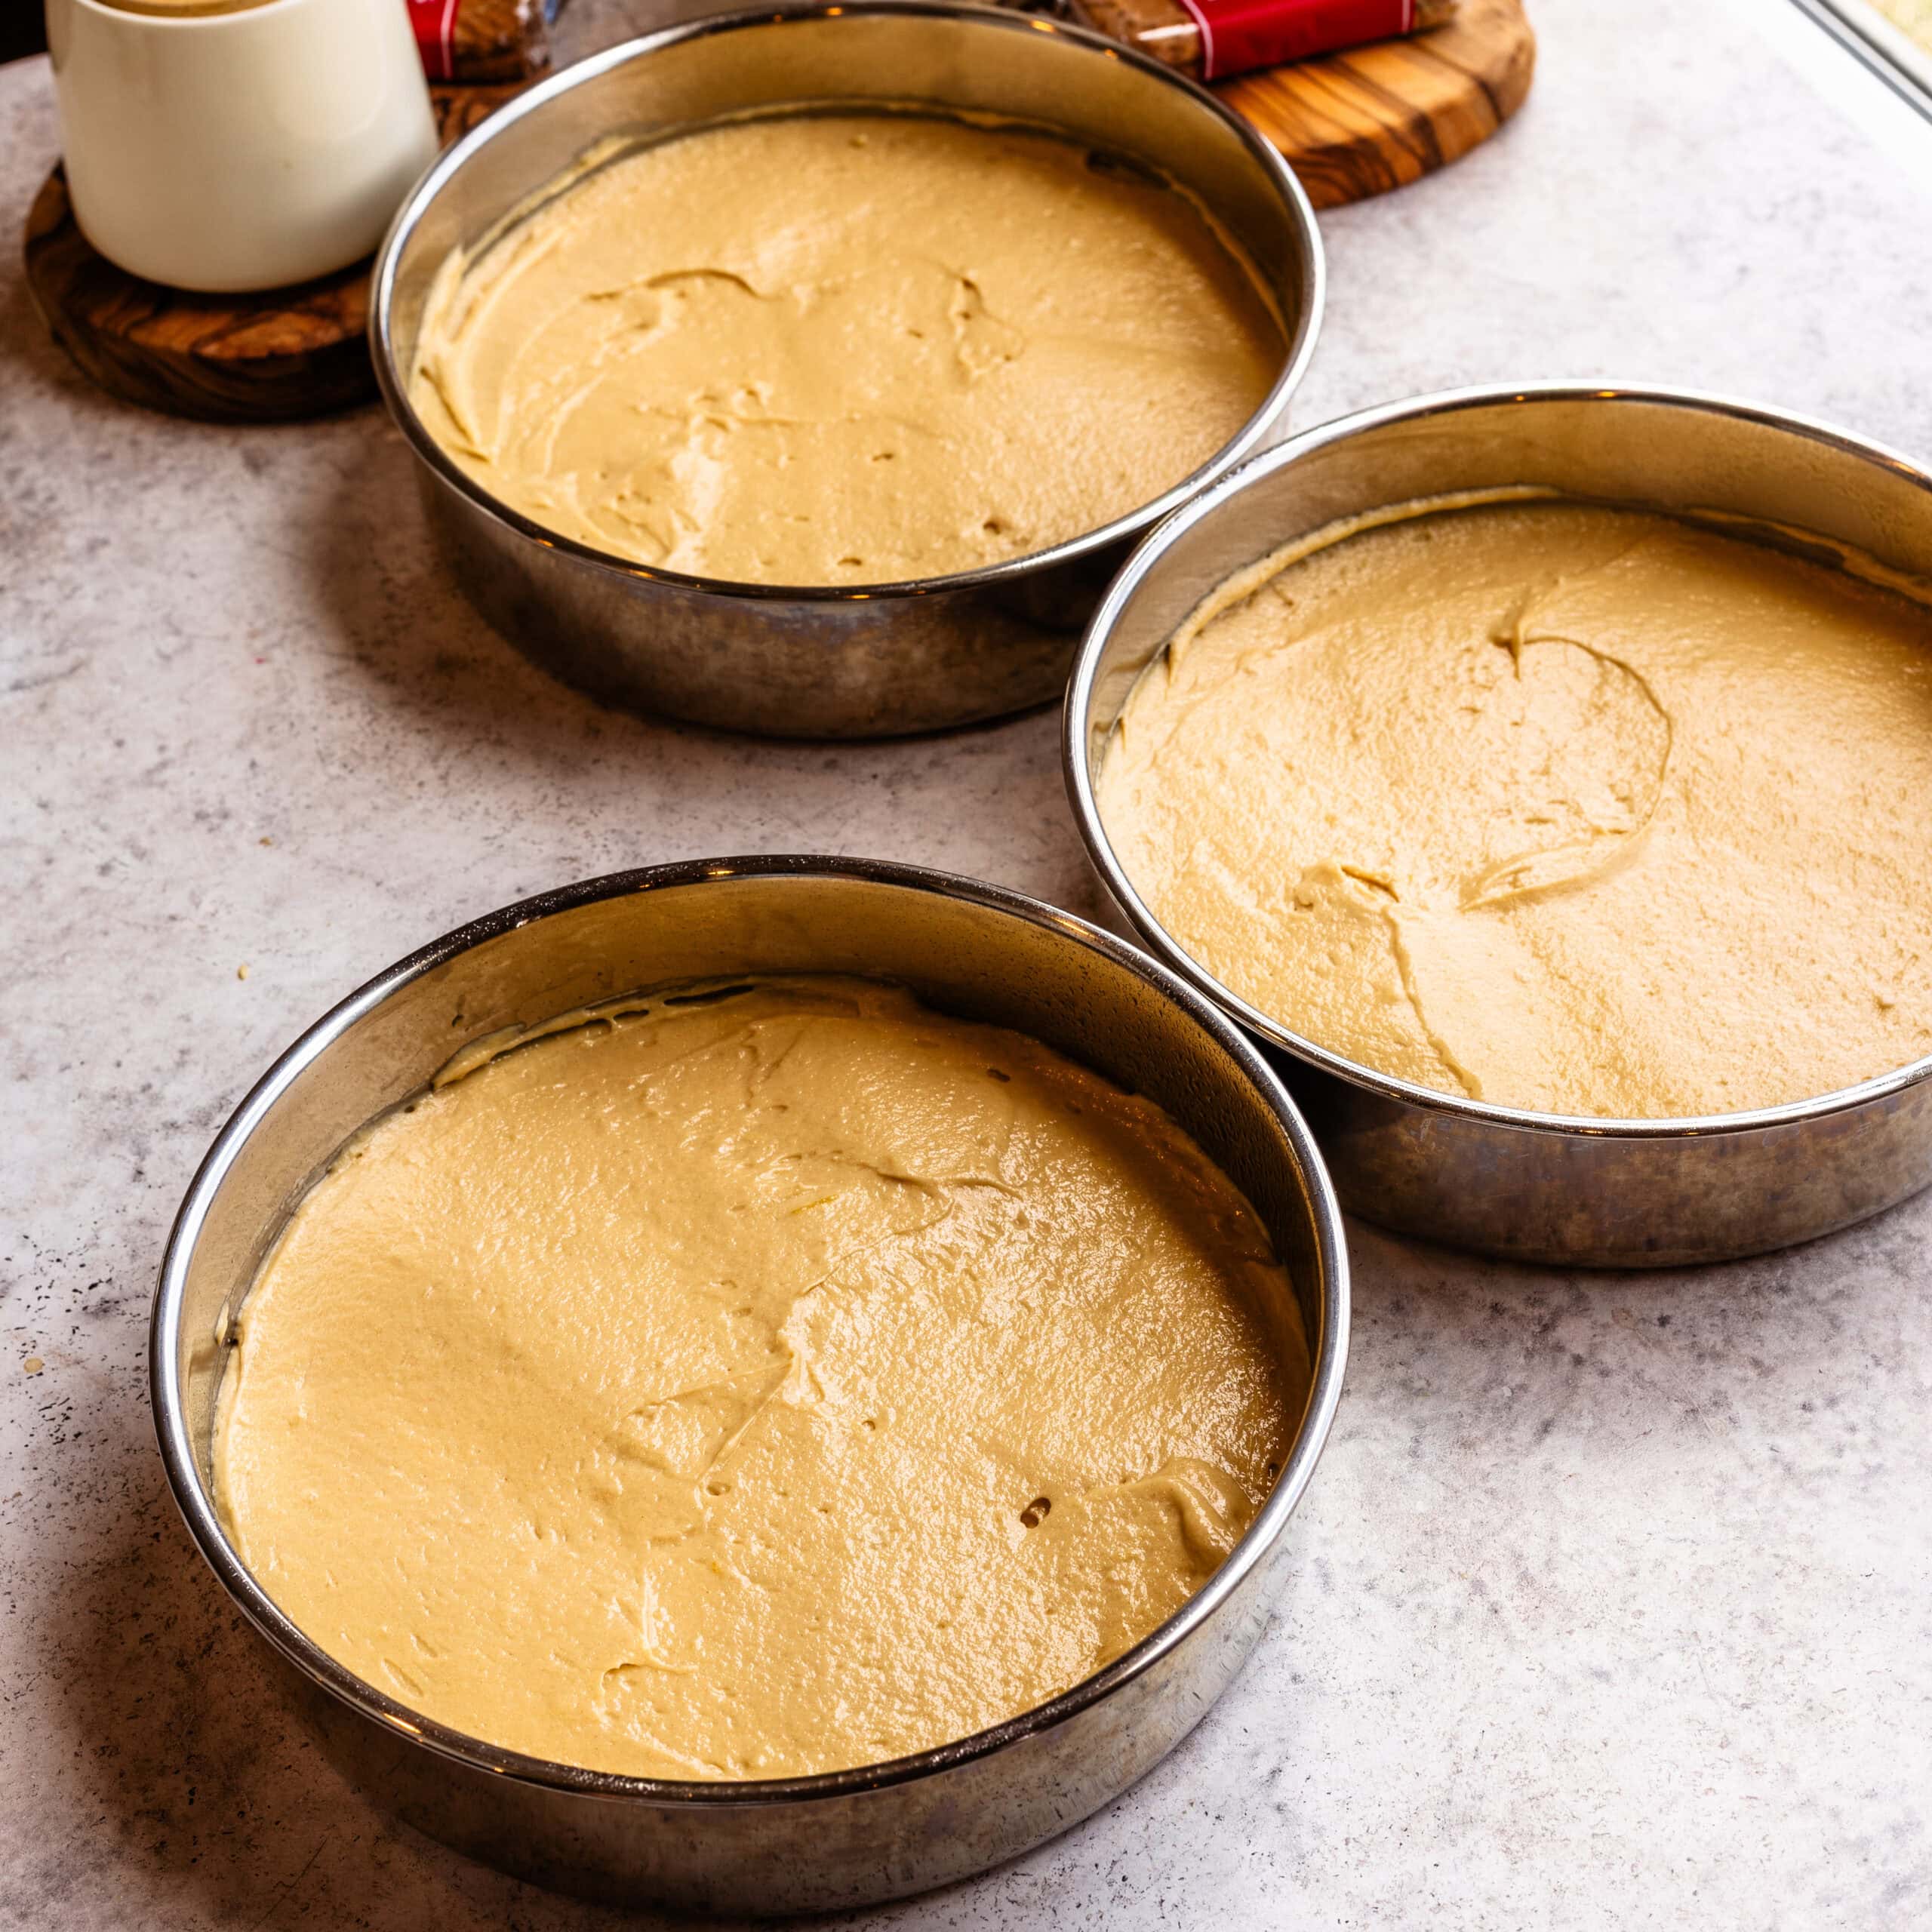
Step 6: Pour into your cake pans
Divide the batter between the pans and smooth the tops.
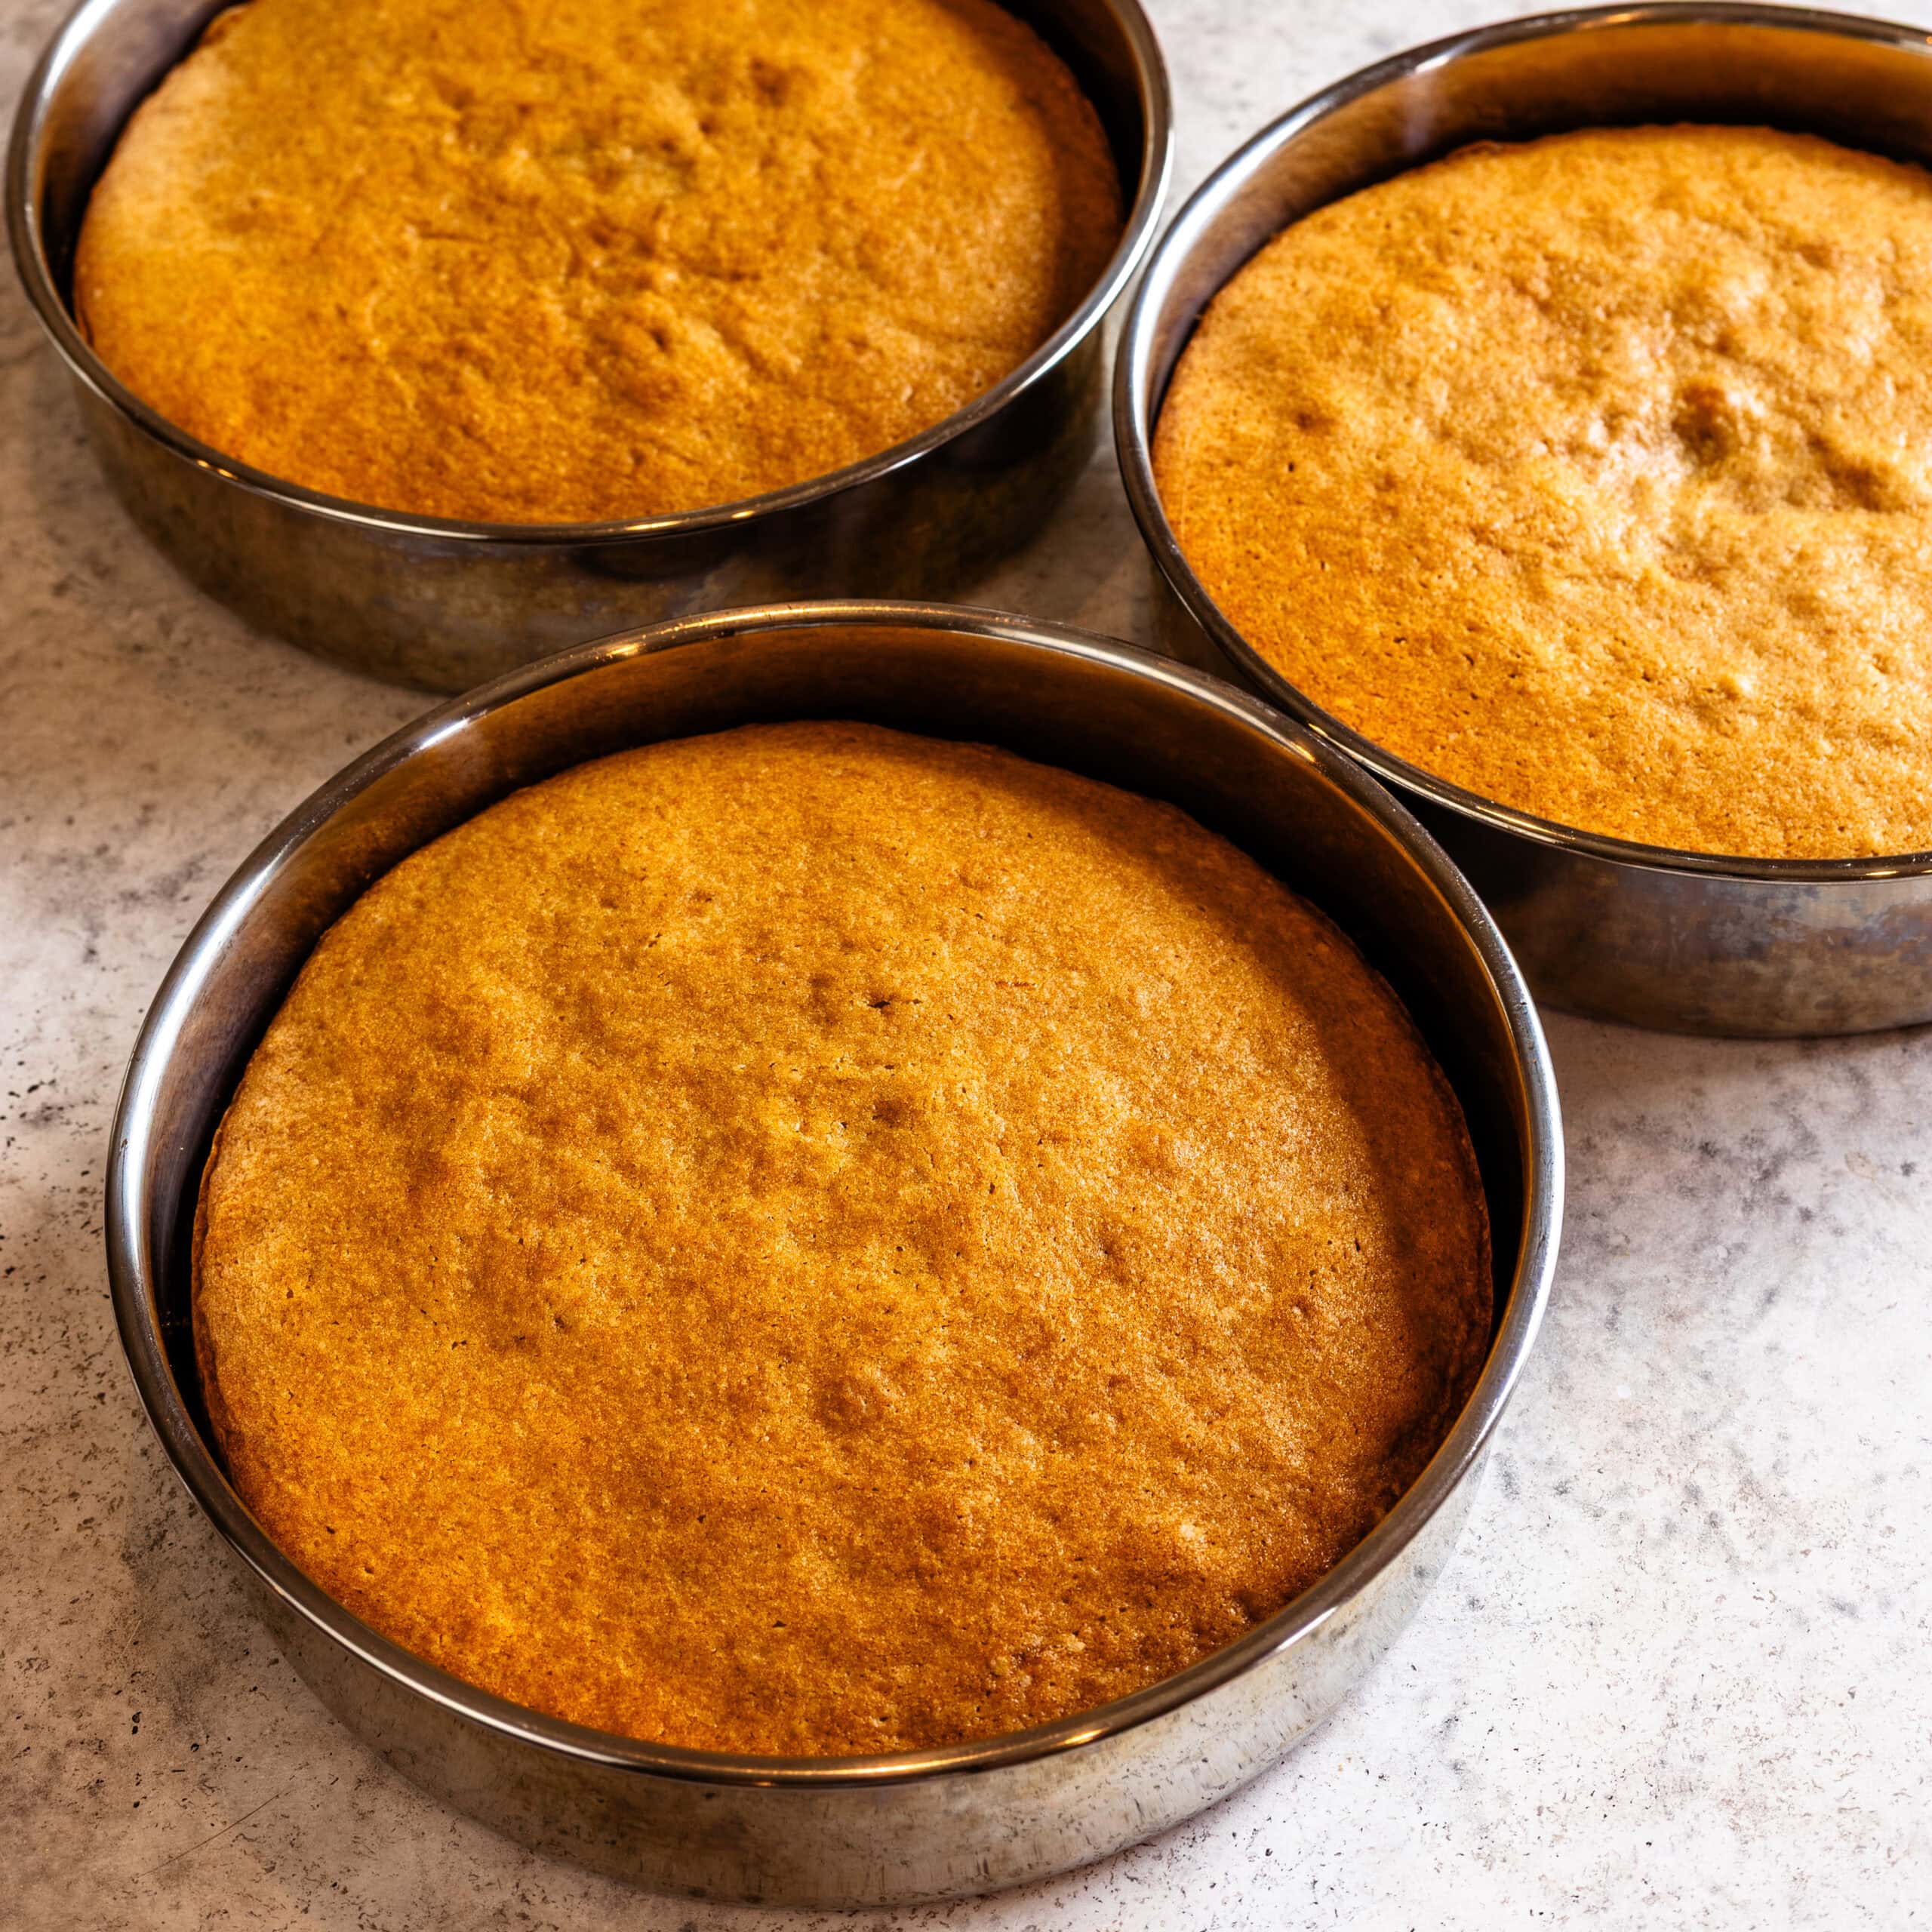
Step 7: Bake
Bake for 30–35 minutes, until the tops spring back and a toothpick comes out clean.
Let the layers cool completely. I often wrap and freeze them, then bring them to room temperature for about 30 minutes before assembling.
Step 8: Make the simple syrup
Bring the sugar and water to a boil until dissolved, then let it cool.
I like brushing a light layer onto each cake layer—it makes a noticeable difference in moisture.
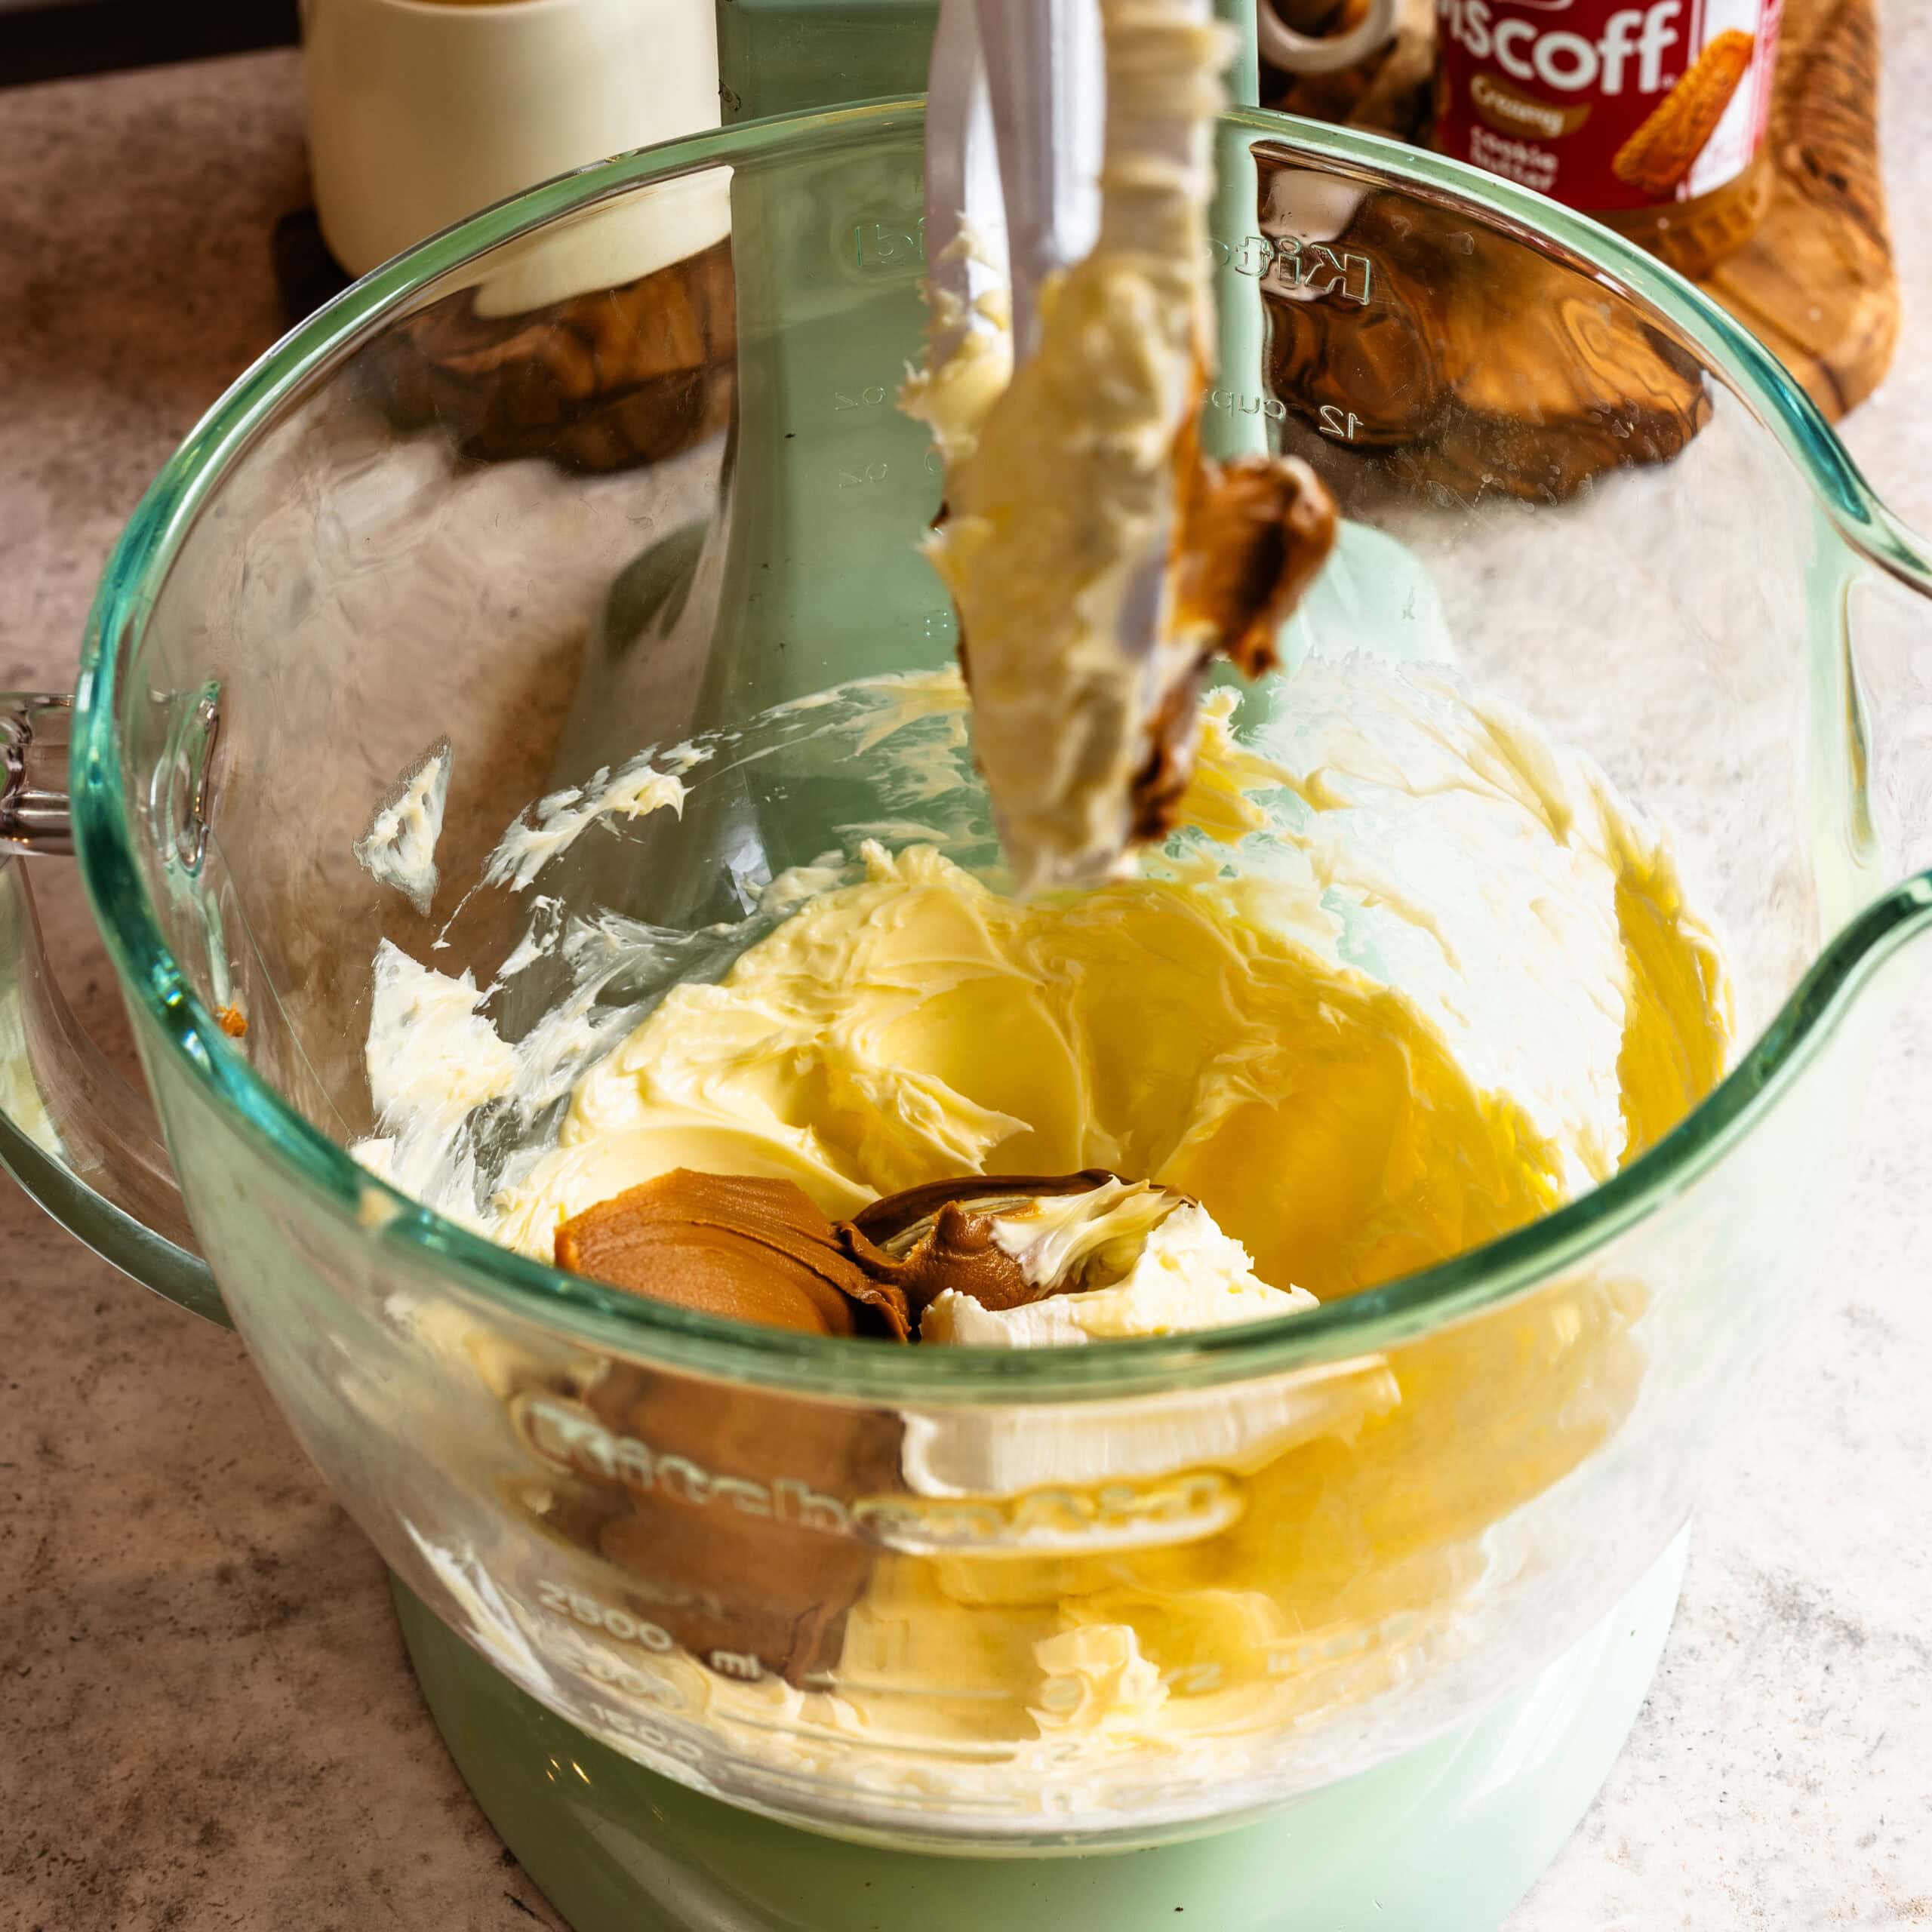
Step 9: Make the Biscoff frosting
Beat the butter for 1 minute, then add the cream cheese and mix again. Next, add the Biscoff cookie butter and whip until smooth.
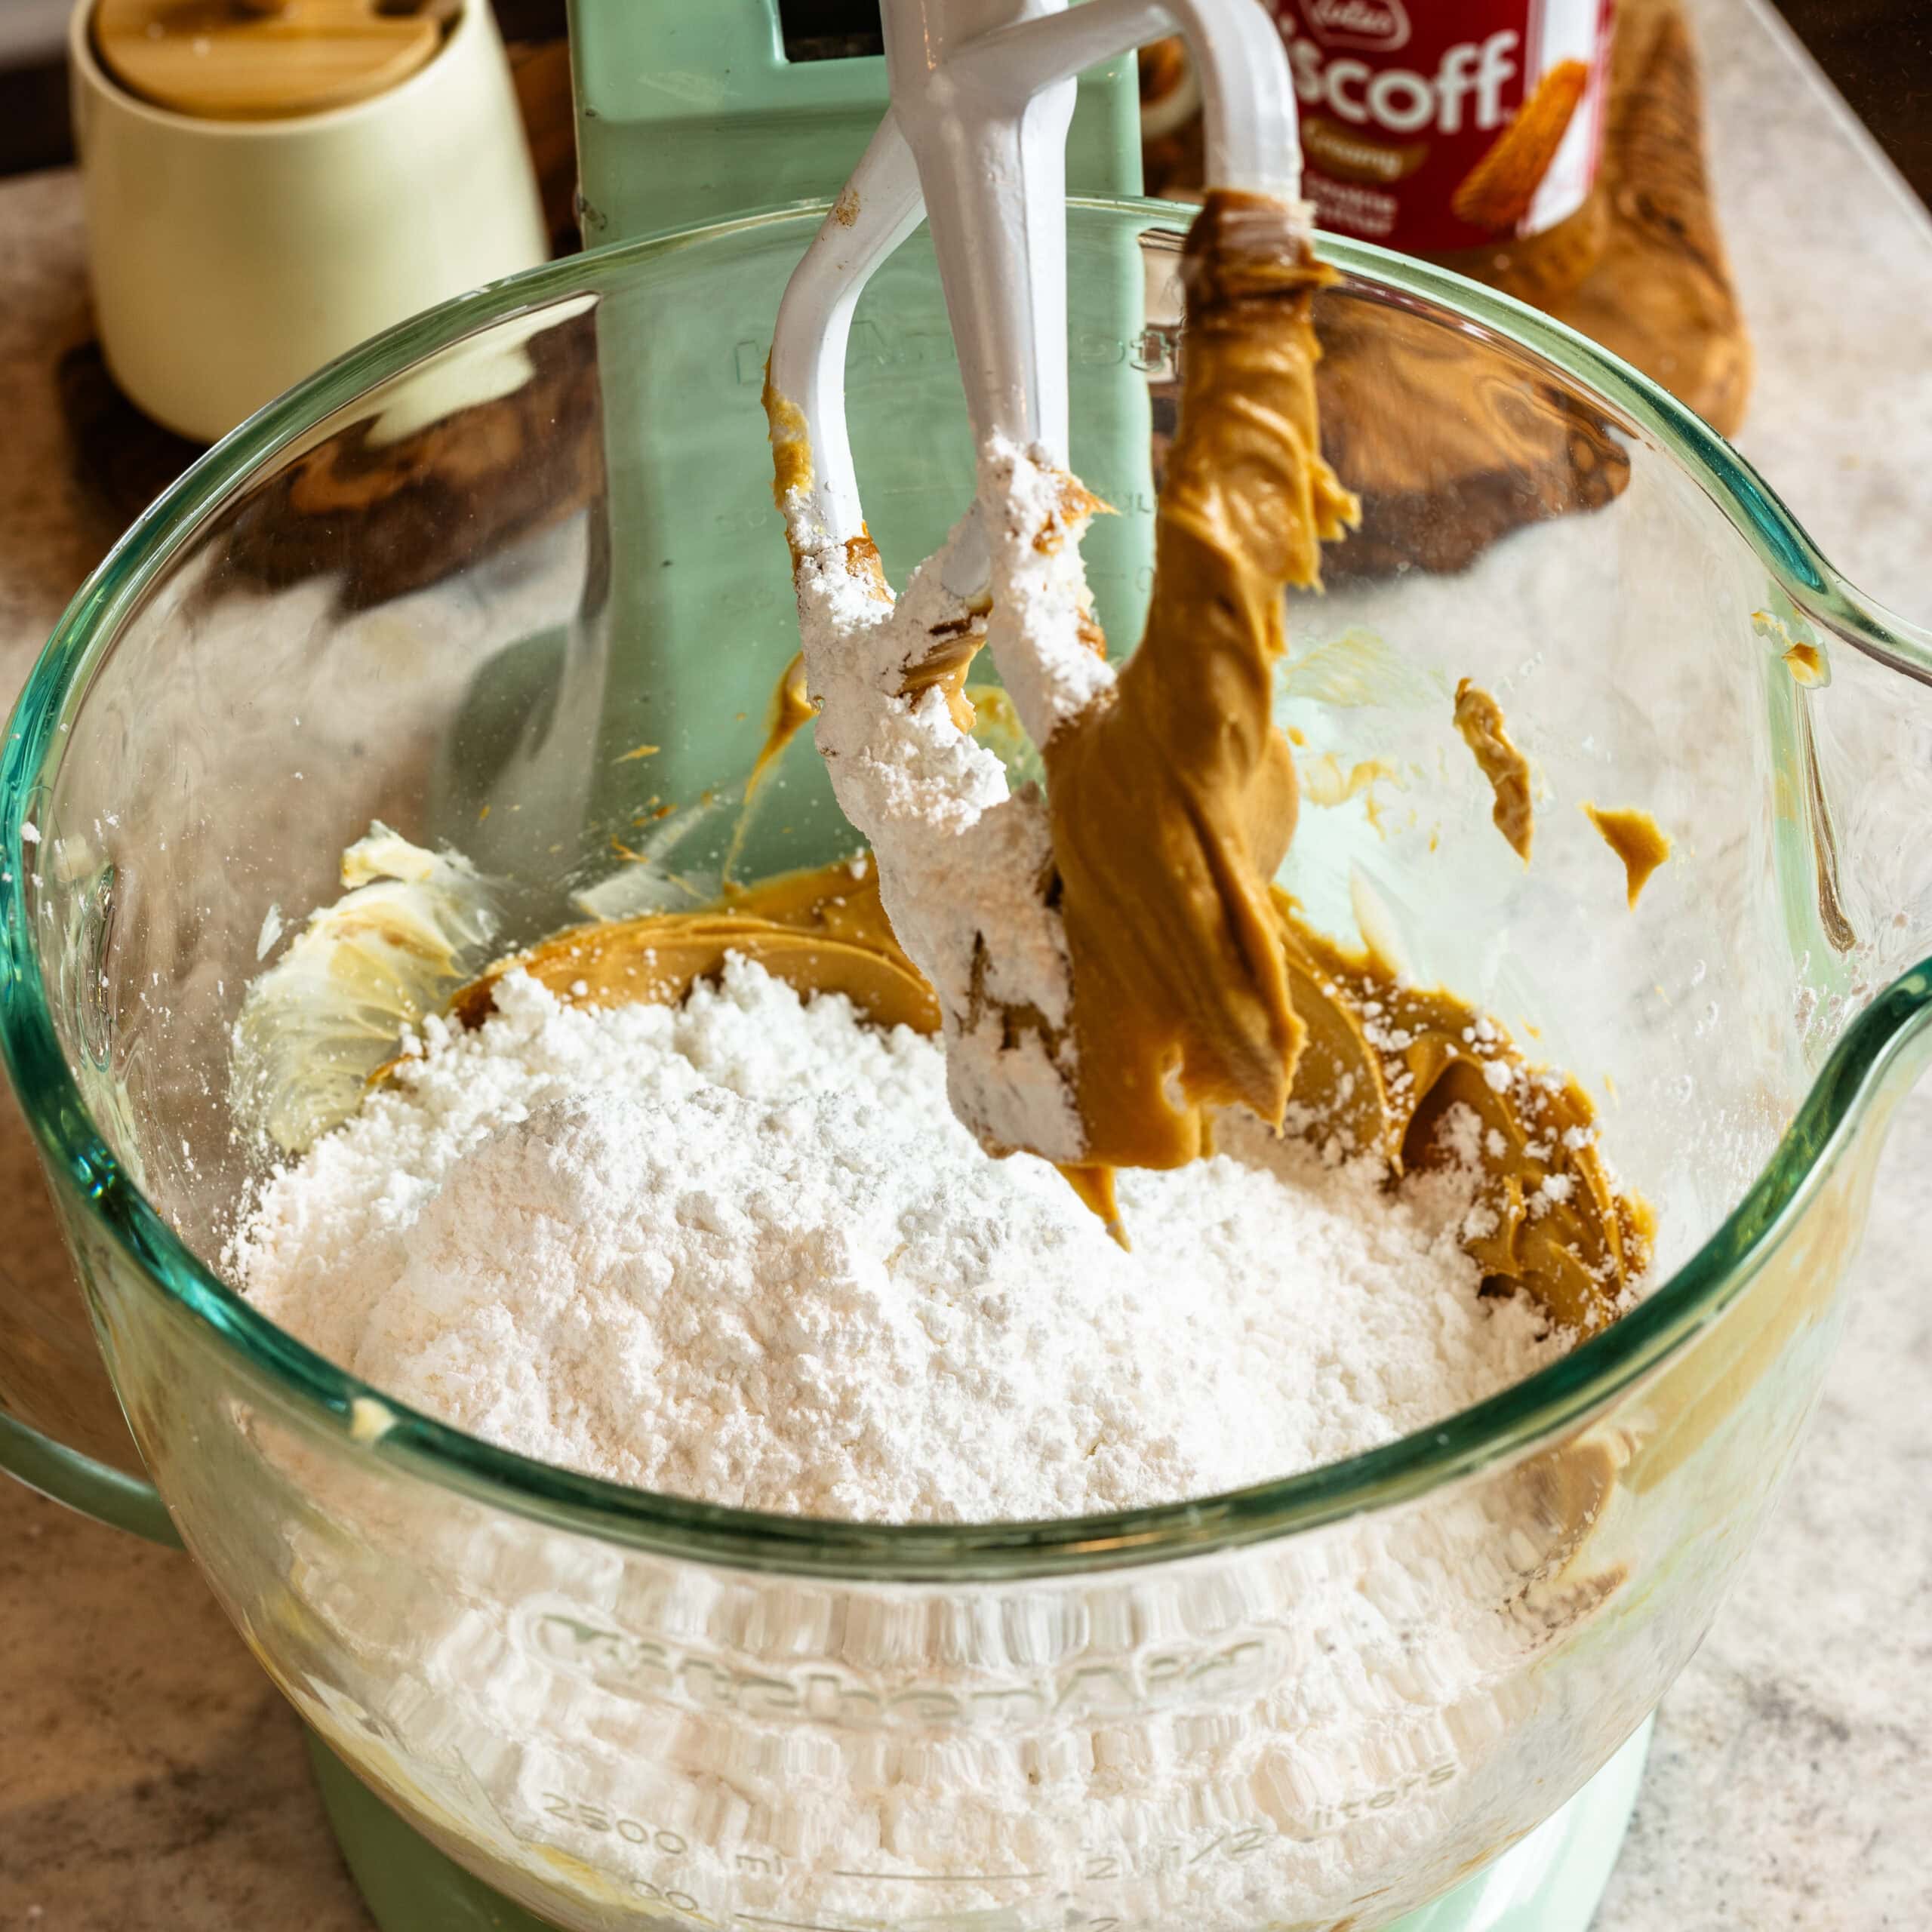
Step 9: Add the powdered sugar
Gradually add the powdered sugar on low speed, then increase to medium-high.
Adjust with heavy cream if needed.
Finish with vanilla.
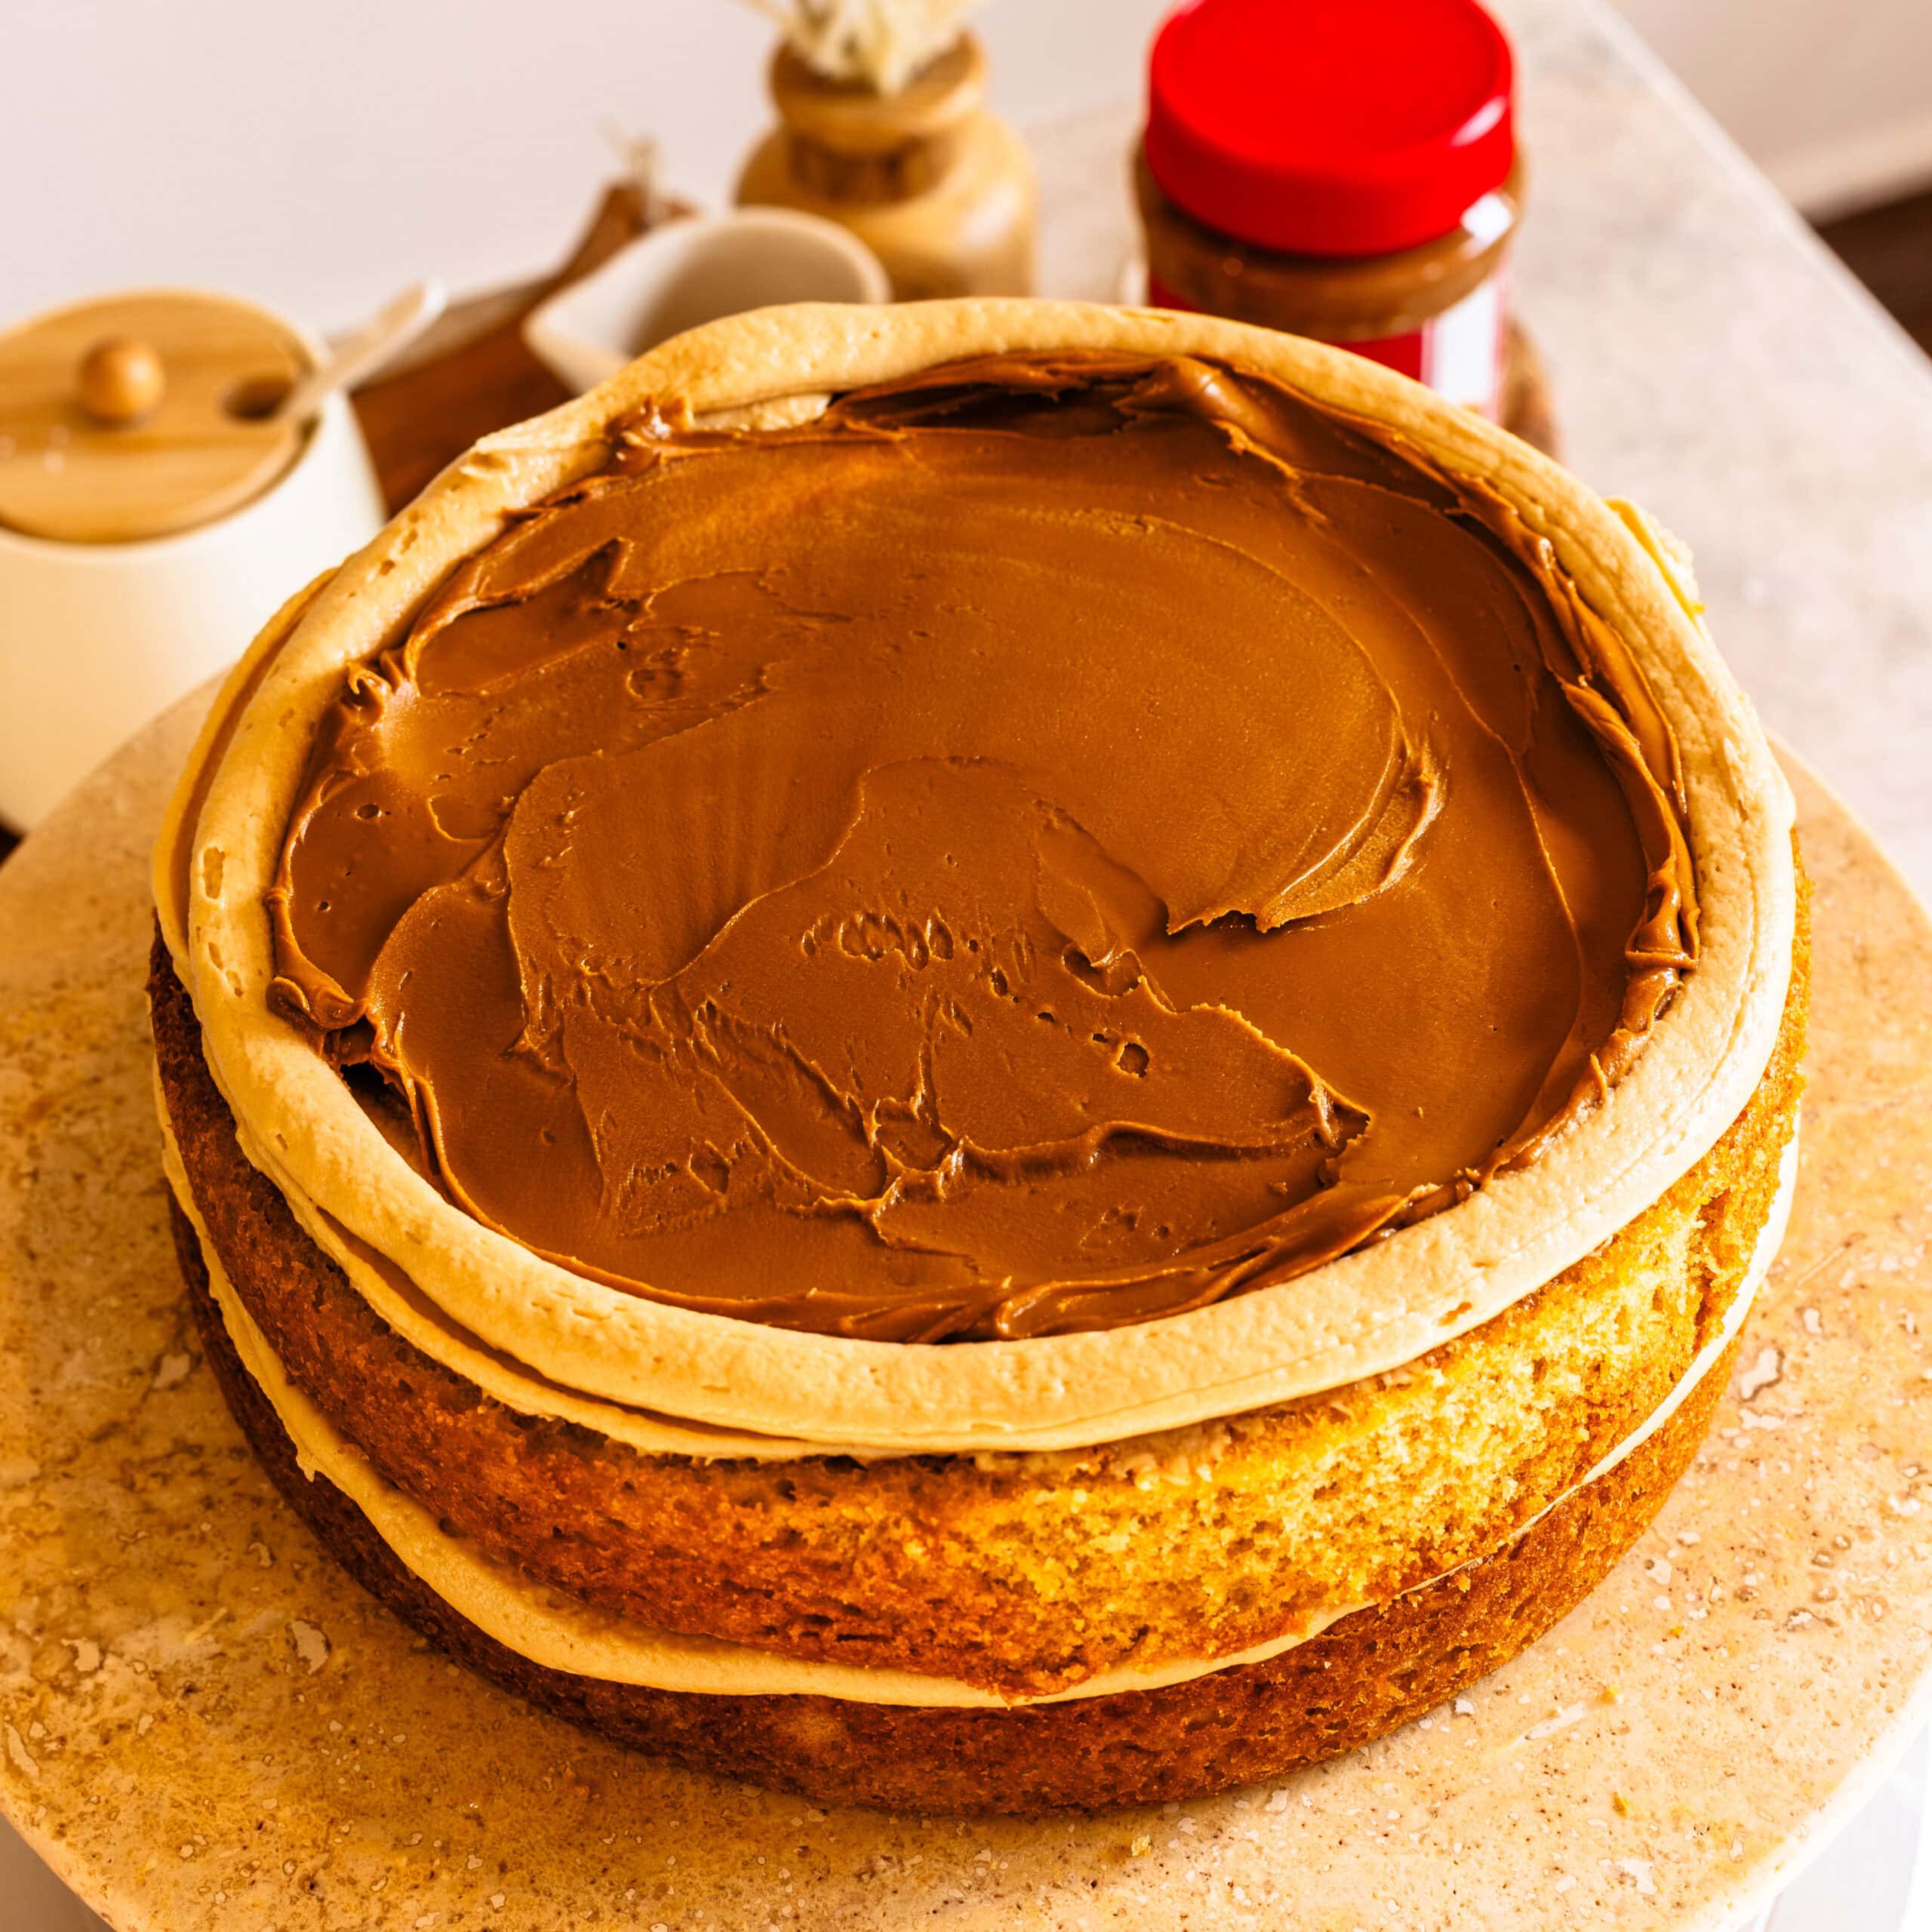
Step 10: Assemble the cake
Place one cake layer on your plate and brush with sugar syrup. Spread a thin layer of frosting, then pipe a border around the edges. Fill the center with about ⅓ to ½ cup of Biscoff cookie butter. Repeat with the remaining layers. Apply a thin crumb coat all over the cake with the frosting and chill for about 30 minutes.
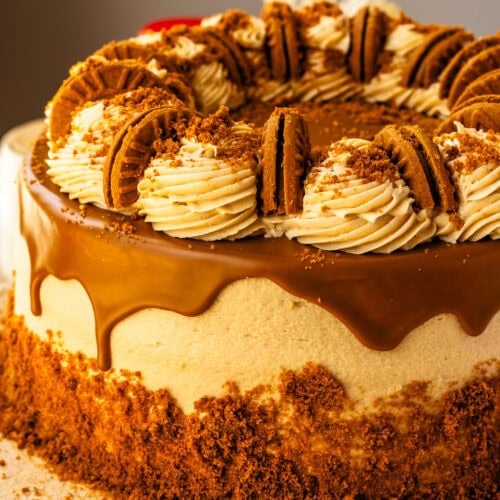
Step 11: Finsh the cake
Frost the cake fully, smoothing the sides with a bench scraper and the top with an offset spatula.
Press Biscoff crumbs around the bottom.
Warm some cookie butter slightly and pour it over the top, letting it drip down the sides. Let that chill for at least 1 hour before decorating with more frosting and Biscoff cookies!
Expert tips
A few small things make a big difference here.
- Stop mixing as soon as the batter comes together
- Use room temperature ingredients for a smoother batter
- Chill between frosting steps for better control
- Brush the syrup lightly—too much can make the layers heavy
If there’s one thing that matters most, it’s not overmixing the batter.
Storage & make ahead
I usually store this cake in the fridge for up to 4–5 days. Before serving, I let it sit out for 20–30 minutes.
You can freeze the assembled cake (without decorations) for up to 1 month. I usually make the cake layers ahead and freeze them until I’m ready to assemble.
Variations
I keep this version simple, but here are a few ways I change it up:
- Add a layer of Biscoff ganache if you want to recreate the original version
- Mix in crushed Biscoff cookies for texture (similar to the original crumble idea)
- Turn this into cupcakes using the same batter
- Add a light chocolate element, like I do in my Biscoff chocolate cheesecake
FAQ
Yes. I usually bake the layers in advance and assemble later.
Most likely overmixing after adding the flour.
You can, but I recommend it for moisture.
Yes—add the crumble into the batter and use a ganache filling like in the original recipe.

More recipes you might like
If you like this cake, you’ll probably also enjoy my Biscoff blondies for a quicker version of the same flavor, or my Biscoff cheesecake if you want something creamier and more decadent. My chocolate cake and coffee cake follow a similar method and have that same soft, reliable texture.
Final thoughts
If you make this cake, I’d love to hear how it turns out. And if you’ve made both versions, I’m really curious which one you prefer.
Feel free to leave a comment below or tag me on Instagram so I can see your version.
Biscoff Cake
Ingredients
Biscoff Cake Layers
- 2½ cup all-purpose flour 318g
- 2 tsp baking powder
- ½ tsp baking soda
- ¼ tsp salt
- ½ cup unsalted butter 113g
- ½ cup Biscoff cookie butter 125g
- ¾ cup vegetable oil 180ml
- 1 cup granulated sugar 200g
- ½ cup brown sugar 100g
- 4 large eggs
- 2 tsp vanilla extract
- ⅓ cup sour cream 80g
- ¾ cup buttermilk 180ml
Sugar Syrup
- ¾ cup granulated sugar 150g
- ⅔ cup water 150g
Biscoff Frosting
- 1½ cups unsalted butter 339g
- 6 tbsp cream cheese 84g
- 1 cups Biscoff cookie butter 240g
- 5-6 cups powdered sugar 625-750g
- 3 –6 tbsp heavy cream 45 to 90ml
- 2 tsp vanilla extract
Filling and Topping
- 1⅓ cups Biscoff cookie butter 320g
- ¾ cup Biscoff crumbs
Instructions
Biscoff Cake Layers
- Preheat the oven to 350°F.
- Grease three 8-inch round cake pans and line the bottoms with parchment paper.
- In a bowl, whisk together the all-purpose flour, baking powder, baking soda, and salt. Set it aside.
- With an electric mixer or in the bowl of a stand mixer, beat the butter for 1 minute on medium speed. Add the granulated and brown sugar. Beat on medium for 2 minutes, until the mixture is creamy and fluffy.
- Add the oil and beat for another minute.
- Add the sour cream and Biscoff butter and mix.
- Add the eggs, one at a time. Make sure one egg is incorporated before adding the next.
- Along with the final egg, you can add the vanilla.
- Add one third of the flour mixture and mix to combine.
- Add half of the buttermilk and mix.
- Alternate the flour and buttermilk until you finish with the remaining third of flour.
- Fold until combined. Don’t over mix the batter at this point.
- Divide the batter between the 3 cake pans. Use an offset spatula to smooth it out.
- Bake the cakes in the pre-heated oven for 30 to 35 minutes, until the cake springs back when touched on top, and the edges are golden, or a toothpick inserted in the cake comes out clean.
- Let the cake layers cool down completely before frosting and assembling the cake. I like to wrap each layer in plastic and place them in the freezer overnight or for up to 1 month.
- To frost the cake from frozen, simply let the layers sit at room temperature for about thirty minutes before assembling the cake.
Sugar Syrup
- Bring the sugar and water to a boil in a small saucepan. Once the sugar melts, turn the heat off, and let it cool completely.
Biscoff Frosting
- To make the Cookie Butter Biscoff Frosting, beat the butter for one minute. Add the cream cheese and cookie butter and beat for another minute.
- Add the powdered sugar gradually, while mixing on low. Once about five cups are incorporated, raise the speed to medium-high and beat for another minute.
- If the frosting is too thick, add the heavy cream, one tablespoon at a time. If the frosting is too thin, add the remaining powdered sugar.
- Add the vanilla and mix to combine.
- Place some of the frosting in a piping bag. Leave the rest aside in a covered bowl.
To Assemble
- To assemble the cake, place one cake layer on a cake stand.
- Brush with the sugar syrup.
- Spread a thin layer of Biscoff frosting on top.
- Snip the ends of the piping bag with scissors and pipe a ring of the Biscoff Frosting around the edges of the cake layer.
- Fill the center with ⅓ to ½ cup of Biscoff cookie butter, using an offset spatula to spread it to the edges.
- Top with another cake layer.
- Repeat with the syrup, frosting, and Biscoff spread. Then another cake layer. Repeat again.
Crumb Coat & Frosting
- Once the cake is assembled, spread a thin layer of frosting over the entire cake, including the top. This is the crumb coat—it seals in any loose crumbs so they don’t show in the final finish. Smooth it out with a bench scraper or cake scraper, then refrigerate for about 30 minutes.
- Once chilled, apply a generous layer of frosting to the cake. Hold a bench scraper at a 90-degree angle against the sides, keeping light contact with the cake. Rotate the cake stand while applying minimal pressure to smooth the sides and remove excess frosting.
- Use an offset spatula to smooth the top by sweeping from the edges toward the center.
- Press Biscoff cookie crumbs gently around the bottom of the cake. Chill for about 20 minutes.
- Meanwhile, microwave about 1/2 cup of Biscoff cookie butter for 5–10 seconds, until fluid. Pour it over the slightly chilled cake, spreading it to the edges with a spatula and allowing it to drip down the sides.
- Refrigerate the cake for at least 1 hour for the cookie butter to set.
- Transfer the remaining frosting to a piping bag fitted with your preferred tip (I used a 4B) and pipe swirls on top. Finish by decorating with halved Biscoff cookies and extra cookie crumbs.
I made this and liked the flavour, but I found it overly sweet unfortunately. To top it off, the recipe did not include the biscoff drip. I did not read the instructions in the top, only the recipe itself, and so I had only purchased a 400g jar of biscoff spread. It was just enough for everything else. But then I couldn’t do the drip design. Thank goodness I had leftover ganache, but the visual effect was just not the same.
The cake baking time was also off. Too long and mine were a bit too done. It’s probably the fault of my oven, but if anyone else makes this recipe, just keep a good eye on the cakes for doneness. I baked mine for 30 minutes and it was 5 minutes too long. Also be aware the recipe card doesn’t mention the extra cookie butter amount for the drip, so you will need larger than a 400g jar. Also, the cookie crumbs applied to the top of each cake were not ideal. I had to level the cakes, and so a lot of the cookie crumbs were just cut off in the end. I’m not sure I would make this again. The amount of work vs the pay off at the end doesn’t seem worth it to me.
This was one of the best cakes I have ever made! I was making a cookie butter trifle for friends for their anniversary, but the recipe that I found called for boxed cake mix so instead, I decided to use this cake and crumble recipe, and Holy deliciousness!! It was one of the best cakes I have ever eaten, such an amazing flavor and tender and delicate. I’m going to have to remake this in the future as a layer cake but wow, it was so good and I have the third layer leftover for another time.
I took the extra step of caramalizing the white chocolate. It was absolutely worth the effort and the cake was delicious. Spot on flavor and texture! I always worry about butter in cakes making them tough but this one was very moist and not too sweet.
That’s wonderful that you liked it! Thank you so much!
I feel like an idiot asking this but I cannot find the biscoff cookie butter recipe. Can someone direct me to it?
Not a silly question at all! Biscoff cookie butter is actually a ready-made product you can buy at the store, so no need to make it from scratch. You can usually find it near the peanut butter and other spreads in most grocery stores. Hope this helps, and happy baking! 😊
Can someone tell me how much cookie butter and cookies to buy total for this recipe? I keep trying to find it but the internet isn’t cooperating.
Thanks
To save time can I freeze the cake layers?
Absolutely yes you can!
Making this now! Does it need to be refrigerated until served or is it okay to sit out?
If it’s not in the sun or in a really hot place, it can stay out of the fridge for a few hours.
Do you have a recipe for a cake to serve 25 people?
If you cut this cake event style you will have 20 to 24 slices. But if you want to make sure everyone will have a piece, I recommend multiplying this recipe by 1.5 and making in 10″ pans instead.
Where do I buy gold chocolate chips? And what are they? Never heard of them. 🙂
I get them online. Some stores sell them. They are caramelized white chocolate. If you type gold chocolate callebaut, or blonde chocolate valrhona, you will find it.
I’m sorry if you mentioned or posted this elsewhere and I missed it. Came to find this recipe after seeing your reel on Instagram. May I ask what cake pans you use, please? Appreciate your time!
the pans in this recipe I am not really sure about their brand since I got them a long time ago at publix I believe. But I love fat daddio pans, I just didn’t have 3 of them to make the cake so I used these ones.
5/5 rating! It’s so delicious I tried it my family love it. Thank you
Spectacular cake! Such rave reviews from everyone who tasted it. Thank you!!
That’s very wonderful to hear!!! Thank you!
What is gold chocolate? Butterscotch morsels? Thank you
it’s caramelized white chocolate. can be found as dulcey or blonde chocolate as well by Callebaut, or valrhona.
you can also use white chocolate in place of it in this recipe
First rate. Worth every second. A real showstopper!! Thanks do much, Camila. Love your creativity
thank you so much!!!! I am so happy you like it!
What would the recipe be for a 6″ spring form pan?
I can’t find golden chocolate what’s a good alternative
you can make your own by caramelizing white chocolate
Bolo maravilhoso e receita deliciosa!!😋😋😋😋😋