Witch Hat Cupcakes
Hello friends, today I am sharing with you how to make these fabulous Witch Hat Cupcakes.
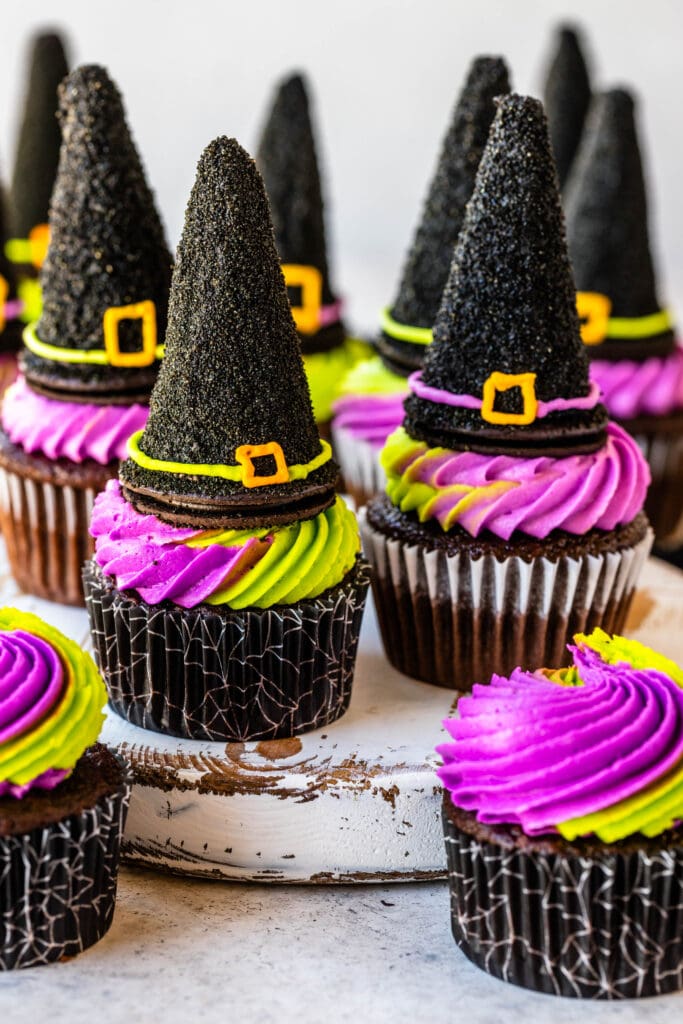
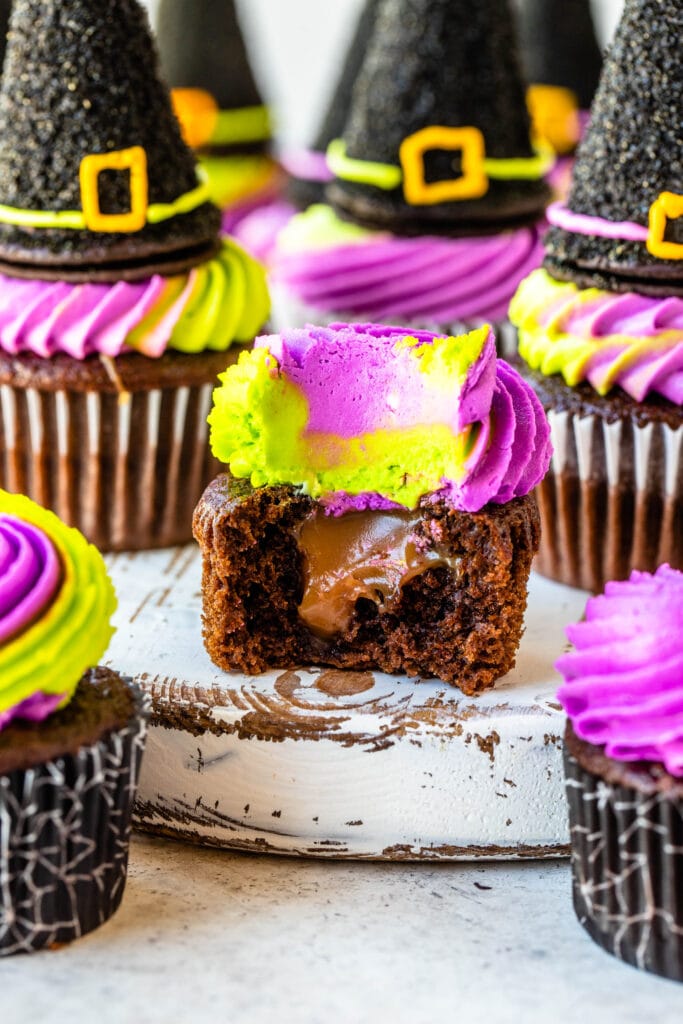
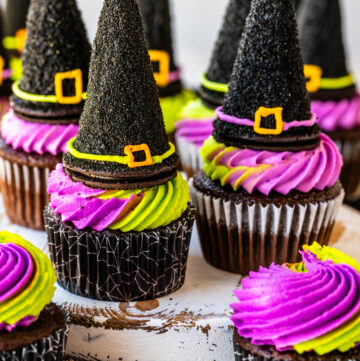
These cupcakes are the perfect Halloween treat. They are spooky in the most adorable way, and super fun to make. Chocolate cupcakes, filled with caramel, topped with buttercream and a witch hat made out of ice cream cone and cookies!
This recipe was sponsored by Domino® Sugar.
This post may contain affiliate links. I earn a commission from qualified purchases. Please read our Privacy policy here.
These are the perfect Halloween cupcakes because they are easy to make and will be a hit with all the trick or treaters!
We start by making the caramel sauce, because it takes a bit of time to cool down.
To make the caramel sauce, you have to be careful not to overcook it. If you overcook the caramel sauce it will become hard. And because this is a small batch, it’s very easy to overcook it because it will cook extremely fast. So be aware of that fact.
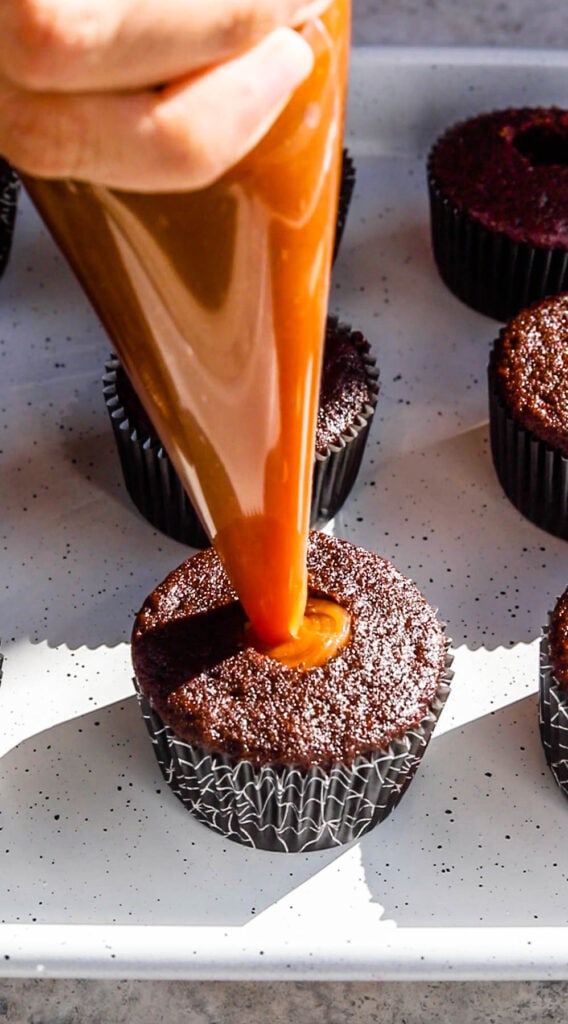
I like to use a piping bag to fill the cupcakes with the caramel, you can also use a spoon, but the piping bag makes it much easier. Make sure the caramel sauce is at room temperature when you use it to fill the cupcakes.
If you made the sauce ahead and had to place it in the fridge, remove it from the fridge and microwave it gently for a few seconds only until it’s soft again.
Making the witch hats can also be done ahead.
The hats can stay in the fridge until you are ready to assemble the cupcakes.
To make the hats you will need ice cream cones, round chocolate cookies, chocolate melts, and sanding sprinkles.
I used mini ice cream cones because they are much better sized for the Witch Hat Cupcakes.
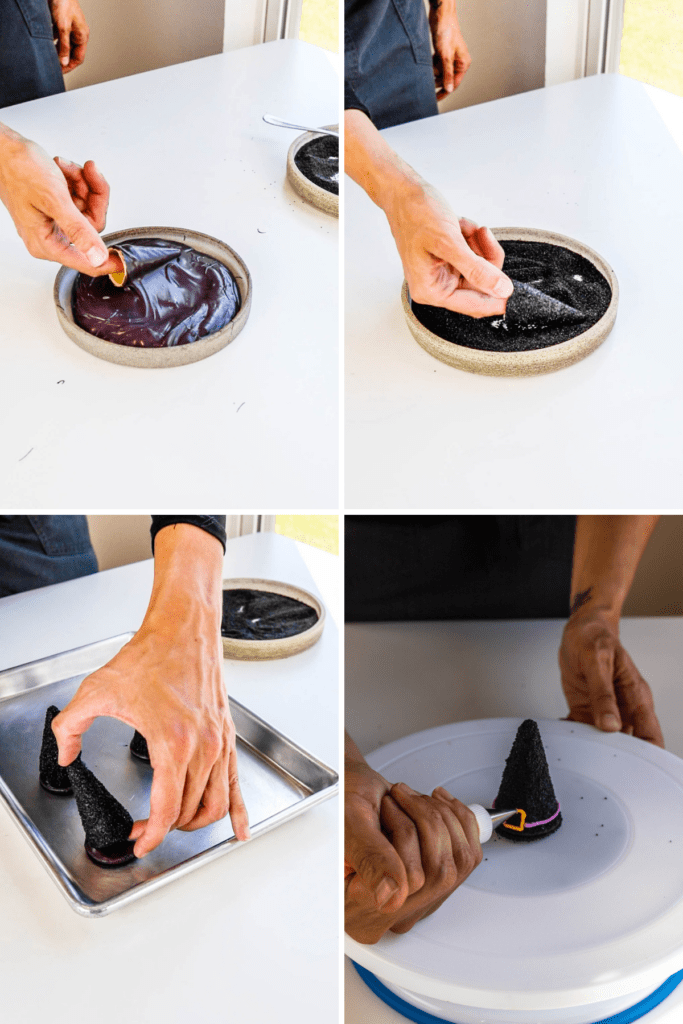
First, make sure to dip the cookie in the melted chocolate. Then dip the ice cream cone in the chocolate, and then in the sanding sprinkles.
You can use chocolate or candy melts, I used black candy melts, but dark chocolate will work as well.
After placing the cookie on top of the chocolate dipped cookie, use the buttercream to pipe the decoration around the hat. I placed my buttercream in a piping bag fitted with a tip number 3. Since I was making a two toned frosting (green and purple), I also separated a bit of frosting to color it yellow to make the buckle of the hat.
Which brings me to the next topic: the two toned buttercream.
The recipe is a simple delicious American Buttercream. Place the two buttercream colors next to each other and roll the plastic onto itself like a log. Then place the log of frosting inside of the piping bag to pipe the two toned buttercream on top of the cupcakes.
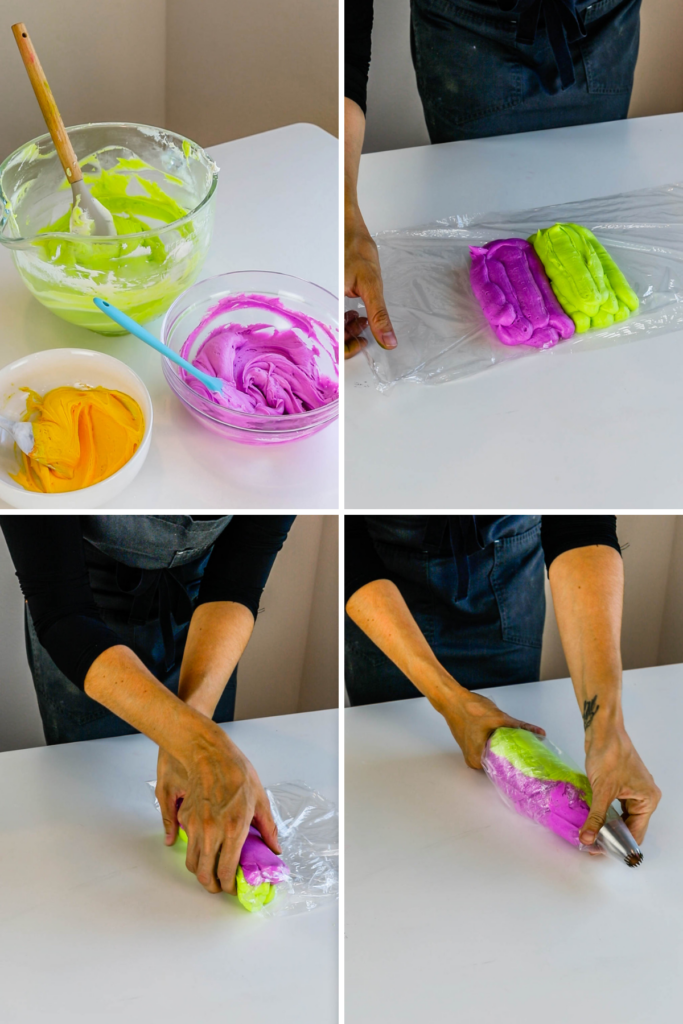
When using this technique make sure to apply even pressure on all sides of the piping bag. Be careful arranging the log of frosting inside the bag to make sure the plastic wrap isn’t tangled anywhere preventing a certain color from being dispensed.
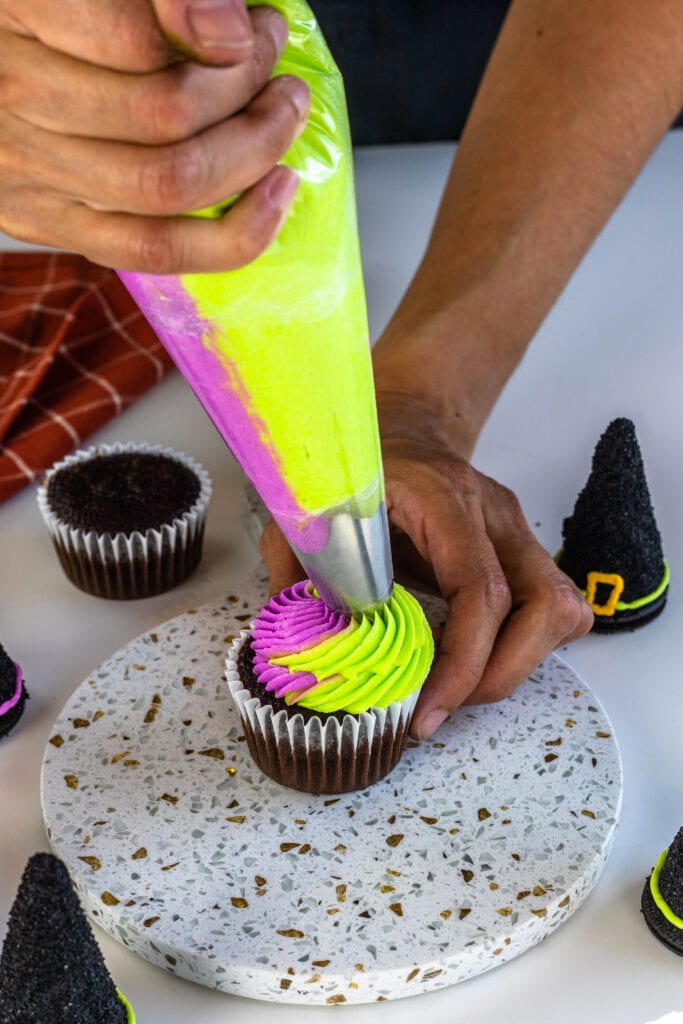
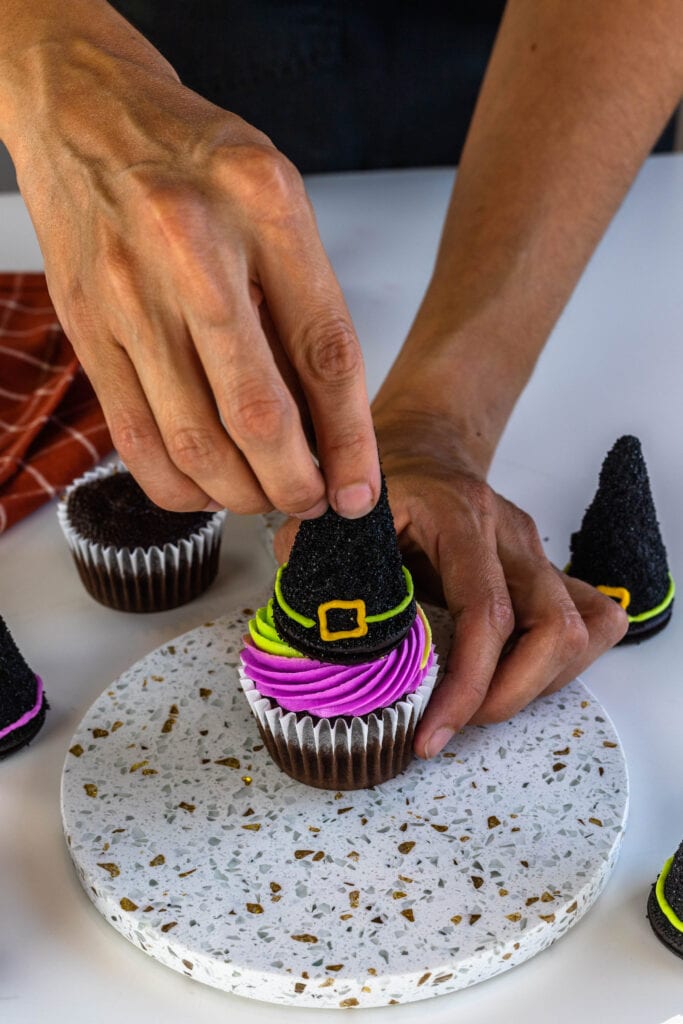
Right after piping the frosting make sure to place the hats on top, this way they will stick to the frosting.
These are the perfect Halloween dessert! The Witch Hat Cupcakes will be the hit of any Halloween party!
If you like this recipe also check out:
- Pumpkin Cupcakes
- Chocolate Pumpkin Cupcakes
- Pumpkin Brown Butter Cupcakes
- Salted Dulce de Leche Cupcakes
- Pumpkin Chocolate Mini Cheesecakes

Witch Hat Cupcakes
Ingredients
Caramel Sauce
- 1/2 cup granulated sugar 100 grams
- 1/4 cup heavy cream 60 ml
- 3 tbsp unsalted butter 42 grams
- 1/2 tsp salt
Chocolate Cupcakes
- 1 cup all-purpose flour 127 grams
- 1 cup Domino® granulated sugar 200 grams
- 1/2 cup unsweetened cocoa powder 33 grams
- 1 tsp baking powder
- 1/2 tsp baking soda
- 1/4 tsp salt
- 1 large egg
- 1/2 cup milk 120 ml
- 1/3 cup vegetable oil 80 ml
- 1 tsp vanilla extract
- 1/2 cup brewed coffee or hot water (120 ml)
Buttercream Frosting
- 1 1/4 cup unsalted butter softened (282 grams)
- 4 1/2 cups Domino® powdered sugar 562 grams
- 1/4 cup heavy cream or milk (60 ml)
- 2 tsp vanilla extract
- One drop yellow food coloring
- A few drops purple food coloring
- A few drops green food coloring
Witch Hats
- 2 1/2 cups chocolate or black candy melts 425 grams
- 1 cup black sanding sprinkles 200 grams
- 14 round chocolate cookies
- 14 ice cream cones I used mini ones
Instructions
Caramel Sauce
- Place the sugar in a small saucepan over medium heat. Stir constantly with a spatula to ensure the sugar is melting evenly.
- Once the sugar has melted entirely and it’s a light amber color, reduce the heat to medium-low and add the heavy cream. Be careful when doing that because the mixture will bubble up and splash.
- Continue stirring for another few seconds until the bubbles subside a bit. Then add the butter. Continue to mix until the butter melts entirely. Don’t overcook or the caramel will be too hard once it cools down, as soon as the butter melts, remove the pan from the heat.
- Add the salt and stir. Then pour the caramel in a small bowl and let it cool down completely at room temperature.
Chocolate Cupcakes
- Pre-heat the oven to 350ºF and line 14 cupcake tins with paper liners.
- Sift the flour, sugar, cocoa powder, baking powder, baking soda, and salt together.
- In another bowl, or in a measuring cup, mix together the egg, milk, oil, and vanilla extract.
- Pour the wet ingredients over the sifted dry ingredients and whisk until combined.
- Add the hot coffee or hot water and whisk until the mixture is smooth. The batter will be very runny, and that’s ok.
- Fill each cupcake tin about halfway full with batter, and bake in the pre-heated oven for about 18 minutes, until you can touch the surface of a cupcake and it springs right back, or a toothpick inserted into the cupcake comes out clean.
Buttercream Frosting
- Beat the butter with an electric mixer for 3 minutes on medium-high speed.
- Sift the powdered sugar, and with the mixer off, add it to the bowl with the butter. Turn the mixer on a low speed.
- While the butter and powdered sugar get mixed in together, slowly add in the heavy cream or milk, and vanilla to the bowl.
- Raise the speed of the mixer to medium-high and beat the ingredients together for 1 minute, scraping in between, until fluffy and creamy. If the frosting is too stiff, add another teaspoon of heavy cream or milk at a time until it comes together. If the frosting is too runny, add a bit more sifted powdered sugar until it comes together nicely.
- Remove about 1/3 cup of frosting and set aside. Divide the rest of the frosting between two different bowls. To the 1/3 cup of frosting, add the yellow food coloring, and mix to combine. Place the frosting in a piping bag fitted with a number 1 round tip.
- To one half of the remaining frosting, add the purple food coloring, mix to combine. Place the frosting in a piping bag fitted with a number 3 tip. And to the other half, add the green food coloring and mix to combine. Place the frosting in a piping bag fitted with a number 3 tip.
Witch Hats
- Place the chocolate or candy melts in a shallow bowl, place in the microwave for 15 second intervals, stirring in between, until completely melted. Also place the sanding sprinkles in a shallow bowl and set aside.
- Dip the top of the chocolate cookies on the melted chocolate and place on top of a baking sheet. It’s best to work with a few at a time, so the chocolate doesn’t dry before you get to the next step.
- With two fingers inside the ice cream cone to hold it, roll the sides of the cone around in the melted chocolate, coating it completely, and make sure to lightly scrape off the sides of the cone to drip off the excess.
- After rolling the cone in the melted chocolate, and removing any excess, immediately roll the cone in the sanding sprinkles to coat it completely. Then place the cone on top of a cookie dipped in the chocolate, this way the cone will stick to the cookie. Grab a spoonful of sprinkles and sprinkle it over the sides of the cookie to coat the sides of the witch’s hat. After doing this to every 14 cones, place them in the fridge for 10 minutes to harden up.
- Use the green or purple frostings in the piping bag lined with the number 3 tip, and go around the bottom of the hats, drawing a line to decorate the witch’s hat. Then using the yellow make a square in the front of the hat on top of the purple or green line.
To assemble and decorate the cupcakes
- Lay out a piece of plastic wrap on the counter. Remove the number 3 piping tip, and spread out the remaining green and purple frosting next to each other on top of the plastic wrap.
- Roll the plastic wrap onto itself to form a log. Then place the log of frosting inside of a piping bag lined with the tip of choice. I used a 6B.
- Use an apple corer or a spoon to remove the center of each cupcake. Spoon or pipe a bit of the cooled caramel sauce inside each cupcake.
- Frost the cupcakes with the bicolor frosting, and immediately place a decorated hat on top.
- Place the cupcakes in the fridge for a few hours or overnight before serving.
You are the best baker ever. These recipes are foolproof.
Every time I try them they just come out perfectly.
Awe thank you you made my day!!!
Um lindo doce saboroso com cara de travessuras!!