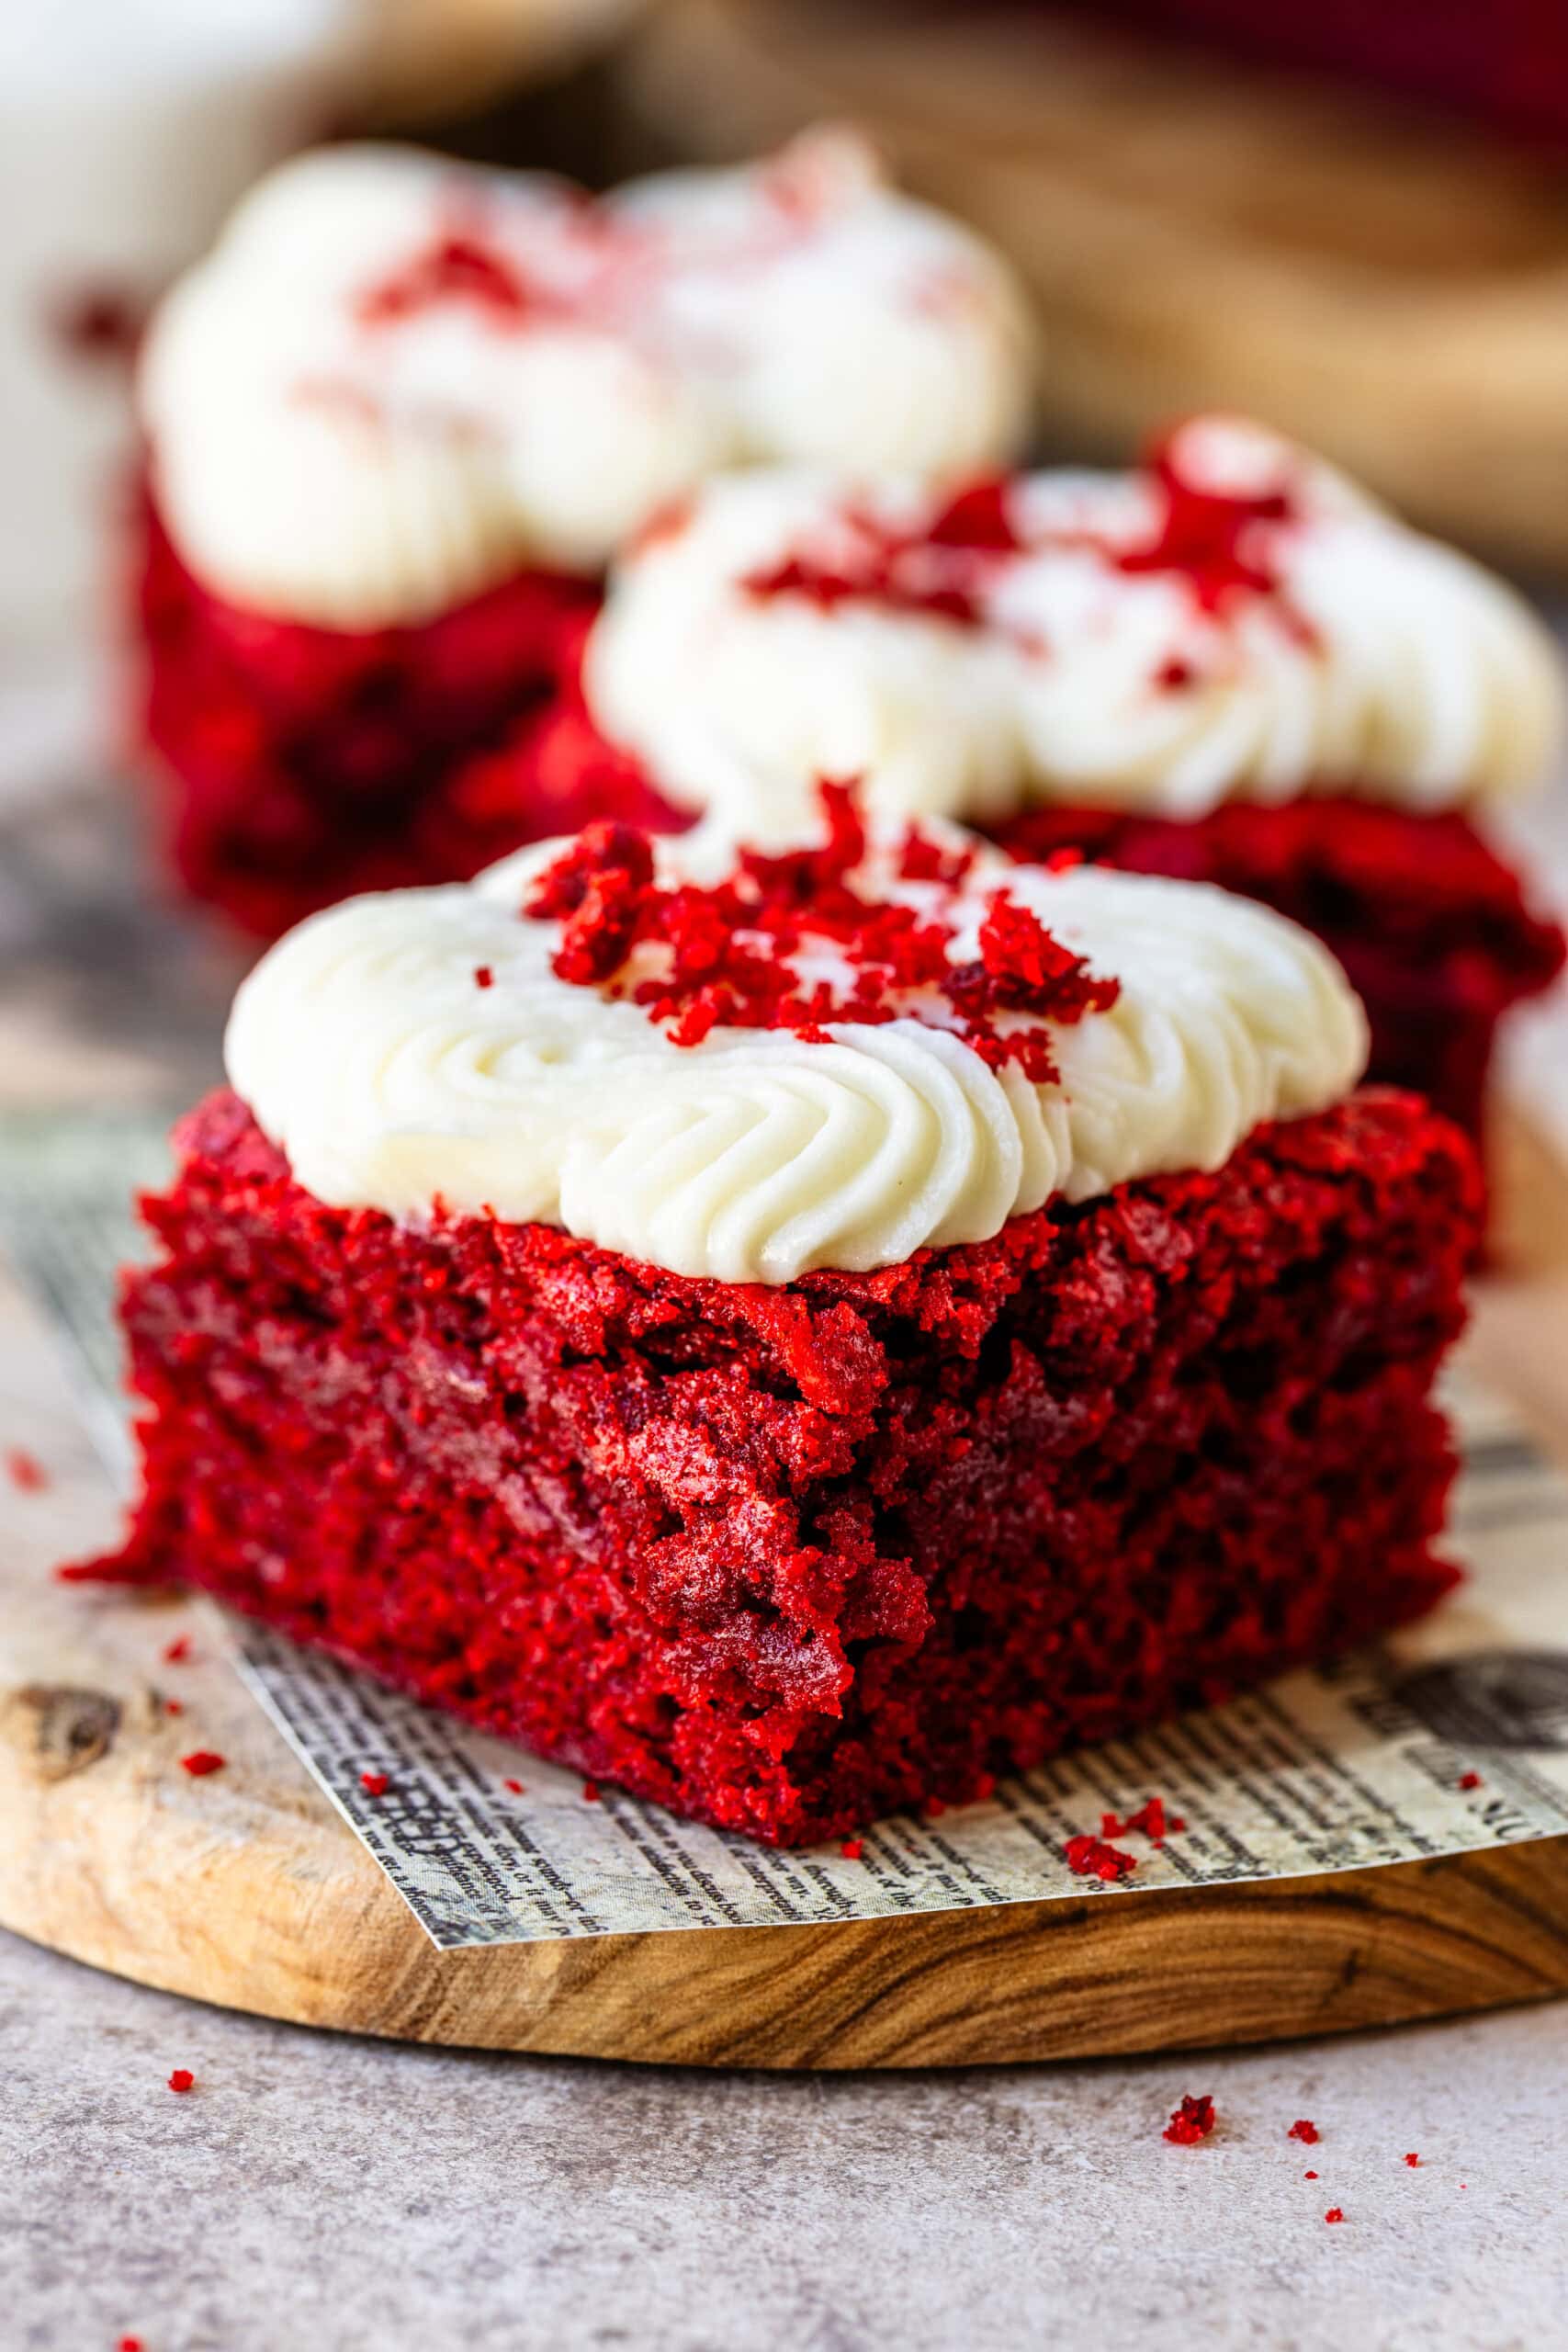
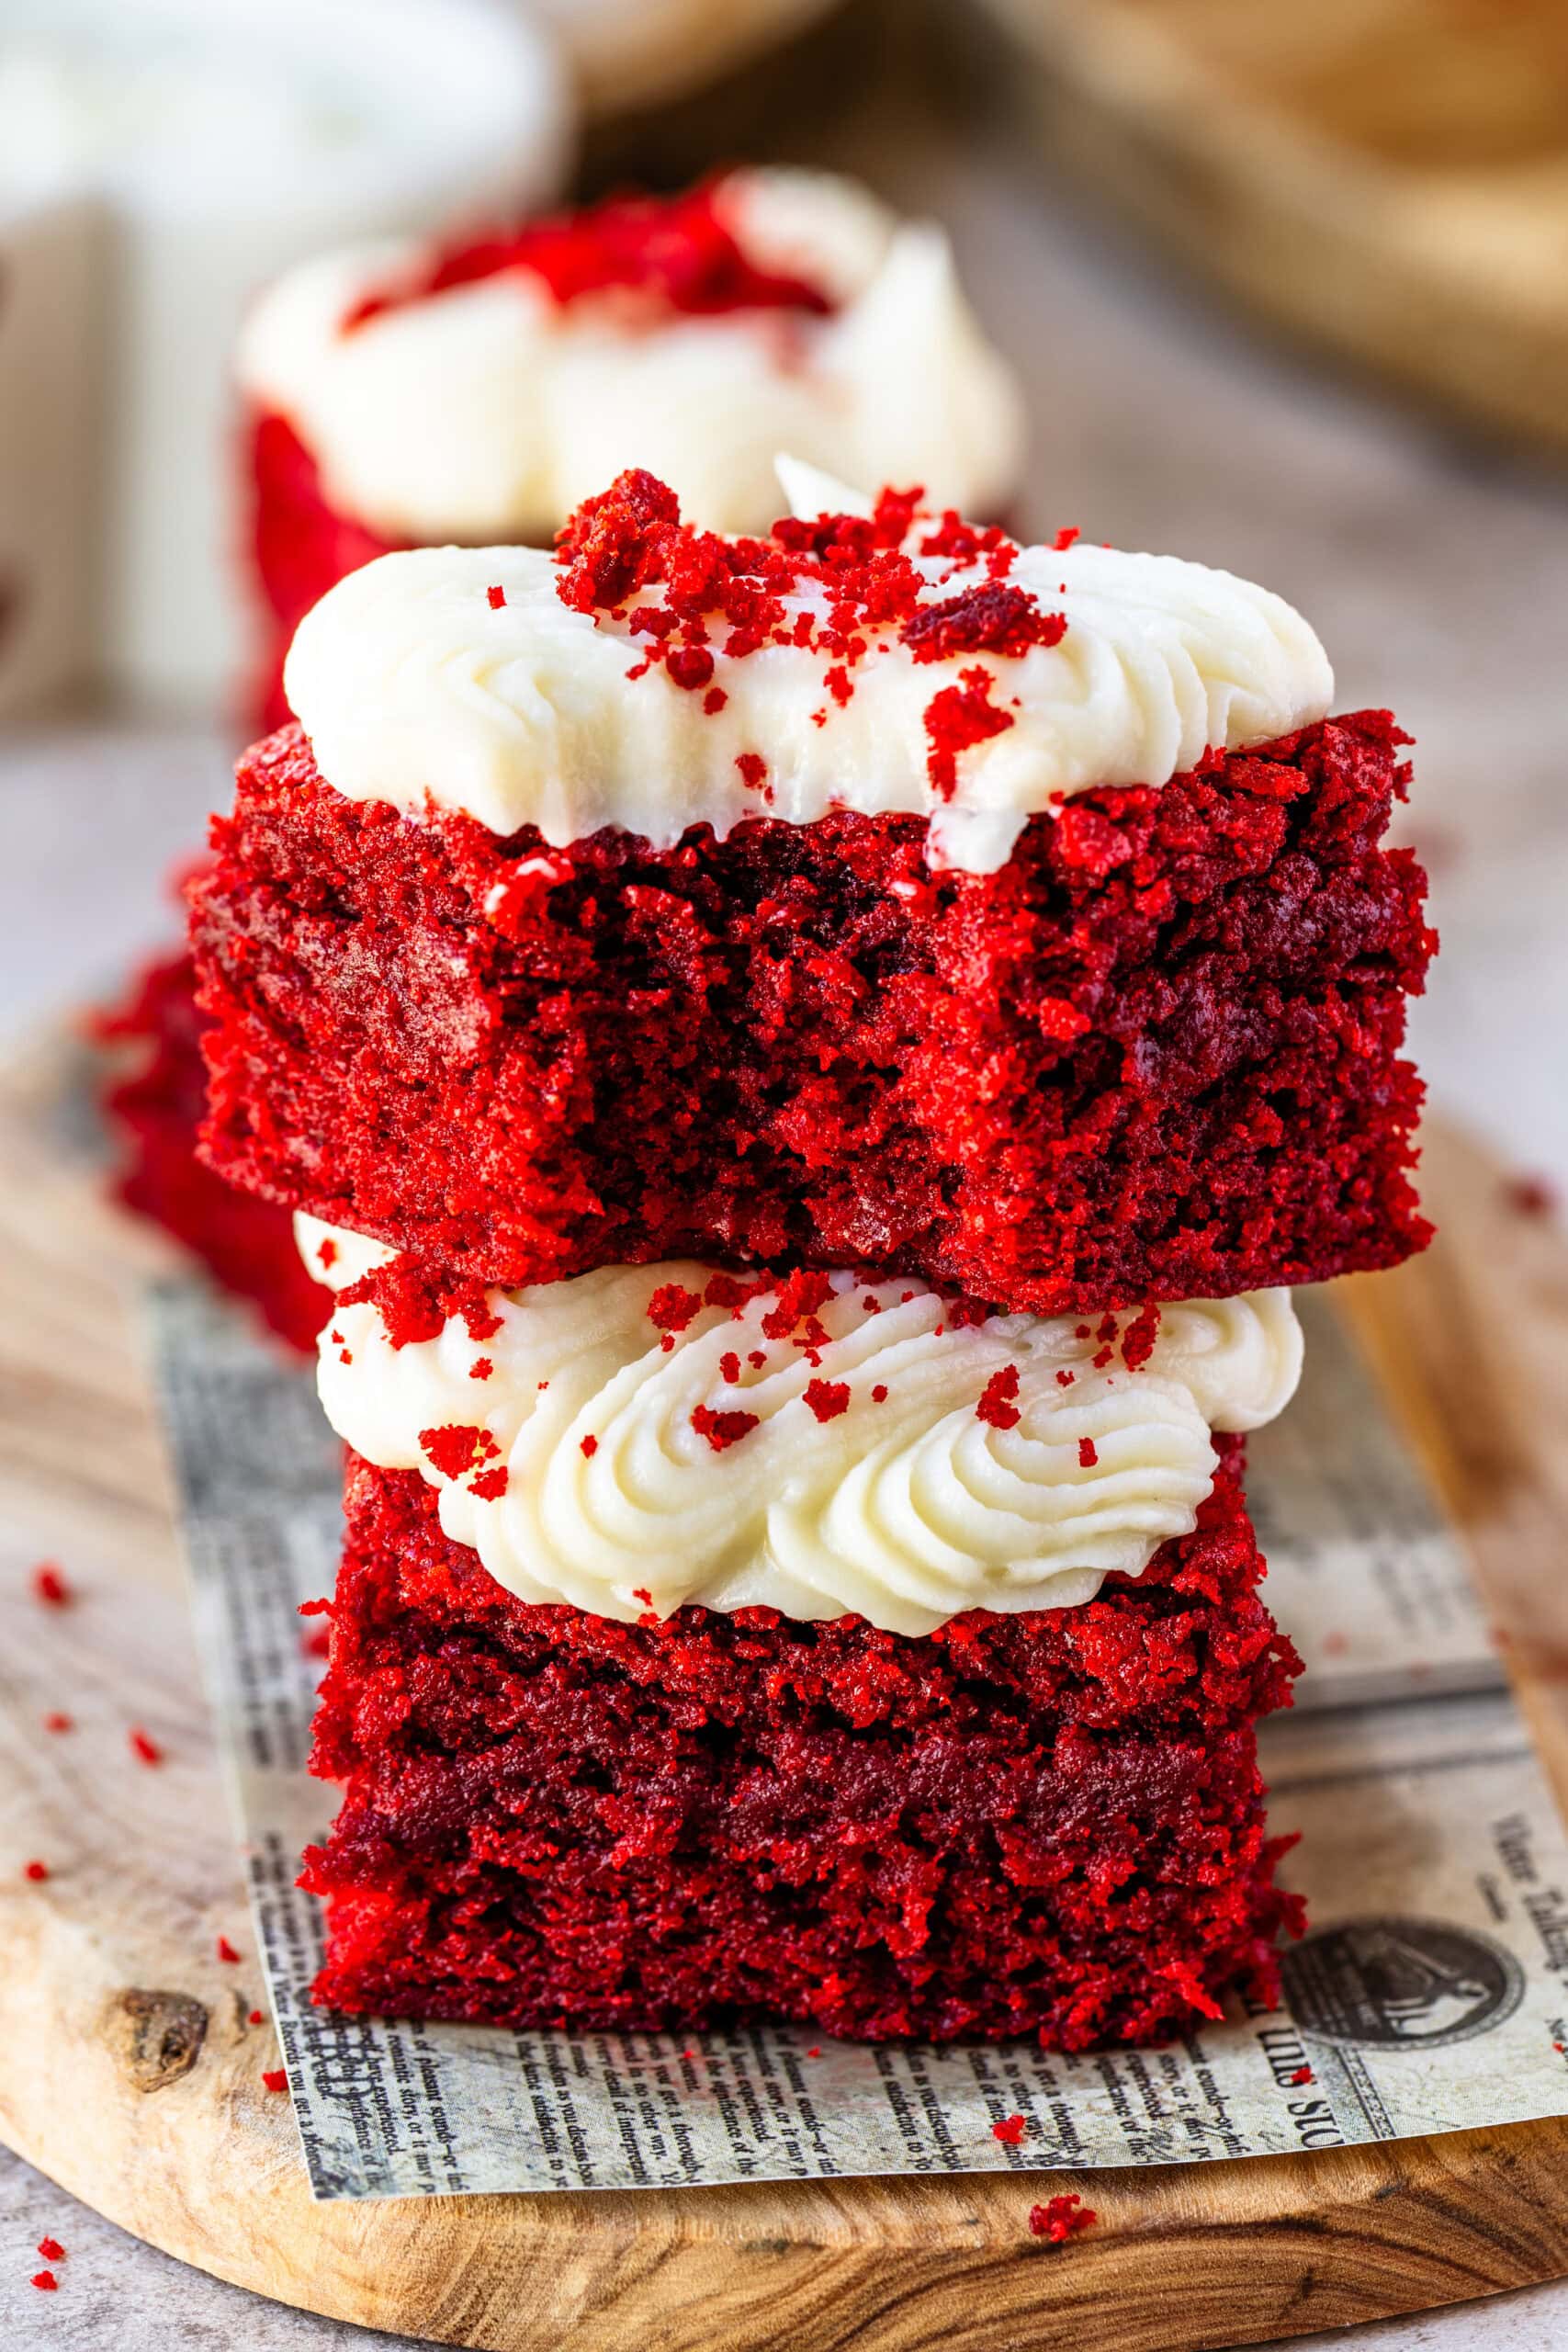
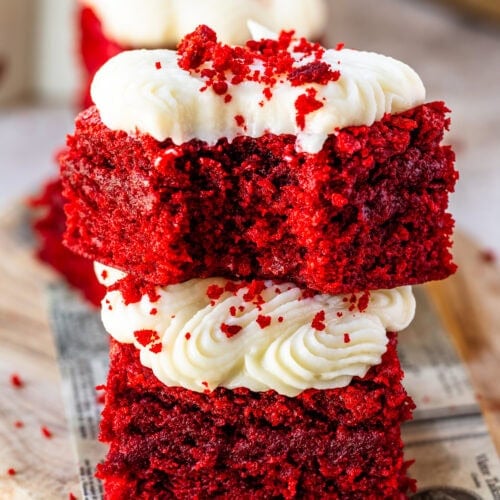
Red Velvet Brownies
Brownies are one of my favorite desserts to make, so naturally I had to add red velvet brownies to my collection. After testing a few batches that turned out either too cakey or too fudgy, I finally landed on the perfect balance—rich, chewy, and just the right amount of decadent.
These brownies work great because of the white chocolate base — melting it with the butter gives the brownies richness and structure without drying them out, and keeps the crumb soft even after chilling. Perfect for so many occaisions, especially Valentine’s Day coming up!
Why I Love This Recipe
I’ve been perfecting the art of making various types of brownies. I’ve made Lemon Brownies and even Strawberry Brownies. So I couldn’t miss the opportunity to make these red velvet ones. I’ve been basically obsessed with brownies and how to make different flavors of them!
This post may contain affiliate links. I earn a commission from qualified purchases. Please read our Privacy policy here.
- These red velvet brownies bake up fudgy and dense, not cakey
- The white chocolate adds richness without extra sweetness
- The cocoa is subtle, just enough to deepen the flavor
- The cream cheese frosting balances everything without being heavy
- They slice cleanly and hold their shape well for serving
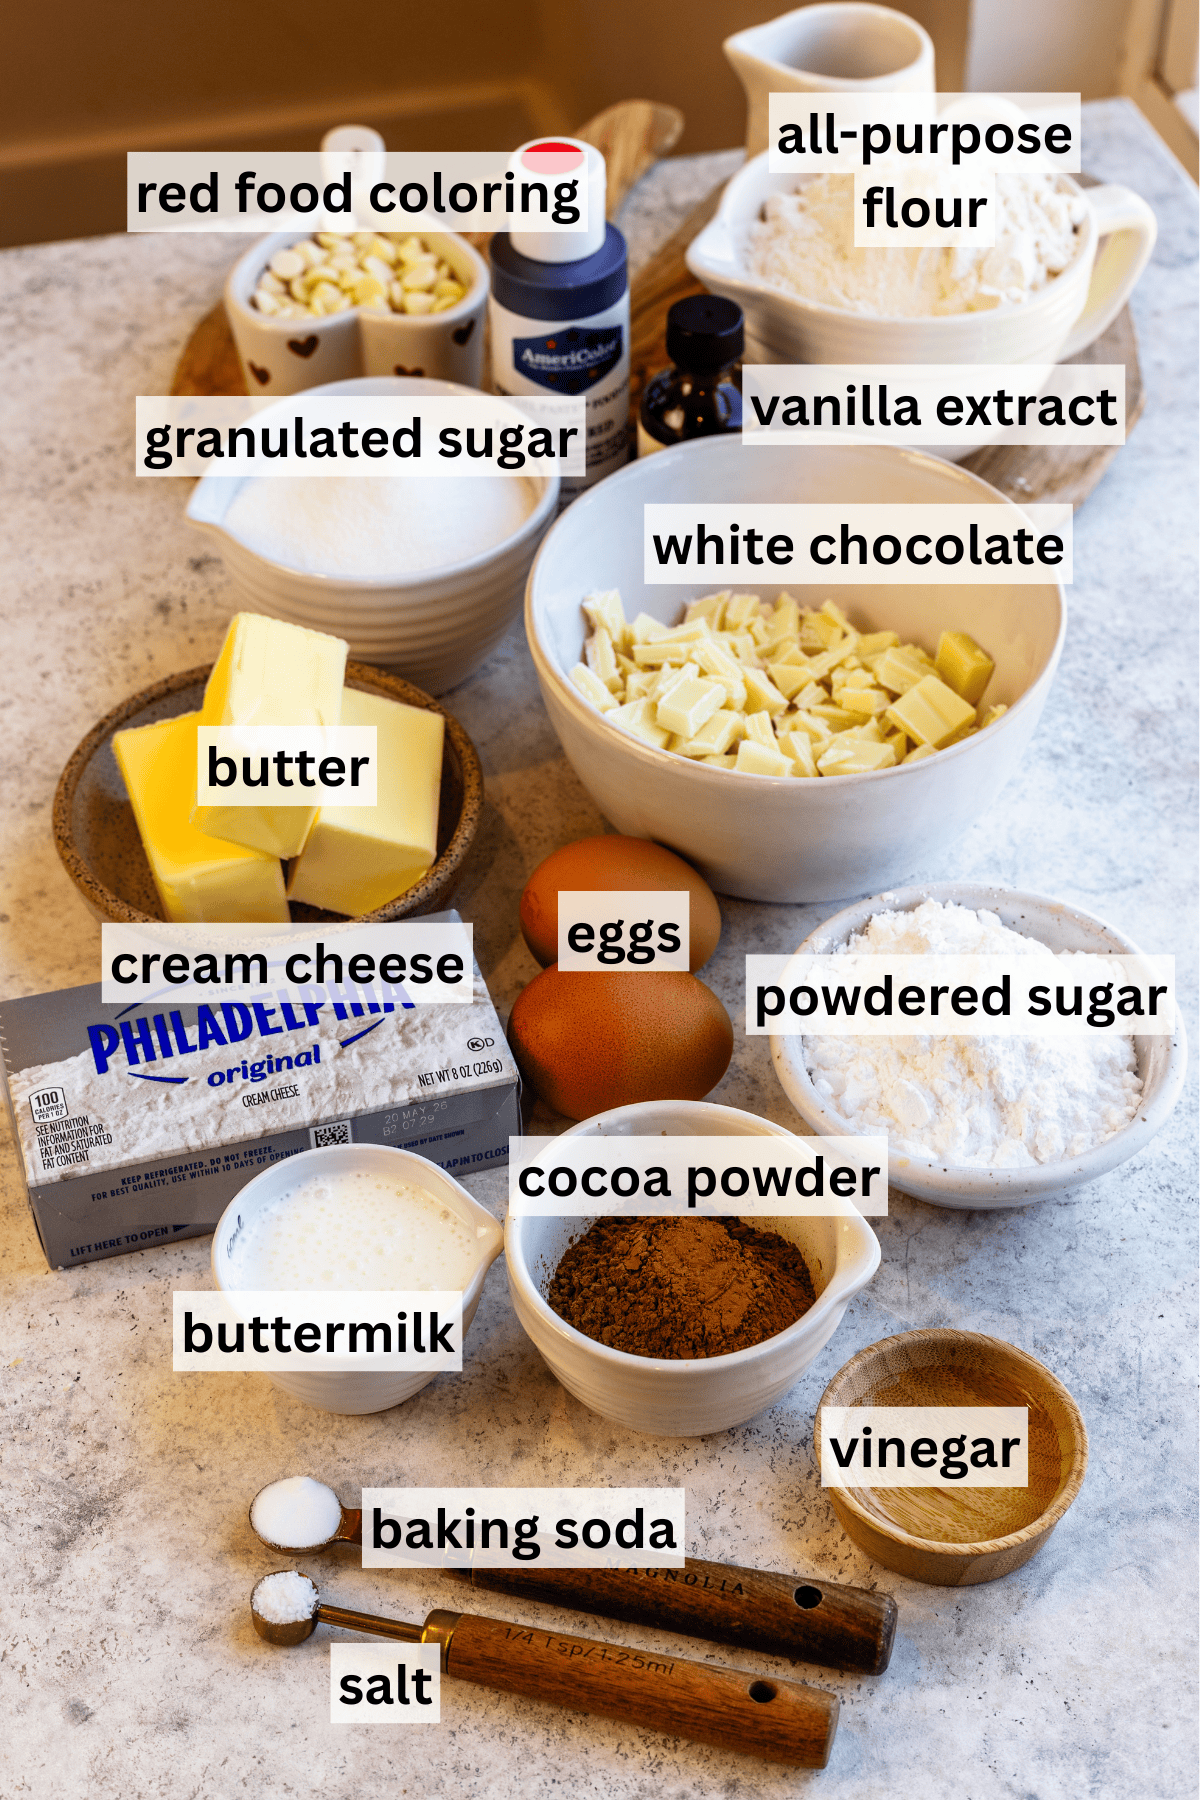
Key Ingredients & Why I Use Them
White chocolate: I melt white chocolate directly into the butter to create a smooth, rich base. This keeps the brownies soft and cohesive instead of crumbly. Make sure to always use real white chocolate with at least 20% cocoa butter in the formula. The white chips from the store don’t usually melt well and might not work with this recipe.
Butter: Butter carries the flavor here and gives the brownies their dense, almost melt-in-your-mouth texture.
Buttermilk + vinegar: This combination gives the brownies that signature red velvet tang and reacts with the baking soda for just enough lift. If you don’t have any, simply use the same amount of milk, mixed with a bit of extra vinegar.
Cocoa powder: I use a small amount on purpose. Red velvet should taste lightly chocolatey, not like a full cocoa brownie.
Cream cheese: For the frosting, full-fat cream cheese is non-negotiable. It gives the frosting structure and that classic tang that pairs so well with red velvet.
How to Make
Before you start, know that the recipe card is below — but this is the order and rhythm I follow when I want these brownies to bake up dense and fudgy every time.
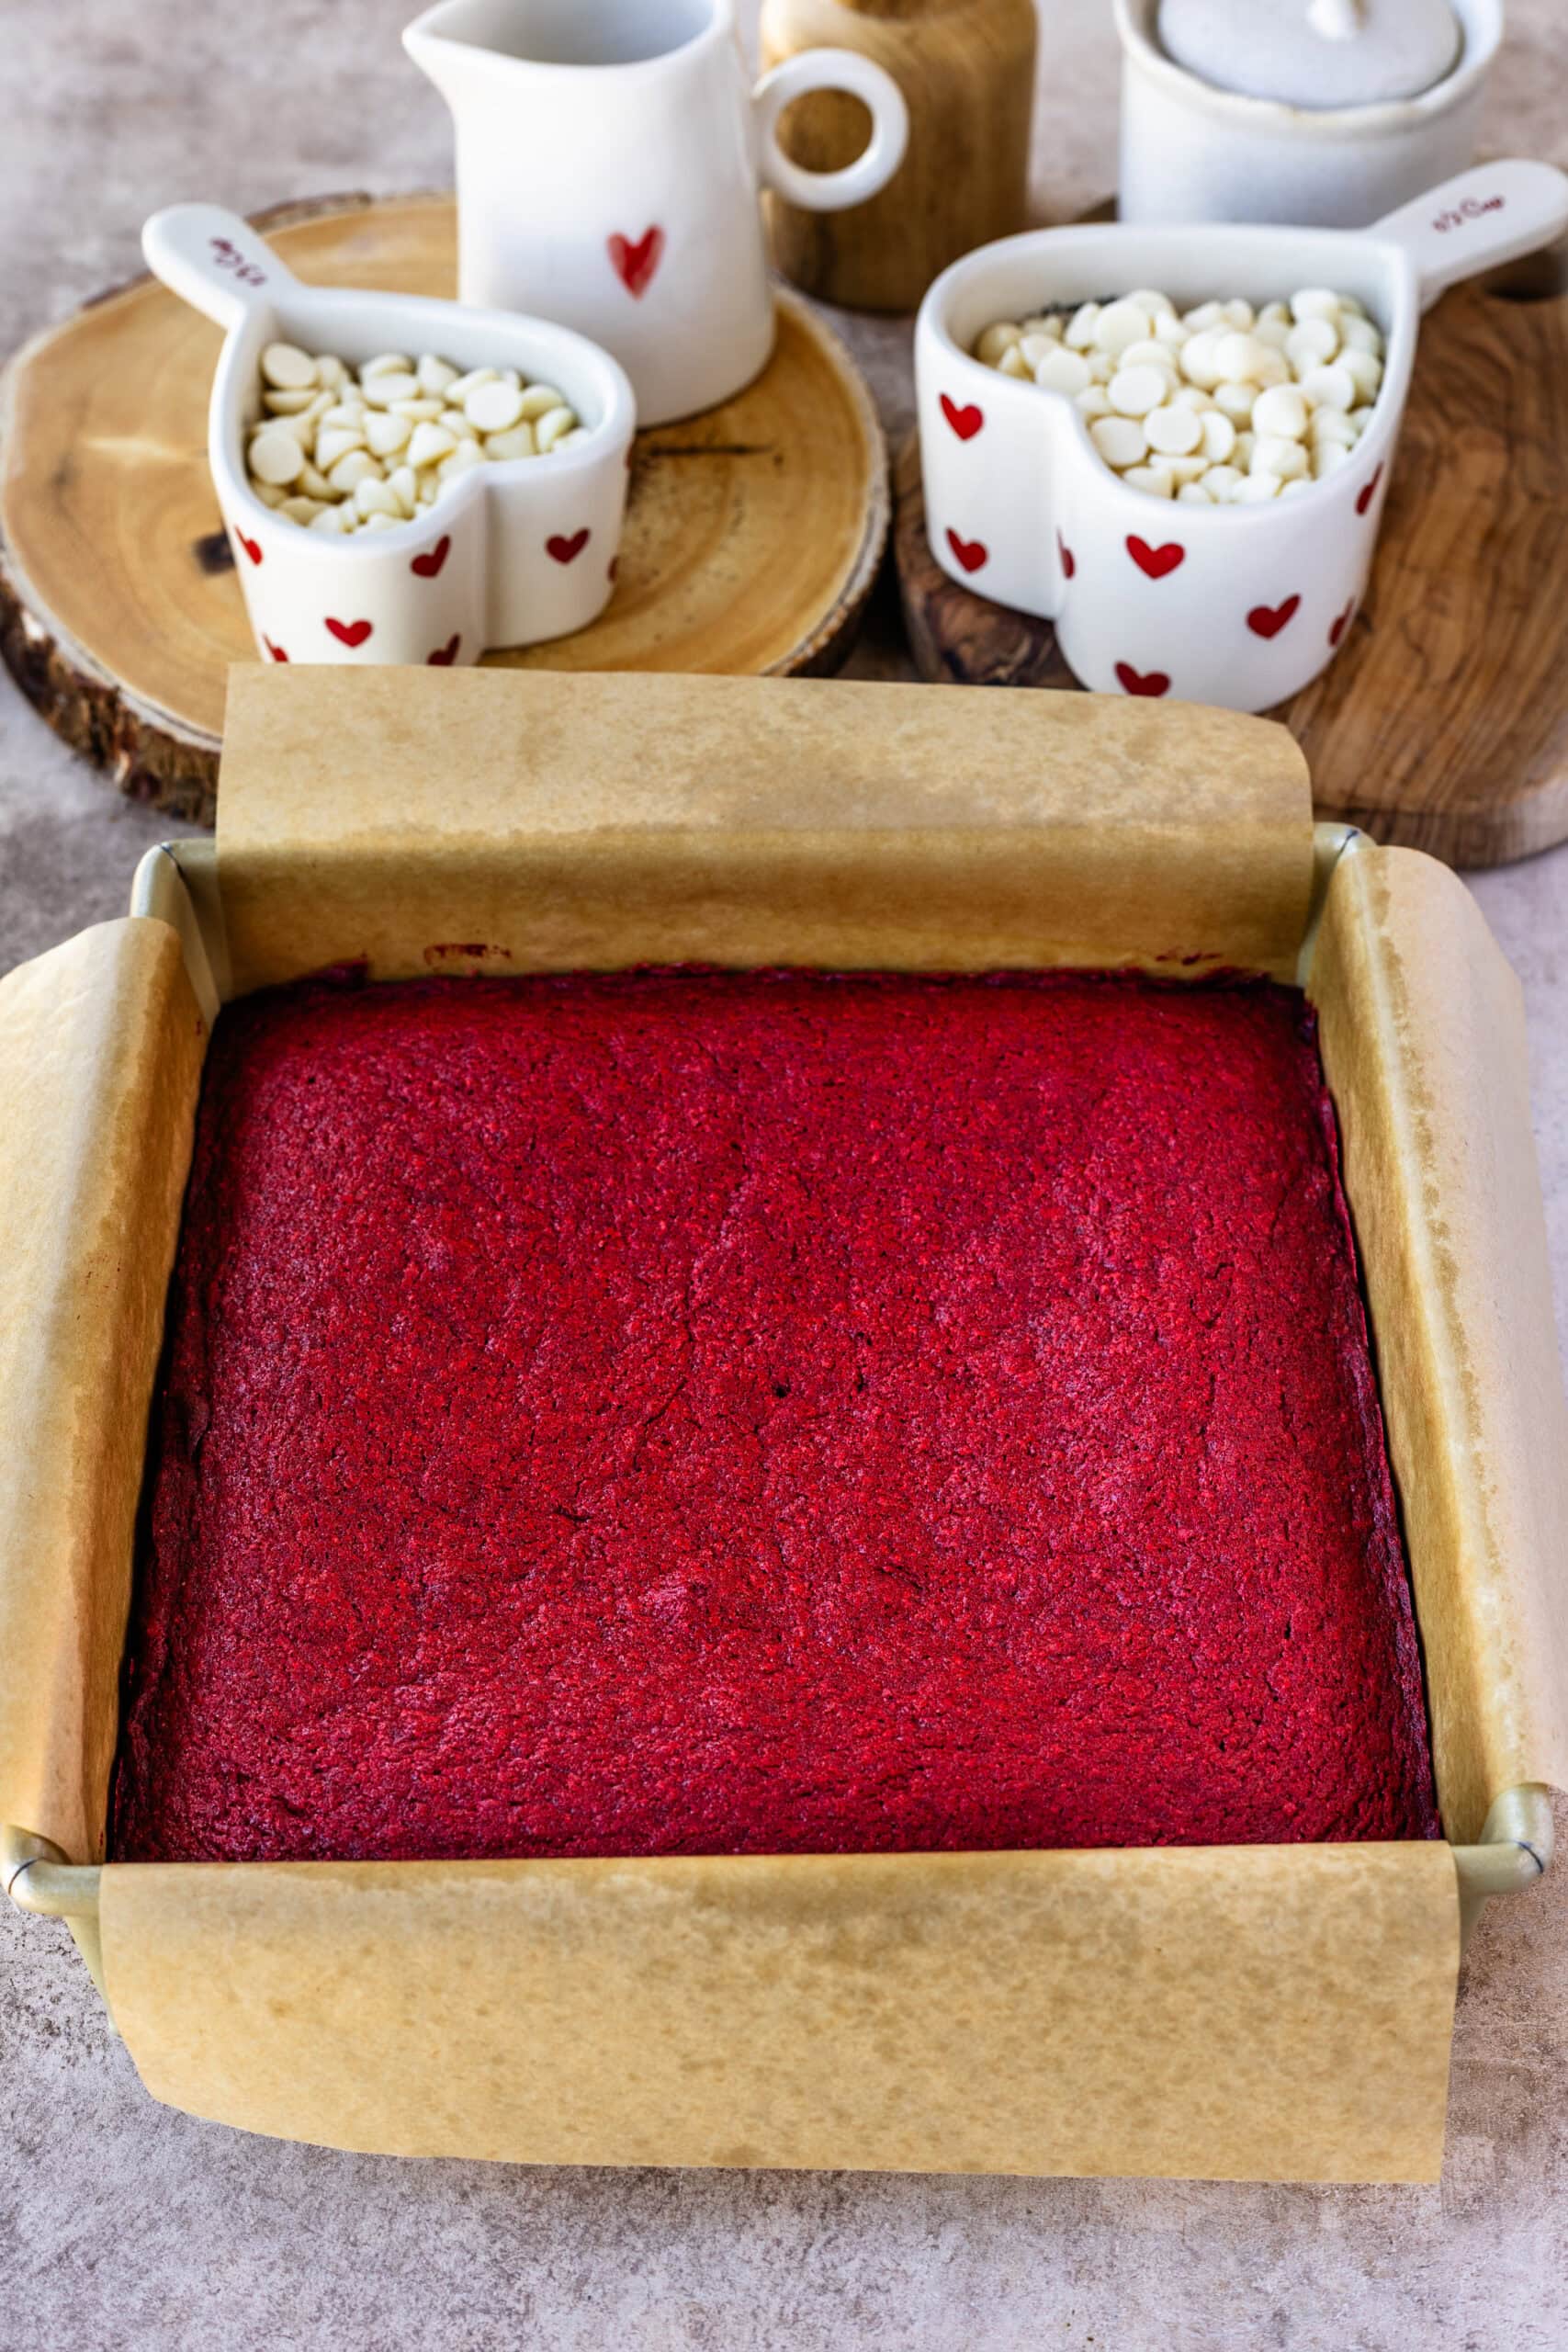
Start by preheating the oven and lining an 8×8-inch metal pan with parchment paper. This is one place where I don’t improvise — skip the glass pan. It heats unevenly and makes the center hard to judge.
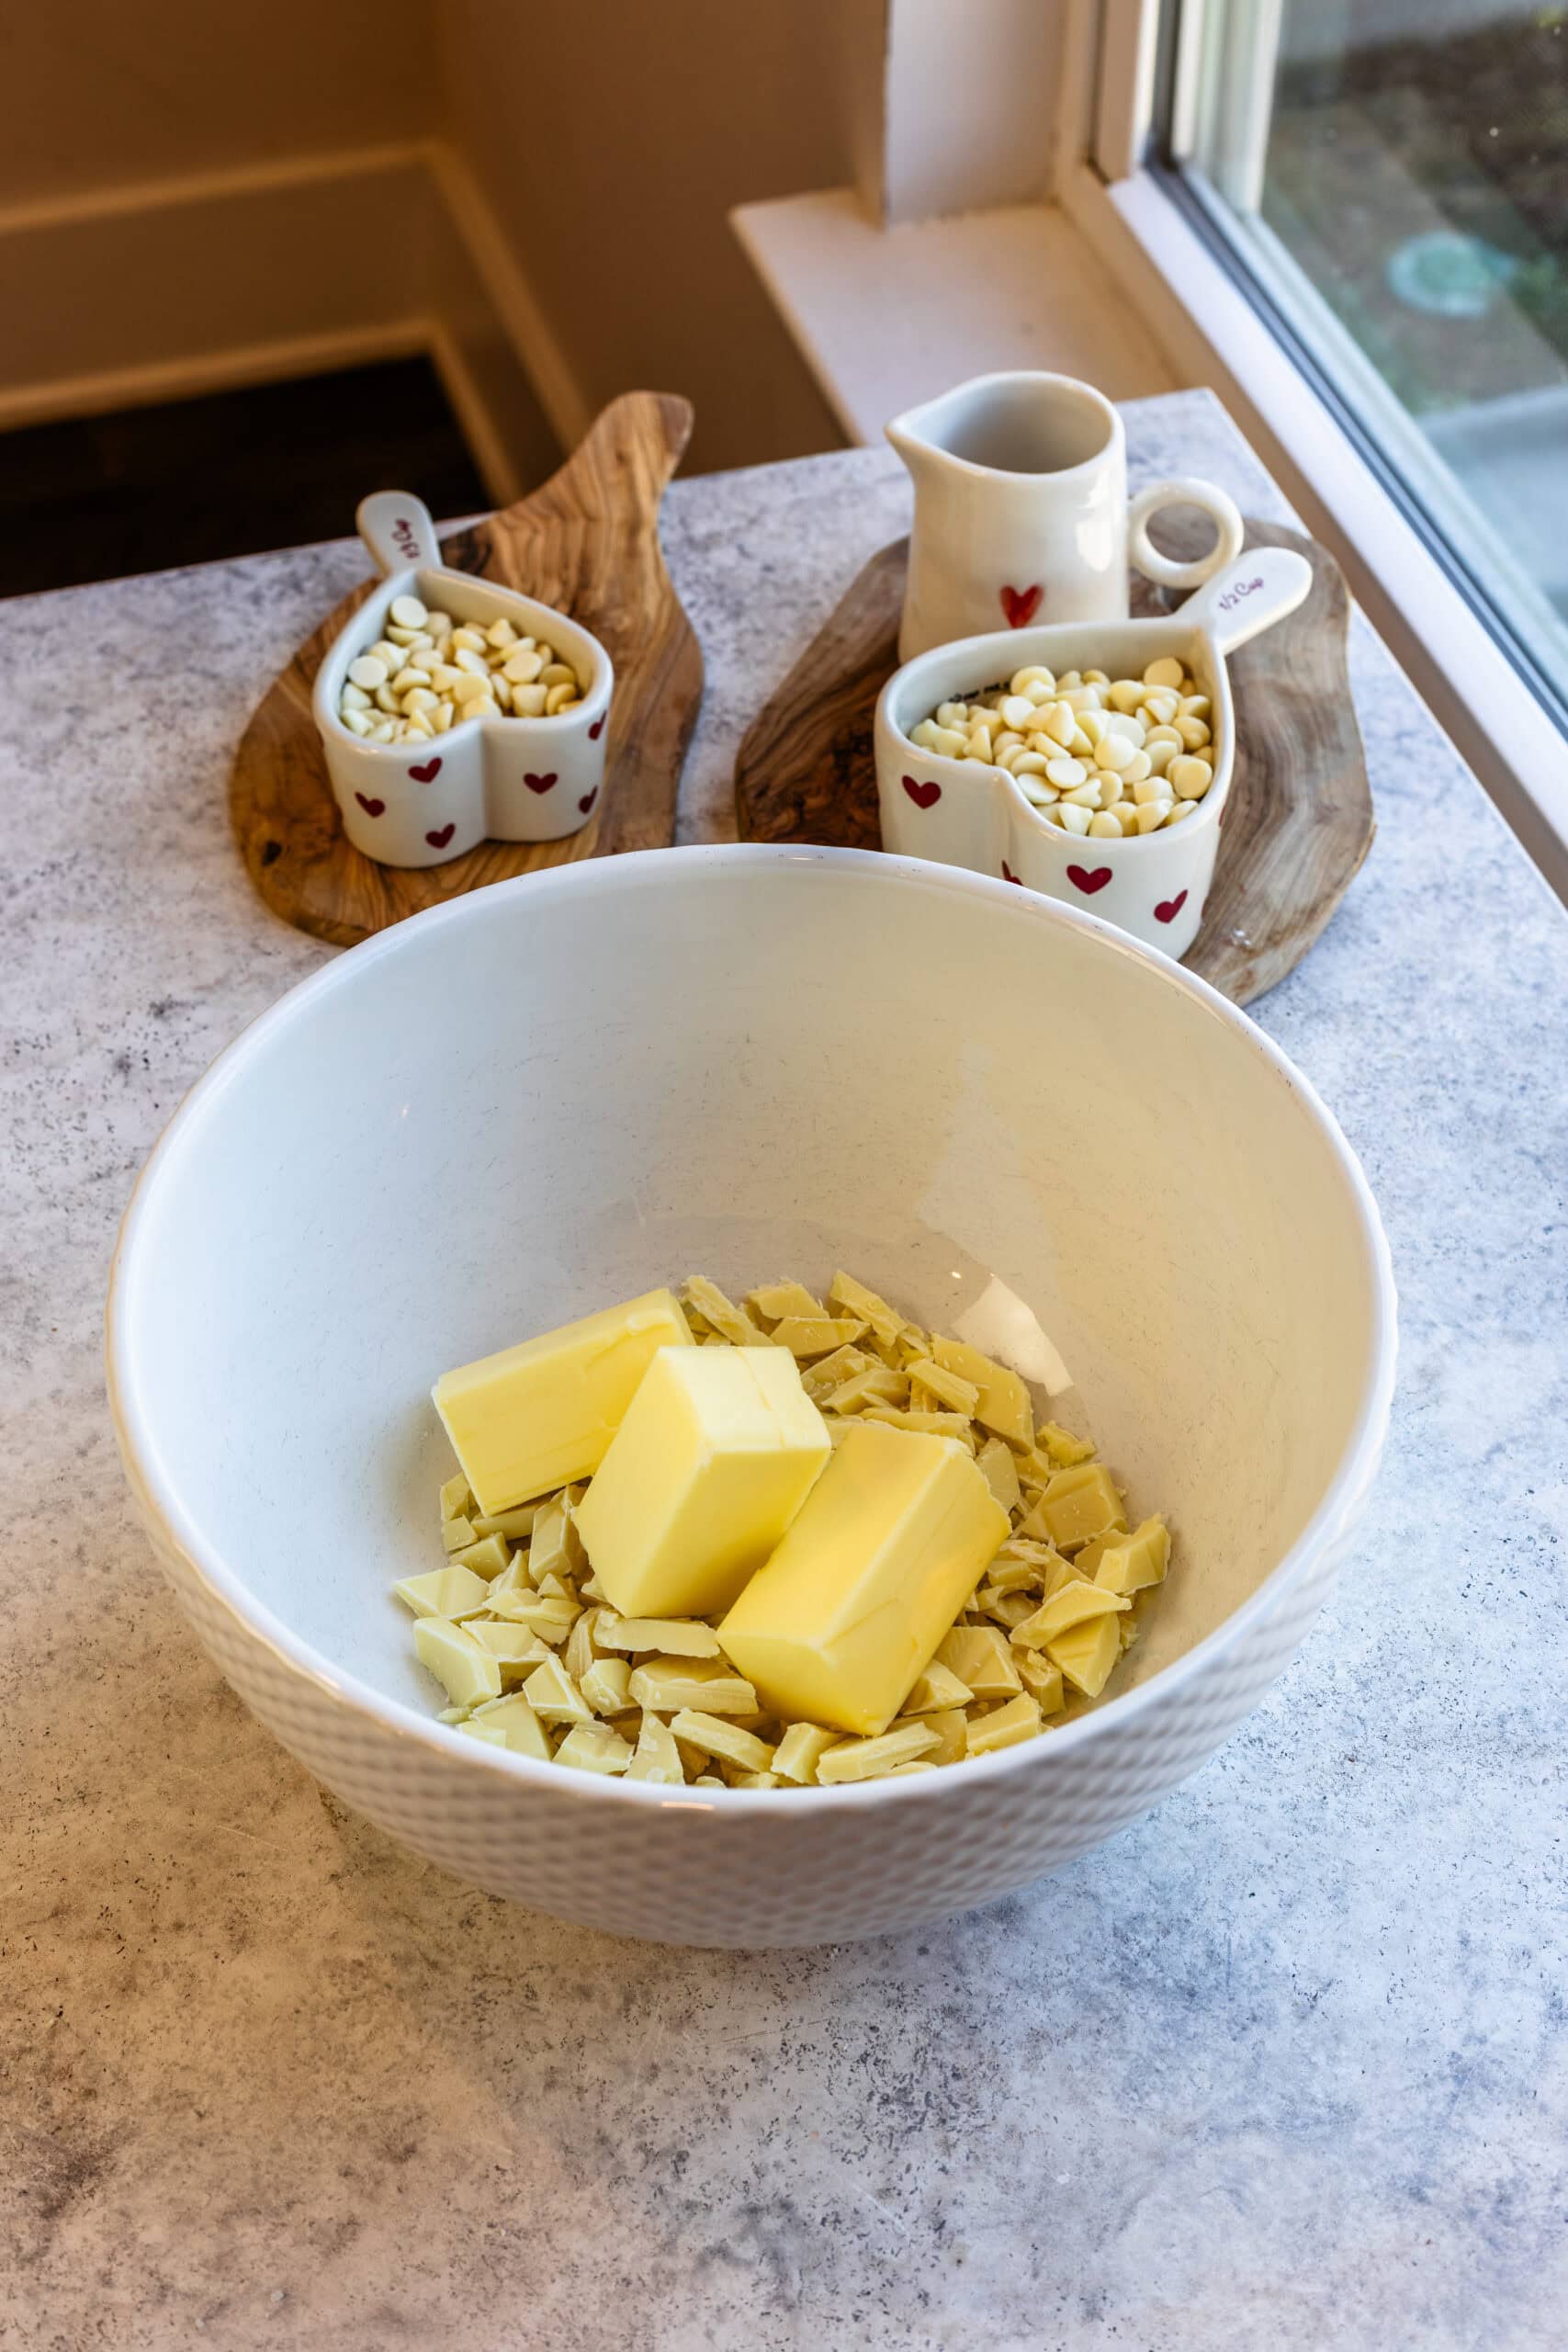
Step 1: Melt the white chocolate
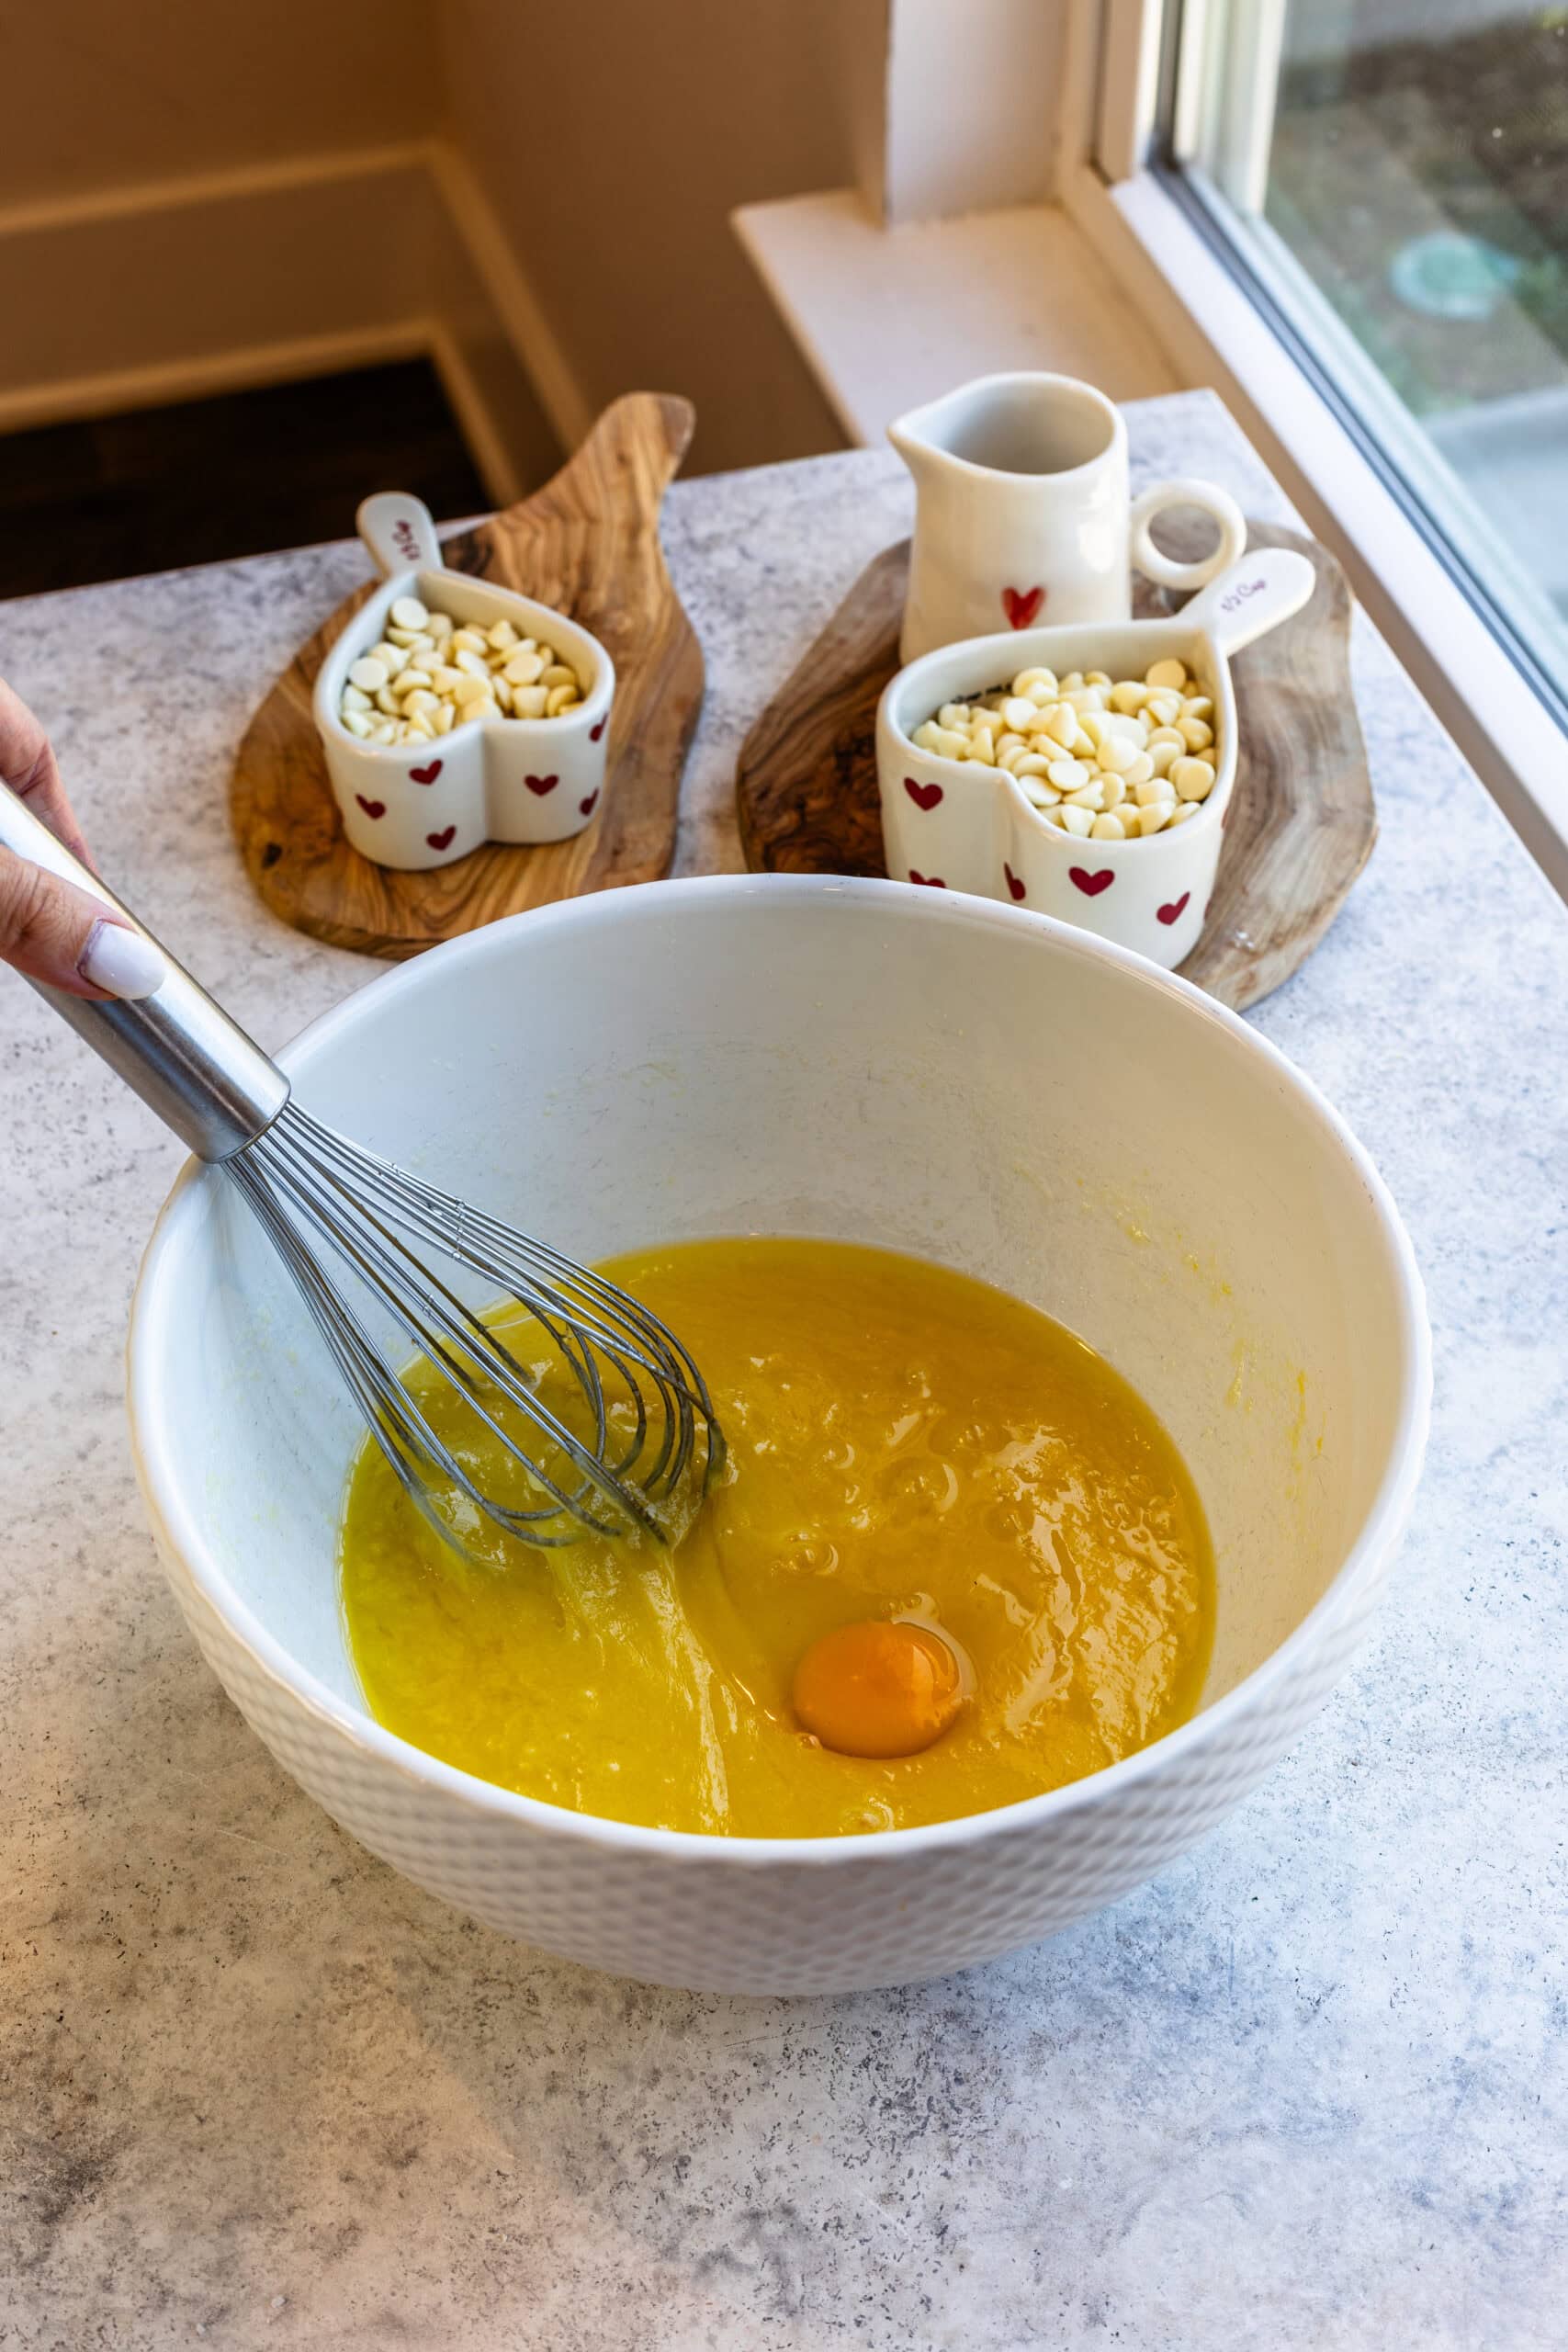
To start the red velvet batter, you need to melt the butter and white chocolate together. I usually do this in the microwave in short bursts, stirring between each one, until the mixture is completely smooth. You want it warm enough to melt everything evenly, but not hot.
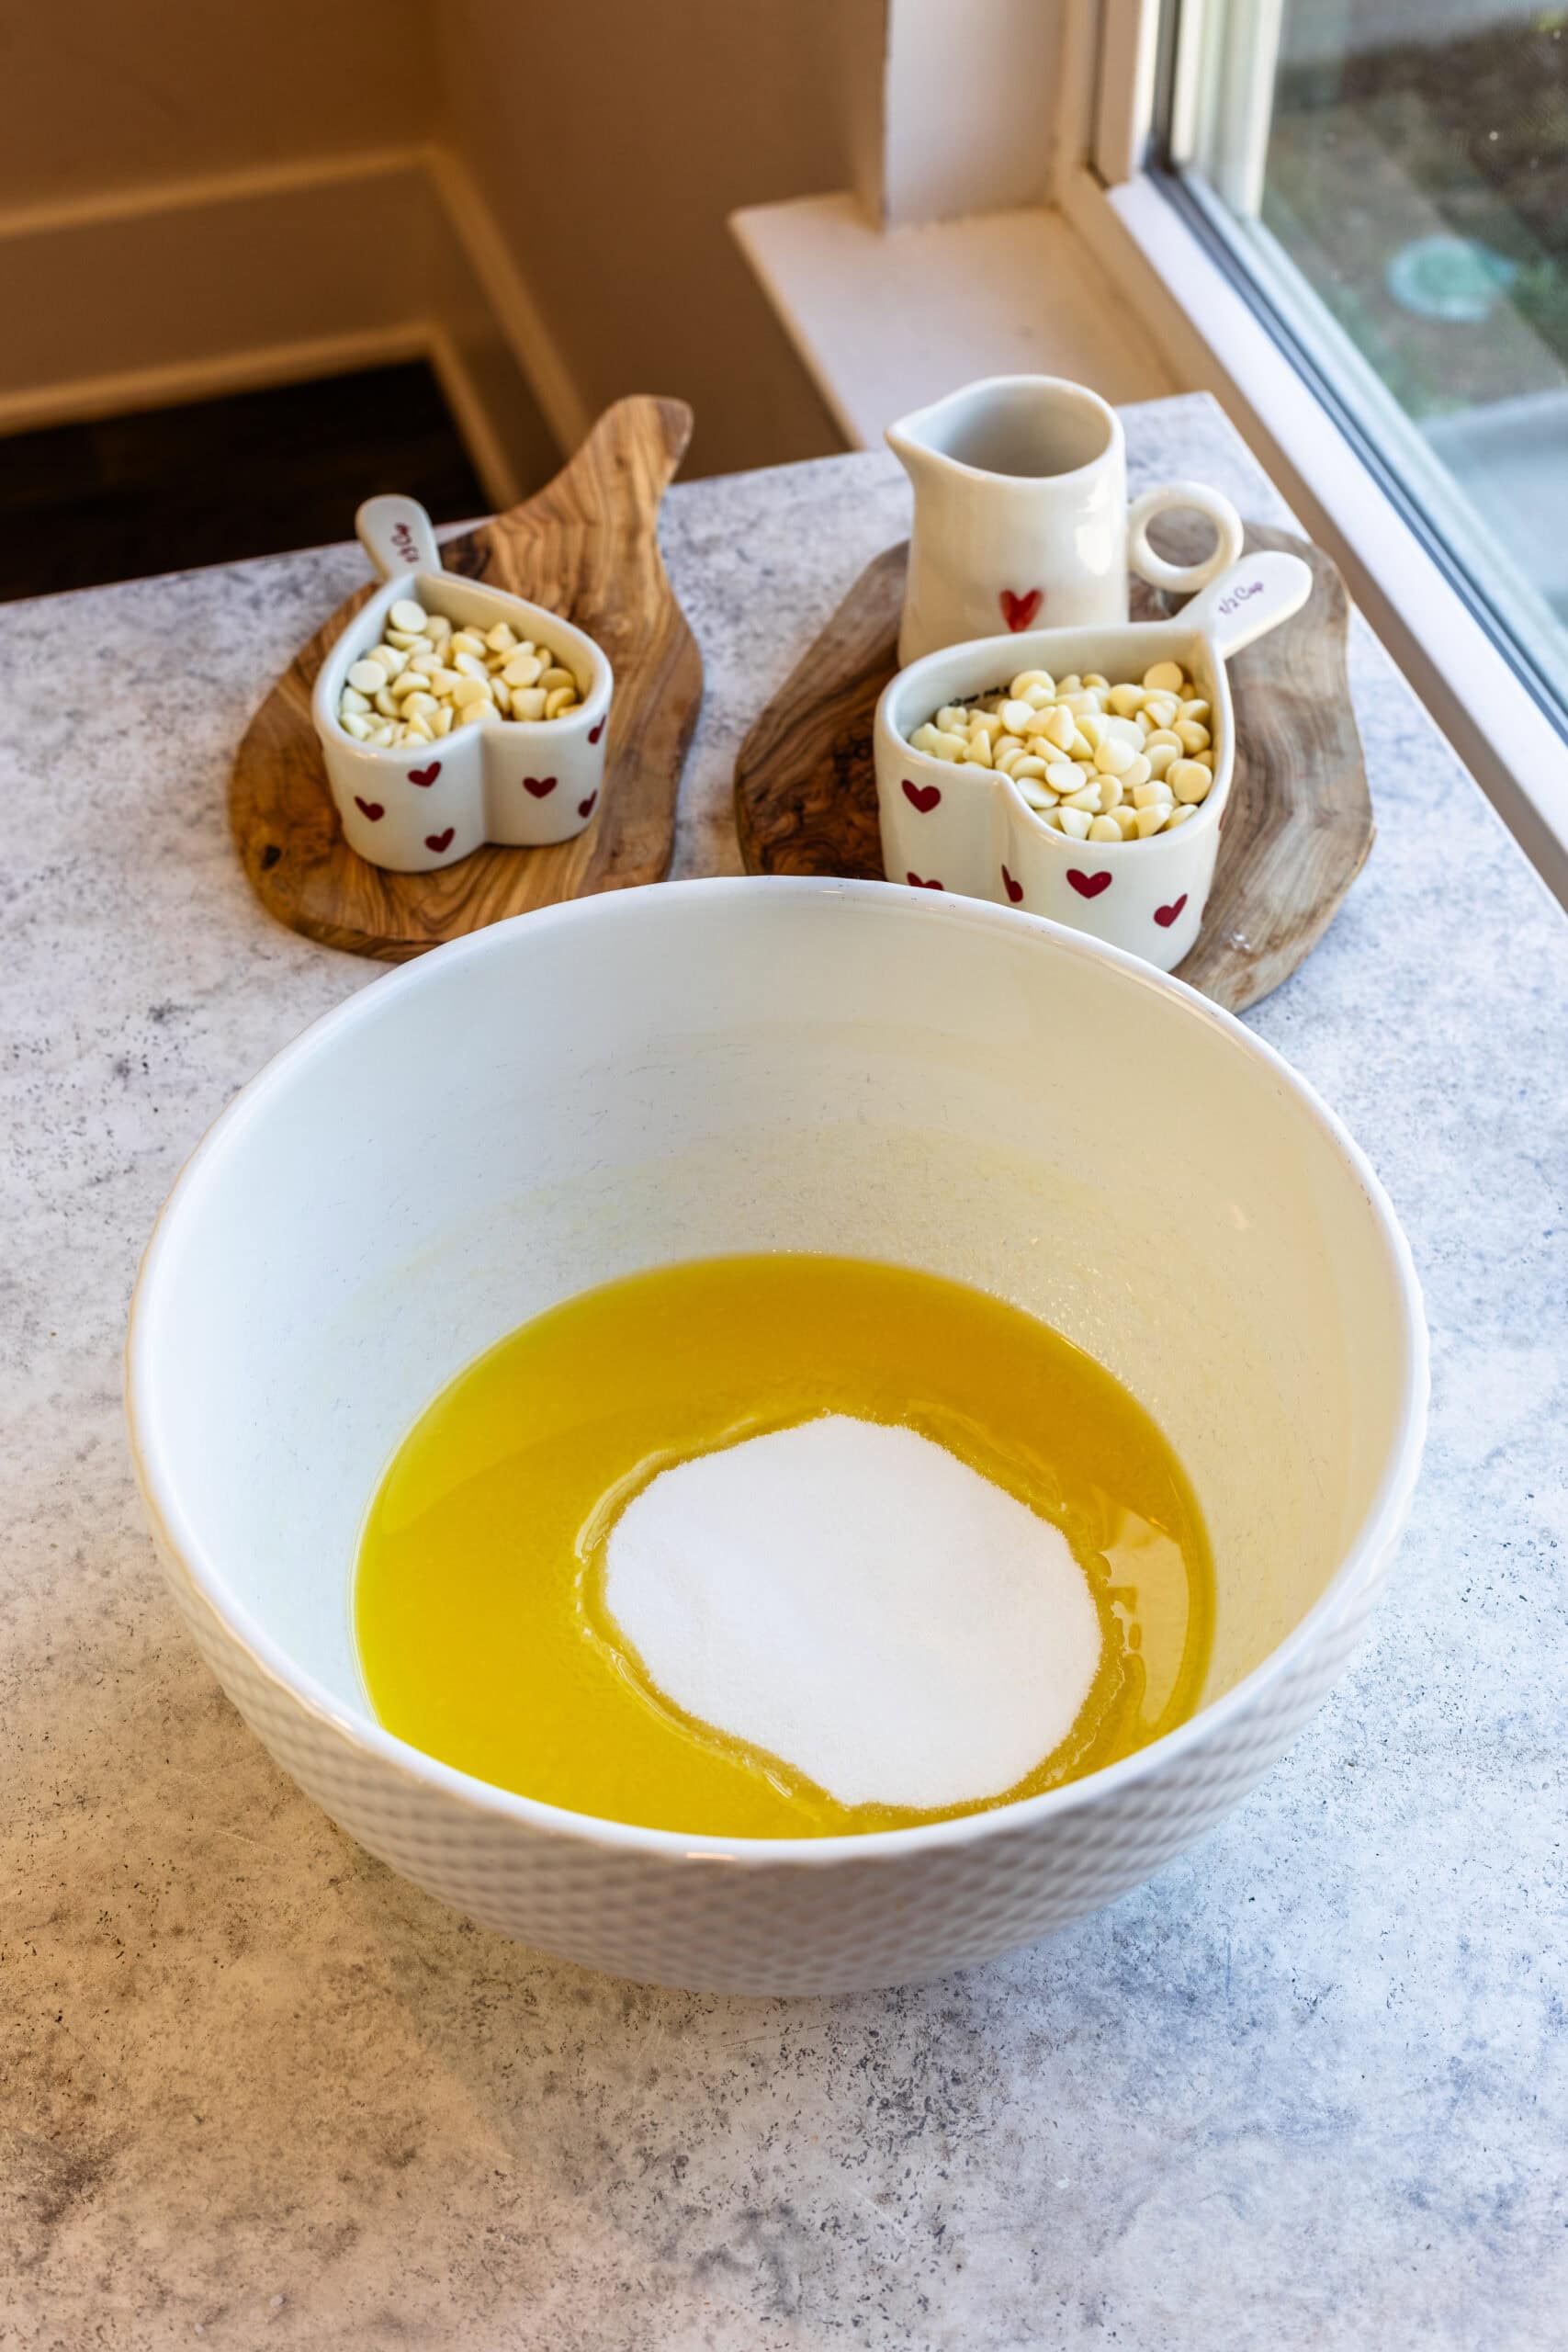
Step 2: Add the sugar
Whisk in the sugar right away. This helps it dissolve slightly into the warm fat, which gives the brownies a smoother texture.
Step 3: Add the eggs
Add the eggs one at a time, mixing until incorporated before adding the next egg. Sometimes I like to use a mixer for this step, but if you are whisking vigorously, just the whisk will do.
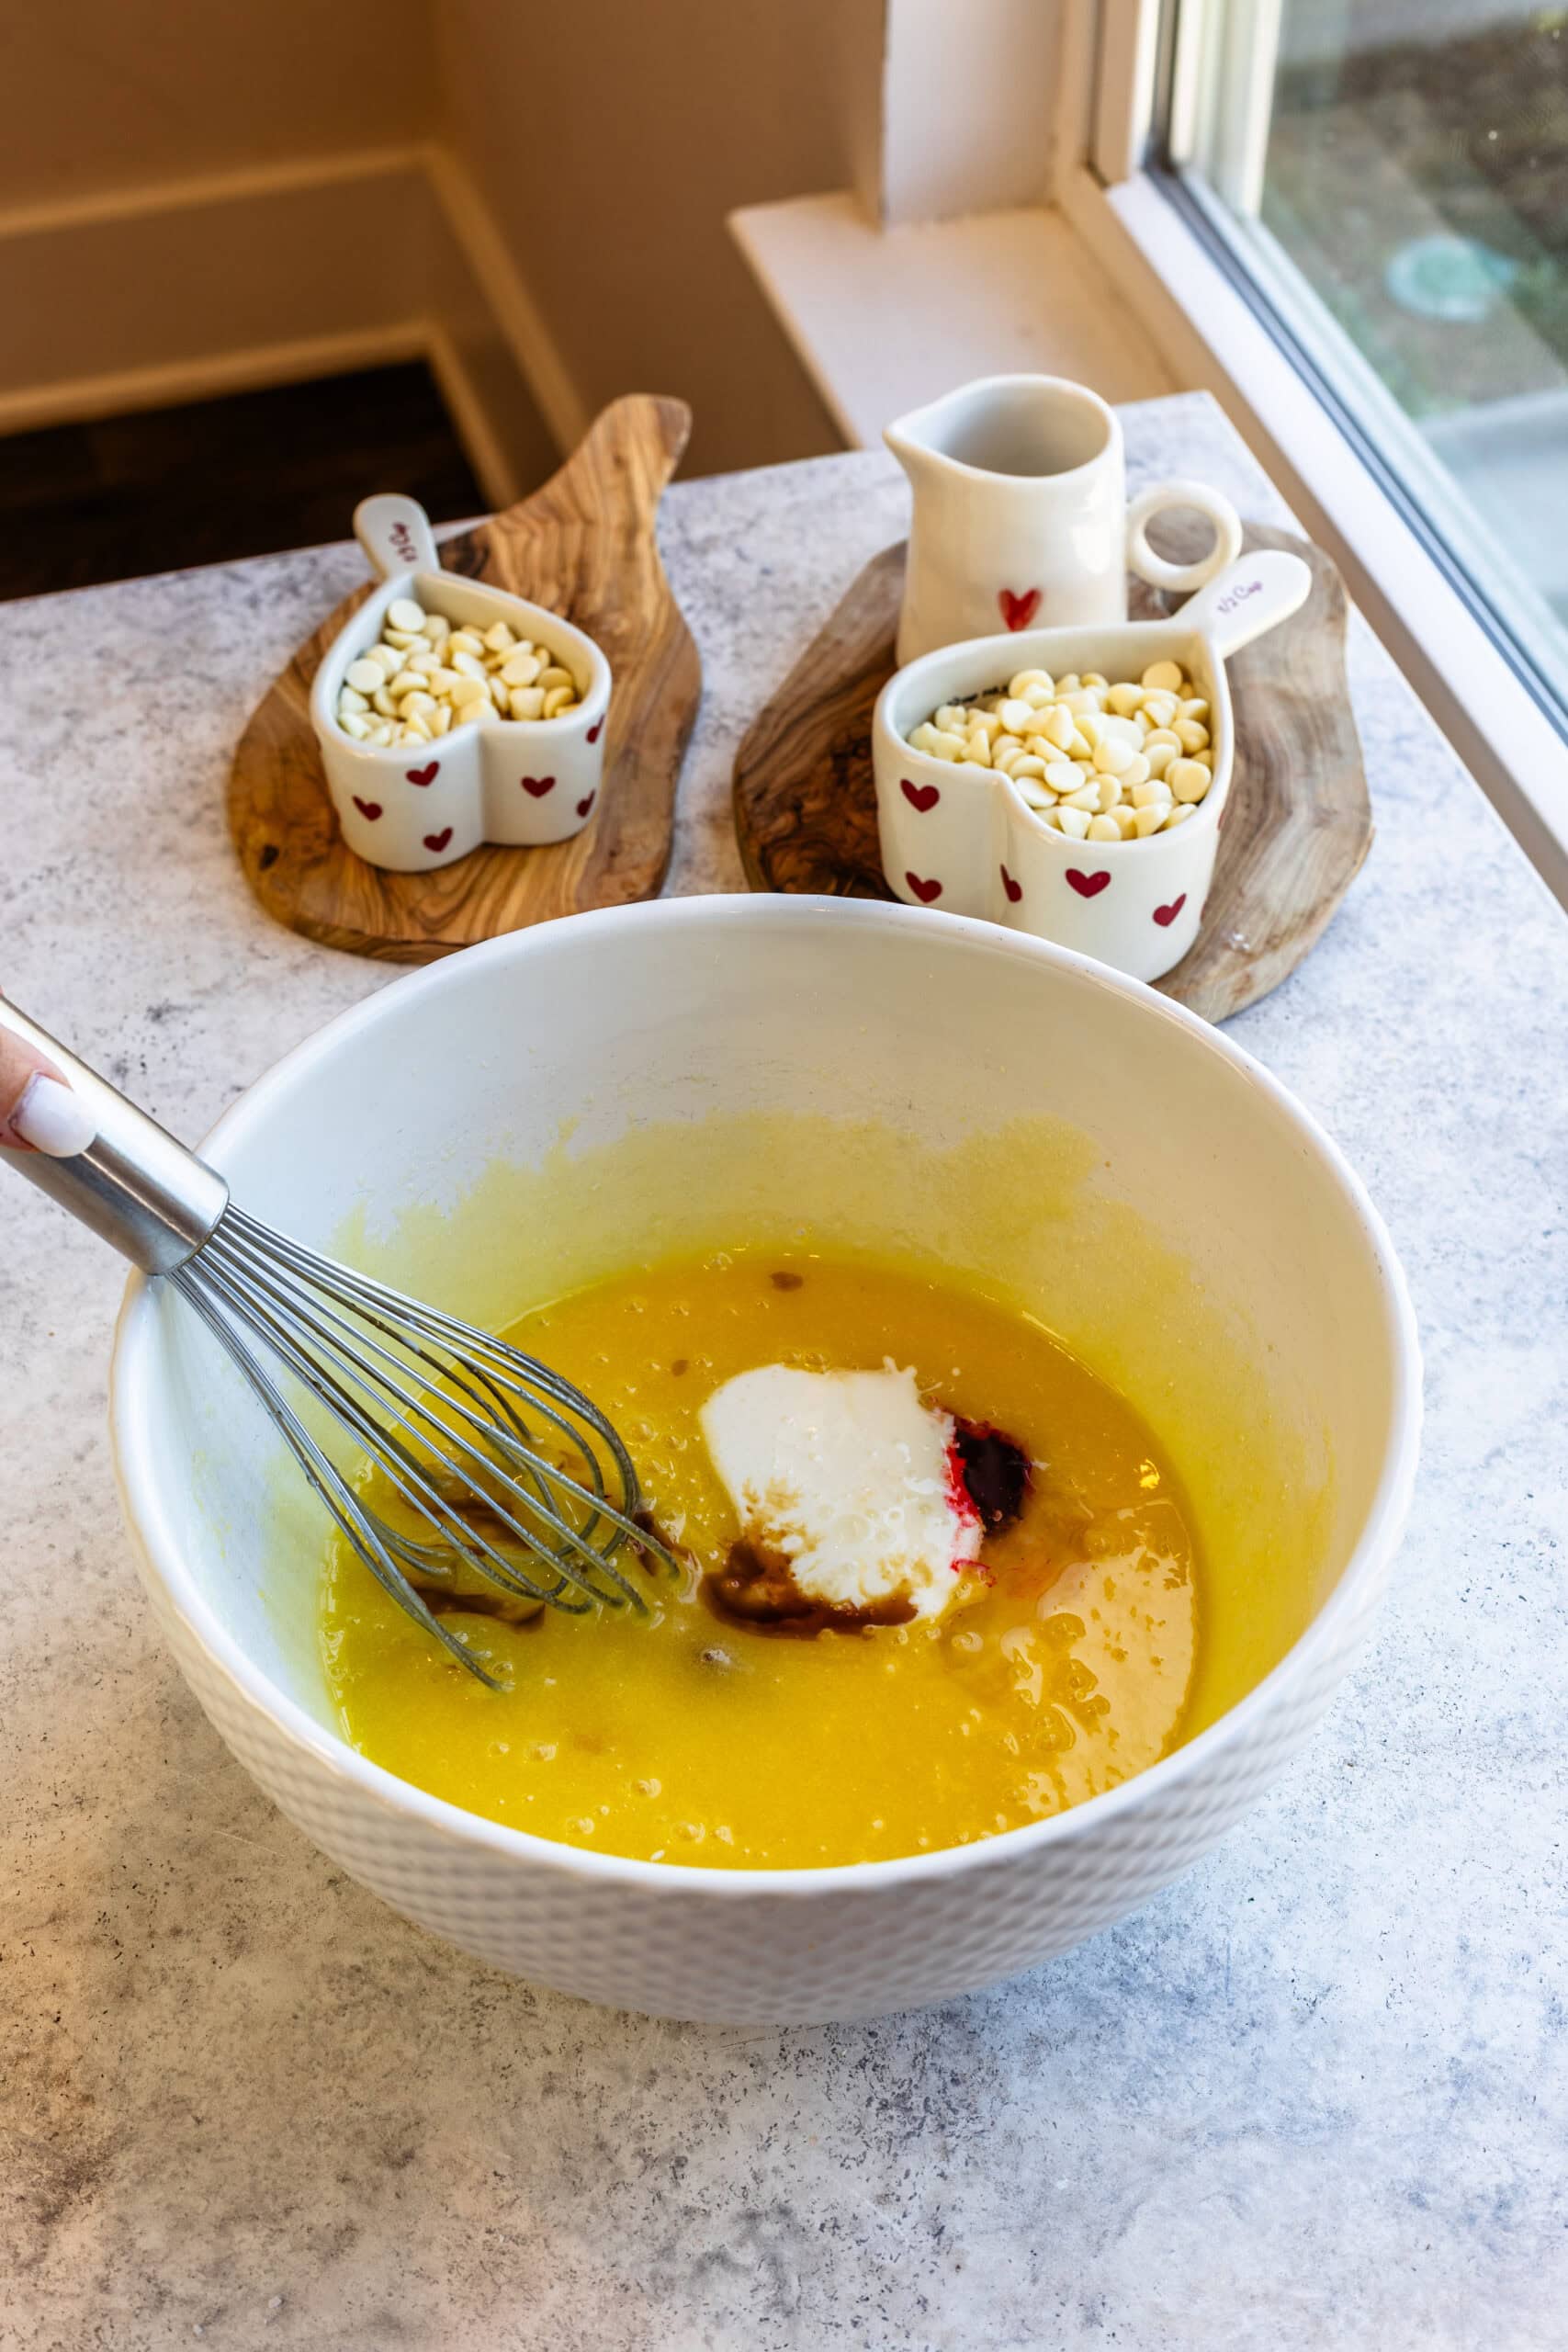
Step 4: Add the wet ingredients
Next, add wet ingredients: the buttermilk, red food coloring, vinegar, and vanilla. At this point, the batter should look smooth and evenly colored — if it doesn’t, keep whisking until it does. The red food coloring is optional.
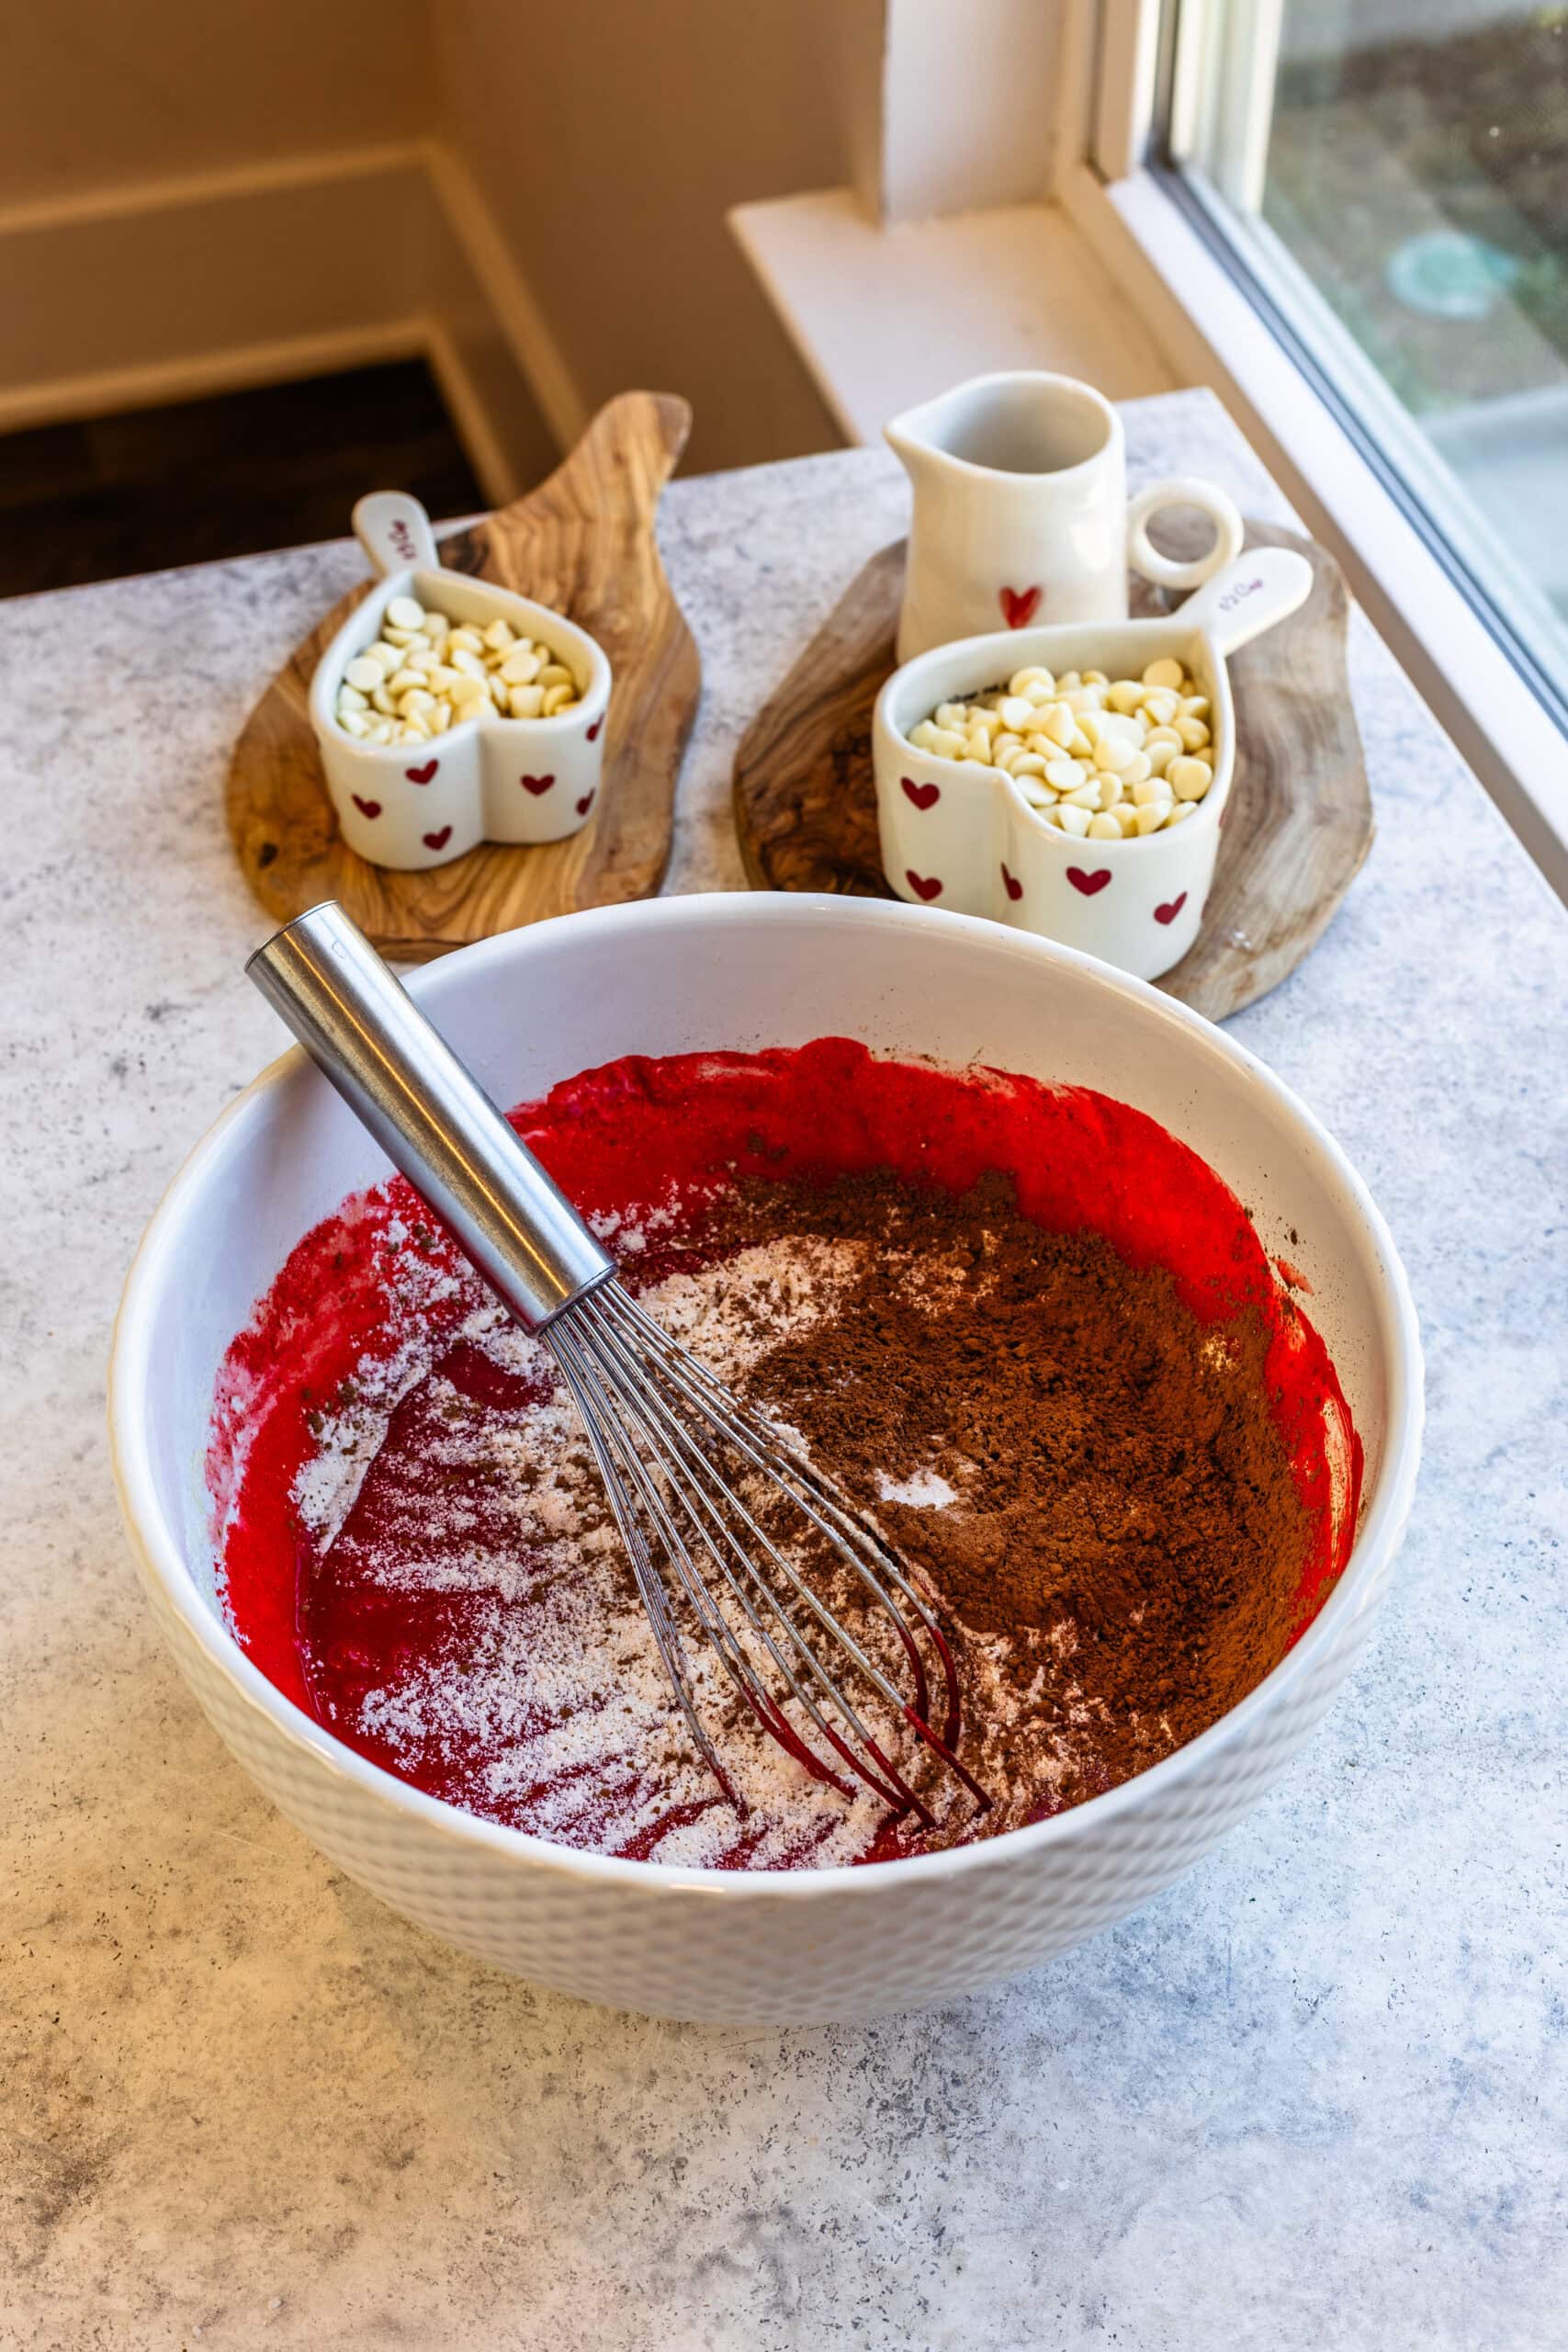
Step 5: Add the dry ingredients
Now add the flour, cocoa powder, salt, and baking soda. I switch to a spatula here and fold gently. Stop as soon as the flour disappears. This is where I’m careful — mixing past this point will push the brownies toward a cakier texture because of overworking the gluten in the flour.
Step 6: Bake
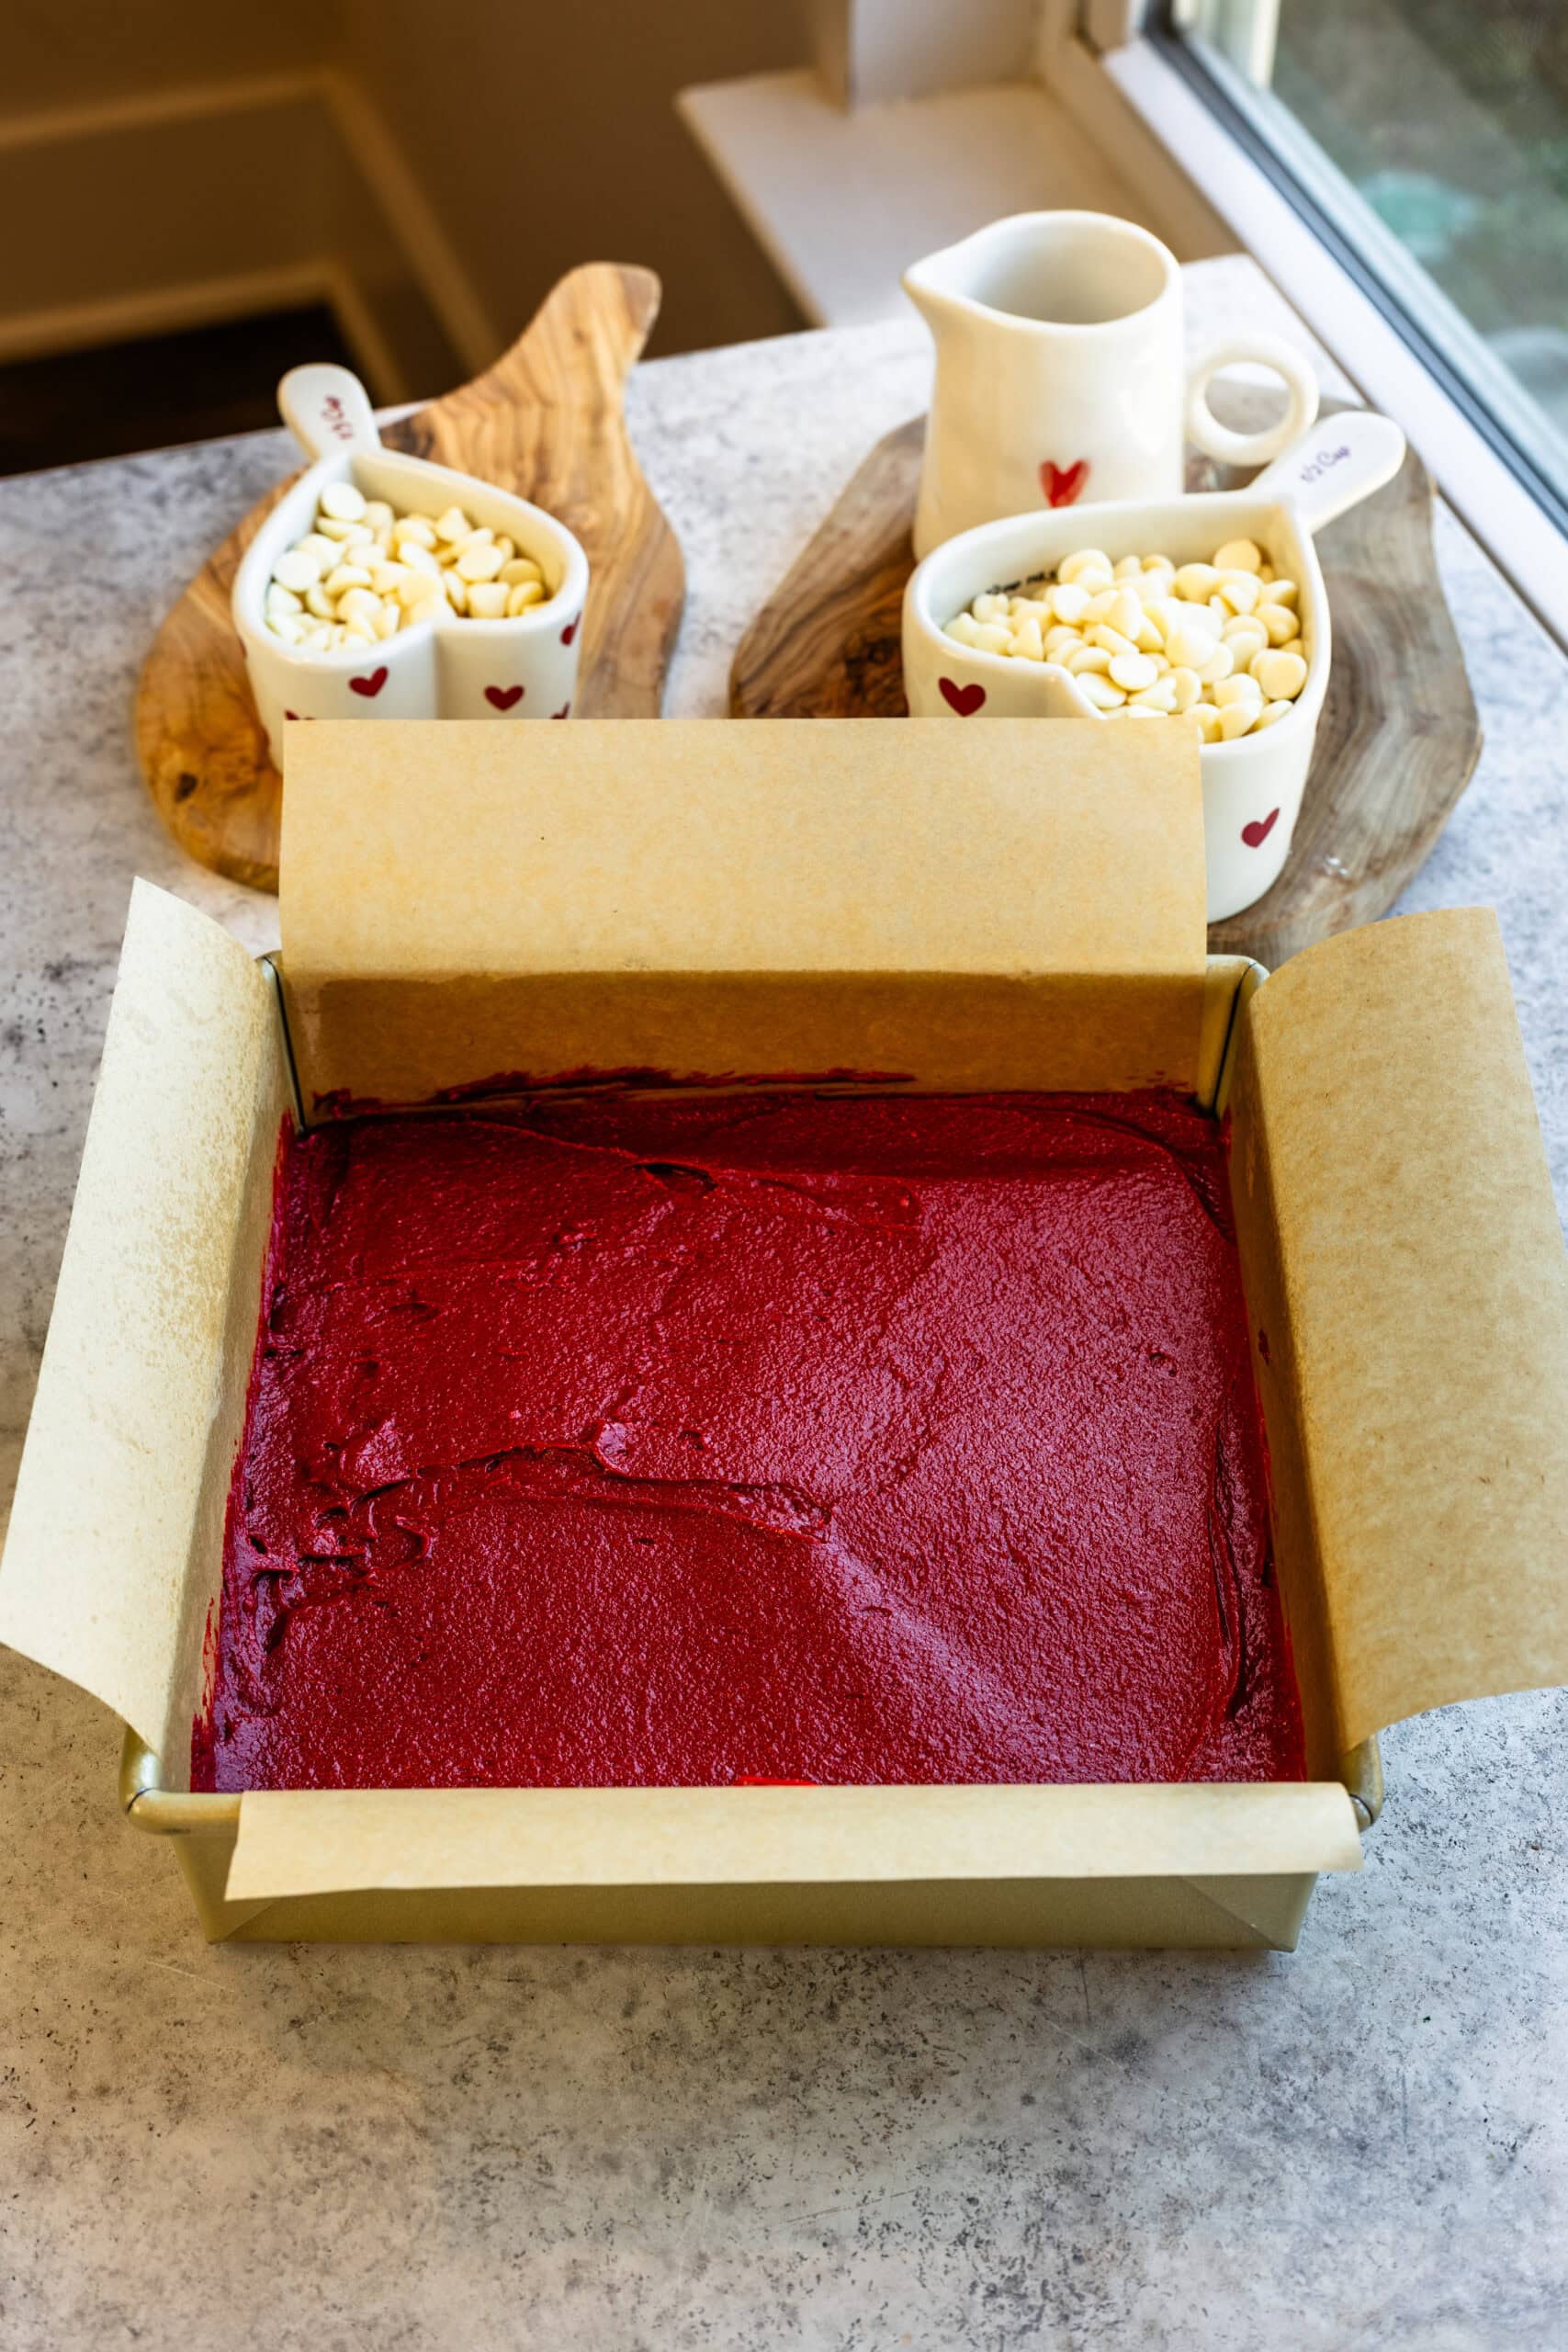
Spread the batter evenly into the prepared pan and smooth the top with a rubber spatula. Bake until the edges are set and the center no longer looks wet (about 35 minutes) . When you touch the surface, it should feel soft but not loose underneath. A toothpick inserted in the center of the brownies should come out clean or with just a few moist crumbs.
Step 7: Let them cool
Once they’re out of the oven, let the brownies cool completely in the pan. I don’t rush this step — the structure finishes setting as they cool, and frosting warm brownies will undo all the work you just did.
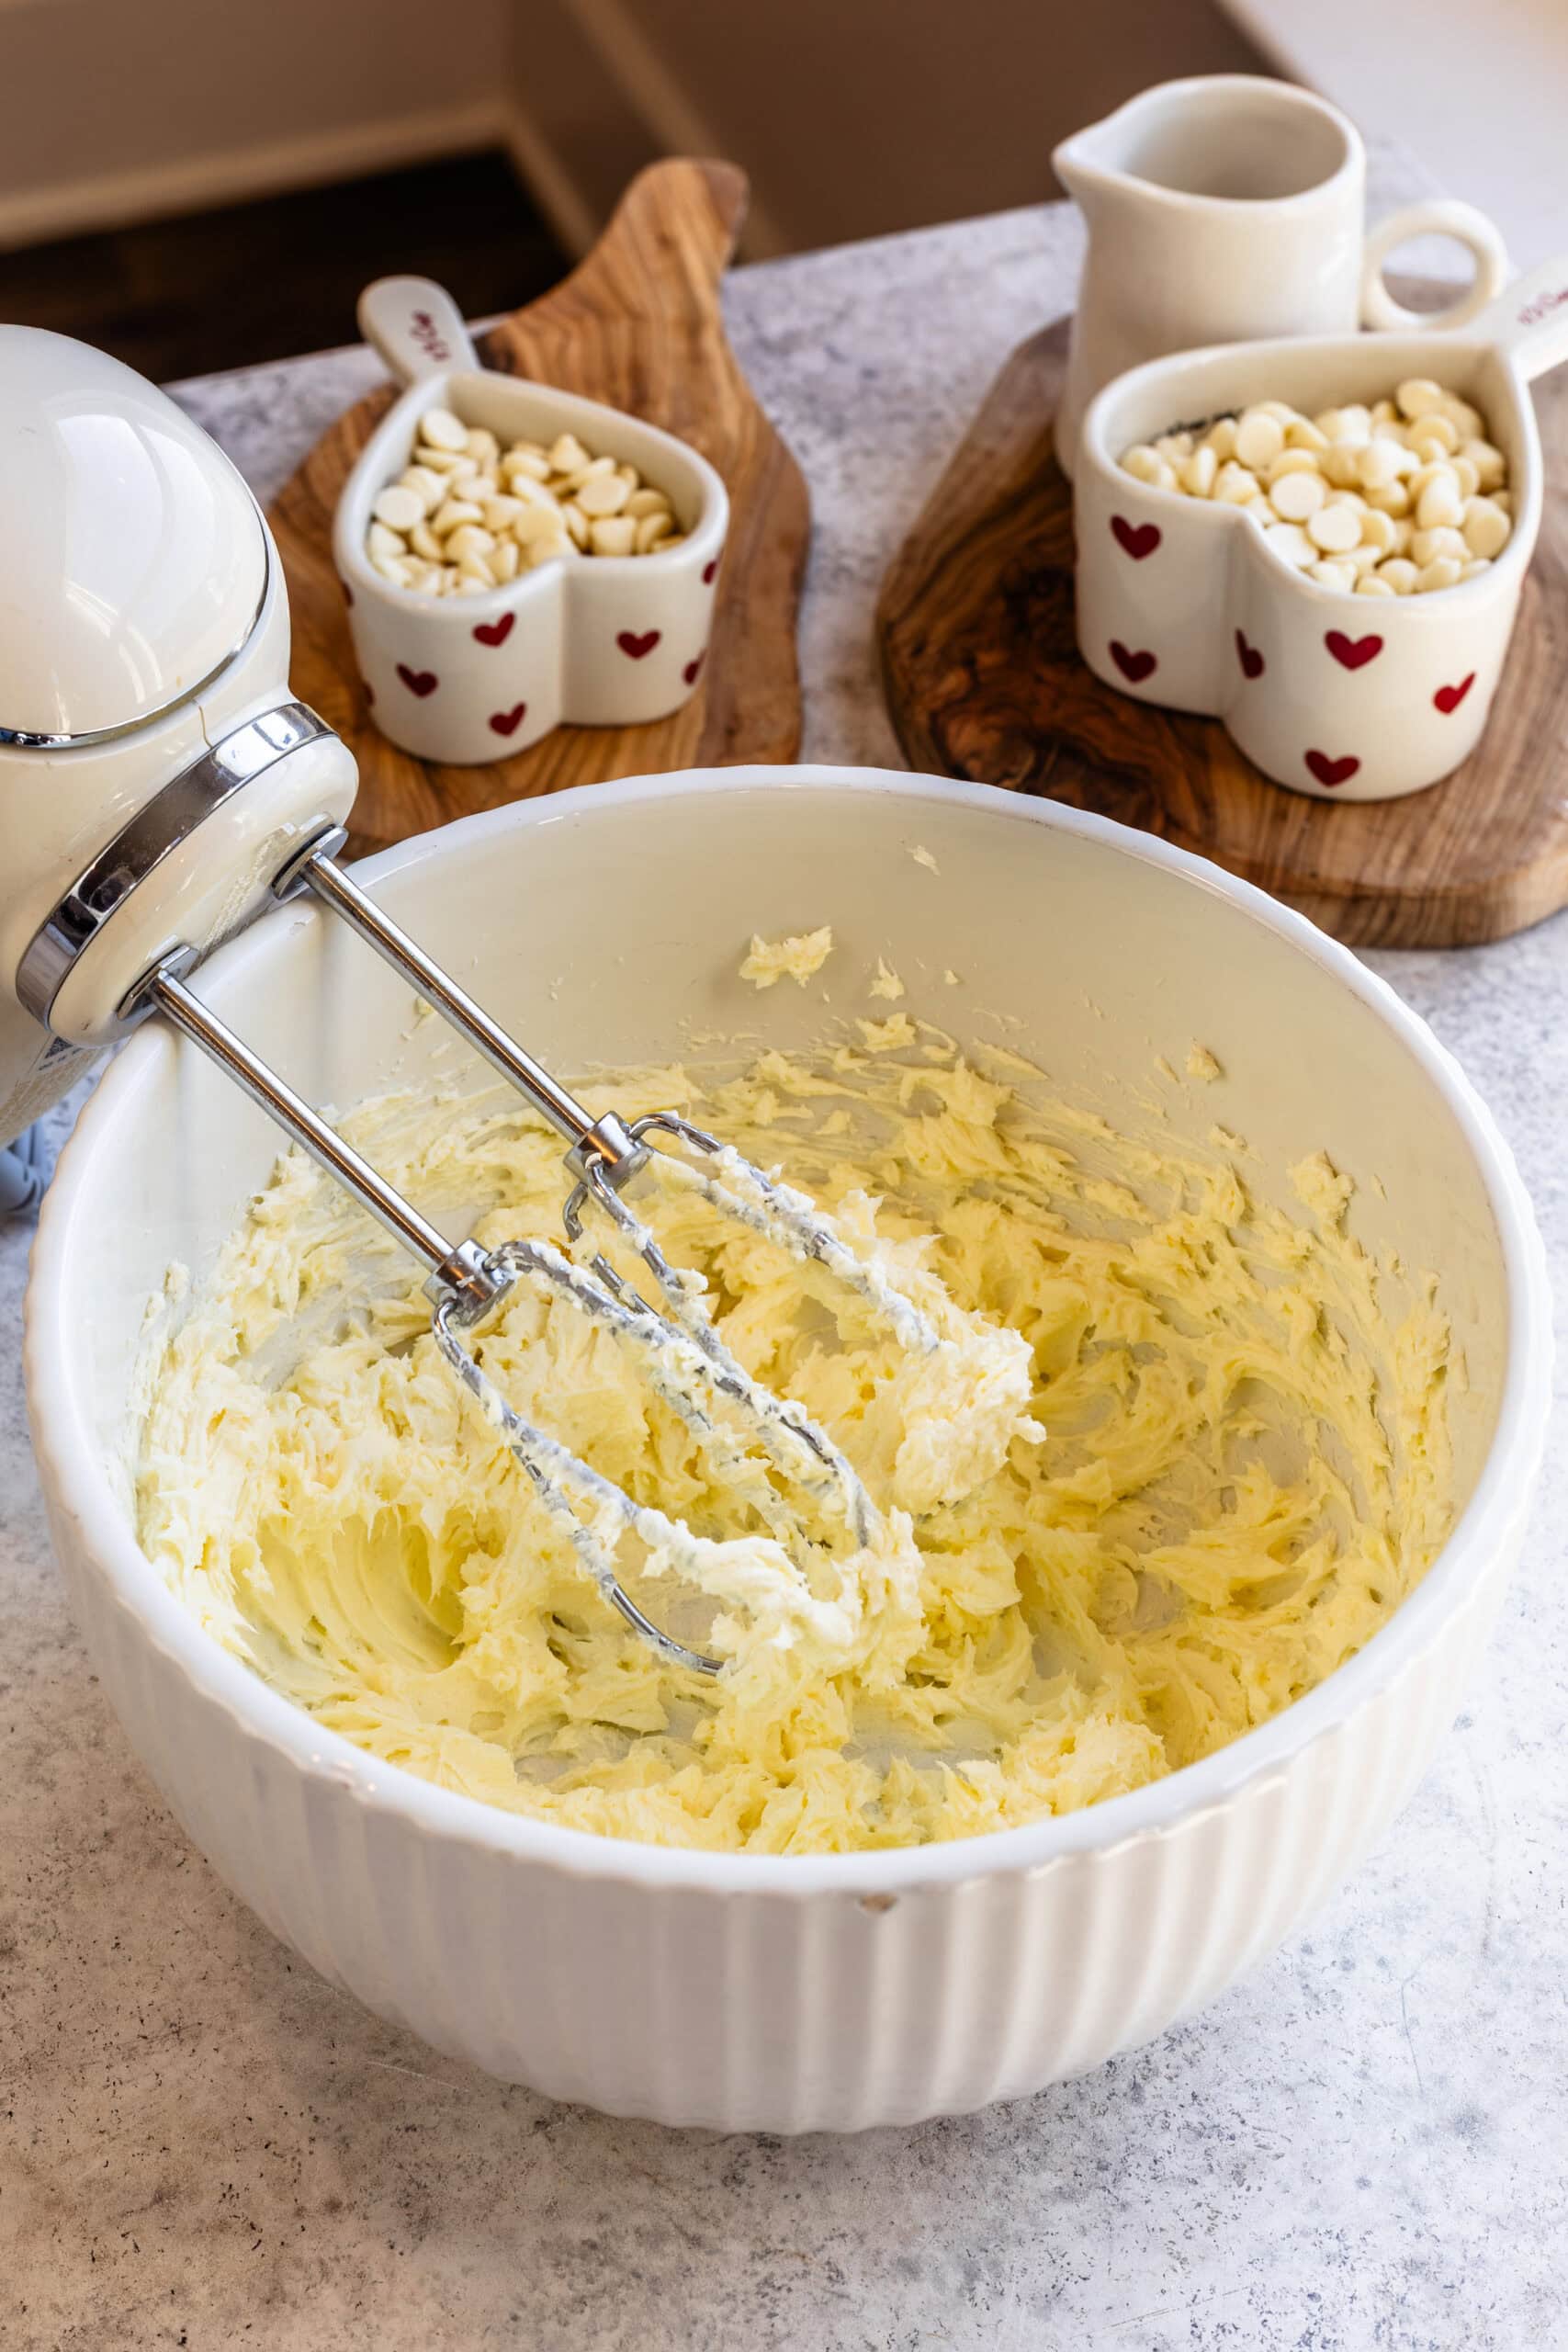
Step 8: Cream Cheese Frosting
I beat the cream cheese and butter together with an electric mixer until completely smooth. I like to make sure the butter and the cream cheese are at room temperature. The cream cheese especially shouldn’t be too warm, otherwise the frosting can become soupy. The ideal temperature is around 72ºF.
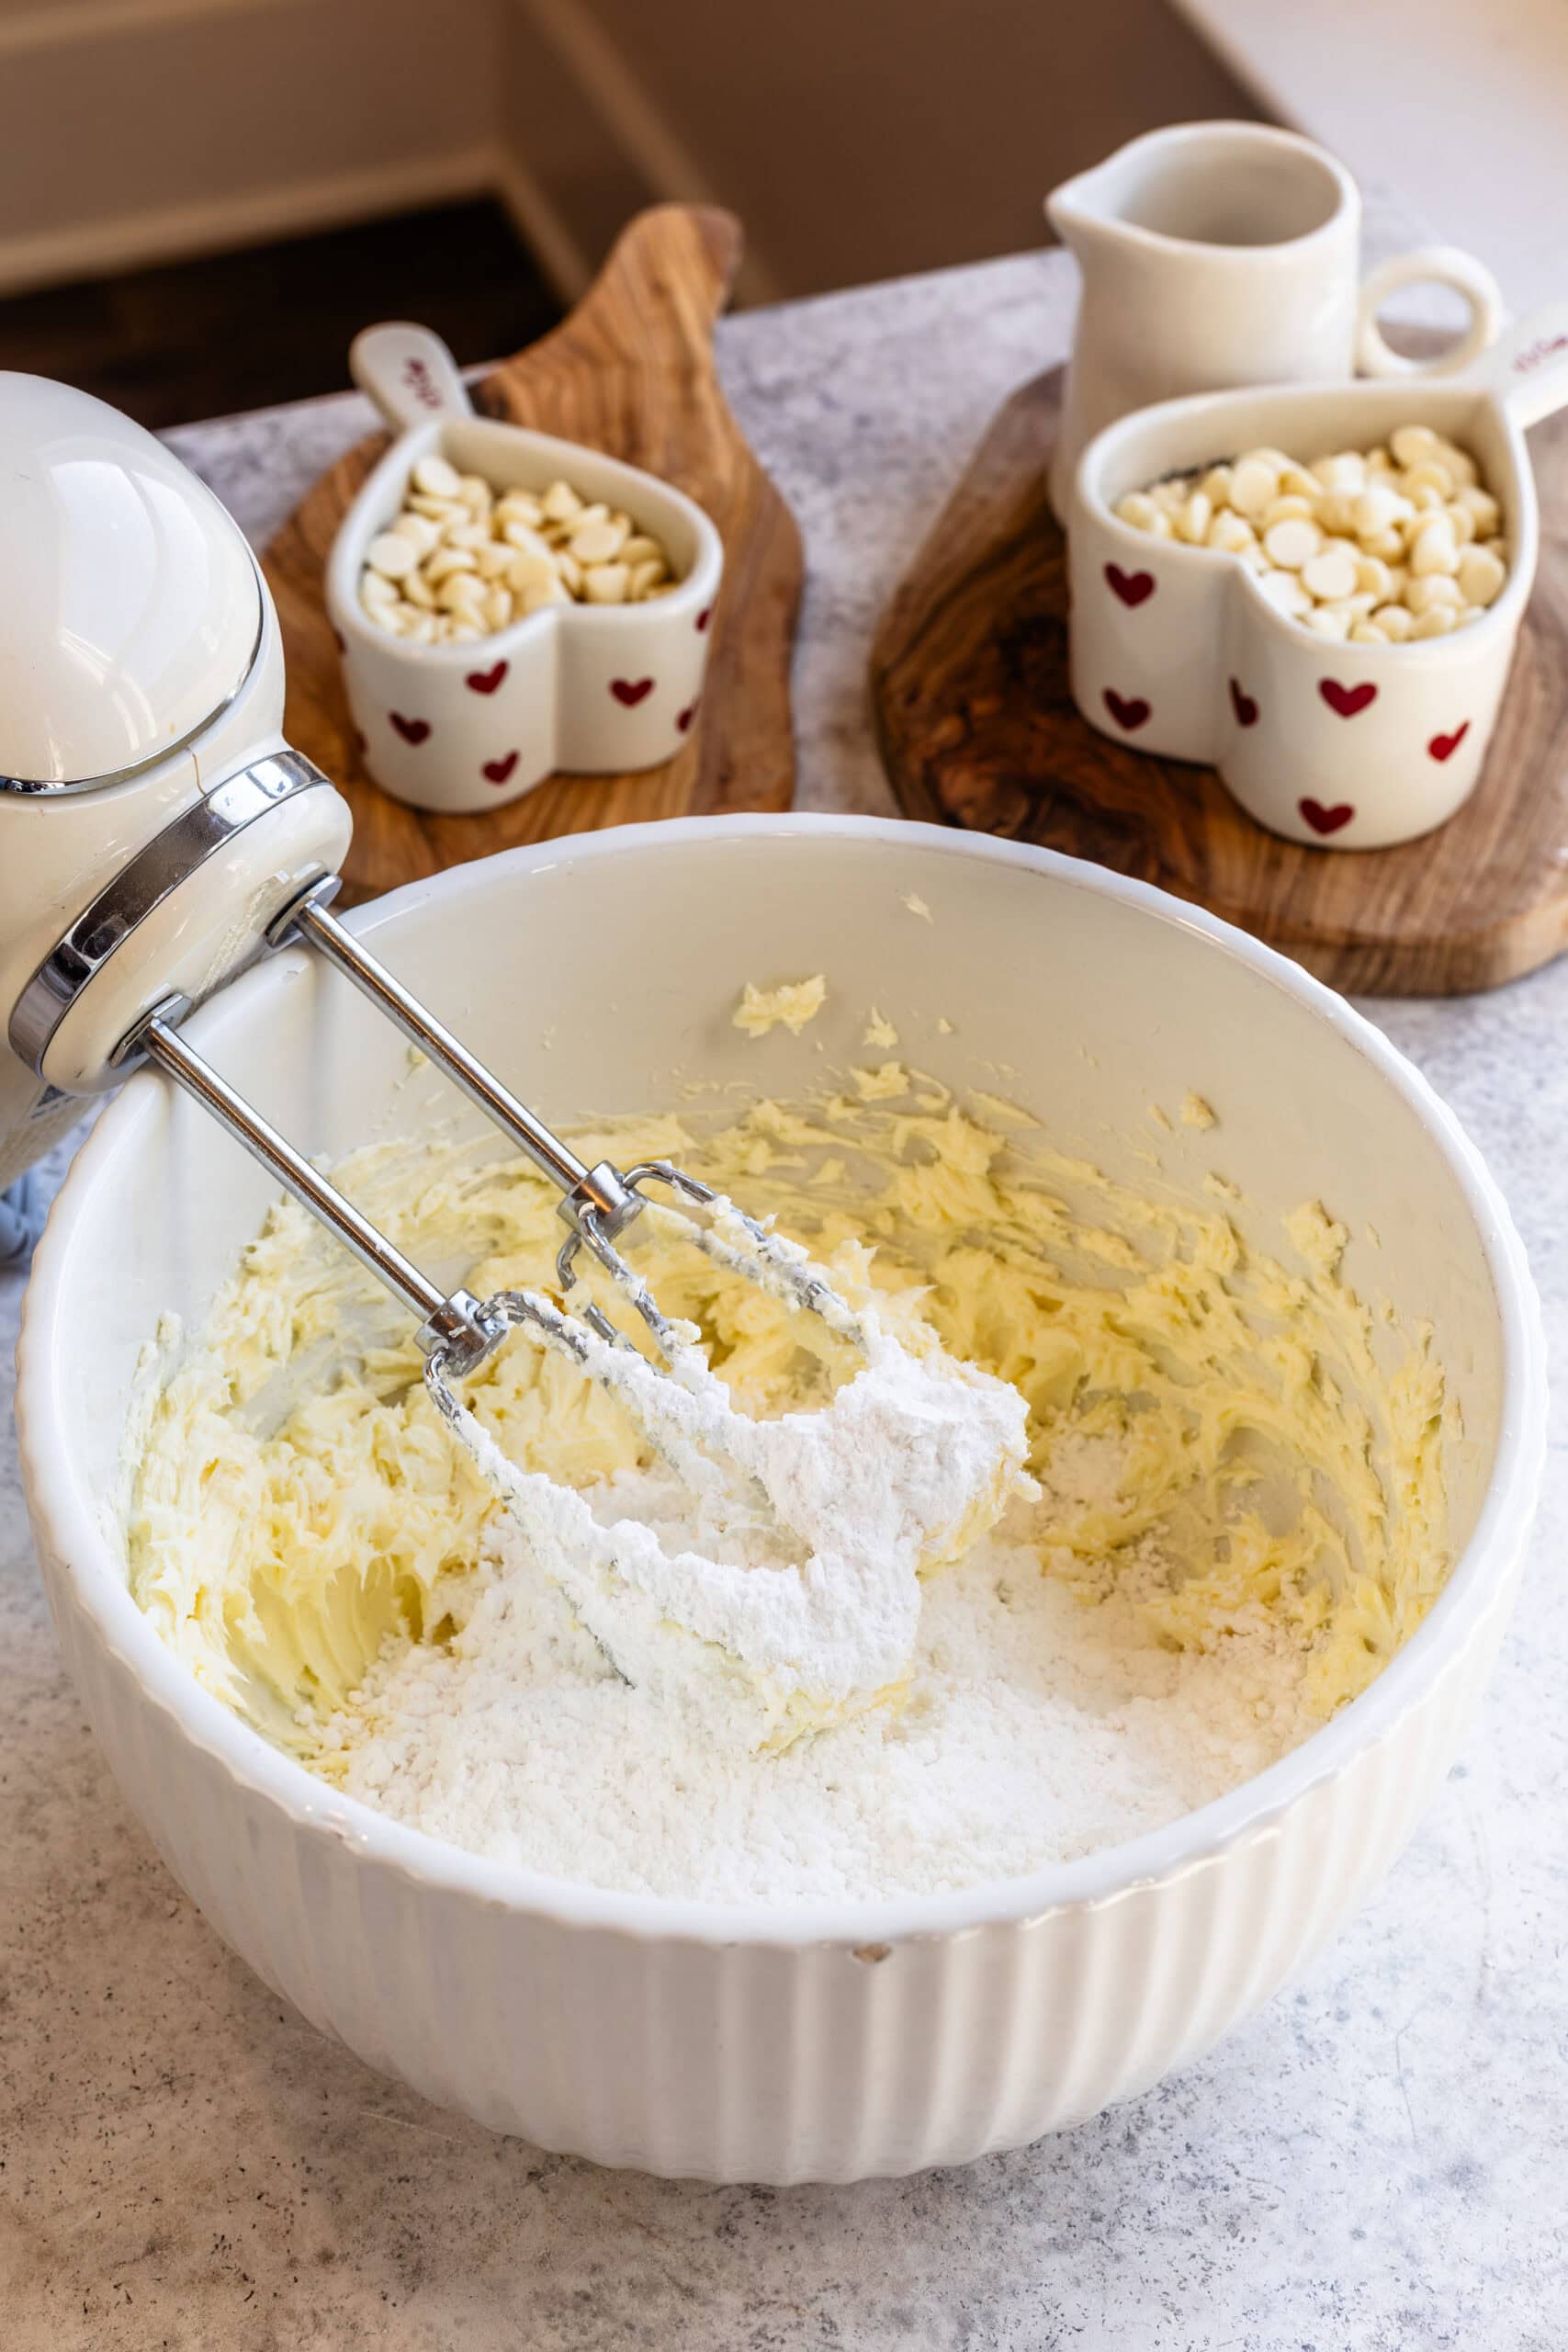
Step 9: Add the powdered sugar
Add the powdered sugar. Starting with fully softened ingredients is key here — it’s the difference between a silky frosting and a lumpy one. Once the sugar is incorporated, I add the vanilla and beat just until fluffy and spreadable.
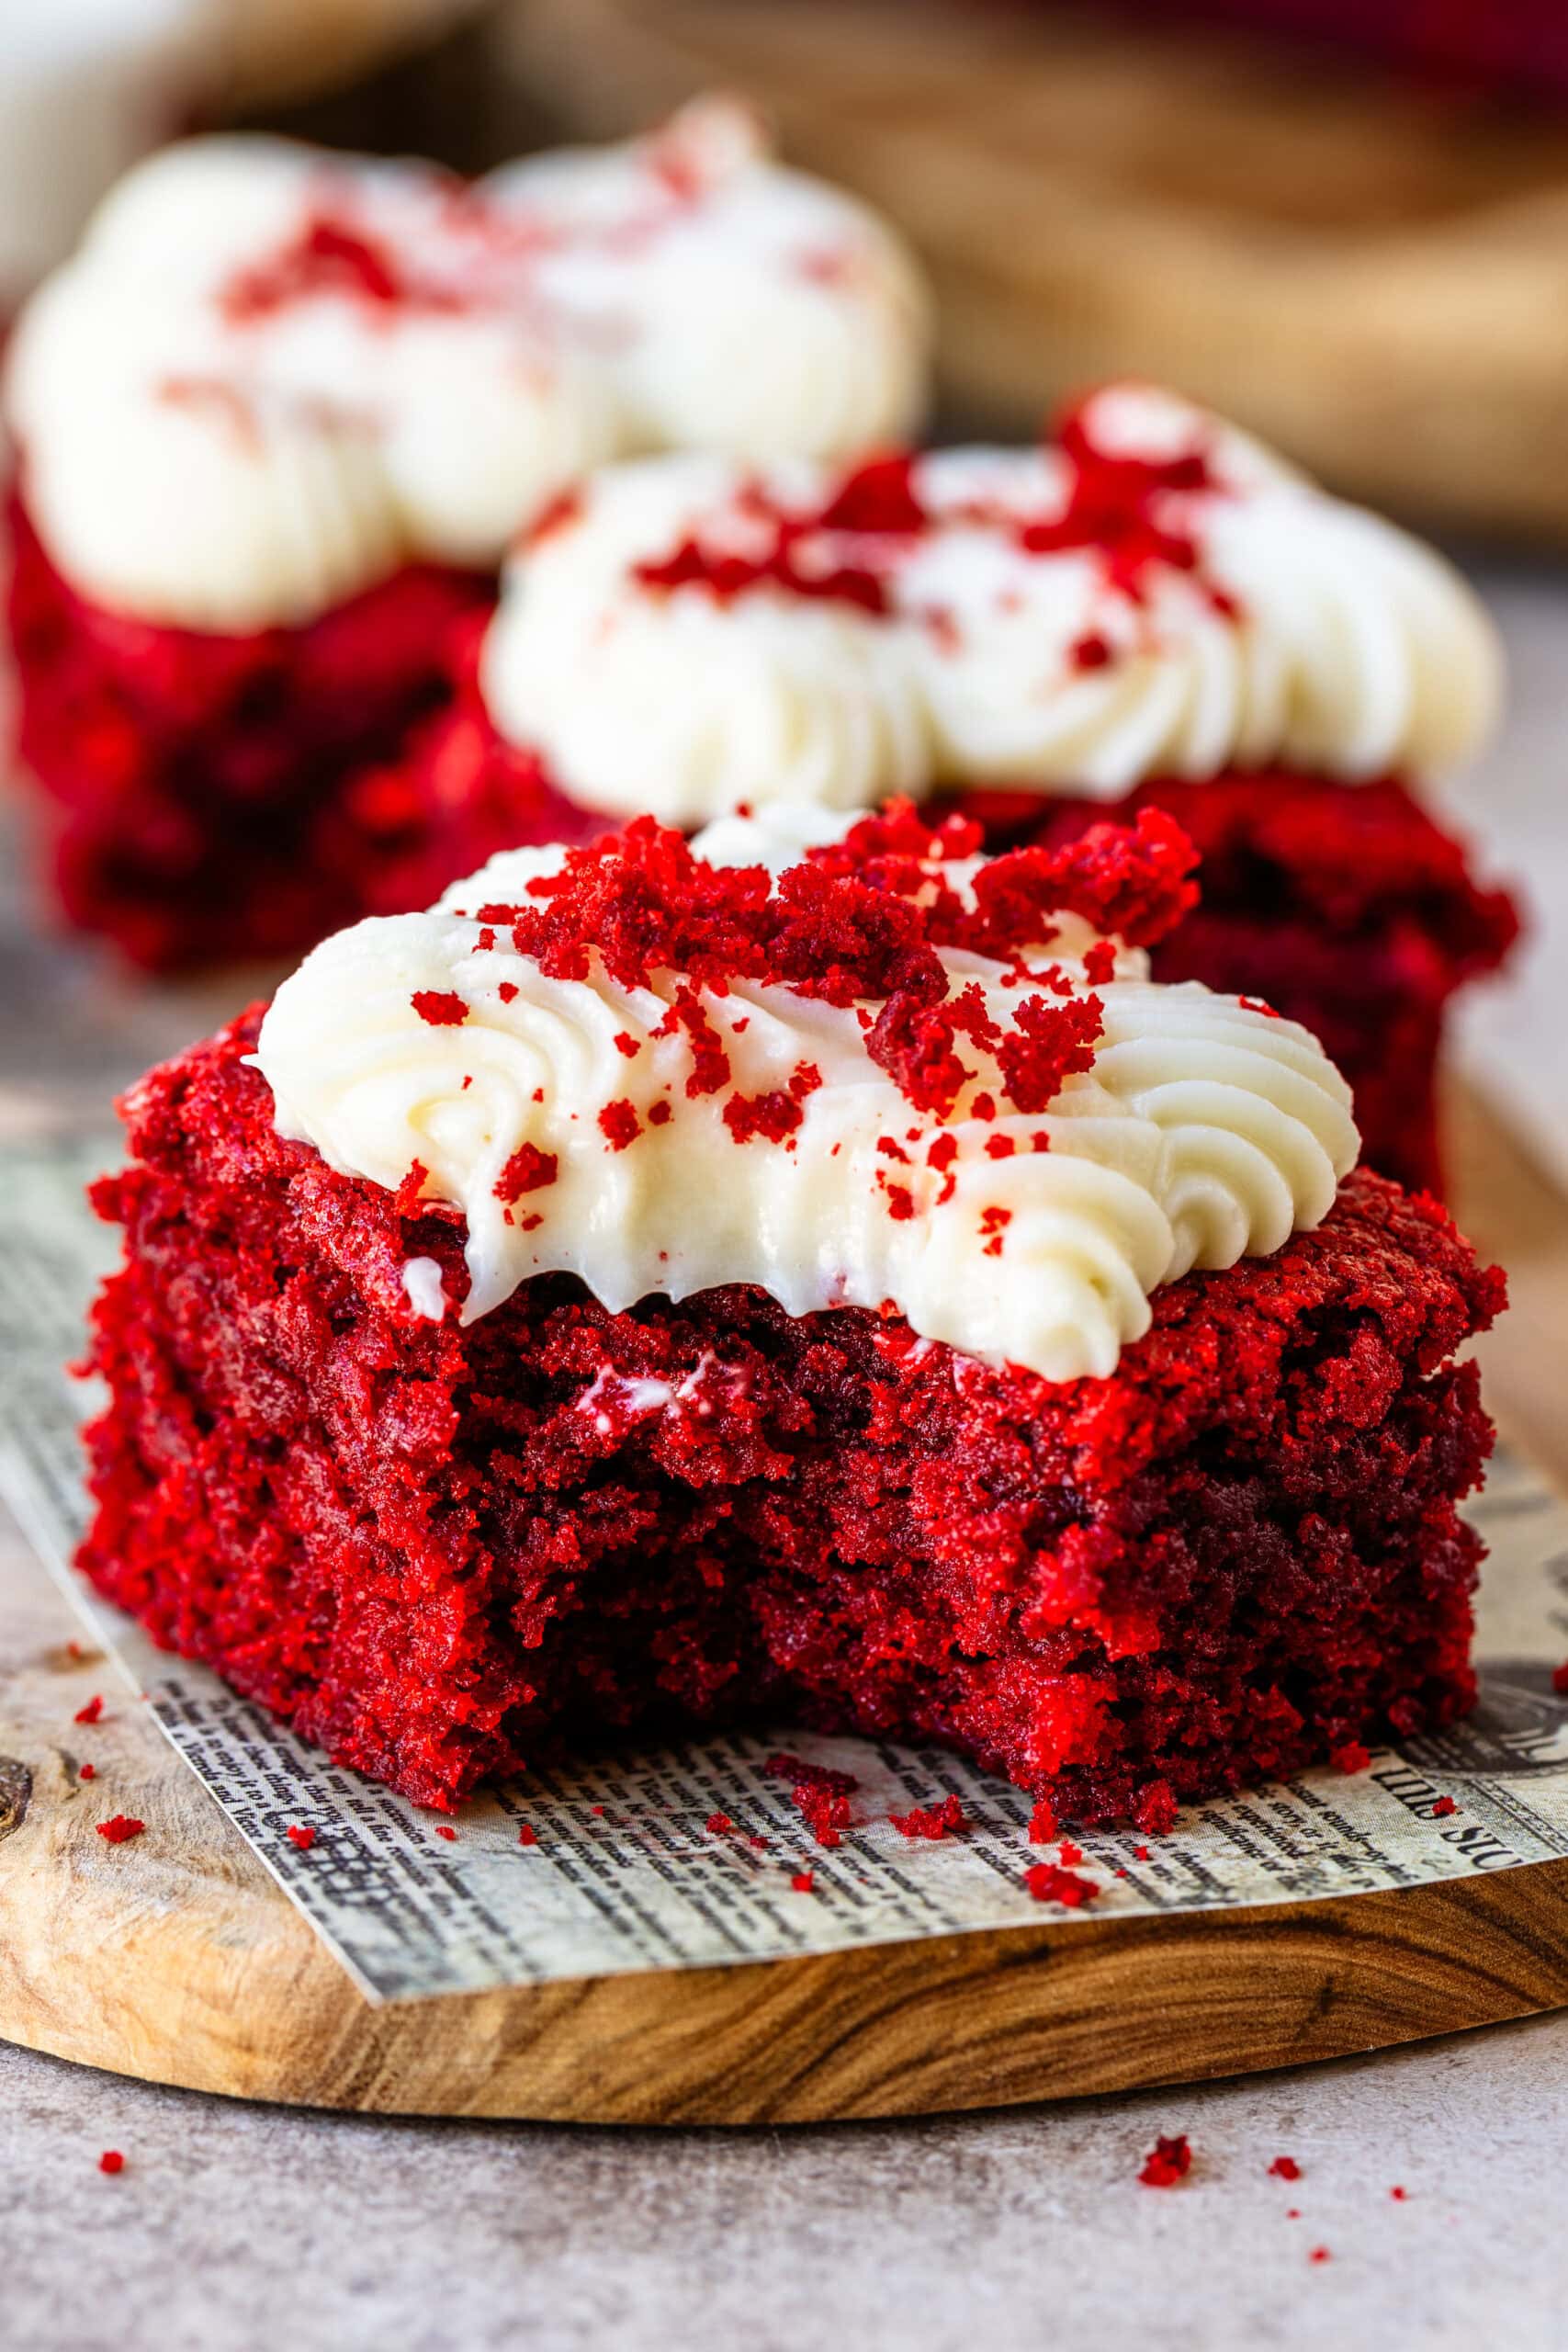
Step 10: Pipe & Decorate!
Spread the cream cheese frosting on top of the frosted brownies. You can slice the brownies and frost each individually, or spread the frosting on top of the unsliced brownies. I places the frosting in a piping bag fitted with a tip 4B and piped on top of each brownie. Then take a small slice of the unfrosted brownies and crumble it to sprinkle on top of the frosted pieces as decoration!
A few things that make a noticeable difference with this recipe:
- This is where most people go wrong: overbaking. Pull the brownies when the center is set but still soft.
- Don’t skip lining the pan — it makes clean slicing much easier.
- Most important tip: Let the brownies cool completely before frosting. The structure sets as they cool.
Variations
This recipe is great as is, but if you had to change a few things, I would do the below!
- Skip the frosting and dust the brownies lightly with powdered sugar
- Add white chocolate chips to the batter for extra texture
- Turn this into a cheesecake! Use my Red Velvet Cheesecake recipe. I would make half of the amount of cheesecake from that recipe, swirl with these brownies, and bake them as so.
Storage & Make Ahead
I store unfrosted brownies in an airtight container at room temperature for up to two days. Once frosted, they keep best in the fridge for up to six days. I like to let them sit at room temperature for about 20 minutes before serving so the frosting softens.
You can also freeze the baked, unfrosted brownies for up to two months. I thaw them overnight in the fridge before frosting.
FAQ
Yes. I often bake the brownies a day ahead and frost them the next day once they’re fully cooled.
This usually comes from overmixing or overbaking. Stop mixing as soon as the flour disappears and keep a close eye on the bake time.
I don’t recommend it. The frosting texture changes after freezing. Freeze the brownies unfrosted instead.
I don’t recommend it. Glass pans heat unevenly and often lead to underbaked centers.
This recipe works well with gluten-free flour. Many readers have made my brownie recipes—which uses the same base for this—using gluten-free flour, and have reported success.
This recipe won’t work without the eggs. I do not recommend substituting them.
More Recipes You Might Like
If you liked these red velvet brownies, you might also enjoy my Red Velvet Cake, Cream Cheese Frosting recipe, Red Velvet Cheesecake or any of my brownie-based desserts that lean fudgy rather than cakey. They all follow the same principle: intentional texture and balanced sweetness.
Let Me Know!
If you make these red velvet brownies, I’d love to hear how they turned out. They’re perfect for Valentine’s Day or any day worth celebrating. Leave a comment or rating below, and don’t forget to tag me on Instagram if you share them — I love seeing your bakes.
Watch Video

Red Velvet Brownies
Ingredients
Brownie Batter
- 1 cup chopped white chocolate 170g
- ¾ cup unsalted butter 170g
- 1 cup white granulated sugar 200g
- 2 large eggs
- 3 tbsp buttermilk
- 2 tsp red food coloring
- 1 tsp vinegar
- 2 tsp vanilla extract
- 1½ cups all-purpose flour 191g
- 2 tbsp cocoa powder
- ¼ tsp salt
- ¼ tsp baking soda
Cream Cheese Frosting
- ¾ cup cream cheese softened (170g/6 oz)
- 6 tbsp unsalted butter softened (85g/3 oz)
- 1¼ cups powdered sugar sifted (150g)
- ½ tsp vanilla extract
Instructions
Brownie Batter
- Pre-heat the oven to 350ºF. If your oven runs hot, or if it’s convection or gas, use 325ºF instead. Grease and line a 8×8” square pan with parchment paper. Don’t use a glass pan.
- To make the batter, add the butter and white chocolate to a large bowl. Place the bowl in the microwave or over a double boiler to melt them together. Microwave for 15 to 30 second increments, stirring in between until the chocolate has melted completely with the butter. If using a double boiler, make sure the bowl is heat-proof, and place it over a pan with simmering water, and whisk the mixture until the chocolate and butter have melted together.
- Add the granulated sugar and whisk to combine.
- Add the eggs, one at a time, mixing until incorporated before adding the next one.
- Add the red food coloring, vinegar, buttermilk, and vanilla to the bowl. Whisk until completely incorporated.
- Add the flour, cocoa powder, baking soda, and salt to the bowl, mix on low to combine, or fold with a spatula.
- Pour the batter in the prepared pan. Use a spatula to smooth it out.
- Bake the brownies in the oven for 35 minutes, until they look set around the edges and on top.
- Touch the top and it shouldn’t feel too wet underneath. When you insert a toothpick, it should come out clean.
- Remove the brownies from the oven.
- Let them cool down.
Cream Cheese Frosting
- Beat the cream cheese and butter together until completely smooth and fluffy for 1–2 minutes. Add the powdered sugar gradually and mix on low, then increase the speed and beat until creamy. Add the vanilla and mix.
Assemble
- Spread the cream cheese frosting on top of the baked brownies. You can slice the brownies and frost each individually by placing the cream cheese frosting in a piping bag fitted with a tip 4B and piped on top of each brownie.
- Then take a small slice of the unfrosted brownies and crumble it to sprinkle on top of the frosted pieces as decoration!