Chocolate Chip Muffin Recipe
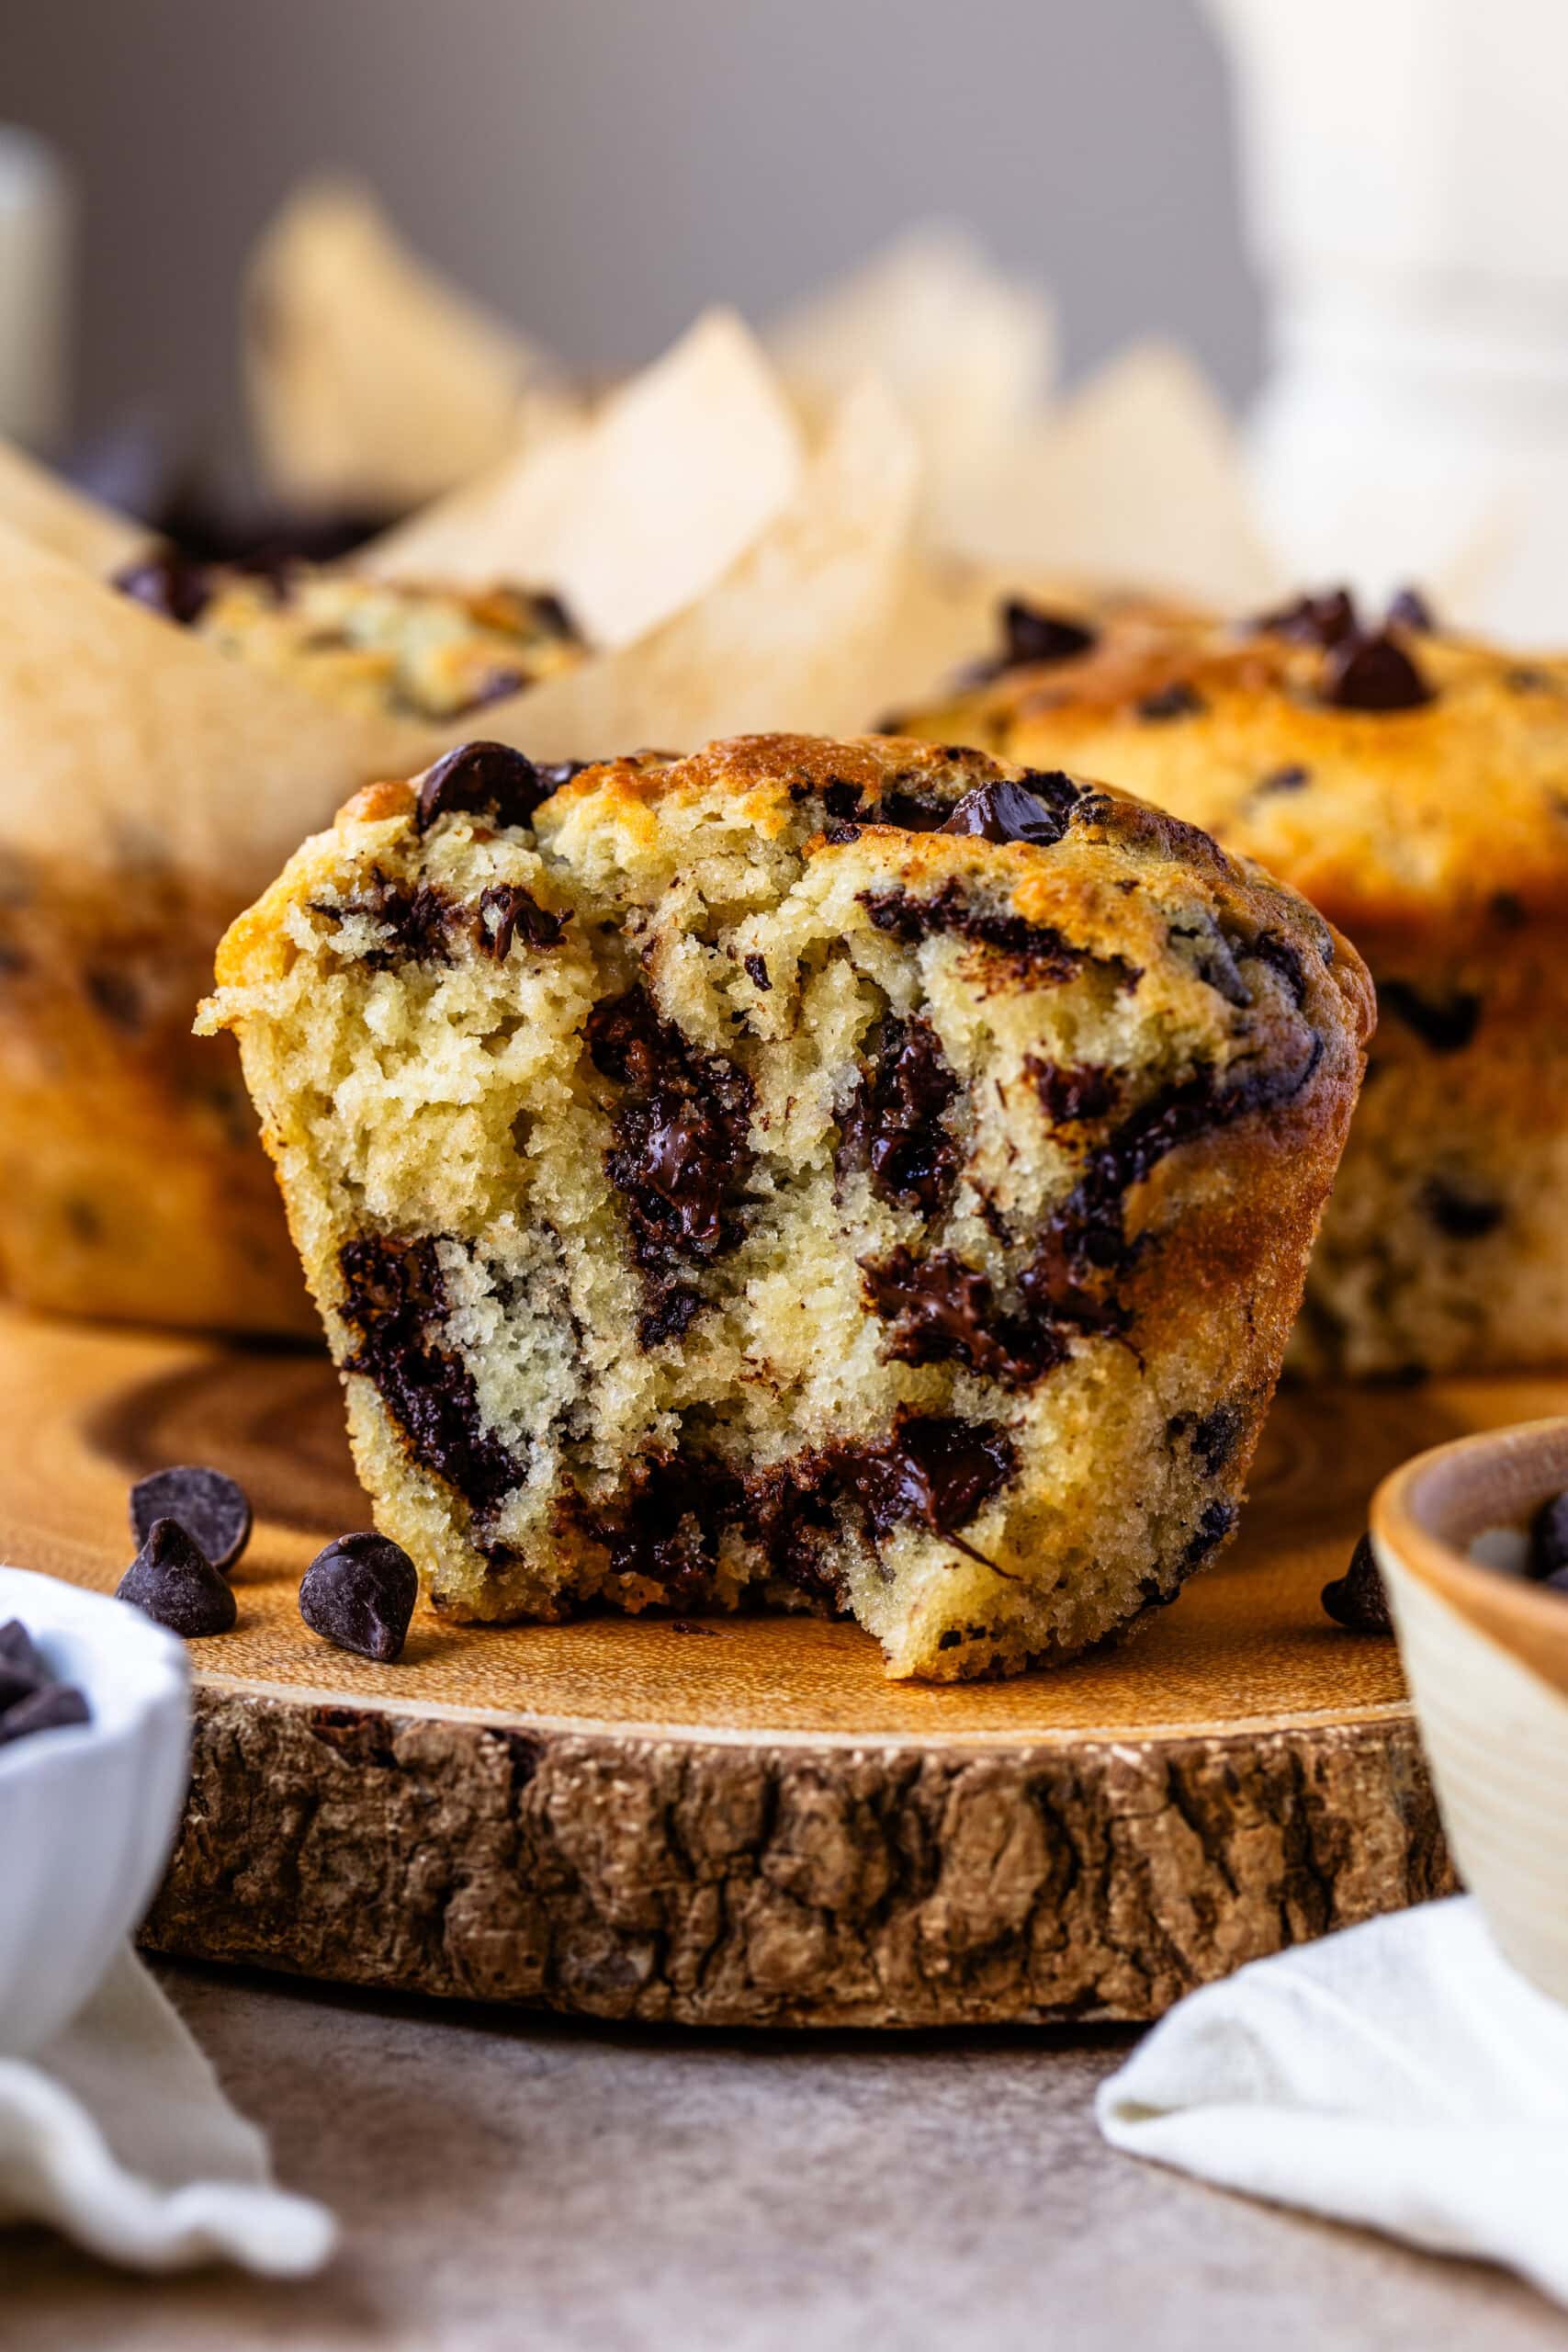
Hello muffin lovers! This Chocolate Chip Muffin Recipe yields soft and fluffy muffins loaded with gooey chocolate chips and a hint of vanilla.
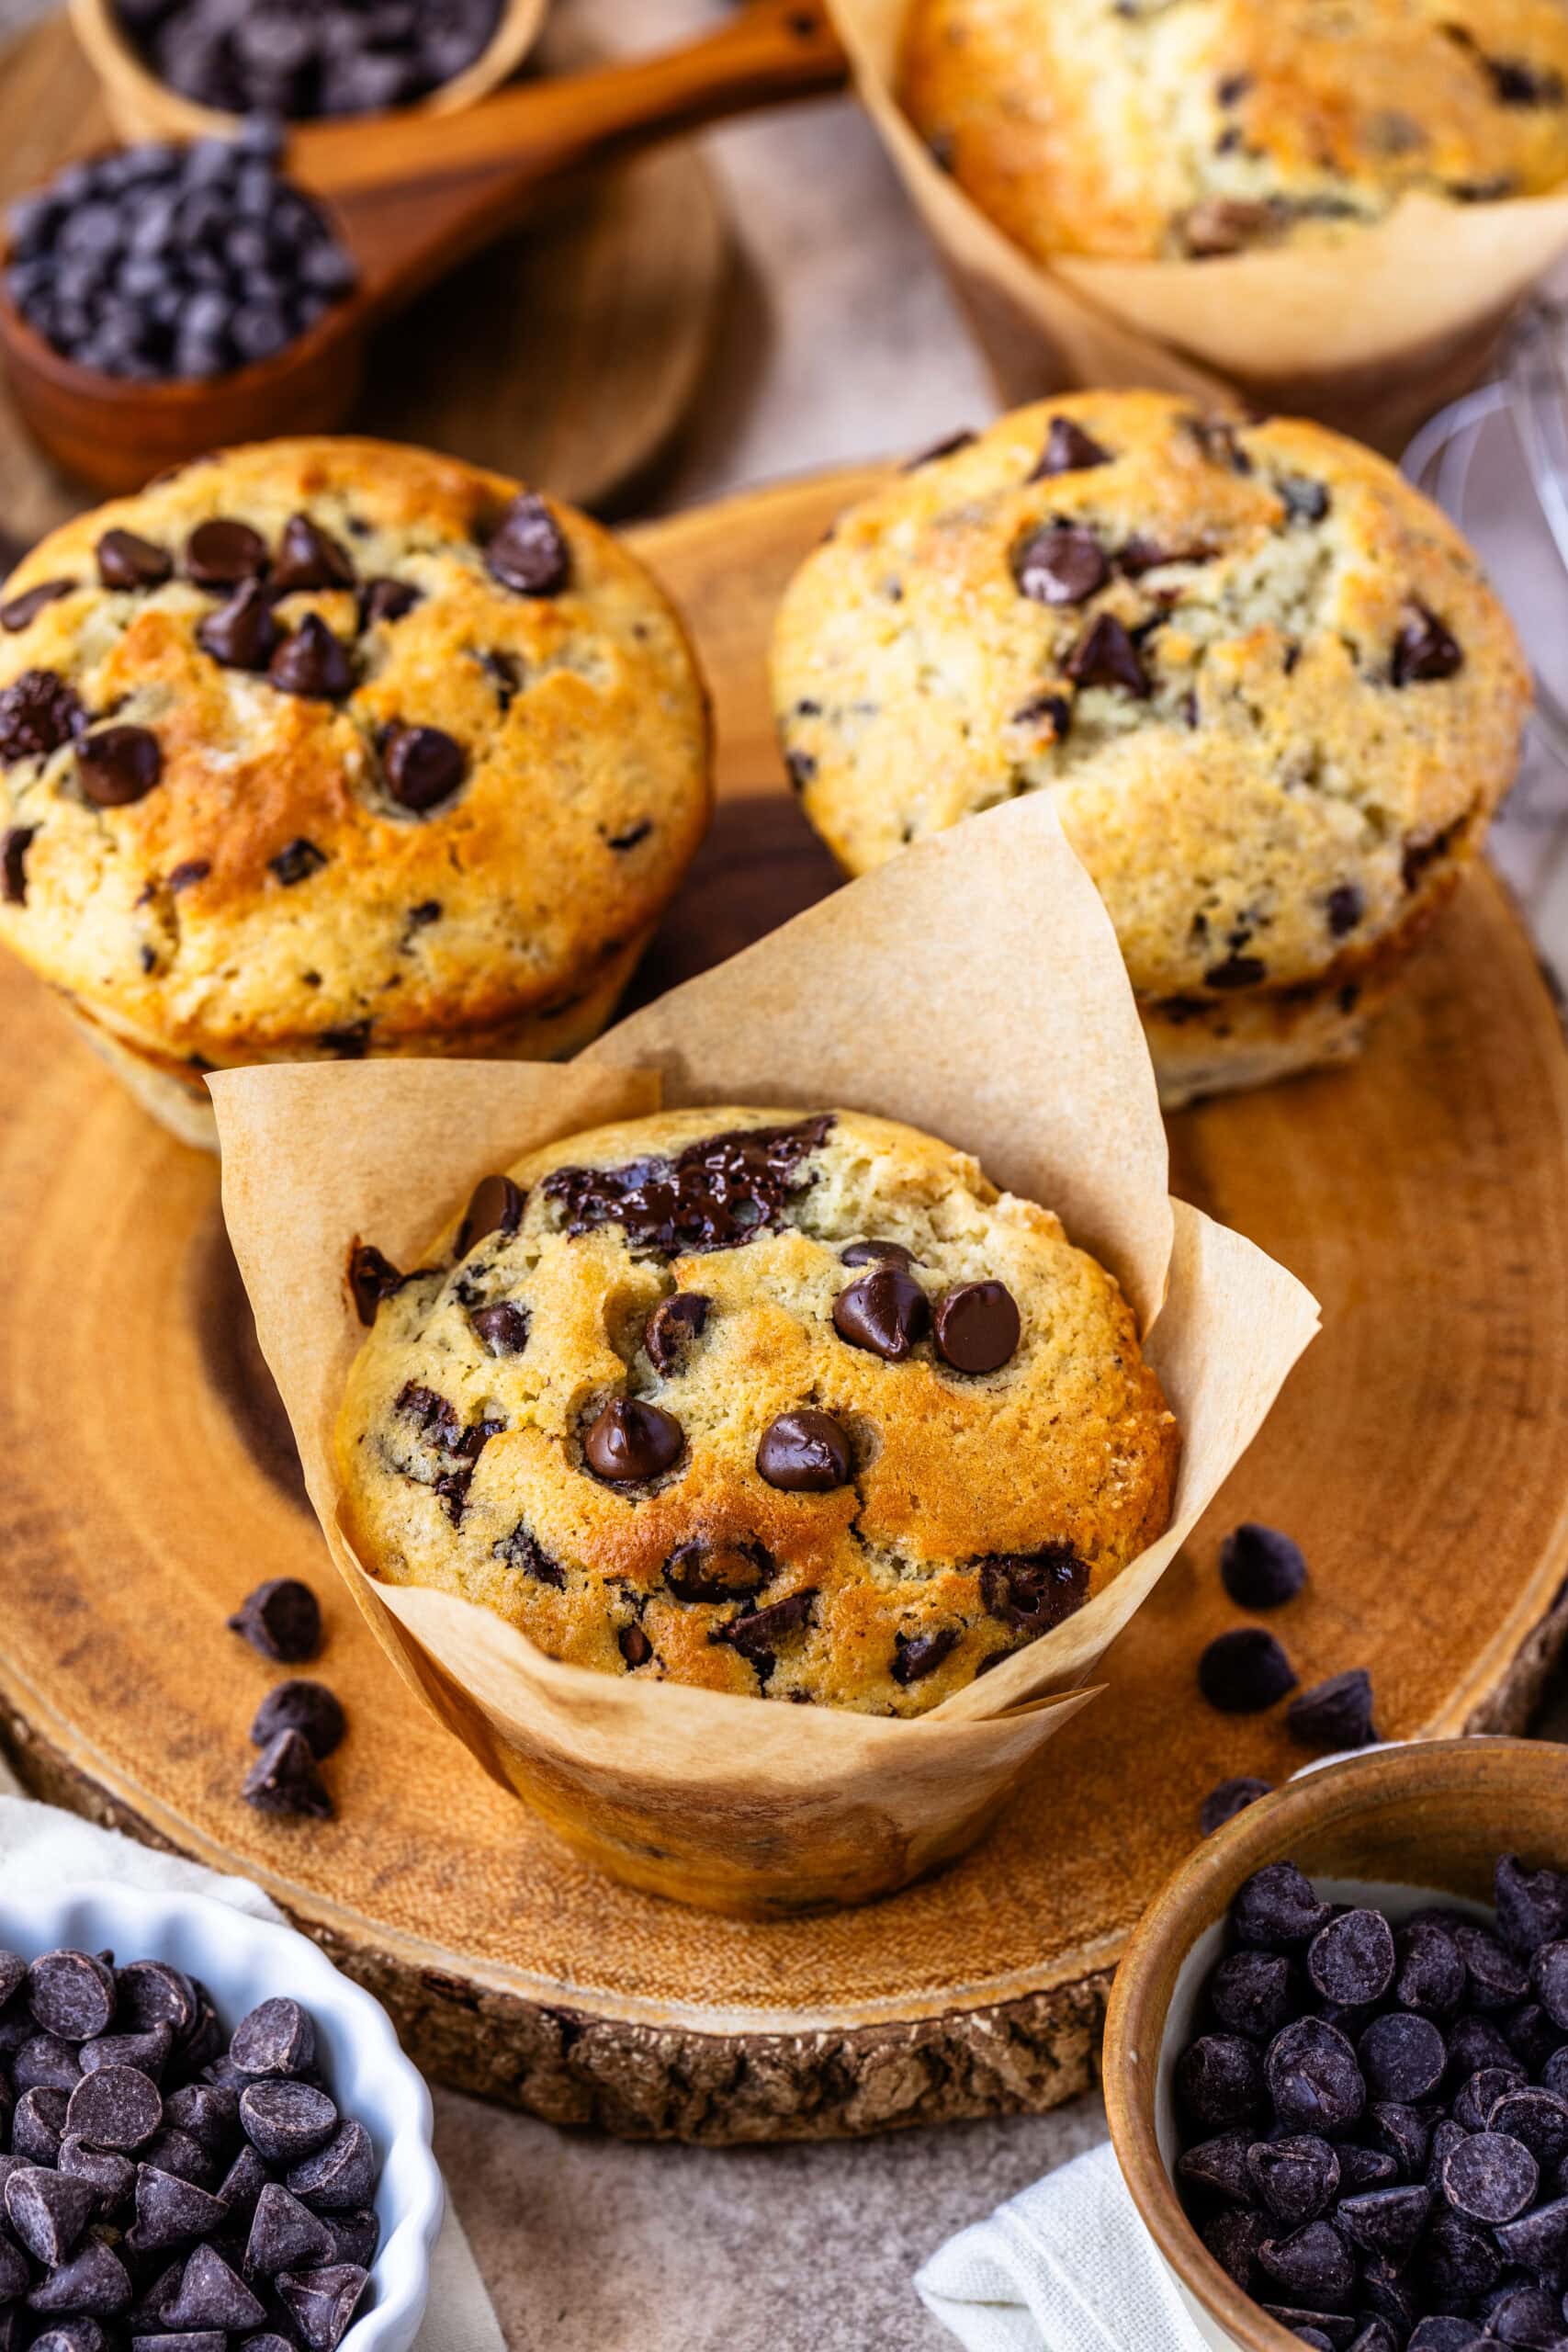
If you’re looking for the ultimate chocolate chip muffin recipe, you’ve come to the right place! These muffins are everything you could want: soft, fluffy, and packed with gooey chocolate chips in every bite. Whether you’re baking for breakfast, brunch, or an afternoon treat, this recipe delivers bakery-quality muffins that are both easy to make and customizable to your taste.
This classic recipe is also perfect to make ahead and store them for just when you need them!
This post may contain affiliate links. I earn a commission from qualified purchases. Please read our Privacy policy here.
Best Chocolate Chip Muffin Recipe
In this post, I’ll walk you through every step of the process, from mixing the perfect batter to baking muffins with a tall, golden rise. You’ll also find helpful tips to make sure your muffins turn out light and moist every time. Plus, I’ll share a few tricks, like resting the batter to achieve that perfect dome shape and using a combination of buttermilk and sour cream for unbeatable flavor and texture.
This recipe is incredibly versatile, allowing you to swap in different types of chocolate, add nuts, or even make them extra indulgent with a sprinkle of crystal sugar on top. The best part? These muffins store beautifully and can be frozen for future enjoyment, so you can always have a batch on hand.
Follow along, and by the end of this post, you’ll have everything you need to bake up the best chocolate chip muffins ever! The full recipe with exact measurements and instructions is waiting for you at the bottom of the page, so let’s get started!
Make the Muffin Batter
In a large bowl, whisk together the wet ingredients: eggs, buttermilk, sour cream, melted butter, oil, and vanilla.
In another bowl, mix the flour, baking powder, baking soda, salt, cinnamon, and sugar.
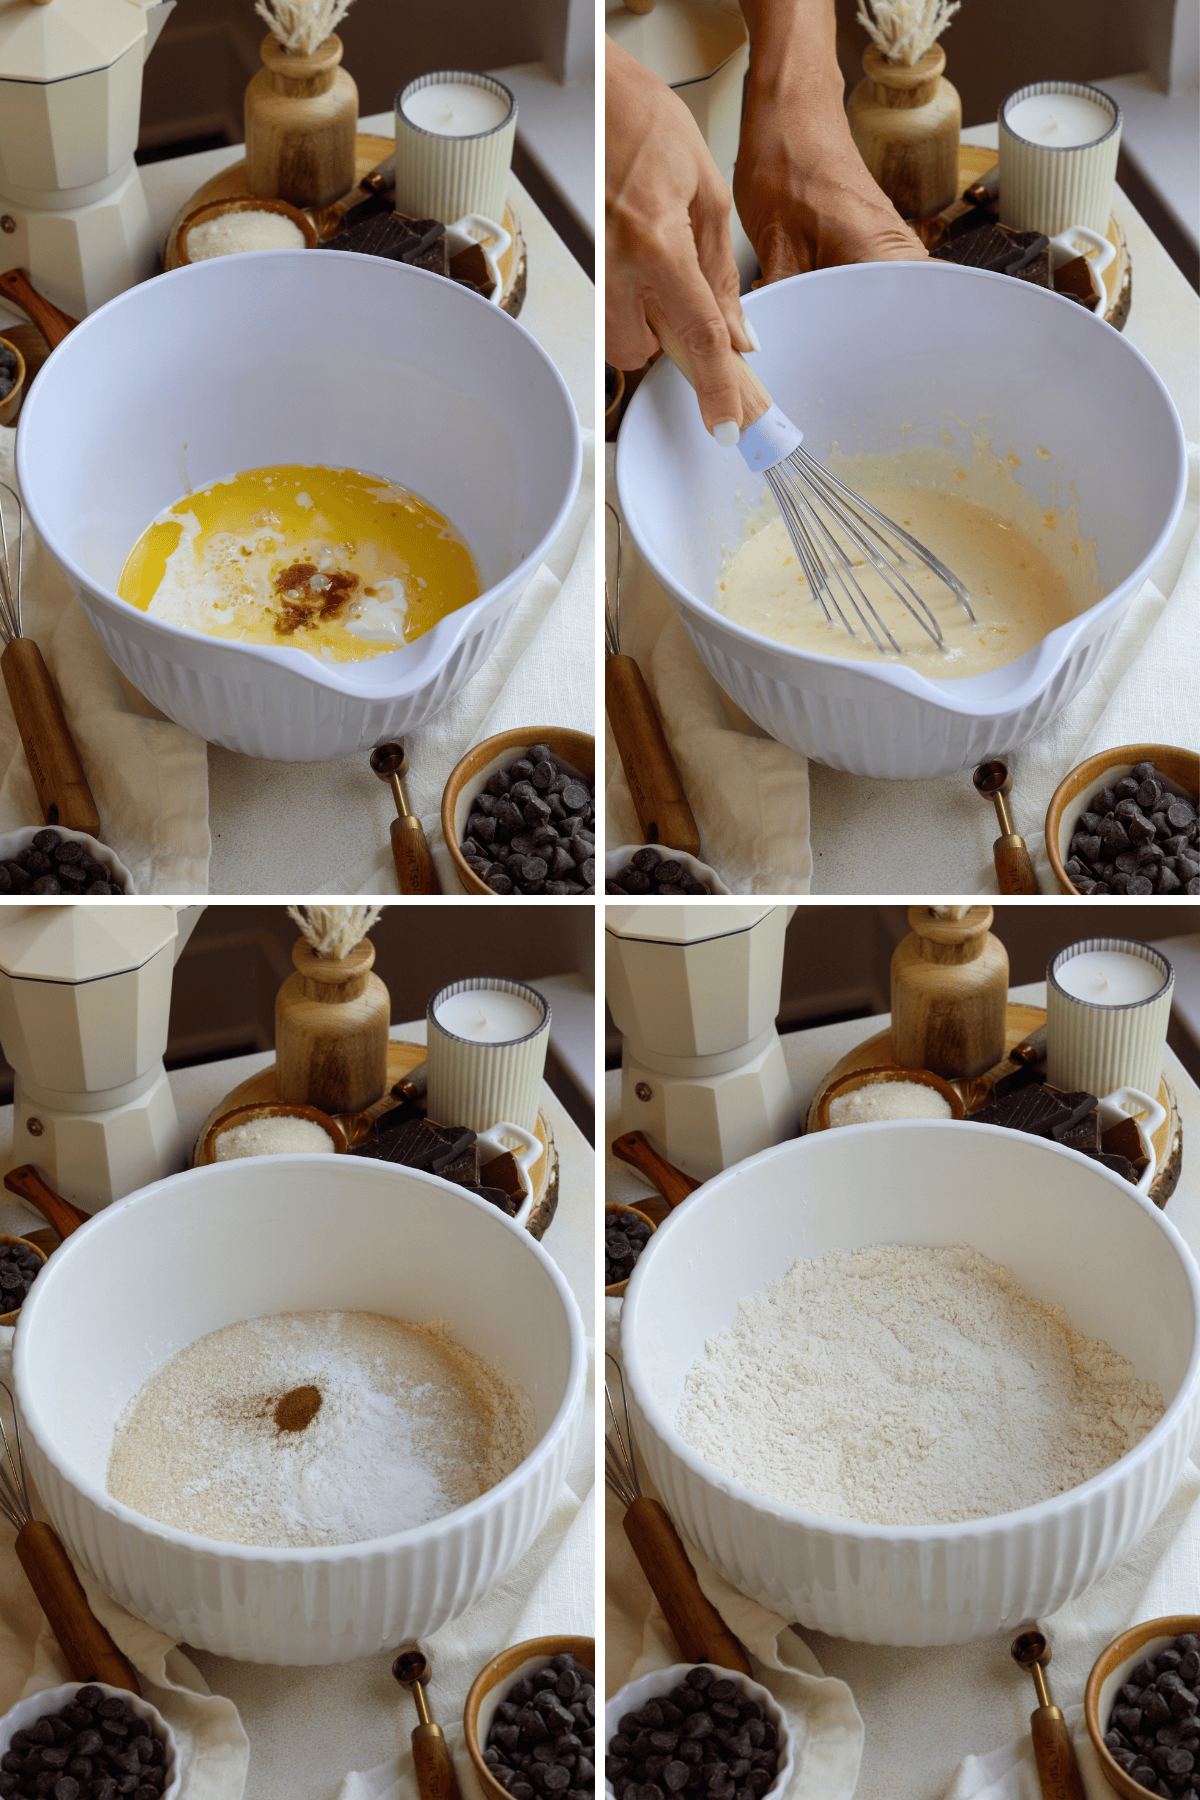
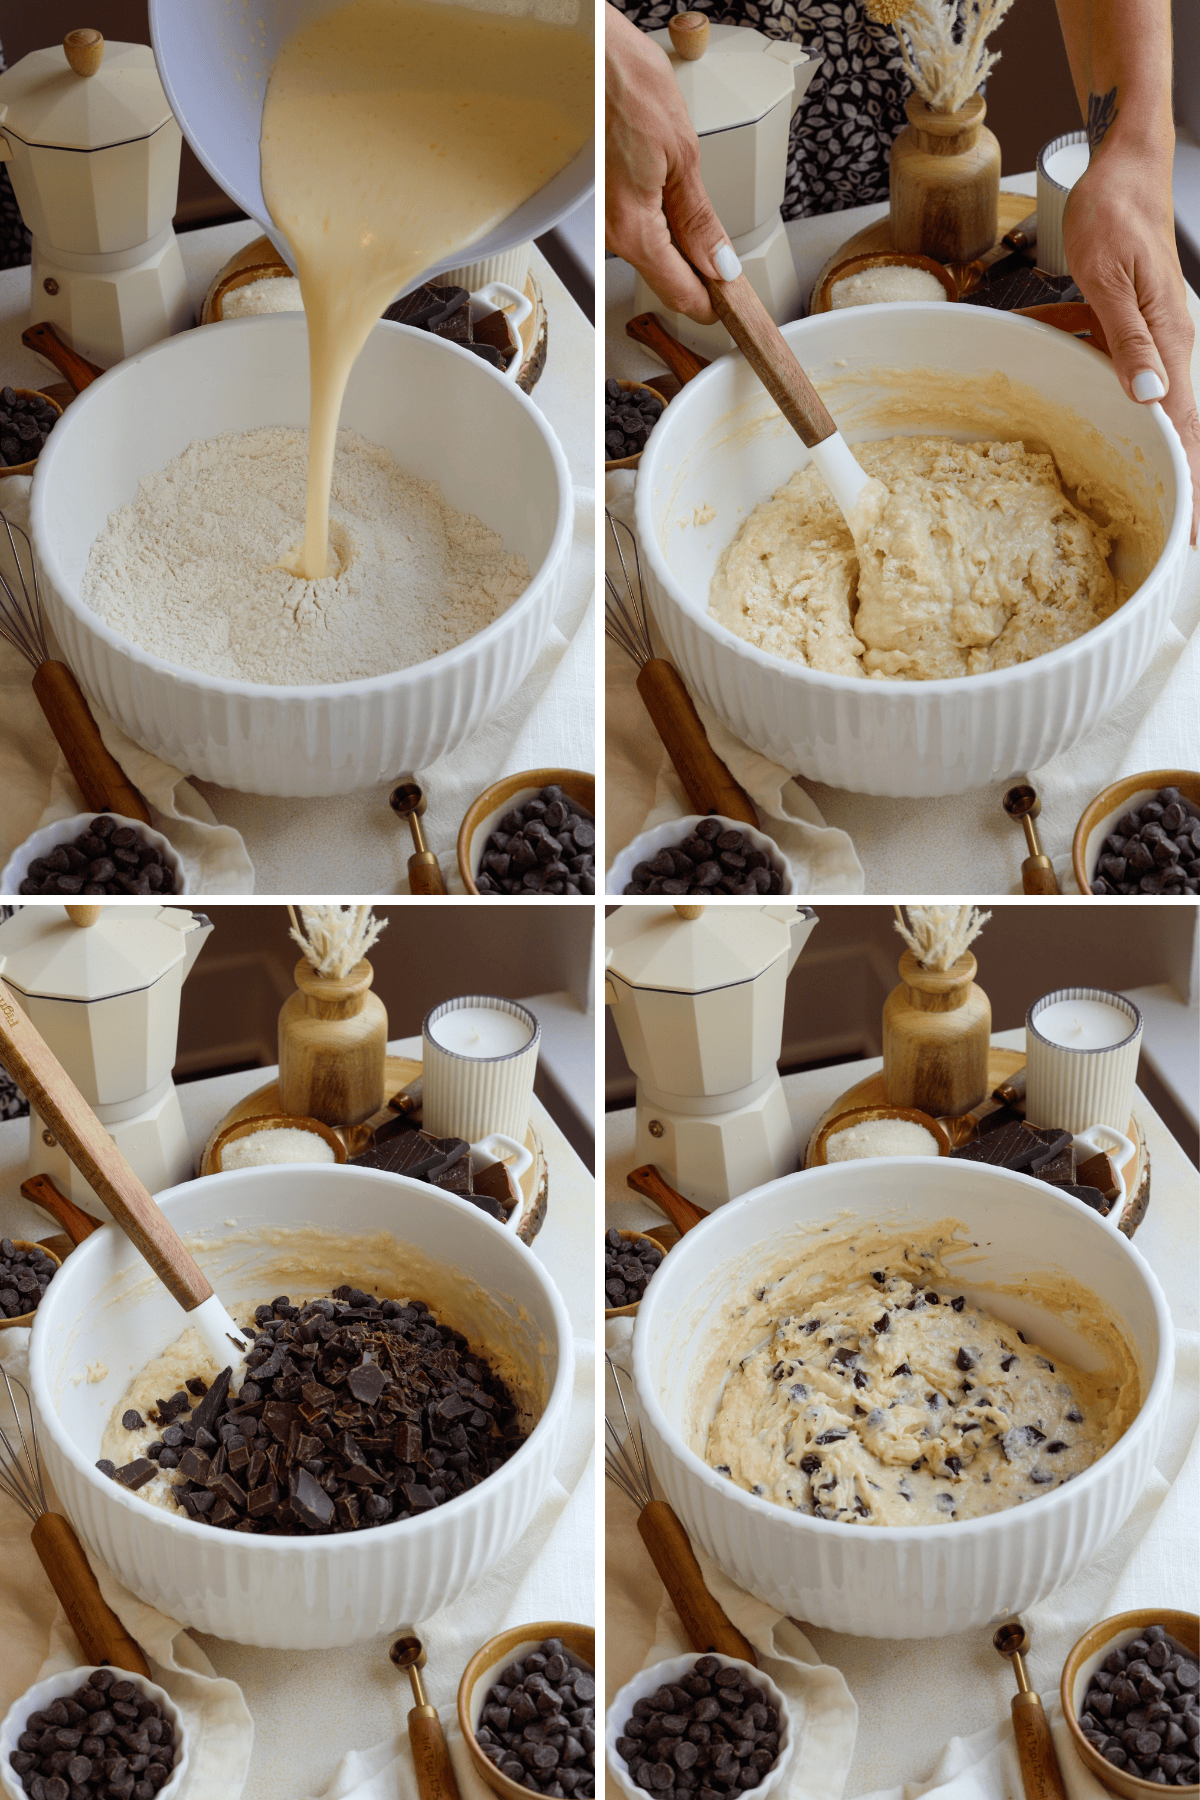
Add the wet mixture to the dry ingredients and gently stir with a spatula until almost combined.
Fold in the chocolate chips, or chopped chocolate. Do not over mix!
Cover the bowl with a towel and let the batter rest for 30 minutes. It’s not mandatory to rest the batter, but it can help the muffins get a taller rise. This is a good time to start preheating the oven to 425ºF.
Baking
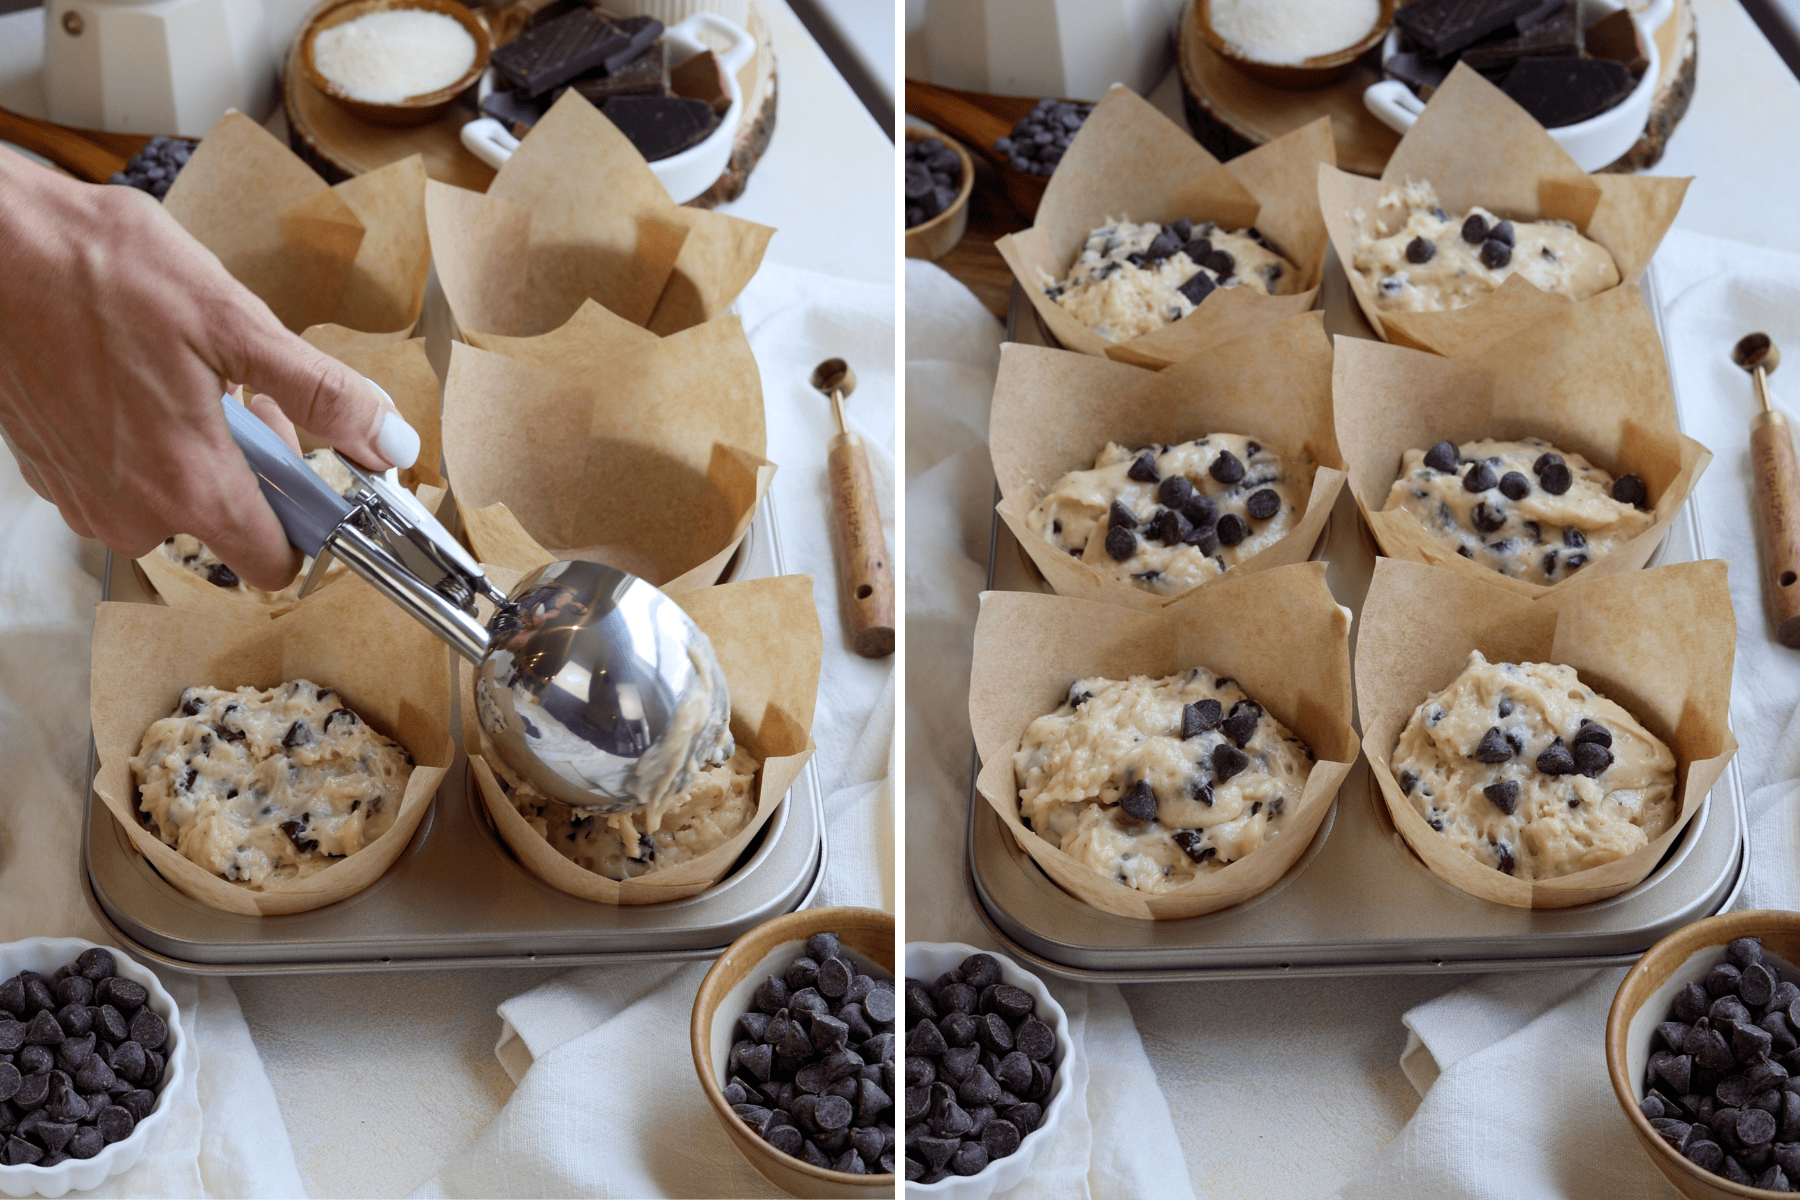
When ready to bake, fill each muffin cavity into the prepared muffin cups to the top with batter and sprinkle with the crystal sugar if you desire. You can also add more chocolate chips on top at this stage.
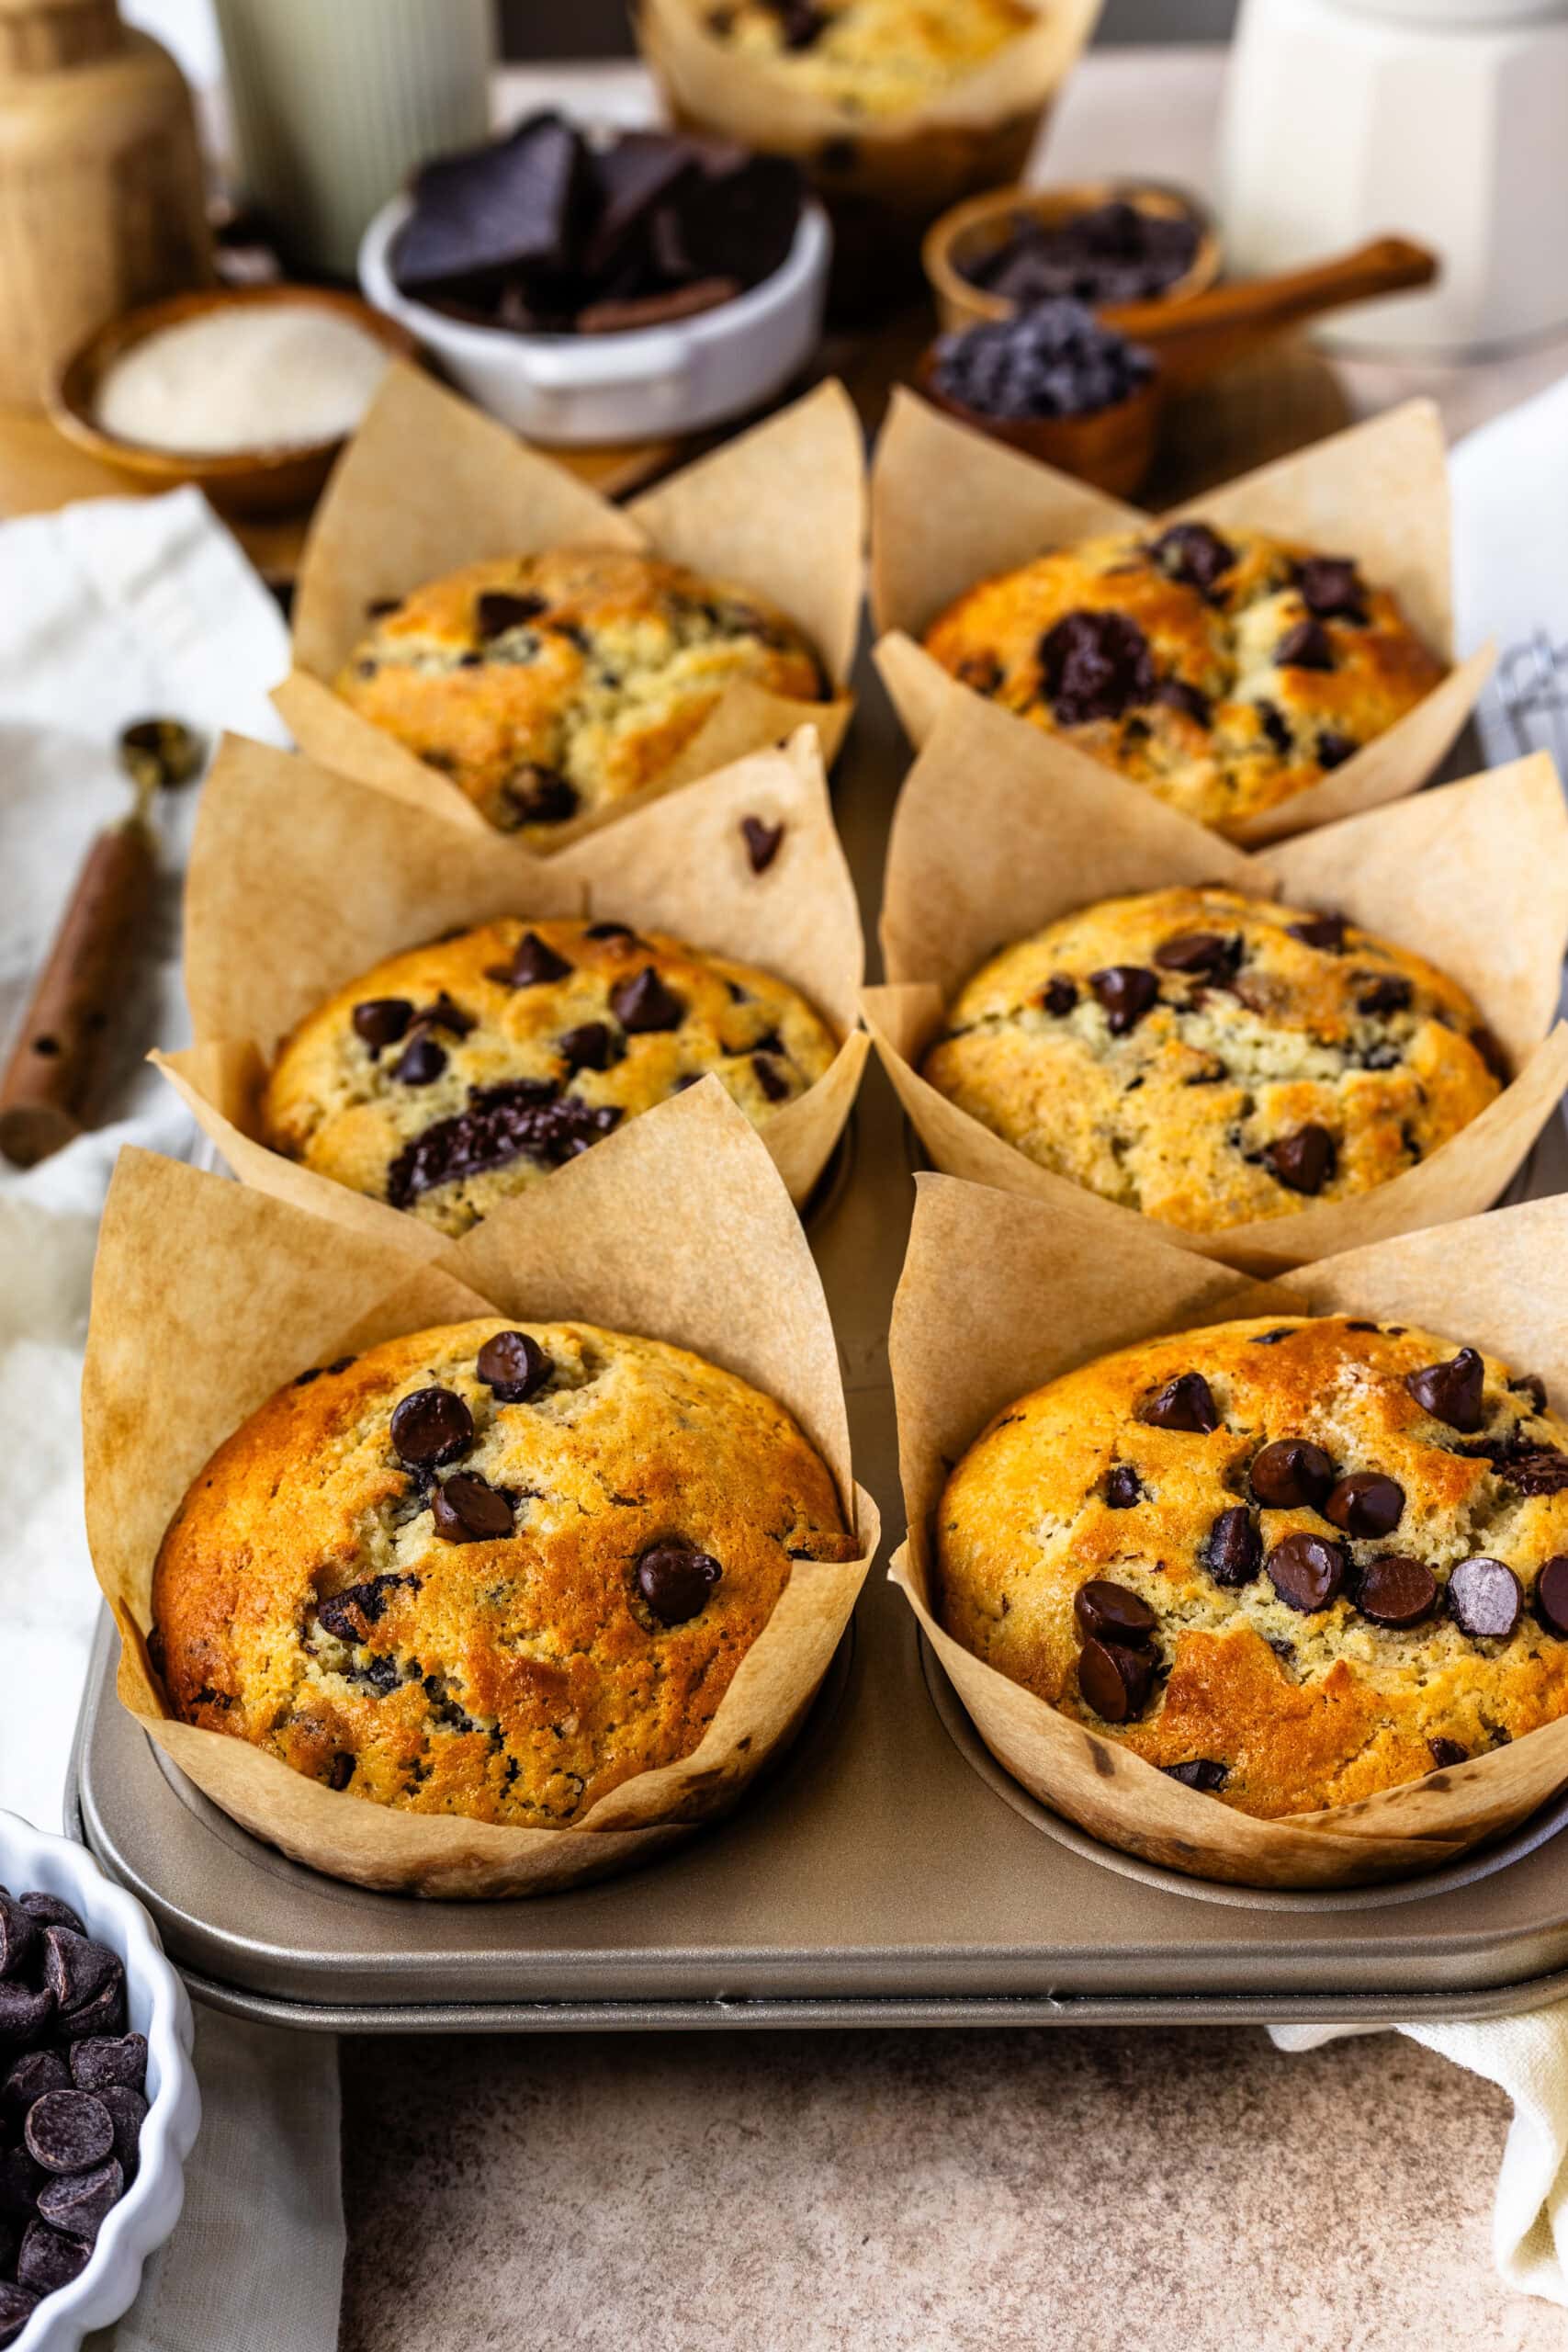
Bake in the preheated oven at 425ºF for 7 minutes. Then lower the temperature to 350ºF and bake for an additional 12 to 15 minutes, or until golden around the edges and a toothpick inserted into the center comes out clean
Let the muffins cool before serving.
Storage
Store at room temperature in a container with a lid for up to 1 day. For longer storage, place in the fridge and let come to room temperature or briefly warm in a toaster oven before serving. Refrigerated muffins stay fresh for up to 4 days.
To freeze, place in a freezer bag or airtight container and freeze for up to 2 months. To thaw, let sit at room temperature for about 1 hour or in the fridge overnight. For quick thawing, wrap in a paper towel and microwave in 15-second intervals, or wrap in foil and bake at 350ºF for 10 to 15 minutes until thawed.
Why rest muffin batter
You can rest muffin batter anywhere from 30 minutes to overnight in the fridge.
Resting muffin batter helps the muffins achieve a taller rise because it allows time for the gluten in the flour to relax and the starches to fully hydrate. Here’s a more detailed breakdown:
- Hydration of Starches: When the flour mixes with the liquid ingredients, the starches in the flour absorb moisture. Resting the batter gives these starches more time to fully hydrate, which helps create a softer, more tender crumb and improves the texture of the muffins.
- Gluten Relaxation: During mixing, the gluten in the flour is activated, which can make the batter slightly denser. By resting the batter, the gluten has time to relax, leading to a lighter, airier texture when the muffins bake.
- Gas Retention: Muffin batter contains leavening agents like baking powder and baking soda, which produce gases when combined with acidic ingredients (like buttermilk and sour cream). Allowing the batter to rest gives these gases time to distribute evenly throughout the batter. This results in a better rise when the muffins get hit by the heat of the oven, as the trapped gases expand and create that tall, domed top.
- Chilling the Fats: If you rest the batter in the fridge (especially overnight), it can help solidify the melted butter or fats in the batter. When baked, this can create a slight delay in the melting of the fats, allowing the muffins to rise higher before they set in the oven.
Overall, resting the muffin batter gives you that ideal bakery-style muffin with a taller, more pronounced dome and a lighter, fluffier texture.
Tips & Tricks for Getting Perfect Muffins
- Don’t Overmix the Batter: Mix the wet and dry ingredients until just combined. Overmixing can lead to dense, tough muffins. A few lumps are okay.
- Use Room Temperature Ingredients: Ensure that ingredients like eggs, buttermilk, and butter are at room temperature for a smoother batter and more even baking.
- Rest the Batter: Let the muffin batter rest for 30 minutes (or even overnight) to achieve a taller, fluffier rise.
- Fill Muffin Tins Properly: For tall, bakery-style muffins, fill each muffin cup nearly to the top. This helps them rise higher and develop a dome shape.
- Check for Doneness: Insert a toothpick into the center of a muffin. If it comes out clean or with a few moist crumbs, the muffins are done. Over baking can lead to dry muffins.
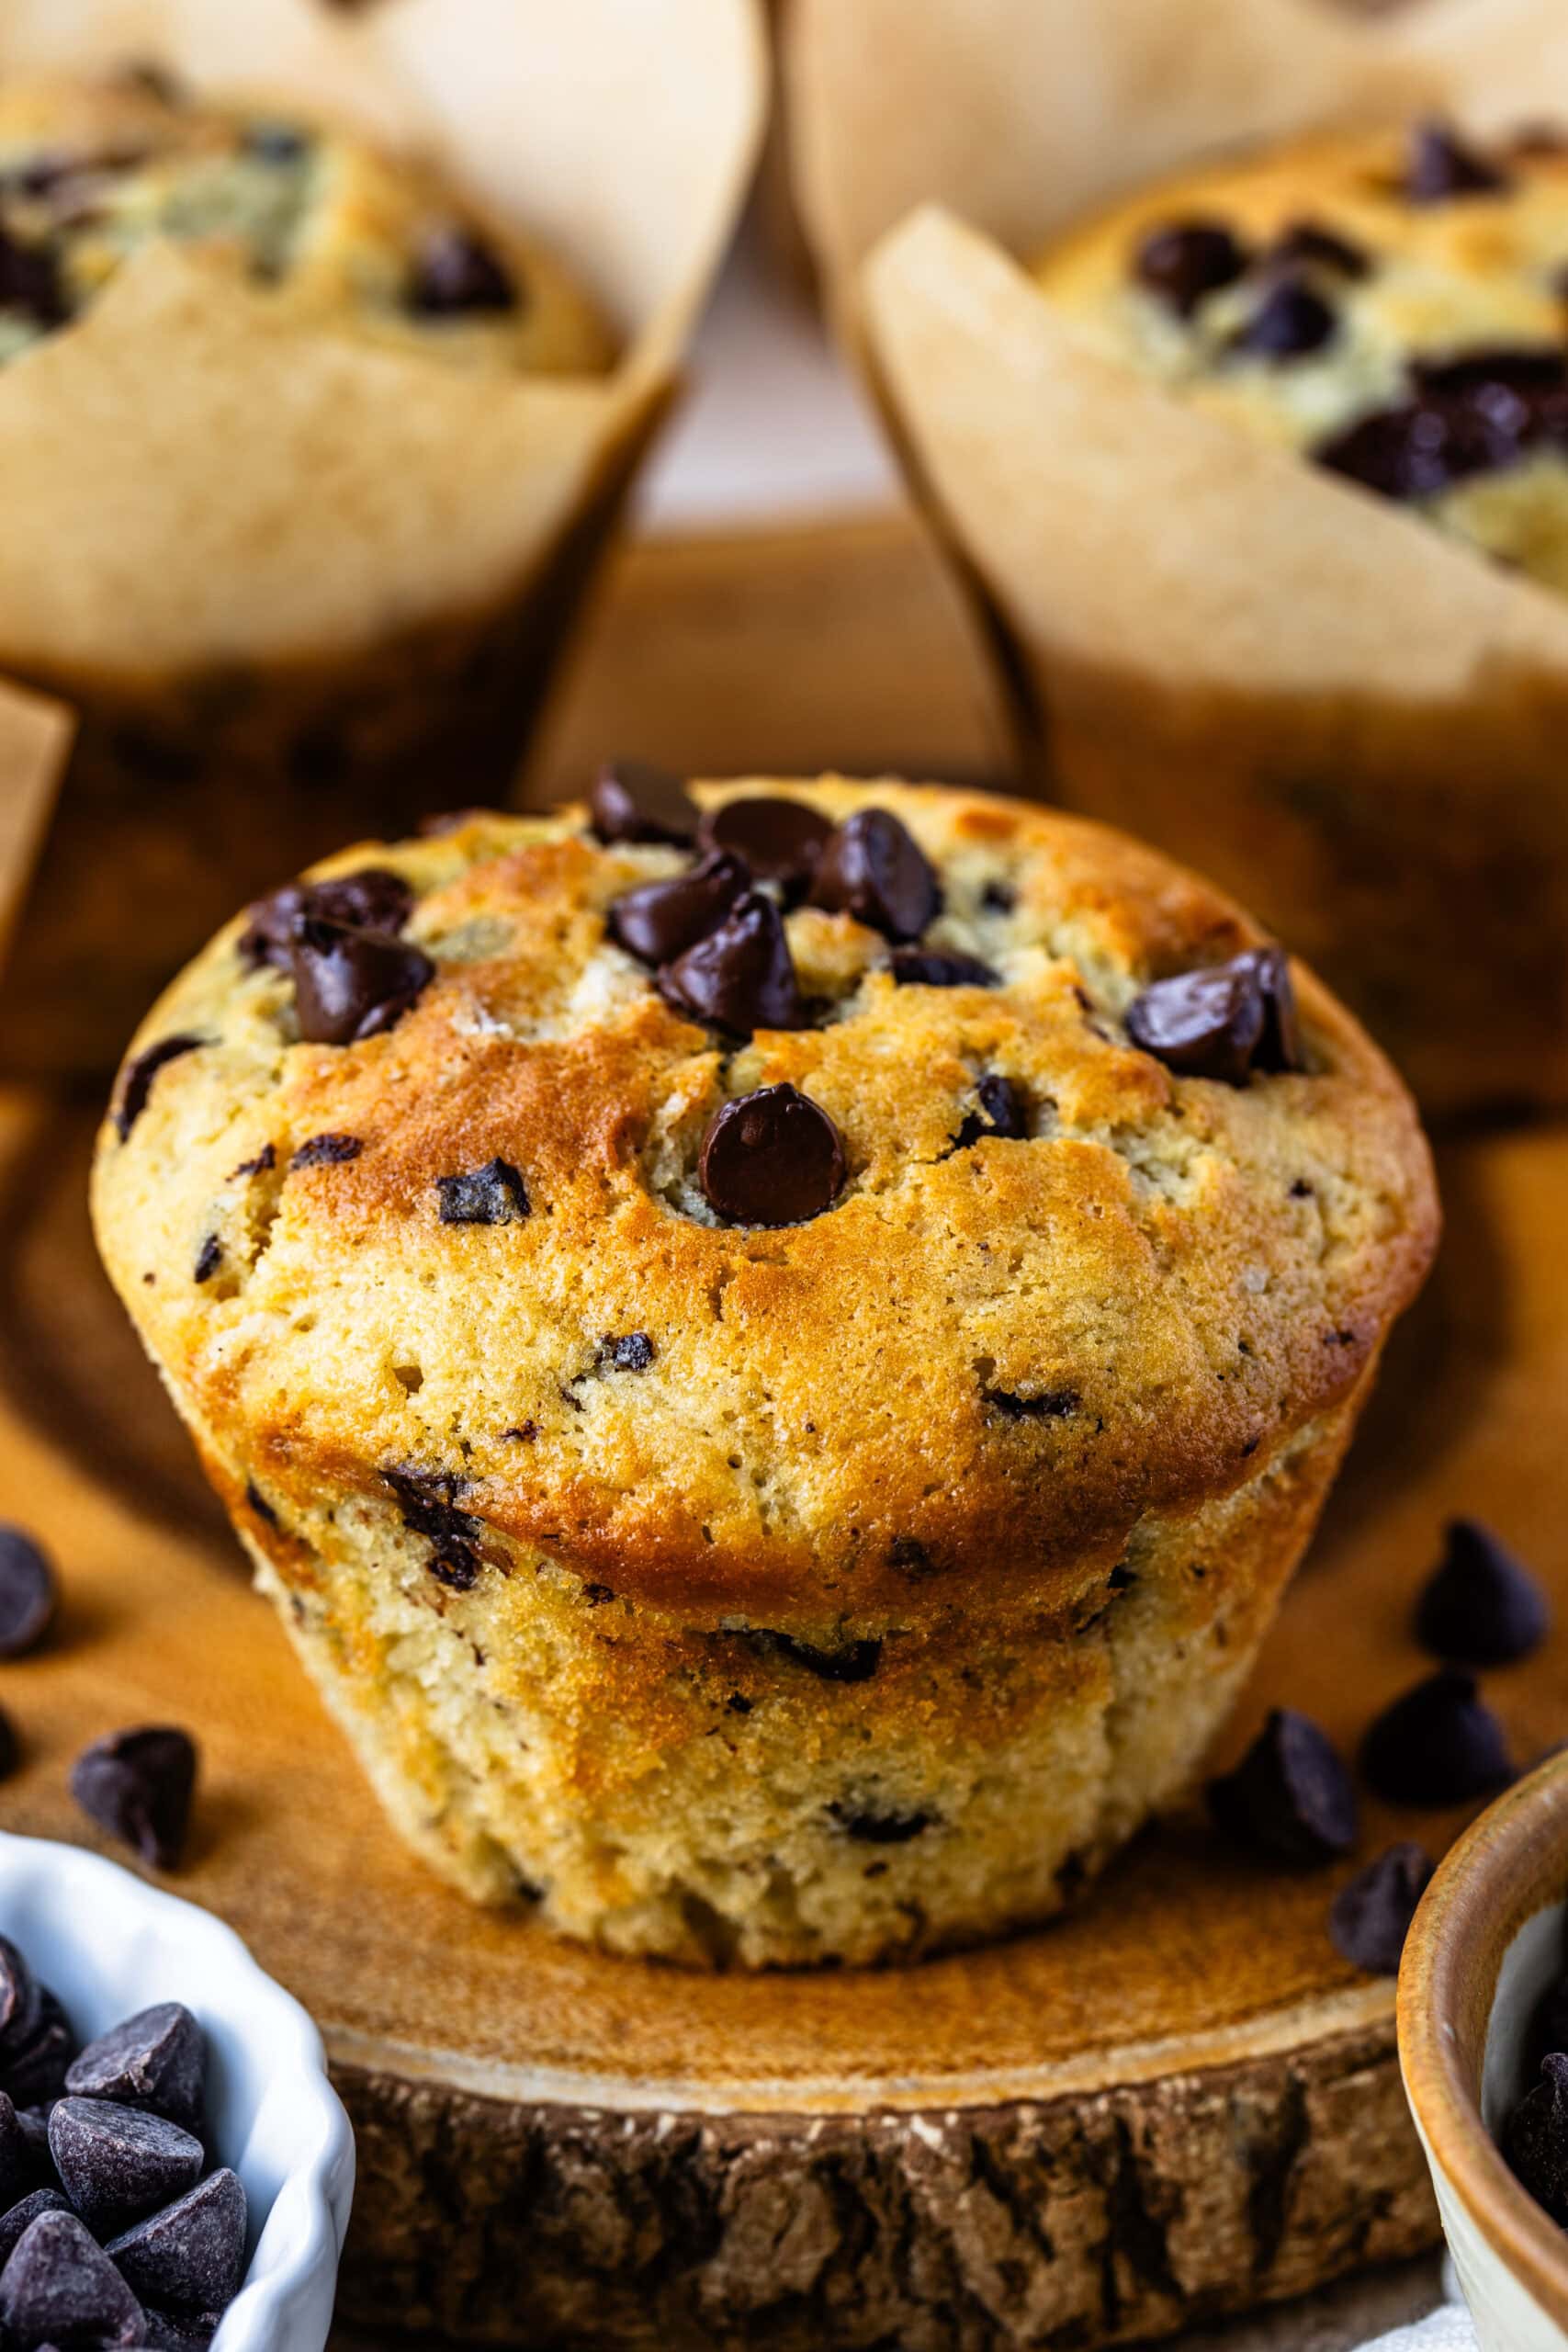
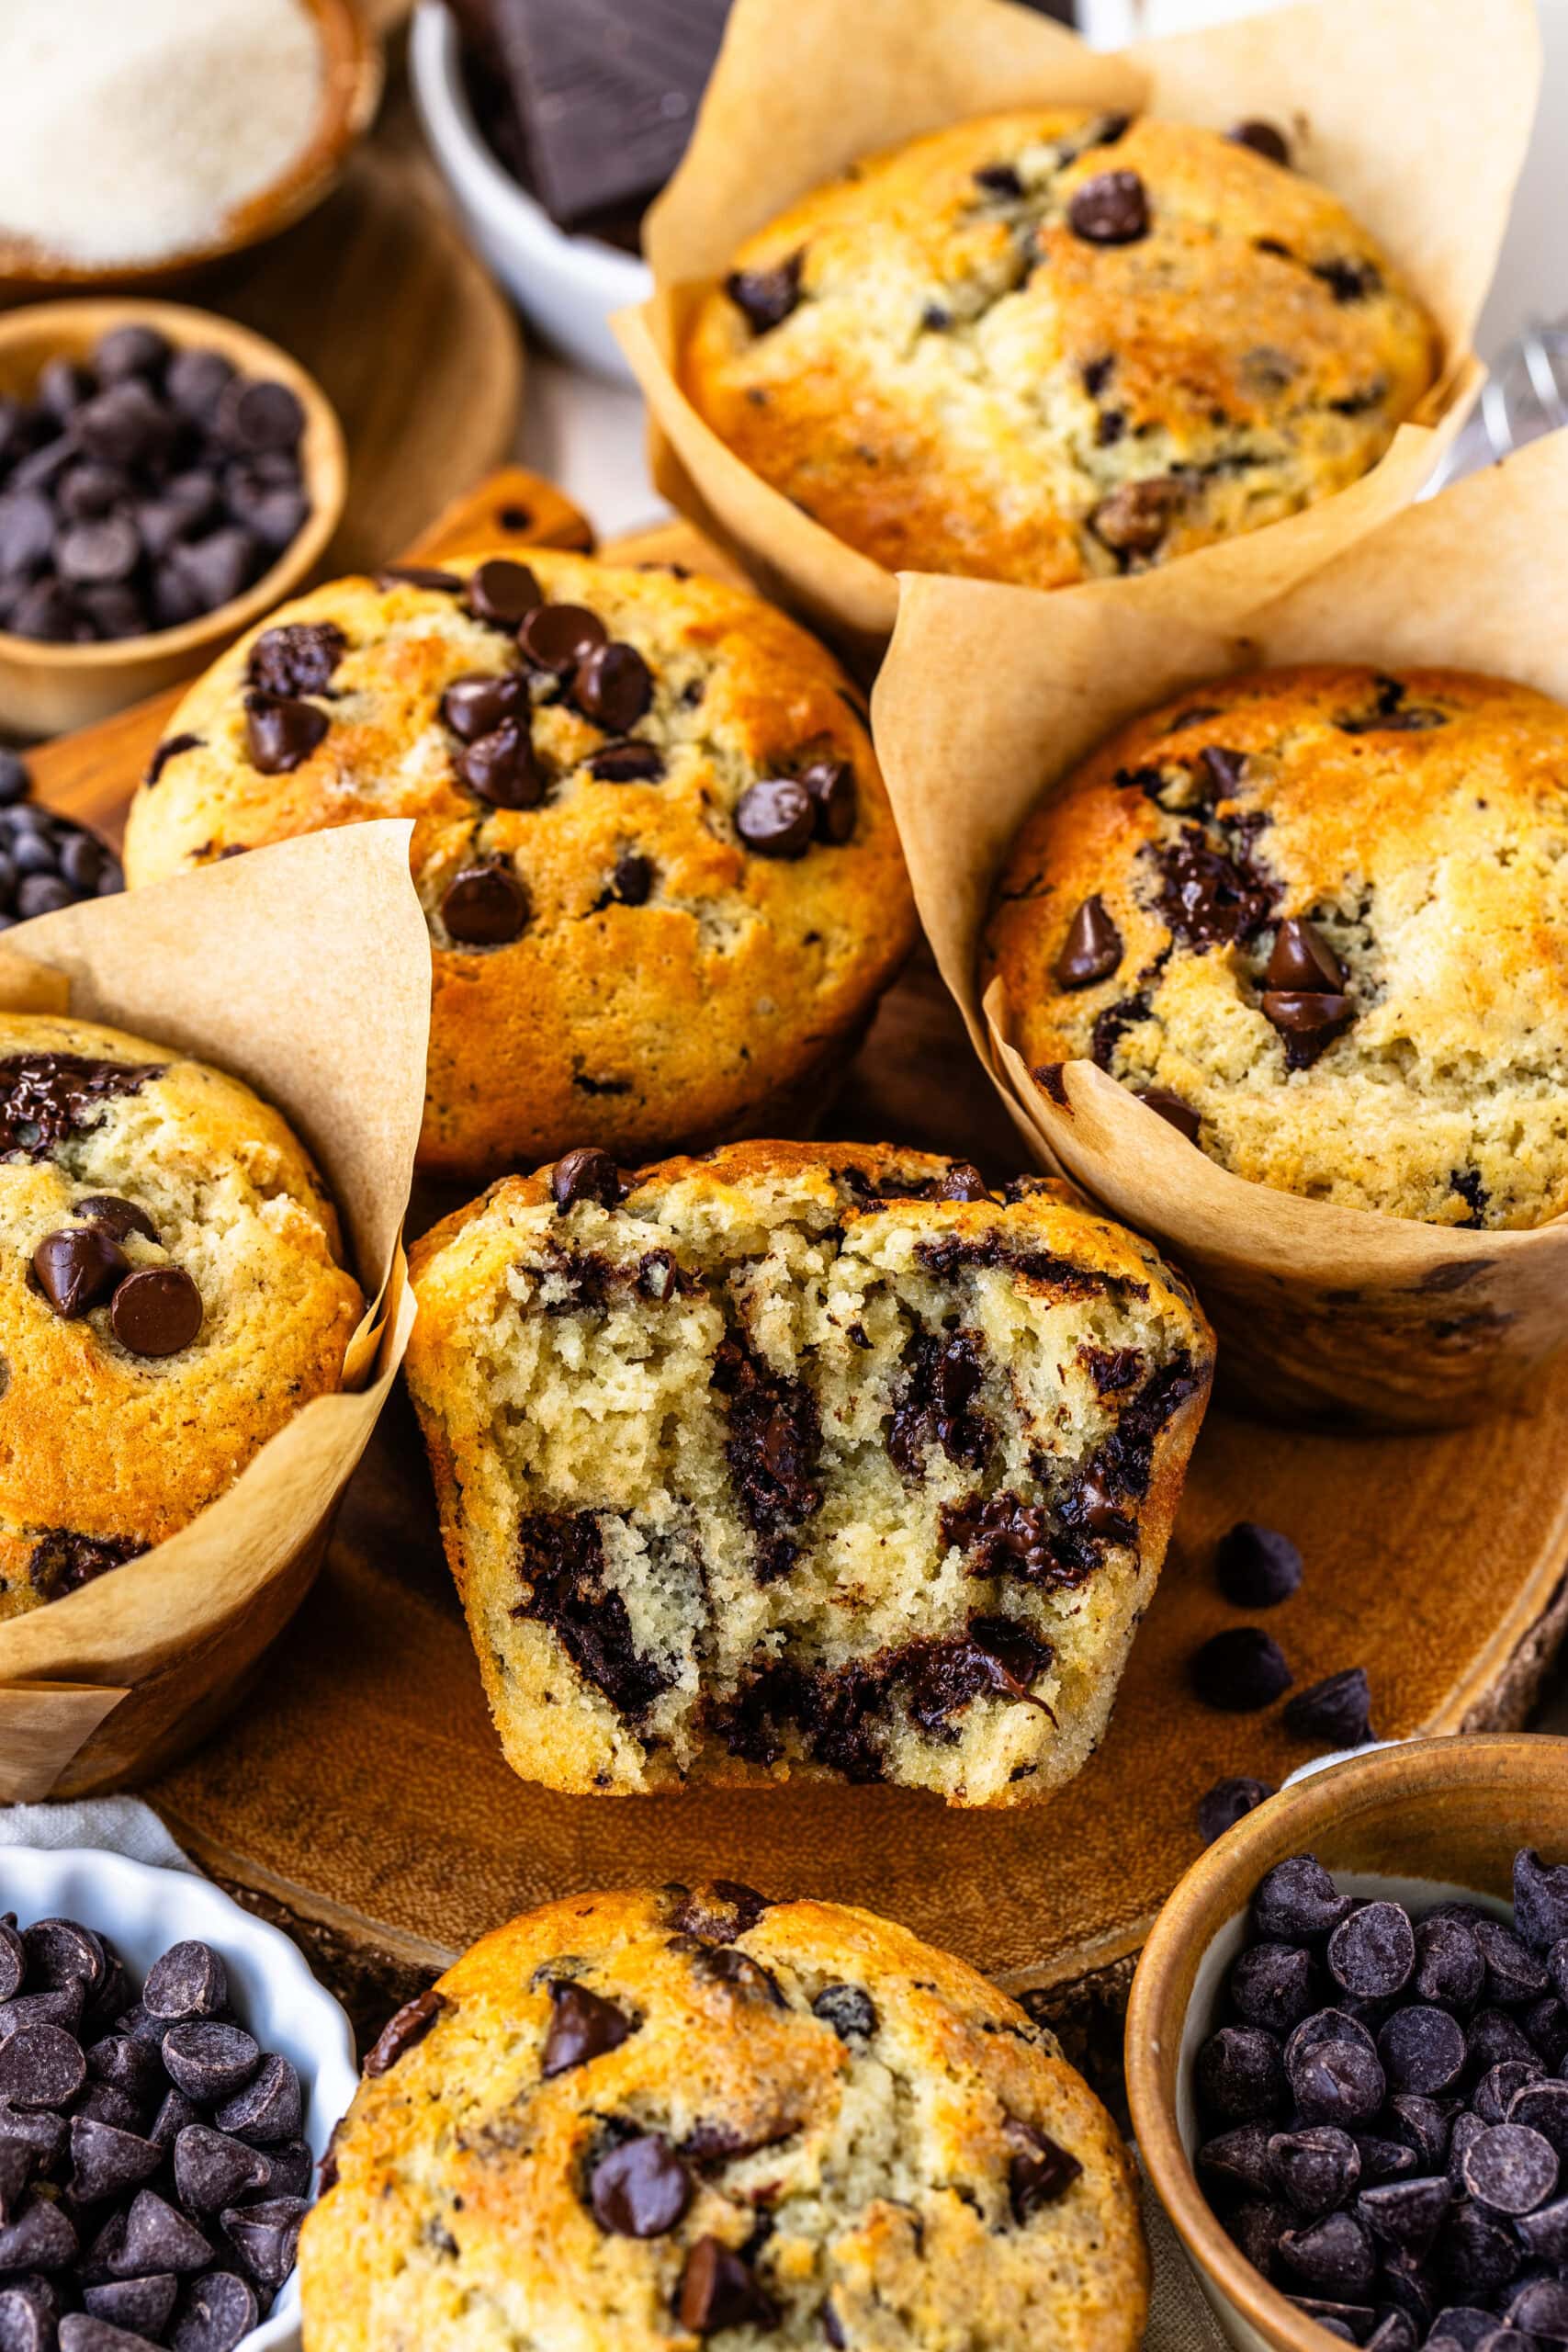
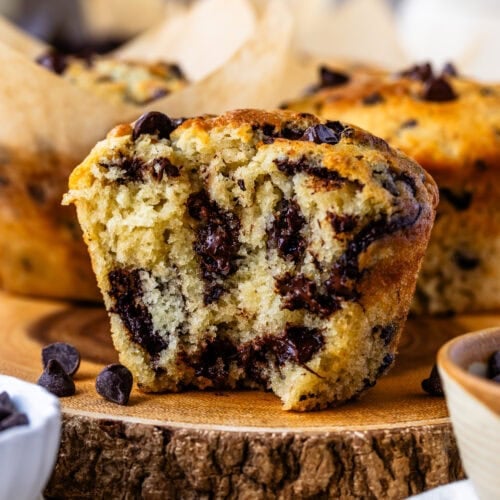
Why You’ll Love These Chocolate Chip Muffins
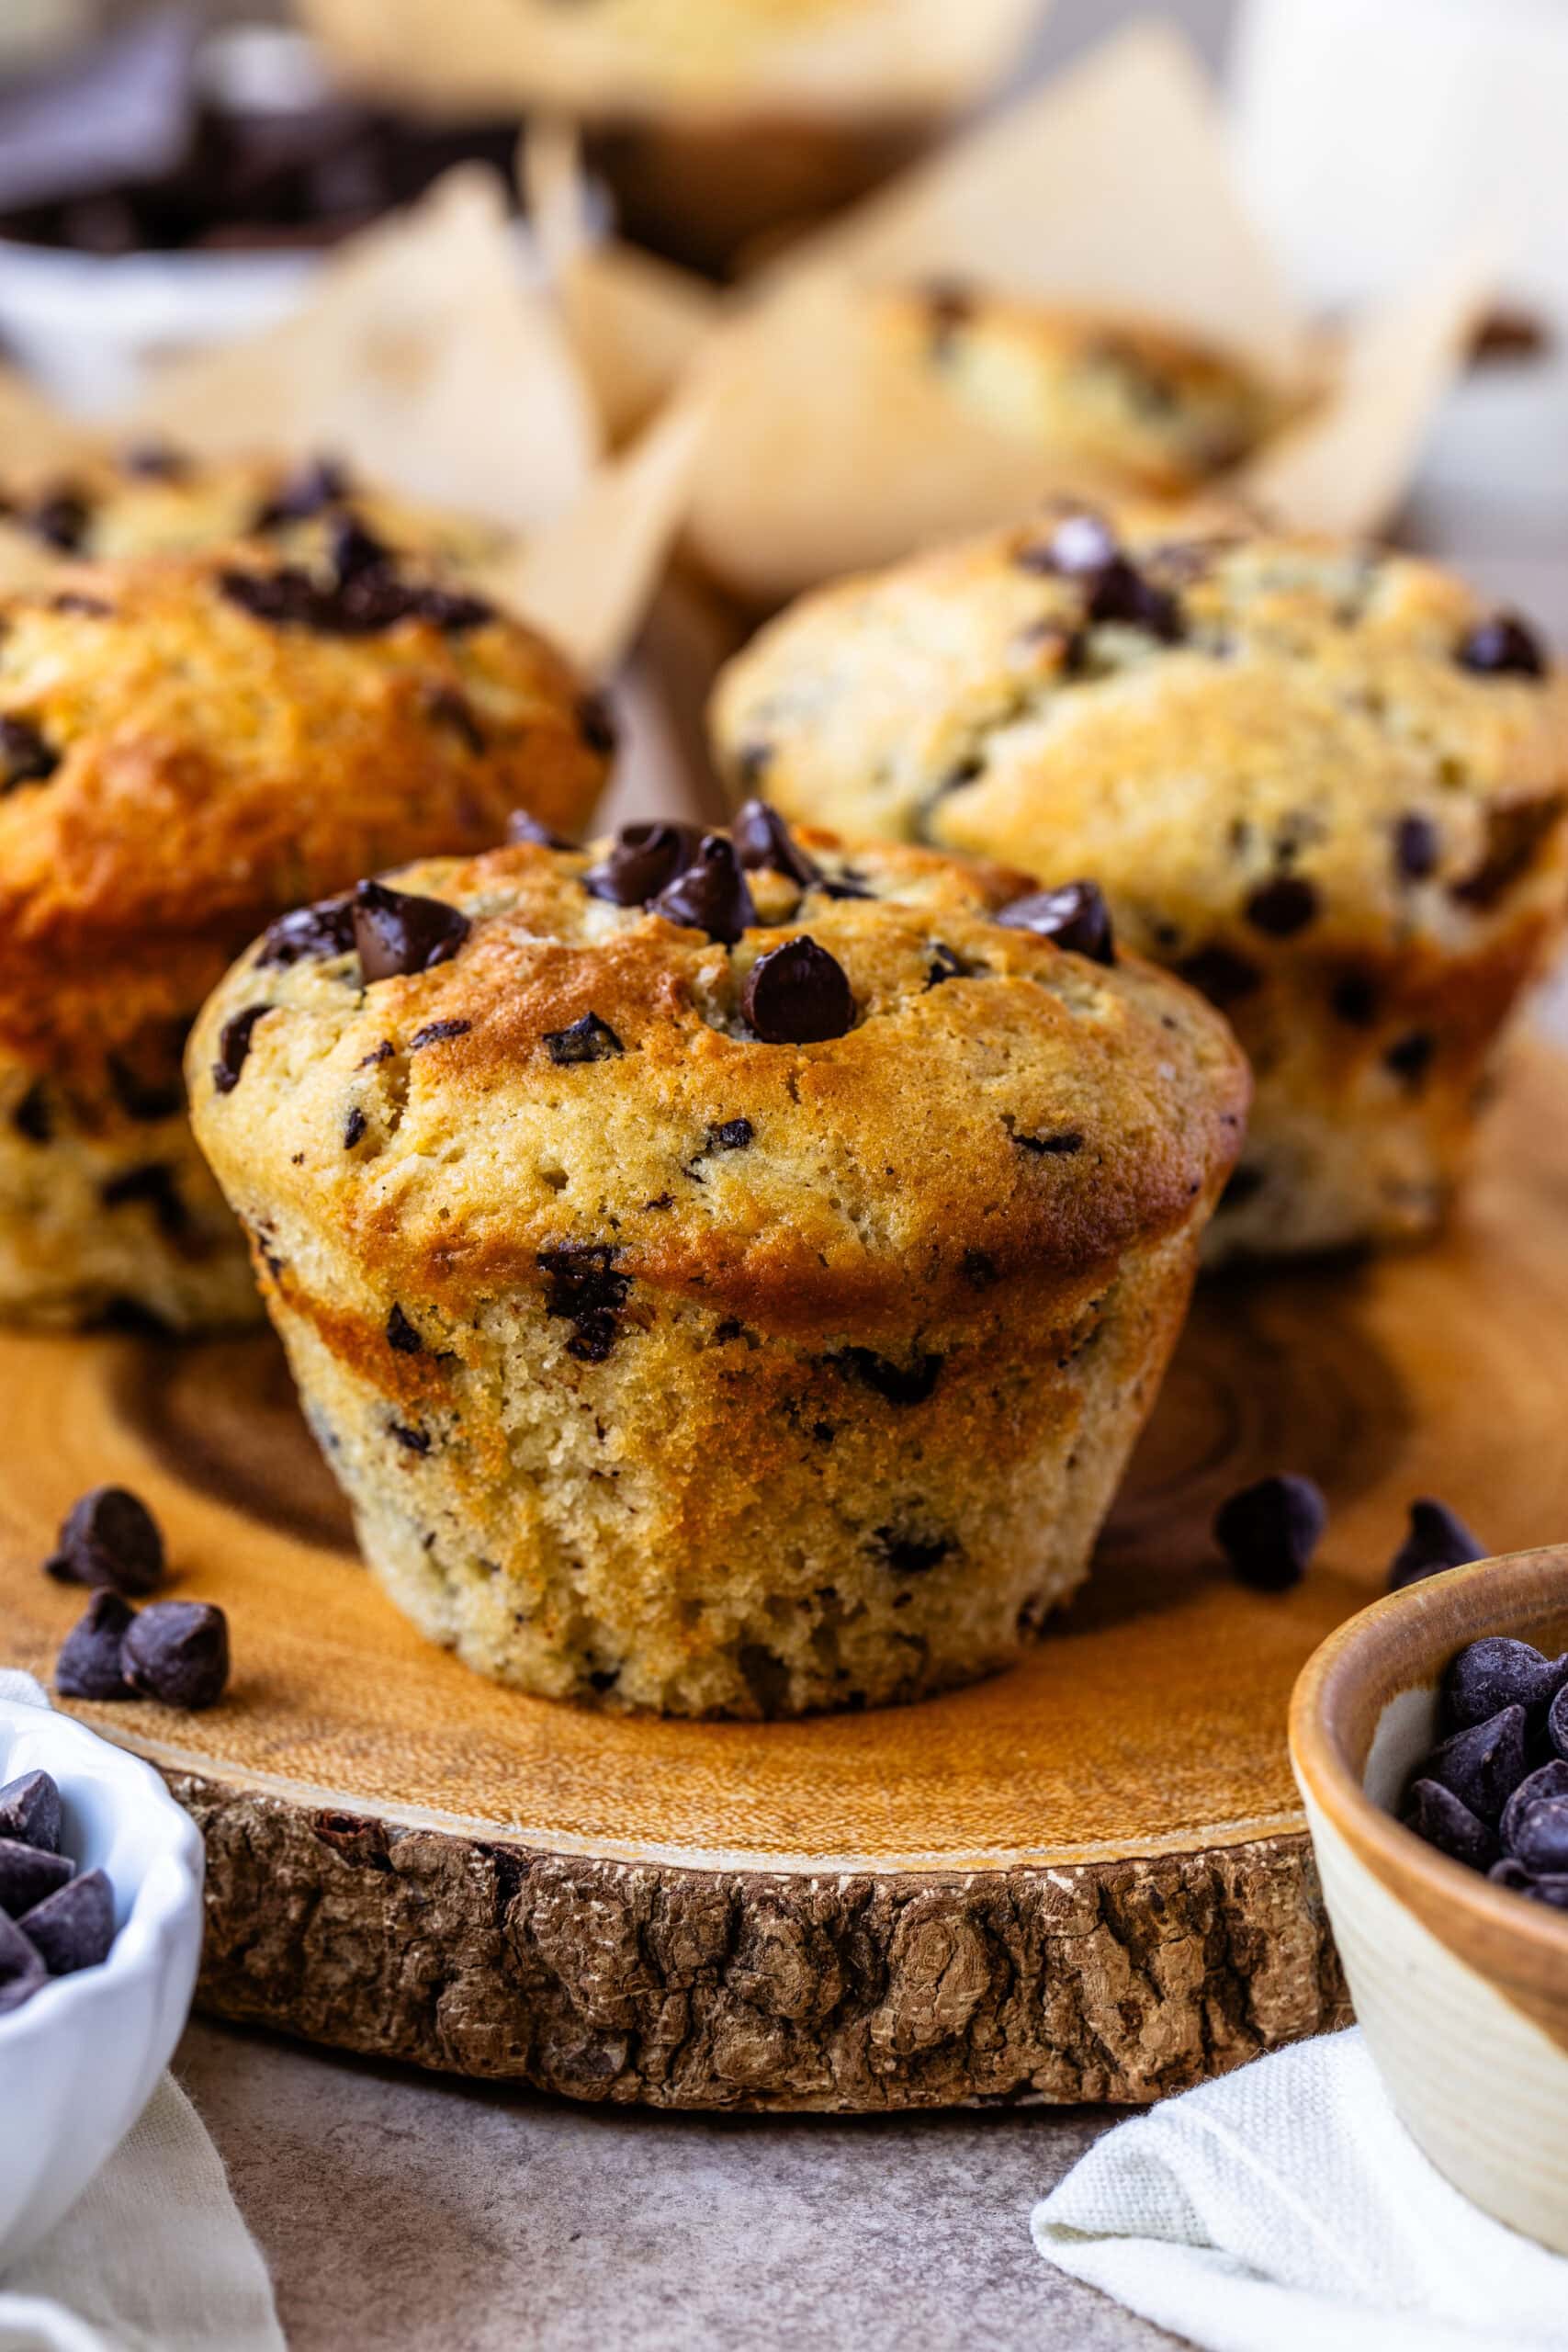
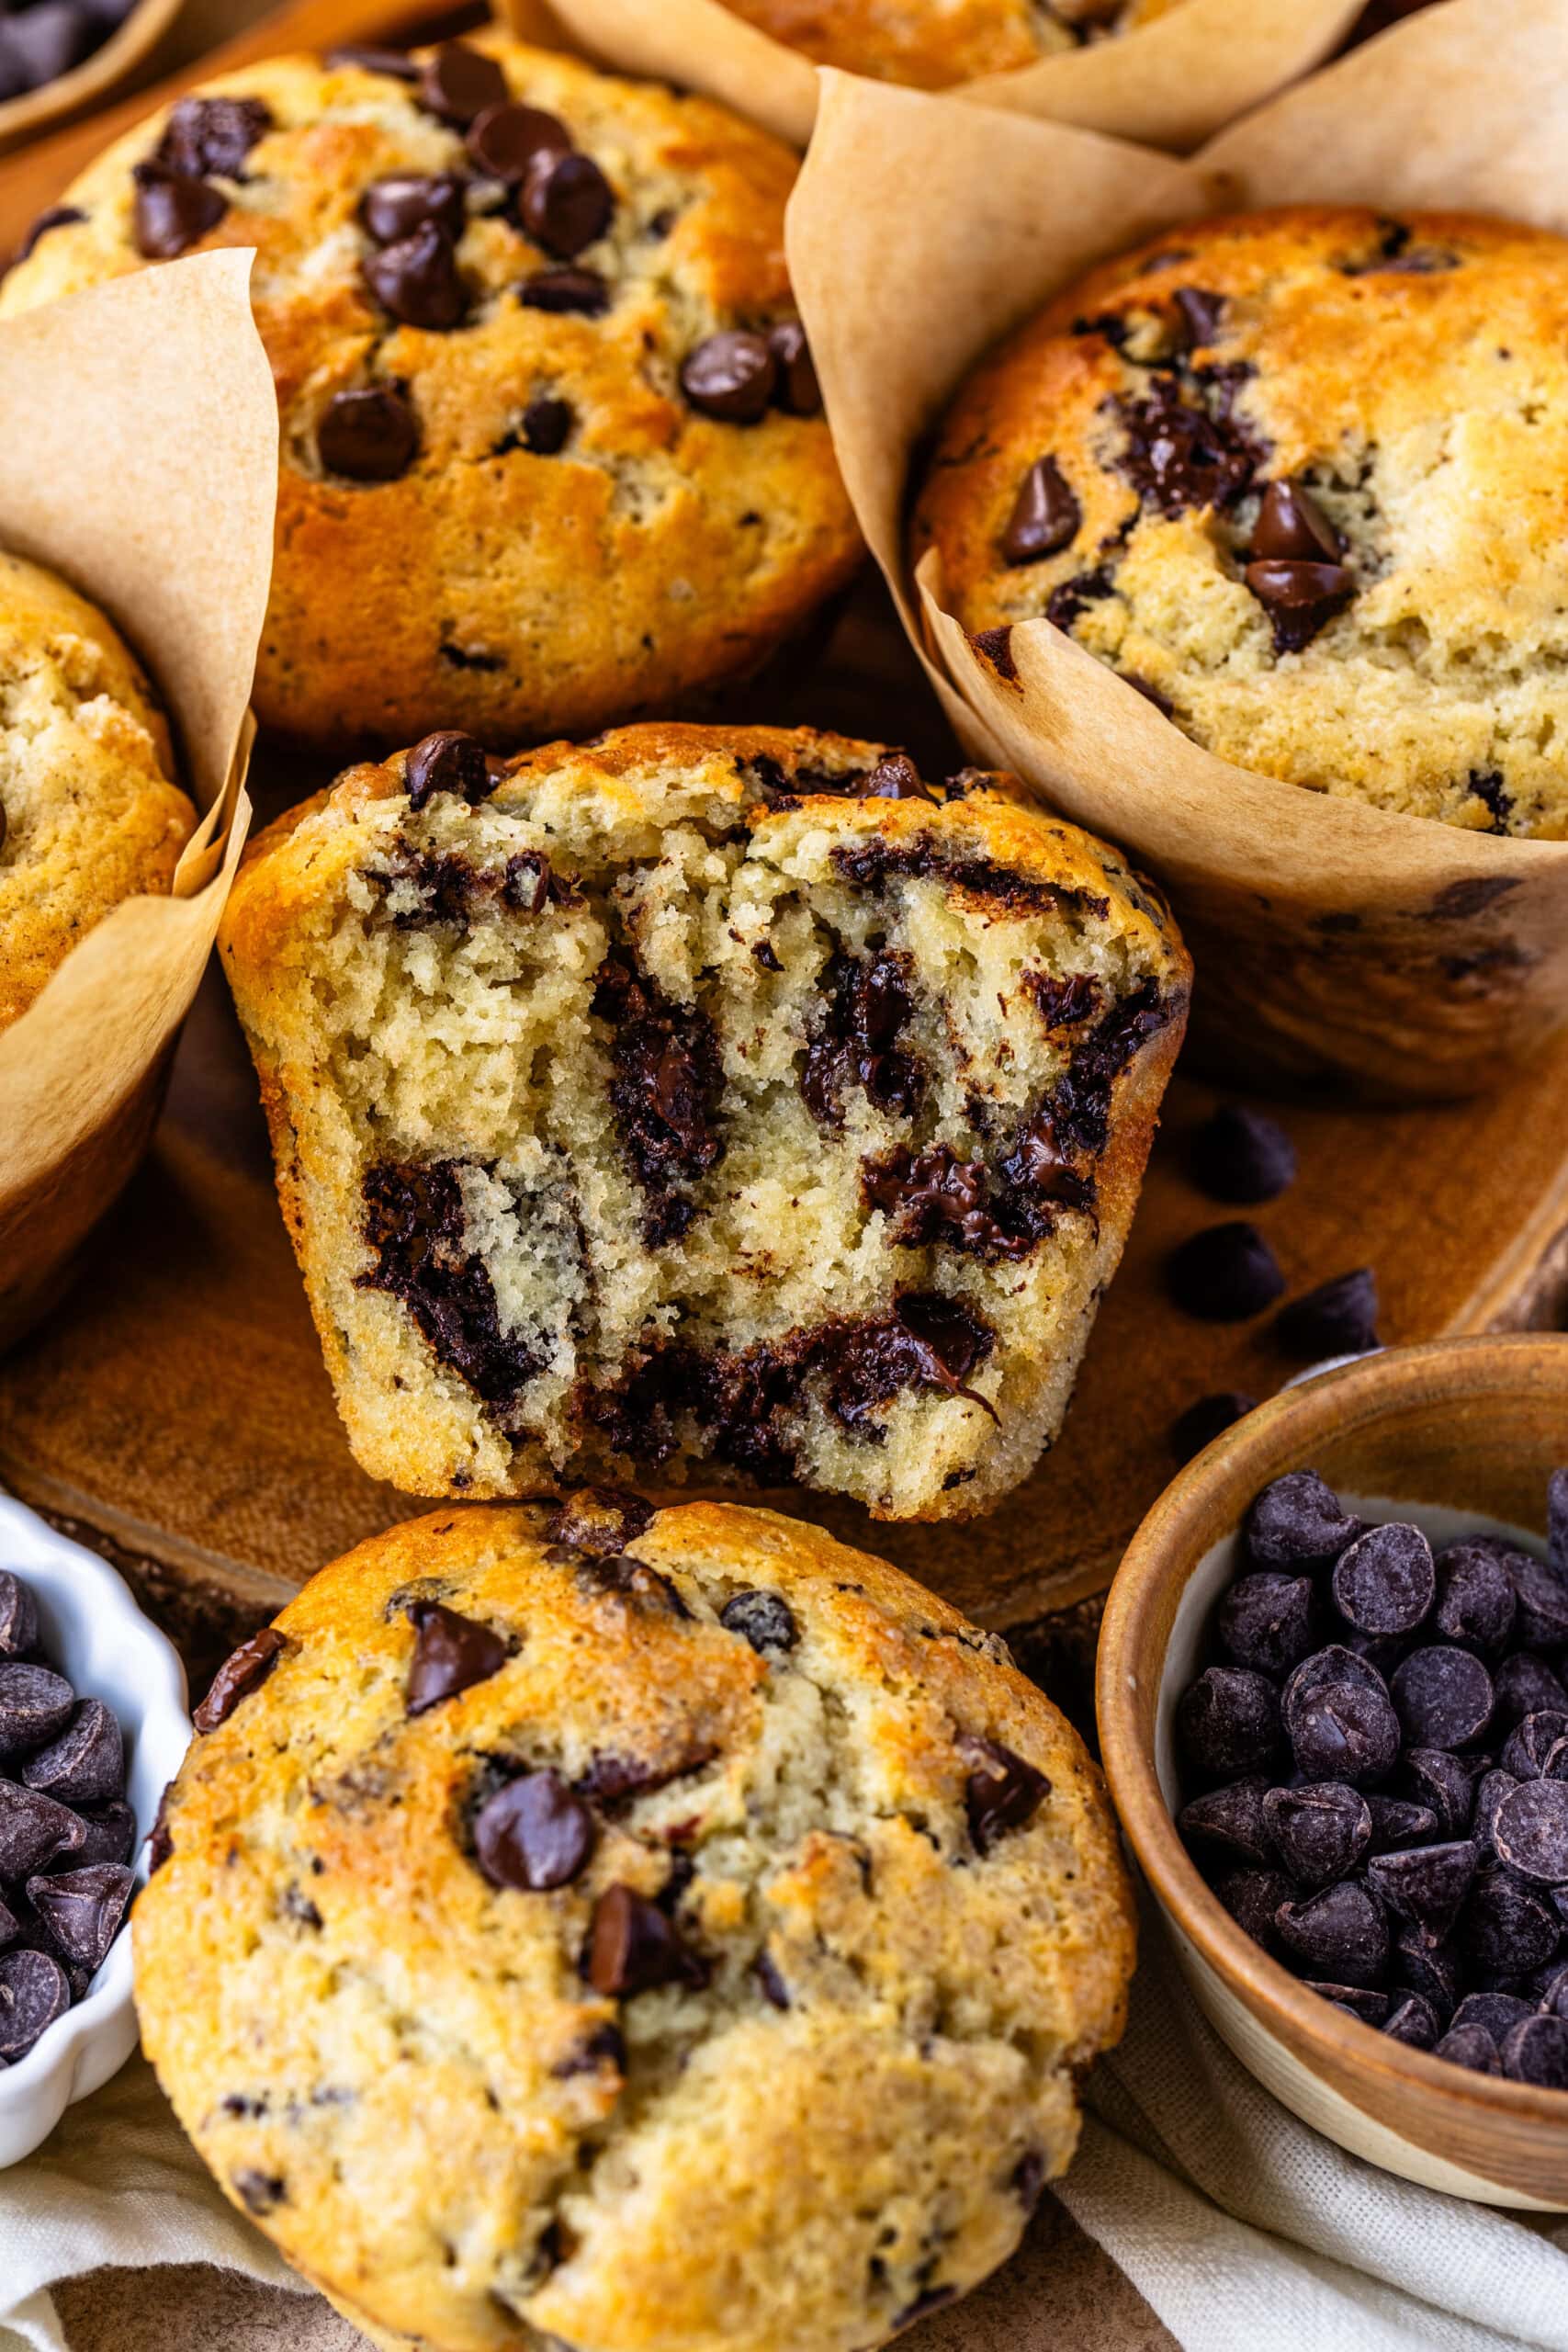
These classic muffins offer the perfect balance of rich chocolate and a fluffy, tender crumb, making them an irresistibly satisfying treat for any time of day. But there’s more to love:
- Minimal Cleanup: With only two bowls needed, one for wet and one for dry ingredients, you won’t be left with a sink full of dishes, making this recipe convenient as well as delicious.
- Bakery-Style Rise: Thanks to the optional resting of the batter, these muffins bake up with a tall, domed top, giving them that beautiful, bakery-style look and texture.
- Moist and Tender: The combination of buttermilk and sour cream creates an incredibly moist and soft interior, ensuring that every bite melts in your mouth without being too dense.
- Customizable Flavors: You can easily swap in your favorite mix-ins, like white or milk chocolate chips, chopped nuts, or even a sprinkle of cinnamon for a warm, spiced touch. You can also top them with crystal sugar for added sweetness and crunch. Check out more variation options below.
- Make-Ahead Friendly: These muffins freeze wonderfully. You can make a batch ahead of time and enjoy freshly warmed muffins whenever you like, which makes them perfect for meal prep, busy mornings, or unexpected guests.
- Quick and Easy to Make: Even with the option to rest the batter for a taller rise, the recipe is simple and straightforward. With just a few steps and common ingredients, you can whip these muffins up in no time, making them a great option for both beginner and experienced bakers.
- Perfect for Any Occasion: Whether you’re serving them for breakfast, brunch, or an afternoon snack, these muffins are sure to impress. Their rich, chocolatey flavor and fluffy texture make them a hit with kids and adults alike.
Chocolate Chip Muffin Variations
- Vegetable Oil: Can be substituted with melted butter, but this will result in a firmer crumb. Olive oil or avocado oil can also be used.
- Swapped Chips: Try using different types of chips like white chocolate chips, dark chocolate chips, chocolate chunks, or semi-sweet chocolate chips.
- Add Nuts: Mix in 1/4 cup of chopped nuts like pecans or walnuts or even shredded coconut for extra texture.
- Peanut Butter Chocolate Chip Muffins: Swirl in 1/4 cup of peanut butter into the batter for a rich, nutty flavor.
- Pumpkin Chocolate Chip Muffins: Substitute 1/2 cup of buttermilk with 1/2 cup of canned pumpkin and add 1 tsp of pumpkin spice, and a pinch of nutmeg for a fall-inspired treat.
- Espresso Chocolate Chip Muffins: Mix in 1-2 tbsp of instant espresso powder with the dry ingredients for a mocha flavor.
- Swap the Chips for Fruit: Try making blueberry muffins by swapping the chocolate chips for fresh blueberries. If using frozen, make sure to coat the blueberries in flour before adding to the batter.
If you like this recipe, you’ll love these other muffin recipes:
- Nutella Muffins
- Double Chocolate Muffins
- Peanut Butter Banana Muffins
- Raspberry and White Chocolate Muffins
- Tall Blueberry Muffins
- Vanilla Muffins
I’d love to see how your muffins turn out! Share your photos and feedback on Instagram or Facebook.
Chocolate Chip Muffin Recipe
Ingredients
- 2 1/4 cups all-purpose flour 287 grams
- 2 1/2 tsp baking powder
- 1/2 tsp baking soda
- 1/4 tsp salt
- 1/4 tsp cinnamon powder optional
- 1 cup granulated sugar 200 grams
- 2 large eggs room temperature
- 1 cup buttermilk 240 ml
- 1/4 cup sour cream 61 grams
- 6 tbsp melted unsalted butter 84 grams
- 1/4 cup vegetable oil 60 ml
- 1 tsp pure vanilla extract
- 1 1/2 cup chocolate chips or chopped chocolate (I used semi-sweet, you can use any kind you want)
- 1/3 cup crystal sugar optional, to top the muffins
Instructions
Chocolate Chip Muffins
- Pre-heat the oven 425ºF.
- Grease or line 16 muffin tins with baking paper liners.
- Mix the flour, baking powder, baking soda, salt, cinnamon (if using), and sugar in a large mixing bowl.
- In another bowl mix the eggs, buttermilk, sour cream, melted butter, oil, and vanilla in another bowl.
- Add the wet mixture into the dry, and mix with a spatula until almost fully combined. Add the chocolate chips and mix.
- Cover the bowl with a towel and let the batter rest for 30 minutes. This step is optional but helps the muffins obtain a taller rise.
- Fill up each muffin cavity until the batter reaches the top of the muffin pan.
- Top each muffin with a few more chocolate chips if desired.
Baking
- Bake in the pre-heated 425ºF oven for 7 minutes.
- Lower the temperature to 350ºF and bake for another 12 to 15 minutes until golden around the edges, and a toothpick inserted in the muffin should come out clean.
- Let the muffins cool down before serving.
Notes
- Store in the fridge for up to 4 days.
- To freeze, simply place the baked muffins in a freezer bag or in an air-tight container and freeze for up to 2 months.
- To thaw, let the muffins sit at room temperature for about 1 hour, or in the fridge overnight. You can also wrap the muffin in a paper towel and microwave for 15 second intervals to thaw. Another option is to wrap each muffin in foil, and bake in a 350ºF oven for about 10 to 15 minutes, until completely thawed in the center.
- Chocolate Chips: use white or milk chocolate chips instead of dark or semi-sweet.
- Additions: add 1/4 cup of chopped nuts, or shredded coconut to the batter when mixing the dry ingredients in.
How can I add bananas to this? I saw your peanut butter banana muffins as well. I have a nut free family member. What would you suggest?
Great question!
If you need the muffins to be nut-free, the easiest and most reliable option is to use the banana nut muffin recipe and simply omit the nuts. That batter is already formulated to handle the moisture and sweetness from the bananas, so it works beautifully on its own. You can definitely add chocolate chips to that recipe. I recommend 1 cup of chocolate chips, plus more for the top.
I don’t recommend directly adding bananas to the chocolate chip muffin batter without adjustments, because bananas add a lot of moisture. If you do want to adapt that recipe, you can add about 1 cup mashed banana and reduce the buttermilk to ½ cup and also reduce to just one egg, but the texture might be slightly denser than the banana muffin recipe.
Hi! Where can I get the cupcake liners you used in your video? Thanks!
The liners are from a brand called Caperci, and the cupcake tins are from Monfish on amazon.
I don’t have buttermilk. Can I substitute it? With whole milk?
yes with a tsp of vinegar mixed in.
Hi! I’m confused how you got 16 muffins? I either have a 12 count muffin pan or the 6 count jumbo muffin pan…which would you recommend for this recipe?
Hi! Great question! This recipe makes 16 standard-sized muffins, so you can use a 12-count muffin pan and bake the remaining 4 muffins in a second batch. Alternatively, if you prefer larger muffins, you could use the 6-count jumbo muffin pan, but keep in mind that the bake time may need to be adjusted slightly since jumbo muffins take longer to cook through. Let me know if you have any other questions—I’m happy to help! 😊
I don’t have sour cream, could I use Greek yogurt? Plain
yes you can!
Thank you! These turned out amazing! 💗 definitely a monthly recipe in my house from now on
I made them for a Halloween party for teens. They were gone in a flash and all the kids said they were the best muffins they had ever had. Excellent and easy recipe! Can’t wait to try other flavor combinations!
I’m so glad to hear the muffins were such a hit at your Halloween party! It sounds like they were the perfect treat for the teens! Thank you for the wonderful feedback, and I hope you have a blast experimenting with other flavor combinations. 😊 Happy baking!
They look delicious. When you put the two scoops of batter in the pan how much do you think it is? 1/4 cup each?
about 1/3 cup, these are jumbo.
Curious, does the recipe allow for 16 jumbo muffins or does 16 muffins mean standard size?
16 standard size