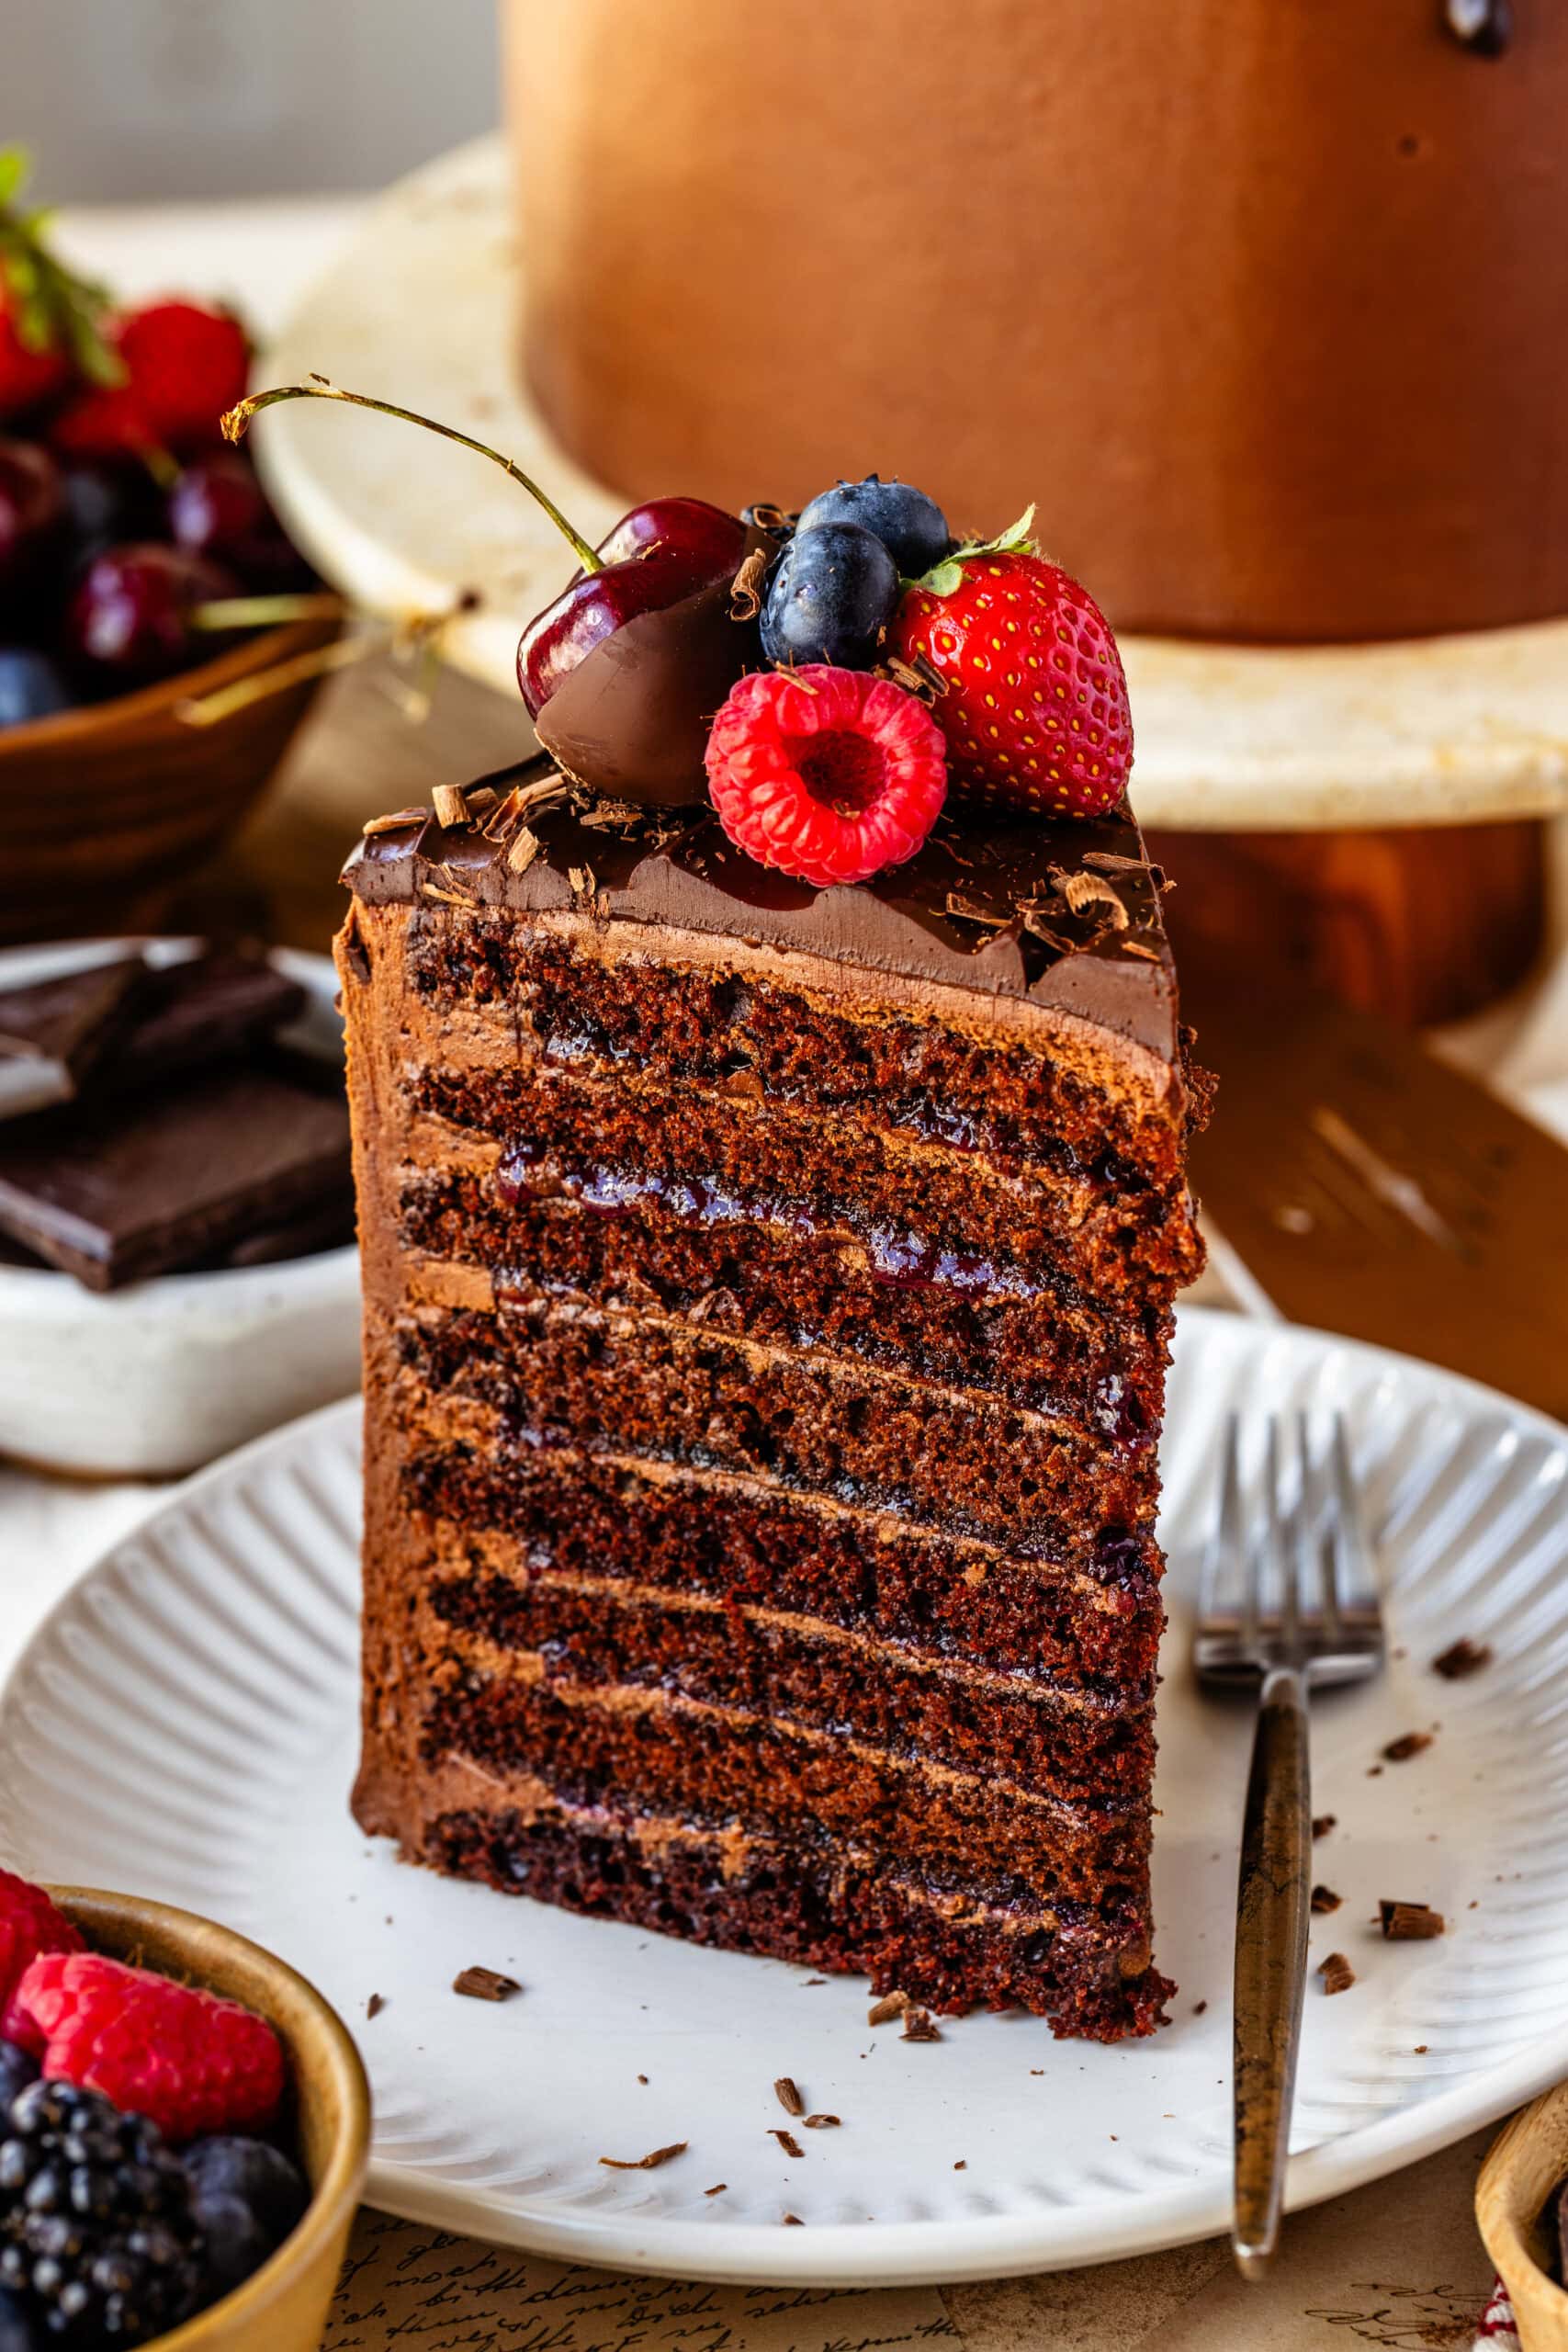
8-Layer Chocolate Cake
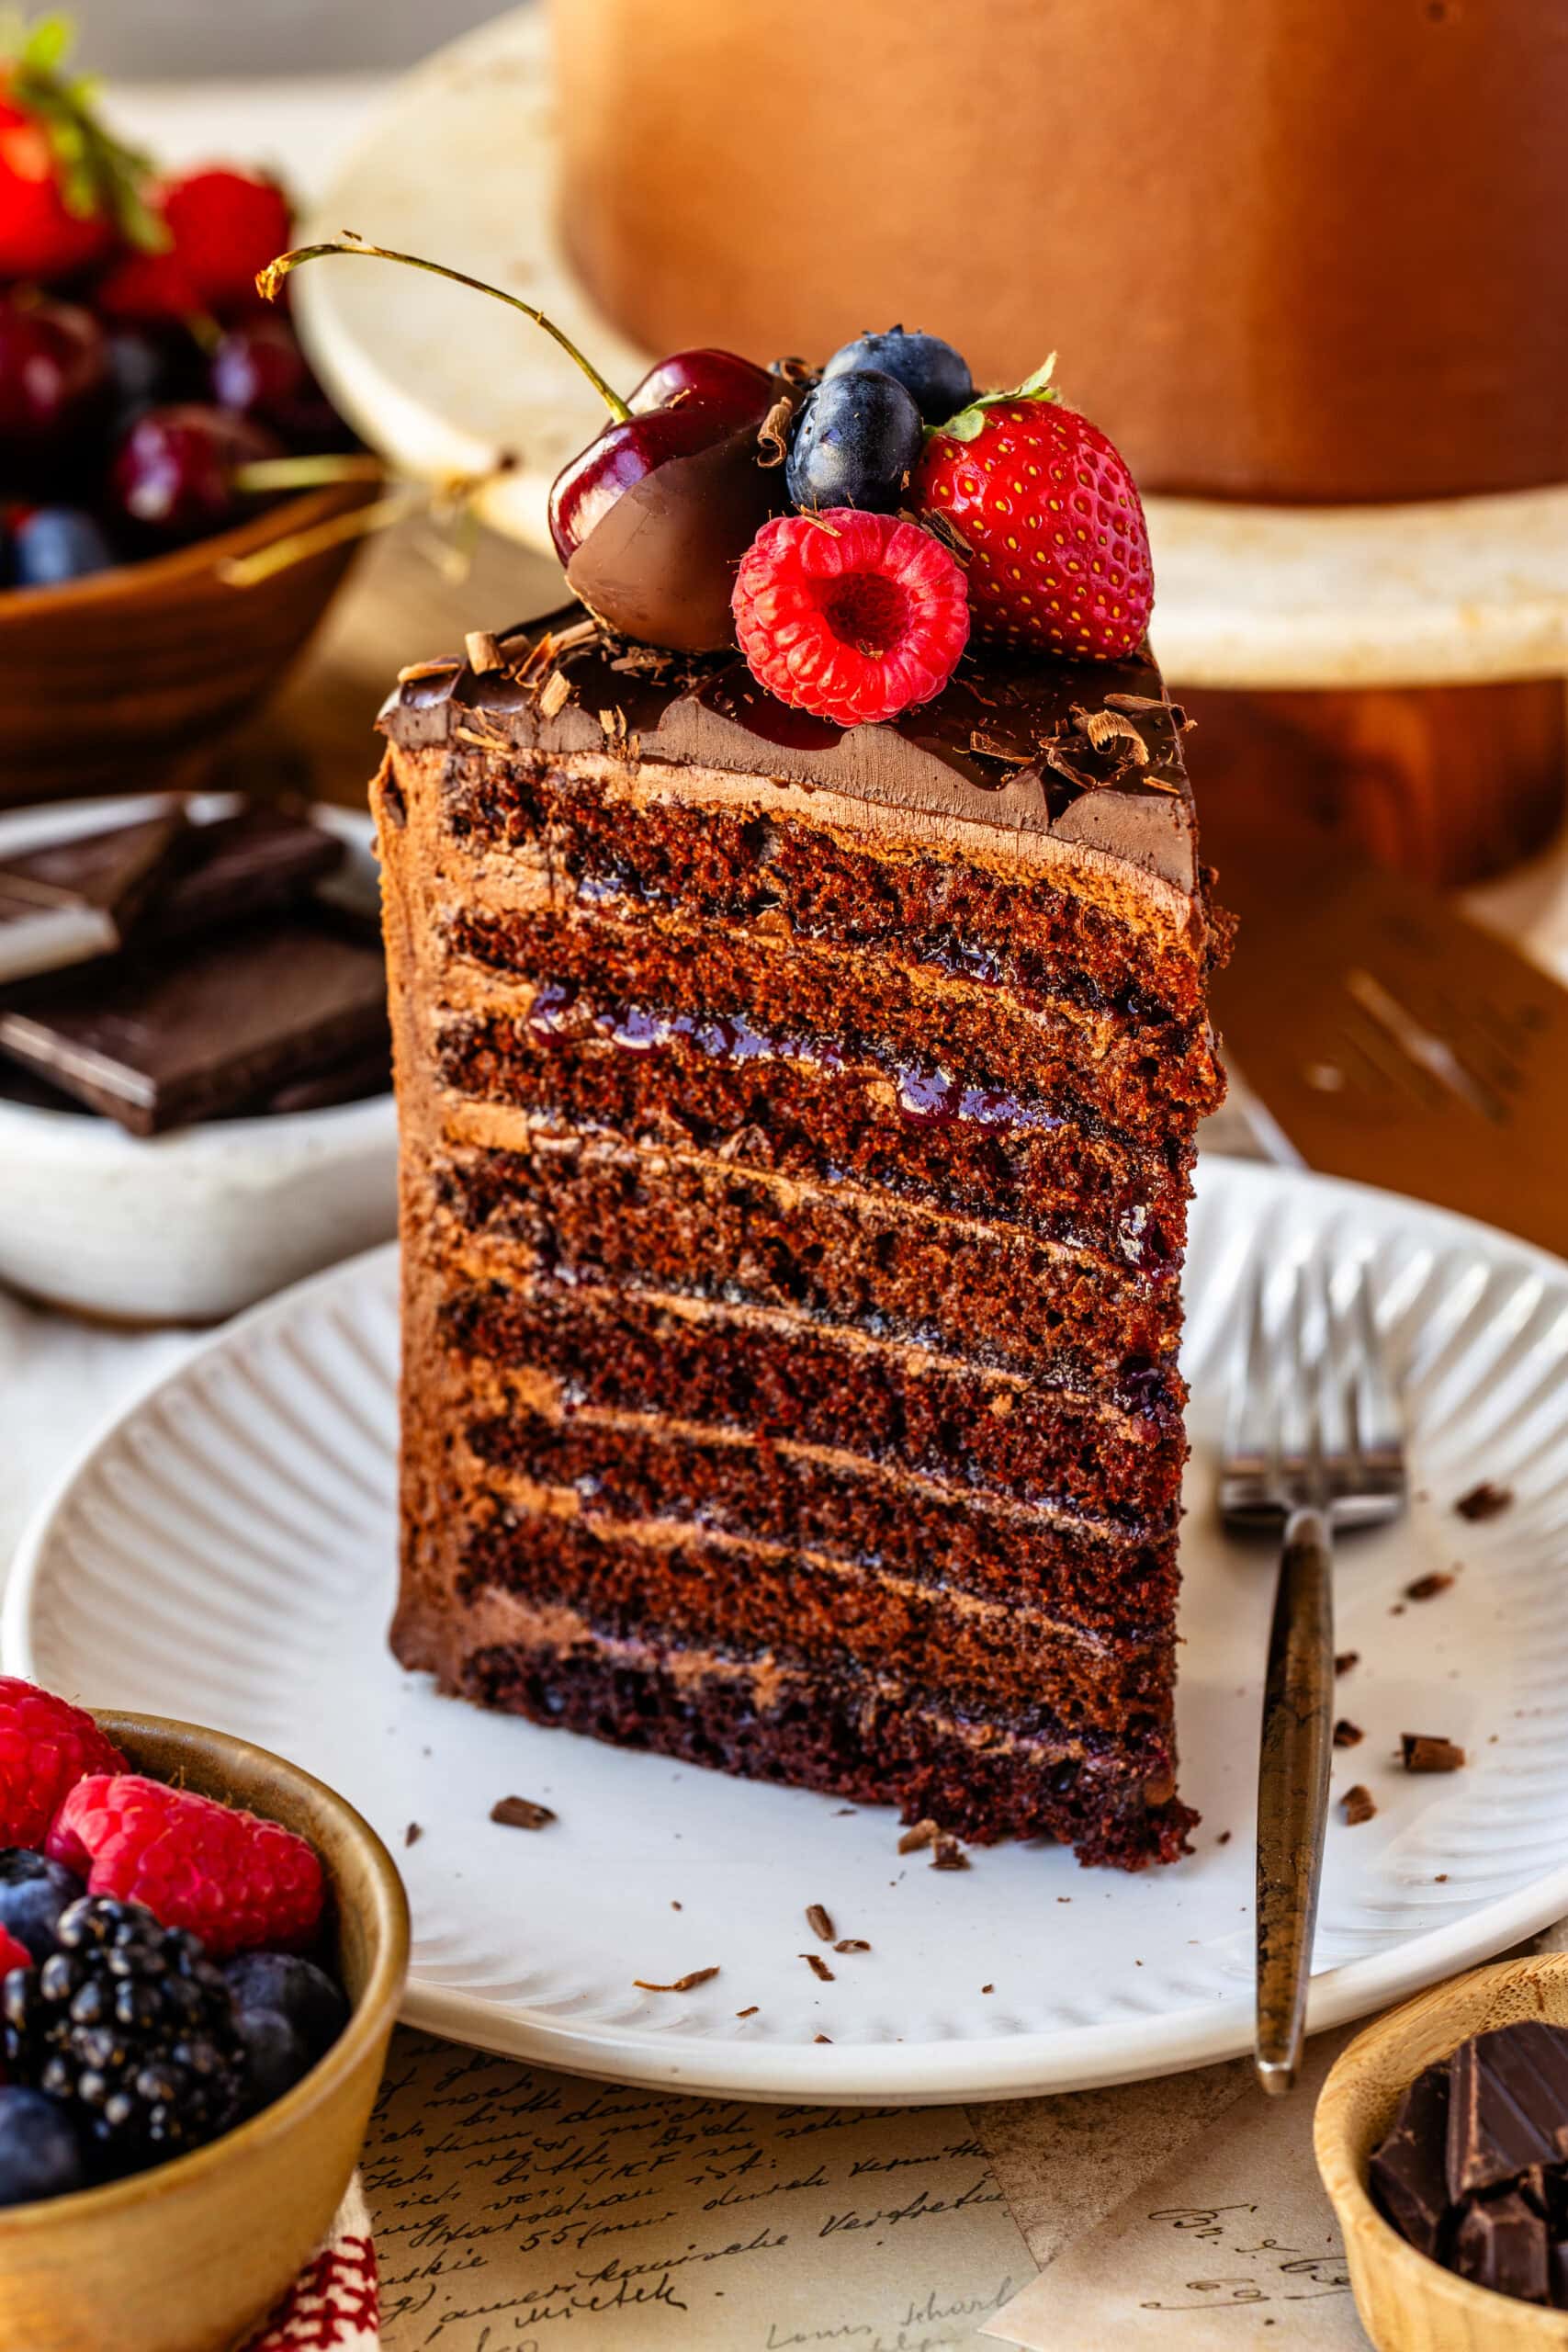
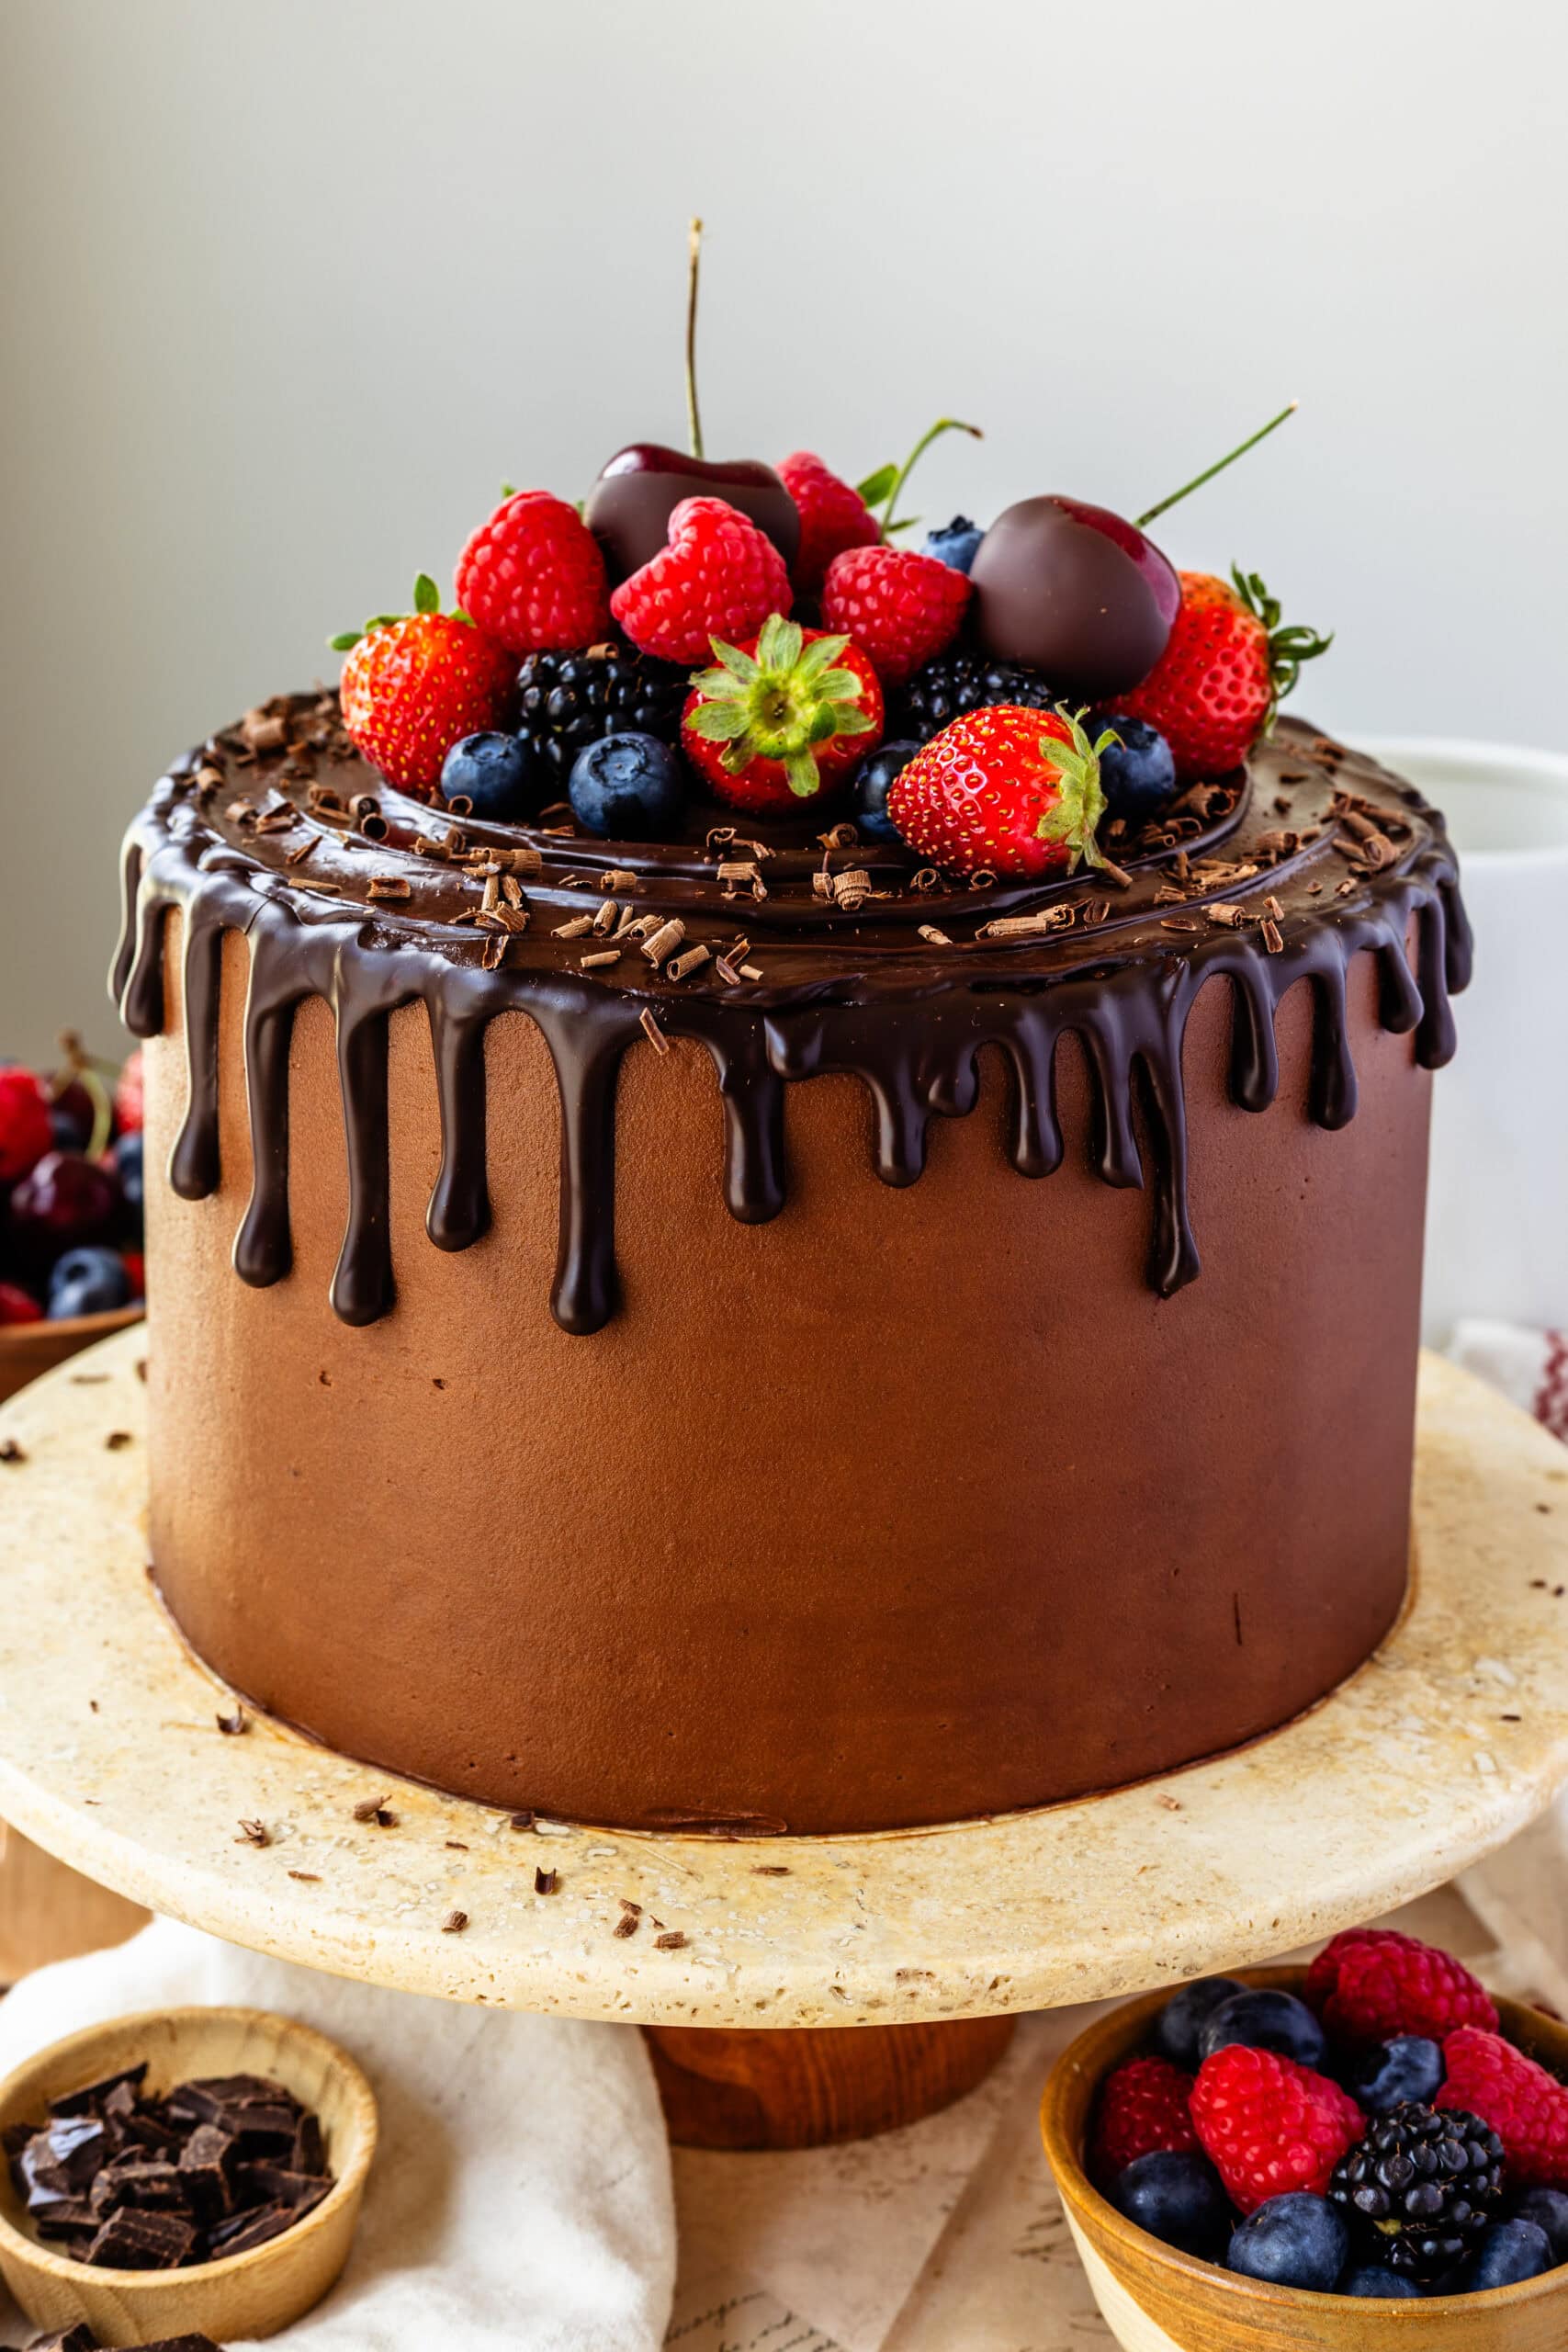
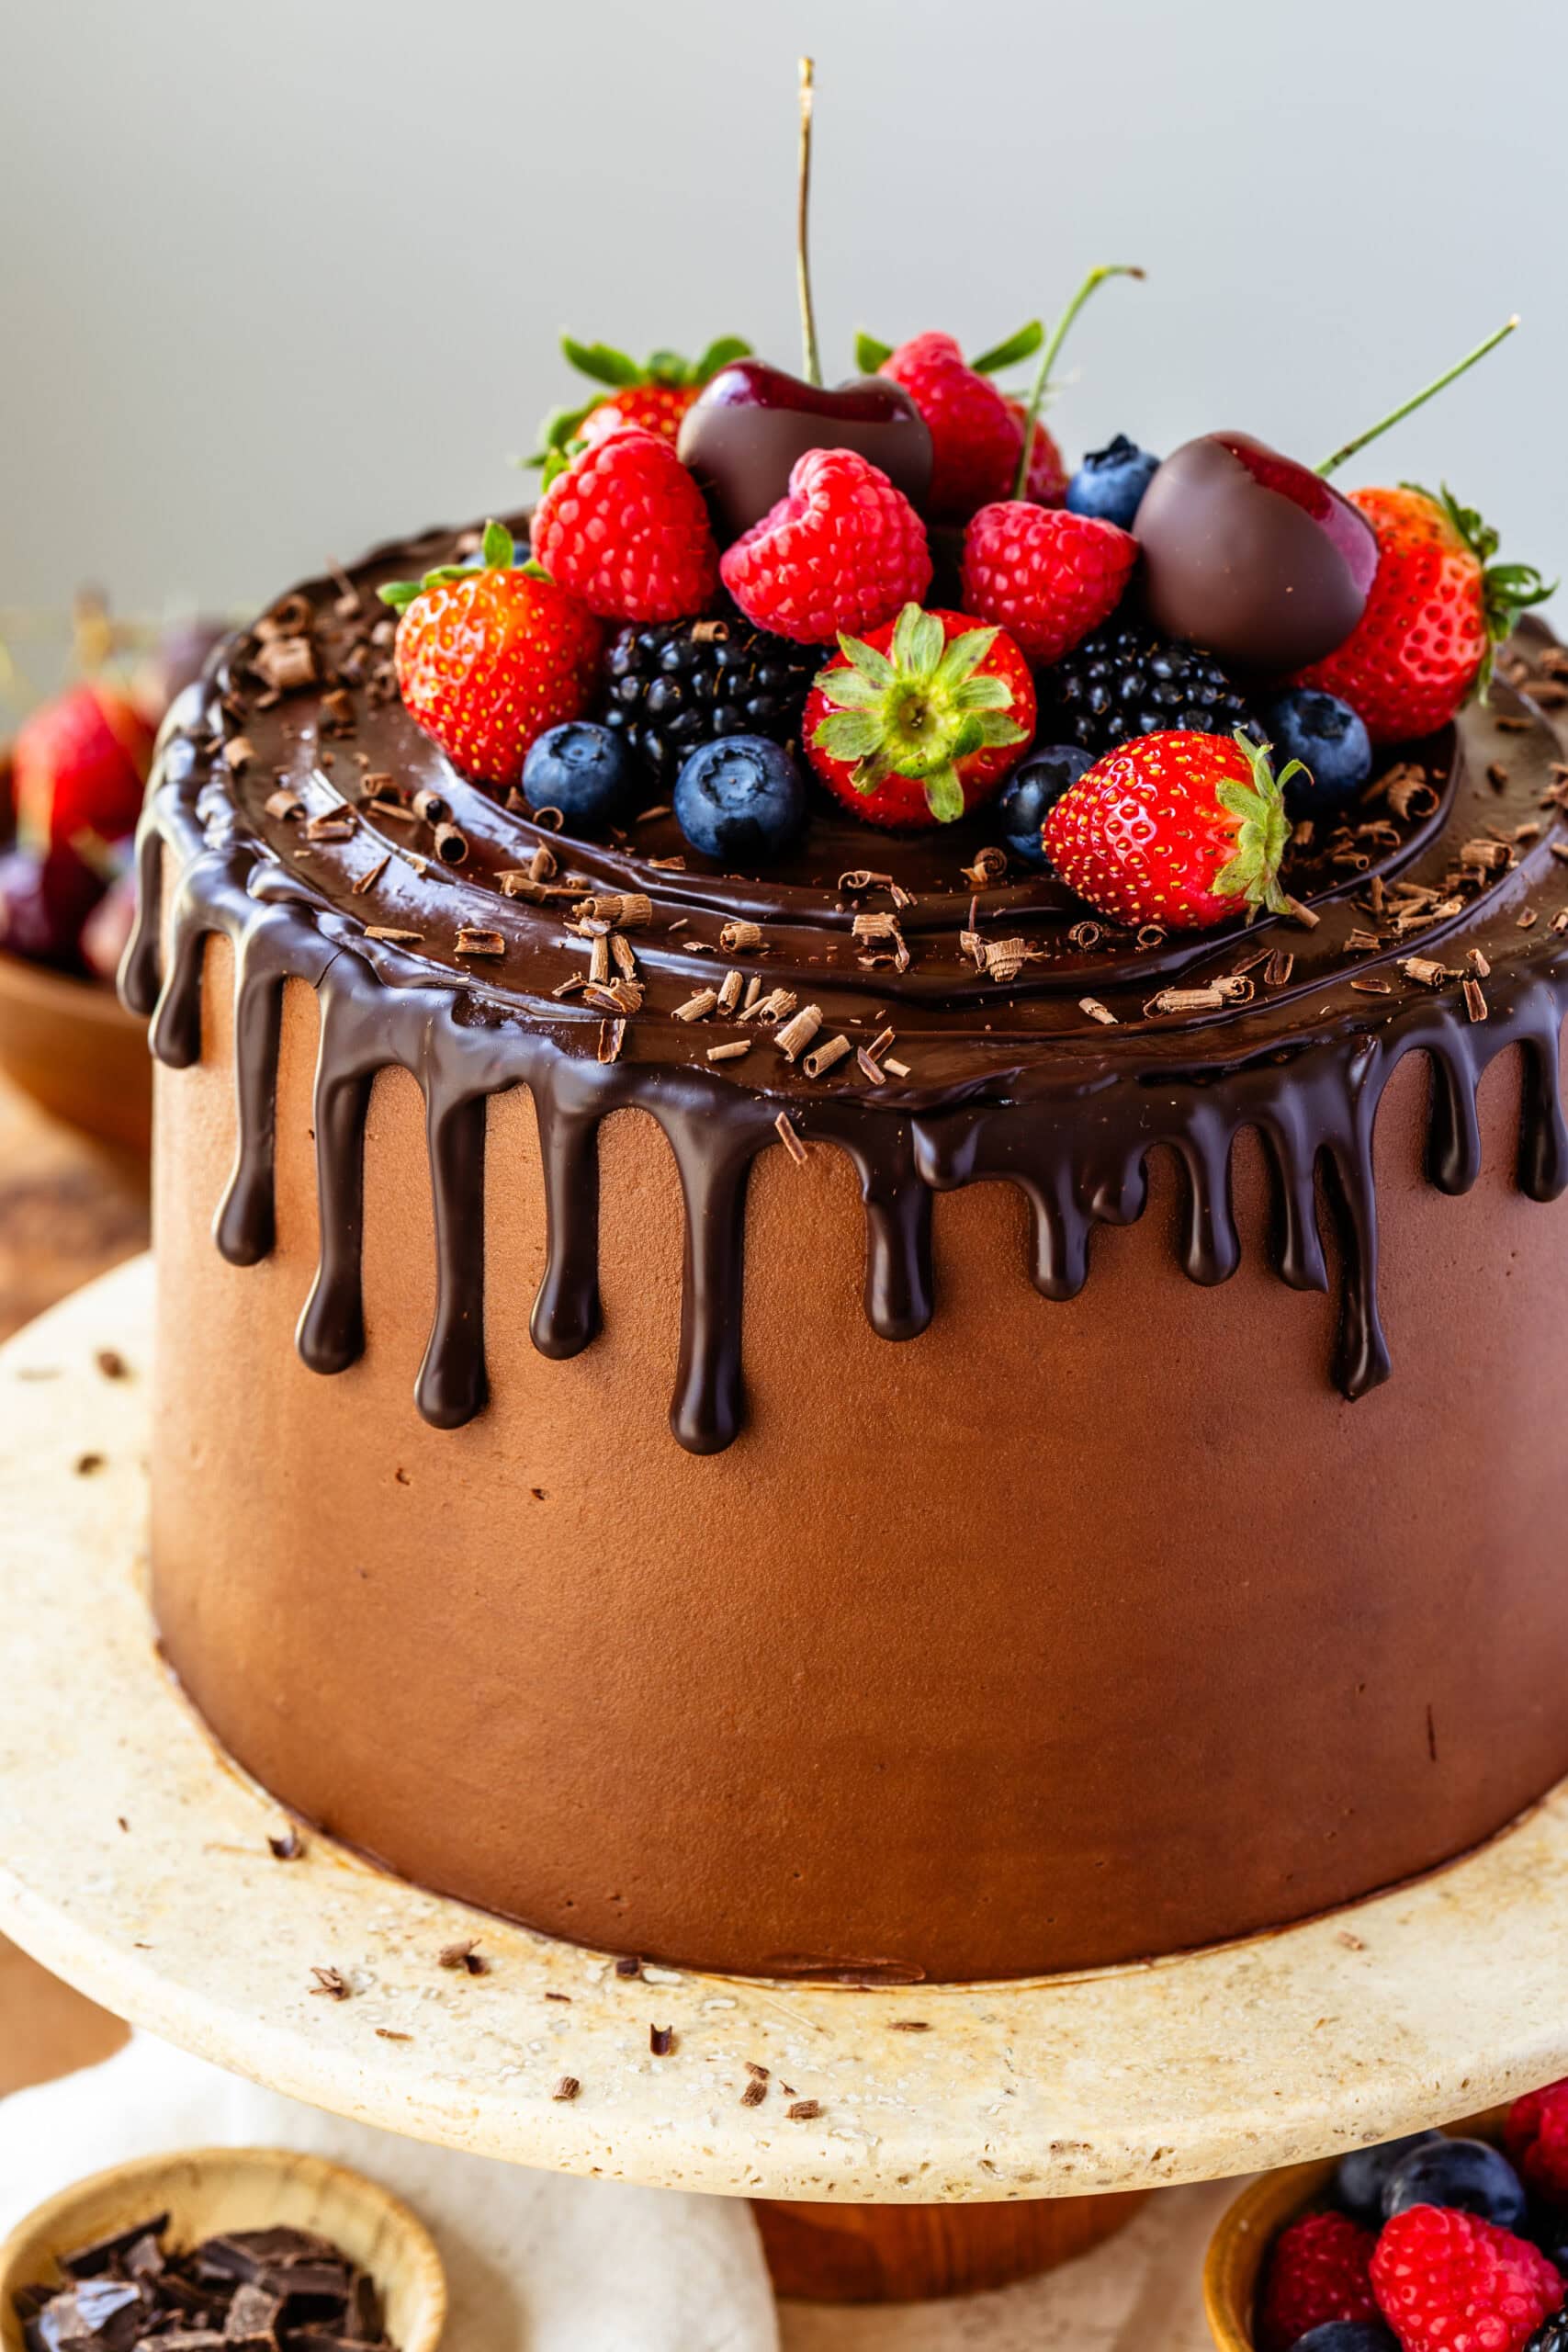
There are cakes… and then there’s this 8-layer chocolate cake. Eight impossibly tender chocolate layers, each sandwiched with a silky chocolate buttercream and a generous spoonful of jewel-toned mixed berry jam, all wrapped in a dreamy chocolate drip that’s pure bakery glamour. This is the cake that makes jaws drop when you bring it to the table. It’s tall, it’s dramatic, and it’s every chocolate lover’s dream come true.
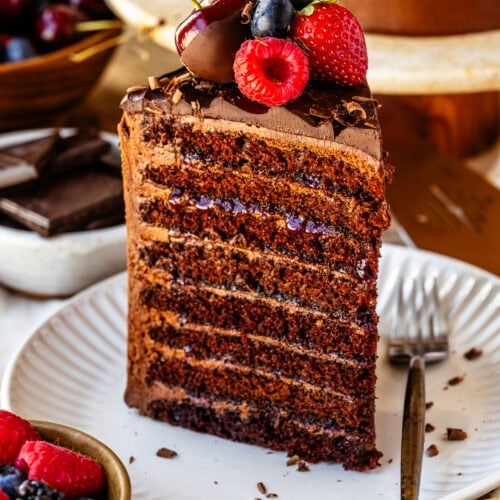
Don’t let the number of layers intimidate you—this recipe is designed to guide you through each step so you can enjoy the process just as much as the final slice. By baking thin, delicate layers separately, you’ll skip the stress of cutting large cakes into even pieces and ensure every bite is balanced between rich chocolate and bright berry. Whether you’re celebrating a big birthday, surprising someone special, or simply treating yourself to a weekend baking project, this is the cake that will make the moment unforgettable.
Best 8-Layer Chocolate Cake Recipe
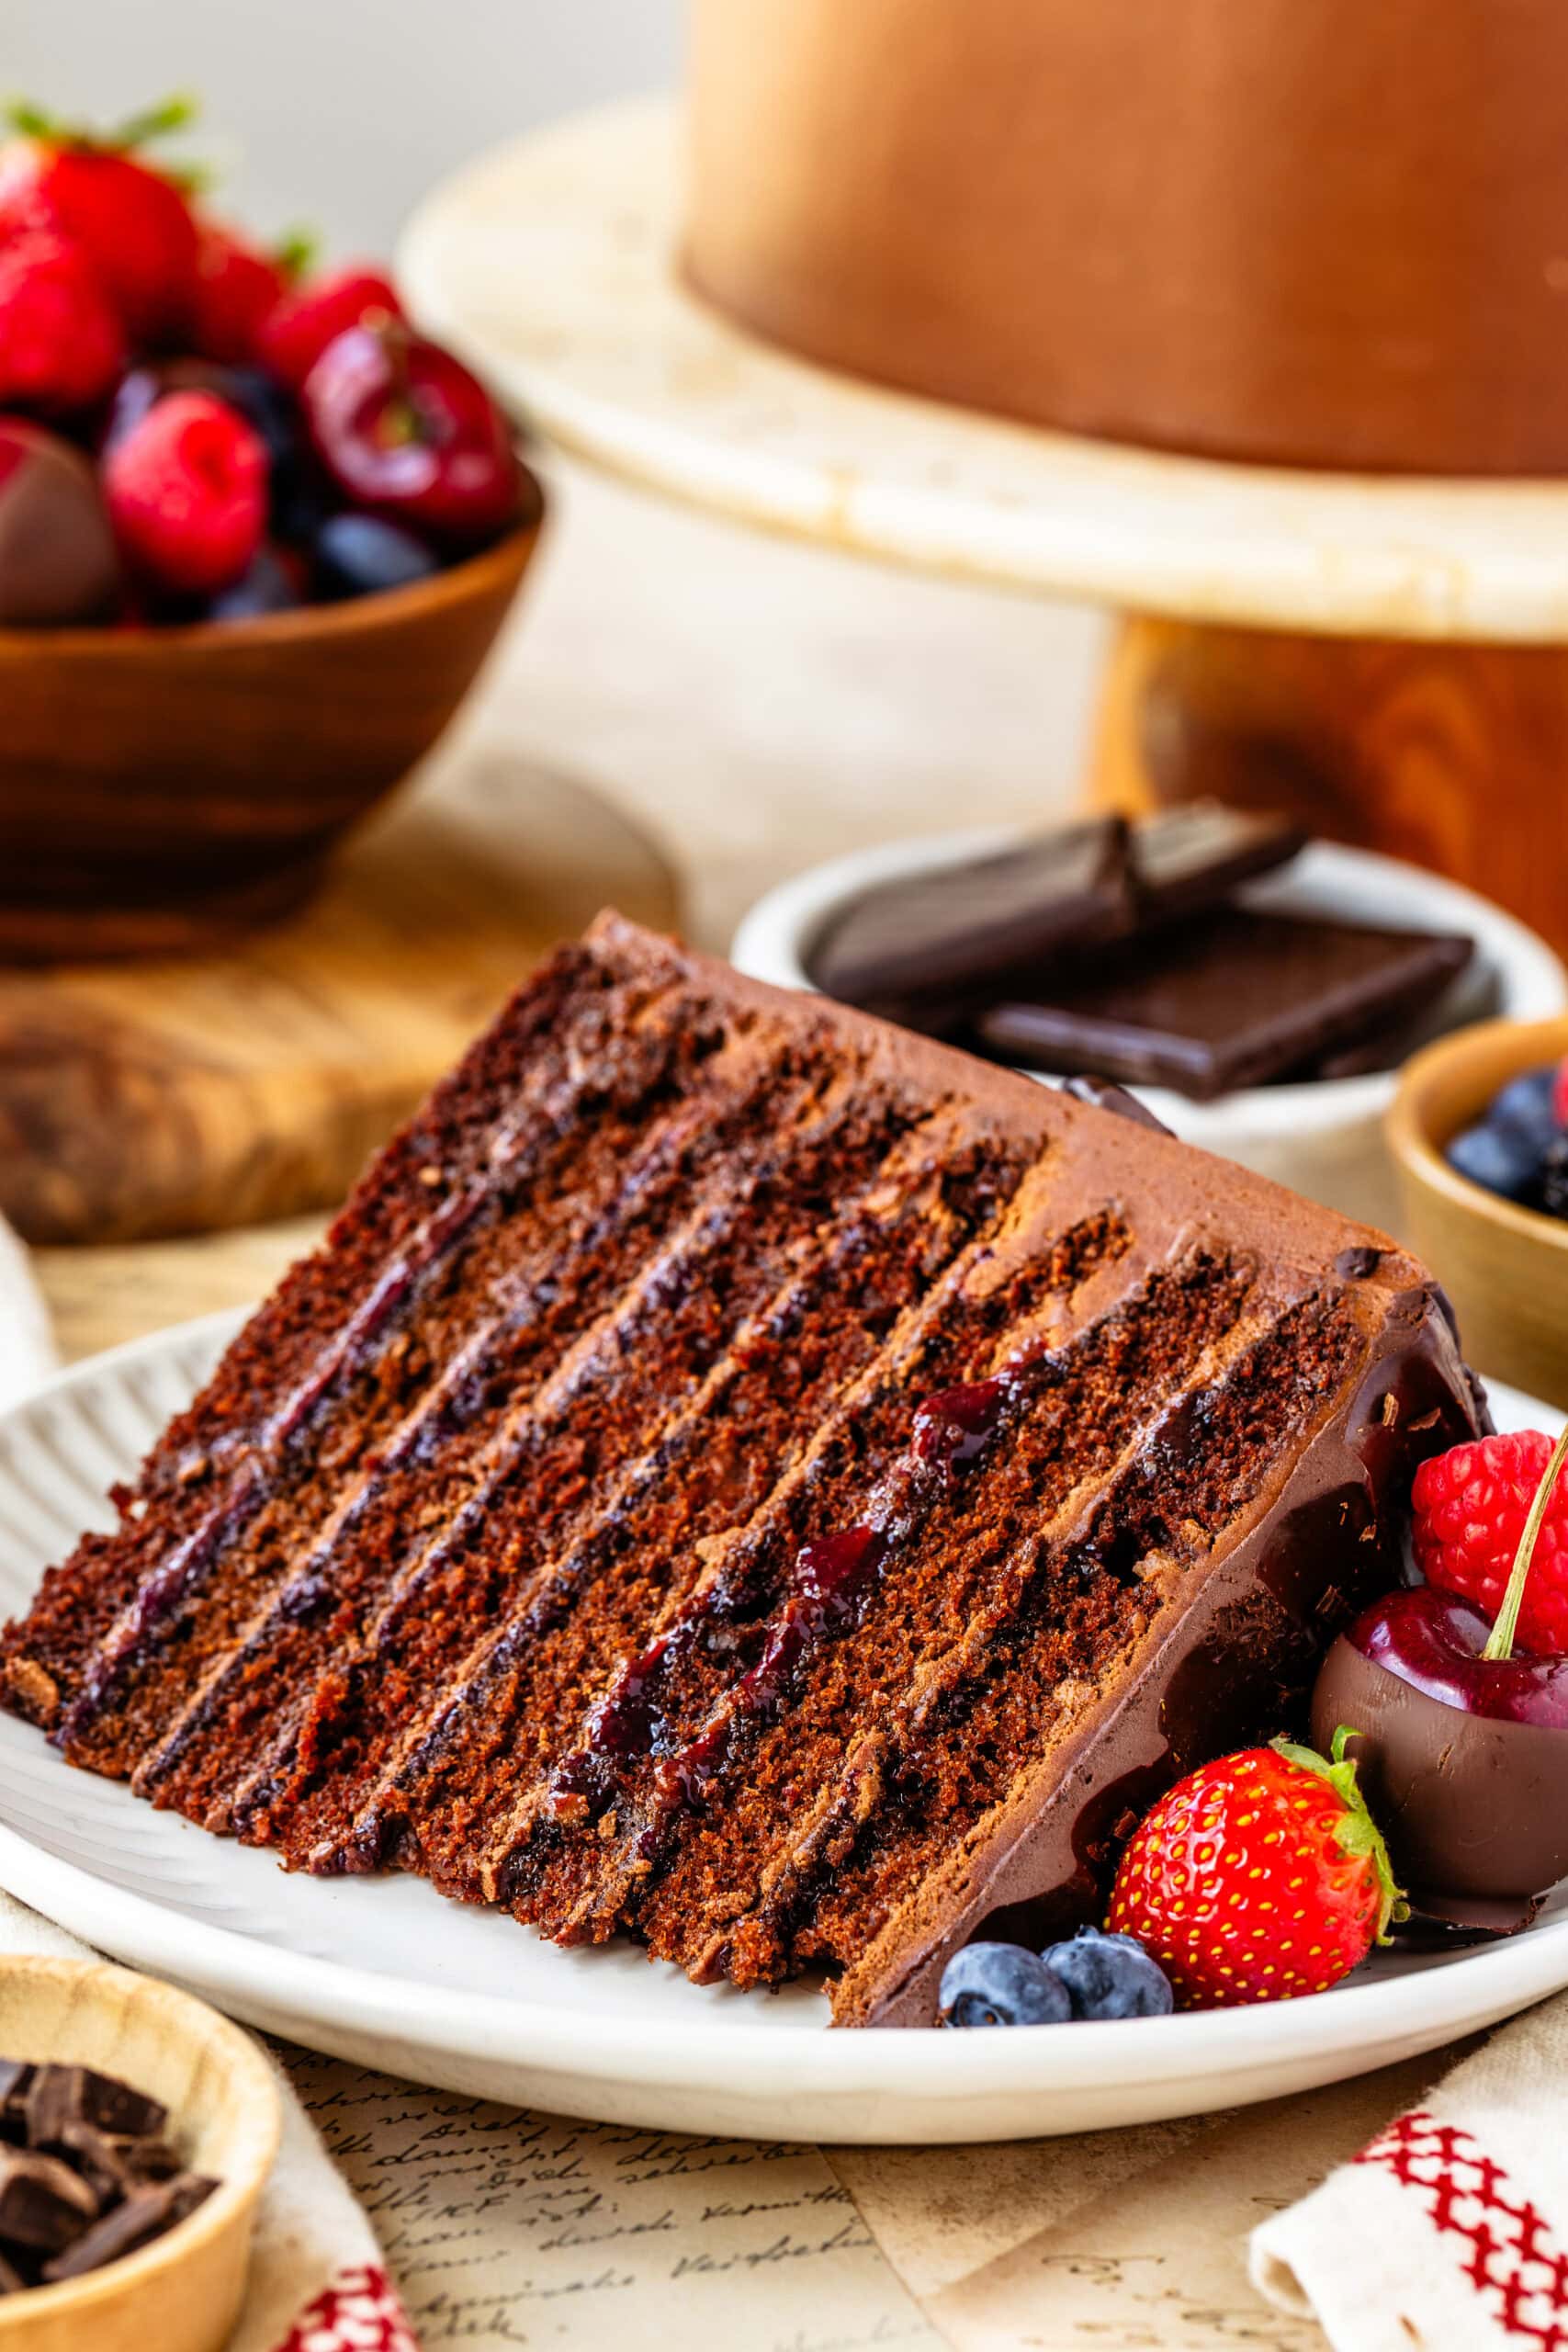
What makes this cake the best? It’s all about the balance and the taste. The cake layers are deeply chocolatey yet incredibly moist thanks to buttermilk, sour cream, and a splash of hot coffee that enhances the cocoa’s flavor and adds moisture. The frosting is a luscious buttercream chocolate frosting—light enough to spread easily but rich enough to hold the tall stack together without collapsing. And then there’s the filling: a homemade mixed berry jam that cuts through the richness with its tart-sweet sparkle, giving you that “just one more bite” feeling.
This post may contain affiliate links. I earn a commission from qualified purchases. Please read our Privacy policy here.
Every layer works in harmony—soft sponge, creamy chocolate buttercream frosting, fruity jam, and the final glossy drip of ganache. It’s a combination that feels both decadent and fresh, perfect for the chocolate fan who still craves a little brightness in their dessert.

Mixed Berry Jam
To make the jam, combine the strawberries, raspberries, blueberries, blackberries, sugar (adjusting between 100 and 132 g depending on your preferred sweetness), and lemon juice in a medium saucepan. Cook over medium heat for about 8 to 10 minutes, stirring occasionally, until the fruit begins to soften and release its juices.

If it starts sticking, add a tablespoon or two of water. Gently mash some of the berries against the sides of the pan to help them break down while leaving a few chunks for texture, then continue cooking until the syrup has reduced.
In a small bowl, stir the cornstarch and water together until smooth, then pour the slurry into the pan while stirring. Increase the heat slightly and cook for another 1 to 2 minutes until the jam thickens and turns glossy.
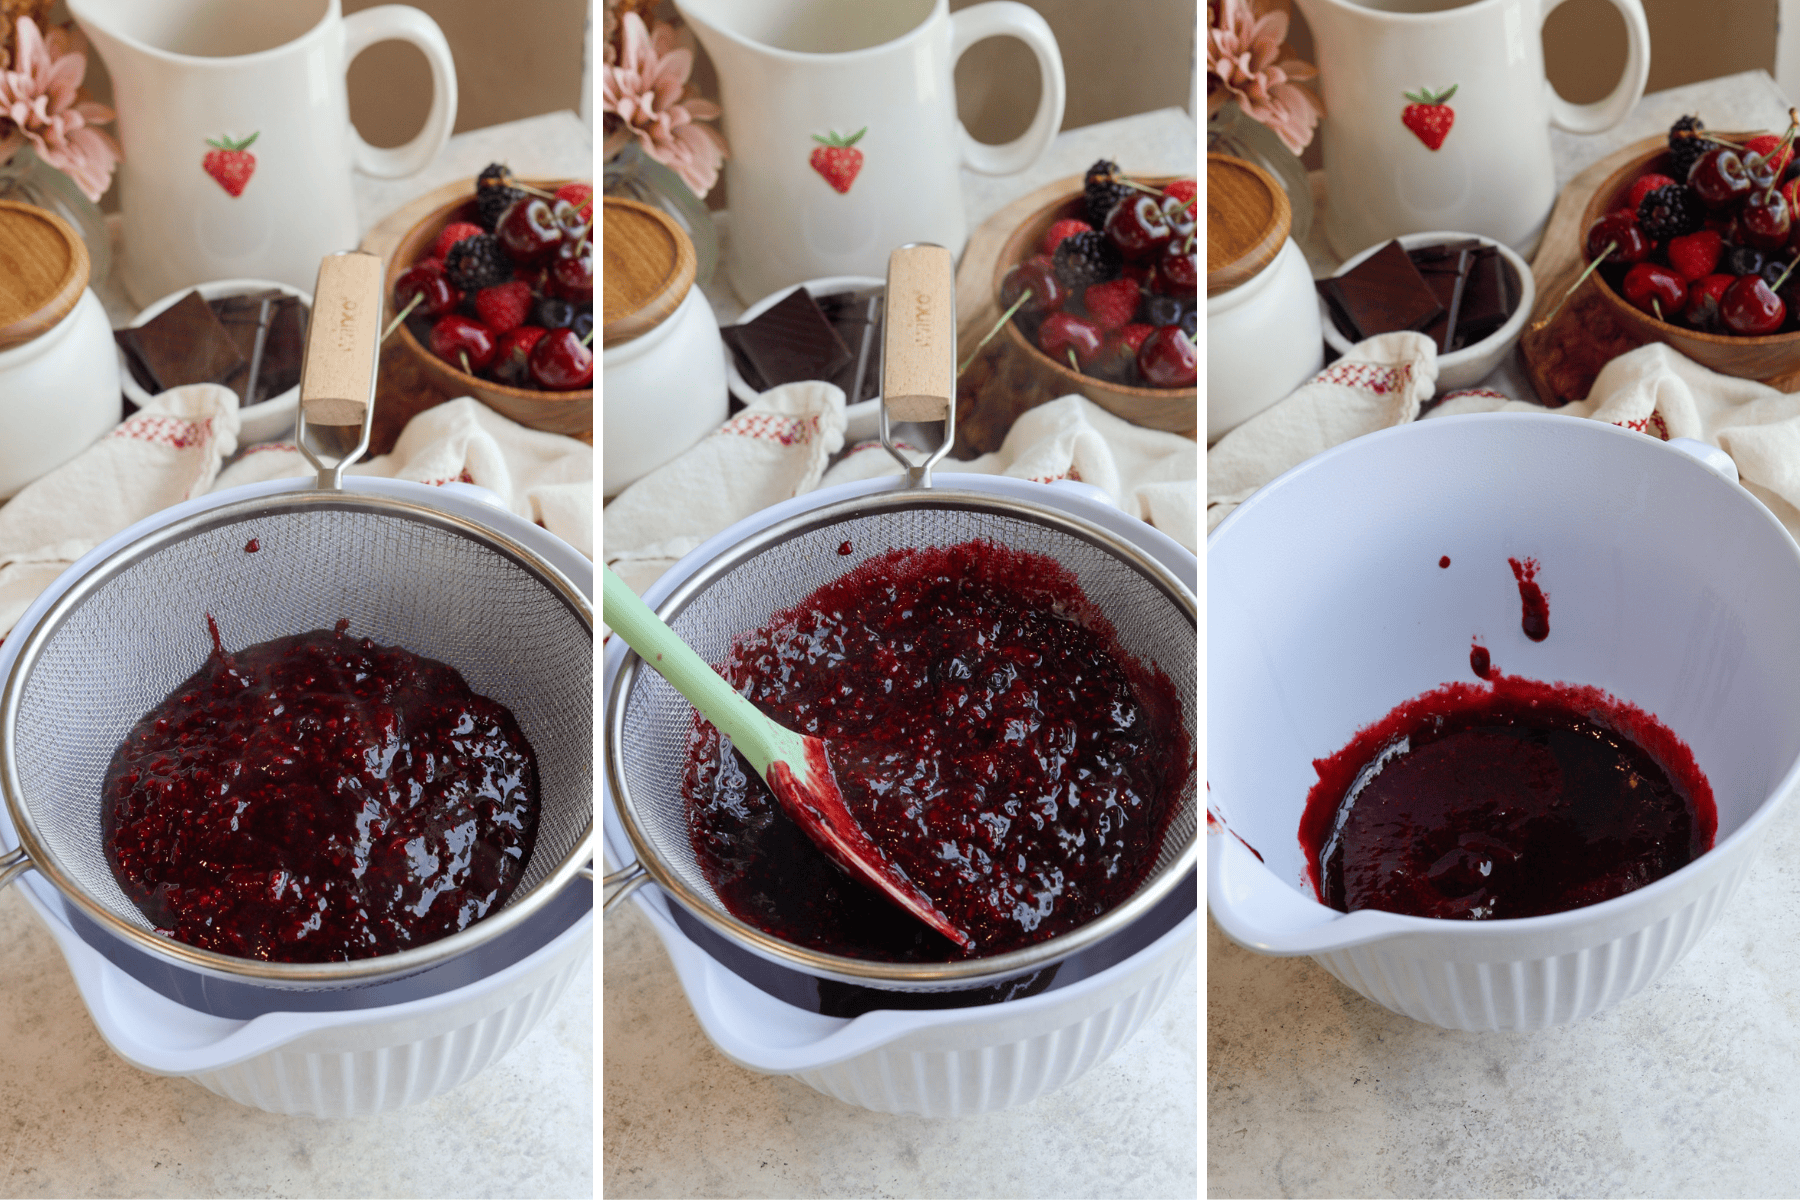
Pour the hot jam through a fine-mesh sieve set over a clean bowl, pressing firmly with a spoon to strain out the seeds and skins, and discard the solids. Press plastic wrap directly onto the surface of the strained jam, let it cool to room temperature, then refrigerate for at least 2 hours or up to 2 weeks. You can also freeze the jam for longer storage.
Chocolate Cake Batter
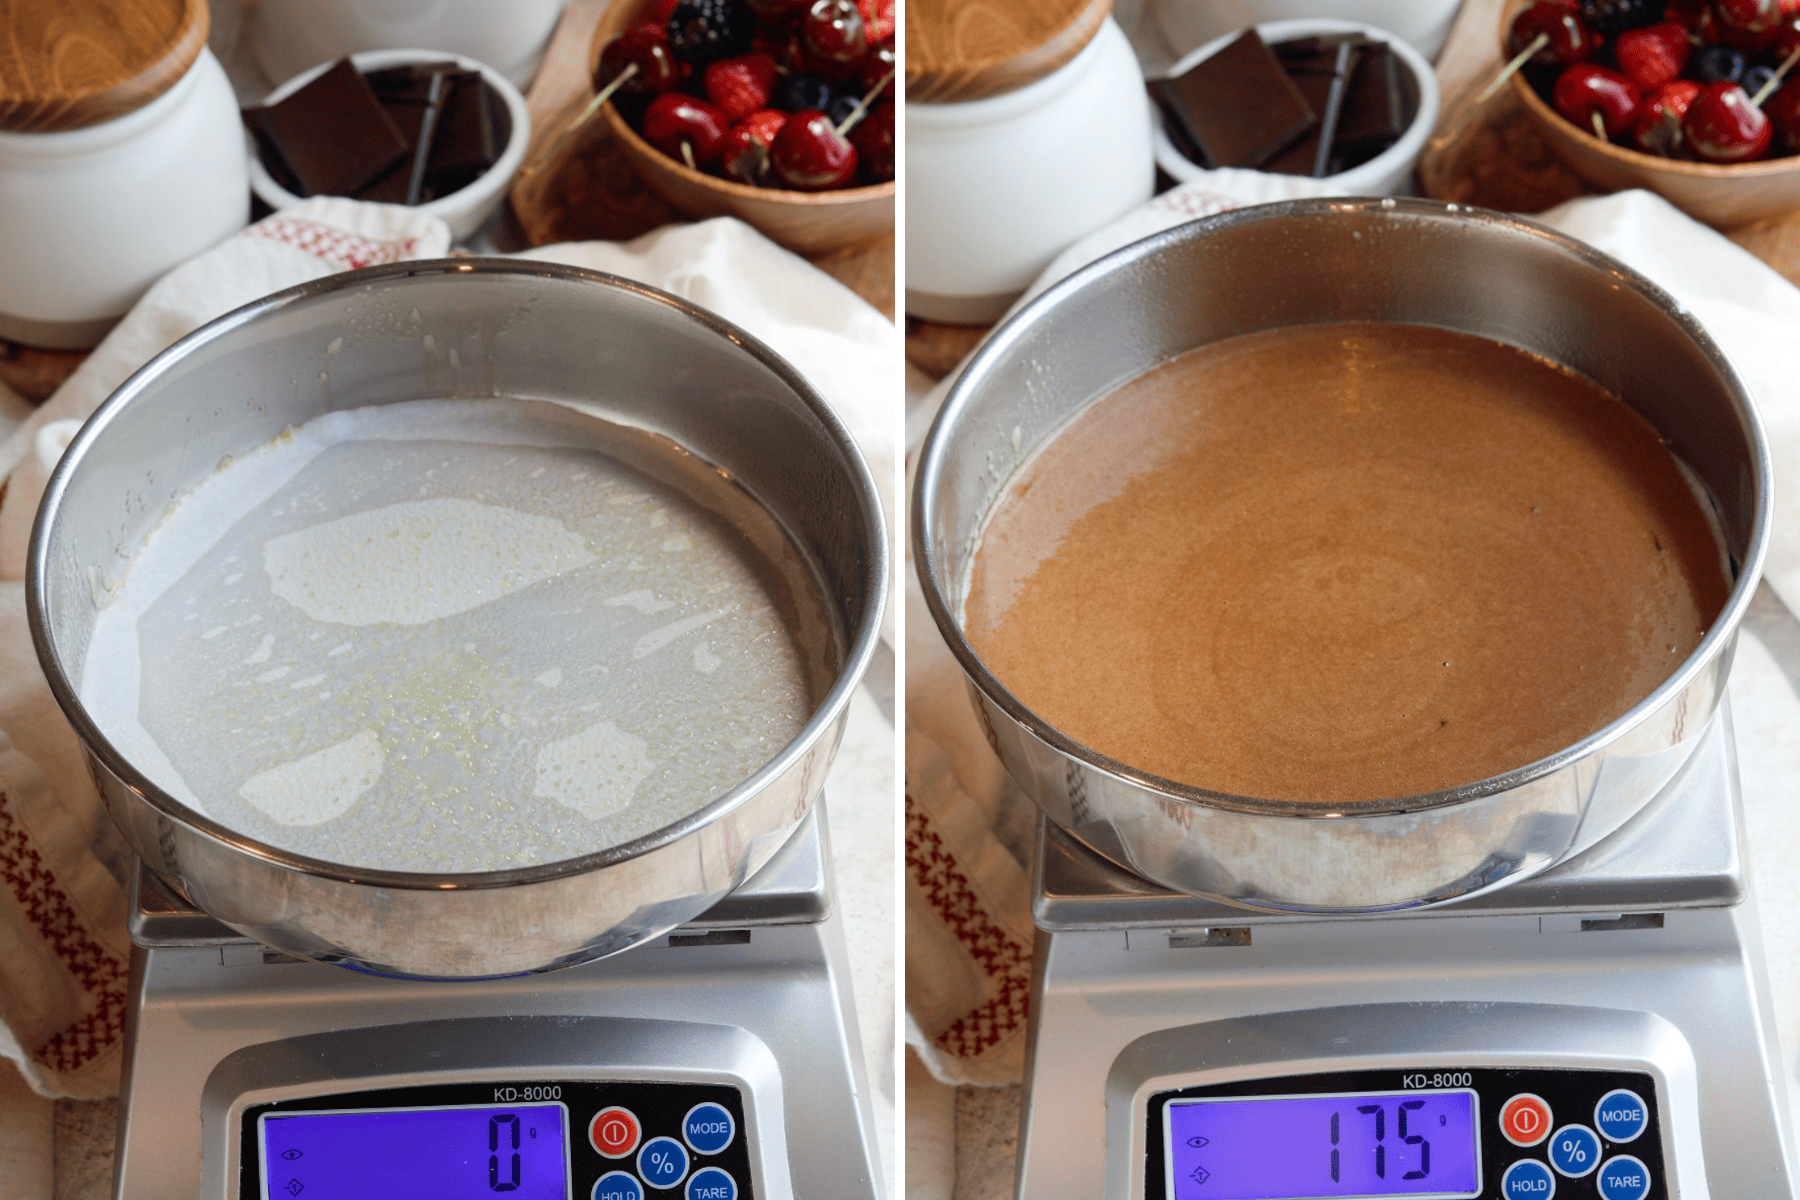
Begin by preheating your oven to 350°F. Grease and line as many 8-inch round cake pans as you have, making sure to grease both the parchment and the sides of the pans. Since you’ll likely be baking in batches, weigh your empty mixing bowl before starting—this will make it easy to portion the batter evenly so each of your eight layers is the same size.
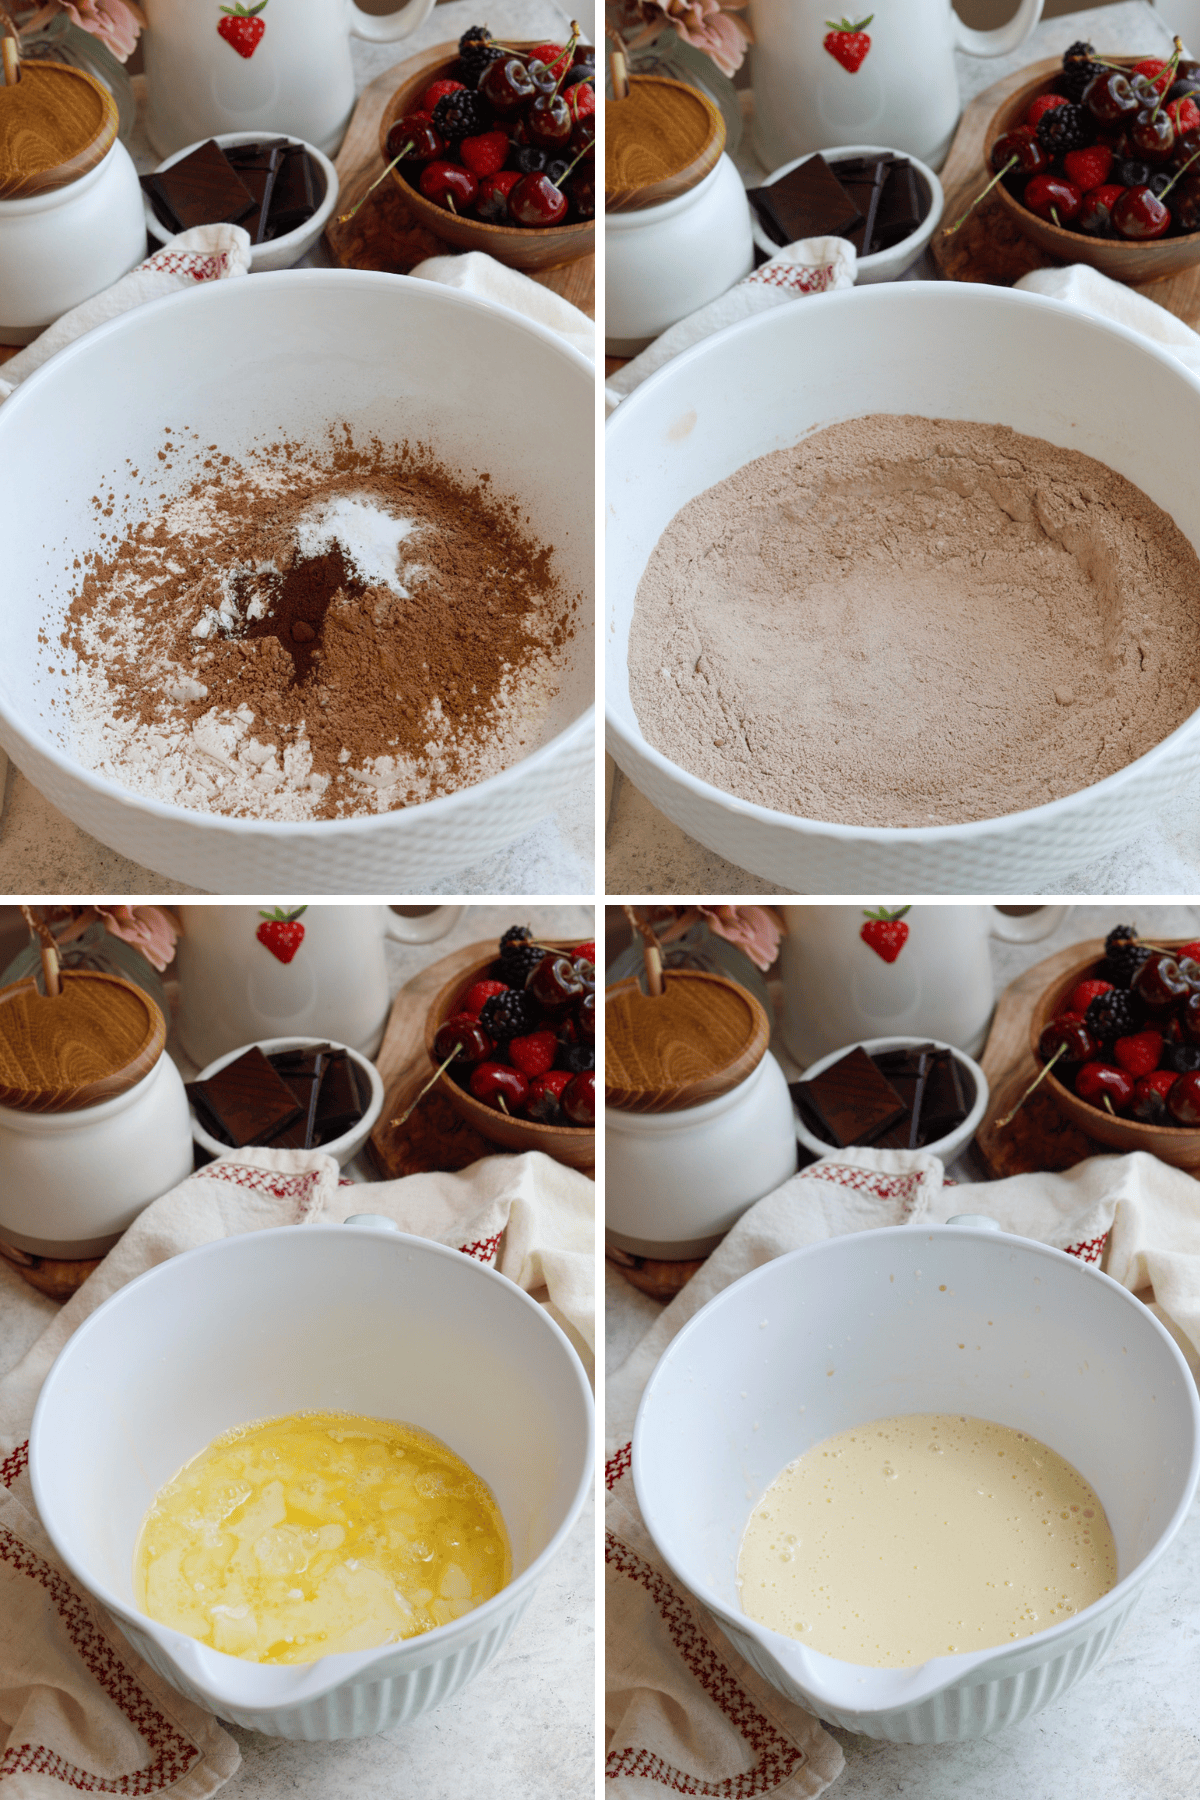
In a large bowl, whisk together the flour, sugar, cocoa powder, baking powder, baking soda, salt, and espresso powder until well combined. In a separate bowl, whisk the eggs, vegetable oil, buttermilk, sour cream, and vanilla until smooth.
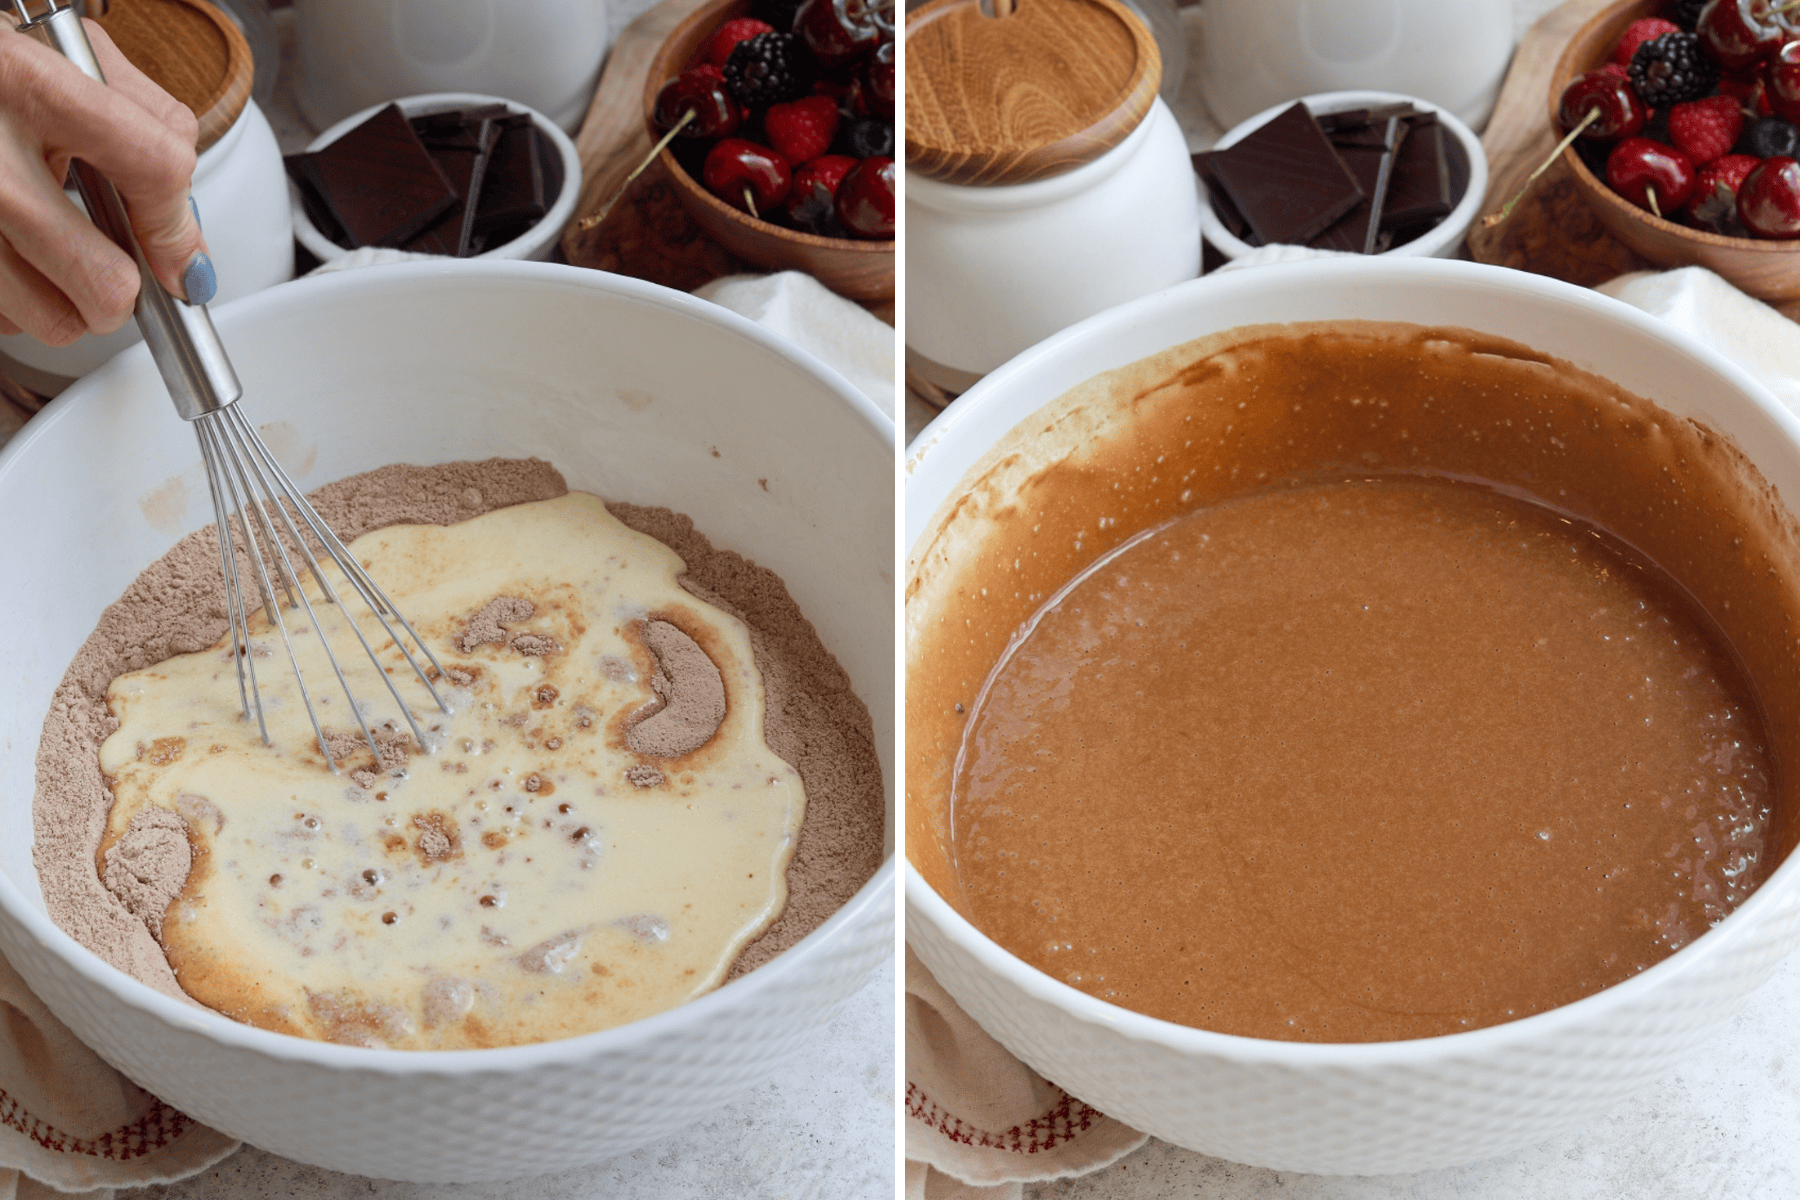
Pour the wet ingredients into the dry and whisk until just combined, then add the hot coffee and whisk again until the batter is smooth and thin.
If possible, transfer the batter to a bowl or large measuring cup with a spout to make pouring easier. Weigh the full bowl of batter, subtract the empty-bowl weight, and divide by eight to determine how much batter to pour into each prepared pan.
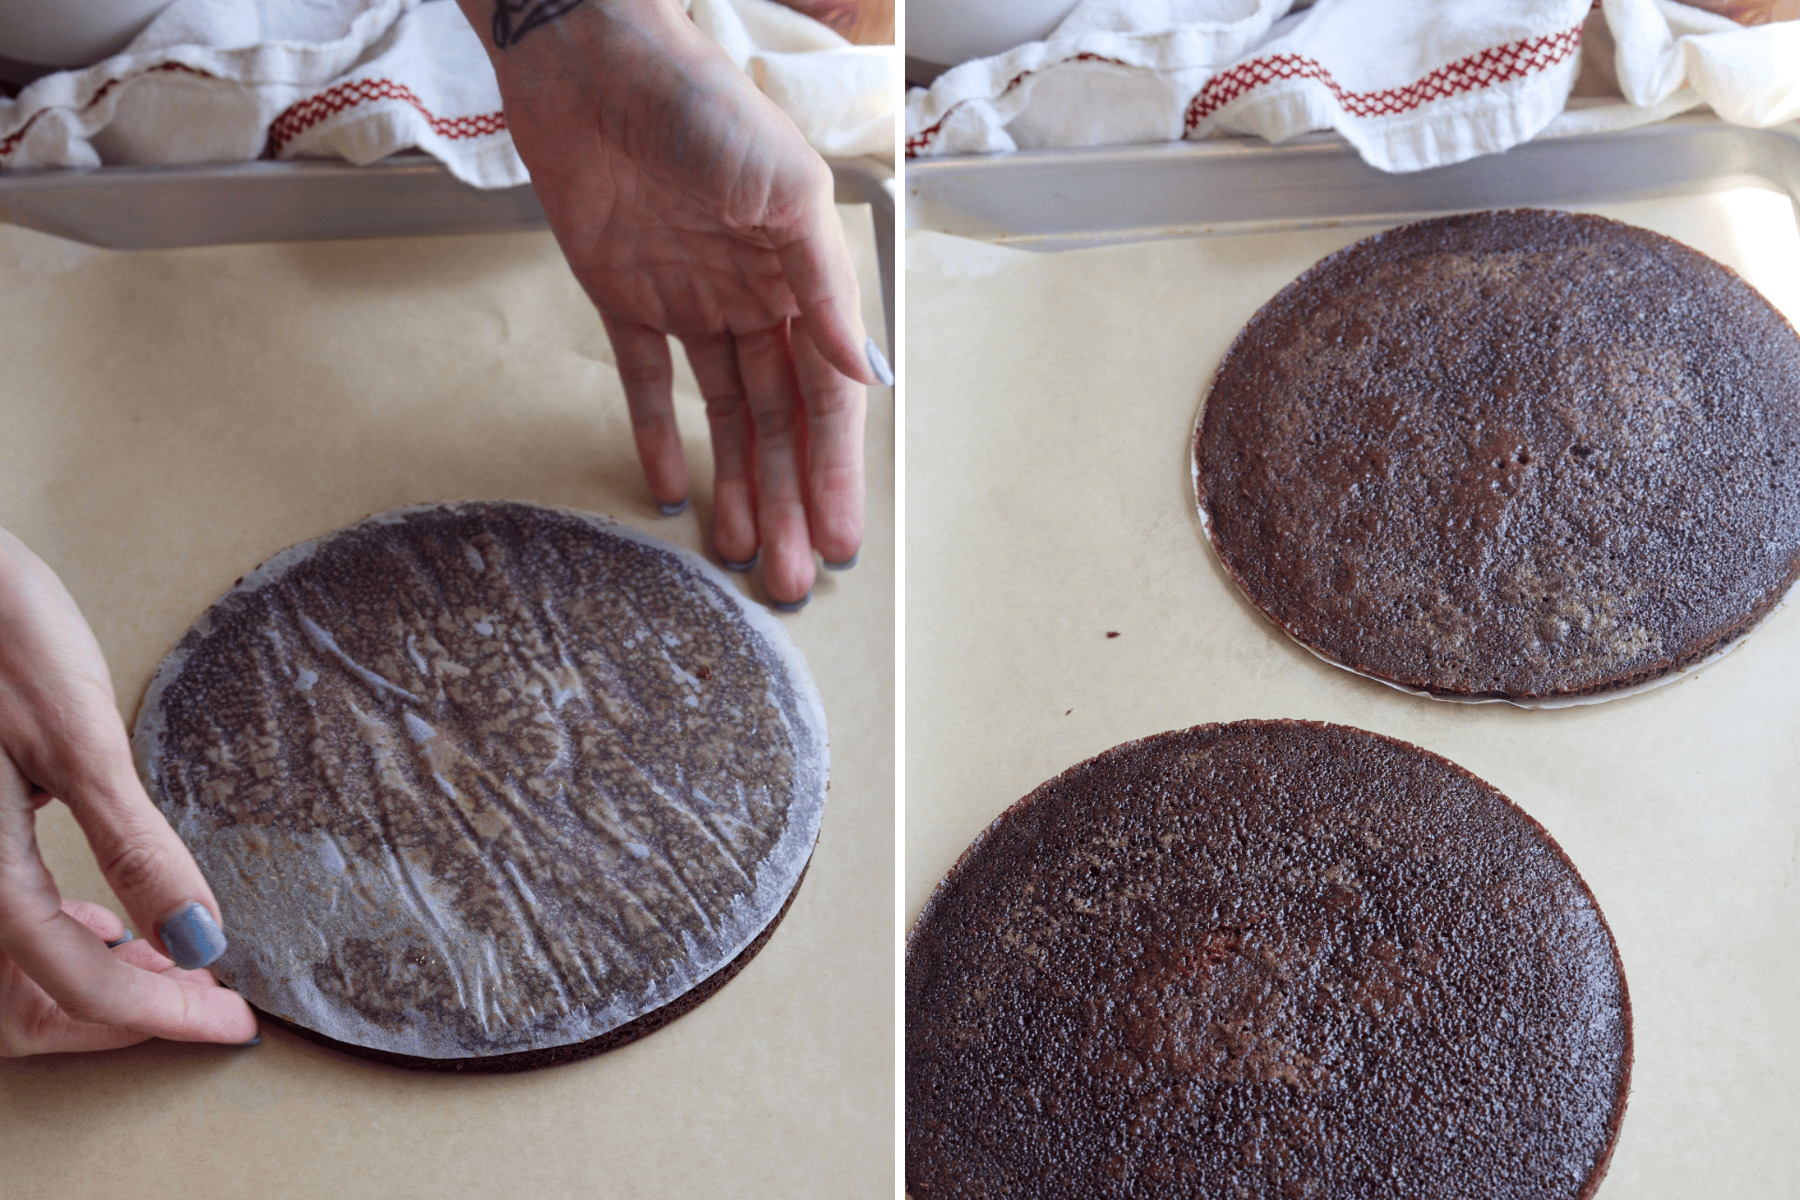
Once the pans are filled, tap them gently on the counter to release any air bubbles. Bake for about 15 minutes, or until a toothpick inserted in the center comes out clean. Let the cakes cool in the pans for 10 minutes before inverting them onto a greased parchment-lined tray—these thin layers are delicate and will tear if they stick. Repeat with the remaining batter, then let all the layers cool completely. If you’re not assembling right away, wrap each layer tightly in plastic wrap and freeze until needed.
Chocolate Buttercream
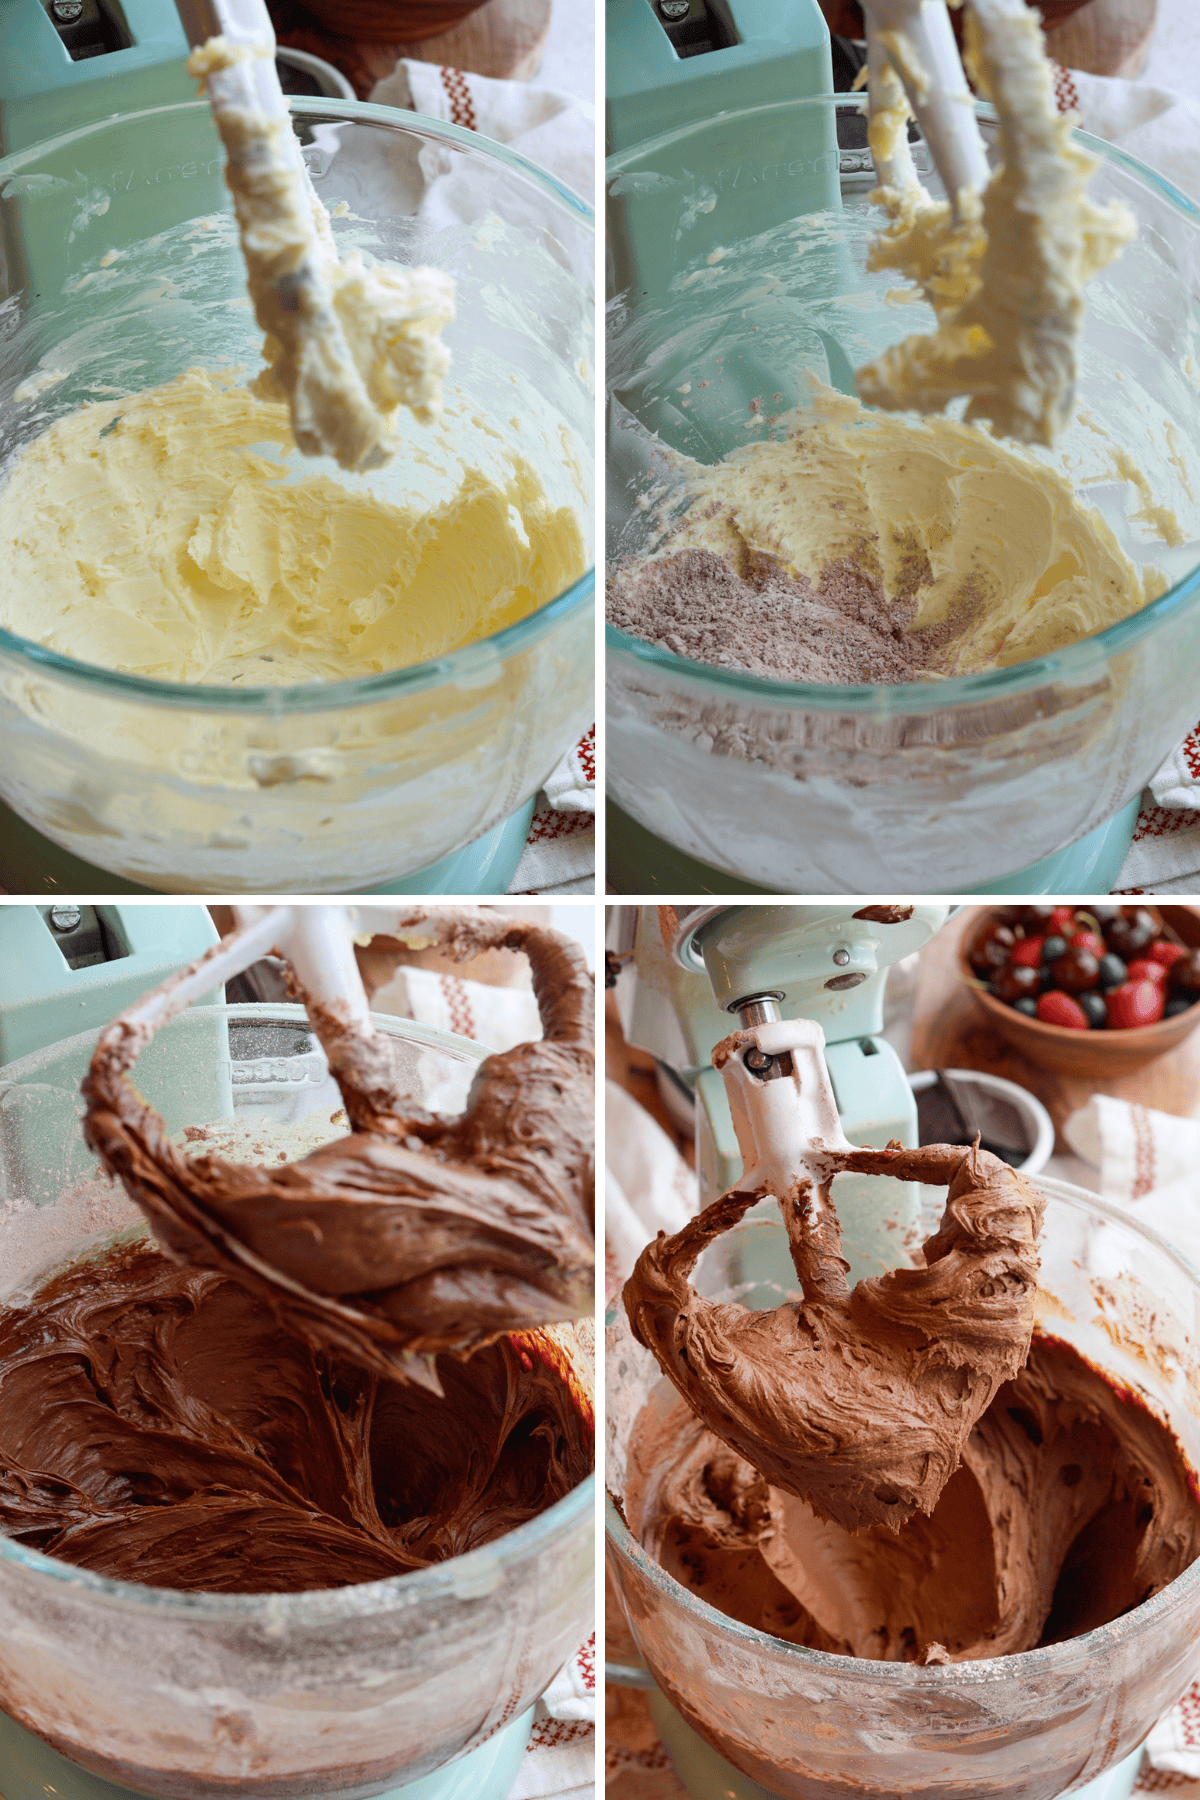
Place the chocolate in a heatproof bowl and melt it in the microwave in 15- to 30-second bursts, stirring between each until smooth. Warm the heavy cream until just hot (but not boiling), pour it over the melted chocolate, and stir until smooth. Let the mixture cool for about 15 minutes.
Sift the powdered sugar and cocoa powder together into a separate bowl. In a stand mixer fitted with the paddle attachment, beat the butter for about 1 minute until smooth and creamy. With the mixer on low, gradually add the sifted sugar and cocoa mixture, scraping down the bowl as needed. Add the cooled chocolate mixture and vanilla, then continue mixing on low until the frosting is smooth and spreadable.
Chocolate Ganache Drip
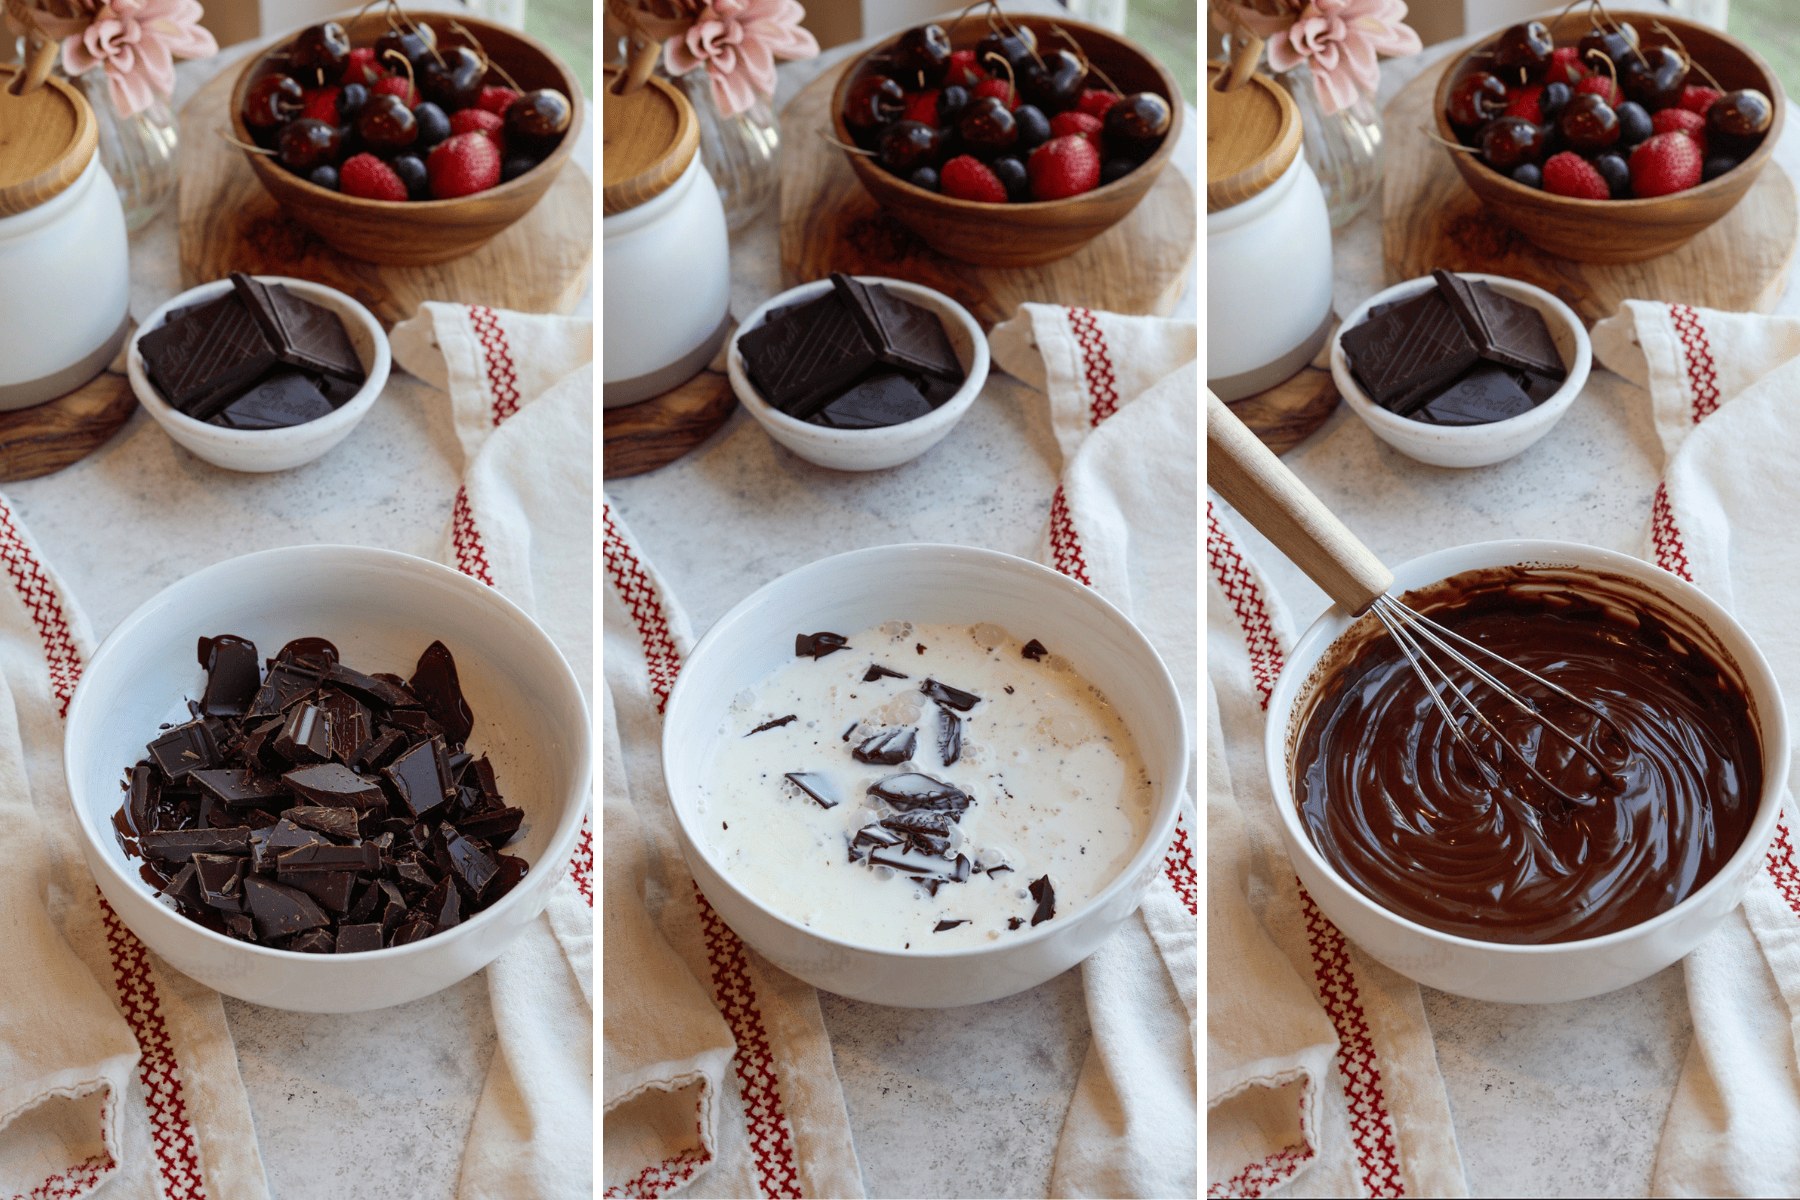
Heat the cream in a small saucepan until just steaming—do not let it boil. Place the chopped chocolate in a heatproof bowl, pour the hot cream over it, and let it sit for 1 minute. Stir from the center outward until glossy and fully combined. Let the chocolate ganache cool at room temperature for about 15 to 20 minutes, or until it thickens slightly but is still pourable. To test the consistency, drip a little down the side of a chilled plate—it should move slowly without running straight off. If it’s too thin, let it cool longer; if it’s too thick, warm it for a few seconds in the microwave.
Assembling the 8-layer Chocolate Cake
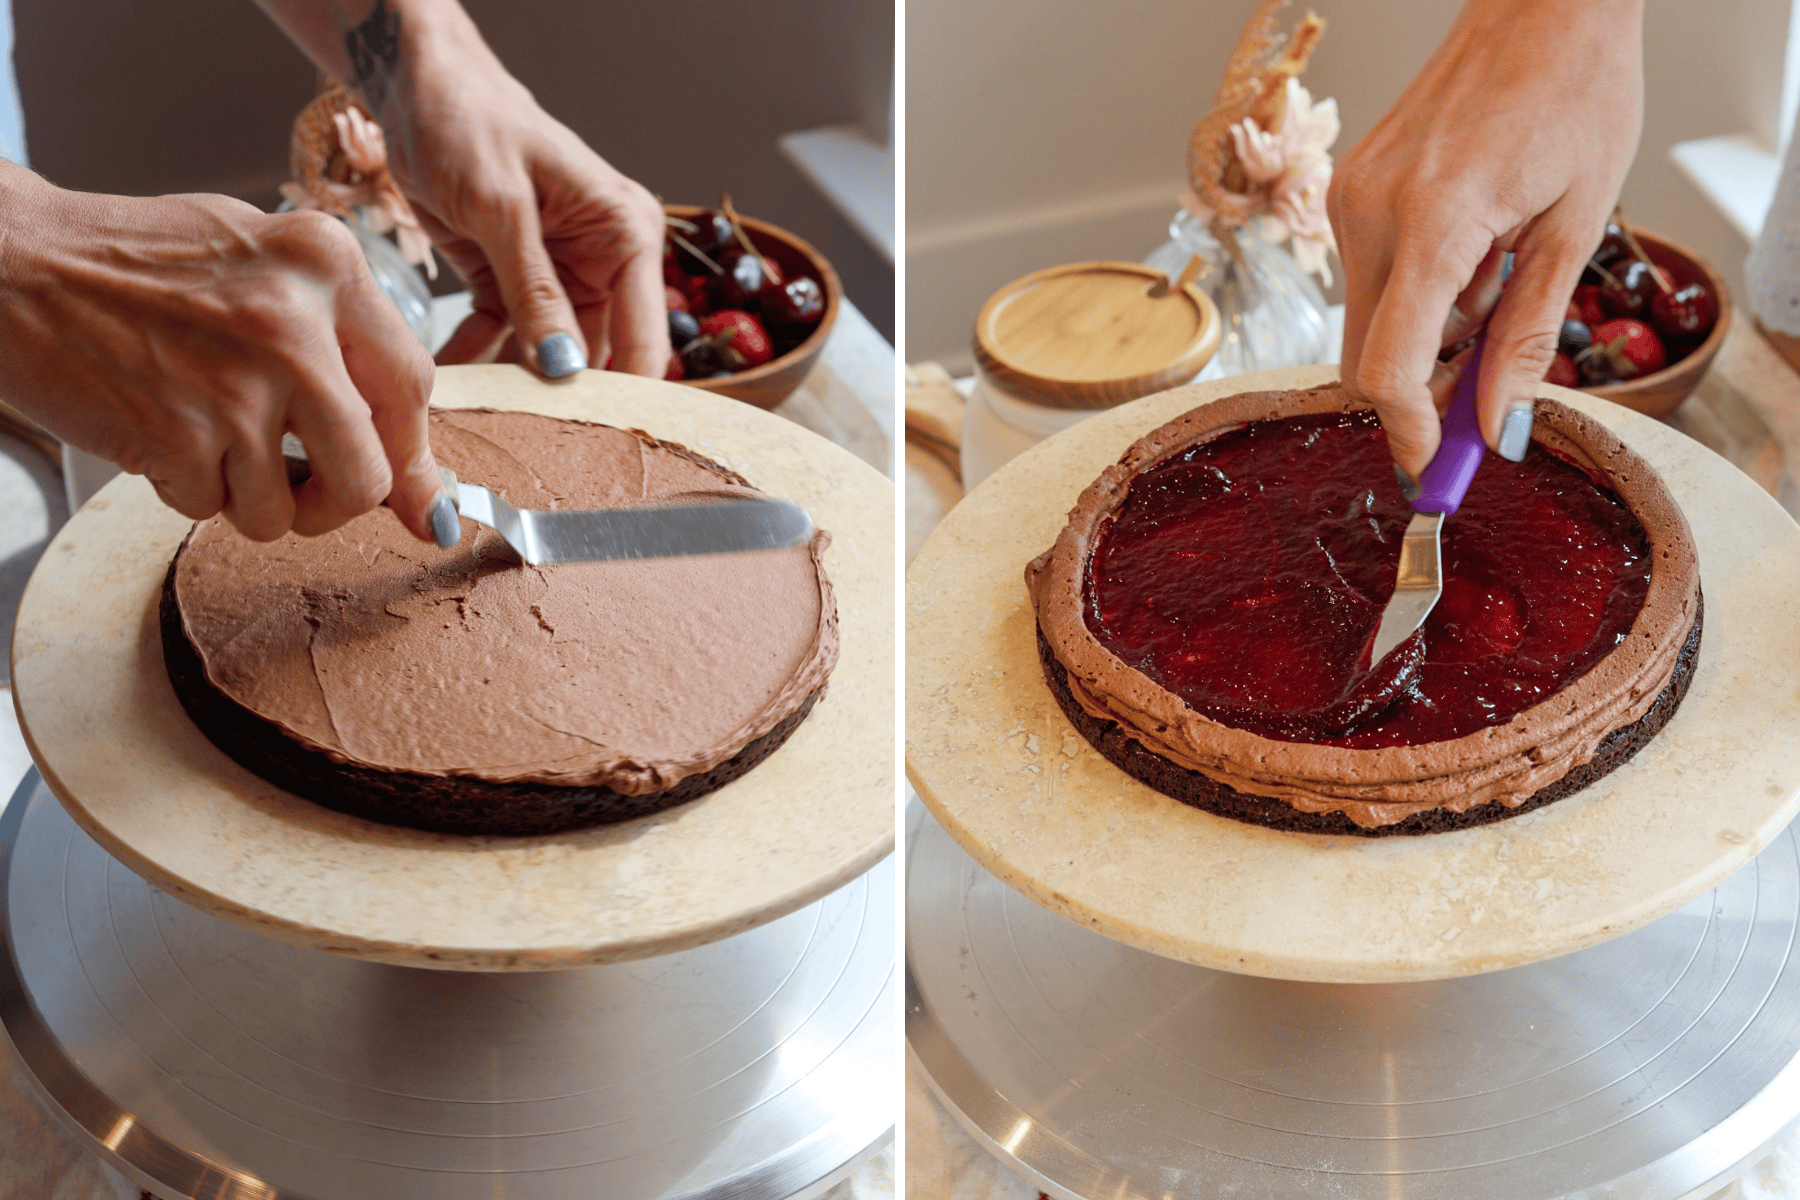
Place the first cake layer on a cake stand or serving plate and spread a thin layer of buttercream over the top. Pipe a ring of buttercream around the outer edge to create a barrier, then spoon in a few tablespoons of the cooled berry jam and spread it evenly inside the ring, taking care not to overfill.
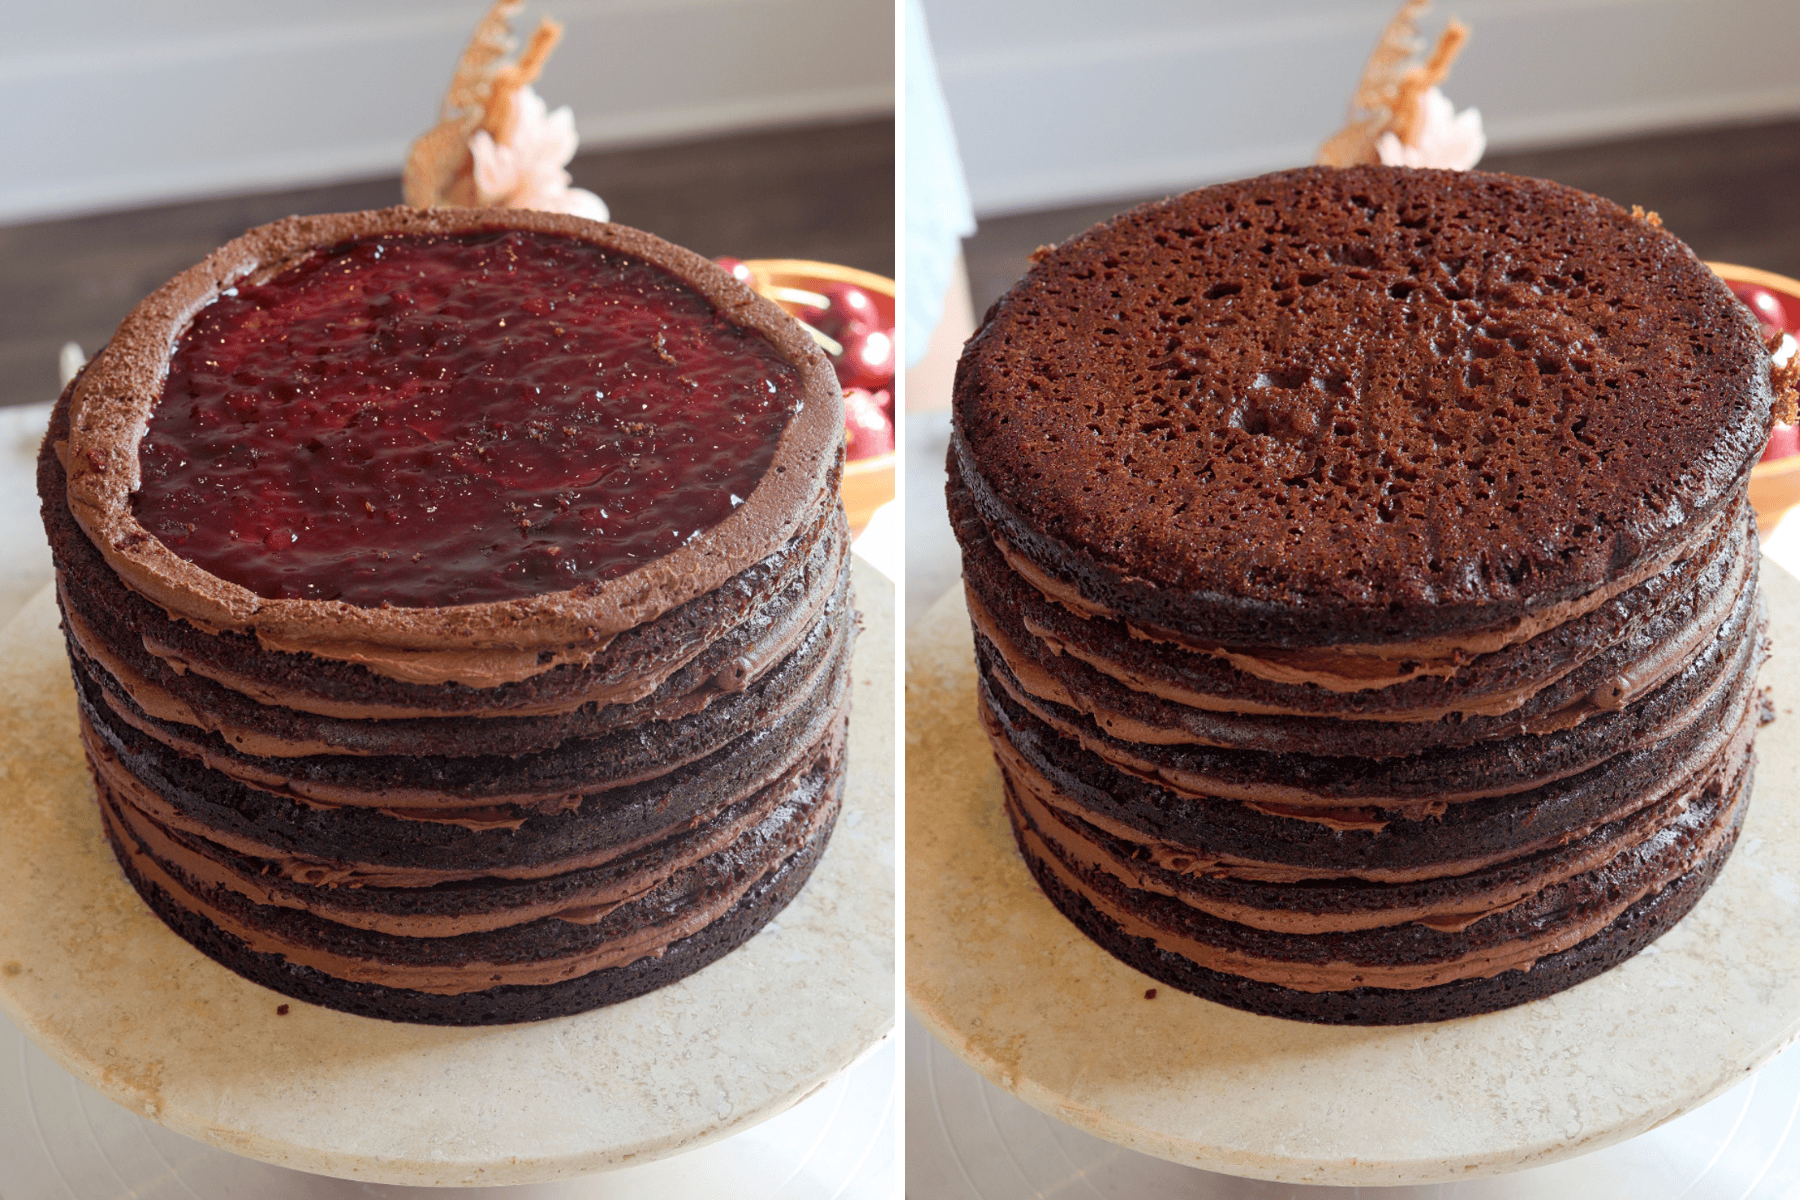
Repeat this process with the remaining layers, stacking them carefully to keep the cake level. Once all layers are stacked, spread a thin crumb coat of buttercream over the entire cake to seal in any crumbs, then refrigerate for about 20 minutes.
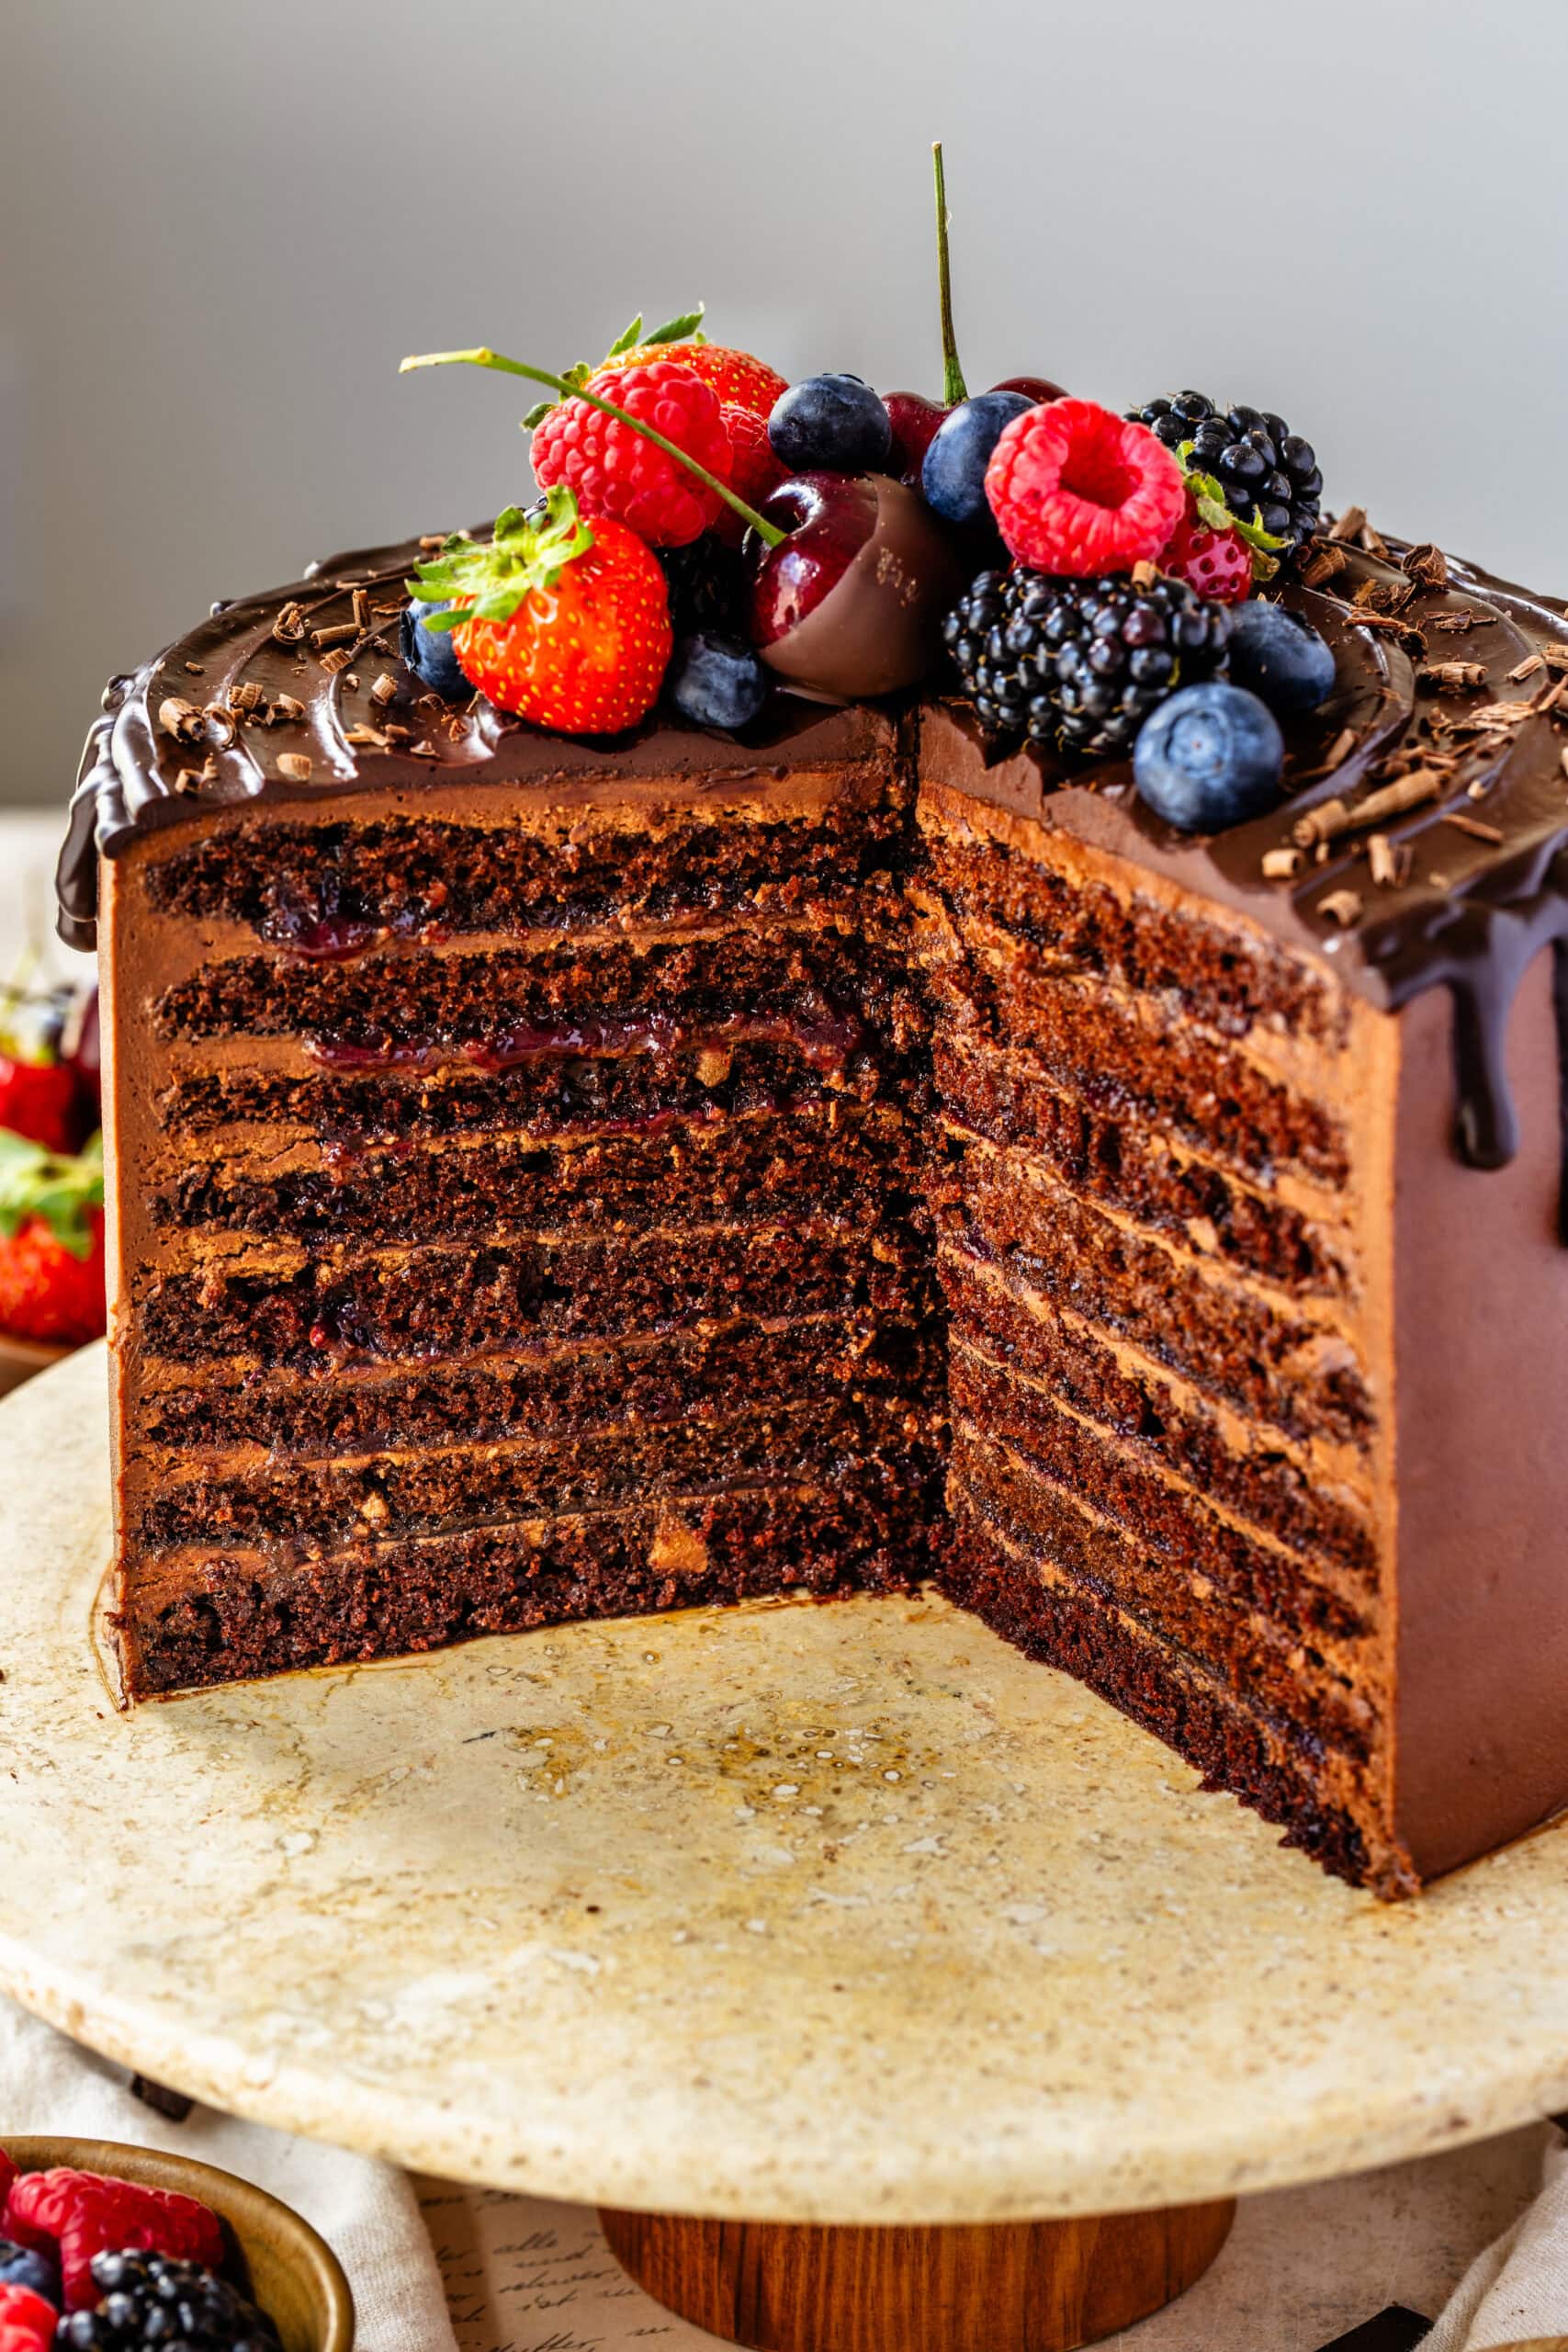
Apply a thicker final coat of buttercream, smoothing the top with an offset spatula and the sides with a bench scraper. Chill the cake for at least 1 hour before adding the chocolate drip. When ready, spoon or pipe the ganache around the edges, letting it drip naturally down the sides, then spread the remaining ganache across the top. Refrigerate for 10 minutes to set the ganache before decorating with fresh berries, chocolate curls, or any finishing touches you like.
Storage
Store your cake in the refrigerator, covered, for up to 4 days. For longer storage, wrap slices or the whole cake tightly in plastic wrap, then foil, and freeze for up to 2 months. Thaw overnight in the fridge before serving.
Tips & Tricks
- Precision is key — weigh your mixing bowl before starting so you can accurately portion the batter for even layers.
- Grease your parchment — thin layers are delicate and can tear if they stick.
- Work with chilled cake layers for easier stacking and cleaner cuts.
- Let your ganache cool to just pourable before dripping—it should move slowly, not run straight down the sides.
- Don’t skip the crumb coat — it seals the cake and makes the final layer look flawless.
Variations on 8-layer Chocolate Cake
Salted Caramel – Replace the berry jam with thick salted caramel sauce between each layer, keeping the chocolate buttercream frosting.
Peanut Butter Frosting – Swap the chocolate buttercream for a smooth peanut butter frosting. Pair it with either the salted caramel filling or the berry jam.
Tropical Chocolate – Use mango or passionfruit curd in place of the berry jam and frost the cake with coconut buttercream.
Strawberries and Cream – Fill the layers with fresh sliced strawberries and stabilized whipped cream instead of jam and chocolate buttercream.
I hope you enjoy every decadent bite of this 8-layer chocolate cake—it’s truly a labor of love that’s worth every step. If you make it, I’d love to see your creation! Share your photos on Instagram and tag me so I can celebrate your baking success right along with you.
8-Layer Chocolate Cake
Ingredients
Mixed Berry Jam
- 1 cup strawberries halved
- 1 cup raspberries
- 1 cup blueberries
- 1 cup blackberries
- ½ to ⅔ cup granulated sugar 100g to 132g (see notes)
- 2 tbsp lemon juice
- 1½ tbsp cornstarch
- 3 tbsp water
Chocolate Cake Batter
- 2½ cups all-purpose flour 320g
- 2 cups granulated sugar 400
- 7 tbsp cocoa powder 42
- 1¼ tsp baking powder
- 2½ tsp baking soda
- ½ tsp salt
- ¼ tsp espresso powder
- 3 large eggs
- ⅔ cup vegetable oil 150ml
- ¾ cup buttermilk 180ml
- ⅓ cup sour cream 75g
- 2½ tsp vanilla extract
- 1 cups brewed coffee 240ml
Chocolate Buttercream
- 1 1/3 cups chocolate chips or chopped chocolate dark or semi-sweet (226g)
- 1 cup heavy cream 240mlop
- 5 cups powdered sugar 665g
- 1⅓ cups unsweetened cocoa powder 133g
- 1½ cups unsalted butter room temperature (339g)
- 2 tsp vanilla extract
Chocolate Ganache Drip
- 4 oz dark or semi-sweet chocolate, chopped 115g
- 4 oz heavy cream 120ml
Instructions
Mixed Berry Jam
- In a medium saucepan, combine the strawberries, raspberries, blueberries, blackberries, sugar, and lemon juice. Place over medium heat and cook, stirring occasionally, until the fruit begins to release its juices and soften (about 10 minutes). If it’s sticking to the pan, lower the heat or add one or two tablespoons of water.
- Use the spatula to gently mash the berries against the sides of the pan to release more juice.
- Once the syrup has been reduced, and the berries are falling apart, mix the cornstarch with the water in a small bowl.
- Stir the cornstarch mixture to make sure it’s smooth, then pour it into the saucepan while stirring. Increase the heat slightly and bring the mixture to a gentle boil. Cook for 1–2 minutes, stirring constantly, until the jam thickens and looks glossy.
- Place a fine-mesh sieve over a clean bowl. Carefully pour the hot jam through the sieve, using a spoon or spatula to press the liquid through while leaving seeds and skins behind. Discard the solids.
- Cover the surface of the jam with plastic wrap.
- Let it cool to room temperature. Refrigerate for at least 2 hours, and up to 2 weeks, or freeze for longer storage.
Chocolate Cake Batter
- Start by pre-heating the oven to 350ºF. Grease and line with parchment as many 8-inch cake pans as you have. Grease the parchment and the sides of the pan as well. You will have to bake the batter in batches, unless you have 8 pans and the oven space.
- Make sure to weigh the bowl you’ll be using before starting the recipe, this way you can easily do the math of how much batter goes in each pan. It’s very important to be precise, or you may run out of batter to have all eight layers. It’s highly recommended that you use a scale for this recipe.
- In a large mixing bowl, mix the flour, sugar, cocoa powder, baking powder, baking soda, salt, and espresso powder (if using). Whisk to combine.
- In another bowl, combine the eggs, vegetable oil, buttermilk, sour cream, and the vanilla extract. Whisk until completely incorporated.
- Pour the wet ingredients over the dry ingredients and whisk until combined. When the batter is incorporated, add the hot coffee and mix to combine.
- Whisk until the batter is smooth. The chocolate cake batter will be very thin and liquidy.
- I like to transfer it to a bowl with a spout to help distribute the cake batter between the cake pans, which helps with such a runny batter.
- Divide the batter evenly between the cake pans.
- Tap them gently against the counter to release any bubbles.
- Bake the cakes in the oven for about 15 minutes, until a toothpick inserted into the cake comes off clean.
- Let the cakes cool down for 10 minutes in the pan. Flip it over onto a greased parchment lined tray, because the cake will be very thin, delicate, and moist, so it can stick to the tray and you won’t be able to lift it. Make sure the parchment is greased or it will stick to the cake.
- Proceed to baking the next batch.
- Then remove the cakes from the pan. Let them cool down. If you aren’t frosting the cake on the same day, I recommend you wrap each layer individually in plastic wrap and then freeze until you are ready to use the cake layers. When you are ready to frost the cake, you can simply use the frozen cake layers, or let them sit on the counter for 20 minutes before frosting the cake.
Chocolate Buttercream
- Place the chocolate chips or chopped chocolate in a bowl. Place in the microwave for 15 to 30 second intervals, stirring until melted.
- Heat up the heavy cream gently, until just hot, and pour over the melted chocolate chips.
- Let the mixture cool down for about 15 minutes.
- Sift the powdered sugar and cocoa powder together.
- In a large bowl, or the bowl of a stand mixer, beat the butter for 1 minute using the paddle attachment, until creamy.
- Add the sifted powdered sugar and cocoa powder slowly, while beating the butter on low, scraping the bowl every so often to ensure everything is getting nicely incorporated together.
- Add the melted and cooled chocolate and heavy cream mixture along with the vanilla to the bowl, and beat on low until combined.
- Add the vanilla extract and mix.
Assembly
- To assemble the cake, start by placing one cake layer on a cake plate.
- Spread a very thin later of buttercream on top. Then pipe a thin circle of frosting around the edges of the cake.
- Fill the center with a few tablespoons of the strained and cooled jam, spreading on an even layer, without over filling.
- Top with another cake layer. Repeat until you reach the top of the cake.
- If the cake is sliding, consider placing it in the fridge or freezer for ten to twenty minutes before continuing assembly.
- Always remember to keep the frosting covered.
- Spread the frosting on top of the cake and all over the sides of the cake.
- Use an offset spatula to smooth out the top of the cake.
- And use a bench scraper to smooth out the sides of the cake.
- You can place the cake in the fridge for 20 minutes after applying this first layer of frosting, this will seal all the crumbs in and give you a clean smooth finish once you apply a thicker layer of frosting.
- Remove the cake from the fridge and spread a thick layer of frosting all over the sides and top of the cake. Repeat the smoothing process with the spatula and cake scraper.
- Place the cake in the fridge for at least one hour before doing the ganache drip.
Chocolate Ganache Drip
- In a small saucepan or microwave-safe bowl, heat the cream until just starting to simmer (do not boil).
- Place the chocolate in a heatproof bowl and pour the hot cream over it. Let sit for 1 minute to soften.
- Stir from the center outward until glossy and fully combined.
- Let sit at room temperature until slightly thickened but still pourable (about 15–20 minutes). It can take longer depending on how hot the cream was.
- Test the consistency of the ganache on the side of a chilled bowl or plate. If it slowly drips down without running off completely, it’s ready. You can also carefully test on the side of the cake.
- You can either use a spoon to drip, or a piping bag.
Decorating
- Start dripping the ganache down the sides of the cake by piping or spooning it in drops around the edges of the cake. Once you go around the whole circumference, spread the remaining ganache in the center.
- Let the ganache set for at least ten minutes in the fridge, until set but not fully dry. Decorate with berries if desired, and chocolate shavings.
Storage
- Store the cake in the fridge for up to 4 days, in an air tight container. You can also wrap the cake in plastic and freeze it, for up to 2 months.
I don’t love berries in chocolate cake (love them with a vanilla cake!). Can you recommend any of your other fillings for this cake? Thank you:)
You could do just the chocolate frosting as a filling. Alternatively, here are some cakes with fillings that would go well: Cookies and Cream Cake, Dulce de Leche, the coconut filling from this German Chocolate Cake, the caramel sauce from this Vanilla Bean Caramel Cake.
Thank you! Pecan coconut filling it is 😻I can’t wait to try your recipe(s).
I have a recent new intolerance to wheat. Is there any possible way to make this with cup4cup or another wheat free option? I want the challenge of making this gorgeous cake but I woudl love to be able to eat it too!
You can substitute one-to-one gf flour