Strawberry Cheesecake
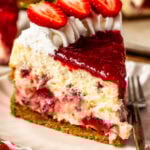
This Strawberry Cheesecake features a buttery graham cracker crust, a smooth and creamy cheesecake filling, and swirls of homemade strawberry jam, all topped with whipped cream and fresh berries. Elegant, rich, and full of fresh flavor, it’s a show-stopping dessert that’s perfect for any celebration.
Servings 12 servings
Calories 480kcal
Ingredients
Strawberry Jam
- 4 cups quartered strawberries 600 grams
- 1 cup granulated sugar 200 grams
- 4 tbsp lemon juice
Graham Cracker Crust
- 1½ cups graham cracker crumbs 180 grams, or digestive biscuits
- ¼ cup brown sugar 55 grams
- 6 tbsp unsalted butter melted 85 grams
Cheesecake Batter
- 907 grams cream cheese softened 4 packages of 8 oz.
- 1⅓ cup granulated sugar 266 grams
- ½ cup sour cream 120 grams
- 4 large eggs room temp
- 1 tbsp vanilla extract
- ½ tsp salt
Whipped Cream
- 1 cup heavy whipping cream
- 2 tbsp powdered sugar
Instructions
Strawberry Jam
- Add the chopped strawberries, sugar, and lemon juice to a saucepan and cook, stirring occasionally, at medium-high heat.
- When the strawberries come to a boil, turn the heat down and continue to cook at medium-low heat.
- Cook until a thermometer reads between 200 and 220ºF. The jam will be dark, and thick. If it starts to stick to the bottom of the pan, turn the heat down even lower. If you don’t have a thermometer, simply stop cooking them jam once it is dark, thick, and reduced.
- Remove the jam from the heat and add to a bowl. Place a piece of plastic wrap directly on the surface of the jam, and let it cool down. Refrigerate for a couple of hours before using.
- Remove 1/2 cup of the jam to spread on top of the cheesecake.
Graham Cracker Crust
- Pre-heat the oven to 325ºF.
- Place the graham cracker in a food processor and process to obtain fine crumbs. Add the brown sugar and mix to combine.
- Melt the butter and mix with the crumbs and sugar.
- Press the mixture on the bottom of an 8” or 9” cheesecake pan. If using an 8” springform pan, it must be at least 3" deep.
- Bake the crust in the oven for 10 minutes.
- Remove it from the oven and let it cool down.
Cheesecake Batter
- Grease the sides of the cheesecake pan. (Read notes)
- In a large bowl, beat the cream cheese for 3 minutes with a mixer at medium speed, until creamy.
- Add the granulated sugar to the bowl and beat for 2 minutes at medium speed.
- Scrape the bowl and beat for another 30 seconds.
- Add the sour cream and mix to combine. Scrape the bowl.
- Make sure to scrape the bowl a few times during the mixing process, to avoid the cream cheese from forming lumps in the batter.
- Add the eggs one at a time to the bowl, mixing until incorporated before adding the next one. Add the vanilla and the salt with the last egg.
- Avoid over mixing once the eggs are added, to prevent cracking of the cheesecake.
Assembling the Strawberry Cheesecake
- Pour one third of the cheesecake batter on the bottom of the baked and cooled graham cracker crust.
- Add about a quarter cup of strawberry sauce in spoonfuls on top of the batter.
- Use a knife or a spatula to swirl the sauce into the cheesecake batter gently. You don’t want to completely blend them together.
- Pour another third of the cheesecake batter on top of the swirled batter and sauce.
- Pour another third of a cup of the strawberry sauce in spoonfuls on top of the batter. Swirl it gently with a spatula or knife.
- Pour the remaining cheesecake batter on top, and top with the another quarter cup of strawberry sauce. Swirl it around with a spatula.
- Wrap the bottom of the pan with a few layers of foil.
- Place the pan in a larger roasting pan, and add hot water to the roasting pan, to form a water bath. This is very important so the cheesecake doesn’t crack.
- Bake the cheesecake in the pre-heated 325ºF oven for 60 to 75 minutes.
- To check if the cheesecake is done baking, give the pan a little wiggle, it should jiggle slightly in the center, but the edges should look set.
- Turn the oven off, and leave the cheesecake to rest inside for 1 hour.
- Remove the cheesecake from the oven, let it cool down. Don’t remove the ring of the pan yet, place the cheesecake in the fridge to chill for at least 6 hours.
Whipped Cream
- In a large bowl, or in the bowl of a stand mixer, add the heavy cream and powdered sugar.
- Whip with the whisk attachment for about 3 minutes, or until the cream achieves stiff peaks.
- Place it in a piping bag fitted with the tip of choice. I used a tip 4B. Set aside for decorating.
To Decorate
- After the cheesecake has been done chilling, remove from the fridge. Remove the ring from around the pan. You can use a cake lifter tool to lift the cheesecake from the pan and slide it onto a serving plate.
- Pipe the whipped cream on top of the cheesecake, spread the remaining strawberry sauce in the center, and decorate with fresh strawberries if desired.
Storage
- You can store the Strawberry Cheesecake in the fridge for up to 4 or 5 days, covered in an air tight container.
- The cheesecake can also be stored in the freezer for up to 2 months. Make sure to place it in an air tight container. You can also freeze the cheesecake first, then once it’s frozen, wrap it with plastic wrap very tightly and then place in an air tight container. This will extend its freezer shelf life.
Notes
Cheesecake pan: I use the Fat Daddio 8″ springform pan. You can also use a 9″ springform pan with this recipe.
Mini cheesecakes: For adorable mini cheesecakes, bake the batter in cupcake tins. This recipe yields approximately 24 perfectly portioned treats, ready in about 25 minutes. Best of all, no water bath is required!
Crust: You can use digestive biscuits instead of graham crackers.
Greasing the Cheesecake Pan: I prefer to grease the exposed sides of the pan after baking the crust. Greasing the pan beforehand often makes it difficult for the crust to adhere properly to the sides and can lead to a soggy crust.
Electric Mixer: I find a hand mixer works best for making cheesecake. The bowl of a stand mixer is often too deep and narrow, and the paddle attachment doesn’t effectively reach the bottom and sides. This can lead to a lumpy batter unless you scrape the bowl frequently, which can be tedious. A hand mixer provides better control and ensures a smoother texture.
Oven Temperature: When using a convection oven, it’s best to lower the baking temperature to around 300ºF. Keep in mind that baking times may vary. Bake the cheesecake until the center has a slight jiggle and the edges are fully set for perfect results.
Oven Thermometer: Using an oven thermometer is highly recommended to ensure accurate temperature measurement. Ovens are often inconsistent, and if the temperature is too low, the cheesecake will take much longer to bake. Conversely, if the temperature is too high, the cheesecake can crack due to overbaking. A thermometer helps you achieve perfect results every time.
Nutrition
Serving: 1slice | Calories: 480kcal