The Best Mixed Berry Galette Recipe
Hello friends, today I will show you how to make this easy Berry Galette. This is the best mixed berry galette recipe.
I’ve used blackberries, strawberries, and blueberries, but you can use any berries you’d like.
By definition, a galette is a free-form tart, which means it’s all about the rustic look. And, let’s be honest, it’s all about the fruit.
This post may contain affiliate links. I earn a commission from qualified purchases. Please read our Privacy policy here.

The best part about this mixed berry galette is that it takes less than one hour to be ready. So once you start making it, you can have a delicious slice of berry galette in less than one hour.
I’ve made this using refrigerated pie crust. But you can make your own pie crust as well. Find a great recipe here.
Using refrigerated pie crust will cut your labor in half, and truth be told, nobody I served this to could have guessed it was refrigerated pie crust.
Of course making your own pie crust will definitely take things up a level, but refrigerated crust will do just fine if you are going for easy and effortless.
How to make the best Mixed Berry Galette recipe
We will start with the berry mixture.
To make mixed berry galette, you’ll need berries of course.
Pick whatever berries you like the most. I used strawberries, blackberries, and blueberries. We could have added some raspberries to the mix as well.
You could even add peaches to the mix, peaches and raspberry galette is one of my favorite galette fillings. However, it wouldn’t necessarily be a berry galette any longer.
First, wash your berries, make sure to dry them well using paper towels. If using strawberries, slice them.
Place all the berries in a bowl. Add the cornstarch, lemon zest, and honey.
The lemon zest is completely optional here, but it does give a nice aroma to the berry mixture, it compliments the whole galette very nicely.
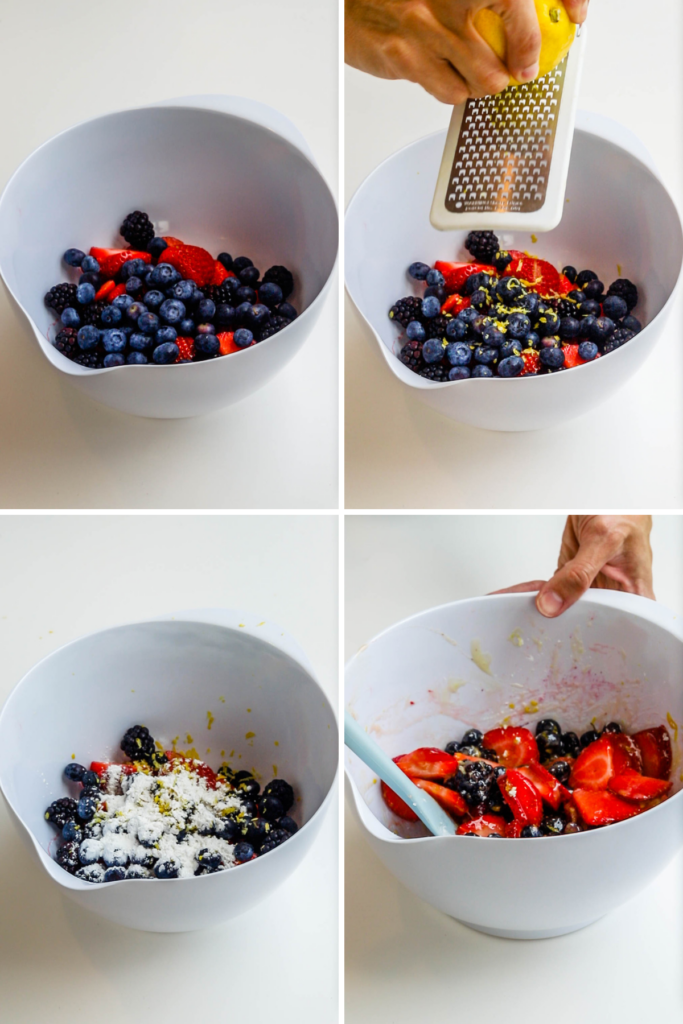
To sweeten the berrie mixture, I used honey, but you can feel free to use sugar instead. You could use any type of sugar, from white granulated sugar to coconut sugar. Instead of honey, you could substitute agave or maple syrup. Anything goes.
Some people also like to squeeze the lemon juice over the fruit before using the mixed berries to fill the galette, but I don’t usually like doing that because it makes for a very wet filling.

After mixing the berries, let’s work with the pie dough.
Whether you made your galette crust from scratch, or if you are using refrigerated pie crust, now it’s time to roll it out.
If you made your own crust from scratch, you’ll have to use the rolling pin to roll it out to a circle that measures about 12 inches in diameter. If using the refrigerated pie crust, simply roll it out on the counter.
It’s best to roll out the dough already on top of a parchment paper or silicone mat that will be used as a surface to bake the galette.
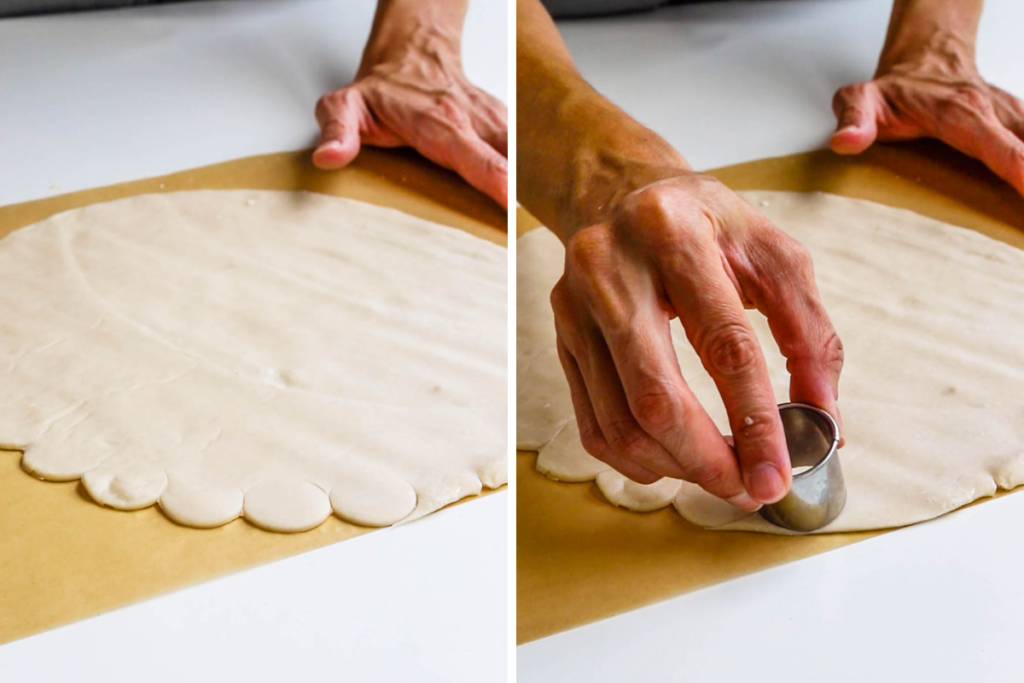
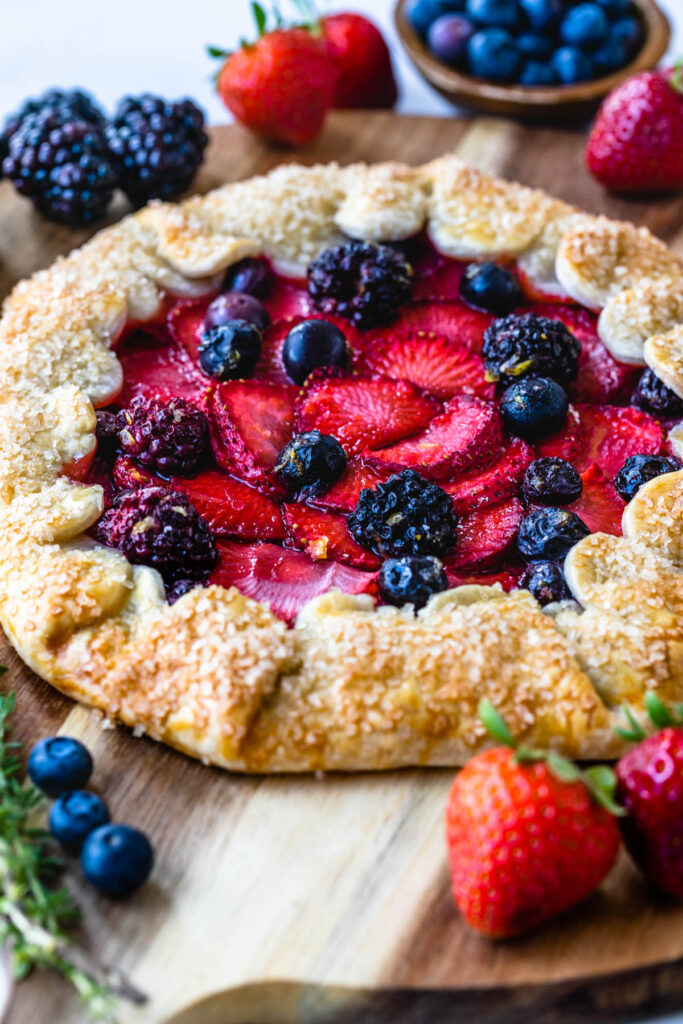
As you can see, I chose to make a scalloped edge for the crust. You don’t have to do that, I just thought it would be a nice touch, and quite effortless to add to the galette. It took me less than 5 minutes to crimp the edges, and using a small round cutter will do the trick just fine.
Make sure not to cut all the way through with the cutter, only use about 3/4 of the cutter to cut through the dough, otherwise you’ll just cut out whole circles in the dough, and you are simply looking to cut a part of it off.
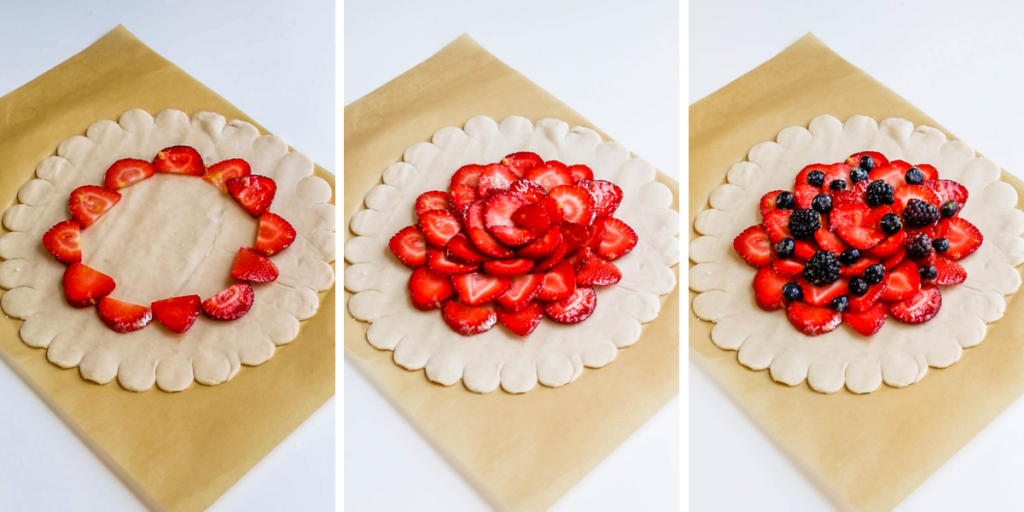
I decided to arrange the strawberries neatly in a circle on the center of the dough, but you can also just pour all the fruit on top of the dough without organizing it.
Spread the fruit on top of the crust, leaving a 2 inch border all around.
If there’s a lot of fruit juices left in the bowl, I just discard it. You don’t want to make a soggy galette, and sometimes the berries will release a lot of juices.
Then fold the border over the fruit, covering the fruit by 1/2 inch.

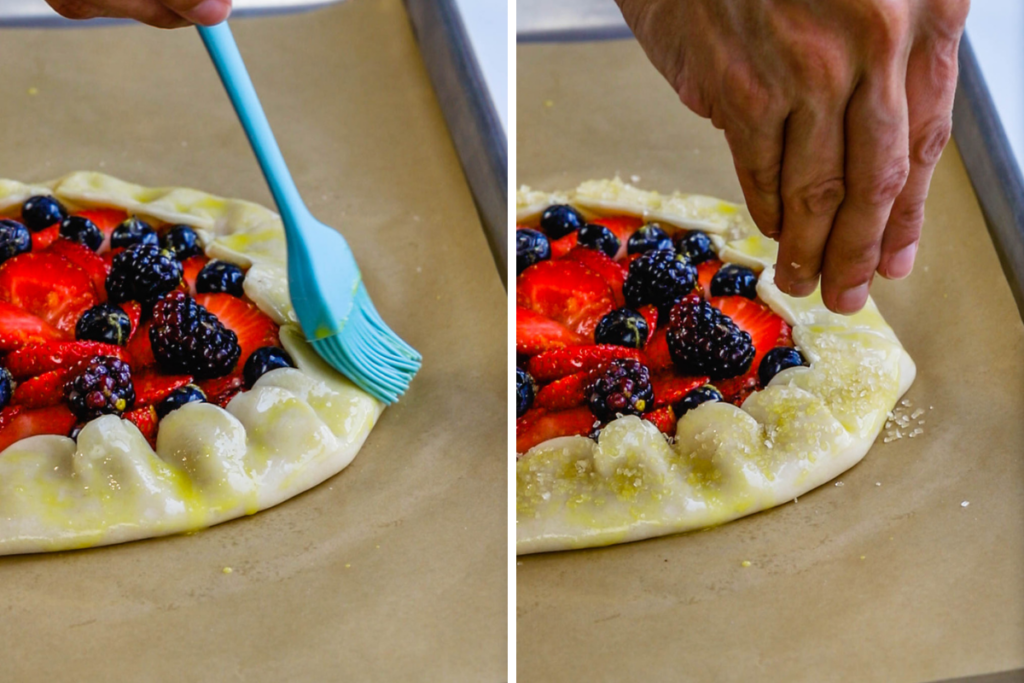
After the galette has been assembled, brush it with egg wash. To keep the galette vegan and egg free, simply use milk instead of the egg to brush on top of the dough.
Whisk the egg well, and use a brush to spread it over the top of the dough.
Then, top the egg washed dough with coarse sugar. I used vanilla coarse sugar. It had a fantastic aroma, and added a nice crunch to the galette as well.
Pick up the parchment paper or silicone mat to transfer the galette to a baking sheet pan.
Now the galette is ready to be baked. Make sure the oven is at 425 Fahrenheit. If the oven isn’t there yet, place the galette in the fridge or freezer while the temperature is reached. It’s important to bake the galette at a high temperature to get a nice golden crispy crust.
The galette should be baked in 25 or 30 minutes, once it looks golden on top and the berries are bubbling.
Remove from the oven and let it cool down for about 10 to 15 minutes before serving.
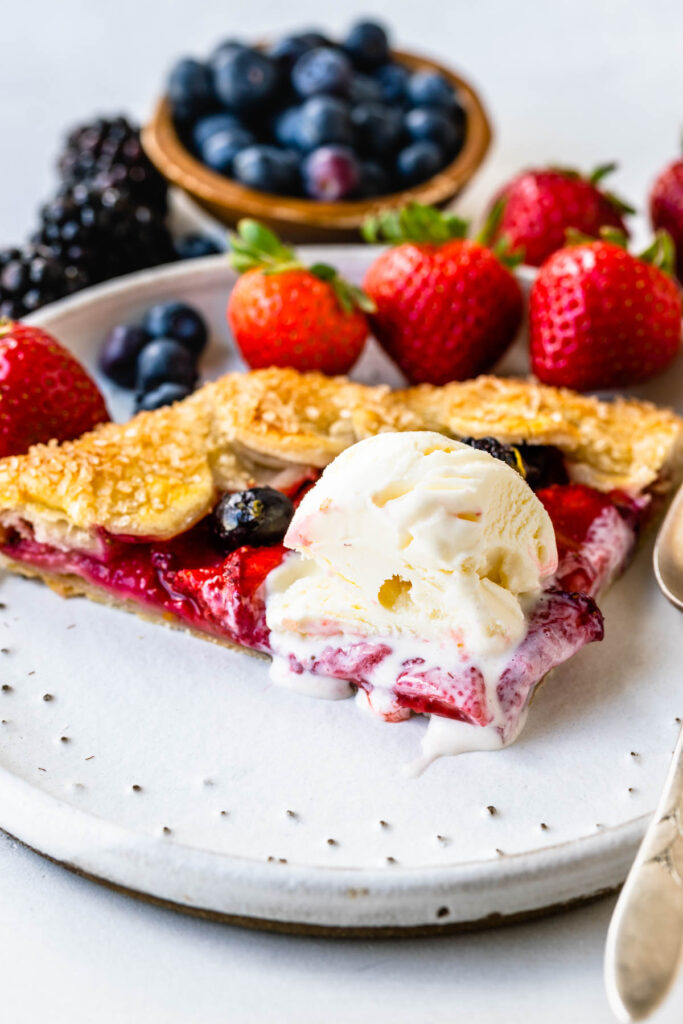
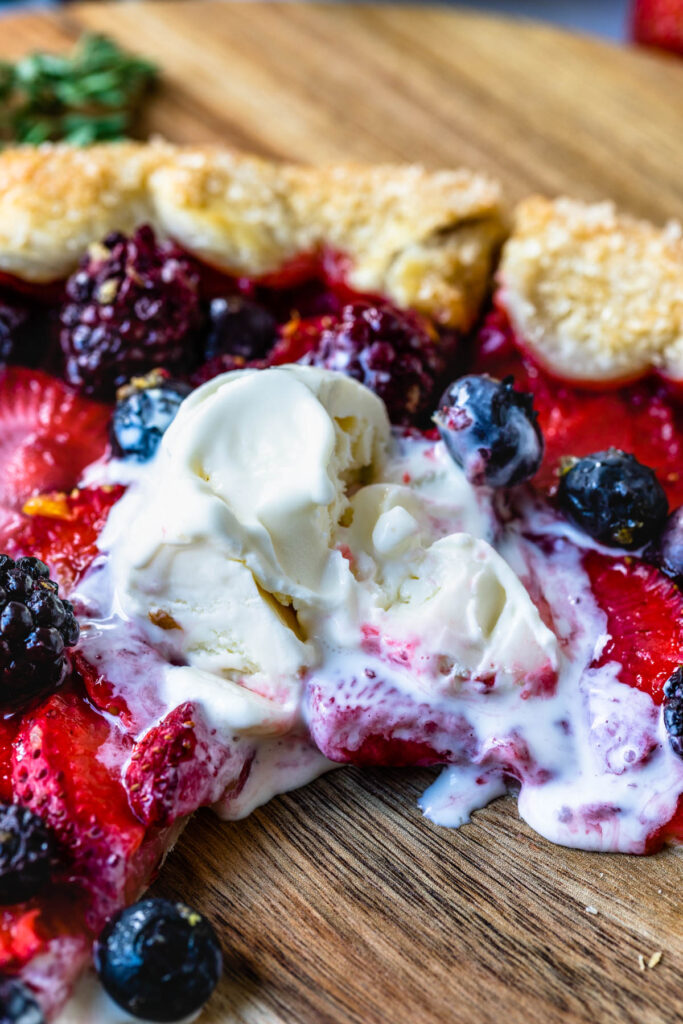
Of course I served my galette with vanilla ice cream, because it’s my favorite way to enjoy any pie or galette.
If you have any leftovers (which I highly doubt you will), you can store them in the fridge for up to 2 days or so.
How do I keep my galette from getting soggy?
As I stated above, I don’t pour all the juices released by the berries over the dough before baking, that will certainly make for a soggy galette.
Can you make a galette the day before?
While you certainly can make a galette the day before, the best thing to me is to eat fresh crispy galette straight out of the oven, still warm, with some vanilla ice cream on top.
What is the difference between a tart and a galette?
A tart is made using a tart pan, while a galette is a free-form pie, which is the beauty of it. It’s often rustic, easy to make, effortlessly delicious.
How do you reheat galette in the oven?
You can reheat the galette using the microwave or the oven. Only 5 minutes in the oven at 350 Fahrenheit will do. And less than a minute using the microwave.
If you like this Mixed Berry Galette recipe, you’ll also like these recipes:
- Strawberry Rhubarb Galette
- Lemon Pie
- Passionfruit Pie
- No Bake Blueberry Cheesecake Pie
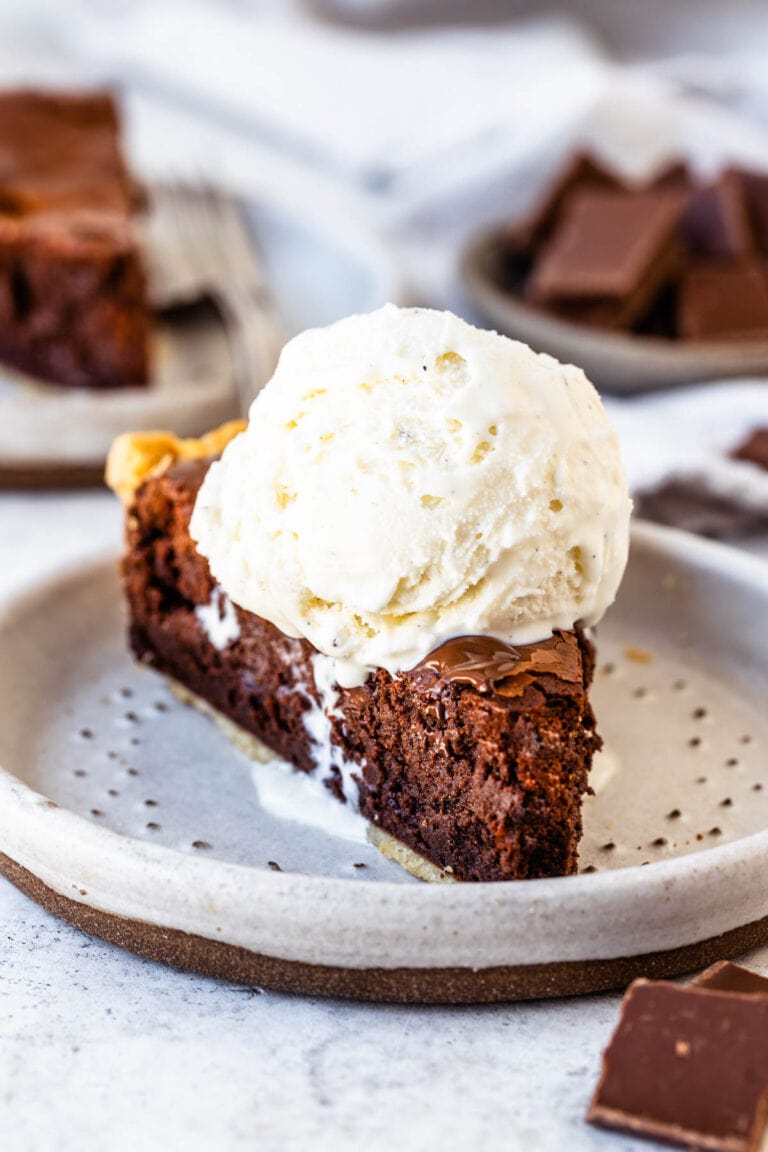
- Brownie Pie
- Oreo Pie
Thank you so much for reading!

Mixed Berry Galette
Ingredients
- 3 cups berries
- 1 tbsp cornstarch
- 3 tbsp honey (or any sugar of your preference)
- 1 lemon zested
- 1 refrigerated pie crust
Egg wash
- 1 egg
- 2 tbsp coarse sugar
Instructions
Mixed Berry Galette
- Pre-heat the oven to 425 Fahrenheit.
- Prepare the berries, wash and dry them. If using strawberries, slice them. For the berries, I used sliced strawberries, blackberries, and blueberries.
- Mix the berries, cornstarch, honey, and lemon zest in a bowl.
- You can also add a pinch of cinnamon, it goes super well with the berries.
- Roll out the pie crust on a piece of parchment paper.
- If you made your own crust from scratch, you'll have to use the rolling pin to roll it out to a circle that measures about 12 inches in diameter. If using the refrigerated pie crust, simply roll it out on the counter.
- It's best to roll out the dough already on top of a parchment paper or silicone mat that will be used as a surface to bake the galette.
- I used a small round cutter to make the scalloped edge of the galette by cutting 3/4 of each circle around the edges. Don't cut all the way through on the bottom of the circle, so you can have just the top of the circle out.
- Spread the fruit on top of the crust, leaving a 2 inch border all around.
- Fold the dough over the fruit, making sure to cover at least 1/2 inch of fruit with the edges of the crust.
- Whisk the egg and brush it lightly on top of the galette crust.
- Sprinkle coarse sugar on top. I used vanilla sugar and it was delicious!
- Transfer the galette to a baking sheet pan.
- If the oven isn't pre-heated yet, insert the galette in the fridge or freezer to keep it cold until it's time to bake. It's always good for pie dough to be cold before baking it.
To bake the galette
- When the oven is pre-heated, place the galette in and bake for 25 to 30 minutes, until golden brown and until the fruit mixture is bubbling.
- Remove from the oven and let it cool down for 15 minutes until serving.
- I like to serve mine with a scoop of vanilla ice cream.
Storage
- You can store the galette in the fridge for up to 2 days.


Que torta maravilhosa!! Adorei!!
This looks absolutely divine! I saw this pop up in my Facebook feed at just the perfect time. I’ve been gathering the last of my garden harvest and have bits of everything to use up. The veggies are simpler, as I throw them into a soup. I wasn’t sure what to do with the berries until I saw this.